


9!'clipseDOHC
Moderator
- 4,913
- 484
- Aug 24, 2003
-
El Paso,
Texas
INDEX
Part 1: THE SWAP
Part 2: STREET/DRAG/AUTOX
Part 3: Track Only - Weight Loss
Part 4: RallyX
OVERVIEW
Part 1: THE SWAP
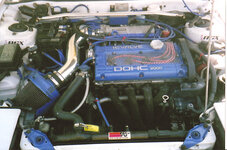
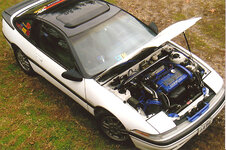
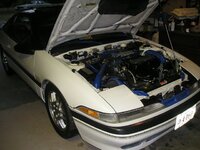
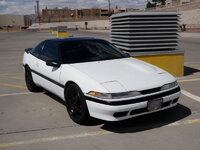
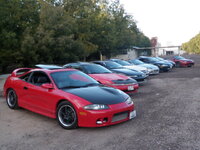
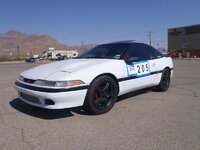
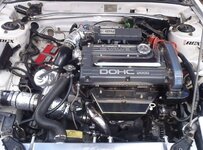
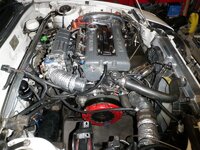
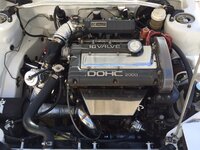
This is the journal of my 4G63t 6 bolt swap into my 1991 Mitsubishi Eclipse GS.
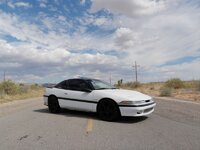
My car: My Eclipse was my first car, I was 16 years old when I got it. I bought it on January 2, 2003 for $250 with a free tow to my house. The timing belt had snapped at 114,000 miles and destroyed the head. Also the front bumper and passenger side fender were smashed in. Other then that it was in great shape. My dad and I rebuilt the engine from the head up. It took us 4 months but when we finally got it started that Easter it was an awesome feeling! This car has been my daily driver ever since, for the last 7 years.
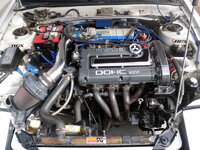
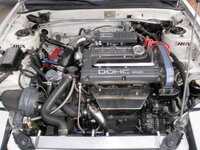
My engine: The engine is out of a 1991 Plymouth Laser RS Turbo FWD car. I acquired the engine, transmission, ECU, and wire harness out of the car when it arrived at a junkyard, where I worked at the time. I pulled everything out in 1 day. I had the engine rebuilt to factory standards and attempted a swap back in 2005. However I ran into problems with the engine, with money, and with it being my daily driver and ended up pulling it out and putting my GS engine back in. My turbo motor has been sitting on a stand in my parents garage for the last 5 years.
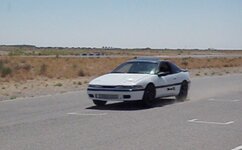
Part 2: STREET/DRAG/AUTOX
Continually building my now turbo 1g FWD DSM for Street, Drag, and Autox.
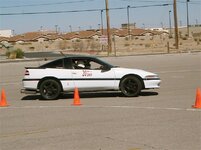
Autox: I race in the Pan Am Division of the SCCA. For the my rookie season in 2011 I raced in the ESP class and moved up to SMF in 2012. In April 2012 I purchased a 2005 Evolution VIII which took over the Street and AutoX (STU class) duties from the Eclipse.
Drag: I raced on the 14b on street tires until November 2012 and then I moved up to Hoosier Drag Radials.
2010: 14.3@101 San Antonio Raceway (14b, 11 psi, 91 gas, Riken Raptors 215/50/17, stock SMIC, open diff)
2011: 13.18@110 El Paso Motorplex (14b, 20 psi, E-85, Hoosier 225/50/16 Drag Radials, VRSF FMIC, Quaife LSD)
2012: 13.10@111 El Paso Motorplex (rebuilt 14b w/ 7cm housing, 20 psi, E-85, Hoosier DR's, FMIC, LSD, HKS 264's)
Part 3: Track Only - Weight Loss
After buying a 2005 Evolution VIII in April 2012 I decided to make my 1G a track only car with hopes of seeing how fast I can take the 14b. I would also like to race at the DSM shootout in the Stock Appearing Turbo class, which will require something a little larger then the 14b as Evo turbo's are included as "stock appearing". At the start of this endeavor my car's gross weight was 2,520 lbs and my best ET was 13.1 @ 111 MPH.
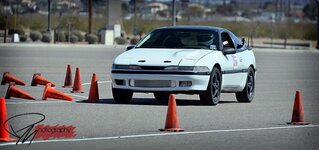
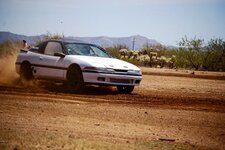
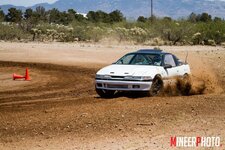
Part 4: RallyX
To be honest I kind of lost interest in having a dedicated drag racing car. I was having more fun Autoxing with the Evo and was preparing to start Rallyxing with the Evo too. Meanwhile the Eclipse was sitting collecting dust. One day I was washing both the Eclipse and Evo in the driveway and I had an epiphany. Why not rallyx the Eclipse? It has a lot more ground clearance, its already a bare platform (like clay waiting to be molded), and when I want to drag race I can still just throw on the slicks and go. It was decided, the Eclipse would become my rallyx horse.
Part 1: THE SWAP
- Post 1: Introductions and Preparations - 3.4.2010
- Post 2: Arrival and Disassembly - 3.15.2010
- Post 3: Cleaning and Painting - 3.22.2010
- Post 4: Spun Bearings and New Internals - 3.23.2010
- Post 5: The Swap, Part 1 - 4.28.2010
- Post 6: The Swap, Part 2 - 5.1.2010
- Post 7: Head Cleaning/Timming Belt/Reassembly - 5.2.2010
- Post 8: The Swap, Part 3 - 5.5.2010
Part 2: STREET/DRAG/AUTOX
- Post 9: Texas Mitsubishi Shootout - Personal Best of 14.3 @ 101</a> 6.21.2010
- Post 10: 2010 Video Recap - 10.12.2010
- Post 11: November 2010 - March 2011 (FMIC, Tires, Track, V3, 850's, SD, CAI, & Meet) - 3.31.2011
- Post 12: April 2011 - July 2011 (Personal best ET, Autox, Road Course, Show, ELHS, Tial) - Personal Best 14.1 @ 113 - 7.22.11
- Post 13: August 2011 - October 2011 (Autox, Drag, DSM Shootout, LSD, Clutch, Fusebox relocation) - 11.8.2011
- Post 14: El Paso Motorplex 11/11/2011 - Personal Best of 13.1 @ 110 - 11.11.2011
- Post 15: 2011 Video Recap - 12.19.2011
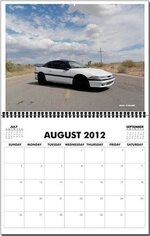
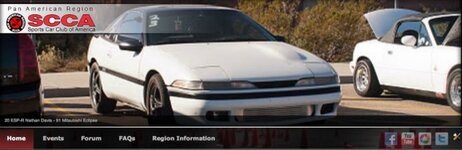
- Post 16: 2012 Calendar, Three Speed FB page, Pan AM SCCA home page - 12.31.2011
- Post 17: Winter Project Part 1: Welding, Grinding, Sanding, Bondoing, & Porting - 1.8.12
- Post 18: Winter Project Part 2: Cams, Springs, Priming, Painting, and Reassembly - 1.28.12
- Post 19: Winter Project Paart 3: Painting body parts, AeroCatch pins, Quick release bumper kit, Power steering pump, and a new 14b - 2.24.12
- Post 20: Pan Am Region SCCA SOLO Championship #1 - 2.26.2012
- Post 21: Pan Am Region SCCA SOLO Championship #2 and El Paso Motorplex, New PB 13.102 @ 111.22 - 3.11.12 & 3.16.12
Part 3: Track Only - Weight Loss
- Post 22: 2005 EVO & Weight Loss, Part 1 (40 lbs) - 9.25.12
- Post 23: Weight Loss, Part 2 (48 lbs) - 9.28.12
- Post 24: Weight Loss, Part 3 (27 lbs) - 10.1.12
- Post 25: Weight Loss, Part 4 (29 lbs - Odyssey Battery) - 10.19.12
- Post 26: Weight Loss, Part 5 (95 lbs - Rims and tires) - 10.22.12
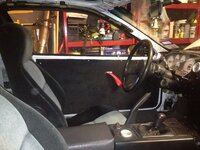
- Post 27: Weight Loss, Part 6 (Interior)
Part 4: RallyX
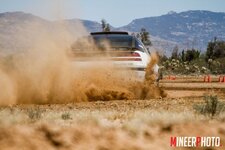
- Post 28: AZ Rally Group 2013 RallyX #2 - 04.20.2013
Post 29: AZ Rally Group 2013 RallyX #3 - 5.25.2013
OVERVIEW
Part 1: THE SWAP
This is the journal of my 4G63t 6 bolt swap into my 1991 Mitsubishi Eclipse GS.
My car: My Eclipse was my first car, I was 16 years old when I got it. I bought it on January 2, 2003 for $250 with a free tow to my house. The timing belt had snapped at 114,000 miles and destroyed the head. Also the front bumper and passenger side fender were smashed in. Other then that it was in great shape. My dad and I rebuilt the engine from the head up. It took us 4 months but when we finally got it started that Easter it was an awesome feeling! This car has been my daily driver ever since, for the last 7 years.
My engine: The engine is out of a 1991 Plymouth Laser RS Turbo FWD car. I acquired the engine, transmission, ECU, and wire harness out of the car when it arrived at a junkyard, where I worked at the time. I pulled everything out in 1 day. I had the engine rebuilt to factory standards and attempted a swap back in 2005. However I ran into problems with the engine, with money, and with it being my daily driver and ended up pulling it out and putting my GS engine back in. My turbo motor has been sitting on a stand in my parents garage for the last 5 years.
Part 2: STREET/DRAG/AUTOX
Continually building my now turbo 1g FWD DSM for Street, Drag, and Autox.
Autox: I race in the Pan Am Division of the SCCA. For the my rookie season in 2011 I raced in the ESP class and moved up to SMF in 2012. In April 2012 I purchased a 2005 Evolution VIII which took over the Street and AutoX (STU class) duties from the Eclipse.
Drag: I raced on the 14b on street tires until November 2012 and then I moved up to Hoosier Drag Radials.
2010: 14.3@101 San Antonio Raceway (14b, 11 psi, 91 gas, Riken Raptors 215/50/17, stock SMIC, open diff)
2011: 13.18@110 El Paso Motorplex (14b, 20 psi, E-85, Hoosier 225/50/16 Drag Radials, VRSF FMIC, Quaife LSD)
2012: 13.10@111 El Paso Motorplex (rebuilt 14b w/ 7cm housing, 20 psi, E-85, Hoosier DR's, FMIC, LSD, HKS 264's)
Part 3: Track Only - Weight Loss
After buying a 2005 Evolution VIII in April 2012 I decided to make my 1G a track only car with hopes of seeing how fast I can take the 14b. I would also like to race at the DSM shootout in the Stock Appearing Turbo class, which will require something a little larger then the 14b as Evo turbo's are included as "stock appearing". At the start of this endeavor my car's gross weight was 2,520 lbs and my best ET was 13.1 @ 111 MPH.
Part 4: RallyX
To be honest I kind of lost interest in having a dedicated drag racing car. I was having more fun Autoxing with the Evo and was preparing to start Rallyxing with the Evo too. Meanwhile the Eclipse was sitting collecting dust. One day I was washing both the Eclipse and Evo in the driveway and I had an epiphany. Why not rallyx the Eclipse? It has a lot more ground clearance, its already a bare platform (like clay waiting to be molded), and when I want to drag race I can still just throw on the slicks and go. It was decided, the Eclipse would become my rallyx horse.
Last edited:
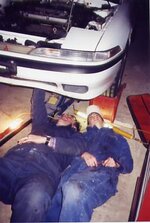
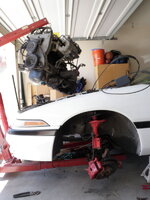
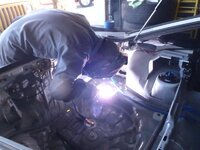
 I pulled out the axles, it got a little messy becasue I forgot to drain the transmission fluid
  Sucks because that was my BG syncroshift 2 fluid. Looks like I'll be trying Pennzoil Syncromesh this time around.

")
 good work
