The Top DSM Community on the Web

For 1990-1999 Mitsubishi Eclipse, Eagle Talon, Plymouth Laser, and Galant VR-4 Owners. Log in to remove most ads.

Please Support Morrison Fabrications
Please Support ExtremePSI

Punishment racing fmic for 2g

This site may earn a commission from merchant
affiliate links, including eBay, Amazon, and others.

This site may earn a commission from merchant affiliate links, including eBay, Amazon, and others.

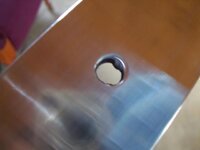
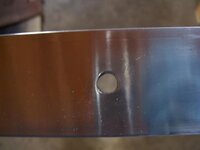
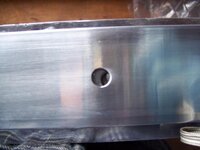
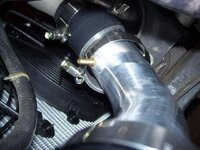
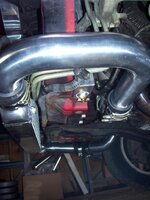
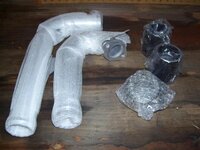
I got to see FenixTX717's kit, actually unwrapped it :p, and I was pretty impressed. 1/8" NPT fittings and bungs welded into the piping and each flange was thick. As stated, packaging was VERY good and from what I've seen customer service is top notch. IMO a good bang for the buck kit.

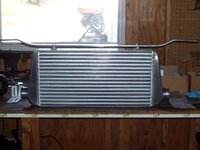
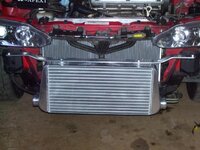
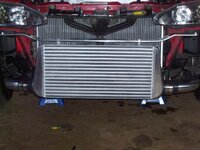
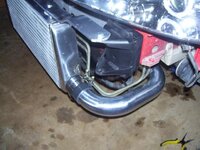
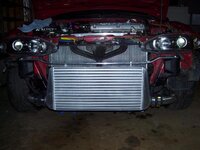
The core is nothing "special" but I'm sure it will get the job done. Slightly offset style external fins but straight through internal.

Although it's not a short route style, I still like the fact there aren't any 90* end tank inlets or outlets.

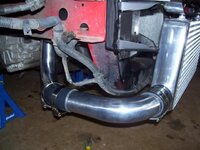
This is a short-route kit; mind you it does not take the same route as other kits. However, this kit is a complete bolt on. You do not have to cut or relocate anything on the car. I do know with the SSAC kits, you have to cut through some of the frame, on each side of the radiator. I'm not sure that the few inches of extra piping will make that big of a difference between the two.


It is indeed a short route compared to the Greddy, Apexi or stock styles. Believe me, I had the Greddy, and it was a ton of pipes.

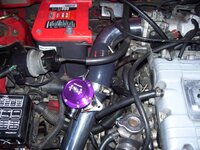
As for the kit itself, for a street kit, I'd run it if I'm trying to save a buck. If not, like my car now, I wouldn't run it at all. And I agree with what Gamble was getting at before. With so many pipes with couplers, it increases the chances of boost leaks. It's not if a person can assemble a damn clamp on a pipe, it's if those clamps will hold a constant pressure for 'X' amount of time. This is one of the reasons I went with my ETS Ultra short kit. In my kit there are seriously 3 short pipes and a TB elbow all with 4ply couplers and T-bolts all around. There aren't any filler pipes, it's all welded where it needs to be and couplers where they need to be for ease of installation as well as maintanence.

Another small gripe I have. If a company is releasing a new product, and this goes for ANY company making any product, there should be some sort of testing done by the maker of it. Yeah, all the distributors go out and test a lot of the stuff, but it shouldn't be up to them to do it. I believe in companies that are upfront with product information. If not, this just turns into a modification a ricer would use. "I don't know if it adds horsepower over my stock piece, but it sounds/looks SO COOL!"

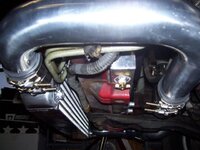
These pipes connecting points are located in places which can all be reached, even when the bumper cover is on the car. The PR kit also has one more pipe than the ETS kit you have and also has 4-ply couplers and t-bolt clamps all around. It's not worth it for me to pay $600+ more for one less pipe, have to trim body work, and according to the ETS website, seems to have SS piping; the PR kit has all aluminim piping.

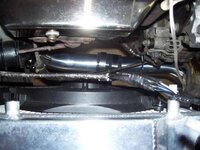
Also of note, is the PR kit also comes with the ability to use a 14b/16g turbo or a downflow turbo; so if you have a 16g now and want a bigger turbo all you have to do is swap out one pipe. Again, all the couplers and clamps are provided for this. I do realize that ETS offers a "steet kit", which offers the same abilities, but is still almost $400 more than the PR kit is selling for right now and has a smaller IC.

As for testing, I spoke with Tim about going ahead and buying this kit, installing it, and testing it. Personally, I don't know how it will perform yet, but stay tuned and I promise I will keep everyone posted.
 
Just wondering, is it possible to retain the bumper? Obviously the FMIC is in the way but perhaps some cutting?

It may, but I don't know. I tossed mine when I installed my first FMIC. I will say though, if you have to cut much, your just wasting your time, because it will probably break in half uppon impact. Like I said before, it has the impact resistance of Jello.

I know on a 1g it's advisable to try and keep the actual bumper, because it can cause issues with the bumper cover. However, on a 2g it's not really necessary. I've had mine off for over 3 years now with no problems.
 
Well I just don't want to hit something at 5 mph and smash everything in. Also I parallel park a lot and sometimes I have to squeeze into a spot literally bumper to bumper.
 
I would say grinf off a good amount of the crash bar and test it out. I know for a fact i will toss mine out but will be taking a big risk.
 
So I got it installed. Everything but the bumper cover is on. It went smoothly and all the piping fit perfect.

I did notice that the holes in the aluminum mounting bar had some excess inside of them. About 10 seconds with my dremel and I had everything cleared out. Then when I went to mount the bar to the IC, the holes didn't quite line up perfectly, so I again took the dremel and widened them a little. Finally, I bolted the bar on to the IC and then mounted it on the car.
 

Attachments

  • PRFMIC021.jpg
    PRFMIC021.jpg
    32.7 KB · Views: 2,716
  • PRFMIC023.jpg
    PRFMIC023.jpg
    34.3 KB · Views: 2,675
  • PRFMIC022.jpg
    PRFMIC022.jpg
    46.4 KB · Views: 2,676
  • PRFMIC024.jpg
    PRFMIC024.jpg
    43.4 KB · Views: 2,701
  • PRFMIC027.jpg
    PRFMIC027.jpg
    57.4 KB · Views: 2,781
Then I finished test fitting all the pipes together, leaving them "loose" for any adjustment that may need to be made while tightening everything down. This part was very easy; all pipes fit exactly how the were supposed to from the turbo to the TB; plenty of clearance, as you can see in the pics.
 

Attachments

  • PRFMIC034.jpg
    PRFMIC034.jpg
    52.7 KB · Views: 3,302
  • PRFMIC033.jpg
    PRFMIC033.jpg
    51.2 KB · Views: 2,760
  • PRFMIC031.jpg
    PRFMIC031.jpg
    44.7 KB · Views: 2,743
  • PRFMIC030.jpg
    PRFMIC030.jpg
    48.1 KB · Views: 2,760
  • PRFMIC028.jpg
    PRFMIC028.jpg
    52.7 KB · Views: 2,774
I tightened everthing down and installed the provided BOV; i'm going to try it out and see how well it works. Another suprise, was when I took the BOV out of the box and lifted the styrofoam up, there was a gasket and hose. If you get this kit, make sure you look everywhere.;) I never did find the directions that were said to be provided, so I contacted Tim via e-mail. He responded that they were still in the works and will be included soon. I was also wondering about the extra brackets supplied with the kit, as I could not figure out where they were supposed to mount. Tim told me they were provided to be used for additional support for the IC, if the customer felt like it was needed. I do not think they will need to be used, but i'm looking at mounting a couple to see if the additional support makes a difference.
 

Attachments

  • PRFMIC026.jpg
    PRFMIC026.jpg
    53.7 KB · Views: 2,743
  • PRFMIC036.jpg
    PRFMIC036.jpg
    60.3 KB · Views: 2,689
  • PRFMIC035.jpg
    PRFMIC035.jpg
    66.8 KB · Views: 2,686
  • PRFMIC039.jpg
    PRFMIC039.jpg
    43.5 KB · Views: 2,789
  • PRFMIC038.jpg
    PRFMIC038.jpg
    47.2 KB · Views: 2,694
Here's another view looking down between the radiator and the exhaust manifold. The bottom pic is the left over parts that would be used if you have a 14b/16g turbo. From my experience with these j-pipes in the past, you will probably have to do some trim work of the stock fan for it to fit. Of course, if you have slim fans you most likely will not have a problem.
 

Attachments

  • PRFMIC032.jpg
    PRFMIC032.jpg
    50.7 KB · Views: 2,653
  • PRFMIC037.jpg
    PRFMIC037.jpg
    45.5 KB · Views: 2,626
NICE! The kit looks great ! Can't wait to get mine. I guess i should start ordering those slim fans for my car.
 
NICE! The kit looks great ! Can't wait to get mine. I guess i should start ordering those slim fans for my car.

You don't have to get the slim fans. You should be able to trim the stock fans if you need to; that's what I did when I had my B16g on the car. If you are planning on getting slim fans, go ahead and upgrade the radiator while your at it. I have the PR radiator/fans kit on my car and it works great.
 
I'd hate to ask you of this after you bolted on everything but can you measure the core? I noticed the pipes and the core look like the same size and it says the core is 3 inch and the pipe is 2.5 inch.
 
Read trough fast, was wondering if you keep fog lights and is it short route, sorry that I did not read trough it all but I'm heading to the bar, maybe if I get drunk I'll buy the kit tonight.
 
thanks for the review and pics.. if its an ebay bov, it will be fine for a while, but the diaphragm is what is known to go out rather quickly compared to authentic type-s.

nice thing about the kit, it accommodates owners with either downflow turbos or turbos needing jpipe, thats a major plus.

i like how it mounts too. looking forward to your follow up after a while
 
I'm planning on picking one of these up. I like how it is short route but goes around the frame rather than cutting through it. For the price it should be a good product. Let us know how well it actually performs, thanks for the information you are providing us!
 
I'd hate to ask you of this after you bolted on everything but can you measure the core? I noticed the pipes and the core look like the same size and it says the core is 3 inch and the pipe is 2.5 inch.

In post #29 I posted pics of the core measurements. The actual core measures 22"x11"x3" and including the end tanks is 29"x11"x3". I also measured the IC pipes, which are 2.5". I didn't take any pics of the IC pipe measurements, but I will get one and post it.:thumb:

thanks for the review and pics.. if its an ebay bov, it will be fine for a while, but the diaphragm is what is known to go out rather quickly compared to authentic type-s...

I'll be sure to watch out for this. Thanks.

Read trough fast, was wondering if you keep fog lights and is it short route...

Yes you can keep the fog light's; see link below. And yes, this is a short-route kit.

2gfmickit
 
anyone know if it will fit on a 2Ga with fog lights? 2Ga fogs are a bit bigger than 2Gb's

2ga fogs got to go on most if not all fmic installs. This core will allow for 2Gb fogs as i have the same core and my fogs are not in the way of the piping, but if i still had my 2Ga front end/fogs i dont think i would be able to keep them.
 
Thanks for the heads up boostjunki. I'll just trim around the fan shroud for now and later i'll get the whole radiator/fan kit like you. Thanks for the pics, still waiting on my tax return to get mine. :beatentodeath:
 
2ga fogs got to go on most if not all fmic installs. This core will allow for 2Gb fogs as i have the same core and my fogs are not in the way of the piping, but if i still had my 2Ga front end/fogs i dont think i would be able to keep them.

weak...
 
2 hours later. got it installed. It fit right on, all pipes clear great. I cut the throttle body flange off as I am using a non turbo throttle body and also chopped off the 1g bov flange for my tial section.

You must be logged in to view this image or video.


You must be logged in to view this image or video.


You must be logged in to view this image or video.
 
There should be an option to buy this with piping that will work for a SMIM. And a different piping to make this work with a n/t tb or both together n/t tb and smim.
 
Support Vendors who Support the DSM Community
Boosted Fabrication ECM Tuning ExtremePSI Fuel Injector Clinic Innovation Products Jacks Transmissions JNZ Tuning Kiggly Racing Morrison Fabrications MyMitsubishiStore.com RixRacing RockAuto RTM Racing STM Tuned

Latest posts

Build Thread Updates

Vendor Updates

Latest Classifieds

Back
Top