The Top DSM Community on the Web

For 1990-1999 Mitsubishi Eclipse, Eagle Talon, Plymouth Laser, and Galant VR-4 Owners. Log in to remove most ads.

Please Support RTM Racing
Please Support STM Tuned

Quarter Master Clutch - Sneek Peek Prototype design twin-disk!

This site may earn a commission from merchant
affiliate links, including eBay, Amazon, and others.

This site may earn a commission from merchant affiliate links, including eBay, Amazon, and others.

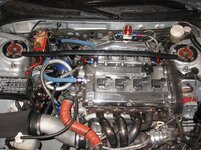
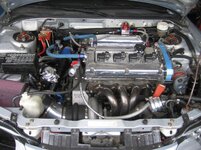
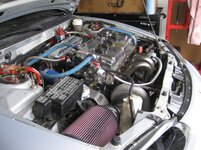
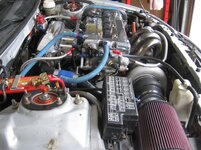
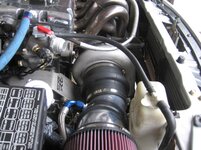
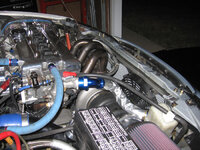
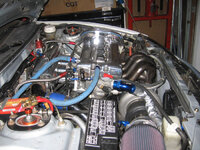
Ok, here's the pictures of the new engine setup!

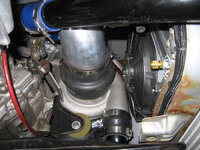
I am still waiting on my radiator/fans/coolant lines which will be done in the next week or two. I cut and rewelded the downpipe today and it fits like a charm without hitting transfer case or oil pan and is fully tucked in the oil pan curve. I have the V-band clamp just after the transfer case mid-housing almost in line with the firewall. This will make it extremely simple to remove the transfer case/transmission with only the front section of the downpipe requiring removal. I will make the race exhaust first, then will do the street exhaust after the car is up and running.

All I need to do otherwise, is bleed the brakes and clutch, fill up the transmission and engine with fluids, and wait on the radiator. Then it is ready to start up.

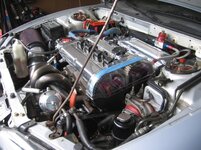
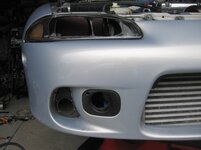
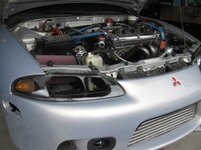
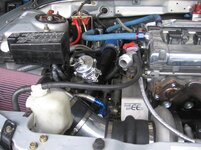
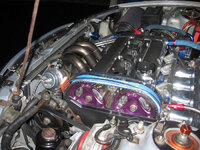
I have attached several pictures of the new setup, and one of the old setup for comparision.

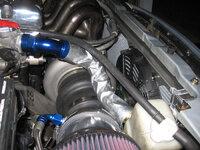
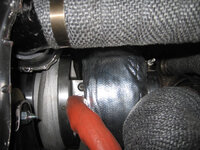
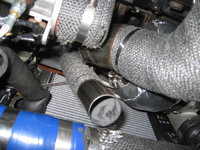
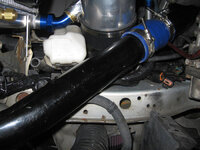
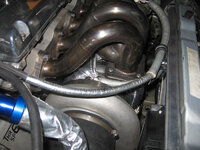
The first photo is the 7-bolt 2.3L GT4088R setup with a 4" intake pipe. The rest of the photos show the 7-bolt aluminum rod 2.3L Borg S400SX 74mm turbo with the Bullseye Power RACE compressor cover and the 5" intake pipe.
 

Attachments

  • 2008 setup.jpg
    2008 setup.jpg
    83 KB · Views: 503
  • 2009 setup 1.jpg
    2009 setup 1.jpg
    73.6 KB · Views: 508
  • 2009 setup 2.jpg
    2009 setup 2.jpg
    74.5 KB · Views: 500
  • 2009 setup 3.jpg
    2009 setup 3.jpg
    75.8 KB · Views: 504
  • 2009 setup 4.jpg
    2009 setup 4.jpg
    75.3 KB · Views: 500
  • 2009 setup 8.jpg
    2009 setup 8.jpg
    38.5 KB · Views: 514
  • 2009 setup 7.jpg
    2009 setup 7.jpg
    50.1 KB · Views: 497
  • 2009 setup 6.jpg
    2009 setup 6.jpg
    66.8 KB · Views: 507
  • 2009 setup 5.jpg
    2009 setup 5.jpg
    66.4 KB · Views: 505
I'm excited to hear this thing run! Can't wait to see some track videos!

Holy hell that's a thick exhaust manifold spacer..LOL
 
I'm excited to hear this thing run! Can't wait to see some track videos!

Holy hell that's a thick exhaust manifold spacer..LOL

Yeah, the manifold spacer was required to use with the larger race compressor cover. The standard 60 (GT42R) compressor cover was a direct fit without the spacer flange, when using the DNPerformance T4 tubular exhaust manifold and cleared the stock radiator and engine block. Unfortunately, the spacer and 70mm studs were required to have the larger compressor cover clear the engine block bellhousing mounting tabs on the 7-bolt. I still needed to do some grinding clearancing to the bellhousing tab on the block to clear the turbo compressor cover.

I am still waiting on the radiator -- It should be here some time this upcoming week. Unfortunately, I am out of town until next weekend, so no updates until then.
 
Yeah I know your reasoning behind the spacer, just never seen one that thick before...LOL
 
Man, I can't wait to see what this beast is gonna do now.
Nice Headlight mod.
I'll have to look into something like that for Road Racing.
I like the other duct you have in the tear drop too.
 
Update --

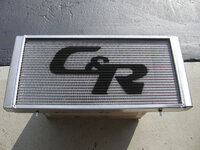
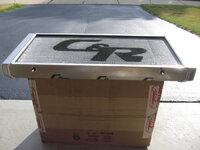
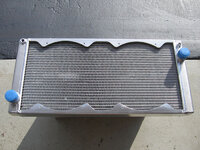
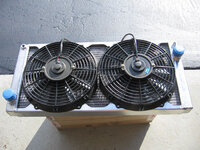
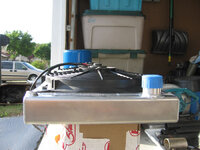
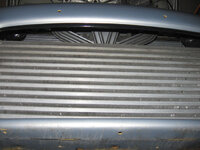
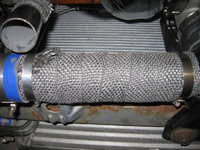
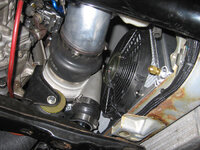
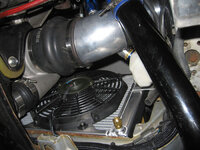
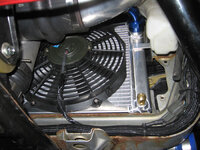
I received my C&R custom race radiator that I designed -- it fits like a champ with no issues whatsoever. I have attached several pictures of the unit itself, as well as the installed unit.

I am currently only running one 11" puller since the driver side one is a bit tight with the turbo blanket on -- it fits, but it would fit better without the dumb 1" spacer flange. As it sits, the radiator can be easily removed by simply draining, disconnecting the -20AN fittings, removing the bolts holding the fans from the shroud bracket, remove the two bolts holding the upper brackets, and pull out -- it completely clears the entire turbo and manifold setup and was able to be installed and removed without touching anything. It really is a nice fit and should be enough cooling capacity for this setup.

I have made a temporary upper -20AN line, and need to pick up different fittings for the lower -20AN line as the line I have with straight fittings just won't fit in such a tight space. I am going to run either one or two -20AN 45-degree fittings on the line to make it fit nicer. I will deal with the upper hose at a different time as it really needs a 13" long line (including the length of the fittings), and I only had a 16" line with crimped -20AN 45-degree fittings and heat-sleeved. It will do for now, but it would be a nicer fit with the 13" version.

Also, the Odyssey PC680 I had is now junk, so I need to pick up a new one tomorrow.

As well, the stupid crank angle sensor is junk, and I need to replace that tomorrow.

Finally, I need to weld up a set of 3.5" v-band flanges onto a straight section of exhaust pipe, and one on my new Burns Stainless 3.5" ID/4.5" OD/17" Long muffler along with an O2 bung and some brackets to use as my "race" exhaust setup. It will have a removable 45-degree dump tip on it. The goal is to have the race setup fully interchangable with the street exhaust setup with just a couple disconnects of v-band clamps and reconnect the exhaust hangers. It will just take a bit of time to do the measuring, cutting and welding to make it work nicely.

When I have more time, I will redo the -10AN breather lines in stainless with a bit more length on them.

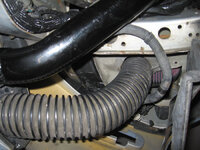
Well, here's the pics, including some underside pics and the intake ducting that comes from the passenger side stock-IC-duct up to the intake pipe.
 

Attachments

  • IMG_2109.jpg
    IMG_2109.jpg
    82.3 KB · Views: 381
  • IMG_2110.jpg
    IMG_2110.jpg
    54.6 KB · Views: 386
  • IMG_2111.jpg
    IMG_2111.jpg
    88.6 KB · Views: 376
  • IMG_2112.jpg
    IMG_2112.jpg
    86.2 KB · Views: 364
  • IMG_2113.jpg
    IMG_2113.jpg
    53.5 KB · Views: 371
  • IMG_2118.jpg
    IMG_2118.jpg
    59.6 KB · Views: 371
  • IMG_2117.jpg
    IMG_2117.jpg
    73.7 KB · Views: 374
  • IMG_2116.jpg
    IMG_2116.jpg
    88.5 KB · Views: 381
  • IMG_2115.jpg
    IMG_2115.jpg
    86.6 KB · Views: 373
  • IMG_2114.jpg
    IMG_2114.jpg
    89.9 KB · Views: 368
  • IMG_2128.jpg
    IMG_2128.jpg
    72.5 KB · Views: 359
  • IMG_2126.jpg
    IMG_2126.jpg
    72 KB · Views: 366
  • IMG_2124.jpg
    IMG_2124.jpg
    71.3 KB · Views: 367
  • IMG_2123.jpg
    IMG_2123.jpg
    86.9 KB · Views: 368
  • IMG_2122.jpg
    IMG_2122.jpg
    72.6 KB · Views: 385
More pics....
 

Attachments

  • IMG_2129.jpg
    IMG_2129.jpg
    78 KB · Views: 361
  • IMG_2130.jpg
    IMG_2130.jpg
    69.5 KB · Views: 366
  • IMG_2131.jpg
    IMG_2131.jpg
    65 KB · Views: 353
  • IMG_2132.jpg
    IMG_2132.jpg
    62.6 KB · Views: 361
  • IMG_2133.jpg
    IMG_2133.jpg
    64.9 KB · Views: 357
Yeah that would be the drain, looks good with those 20an's!

Yeah, it is the drain. I forgot to have C&R send me a drain petcock, so I just installed a 3/8" NPT to -8AN fitting and a -8AN cap. I will deal with the petcock fitting at a later date.
 
looks good. Did you notice that you have everything wrapped but the manifold, I have had good luck with a manifold blanket on my DD. really kept under hood temps down. I am debating to put one on my 2g because the manifold is so pretty but time will tell.

PS. I tried and looked at my alternator location with the 4in down-pipe. It wont fit down from the stock location. I think that I have figured it out though. going to try something different.
 
looks good. Did you notice that you have everything wrapped but the manifold, I have had good luck with a manifold blanket on my DD. really kept under hood temps down.

I didn't do anything to the manifold because it is a temporary manifold. The DNP has done fine on its own for years, and it really isn't the easiest manifold to wrap. You would definitely need to use 1"-wide wrap if you are going to attempt it.

I will redo the manifold this winter with a different custom tubular manifold. I felt it was not worth spending any money on coatings or wrap for it. The next manifold will be coated before using via Swain Technologies and the White Lightning coating. It is rated for 3000-degrees and is a 0.015"-thick ceramic insulating coating.
 
I like how that radiator sits in the engine bay; shoving it under the cross-bar and forward a bit definitely pays off in fan clearance. :) I've been trying to see how you set up the AN fitting for the water pump side; I'm guessing it's similar to Jay Racing's water pump adapter setup?
 
The water pump is utilizing a Jay Racing -20AN removable/reusable forward-facing water pump fitting Jay Racing Water Pump AN Fitting Adapter Kit - Front Inlet [WPF2-__] - $90.00 : Jay Racing , that I only modified by tapping the bolt hole for a 5/16"-24 socket head cap machine screw and tapped the cover and the -20AN tube to accept the bolt and then used a bit of Permatex Ultra Grey to seal it. You can get o-ring receiver cap screws as well. I forgot how long the screw is -- I think it was around 7/8" long.

Quoted from above, so you know he is using the Jay Racing piece for the water pump.
 
Hey Tim,
Just caught up on your thread here, great read.

Just curious as to why you didn’t elect to fabricate a side exit exhaust. I understand you’re looking to build a street car here, but I’ve been thinking about a V-band design where I could run both a full cat back and replace it with a side exit on track days.
With alternator relocation, I would not see the problem. Would your water delivery setup or radiator design give you a problem here? I would assume a side exit would increase your thermal efficiency.
My biggest issue is routing the dump away from the intercooler piping. I have my downward facing turbo routing pipes across the bottom of my exhaust. I'm sure I saw this on your pictures.

EDIT----- I noticed you said you had a CAS take a dump on you. I know those aren't cheap through Mitsu, so if you need one brother I got a few spares.
 
Hey Tim,
Just caught up on your thread here, great read.

Just curious as to why you didn't elect to fabricate a side exit exhaust. I understand you're looking to build a street car here, but I've been thinking about a V-band design where I could run both a full cat back and replace it with a side exit on track days.
With alternator relocation, I would not see the problem. Would your water delivery setup or radiator design give you a problem here? I would assume a side exit would increase your thermal efficiency.
My biggest issue is routing the dump away from the intercooler piping. I have my downward facing turbo routing pipes across the bottom of my exhaust. I'm sure I saw this on your pictures.

EDIT----- I noticed you said you had a CAS take a dump on you. I know those aren't cheap through Mitsu, so if you need one brother I got a few spares.

I chose not to fabricate an actual side exit dump exhaust because it would be directly where my lower radiator hose (from the water pump) runs. If you were running a side-exit -20AN fitting off the water pump to a scirocco style radiator that has both inlet and outlet on the passenger side of the vehicle, it is a good way to run the exhaust. In my case, it isn't really that feasible. As well, I am running a very large oil cooler in the driver-side corner of the front bumper and the oil cooler lines would be also in the way of a side-exit exhaust.

I also felt that I wanted to keep one downpipe and run it with both setups.

The race setup runs a 24"-long section of 3.5" stainless straight tube pipe with v-band sections on both ends. Think of it as a "test pipe". I have two wideband O2 bungs on this section, and 3.5" V-band clamps on each end connecting the downpipe to it as well as the muffler. The Burns Stainless muffler has a V-band on the inlet end, and a T-bolt clamp on the outlet slotted end that holds the exhaust 45-degree turn-down.

To swap from the race setup listed above to the street setup, you need to disconnect one v-band clamp at the muffler, and then remove the muffler and install the "test-pipe-back" section and reinstall the muffler at the back end of the car with the v-band clamp.

This way, it reuses the race muffler for both setups, as well as the downpipe and "test-pipe" that has all the sensors on it.

As well, if I need to pull the transfer case or the oil pan, all I need to remove is the downpipe; no other pipes need removal and no sensors need disconnecting. Just one 11mm locknut loosened, and use the quick-release on the clamp. It is a 15-second exhaust removal. Also, for oil filter changes, the downpipe does not need to be removed whatsoever.

The downpipe is short enough to be easy to manuvuer and the entire race exhaust will be less than 10#. The street exhaust should be less than 15# as it just uses more straight and a couple bends.

The muffler is rebuildable with fiberglass packing, and I am also using the optional stainless steel scrubble packing to further reduce decibal levels. To rebuild the muffler, all you need to do is remove three machine screws and it completely disassembles for simple servicing. As well, the 3.5" ID/4.5" OD/17"-Long muffler weighs less than 3 pounds with packing.


As for the crank angle sensor, I had a brand new spare one at home. I will be installing it tonight, along with a new Odyssey battery. I am also going to try and get the exhaust stuff welded up today and installed so I can make my final hanger brackets on the test pipe and on the turn-down sections.
 
Last edited by a moderator:
Would you be worried about too much heat on the oil pan, or you think the cooler will take care of that?
Also I was thinking about an additional intercooler spray bar going on my oil cooler. Ever though about spray on the motor or intercooler?
As well, do you think it is possible to spray an oil cooler?

Silly questions maybe....

I am not worried about the heat whatsoever. This is not a road-race or time-attack car; it is a street/drag car.

I have never had an oil temperature issue, but I am also running a 11"x13" oil cooler with -10AN lines. If you really wanted to, you could use gold reflect foil and lined the outside of the oil pan. Really though, the wrap on the downpipe where it is, is all I need in this circumstance. The oil cooler is in the driver-side front nose and gets a direct air source from the brake duct.

As long as you have a properly sized intercooler and oil cooler for your application, there should be no reason to run a spray bar or sprayer system.

The only time I ever spray water on my intercooler is at the dyno just to maintain a constant surface air temperature since there is only air flow from the fans; not from the actual wind-speed of driving at 30-110mph in 3rd gear.
 
Support Vendors who Support the DSM Community
Boosted Fabrication ECM Tuning ExtremePSI Fuel Injector Clinic Innovation Products Jacks Transmissions JNZ Tuning Kiggly Racing Morrison Fabrications MyMitsubishiStore.com RixRacing RockAuto RTM Racing STM Tuned

Latest posts

Build Thread Updates

Vendor Updates

Latest Classifieds

Back
Top