The Top DSM Community on the Web

For 1990-1999 Mitsubishi Eclipse, Eagle Talon, Plymouth Laser, and Galant VR-4 Owners. Log in to remove most ads.

Please Support STM Tuned
Please Support Rix Racing

Quarter Master Clutch - Sneek Peek Prototype design twin-disk!

This site may earn a commission from merchant
affiliate links, including eBay, Amazon, and others.

This site may earn a commission from merchant affiliate links, including eBay, Amazon, and others.
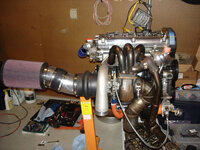
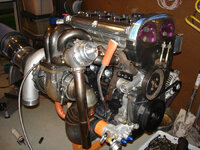
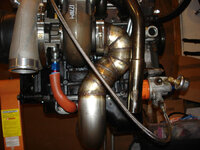
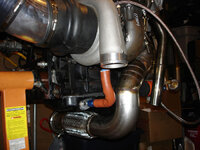
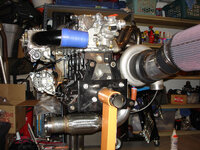
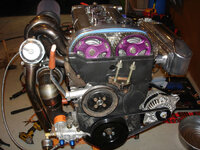
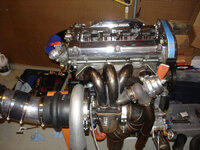
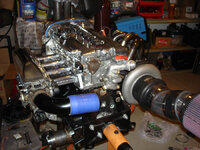
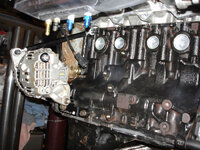
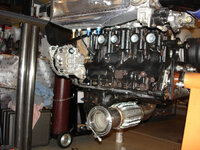
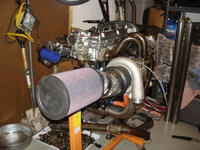
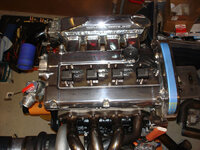
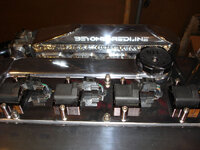
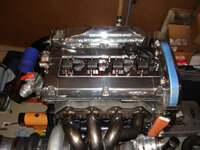
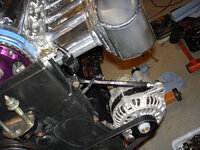
Ok, here's the pictures of the engine for you guys!

I have it mocked together and will install in the car when I have a bit of time. I currently need to work on the wiring stuff before I install it in to the car.

Enjoy!
 

Attachments

  • DSC05834.jpg
    DSC05834.jpg
    72.7 KB · Views: 754
  • DSC05835.jpg
    DSC05835.jpg
    82.7 KB · Views: 549
  • DSC05837.jpg
    DSC05837.jpg
    61.8 KB · Views: 551
  • DSC05838.jpg
    DSC05838.jpg
    64.7 KB · Views: 547
  • DSC05839.jpg
    DSC05839.jpg
    85.8 KB · Views: 547
  • DSC05845.jpg
    DSC05845.jpg
    78.8 KB · Views: 547
  • DSC05844.jpg
    DSC05844.jpg
    72.8 KB · Views: 541
  • DSC05842.jpg
    DSC05842.jpg
    71.2 KB · Views: 536
  • DSC05841.jpg
    DSC05841.jpg
    87 KB · Views: 539
  • DSC05840.jpg
    DSC05840.jpg
    79.4 KB · Views: 549
  • DSC05854.jpg
    DSC05854.jpg
    79.4 KB · Views: 547
  • DSC05852.jpg
    DSC05852.jpg
    74.3 KB · Views: 533
  • DSC05850.jpg
    DSC05850.jpg
    60.2 KB · Views: 516
  • DSC05849.jpg
    DSC05849.jpg
    71.6 KB · Views: 527
  • DSC05846.jpg
    DSC05846.jpg
    75.6 KB · Views: 524
More pics....
 

Attachments

  • DSC05863.jpg
    DSC05863.jpg
    79.9 KB · Views: 530
  • DSC05861.jpg
    DSC05861.jpg
    81.5 KB · Views: 509
  • DSC05857.jpg
    DSC05857.jpg
    63.7 KB · Views: 528
  • DSC05856.jpg
    DSC05856.jpg
    71.8 KB · Views: 526
  • DSC05855.jpg
    DSC05855.jpg
    81.4 KB · Views: 626
  • DSC05865.jpg
    DSC05865.jpg
    65.6 KB · Views: 515
  • DSC05866.jpg
    DSC05866.jpg
    82.2 KB · Views: 527
Very nice

I got the same block and engine stand

That brass elbow for the pressure sender scares me though.. I've seen too many motors lost to broken brass fittings.
 
Very nice

I got the same block and engine stand

That brass elbow for the pressure sender scares me though.. I've seen too many motors lost to broken brass fittings.

That fitting has lived for over 7 years. I am not worried at all about it.
 
WOW Tim, looking good! :thumb:

Amazing work fitting that downpipe in there with it being such a tight radius. :applause:

On a side note, If things go as planned this weekend, I'll confirm whether or not there's an issue with the OEM 7-bolt flywheel bolts......... the 21.2mm ones being used on my QM flywheel. I'm not looking forward to it, but it's the BEST way to confirm if there are any problems. I'll let you know what I find.

I was going to let it go and try to rule out any oddities with weird harmonic problems, etc. But I'm afraid that my Fluidamper, along with solid aluminum motor mounts, etc. might mask or obscure things a bit. I don't want to find out when it's too late after I have damaged flywheel bolts etc. and need to replace the flywheel itself.

Funny about us having the same past experiences in the Rotory world. :D
 
Thats good to hear

Whats up with the dipstick?

Well, 600+ degrees adjacent to dipstick = burnt and brittle very quickly. I reflect sleeve the dipstick tube, and fire sleeve the plastic part of the dipstick. They last substantially longer when ran directly next to a tubular manifold and retarded ignition timing that causes pretty pink exhaust parts.
 
the motor looks good. What turbo is that? what compressor housing? I have a similar set up- gt42-76 w/115 ar, and a 5in cold air that puts the same filter you have in the stock intercooler location and a 4in downpipe. I'm working on how to keep my AC and not move the alternator to the back. Any ideas?? only thing I can come up with is to leave it on the stock lower mount and remove the oil filter housing then swing the alternator down out of the way and remote mount the oil filter housing. Do you see any problems with that?? Thanks, and cant wait to see some vids of your car up and running.
 
the motor looks good. What turbo is that? what compressor housing? I have a similar set up- gt42-76 w/115 ar, and a 5in cold air that puts the same filter you have in the stock intercooler location and a 4in downpipe. I'm working on how to keep my AC and not move the alternator to the back. Any ideas?? only thing I can come up with is to leave it on the stock lower mount and remove the oil filter housing then swing the alternator down out of the way and remote mount the oil filter housing. Do you see any problems with that?? Thanks, and cant wait to see some vids of your car up and running.

The turbo is a Borg Warner S400SX 74mm -- aka S374 or S475 by bullseye/borg terminoligy. It also has a larger Bullseye Power RACE compressor cover with a 5.61"-inlet and a 3" hose outlet, and is around 11" in diameter. The compressor wheel is a 74mm inducer/102mm exducer and a 106mm ETT leading edge, and has the larger turbine wheel option, along with a 1.1A/R T4 divided flange with a 4" outlet.

The intake is a 5.5"-to-5" hose coupler and a 5" intake pipe. The downpipe is a 4" to 3.5" transition, then 3.5" the rest of the way back. As well, with the radius I made, I can still run the alternator in the front of the engine. I just decided to run it in back for additional clearance, and a bit longer life out of the alternator from less radiant heat.

If you are going to keep your A/C and the alternator in front, you will need to sacrifice the downpipe and make it an extremely tight radius. Otherwise, you could have a hydroformed bend made to your specs to be 4" and fit the angles you need -- but expect $300-600 for one piece. I was going to do a 4"-to-3.5" reducing transition bend on a constant bend radius transition in a similar shape to the pie cut section that I made, and it was quoted around $500 when all was said and done -- the original transition/bend alone without v-bands would have been over $300. I really hope that you have plenty of cooling capacity to run with the AC still installed. You could also run a forward facing oil filter housing with a sandwich plate that has oil cooler fittings to run an external oil cooler. This would open up a bit more room as well.
 
the motor/setup look awesome tim!!

hoping to finish my build up in the next month or so, i can not wait!! :D
 
:D You just made my day Tim.

Holy crap is that a f'in huge turbo! I so want to hear that thing spool up. :sneaky:

Everything looks great man! Job well done! :thumb:
 
Ok, I just got off the phone with Patrick over at Fluidampr. Here's the scoop.

Part number 630702 is the aluminum casing one. This part has been discontinued.

Part number 630701 is the steel casing damper; and is currently the ONLY one they produce for our applications.

I also asked them about the variations between the 4G63 and 4G64 crank setup, and they recommend Part #630701 for BOTH applications.


I hope that this clears some things up!

Phew. I came across this thread and when I read that there were different part numbers it had me worried. Nice work Tim by the way.

What CAD system did you use to design the radiator?
 
Phew. I came across this thread and when I read that there were different part numbers it had me worried. Nice work Tim by the way.

What CAD system did you use to design the radiator?

I just used AutoCAD 2009. I work for an environmental engineering firm and have it at my disposal.

If you want a couple fun demo engineering tools, you can download AutoCAD 2010, or EMachineShop.

Autodesk - AutoCAD
Home Online Machine Shop Fabricate Custom Parts Instant Pricing

EMachineShop is a good tool for designing or prototyping hard parts that require one or several machines to fabricate. It is good for designing almost anything.

AutoCAD is a bit more intensive as it is a professional engineering tool used for anything and everything.

Both programs are 2D and 3D modelers and are worth learning for fun or for professional use.
 
Looks great, as allways Tim. Weren't you about to instal a CAI on that thing. I undestand is very hard to make sharp bends with 5" pipe... Is there any solution to that - msking a CAI on 5" pipe??? Thanks.
 
Looks great, as allways Tim. Weren't you about to instal a CAI on that thing. I undestand is very hard to make sharp bends with 5" pipe... Is there any solution to that - msking a CAI on 5" pipe??? Thanks.

I actually gutted an extra 99 headlight and cut a 5"x10" hole in it, ane removed its guts but left the lens inner bracketry (the black part). I will post up a pic tomorrow. Yes, you can fit a 5" cold air intake in the spot, but I wanted to keep it protected if I was in rain. The ducting I have prepared will be more than sufficient for air intake flow and good intake temperatures. As well, this intake pipe is substantially easier to remove and install than a CAI in the wheel well/fender.

I have also done some sheet metal work to the crash bar and a bit of crash bar cutting to increase airflow to the new radiator. I should have the radiator around July 13th or so.

Also, the engine is in the car, and I just need to button up some of the drivetrain parts and fill up the fluids.

Unfortunately, I will need to remake the downpipe a bit, as the mandrel 90-degree bend at the bottom of the downpipe needs to be shortened and re-angled to clear the ground better as well as the transfer case is hitting the flex section.

Finally, the key things I still need to do are weld in a -10AN bung in the intake pipe for the catch can, fab -20AN coolant lines, install the turbo blanket, wrap the upper portion of the downpipe after refitting it up, fab a full 3.5" street exhaust and race exhaust setup, and figure out where one plug goes that I cannot remember for the life of me where it goes to....
 
Sounds like you might need to check this out.
http://www.dsmtuners.com/forums/art...047-2g-engine-bay-electrical-connections.html

Do you still have baffles in your valve cover? And are you running all -10 lines for the catch can setup, along with one or two catch cans? Did you purchase the catch can(s) or have them made?

I think I found the connector based on the thread -- FANTASTIC THREAD! I believe it is the Evap Solenoid Valve connector based on its shape and 2-wire -- I will need to check.

As for the valve cover, the baffles are still in place. The catch can setup is one catch can with three -10AN male bungs, and the breather filter removed and replaced with a freeze plug cap. The catch can was from Oval Craft -- products2 Part number #02006, and then I added a third -10AN fitting. I have two -10AN's on the valve cover in the "stock" locations, and then a -10AN fitting on the intake pipe. Either way, for my current setup, it was not a direct bolt-on. You can run the catch can in "bolt-on" form with some barb fittings and the breather filter if you want to directly vent atmospherically all while using the stock breather lines from the valve cover with the PCV installed.
 
As well, I decided to give my radiator design to the public to help everyone out -- that is, if they are running my style of setup....

I am utilizing a 1G head/thermostat assembly with a -20AN weld-on male bung on the water neck (the water neck tube was cut ~ 1" and then chamfered to fit the -20AN weld-on male bung locator flange and TIG welded. The water pump is utilizing a Jay Racing -20AN removable/reusable forward-facing water pump fitting Jay Racing Water Pump AN Fitting Adapter Kit - Front Inlet [WPF2-__] - $90.00 : Jay Racing , that I only modified by tapping the bolt hole for a 5/16"-24 socket head cap machine screw and tapped the cover and the -20AN tube to accept the bolt and then used a bit of Permatex Ultra Grey to seal it. You can get o-ring receiver cap screws as well. I forgot how long the screw is -- I think it was around 7/8" long.

I am also utilizing SPAL 11" puller fans from Road Race Engineering. RRE's Eclipse Engine Upgrades The fans range from $60.00 each for the slims or $95.00 each for the higher capacity ones.

The water pump hose is -20AN and is ~11" long including straight -20AN hose fittings on both ends. The thermostat hose is -20AN and is ~14" long including a 45-degree hose fitting on the radiator, and a straight fitting on the water neck. I also needed to move/bend the bracketry for the stock overflow tank (I need to fit test it once I receive the radiator to know if I need to run an aftermarket tank to clear -- all while clearing a 5" intake pipe...). Keep in mind, the -20AN fittings are NOT cheap. The -20AN stainless steel hose is ~ $70.00 for 3 feet from XRP, and the straight fittings are around $55.00 each, and the 45-degree fitting is around $85.00. I can definitely tell you that if you want to save some money and have less headaches, use -16AN hoses instead as they are substantially more plentiful to get line and fittings for. Especially if you are using a specialty wholesaler vendor like the ones I use that part out NASCAR cars. Race City Race Parts is just one of the people I purchase used lines/fittings from at DIRT CHEAP prices: RACE CITY RACE PARTS Home Page

I also have the alternator relocated to the back of the engine utilizing a Jay Racing 2G bracket kit ( Jay Racing Alternator Relocation Kit - 2G DSM [ARK2] - $150.00 : Jay Racing ) with the mount bracket drilled/tapped for the 1997-1999 halfshaft bracket mounting bolt. I needed to do a bit of die grinding work on the aluminum bracketry to clear the tubular manifold on the power steering spacer and die grinding to the lower mount bracket for the alternator to clear the front cover and a block tab. I also needed to use a 1/4"-thick spacer to attach the bracket as the 97-99 bracket sticks out from the block a bit and normally utilizes the A/C bracketry as a mounting tab. I also needed to utilize slightly longer fan belts than what were supplied with the kit. I believe that this is due to me using the Fluidampr crank pulley, but I am not sure. I needed to use Dayco 5040330 and 5040450 fan belts as the alternator belt was too long, and the power steering belt was too short. I purchased the replacement belts through Rock Auto -- Auto Parts Fast at RockAuto .

The radiator mounts into the radiator support bracketry using 1/4" diameter pegs in the bottom that are spaced to mount into stock mounting holes, and the upper mounts will be fabricated from 3/4" flat-stock aluminum and will bolt into the sheet metal framing mounting holes below the headlights that the A/C Condensor was originally mounted to. The entire radiator sits inside the A/C Condensor area and a small amount of sheet metal cutting was done to recess the power steering cooler line further into the hood-support bracket using an air saw. I also have a substantial amount of the stock 2G crash bar cut to increase airflow along with some sheet metal ducting, and have cut the 2G front bumper nose in the past to accomodate a 24"x12"x3.5" Precision Turbo intercooler core with Precision Turbo end tanks that are ~2.75" inlet/outlet hose ends.

The Radiator alone cost $630.00 shipped. Keep in mind -- this is a ONE-OFF from a company that produces RACE parts for RACE cars. This is a very fair price for something that is of this caliber and made to my design by professionals. C & R Racing is a serious shop that produces extremely high-quality radiators and other parts. Check them out at ***** : : C&R RACING : : ***** and you will see what I am talking about.

I have attached a .pdf of the radiator production design for you all to look at. Please keep in mind that I have alot of time into this setup and everything is done to my specifications.
 

Attachments

  • zimmer_intclr_june09.pdf
    346.6 KB · Views: 353
Very usefull, Tim. Thanks for the info. And that WP fitting adapter from jay Racing is really cool. Iam sure it fits well/ the radiator/ just want to see pictures of it, on the car , when you get it. C&R are very well known. Almost every second RACE car has their radiator.
 
I just used AutoCAD 2009. I work for an environmental engineering firm and have it at my disposal.

If you want a couple fun demo engineering tools, you can download AutoCAD 2010, or EMachineShop.

Autodesk - AutoCAD
Home Online Machine Shop Fabricate Custom Parts Instant Pricing

EMachineShop is a good tool for designing or prototyping hard parts that require one or several machines to fabricate. It is good for designing almost anything.

AutoCAD is a bit more intensive as it is a professional engineering tool used for anything and everything.

Both programs are 2D and 3D modelers and are worth learning for fun or for professional use.

I have been using Solidworks and AutoCAD for 10 years. I have Solidworks 2006 at home. It rocks. Much better than AutoCAD in my opinion. Let me know if you need anything modeled up in 3-D. :thumb:
 
So when will this be released to the public, after you test it on your car? I'm assuming the Quarter Master unit available right now is still the old design?
 
So when will this be released to the public, after you test it on your car? I'm assuming the Quarter Master unit available right now is still the old design?

Yes, it will be tested and run for the season, then taken out, shipped to Quarter Master and inspected, etc. It is up to them to feel if it is a worth-while solution for us.

As for now, the "old" design is the updated design using heat-treated hubs on the clutch disks.
 
what is the difference in weight between the prototype and the original?

what kind of alternator is that?

The weight is nearly identical. I haven't measured it out to the ounces or anything, but it is darn close.

As for the alternator, it is a Mitsubishi replacement alternator.
 
Support Vendors who Support the DSM Community
Boosted Fabrication ECM Tuning ExtremePSI Fuel Injector Clinic Innovation Products Jacks Transmissions JNZ Tuning Kiggly Racing Morrison Fabrications MyMitsubishiStore.com RixRacing RockAuto RTM Racing STM Tuned

Latest posts

Build Thread Updates

Vendor Updates

Latest Classifieds

Back
Top