


snowborder714
Moderator
- 16,188
- 462
- Oct 15, 2006
-
Mechanicsburg,
Pennsylvania
I wouldn't ask that if I were you Pat until the car is back up and running  Anyone can rip wires out!
Anyone can rip wires out!For 1990-1999 Mitsubishi Eclipse, Eagle Talon, Plymouth Laser, and Galant VR-4 Owners. This is where the DSM platform history is documented and archived. Log in to help us in our mission, and to remove most ads from the browsing experience.

This site may earn a commission from merchant affiliate links, including eBay, Amazon, and others.


 Very true.
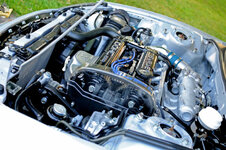
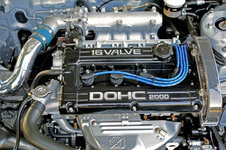
 ... I was planning the whole left side right side wiring thing so this has definatly helped me out...
 The engine build will now be taking place in the Florida room. Tip: Pushing an engine stand (with engine) through the grass is not easy.
 ! This is absolutely amazing! Keep up the great work man!