The Central Hub for DSM Community and Information

For 1990-1999 Mitsubishi Eclipse, Eagle Talon, Plymouth Laser, and Galant VR-4 Owners. This is where the DSM platform history is documented and archived. Log in to help us in our mission, and to remove most ads from the browsing experience.

img_8094800x600.jpg

My fuse box relocation (project log)

This site may earn a commission from merchant affiliate links, including eBay, Amazon, and others.

Wait a week - I'll powdercoat it for you :D

The oven is all wired up and this is my last week of school, so hopefully the oven works out and I'll be powdercoating more parts soon.
 
Wait a week - I'll powdercoat it for you :D

The oven is all wired up and this is my last week of school, so hopefully the oven works out and I'll be powdercoating more parts soon.

Yea you are. Im coming over and You, your brother and I are powdercoating my shit!!

James :laser::talon:
 
Thanks to treebonker's help, I realized I could remove the middle condensor fan relay since it's only for A/T.
http://www.dsmtuners.com/forums/bolt-tech/317803-why-2-high-speed-relays-fan.html


I went through both harnesses and the fuse box and made up these charts. I write pretty small so you'll have to zoom in a lot to read my writing on two of them.

View attachment ECU Harness Connectors Pinout.pdf

View attachment Fuse Box Harness Connectors Pinout.pdf

View attachment Fuse Box Harness Interior Connectors Pinout.pdf

View attachment Fuse Box Pinout.pdf
 
Last edited by a moderator:
Now heres a quick question. With how your removing all the wiring to excess items like the bcs, egr, etc...etc...

IF you did NOT run DSMLink would your car produce a CEL?

Idk if it would because there are no wires there, but it is still programmed in the ecu correct?
 
Ya, it'll throw the CEL's. The ecu is expecting to see a signal, but it isn't.
 
WOW!.. Nice buildup bro ! I give you a lot of props for having the guts to strip a perfectly clean, good-working car and dedicating so much time to your car and not passing up any small detail. Keep up the great work !
 
This has been a very fun and knowledgeable thread to follow. Makes me feel really lazy. Keep up the good work.
 
More powdercoated parts.

Glass bead blasted, then powdercoated Satin Clear:
CAS cover
P/S pump line
FPR
Bolts galore

IMG_7272 (Medium).jpg


Matte Black:
Shifter assembly (have to disassemble everything, can't coat the piece in the front because there is rubber holding the 2 metal pieces together - I'll paint it black later)
Symborski bushings
Coil pack bracket
Power trans bracket
Injector box bracket
Shifter cable firewall bracket
A bunch of interior brackets under dash and center console
Few more little brackets
Oil pan
Bolts galore

IMG_7280 (Medium).jpg


IMG_7288 (Medium).jpg


IMG_7297 (Medium).jpg


Satin Black:
Oil pan
Front and rear motor mounts
Radiator brackets
Coolant line
Pulleys
Trans shifter brackets
P/S reservoir
Bolts galore

IMG_7309 (Medium).jpg


I attempted coating a different set of cam gears and properly prepped them this time. One turned out good, the other didn't. I ordered this so I can strip them and try again.

Every part that was blasted or coated and will see fluids or air for the engine was cleaned thoroughly in water to make sure I got all media out of it. I'm chasing the threads for all threaded holes on the engine block and head that will be used to make sure they're clean.
 
Last edited by a moderator:
I blasted my exhaust manifold to prep it for paint, and found a small crack on the top. This is the manifold I got from my friend - my stock one has a crack in the same place as this one, plus 2 others. I really don't have the cash to buy another one or have this one fixed (unless the welder fee is minimal). :( 
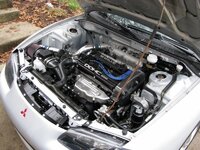
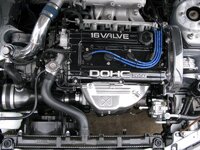
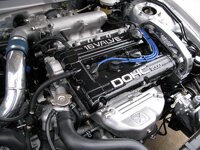
I'm thinking about using it as is and hoping it doesn't leak. Anybody have good advice for me?

I hate our stock manifolds!!!


IMG_7336.jpg


IMG_7337.jpg


IMG_7338.jpg
 
Last edited by a moderator:
mine is cracked in that same spot, but worse, i always check it for leakage but it hasnt happened yet, crack may not be all the way though.

good progress btw :thumb:
 
Thanks! I forgot to mention that the crack does go all the way through. I guess this is a common crack spot for 2g manifolds?
 
Guess I'll see how much the welder charges me to weld the crack in my turbo and go from there. Should be getting that back in the next couple days.
 
In post #111 I showed how I welded the thermostat housing and water pipe to delete the heater circuit. A friend later informed me that the heater circuit is used to bypass coolant while the radiator is closed. The water travels from the water pump through the head and block to the thermostat housing, then back through the main water pipe to the water pump, but if the thermostat is closed it can't pass through the radiator and get back to the water pipe. Normally, the coolant would then travel through the heater core and through the turbo to bypass the radiator and go straight to the water pipe. Since I deleted the whole heater circuit, I only have the turbo left as a bypass route. So I looked at the thermostat housing to see if water can travel straight from the housing to the water pipe with the thermostat closed. It can, through the hole pointed at below. However, the thermostat does block the hole a good bit. I decided to port that hole a little to increase flow through there so I don't damage the water pump or have headgasket issues. I didn't test much before porting, but after porting I can run water from a faucet straight through that hole and it will easily pass out the exit to the water pipe - I can turn the faucet up pretty high before the water starts to back up. After talking with kiggly, he thinks I will be ok with the hole ported as long as I stay with a water cooled turbo. We'll find out!

1g guys, note that your thermostat housing setup is different because the water pipe doesn't go straight to the housing. If you delete the heater circuit and use a non-water cooled turbo on a 1g you will have problems because the water has nowhere to go after it enters the thermostat housing, and it can't pass through the turbo either. In this case, you need to loop the heater lines from the thermostat housing to the water pipe instead of welding them. This is what I should have done from the start but I was stupid and didn't think of this as a potential issue. Hopefully I don't have any problems with it setup like it is.


IMG_7318.jpg


IMG_7322.jpg


IMG_7325.jpg


IMG_7339.jpg
 
Last edited by a moderator:
Jesus man! All that beautiful work and you're going to put a cracked manifold and turbo back on? WTF I won't tolerate that as I have 2 perfectly good 2g manifolds and a t25 turbo laying around. PM me if you want anything.
 
1g guys, note that your thermostat housing setup is different because the water pipe doesn't go straight to the housing. If you delete the heater circuit and use a non-water cooled turbo on a 1g you will have problems because the water has nowhere to go after it enters the thermostat housing, and it can't pass through the turbo either. In this case, you need to loop the heater lines from the thermostat housing to the water pipe instead of welding them. This is what I should have done from the start but I was stupid and didn't think of this as a potential issue. Hopefully I don't have any problems with it setup like it is.

I guess I'm stupid, too. My water pipe is welded shut also. Guess I will have to figure something out since I didn't bother to see if there would be any problems with doing that.
 
Have you ran the car like that yet?

I have gone on a few third gear pulls. And it has idled for probably around two hours total. I was noticing a problem with the coolant in the thermostat housing. When I was trying to bleed the system, about every ten seconds a big bubble would come and coolant would go out the housing. Then the level would go back down. Welding the water pipe is probably the cause of it. I will pull the thermostat out and see what happens.
 
Looks great man, this is the same thing I wanted to do to the dsm a few years back :)

Where'd you get your powdercoating gun? I've sandblasted before and I've always wanted to get into powdercoating but I've never been able to dig up any good sources of info on the process & what's required.
 
Add Value - Be Respectful - No Trolling - No Misinformation - Participate Often!
Support Vendors who Support the DSM Community

Build Thread Updates

Latest Classifieds

Back
Top