The Central Hub for DSM Community and Information

For 1990-1999 Mitsubishi Eclipse, Eagle Talon, Plymouth Laser, and Galant VR-4 Owners. This is where the DSM platform history is documented and archived. Log in to help us in our mission, and to remove most ads from the browsing experience.

IMG_2936.JPG

Street Build ITFLYS - 1Gina2G

ITFLYS - 95GSX 2.0L 6-Bolt Crank with 2G pistons, 1G TopEnd, with 2Gb-CamSensor and a Kiggly-CrankSensor - TD05H-Bastard 20G - E85 w 1000cc inj. ~25psi. Street driven track day car.

This site may earn a commission from merchant affiliate links, including eBay, Amazon, and others.

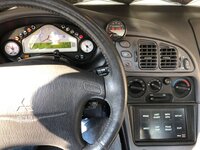
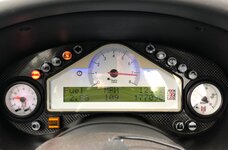
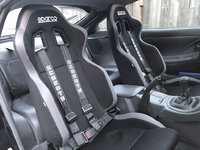
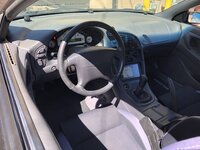
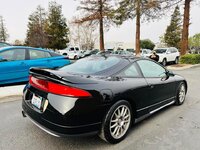
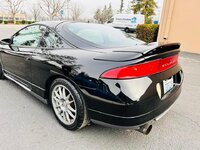
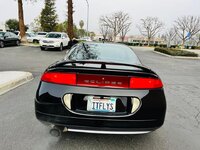
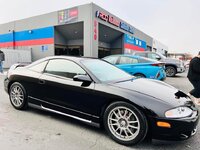
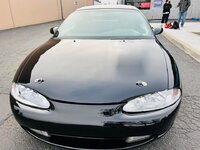
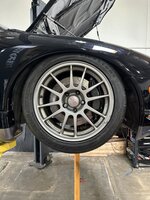
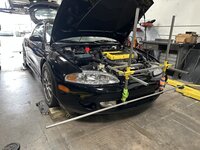
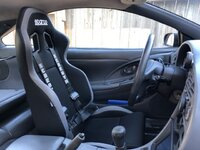
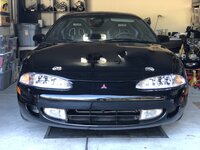
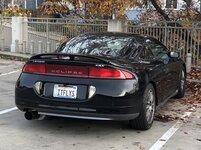
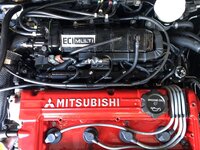
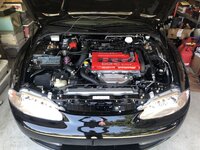
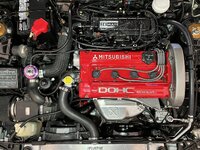
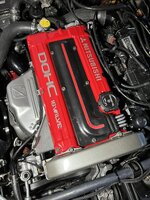
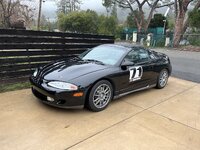
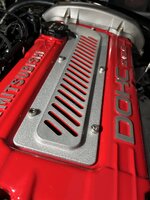
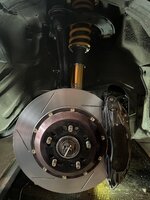
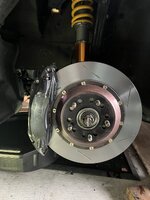
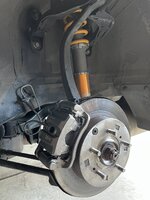
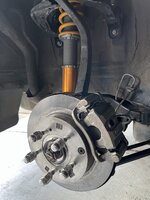
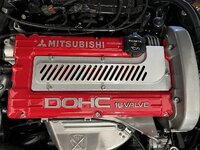
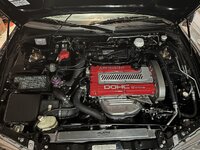
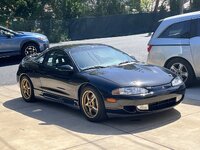
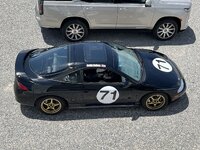
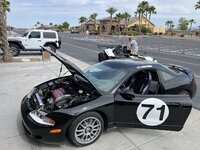
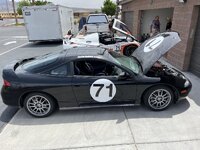
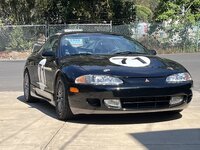
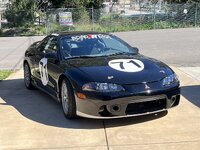
Dude, hell yes. The black and red combo is really hard to beat. That is precisely what I'd like to eventually top off my build in the bay. 🤘🤘
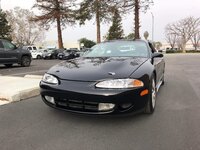
 
I’ll just put that 20g right here while we wait for an intake manifold gasket, and some new injector clips.

IMG_6969.jpeg

I should find some 6mm studs for the oil drain. Its always a PITA to line up the gasket and bolts.

I suppose I can finally update the vehicle profile - 20G is installed 🤤
 
Last edited:
Did you the pursue the cyclone manifold? I see you have your IM done in black which may have been in the works before talking about it last time.

edit: "While you're at it", you should pull that alternator out and put in a Saturn unit.
 
Did you the pursue the cyclone manifold? I see you have your IM done in black which may have been in the works before talking about it last time.

edit: "While you're at it", you should pull that alternator out and put in a Saturn unit.
In progress - not in a hurry.

I have had for a while, 2 black PC’d intake manifolds, but the prep work wasn’t great before the PC, like 15 years ago. This one does not have an MDP bolted on it.
 
Now the work list - been a while since I've had a list.

1. Install idler pulley - Done
2. Final Scrape/Clean block deck for head gasket - Done
*. Tap and Die clean cam cap bolts and threads - Done
*. Remove studs for 1G CAS and manifold bracket, use bolts - Done
3. Bolt Intake manifold to new head - Done
IMG_6986.jpeg

*. Install EGR valve with blockoff plate, Brake Booster port and MAP sensor - Done
4. Fiber head gasket install on block with dowels - Done
IMG_6990.jpeg

*. Washer/Nut clearance to the spring seat shims are very close on 12mm studs 1,2,9, and 10. It is necessary to keep the studs loose and slide washers down and thread the nuts on the stud all the way, then use the deflection tolerance of the loose stud to get the nut past the spring shims. Then I was able to hand tighten the studs all the way in before torquing down the nuts - Done
IMG_6994.jpeg

5. Install head and manifold with ARP head studs - torque to spec with ARP grease - center out sequence to 30,65 and finally 90 ft lb - Done
73586924118__4186C8DC-6CEC-4C32-A732-F16BF3DC7926.jpeg

*. I did decide to use a super thin smear of permatex on the stock oil pressure regulator before installation - Done
73586682772__3455FD8C-801B-4EC2-B809-AFBF836962AD.jpeg


*. Fill the filter with oil, several times - Done
IMG_7003.jpeg

*. Replace the dipstick o-ring - Done
IMG_7004.jpeg

6. Change Oil/Filter - Done
*. Use favorite tool to remove stuck cam caps - Done
IMG_7007.jpeg

7. Populate head with lifters, rollers, and cams - Done
IMG_7009.jpeg

8. Pump clean oil through the turbo supply line and reconnect to turbo - Done
*. Say some choice curse words when you forget to bolt up rear timing covers before putting in the cams - Done
*. Bolt up exhaust side rear timing cover - Done
*. remove Intake CAM - Done
*. Bolt up intake side rear timing cover - Done
*. install Intake CAM - Done
IMG_7015.jpeg

9. Install valve cover gasket - Done
IMG_7013.jpeg

*. Plug PCV port, Chase all threads, Fit Oil Cap, RTV spots, and...
*. Install Valve cover - Done
*. Install CAM sensor housing - Done
IMG_7017.jpeg

10. Install water neck/thermostat and new temp sensor - Done
11. Prime the oil pump - check for leaks - and install and tenson timing belt - Done
12. Install timing covers, AC belt tension-er, crank and water pump pulley's, and right side motor mount - Done
IMG_7023.jpeg

IMG_7022.jpeg

13. Install o2 sensor - Done
14. Install exhaust manifold, and torque turbo manifold ARP bolts to spec - Done
15. Make down-pipe hangar bolts tight, check for clearances - Done
16. Install manifold heat shields - Done

IMG_7026.jpeg

17. Replace injector clips, and clean up engine wiring harness - Done
*. AEM injector clips are not as secure as I want, ordered something else - Done
IMG_7164.jpeg

*. Replace coolant sensor connectors - Done
*. Replace broken GM MAP sensor - Done
18. Install throttle body, and TB elbo with IAT - Done
IMG_7112.jpeg

*. Re-plumb vac hoses to EGR and GM MAP sensor - Done
*. Hook up FIAV coolant lines - Fu@#$ng Pain in the A@$ - Done
*. Order 15-17mm hose clamps for the new FIAV coolant hoses - Done
*. Install plug wires (without plugs) - Done
*. Install Cam sensor adaptor, narrow side up - @ TDC and torque bolt to 180in/lb - Done
*. Bolt on intake manifold ground wire to firewall - Done
19. Install fuel rail - Done
20. Clean, gap and install spark plugs - Done
21. Hook up UI Hose-Pipe, and check for boost leaks - Done
*. Fix boost leaks - Done
*. Install transistor pack - Done
IMG_7165.jpeg

22. Install radiator and MAF intake - Done
23. Fill with coolant, and crank for oil pressure and check for leaks again - Done
24. Connect remaining sensors, and fire - DONE!!!
 
Last edited:
Personal experience. I did it because I read about the big dogs doing it but missed the part where these guys were doing it to MLS. I remember spraying it and it just didn't seem correct, like some of it absorbed into the gasket - which thinking back now was probably it's demise. But whatever send it and it's too late anyways.
I got idle time out of the car after doing it, and it was smoking bad. After an hour of denial I pulled the head off. Cleaning off the copper spray and gasket material was a nightmare. I put it all back together without copper spray and it was perfect. Literally nothing was different about the assembly aside of the spray.

I use copper on all exhaust metal gaskets. Love the stuff actually. But any fiber or composite gasket I will never consider it.

YMMV
This had an MLS HG, but today we are going to try the Mitsu fiber gasket - and I might as well try it without copper spray and see if it seals.
 
Jesus man, that’s insane. But I admit I have been very curious how the inside of the GM Maps look.
I’m wondering if this is what they are supposed to look like. The sensor is in the square box filled with epoxy, the rest of this sensor is empty space with 3 wires from the actual sensor to a plug.

I dunno - I call shiningans - I think this is a cheap knockoff
 
Check out MPXH6300AC6T1 (3 bar) and MPXH6400AC6T1 (4 bar). These work and are tiny. So, maybe anything more is designed larger to look important or stand out as a mod?

edit agreed above, AEM stainless is what I would go to as well. I think 3 bar would be ideal for him, not 5. Resolution loss for no reason.
 
Last edited:
Add Value - Be Respectful - No Trolling - No Misinformation - Participate Often!
Support Vendors who Support the DSM Community

Latest Classifieds

  • For sale 2g 2G Mishimoto Radiator & Fan Shroud
    2G Mishimoto Radiator & Fan Shroud $200 + shipping and paypal feesYou must be registered to...
    • jersygsx
    • Updated:
    • Expires
  • For sale 2g 2G Power Window Switches ( tested and hardware included )
    2G Power Window Switches $55 + shipping and paypal fees* Tested 6/2/26 * Hardware included *...
    • jersygsx
    • Updated:
    • Expires
  • For sale VIRGIN 4G63 6-BOLT TURBO HEAD
    Came off a virgin stock AWD Auto 1G DMS (91), also have matching block and crank which are also...
    • The_Partout_Spot
    • Updated:
    • Expires
  • For sale 1G DSM 4G63 6-BOLT TIMING COVER
    Used, see condition in photos. Buyer covers shipping / fees.
    • The_Partout_Spot
    • Updated:
    • Expires
  • For sale Garage clean out
    Changing setups on the car and getting rid of some stuff as well that's been laying around. Will...
    • 92GSXtacy
    • Updated:
    • Expires
Back
Top