The Top DSM Community on the Web

For 1990-1999 Mitsubishi Eclipse, Eagle Talon, Plymouth Laser, and Galant VR-4 Owners. Log in to remove most ads.

Please Support Rix Racing
Please Support STM Tuned

Bumper Cut Out (Merged 3-31-09)

This site may earn a commission from merchant
affiliate links, including eBay, Amazon, and others.

This site may earn a commission from merchant affiliate links, including eBay, Amazon, and others.

LandoAWD

Retired
Supporting VIP
10,745
42
Jun 13, 2002
Hillsborough, North_Carolina
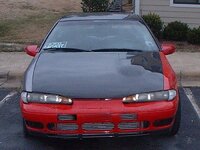
Pardon the horrid clone-brush attempt, I suck at photo editing.

Anyway, I was considering doing something similar to this to my front bumper cover, and was looking for suggestions on prep, cutting tools, cutting methods, etc so it doesn't look as bad as my digital attempt.
 

Attachments

  • Dscf0340.jpg
    Dscf0340.jpg
    72 KB · Views: 2,720
4760EclipseMall01.jpg


Kris,

I used rubber liners that surround the tail lights on like a delivery truck for the two outside inlets. I got them at Car Quest and they were pretty cheap. I saw them at Northern Tool in Cary as well. The advantage was that I didn't have to have a nice smooth cut since it was covered up anyways. I used a drill to put a whole in the bumper cover and then used a jig saw to cut out the shape.
 
The car is looking mean, Eric.

Thanks for the tip on the tailight pieces!
 
Prep: Make a template out of cardboard, or paper. Trace the template on the bumper cover where you want your vents to be.

Cutting Tools: a few possible choices, its up to you and what you have at your disposal but I would suggest a: Dremel with a grinding stone, Jigsaw, and Drill.

To start off (after you have you templates traced on the bumper), drill two large holes on the center of the traced vents (Large enough to fit the jigsaw blade in). Next use the Jigsaw to cut away a portion of the inner vent about a 1/8 or an inch from the traced lines. Use the dremel to file away the rest of the bumper material until you reach the traced line.... use the dremel to your advantage...to make the vents as even as possible.

You can use some vacuum hose cut in have, or trim wrap to mold around the vents to make them look clean and uniform.... but that’s all for aesthetics. I don’t know what tools you have access to, but that above should give you a nice turn out. But most importantly take your time and be patient with it. I am sure it will come out looking great. And on a final note...while cutting the plastic wear some type of covering on your mouth, breathing that stuff in doesn’t help anything.

P.S. You can check out my hacked up 1ga bumper on "my website".

Good Luck,
Dave
 
A RotoZip, or the same bit with a Dremel name on it should do the trick, you'd want a good base on it to help keep it square. You could do it like Norm and build a masonite pattern template that you'd mount onto the bumper to guide the tool, but you may not have a half-million dollar shop at your disposal.

Use some masking tape to try and save whatever paint you can, and be aware that the plastic of the bumper will start out tough and then go suddenly soft as the area being cut and just ahead of the blade will suddenly go soft with the heat- which is where the trouble comes in when cutting this stuff. You'll be all set at a certain cut rate, and bango it turns to pudding and the tool wanders. Just go slow, you have more skill than needing to be told all this.
 
Awesome, y'all. As sson as my balls grow a bit....I'm on it.
 
remember,

you can take away as much as you want. but you can never add.

go slow. and SAND MORE!!! get hand sanding tools to finish it and get it close to the orig template.

now put the template on the INSide of the bumper, because if you mark the outside, you have to grind it away, or buff off. whereas the inside you can retain the outline to align you to sand.


(without bondo, prep, paint...)


i need to look at those pics again at home, because i think there was toooo many holes in that front.
 
Kris,
My FMIC cause very high coolant temps,(223* to 235*) even with 2 SPAL fans running all the time.
Below are some pictures of my bumper modifications to allow more air to the intercooler and radiator. This solved my high coolant temps finally. (192* to 203*)
Tools used: Skill saw for the bumper support cutting in the first pic.
3" hole saw/drill bit for the rounded ends in the upper bumper cover vent.
Razor knife and steel straight edge.
Good Tin snips
Gutter guard mesh from Home Depot.
1 can of black spray paint.
Small self tapping screws to hold mesh on bumper from back.
Roto Zip/Dremel with cutting wheel to shave off screw points that come thru front of bumper cover.
Color matched touch-up paint to cover shaved off screw points.
You must be logged in to view this image or video.

You must be logged in to view this image or video.

You must be logged in to view this image or video.

Last PIC finally got the bumper mounted and test drove the car coolant temps on a 90* day never went above 196* at highway speeds, in town 206* was normal.
You must be logged in to view this image or video.
 
Kris- IMO you should chop out the loer laser 'swiss cheese' holes to an even rectangle around the FMIC- for the most flow possible. The one thing I dislike most about laser fronts is the swiss cheese holes, may aswell make it one big one
 
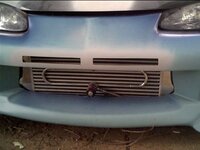
Mine minus the rubber gourment stuff I used on the edge to make it cool cleaner.
I just measured roughly, and used a dremel to do it.

Sorry for the crappy ass pic.

You get the idea though.

You must be logged in to view this image or video.
 
I seen alot of variations the way people decied to trim the stock front bumper to better incorporate a FMIC

I need help the to deciede which way to trim mine for when I add a fmic in the spring.

thx
 
Here are some pics of how I cut apart my front bumper core.

http://www.imagestation.com/picture/sraid149/pc59f349c6ec3d394d2fea0beb455a0ce/f5f0f756.jpg

http://www.imagestation.com/picture/sraid149/pc34df3f8a156a27c47b8a5f63e585d1d/f5f0f75c.jpg

http://www.imagestation.com/picture/sraid149/pc898bc700d30dd4919daa5b4220d0e5a/f5f0f758.jpg

Used a plasma torch, it took alittle while longer than I thought it would. There are alot of bracing inside the core that you can't see until you start cutting sections away. I don't have pics of the front bumper cover cut outs though. I just removed material from the front to allow air to enter the top of the IC.

***freaking imagestation***, you'll have to copy paste
 
OK here is my front bumper. I didn't want to cut out the entire bumber like above but I needed more air flow to the radiator. This was my solution.

Cut the steel support infron to the intercooler.
You must be logged in to view this image or video.


Cutout in the bumper, filled the cutout with mesh to give it a finished look.
You must be logged in to view this image or video.


Finally the finished product on the car. Pardon the dirty car it was a 2 week work in progress in my garage.
You must be logged in to view this image or video.
 
TURFNSURF,
Your bumper modification looks very nice and well thought out. Most of the time the bumpers just look like hack jobs and don't flow well with the car. I also like arctic tsi's ducts that he added for his enormous fmic.
 
Hey did a search .. didnt see a thread that was set up specifically for pictures of cut 1g bumpers. I like to see the creativity some of you guys have when deciding how to cut your bumper to get your fmic to breathe better. So i figured it would be helpful for other people if we had a thread with pictures of everyones bumpers to give people ideas.

Please post pictures of your 89-94 DSM cut bumpers!

Thanks,
Luke :dsm: :laser: :talon:
 
both threads have like 3 pictures .. thats weak .. :|
 
Support Vendors who Support the DSM Community
Boosted Fabrication ECM Tuning ExtremePSI Fuel Injector Clinic Innovation Products Jacks Transmissions JNZ Tuning Kiggly Racing Morrison Fabrications MyMitsubishiStore.com RixRacing RockAuto RTM Racing STM Tuned

Latest posts

Build Thread Updates

Vendor Updates

Latest Classifieds

Back
Top