The Central Hub for DSM Community and Information

For 1990-1999 Mitsubishi Eclipse, Eagle Talon, Plymouth Laser, and Galant VR-4 Owners. This is where the DSM platform history is documented and archived. Log in to help us in our mission, and to remove most ads from the browsing experience.

FB_IMG_1751294680936.jpg

Street Build 1g build - The Real Life Trials and Tribulations of building a DSM

Stock 14b,--> PTE 5031--> FP Red --> GTX 3584RS build 1GB --> 1GA chassis swap

This site may earn a commission from merchant affiliate links, including eBay, Amazon, and others.

Those needles will hide in crevices in the head for sure. Use a good magnet, as suggested, and see if it will find another 1 or more. I had 3 that were broken and they were in little places and grooves. You could put a super magnet on the bottom of the pan to try and capture any if they get in the oil flow. They won't get through the pickup screen. You may find one in an oil change. I know you must be worried but I don't think they are going to hurt anything, but in the back of your mind, you are always wondering and bothered by it.
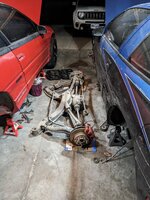
Yeah hopefully I find them all. I assume if I don't find any they got obliterated falling down and banging around off the rod / crank.

The magnet idea is a good one too actually. I have a couple neodymium magnets
 
Got the car all back together last night. Let the gasket making setup and cure overnight and I'm hoping to put some oil in it after work and then give it a start and probably an easy drive to see what fueling looks like.

Noticed while putting the oil pan back on that the axle seal was leaking. Gotta order up a new one of them.

Scraping the old gasket material off the oil pan is such a pain. Anyone got a any good advice besides razor blade for getting that stuff off and out of the groove of the pan flange?

PXL_20251217_023725940.NIGHT.jpg
 
My bench mounted wire wheel ROFL
And it still is tough. Even WORSE if someone has used "The Right Stuff". That stuff is like cement. I don't ever recommend using it unless its an emergency because I've had to remove it before. What a PITA.
Good luck on the start up! I am looking at 70* weather on Christmas and am hoping for a 1st start on a 20 year old built SBC. 🤞
If you have a drill and a wire wheel for it, I'd go for that, in the oil pan grooves. :thumb:
I've used a wire wheel before (just on the drill) and it worked but made an absolute mess inside the pan. How did you clean it out?

That's exactly what I used is "The Right Stuff" it's absolutely bi***. I think I'm going to switch to something else because like you said it's like an act of God to get it off the engine and clean up.

It's somehow like 50°+ today so it's not a terrible December day here!
 
I use Permatex Optimum Grey. It will treat you right!

Screenshot_20251217_123803_Walmart.jpg
 
Got the car all back together last night. Let the gasket making setup and cure overnight and I'm hoping to put some oil in it after work and then give it a start and probably an easy drive to see what fueling looks like.

Noticed while putting the oil pan back on that the axle seal was leaking. Gotta order up a new one of them.

Scraping the old gasket material off the oil pan is such a pain. Anyone got a any good advice besides razor blade for getting that stuff off and out of the groove of the pan flange?

View attachment 781061
I used carbide scrapers for gasket removal. Beware, use them incorrectly and they can gouge the crap out of something.
I used Lisle 81780.

I use roloc disks and die grinder for silicone removal. My go to for most everything is permatex ultra Grey.

 
Do yourself a favor while the pan is off and clean. Put it on a FLAT SURFACE and take a 3/8" extension and tap all of bolt holes flat before reinstallation. If the rail is wavy, give it a little love too. I've had to do it many times on SBC pans and valve covers.
 
I used carbide scrapers for gasket removal. Beware, use them incorrectly and they can gouge the crap out of something.
I used Lisle 81780.

I use roloc disks and die grinder for silicone removal. My go to for most everything is permatex ultra Grey.

I have some of these and they were a bit too aggressive for the pan. Worked great on the block side though.
 
I have some of these and they were a bit too aggressive for the pan. Worked great on the block side though.
These are great on the block l. For head gasket I dont want to use roloc. I was shocked how much more came off when I thought I already had it clean.
 
I used carbide scrapers for gasket removal. Beware, use them incorrectly and they can gouge the crap out of something.
I used Lisle 81780.

I use roloc disks and die grinder for silicone removal. My go to for most everything is permatex ultra Grey.

The Roloc disks, those are the plastic bristle disks?
 
The Roloc disks, those are the plastic bristle disks?
Thats is one type. I use the mild brillo pad ones. Different brands are different color. Would never use one on a precision sealing surface. Transmission cases, oil pans, thermostat housing. Yep.
 
Well got oil in the car and got it started and it's definitely not happy. Sounds like it's down a cylinder. I unplugged cyl 3 injector and didn't change anything so I think maybe the injectors need cleaned. Last time they were cleaned was 11/2023. Only ever ran e85 through them since then.


Ordered up a new fuel filter as well just in case. Ol Ken McDonald told me to try cleaning them at home with some carb cleaner and compressed air to see if that fixes it before sending them to him for cleaning. I'll give that a go.

Also switching back to the NGK BPR7ES plugs instead of the NGK 2668 BKR8EIX Iridium that I've been running. Only used the 8s because my old stalks for my COP didn't fit anything else.
 
Opinions fellas. Just took out injectors and cleaned then with carb cleaner and air. No change to idle. Misfiring and what not.

I checked the cam gears, put the crank at TDC and it looks like to me SOMEHOW the exhaust cam is half a tooth retarded? I used one of those PQY cam tools it doesnt look like it allows you to lock it with the cams this way. So I'm not sure.PXL_20251219_180144681.jpgPXL_20251219_180148119.jpgPXL_20251219_180436137.jpg

I really hope I didn't just bend valves.
 
Yes, it is out of time. My White 90 GSX was that way (maybe a bit worse) but it did not hurt anything. Its CAS was even 180* out and it still ran "ok". Retime it and you should be fine. 👍🤞
I like the cam gear holes.....kinda looks like mine! :D
 
Yes, it is out of time. My White 90 GSX was that way (maybe a bit worse) but it did not hurt anything. Its CAS was even 180* out and it still ran "ok". Retime it and you should be fine. 👍🤞
I like the cam gear holes.....kinda looks like mine! :D
Thanks for this! Made me crazy worried.

Yeah can't seem to get the dang bolt centered though..
 
As long as they don't rub, its all good. Mine are the same way. Not perfect but good enough. ✌️
 
Okay we should be back in action! Got new high pressure valve springs in, and swapped in my Evo rockers, redid the timing triple checking it and she took awhile to start up but start up she did and she idles great. Possibly even better than with the S2s.

Im also happy to report she's got some lope now too, which is a plus.


I guess time for some logs and send em out to the tuner and see about touching up this tune. Not sure how many nice days we've got left but it's been consistently 50°+ outside somehow.
 
That lope is almost identical to my Kelford 280R's. Sounds GREAT! I am excited FOR you! 💪
Just to "rub it in", it was 60 this morning and going to be 70 until Sunday, when the bottom drops out. That's why I am working hard for a 1st start during the nice temps!
 
I could do with less chop on these BC cams. There was a set of OG HKS 272s for sale on FB for $350 for exactly 20 minutes before they got bought. Damn it! Lol.

I am equally as curious though to hear the pros/possible cons of the S3's vs the S2s though.
Ditto, I have new S2’s on the shelf.
 
Well I decided to sign into why my fuel level gauge wasn't working and it's so much worse than I thought it could be. Not even sure how this is possible but obviously it is.

I started by swapping in another cluster and it did the same thing. So obviously something was telling the gauges that it was empty, or the wire was disconnected somewhere.

I pulled the fuel pump housing and tried testing the resistance of the level sending wire but I honestly dont know what to ohm it against.. ground? Way anyways, I pulled the hanger out and found that the level sending wire was corroded and basically broke in half inside my heat shrink. I while messing with that the teeny tiny low level light wire also broke so now I gotta fix both of those. That's not even the worst part.
PXL_20260103_214843301.jpg
I fixed the level sending wire and then turned the ignition on and got nothing again. Level didn't move even though I had it the float lifted simulating a full tank. I ohmed the wire from the new joint I fixed the wire with and the connector on the outside of the pump housing (the one that's literally glued and sealed through the top of it) and got no continuity.. weird... I inspected the wires OUT SIDE of the pump housing ( between the pump housing and the cover) and the wire looked weird and thin so I moved it around a little bit and the shielding split open and I found corroded wire in there that literally turned to dust..
PXL_20260103_222550343.jpg

Fuel had wicked UP the wire jacket / shielding and corroded the wire in half completely.
The power and ground wires for the fuel pump were similar and weren't making full contact anymore.


So I removed the fuel pump housing completely and cut out all the wires and drilled out the epoxy sealing the wires though the top and I have some new tefzel wire, PTFE heat shrink, and some Loctite EA E-20HP sealant to reseal the wires passing through. I'm going to replace all wires and have zero solder joints inside and just going straight to connectors hoping this won't ever happen again.
PXL_20260103_224732356.jpg
 
Add Value - Be Respectful - No Trolling - No Misinformation - Participate Often!
Support Vendors who Support the DSM Community

Build Thread Updates

Latest Classifieds

  • Wanted Looking for T25 replacement
    2G, preferably a t28 or t25
    • Mando Vee
    • Updated:
    • Expires
  • For sale 2g 2G Manual Shifter Cables
    2G Manual Shifter Cables $85 + shipping and paypal feesYou must be registered to see element.
    • jersygsx
    • Updated:
    • Expires
  • Wanted 2g Factory radio brackets
    Looking for some factory radio brackets.
    • jesse12345
    • Updated:
    • Expires
  • For sale 1G DSM COMPLETE A/C UNIT
    Came off a bone stock 1G, won’t be using. Good for anyone that’s looking to go back to a/c or...
    • The_Partout_Spot
    • Updated:
    • Expires
  • For sale 2g 2G AWD OEM Grey Hatch Carpet
    2G AWD OEM Grey Hatch Carpet $40 + shipping and paypal fees* Great condition with backing...
    • jersygsx
    • Updated:
    • Expires
Back
Top