The Top DSM Community on the Web

For 1990-1999 Mitsubishi Eclipse, Eagle Talon, Plymouth Laser, and Galant VR-4 Owners. Log in to remove most ads.

Please Support RTM Racing
Please Support STM Tuned

Paul's ongoing project '99 GST-X

This site may earn a commission from merchant
affiliate links, including eBay, Amazon, and others.

This site may earn a commission from merchant affiliate links, including eBay, Amazon, and others.

99gst_racer

Moderator
11,981
1,553
Apr 5, 2003
Coloma, Michigan
I’ve only ever kept track of my car’s build on my local DSM forum, which has since died down to zero traffic. So I figured this would be a good new place to share and document my car’s progress. Most of this is copied and pasted, so ignore all of the "todays" and "tomorrows". I'll do my best to indicate when each part of progress took place.

Index

Post #1) Intro, History, FWD dyno
Post #2-4) WINTER '06-07 - AWD swap, new suspension, raping parts car
Post #5) SPRING '07 - Fuel system install, new parts, new manifold and TB adapter
Post #6) Engine timed, new tranny, both installed. AWD swap complete!
Post #7) New spoiler and new springs (hypercos)
Post #8) SUMMER '07 - Engine goes boom, new suspension (D2s),
Post #9) Shortblock build
Post #10) FALL '07 - Longblock assembled and installed, fresh headliner
Post #11) SPRING '08 - New T4 manifod & 60-1 turbo, new radiator & fans
Post #12) SUMMER '08 - Radiator ducting, new fabricated parts
Post #13) Fluidampr & MISC car pics
Post #14-15) WINTER ‘08-09 - Compound turbo build begins
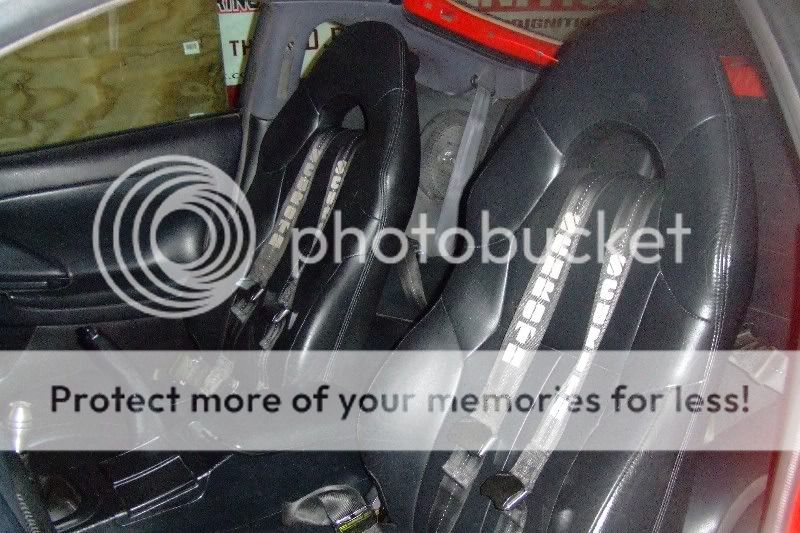
Post #16) New seats, bumper cover, and many other performance parts
Post #17) Fiberglass gauge pod project
Post #18) SPRING '09 - Cylinder head work, Link V3, driving lessons
Post #19) Downpipe modifications
Post #20) Compound stuff installed, side exit exhaust build
Post #21) SUMMER '09 - Start-up vid, new fuel pump, oil pan, MBC, fixing SMIM
Post #22) FALL '09 - Exhaust components coated
Post #23) SPRING '10 - New hubs & knuckles, fuse box relocated, compound pics
Post #24-25) SUMMER '10 - Crankcase evacuation build
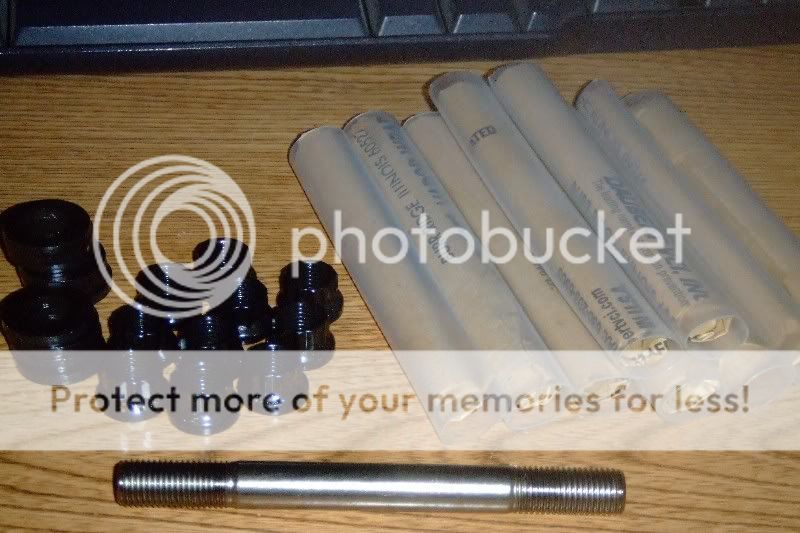
Post #26) New front Wilwood brakes, custom rear toe arms, Fluidampr dilema, hood shocks
Post #27) Compound turbo pics, steering rack solution, replacing head gasket
Post #28) Compound turbo dyno, new wheels/tires, hydroelectric power steering
Post #29) FALL '10 - front brake modifications, staging brake install
Post #30) WINTER '10-11 - New turbos!
Post #32) QM gear drive twin disk, turbine housing fab work


HISTORY:

I bought the car in October of 2002, after getting bored with a ’95 GS. I got into a nasty accident two weeks later, and being the ricer that I was, I took that opportunity to flare up its appearance a bit so that I could take it to car shows like HIN. Over the course of the next few years, I bought miscellaneous go fast goodies for it. I slowly got bored with the show car scene and grew more interested in the performance side of things. I worked my way from a T25, to a 14b, to a v-trim, and eventually a T3 50-trim.


In the fall of 2006, I made my way to the dyno for the first time. The car was still rocking a bone stock 7-bolt longblock down to the factory intake manifold, cams, head bolts, and head gasket. It had literally never been opened up. My baseline pull netted 348 WHP. Within 30 minutes of tuning and a few pulls later, I was up to 403 WHP.
* Acceleration from 3100 to 7100
* Elevation: 997 ft. above sea level
* T3 50-trim @ 27.6 psi (spikes briefly at around 32 psi)
* peak timing advance: 21.4 degrees
* Injector duty cycle: 69.0% (850cc)
* Air-to-fuel ratio: 12.3:1 (on 110 octane Sunoco)
* Airflow: 47.5 lbs/min
* Peak power: 403.4 WHP
* Peak torque: 356.9 ft/lbs

pics6615.jpg


pics6623.jpg


pics6624.jpg


dynorun403hp.jpg


http://youtube/xQQVqYvWhXg


On the way home from the dyno, I was fighting traction the whole time. I was rocking a stage 1 Shep rebuild with a Quaife, and it was still blowing the tires off on command under 80 mph. At that point, I decided I was going to do an AWD swap. 2 days later, I pulled the tranny and sold it. A week after that, I bought a house with a 3-car garage, moved my car there. This is when I began documenting my car's build...

and the neverending project began.
 
Last edited:
WINTER '06-07

My winter goals:

#1. The AWD swap on the GST. (GST tranny is pulled and sold. rear subframes get pulled next week and work begins.)
#2. Pull GST engine and replace timing components, as well as install Magnus SMIM.
#3. Eliminate cruise control and A/C. Emissions delete and vac. line delete.
#4. Have AWD tranny rebuilt by TRE.
#5. Redo black headliner.
#6. New springs, shocks, flywheel, clutch.
#7. Finish replacing "the wing" with a more low profile (non-aluminum) design spoiler.


We kinda sorta started yesterday. The GST's engine is pulled. A/C and cruise control are gone. (Dano in the pic)

pics69940.jpg


pics69951.jpg


I picked up a complete '95 GSX with a broken t-belt to use for my donor car for the swap.

pics6592-1.jpg


So, I felt motivated today, and turned a couple wrenches.

Dale and I got the entire subframe and rear suspension dropped today on the 95 GSX parts car. We also removed the fuel tank and driveshaft. Tomorrow, we're going to tackle the t-case, and we're going to try to get the front CV shafts pulled to get the engine and tranny ready for removal.

As soon as I have all of the parts removed, I'll get my GST back in the first garage bay and start tearing the ass end out of it as well.

**Worst part of today's adventure: Busting up every single knuckle, and cutting my hands and fingers, only to spill gasoline all over my hands an hour later.... Curse words were spoken.**


Lowering the subframe out:

pix1018.jpg


Out in one piece:

pix1020.jpg


The removed fuel tank:

pix1042.jpg


The interior is now FUBAR:

pix1037.jpg


The exterior aint too pretty either. I've raped this car pretty bad....

pix1040.jpg


I had to lure Dale to the garage with some beer. Who'da thought....

pix1016.jpg


**Thoughts**
Never in my days did I ever think I would actually be doing this much "modification" to my GST when I bought it 4 years ago. I remember telling myself, "It's already turbo'd - you wont need to do anything else to make it fast..." HAHAHA. And as of next week, it will sit with no engine, tranny, suspension, rear subframe, and I'll be cutting and welding vital parts of the car's geometry. I never thought it would come to this....
 
Last edited by a moderator:
So, We made more progress today. I had to lure Onad out there with the promise of a new friction surface for his Fidanza. And I actually got him to stay and help for an hour or so...

#1 - We finally got the engine and tranny pulled.

#2 - We re-positioned the parts car..... LOL

#3 - I got one of the driveshaft supports drilled out. And the other is 70% removed as well.


Engine/Tranny removal:

pix1057.jpg


pix1059.jpg


Before re-positioning:

pix1062.jpg


After re-positioning:

pix1064.jpg


pix1069.jpg


pix1075.jpg


The rear driveshaft support:

pix1076.jpg


Next step is to clean up garage, then shovel snow for a couple hours so I can get my 99GST out of the third garage bay and into the "working" area. Hopefully it will be in there by Friday.


So, Dan and I worked for a little over an hour today, and got a decent amount accomplished. We dropped the turboback, removed the entire rear subframe, suspension, and e-brake assembly, and I also prepped/gutted the rear of the interior. And Yes, it seriously only took a little over an hour of work. Thanks for the help, Onad!!

PICS:

pix1100.jpg


pix1101.jpg


pix1104.jpg


Tomorrow, I'll take care of the rear spring/shock stuff, and I plan on removing the fuel tank, and maybe cutting the subframe bolts out of my GST. More pics to come as progress takes place. Stay tuned!


I dropped the FWD fuel tank (which was much more of a PITA than the AWD tank was), and I prepped the rear suspension. The GST's underside is pretty much gone now.

Next step is to weld the driveshaft supports in place and rewire the fuel tank wiring. (both of which are going to suck ass)

PICS:

pix1106.jpg


pix1109.jpg


pix1114.jpg


pix1118.jpg
 
Last edited by a moderator:
SPRING/SUMMER '07

I cut out the FWD gas tank mounts:

pix1184.jpg


Cutting into the frame to swap out sub-frame bolts:

pix1128.jpg


pix1130.jpg


pix1185.jpg


I cut a hole out underneath the back seat, and installed a cover. This will be an access point to the secondary sending unit on my fuel tank, if I ever need to service it.

pix1199.jpg


pix1202.jpg


Instead of using the front driveshaft support from the AWD parts car, I instead chose to use the support that came on my FWD. That means I had to cut it off and weld studs on it.

pix1206.jpg


Then I had to cut the front FWD sub-frame bolts off flush with the underside of the frame, and then weld then in place to keep them from rattling.

pix1214.jpg


And tonight, I welded in the front driveshaft support. This was easier than I expected. Even though this was only one day after I learned how to weld, and I was on my back with low light and very little room to move around, and I had a shitty ground for the welder..... Even though all of that, it still wasn't as bad as I had expected.

BEFORE:
pix1209.jpg


AFTER:
pix1210.jpg


This week will be the following:

* Weld on rear driveshaft support
* Wire up fuel pump and sending units
* Install gas tank

I'm still waiting to get my modified fuel pump assembly back from my buddy. Hopefully he has it done within the next couple of days.


I got the rear driveshaft support tacked in place. I'm going to verify it's in the right place and then finish welding it on.

pix1223.jpg


I did a little work to the belly pan for the fuel tank. I sanded it down to remove all of the rust, and then I welded the straps on it, instead of relying on old rusty bolts. And then I sprayed it with some black rubberized coating.

pix1225.jpg


My buddy Evan welded this fitting on the top of my fuel pump plate for me. This allows be to use AN fittings from the pump, forward, without modifying the way the pump mounts and hooks up.

100_1339.jpg


All assembled and ready to go. I should be installing the tank tomorrow.

100_1345.jpg


I finished welding the rear DS support in, and I studded the frame, front and rear, for the fuel tank straps to bolt to:

100_1350.jpg


Apparently, nobody has ever taken the time to lay out the proper fuel tank wiring in a nice little diagram. So, I whipped one up.

swapfueldiagram1.jpg


100_1351.jpg


Then, I mounted the fuel tank by myself because Dale was drunk. This wasn't too bad though.

100_1352.jpg


And I prepped the rear subframe. I installed my previous caliper brackets and rotors, new suspension, and previous upper control arms and mounts.

100_1353.jpg


I still need to:

* Rebuild tranny
* BS elim. and new timing stuff on engine
* Install rear subframe.
* Install engine, tranny, t-case, and driveshaft

And a bunch of other little shit..... I should be done by the end of April...
 
Aww, snap. Check it out fellas.....


Subframe is on!!!

pix1252.jpg


pix1255.jpg


I also ran my SS braided house from the tank up to my fuel filter that I mounted on the firewall.

pix1263.jpg


pix1265.jpg


I also got the e-brake cables hooked back up last night. I'm going to finish reinstalling and cleaning the interior this week. Next week, I'll be taking my tranny down to Jon and I should be placing my big order with JNZ. I won't have much to do for a week or two now, though.....


Did a little more work yesterday. It's finally starting to look like a car again.

I got the entire interior back in (uncleaned as you can see). I got the stereo wired back up, and I got the battery relocation kit finished.

I'm still waiting for a parts order from JNZ and one from SBR. Until that stuff comes in, I'm at a standstill. The engine work is next on my list.

pix1289.jpg


pix1284.jpg


Some pics of the new parts. Everything here should be installed either Thursday or Friday.

My JNZ order:

pix1293.jpg


Comp 101200's and Fidanza gears:

pix1295.jpg


pix1296.jpg


My rebuilt 1G throttle body (big thanks to Zack [boomboom] and Jim H.):

pix1298.jpg


My manifold dilemma: My Magnus SMIM is flanged for a 75mm Mustang TB, and I've decided against running one of those TB's. I needed a way to mount my rebuilt 1G TB to the manifold, but I didn't want to directly modify the manifold itself.

So, Evan and I spent a few hours at the machine shop last night working on the CNC mill, and we came up with this nifty little adapter.


pix1300.jpg


pix1302.jpg


pix1305.jpg


pix1306.jpg


pix1312.jpg


pix1309.jpg


pix1315.jpg


My Fidanza clutch and flywheel finally came in yesterday as well:

pix222.jpg


pix218.jpg


And here's my recently acquired Thermal R&D catback:

pix215.jpg
 
Last edited by a moderator:
The engine is mostly put back together now. All new timing components and water pump. Balance shafts are gone. Comp 101200's are installed along with the Fidanza gears. I also have the Magnus SMIM installed with one of those heat barrier spacer gaskets.

Jon from TRE finally called me today. Here's the extras that it's getting:

- Double syncro 1st-3rd
- 11% taller 1st w/ new input shaft
- Welded center differential

I'll be picking it up Friday of this week.


Engine Pics:

pix1323.jpg


pix1330.jpg


pix1340.jpg


Aint she purdy?


pix1345.jpg


pix1348.jpg


Engine and tranny go in tonight. Will post pics tonight.


We didn't get the engine and tranny in tonight because we wasted a bunch of time dicking with the rear suspension, and we never did get it right.... Nevertheless, the clutch, flywheel, starter, and tranny are bolted up and ready to rock. We'll drop in the assembly tomorrow afternoon, hopefully.


pix1361.jpg


pix1360.jpg


Well, we got the engine and tranny dropped in today.

My hoist was broken, so Dan picked it up and man handled in in there. LOL

pix1366.jpg


HAHAHA, j/k j/k

pix1369.jpg


pix1374.jpg


pix1378.jpg


I'll spend the next couple days tying up loose ends, and I should be driving it by the end of the week.
 
Last edited:
It's official. She moved on her own power tonight. It's put back together and I drove it down the road a bit. I have to show up to work tomorrow morning to win a bet. Hopefully I have no issues with running zero tune and zero exhaust.

It's good to see it off jackstands and re-assembled. I haven't driven this car in almost 8 months. I haven't quit smiling yet. :)

pix1431.jpg


I'm lovin this new spoiler. It's exactly the "new look" that I was looking for. All my co-workers seem to like it better as well.

This week, I still have to fab up an exhaust, tune it with Link, adjust the rear suspension up a bit, wash and wax, figure out why my speedo and fuel gauge aren't working, and re-do the headliner. So, I'll still be busy with it this week. My goal is to be able to drive it to the Sunday meet coming up.


Also switched out the Megan springs for 7" Hyperco's.

pix1414.jpg
 
SUMMER '07

Well.... Lots of updates.

I sold the Koni/Hypercoil set-up. It was a nice set-up, but the lack of shock travel at my desired ride height steered me to a different set-up. So, I picked up a brand new set of D2's. These should do the trick.

pix1528.jpg


Now for the bad news - Car is down for a while. I over-boosted and finally lost my bottom-end. Bent all rods but mostly #1 and #4 rods.

pix1521.jpg


And upon taking everything apart, looks like I've completely destroyed my half shaft as well.

pix1516.jpg


So, being that I don't have the extra $1000 lying around right now, it might be a while until I get my car going again. Maybe until this coming winter unfortunately.... Oh well.... This was all inevitable; I was just hoping that it would last one more summer.

Shit's depressing though. The clutch and TRE tranny isn't even broken in yet.... Hmm.... Maybe I'll take a few beers out to the garage tonight and at least install the suspension and get her off the jack stands....

:sigh:


Well, the D2's are on. These things are bad-ass. They are completely unadjusted in these pics, but they are pretty close to where I want them to be. So, at least now, she sits lookin pretty while not running.

pix1534.jpg


pix1537.jpg


Engine and tranny are back out once again. Me and Dale had it out in like 20 beers. Just kidding. It took us a little more than 2 hours with distractions.

I'll pull the engine apart on Tuesday or Wednesday and post the carnage.

pix499.jpg


Well, Me, Dan, and Dale pulled my engine apart last night. The carnage:

pix1547.jpg


Three of the four rods were bent to this extreme. #1 and #4 were actually hitting against the very bottom of the cylinder wall and chunking away at the wall, and gouging up the rod and piston skirt. Surprisingly, the head gasket never failed even though I was still only using factory head bolts and a composite head gasket.


Upon pulling the head, this is what TDC looked like:

pix1543.jpg


And this is where the side of the rods were hitting the wall:

pix1551.jpg
 
Block machine work:

$155 - Bore & hone w/ torque plate
$120 - Deck block
$120 - O-ring block
$175 - Assemble shortblock
$25 - Check align hone
$60 - Degrease block
$50 - Assembly-clean block
$50 - Micropolish crank journals
$30 - Hanging pistons
$35 - Install new freeze plugs and b-shaft bearings

Plus the price of the Wiseco pistons, Eagle rods, bearings, head gasket, timing belt, head studs, blah, blah, blah, etc, etc......


Well, here she is:

pix1572.jpg


pix1562.jpg


pix1564.jpg


pix1580.jpg


I painted the block dark gray. I know it looks light gray in the pics, but it really is darker than it looks. I also installed my JM Fab coil bracket. I was getting ready to make my own, and then I stumbled across this nifty little critter.

pix1598.jpg


I got my head back from the machinist with a fresh surface and a light exhaust port job. I also helicoiled two of the exhaust studs and seven of the valve cover holes. The head is assembled and ready to rock.

pix1664.jpg


pix1680.jpg


pix1686.jpg


Not a whole lot to report, but....

- The head's torqued down
- I studded the valve cover
- Also studded the oil pan


pix1700.jpg


pix1701.jpg


pix1703.jpg


pix1710.jpg
 
FALL 2007

She's 99% ready to drop back in ;D :

pix2082.jpg


pix2092.jpg


I'll be dropping the engine and tranny back in very soon and breaking the engine in on my 14B as soon as the snow clears. I just need to figure out the oil drain, buy a new clutch line, and pick up a new O2 sensor, and she's ready to rock.

Tonight, I plan to work in the headliner (finally) and then cut out some polycarbonate windows for the 1G. I'm going to do two different headliners for the 2G to see which I like best. I'll post pictures as soon as I can.


WINTER early 2008

Well, I finally did something with the dam headliner. My current headliner has been FUBAR for the past 2 years, so I bought Ben's headliner out of the Fenderless Wonder (the red 2G that caught on fire). I've had this since '05 and I finally got around to painting it black. I also blacked out my visors, which haven't been installed since '05ish. Maybe I'll get this installed tonight.

pix2103.jpg


Got bored today. Engine and tranny are back in.

pix2133-1.jpg
 
Last edited by a moderator:
SPRING 2008

Well, it's been a couple months since the last update, so here goes.

The car is coming back to life slower, but surely.

My new turbo arrived yesterday, and it was ####in wrong! I was sooo pissed off. My purchase order had "twin scroll" and "divided turbine housing" each written twice on it and the jackasses still sent an open housing. So, I'm now waiting for turbonetics to send out the correct housing and a call tag to pick up the wrong one. Hopefully I'll be able to take it home by Friday of this week.

Other than that, I've been buying all the small stuff for the car.

I got my new aluminum 1G radiator modified to fit and installed. I also have my new SPAL pushers installed and wired up.

pix2229.jpg


And here's how the engine bay is sitting.

twingate.jpg


Things that still need to be done:

* Connect drivetrain components
* Finish underhood wire clean-up
* Mount fuse box
* Fabricate new downpipe and wastegate dump tubes
* Modify intercooler piping


I recently picked up a new JH Racing T4 header and Turbonetics 60-1.

pix2197.jpg


pix2199.jpg


pix2200.jpg


Picture007.jpg


Picture003.jpg


pix2238.jpg


pix2243.jpg


pix2240.jpg


twingate.jpg


pix2207.jpg
 
SUMMER 2008

I got my -10 welded on my new pan (Brandy's old pan) today. I cleaned it up a bit and swapped it for the leaky one that I had on the car.

pix2252.jpg


pix2257.jpg


Also, a picture of what I have finished of the downpipe thus far.

pix2249.jpg


I picked up some plastic and racer tape and enclosed my radiator/intercooler/fans. This should work even better than the factory ducting.

pix2258.jpg


BEFORE:

pix2260.jpg


AFTER:

pix2261.jpg


pix2262.jpg


pix2264.jpg


I fabricated a sweet "housing" for the fuse box. I couldn't stand the way these come mounted from the factory. It looked cheap, and I wanted something different. So, this is what I came up with:

pix2271.jpg


pix2272.jpg


Also, the car is almost done. I've spent the last few days tying up loose ends. I also got my new tags for it today. The only things left to do is bleed the clutch and put clamps in the lower radiator hose. I'll be rocking the 14b for the first 50 or so miles. I'm hoping to fire it up and heat cycle for the first time either tonight or tomorrow afternoon.

pix2273.jpg


pix2277.jpg


Ohh, also got my intake all set-up. Full 4" with one of the newer AEM dry filters. This will place the element out of the engine bay, right behind where the factory SMIC normally sits. I also have an Outerwears pre-filter on the way for it.

pix2287.jpg


Because size does matter. ;) :p

pix2288.jpg


A couple pics.

Waiting for a socket after the wheel came loose:
0704080003.jpg


In all her glory:
pix2313.jpg


I got it halfway broken in today. I took advice from Tyler from Street-N-Strip, and I pulled a bunch of fuel out, and now she drives great. No 4K rpm face fall. I just got back from a quick 15 mile drive and she drove flawlessly.

I think someone called the police on me though, because an officer met me half way back home on my route. He didn't give me any trouble though, and luckily, I wasn't driving fast or doing anything else stupid.

I'm only running 12 psi right now and it pulls like a raped ape. I'm literally baffled as to why it's so damn fast at that boost level. But, hopefully that is a sign of good things to come. I sure wish I can a powertrain set-up like this for my 1G.

I'm going to let the car cool down a bit and take her out one more time this afternoon. Then, it's back in the garage for some weekend T4 sweetness installation.


PS - I'm fu<kin psyched right now!


Well, I finally finished the downpipe today. It's installed as well. Sure is weird having a quiet car.

The car is up and running with the new turbo and manifold. She's being detailed as we speak. Tomorrow morning she'll get an alignment, and then it's off to the Venetian Festival car show in St. Joe.

More pics tomorrow. :)


pix2356.jpg


pix2355.jpg
 
Well, fresh off the alignment rack, I drove it for a bit yesterday. Running wastegate spring pressure (20 psi), and she pulls like a raped ape. Spool is still a bit slow, but I still haven't really started tuning yet. I did log 43.5 lbs/min though, so I'm almost flowing a maxed out 50-trim at only 20 psi. Next upgrade will be an inline 044 pump, some 1150's, and 30+ psi. I want to hit 60 lbs/min. Should net me that 550 whp that I'm looking for. :)

Also, my accessory belts developed a nasty belt squeal yesterday. It would usually go away once everything warmed up, but that takes a few minutes. So, last night I played with belt tensions a bit. Over-tighten - squeal. Proper tension - squeal. Loose tension - horrendous squeal. So, after a bit of research this morning, I came to the conclusion that there's an 8-% chance it's my OE harmonic dampener. On a whim, I brought home a Fluidampr from work and swapped that out a couple hours ago. Wha-la. No more belt squeal. Upon inspection, my OE HD looked fine. No rubber cracks or separations, I still can't figure out how its fubar'd but I know it is somehow.

pix2374.jpg


pix2370.jpg


edit06.jpg


edit05.jpg


pix_2329rs.jpg


Shootout 2008

img_0403.jpg


img_3793medium.jpg
 
Last edited by a moderator:
WINTER '08-09

I never did really like my 60-1 running by itself. It spooled like a dog, and made for a boring street set-up. And right around this time, a buddy told me about a compound turbo'd Ford Ranger that he saw on the turboford forum. I loved the idea and figured I'd give it a shot. And so it began.

Initial mock-up pictures. This shows the only spot I can fit a second turbo on my 2G.

moto_0053.jpg


moto_0057.jpg


Getting started on fabbing the crosspipe to connect the two turbine housings:

moto_0058RS.jpg


moto_0062RS.jpg


All tacked up:

moto_0068.jpg


TIG'd and braced:

pix23281.jpg


pix23283.jpg


pix23284.jpg


pix23288.jpg


pix23291.jpg


Wastegate inlet time:

pix23311.jpg


pix23317.jpg


pix23321.jpg


pix23322.jpg


Machining the manifold for the wastegate port:

moto_0087.jpg


pix23340.jpg


pix23342.jpg


Port matched the manifold:

DSC00978.jpg


Welded the inlet tube on:

pix23357.jpg
 
Last edited by a moderator:
On to the wastegate re-circ tubes. Believe it or not, I came up with an idea using spaghetti to help create this notch.

pix23413.jpg


pix23421.jpg


pix23418.jpg


This thing is really starting to take shape!

pix23430.jpg


Other re-circ tube tacked in place. This clears the power steering pump as well.

01132009119.jpg


And this is how it sits right now:

DSCF0356.jpg


DSCF0359.jpg


And this is what I came up with for the charge piping between turbos. Simple, effective, and it'll fit well.

pix23521.jpg


pix23520.jpg


The B16G has been gone through. Now it's got a fresh rebuild (courtesy of Justin - jusmx141), a new 15* clipped turbine wheel, and a brand new 7cm2 turbine housing with a welded flapper. Soon to sport a polished compressor cover.

pix23507.jpg


pix23504.jpg


pix23502.jpg


pix23505.jpg


pix23503.jpg


Pictures of the final downpipe design.

Everything seen in the first picture will be sent off to be jet-hot coated along with the compound turbo exhaust parts.

photo3.jpg


photo2.jpg


Both turbos are now plumbed for oil.

pix23618.jpg


pix23623.jpg


pix23648.jpg


And this is EXACTLY how it sits right now. Picture taken a couple days ago.

pix23727.jpg
 
Pics of what I recently came up with for a downfiring compressor cover for the 16G:

pix23731.jpg


pix23733.jpg


pix23735.jpg


And the radiator hose that I made to clear the 60-1's compressor cover:

pix23741.jpg


New front bumper. Yay! No more blitz!

pix23747.jpg


And I finally gave myself the comfy leather seats that I missed having. Can anyone guess which car they came from?

pix23558.jpg

pix23552.jpg

pix23531.jpg


Here's a shot of both compressors on the car:

pix23751.jpg


I got some new injectors in the mail. Lucus 1200cc's.
And I got the new fuel pump installed. I now have an intank Wally 255HP feeding a Bosch 044 in series. This should be plenty.

pix23271.jpg


pix23274.jpg


pix23277.jpg


Picked up Angelo's Type-s, so now I have twins.

pix23497.jpg


The Kelford 272's showed up today.

pix23518.jpg


pix23519.jpg


One step closer.
I picked up these Driveshaft Shop level 2's from Brian the other day. Big thanks to Brian for these. This will hopefully cover my ass on one of my potential weak links.

pix23525.jpg


Got my ignition box and install kit yesterday. I was originally going to mount it in the glove box, but they make it so damn easy with this install kit. For once, I'm going to take the easy way out and mount it near the power steering reservoir.
pix23529.jpg


ARP L19's:
pix23544.jpg


These showed up in the mail yesterday. Solid aluminum front and rear roll stops. I'm going to hit them with a few coats of black paint tonight. And I have alot of sanding to do on that bezel tonight.

pix23561.jpg
 
Last edited by a moderator:
I started a new fiberglass project last night. I've been wanting to replacement my center vent gauge bezel for some time now, but I haven't been able to locate one that suits my needs. So, I decided to make my own.

I picked up this center vent from Edwin several months ago. And I used JB weld to locate the mounting rings for the gauges. Then, after 3 layers of fiberglass, here she is.

pix23547.jpg


pix23548.jpg


pix23545.jpg


pix23549.jpg


pix23550.jpg


pix23551.jpg


IMG00075-20100201-2301.jpg


IMG00077-20100201-2302.jpg


I plan to add a coating of body filler mixed with resin (5:1 ratio) tomorrow. It will basically be my gel coat. Then it sanding, and sanding, and sanding.

IMG_0514.jpg
 
Last edited:
SPRING 2009

I'm picking my head up today from Tyler at Street & Strip. Looks excellent.
Exhaust ports are gasket matched and the Kiggly beehive springs and titanium retainers are installed.

DSC01080.jpg


DSC01083.jpg


DSC01081.jpg


Another good shot of the gasket match:
pix23572.jpg


We welded the EGR port shut to prevent blowing out anymore gaskets due to anti-lag.
pix23591.jpg


And the head is torqued back down and most of the longblock is ready to go. Next on the list is drilling and tapping my Kelford intake cam for my 2G CAS. After that, it will be ready to be timed and degreed.


pix23599.jpg


pix23600.jpg

My intake cam is now drilled and tapped for my 2G CAS. I got it back in the head, and timed the engine tonight. Now, I just need to get the degreed this week, and should be about ready to drop it back in soon.

I'm going to plumb the turbos and wastegates tomorrow. Will update.

pix23604.jpg


pix23606.jpg


Oil drains finished and installed:
pix23623.jpg

pix23648.jpg


And V3 just showed up today. I also got the GM MAF cable. Yayy! No more V2.5!

pix23696.jpg


My nephew came out to the garage to show be how to drive. &#61514;
pix23715.jpg


pix23717.jpg


I also relocated the alternator to the rear, but it hits the frame rail badly, so I'm going to remove it tonight and stick it back up front for now.
pix23725.jpg
 
Last edited:
And here's the notch that I made for the electric cut-out. I can't notch anything larger than 2" on my notcher, so I had to do this one the hard way. Trace the notch onto the pipe and remove it with a cut-off wheel and a carbide bit.

pix23756.jpg


Now, that's a sexy fitting notch.

pix23760.jpg


pix23759.jpg


I just found out what my lower radiator hose also needs to be AN to clear the pipe connecting the compressors. So, while that being welded up this week, I can focus on re-wiring the fuel pumps, filling up fluids, and finishing this exhaust.

Updates! Almost ready to fire it up. Aiming for Tuesday.

Final downpipe design - Added provision for Race Ready electric cut-out.

pix23803.jpg


pix23802.jpg


pix23801.jpg


pix23826.jpg


I ordered in and installed new wheelwell plastics. Mine were tired.

pix23775.jpg


Shoved everything out of the garage for a night of -balance-. Yup, still got it.

pix23806.jpg
 
So, what do you guys think of the new front look? (bumper not bolted on yet in this pic)
I effin love it.

pix23789RS.jpg


Almost finished!
pix23836RS.jpg


pix23823.jpg


pix23845.jpg


pix23841.jpg


pix23814.jpg


pix23831RS.jpg


I finished up the turbo-back exhaust today. I had to fab up everything in front of the Thermal cat-back in this pic. It's all V-band now.

pix23853.jpg


And here's the bumper exit portion that I also made this morning:

pix23854.jpg


pix23857.jpg


pix23856.jpg


And I decided to take a break from working on it to give it it's first wash of the year.

pix23862.jpg


pix23864.jpg


I guess I can once again say goodbye to ground clearance too. I don't even know if I'll be able to get out of my driveway anymore...

pix23868.jpg


Here's a couple more shots of the side exit portion installed:

pix23879.jpg


pix23893.jpg


pix23875.jpg
 
SUMMER 2009

It runs!

YouTube - First breaths

After a few times swapping plug wires, it fired right up. It's in dire need of a tune, and it's idling a bit high - ohh and that pesky belt squeel again... But it runs!

As it turns out, the idle sounded mean on the first startup due to a misfire. My buddy Dan came over for a bit last night and we gave the car a once over and found one of the dip switches set incorrectly on the Dynatek box. The car purrs like a kitten now.

I just ordered an AEM 5-bar MAP sensor last night and I'm probably going to pick up a wideband from work today. I still need to bleed the clutch and brakes and a few other misc things before she's drivable. So, I'll be driving it on the regular very soon.


Well, to cut a long story short, we had a pretty large garage fire last night while I was testing my fuel pump. It was all Sewey's fault, but we contained it well enough that the only thing beyond repair my Walbro 255. It was at ground zero. It just finished its sixth year in service.

pix23885.jpg


I had originally removed the pump from the car because it wasn't functioning properly. And well, it definitely aint working now. But luckily, I had this gem laying around. It's a 280 lph Denso for the TT 2JZ Supra. This was a vendor freebie that I got from work. Never thought I'd be using it though. Tight....

pix23886.jpg


If I never have to swap another oil pan on this car, I'll die a happy man.
These are the four that I've had on it - 3 of them in the last 3 weeks alone.
pix23937.jpg

And here's the newest one. It's been used for 1000 miles since purchased brand new.
pix23931.jpg

pix23941.jpg

pix23940.jpg


I just got it put back on last night. I'll fill it with oil and fire her up today to make sure it seals.


The car is running great. It rapes! We're working on tuning it now. Right now, at only 27 psi boost, I'm seeing roughly 60 lbs/min airflow @ 8100 RPMs. The torque is amazing - I can't believe my clutch is taking this!
Here's a video I made a week ago. The tune has come a long way since this, so it's a bit quicker. Low boost and granny shifts, but it shows its response well.

th_PICT00052.jpg


And here's a picture of it at the Venetian Festival car show this past Thursday.
pix_23997rs.jpg


I got my Hallman MBC installed. I finally got my boost turned up via a Hallman MBC. It's now spiking 40 psi at 4500 RPMs and it slowly falls to 35 psi by 8K. Holy hell, it's fast now.

Spool-up goes like this:

10 psi @ 3264 RPM
20 psi @ 3720 RPM
30 psi @ 4058 RPM
40 psi @ 4518 RPM

pix24014.jpg

My new and improved fuel pump assembly.
pix24011.jpg

pix24010.jpg


Well, the Magnus must not like the 40 psi spikes. It held up fine at 27 psi, but it didn't seem to enjoy the boost increase. It's getting fixed tomorrow morning.
pix24041.jpg

This was causing me to lose 3psi.
Manifold is fixed for now. I plan to brace the hell out of it this winter. My welder has some ideas that would make it much stronger and less susceptible to ballooning and/or cracking a weld. I pressure tested it this morning and it now has zero leaks. I'll throw it back on tonight or tomorrow.

pix24055.jpg


pix24052.jpg


I had some clutch engagement issues, so I currently have the tranny sitting on the garage floor, awaiting delivery of a clutchnet disk on Tuesday of next week. Upon disassembly, I discovered that my tranny was partially misaligned with the crank. The rear section was not fully seated over the dowel pin and the bolt was missing. There's no abnormal wearing on the clutch disk, pressure plate, or flywheel. But off-idle and low rpm engagement really sucked. After seeing the clutch, I find it almost impossible to blame any of the engagement issues on the clutch. Nevertheless, I'm going to put in an ACT 2600 pressure plate and a clutchnet sprung-hub, 6-puck disk in it this time. Not that the Fidanza wasn't doing the job, I just think this new combination should be better suited for the torque of my current turbo set-up.


pix_23902.jpg


Shootout 2009

Enroute:
3831056651_5de79d6a0f_b.jpg


Open house at Daves:
dsc00733m.jpg
 
Last edited:
FALL 2009

Exhaust components are cleaned, blasted, and ready for coating. I'll be shipping them off within the next 2 days to Carlos @ Tirado Custom Coatings. I'm very excited to see how it all turns out.

pix24158.jpg


Got some pics of the new ceramic coating.

DSC00277.jpg


DSC00278.jpg


DSC00279.jpg


DSC00280.jpg


DSC00281.jpg


DSC00282.jpg


DSC00283.jpg


DSC00284.jpg


DSC00295.jpg


DSC00300.jpg


DSC00302.jpg
 
Last edited by a moderator:
SPRING 2010

So, upon installation of my DSS axles, I found that my axles were seized in the hubs. After failed attempts to remove them using a plasma cutter, an oxy-acetylene torch, and a 50-ton press, I gave up on reusing the hubs that I had. So, I ponied up and bought some brand new OEM hubs. I also picked up some spindles from Brian since his are cleaner than mine and already have the prothanes installed on them. I'll install this stuff this weekend.

IMG00071-20100318-0055.jpg


IMG00068-20100318-0054.jpg


John did a hell of a job polishing my 16g compressor cover for me. Thanks again, John. And thanks to gixrman for the sweet carbon fiber intake tube!

IMG00035-20100307-1639.jpg


IMG00033-20100307-1638.jpg


IMG00038-20100307-1640.jpg


IMG00044-20100307-1722.jpg


IMG00048-20100307-1723.jpg


IMG00051-20100307-1724.jpg


IMG00052-20100307-1726.jpg


I cut out part of a WG tube and fit in a flex section. The makes assembly and fitment so much better and easier. Next on the list is the fuse box relocation.

IMG00092-20100327-1821.jpg


The fusebox is now in the glovebox. I'll be running wires, soldering, and shrink wrapping this afternoon.

FuseboxReloc02.jpg


FuseboxReloc01.jpg


FuseboxReloc03.jpg
 
Last edited:
SUMMER 2010

I spent quite a bit of time setting this up this past winter and spring. I finally got it the way I like it, and I figured I'd share it with everyone else.

I'll start with the valve cover. All machining was done by my buddy Evan and myself. We shaved the lettering and the oil cap boss (I'll discuss this more later). We also punched two holes through the top for vent ports.

pix24179.jpg


After that, I removed the factory baffle from the underside and began mocking up my version of a baffle system. I basically wanted to be able to remove the factory baffle to clean underneath it, and I couldn't come up with a good way to reattach it. So, I decided to make my own. When we punched the holes through the top, we did it directly above the cam towers. This will give me an area where oil isn't being slung. We just had to weld in two small pieces of aluminum on each side of the hole to deflect any oil being slung up by the cam lobes.

IMG00092-20100515-2315.jpg


IMG00093-20100515-2316.jpg


IMG00090-20100515-2315.jpg


IMG00091-20100515-2315.jpg


After all the machining was done, I had my welder weld in a few bungs here and there. We used -10 ORB (o-ring boss) bungs on the top, and a 2" Pro-Werks 2" cap & bung assembly for an oil cap. This thing is SWEET, by the way. No more leaking oil past the cap gasket like the factory ones usually do. We had to machine off the locking assembly for the factory cap, and weld on a threaded ring in it's place. The cap itself is a black anodized, billet aluminum cap with an o-ring seal.

pix24181.jpg


pix24184.jpg


A few pics of the bungs and fittings prior to welding them in place:

pix24185.jpg


pix24186.jpg


Here's a few pics of the valve cover after being powdercoated and clear coated by Carlos of Tirado Custom Coatings. Turned out beautiful, if you ask me. :)

DSC00127-2.jpg


DSC00128-1.jpg


* Also notice that we took the time to completely eliminate the side factory ventilation port. This involved filling in the hollow bubble from the underside, and hand filing it down to match the side contour of the valve cover. It probably took more time than it was worth, but I did it anyway. :p


With the valve cover finished, it was time to look into a worthy catch can. I had plans to buy an aluminum coolant overflow tank and completely modify it to suit my needs. And then I came across Craig's large filter catch cans. These cans are much nicer and are far more advanced than what I had originally planned, so whether or not to buy one was a no-brainer. ;) Pictures don't do these justice - they're gorgeous.

Here's a pic of mine after being polished. -10 inlets on the top and a -12 outlet on the front. I welded a bracket on the backside and mounted the can in the area that the fuse box is typically located for a 2G.

IMG00082-20100508-2229.jpg


IMG00077-20100507-1902.jpg


IMG00076-20100507-1902.jpg


IMG00075-20100507-1901.jpg
 
Last edited by a moderator:
These pictures also show my one-off 4" carbon fiber intake tube. It was handmade by Chris (gixrman) for my compound set-up. Being that I didn't have him incorporate a fitting into the side of it when it was made, my best option was to use a bulkhead fitting to attach the -12 hose. I borrowed the fitting design that many manufacturers use to evacuate the crankcase via the exhaust system. I'm hoping this will help scavenge and put a vacuum on the catch can and crankcase. I'll eventually wire in MAP sensor to datalog its performance.

IMG00101-20100516-1748.jpg


IMG00103-20100516-1748.jpg


IMG00105-20100516-1749.jpg


IMG00110-20100516-1756.jpg


Here's how it all looks as of about an hour ago:

IMG00181-20100602-2037.jpg


IMG00183-20100602-2037.jpg


IMG00180-20100602-2036.jpg


I setup a GM 3-bar MAP sensor on my crankcase to see how the system is functioning. With normal low-load driving, it bounces between 0 and .2 PSI. Under heavy load, crankcase pressure sits at .2 PSI. It jumps up to .4 PSI from 4900-6300, then back down to .2 PSI and then eventually settles to 0 PSI by 7300+. I'm willing to bet that if I were running an element on my intake pipe, that I'd be getting more vacuum (more pull) out of it. But so far so good!
 
Last edited by a moderator:
Support Vendors who Support the DSM Community
Boosted Fabrication ECM Tuning ExtremePSI Fuel Injector Clinic Innovation Products Jacks Transmissions JNZ Tuning Kiggly Racing Morrison Fabrications MyMitsubishiStore.com RixRacing RockAuto RTM Racing STM Tuned

Latest posts

Build Thread Updates

Vendor Updates

Latest Classifieds

Back
Top