The Top DSM Community on the Web

For 1990-1999 Mitsubishi Eclipse, Eagle Talon, Plymouth Laser, and Galant VR-4 Owners. Log in to remove most ads.

Please Support Morrison Fabrications
Please Support Rix Racing

AWD Conversion/Swap Guys Enter Here - Advanced. [Merged 2-07]

This site may earn a commission from merchant
affiliate links, including eBay, Amazon, and others.

This site may earn a commission from merchant affiliate links, including eBay, Amazon, and others.

Sounds about right to me...

You must be logged in to view this image or video.


:dsm:

Thanks. Guess I need to see about ordering the new filler neck and hoses. However much that's gonna be. Ugghhh....

Okay guys I am having a issue with my awd conversion. My install went pretty well. No major issues which was great. The only problem is my pass side front axle. For some reason it keeps ripping my boots in half at the cup that goes into the trans. It seems there is about an inch of travel, so its stretching the boot till it rips when I make a turn. I even had the axle pop out of the cup. Im at a loss at the moment of what to do. I replaced the lower control arm because I thought maybe it was bent.. no go. I removed the lower lateral arm to see if that was the cause..didnt work. Then I proceeded to remove the uppr control arm to see if it would line back up but that didnt work either. I checked all my mounts to verified they were tight. Im auto so Im not sure if that matters. I tried 2 different axles with the same results. Can anyone help me out on this?

Wonder if there's different length axles and maybe you need a longer one. I know I had to try and replace one of my axles and Autozone gave me a bunch of different ones for whatever reason before they finally got it right. I said it was a 95 awd with manual transmission and they seemed to have a BUNCH of different length and width axles. Just a thought.

Wiring...

Can someone tell me what this connector plugs into? Some idiot threw away my fwd fuel pump assembly away here at school so I dunno if it connects into it or what. It has a blue/white stripe, green/white stripe, and black wire. Not sure if I need to cut the connector off (already did that but was gonna solder it back if needed for something), or if it plugs into something. I don't see anywhere for it to connect to. Thanks.
You must be logged in to view this image or video.
 
Last edited by a moderator:
Okay, I've done more work on my awd conversion. Anyway, finished up my wiring and the few wires I wasn't sure about I just folded over, put heat shrink around them, then taped them up to the harness.
You must be logged in to view this image or video.


Now onto the gas tank. I wanted to do as little hacking as possible so I used this tool I have laying around to drill the holes.
You must be logged in to view this image or video.


Using that, I made the holes for the bolts for the gas tank mounting straps and made them just big enough for the bolt to slide down into and use a ratchet with a 1/2" socket to hold the bolt without it just falling down in there and not be able to get it out. Then while having someone hold the ratchet, I tightened it from the bottom. All I did to find out where to drill was put a punch (or screw driver) in the hole from the bottom side and hit it with a hammer. Did this for the front and the rear holes.
Holes where the rear bolts were dropped through.
You must be logged in to view this image or video.

You must be logged in to view this image or video.


After I got all the gas tank stuff done, I moved on to the rearend mounting bolts. I cutoff the front bolts flush with a die grinder. Still need to throw some silicone up in there to keep the remains from rattling around. Then I used the same punch method to find where I needed to drill for the front holes. I didn't wanna cut the frame. I used a holesaw this time around and the hole is right beneath the rear seatbacks so they won't even be seen. I'm not doing all the welding a washer crap and all that on there. I did add a washer but I'm just gonna either stick a prybar against the side of the square head from the top of the hole and hold it with the prybar while I hit it with an impact on the bottom side to tighten it, or use a 36mm socket to try and hold the square still (already checked and think that'll work, but prybar looks easier). Anyway, here's the holes.
You must be logged in to view this image or video.

You must be logged in to view this image or video.


Lastly is the part I hated doing the most because I didn't wanna go hacking up the rear trunk area. BUT, it's hard to tell exactly where I was suppose to cut and most everyone is taking pictures really closeup and it's hard to tell exactly where to cut. So hope this helps for anyone needing to do it in the future so you can make as small of a cut as possible. You can't just hit the bolt upwards from the bottom to make a mark like I did with the punch.
You must be logged in to view this image or video.

You must be logged in to view this image or video.

You must be logged in to view this image or video.


Okay my gas tank and the rearend is now installed. The only problem I was having with the rearend was the front bolts for the subframe. Trying to hold them still with a prybar was a joke. So I went next door to the welding shop and had them make an easy fix for me. Dunno why I took me until today to think of this and haven't seen anyone else do it yet but it made it super easy to install the bolts because I just used a socket on the top to hold them in place and just used an impact on the bottom. Zipped them on real quick and all done.

You must be logged in to view this image or video.
 
Finally finished with everything except for the driveshaft because I have to save for that. Guess I'm gonna go with the 2 piece shaft. Gonna go with the riveting idea.
You must be logged in to view this image or video.


And thanks guys for making me feel like an idiot. Someone could've mentioned that almost all the cuts I made would be covered up. Lol. The holes for the front subframe bolts can't be seen at all, none of the fuel tank bolt holes made can be seen at all, and the only cuts I can see are here. Gotta do something about that later. I don't have the rear floor panels in the hatch area. Oh well, I'll get it later.
You must be logged in to view this image or video.

You must be logged in to view this image or video.


Sure wanna thank all those who contributed to this thread. Helped a lot.
 
Glad its coming together for you. BTW it is mentioned in many posts that the cuts will be covered up. Also if you ever have to remove the rearend wouldnt it have been better to just weld the bolts in place so you wouldnt have to remove your interior peices?
 
Honestly, I don't see any reason to have to remove the entire rearend again. But even if so, it'd be easier to just remove the rear interior pieces versus having to weld the bolts in place. And if the car ever got totalled, I'd wanna be able to take off as many pieces as I could.

P.S. I didn't notice the talk about the cuts being covered up. There was too much b.s. to sift through to read every single bit of it. Oh well.
 
v8s_are_slow, looks like you probably have this figured out but for future reference if your car is a 98+, your probably going to have to ditch some of the emissions stuff as it won't be easy to swap.

The 95-97 fwd vs awd cars have the same emissions, so connecting up the emissions isn't an issue. For the 98 & 99 cars, Mitsu had a great idea to make the emissions completely different in the fwd vs the awd. In the fwd the charcoal canister is in the fuel tank & all the related solenoids, etc are also back there. In the awd the charcoal canister is located on the drivers side between the wheel well & bumper, under the frame. I don't recall exactly where all the related emissions items are in the awd (long time since I looked) but there in the engine bay. So in this case, it would be alot of work to try & swap the two systems. IIRC in the 95-97 tank there's a vent line that runs towards the engine bay for the charcoal canister. Being my cars a 98, I ran this line to a small fuel filter & left it vented.
 
Yeah, I figured that out. Have to wait till Friday and gonna go get the parts from a salvage yard.

Another thing, the fwd cables worked just fine. Really wasn't all that bad to change honestly.
 
This is in reference to an earlier post that I made about using pop rivets to hold the axle carriers in place. Three years later, autocross and drag strip use and no signs of movement.

http://www.dsmtuners.com/forums/dri...guys-enter-here-advanced-merged-2-07-a-6.html
Here is a little more detail, sorry I did not document fully when I did it.

I strongly recommend that you pay a little more and get the best rivets, Cherry max available at:
Pilot Supplies, Avionics, and Homebuilt Aircraft Parts from Aircraft Spruce and Specialty Co.
Also check them for metal glue.

You can also use hardware store rivets, but they are not as strong. When I did mine this is what I used and for adhesive I used JB Weld. Use 1/8 x 3/8 long STEEL rivets, DO NOT use aluminum rivets. Besides not being as strong there is a reaction of dissimilar metals with aluminum. Even using hardware store rivets I think it was over kill.

This is assuming that you already have your fwd carriers removed and the awd carriers ready to go in.

Do a number of dry fits to make sure they lay flat against the bottom of the car. Clean off burrs and flatten so they lay flat. Strip the paint only where the carrier will actually lay on the car. It might be easier to just strip a larger area and then lay tape where the carrier will touch and spray paint it, them pull the tape. Do the same on the carrier, strip the paint where it will touch and make sure the middle that does not touch is painted.

You now have the carrier straighten, burrs removed and paint stripped. Place the carrier exactly where it is to go and drill two 1/8 holes in the middle where you will start riveting, one on either side. Insert rivets but don't "pop" yet, check your fit.
Once you are happy with the fit, mix up your glue, lay a nice heavy bead long the area that will touch, position it and the re-insert your first two rivets and pop. If you really want to protect it from rusting, dip the end of the rivet in zinc chromate primer before inserting and popping, this will seal the hole completely with zinc and help prevent rusting.

Now work your way FROM THE MIDDLE. Drill a hole insert pop rivet and pop then move on to the next spot. This will insure that the carrier is drawn down tight to the car.
Try to keep them 1/2 to 3/4 of an inch apart. Because of the metal that you removed drilling the awd carrier out there will be spots that you cannot hold the 1/2 inch. Don't worry about it, you will still have a lot of rivets in it.
When done riveting, spray paint and coat with spray undercoating.

Advantages are you don't have to know how to weld, own a welder or find someone to come to your garage to weld for you. Of course if you are in a fully equipped commercial garage, this is not an issue. The second advantage is this will be STRONGER than 6 or eight spot welds.
The third advantage is - this is a biggie - you don't have to strip out your interior. If you weld, you will catch your interior on fire if you don't remove it.

I'll try to scrounge up some picture and photo shop them if I have to, but I don't have them right now.
 
Last edited by a moderator:
I'm in the middle of the swap and I've read through the ENTIRE thread from page 1 to now and I've got a few questions. Not gonna lie, been into DSM's for awhile but I haven't done something like this (ever) so if I seem noobish, my apologies.

99 GSX into a 97 GST for inquiring minds

1-there's some harnesses on the rear subframe. disconnected off the gsx, but no place to plug it into the gst. should I disregard this?

2-the brackets that hold the carrier bearings for the driveshaft are decently rusty. i saw that i could just use the studs from the front one, but as for the rear, what should i do in regards to that?

3-has ANYONE figured out the fuel gauge problem?
Like Adam said, the harness on the AWD rear subframe is the ABS stuff so you can pull all of it out of there. If the rear carrier bearing bracket is rusty then try to do some corrosion control to it. See how far into the metal the corrosion actually goes, if its just surface rust grind it down to metal then paint it after you weld it up. If its too bad to be used then you can fabricate one or pull one off of a different AWD DSM. There is no fuel gauge problem, just wire it up as per the diagram below, I did and my fuel gauge works great.

You must be logged in to view this image or video.


Good luck and have fun.

:dsm:
 
Last edited by a moderator:
Like Adam said, the harness on the AWD rear subframe is the ABS stuff so you can pull all of it out of there. If the rear carrier bearing bracket is rusty then try to do some corrosion control to it. See how far into the metal the corrosion actually goes, if its just surface rust grind it down to metal then paint it after you weld it up. If its too bad to be used then you can fabricate one or pull one off of a different AWD DSM. There is no fuel gauge problem, just wire it up as per the diagram below, I did and my fuel gauge works great.

You must be logged in to view this image or video.


Good luck and have fun.

:dsm:

thank you (and black-gst) for the help.

gofer, I believe it was you I read about a few pages ago that riveted certain things. exactly what did you rivet?
 
ok, I'm working on this as we speak. I'm trying to remove my gsxs tank to put in the gst and I can't get the nuts off. I wanna cut the strap but obviously, I kinda need that. suggestions?
 
The part that was riveted doing the AWD swap were the carrier bearing brackets but it wasn't me that did it it was gorf in post #325, I have a buddy with a welder so for a handle of Sailor Jerry it did it for me. :)

:dsm:
 
gofer, I believe it was you I read about a few pages ago that riveted certain things. exactly what did you rivet?

I used glue and rivets to mount the drive shaft carriers that you remove from the GSX to instal in the GST. If done correctly there is more contact surface than welding and you don't need a welder. But by all means, if you already have a welder or someone to do it for you - weld it, or if you just feel better about welding it - it is your car, do what feels right.

If you decide to try the rivet trick make sure you cover with spray undercoat!
 
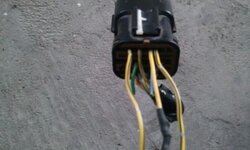
gofer i am currently doing the gas tank wiring but in the 2nd sender harness there is two yellow/black cables. i was wondering how you figure out which one to use? i just snaped a picture of the harness to show what i am trying to figure. is it the one next to the yellow(solder cable) or the one next to the yellow/blue cable.
 

Attachments

  • 2011-07-15 20.59.49.jpg
    2011-07-15 20.59.49.jpg
    37.7 KB · Views: 96
Here's something I thought of as I was taring into my swap shell. I'm going from a 96 gst spyder chassis and installing all the parts from a 98 talon auto. Arn't there temp sensors in the trans and t-case? If so they're on the auto engine harness correct? I have the gauge cluster from the auto, I just need to know how to make it all work.
 
gofer i am currently doing the gas tank wiring but in the 2nd sender harness there is two yellow/black cables. i was wondering how you figure out which one to use? i just snaped a picture of the harness to show what i am trying to figure. is it the one next to the yellow(solder cable) or the one next to the yellow/blue cable.

I just did my fuel pump wiring last night. I can't see the picture too well, but whichever wire is just solid yellow, use that wire, and then the wire NEXT to it but also taking up one side.

o o x x or x x o o

o=used
x=not used

but not

x o o x
 
What AC bracket will I need to make a 98 AUTO AWD intermediate shaft work on my 97 engine? Just a 97+ AWD AC bracket or is there a difference between the manual and auto bracket??
 
The donor-99 GSX (rusted out)
The recipient-97 GST

So I was going to drill out the spot welds for the brackets but literally, they were crumbling. I know with the bracket near the o2 sensor I could just get some studs and make it work, but what about the rear bracket near the gas tank? Could I just drill some holes underneath the car and just attach the driveshaft that way (and use spacers as necessary)?
 
Yes, thats how one or two people did there swap.
 
Yes, thats how one or two people did there swap.

Some pretty big spacers to make that work, that bracket is like 2'' tall..

Im in the middle of the swap right now with my spyder. We just got the driveshaft hung last night and I still have the rear fuel tank bolts to drop and weld in place. So, today I should have that done and itll be time to be putting the fuel tank in.. After I do the little re-wiring.. I hate wiring!! :notgood:
 
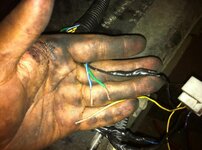
Hey guys Im doing my fuel pump wiring and Im kind of stuck.. Im looking at the diagram in VFAQ but the wire colors in my GST harness are different from the picture and I dont know what wire is which.. Question is in regards to the FWD 3 pin connector. I got the black wire however, my harness has a Blue/white and Green/yellow instead of Yellow/blue and solid Yellow.

Which wire does my Yellow (off awd fp connector) wire splice into? :idontknow:
 

Attachments

  • awdfp.jpg
    awdfp.jpg
    52.7 KB · Views: 104
Nobody?? Well just to kind of update, I tried to squeeze together each of the wires and check to see if my gauge would work but still no dice. I tried every possible way I could think of with the 4 wires. What did I do wrong?? Ill get all my wire colors for you guys here in a while.
 
Support Vendors who Support the DSM Community
Boosted Fabrication ECM Tuning ExtremePSI Fuel Injector Clinic Innovation Products Jacks Transmissions JNZ Tuning Kiggly Racing Morrison Fabrications MyMitsubishiStore.com RixRacing RockAuto RTM Racing STM Tuned

Latest posts

Build Thread Updates

Vendor Updates

Latest Classifieds

Back
Top