
- Thread starter
- #1,726
CrackedDSM
15+ Year Contributor
- 5,833
- 5,729
- Dec 17, 2009
-
Pensacola,
Florida
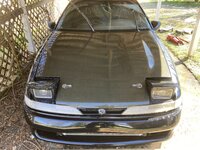
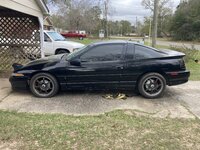
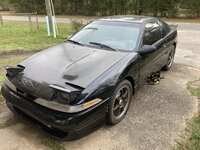
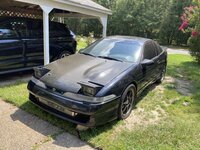
Got bored today so I decided to do a few things to the DSM. Nothing crazy, but a few things have been really bothering me. I'll post the before and after first, then explain what I did.
Before

After

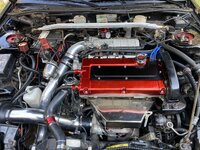
So much better. I got so tired of the cluster of wires and harnesses, so I went and started to re-route wires and lines where necessary. I did this because I installed my little catch-can setup, and figured since I was in there, might as well do it too.
But, list was
1) Installed the catch-can
2) Moved the SD harness to route behind and around the battery and under everything in that corner
3) Moved the W/T sensor wiring from over the VC/Intake manifold to behind and around it. Still have to extend the wires but that'll come later.
4) One of the biggest, at least to me, was replacing the single ply red coupler with a black silicone coupler and t-bolt clamps to match the piping. This made a huge difference to me at least, and it moved the intake pipe away from the shifter arms.
5) Re-routed some of the vacuum lines on the manifold to be more out of the way.
I'm nowhere near done, I just am out of vacuum lines and stuff. When I get more, I'll re-route the vacuum lines on the manifold and clean them all up, and wrap some of the exposed ketchup and mustard wires on various harnesses with either some sheathing, vinyl tape, or some corrugated wiring cover. I'm also gonna get rid of that random red vacuum line going from the VC to the catch can with a black line that'll run under the UICP. The goal is to clean up the view of the pipes and make them and the VC more the star of the engine bay. The 5 minutes of work I did now made a huge difference, so I can't wait to finish the firewall/IM area too.
Before
After
So much better. I got so tired of the cluster of wires and harnesses, so I went and started to re-route wires and lines where necessary. I did this because I installed my little catch-can setup, and figured since I was in there, might as well do it too.
But, list was
1) Installed the catch-can
2) Moved the SD harness to route behind and around the battery and under everything in that corner
3) Moved the W/T sensor wiring from over the VC/Intake manifold to behind and around it. Still have to extend the wires but that'll come later.
4) One of the biggest, at least to me, was replacing the single ply red coupler with a black silicone coupler and t-bolt clamps to match the piping. This made a huge difference to me at least, and it moved the intake pipe away from the shifter arms.
5) Re-routed some of the vacuum lines on the manifold to be more out of the way.
I'm nowhere near done, I just am out of vacuum lines and stuff. When I get more, I'll re-route the vacuum lines on the manifold and clean them all up, and wrap some of the exposed ketchup and mustard wires on various harnesses with either some sheathing, vinyl tape, or some corrugated wiring cover. I'm also gonna get rid of that random red vacuum line going from the VC to the catch can with a black line that'll run under the UICP. The goal is to clean up the view of the pipes and make them and the VC more the star of the engine bay. The 5 minutes of work I did now made a huge difference, so I can't wait to finish the firewall/IM area too.
 only time I've had a problem.
") So, rest coming asap. Soon as the proper Outlander bracket(and rotors) comes in, I'll swap the front brakes which I'm excited about. Got some upgrades, some engine bay appearance stuff, and hopefully a whole new lease on life for the old girl when the injectors come back. Either way, excited for its future and my break. Once I'm done working in the engine bay, I'm gonna take a spray bottle with some degreaser/soapy water and clean the engine bay up more. Want it to be nice to look at even with the little tiny spots that show its age.
So, rest coming asap. Soon as the proper Outlander bracket(and rotors) comes in, I'll swap the front brakes which I'm excited about. Got some upgrades, some engine bay appearance stuff, and hopefully a whole new lease on life for the old girl when the injectors come back. Either way, excited for its future and my break. Once I'm done working in the engine bay, I'm gonna take a spray bottle with some degreaser/soapy water and clean the engine bay up more. Want it to be nice to look at even with the little tiny spots that show its age.

