
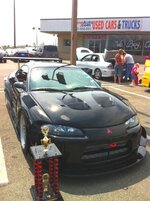








The Central Hub for DSM Community and Information

For 1990-1999 Mitsubishi Eclipse, Eagle Talon, Plymouth Laser, and Galant VR-4 Owners. This is where the DSM platform history is documented and archived. Log in to help us in our mission, and to remove most ads from the browsing experience.

This site may earn a commission from merchant affiliate links, including eBay, Amazon, and others.

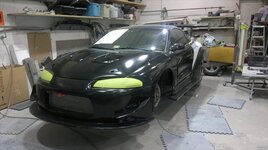
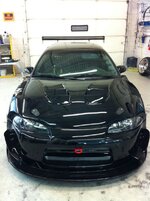
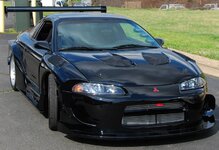
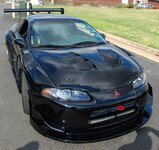
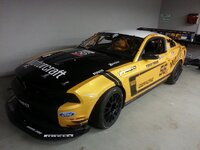
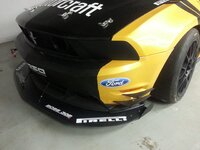
Thanks again for sharing more of the story behind the photos we see on social media. The splitter mounting I think is the part hardest to get right. That is where your fabricators will really put their brains to work.

I am kinda curious why Sergio hasn't molded the headlights and front bumper cover together to eliminate a PITA area to seal air out of. Specially with the way the blank mounts, I am sure you got some creative ideas for solving that though.

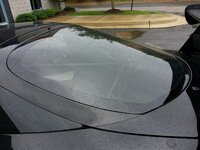
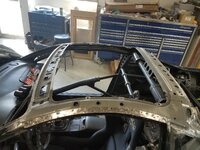
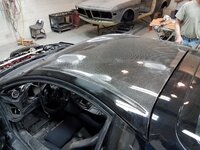
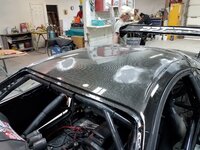
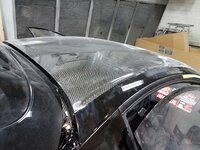
I know Bobby recently did some rear lexan windows, but do you have a plan for your new prettyy hatch? Consider full carbon windows replacement like some WTAC cars, or you still like visibility vs saving .3 ounces? :p

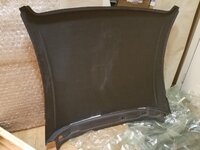
Do you have any photos of the hatch without the skeleton? I wanted that too and mine mistakenly was sent with, so I'll need a replacement. Curious what it looks like and how you planned to keep it closed. OEM top hinge and Aerocatch latches for the bottom?
 
I am kinda curious why Sergio hasn't molded the headlights and front bumper cover together to eliminate a PITA area to seal air out of. Specially with the way the blank mounts, I am sure you got some creative ideas for solving that though.

I can't speak for Sergio but I'd imagine because:
1) No one's buying V1. I am not sure anyone has bought a copy from this mold besides the one copy Andrew purchased that you sold me. I'm really surprised Sergio kept it. So he probably doesn't see any business reason to spend time modifying or making a new mold.
2) I think some people want headlights?

Either way I'm probably going to bond these blanks to the bumper to simplify things, but that really depends on whether or not they'll slide into place while attached to the bumper. I think they will, but we haven't made sure yet.

I know Bobby recently did some rear lexan windows, but do you have a plan for your new prettyy hatch? Consider full carbon windows replacement like some WTAC cars, or you still like visibility vs saving .3 ounces? :p

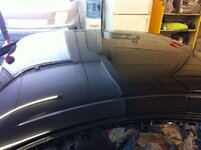
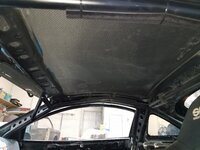
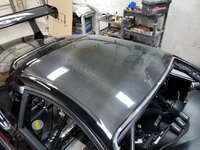
I really don't know why Bobby bothered, Optic Armor has been selling windows for the 2g for quite some time and they're good. I already have their polycarbonate on my OEM hatch, and have a new piece for the Carbonetics piece as I'm selling the old one with the hatch. I did consider a full carbon piece but I already had the Optic Armor in storage and the price to have some take that piece and make a carbon fiber mold is not worth it to me, probably the same cost as the roof was.

Do you have any photos of the hatch without the skeleton? I wanted that too and mine mistakenly was sent with, so I'll need a replacement. Curious what it looks like and how you planned to keep it closed. OEM top hinge and Aerocatch latches for the bottom?

I didn't take pictures of the underside, but I'm not sure what you want to see. It's basically a skin, probably like 1/4" thick since it's really fiberglass. No where near as light as it could have been but I'll have to take it for now.

As for the latches, originally I was going to do flush mount Aerocatch latches, like I was already using on my hood except they mount from underneath so as to keep the surface flat. I had Aerocatch make a complete set of six latches all with the same key pattern, two surface mount and four flush. Surface mount would replace the hood latches, and the four flush mount on the hatch. This way I didn't have to worry about three keys (one for each pair of latches). However Chris@RRT had a novel idea of instead using push button latches from inside and so there would be no visible or accessible latches outside. He wanted me to climb into my trunk to hit the buttons for the rear and I told him he's nuts, but I had a slightly different idea of having a hinge on the rear end of the trunk that the hatch slid into, and then the hatch would lower down with two inside pins into the button catches. Something like these:
s-l300.jpg


Of course you'd have to bond the pins perpendicularly to the inside of the hatch and weld up the mounts for the button receivers, but I actually think it would work and be kind trick. We'll see.

Edit - oh the reason you'd basically be switch the hatch's hinges to the rear is that with the wing now attached to the chassis the hatch can't open. In case that wasn't obvious for people.
 
I can't speak for Sergio but I'd imagine because:
1) No one's buying V1. I am not sure anyone has bought a copy from this mold besides the one copy Andrew purchased that you sold me. I'm really surprised Sergio kept it. So he probably doesn't see any business reason to spend time modifying or making a new mold.
2) I think some people want headlights?

Either way I'm probably going to bond these blanks to the bumper to simplify things, but that really depends on whether or not they'll slide into place while attached to the bumper. I think they will, but we haven't made sure yet.


I really don't know why Bobby bothered, Optic Armor has been selling windows for the 2g for quite some time and they're good. I already have their polycarbonate on my OEM hatch, and have a new piece for the Carbonetics piece as I'm selling the old one with the hatch. I did consider a full carbon piece but I already had the Optic Armor in storage and the price to have some take that piece and make a carbon fiber mold is not worth it to me, probably the same cost as the roof was.


I didn't take pictures of the underside, but I'm not sure what you want to see. It's basically a skin, probably like 1/4" thick since it's really fiberglass. No where near as light as it could have been but I'll have to take it for now.

As for the latches, originally I was going to do flush mount Aerocatch latches, like I was already using on my hood except they mount from underneath so as to keep the surface flat. I had Aerocatch make a complete set of six latches all with the same key pattern, two surface mount and four flush. Surface mount would replace the hood latches, and the four flush mount on the hatch. This way I didn't have to worry about three keys (one for each pair of latches). However Chris@RRT had a novel idea of instead using push button latches from inside and so there would be no visible or accessible latches outside. He wanted me to climb into my trunk to hit the buttons for the rear and I told him he's nuts, but I had a slightly different idea of having a hinge on the rear end of the trunk that the hatch slid into, and then the hatch would lower down with two inside pins into the button catches. Something like these:
View attachment 592315

Of course you'd have to bond the pins perpendicularly to the inside of the hatch and weld up the mounts for the button receivers, but I actually think it would work and be kind trick. We'll see.

Edit - oh the reason you'd basically be switch the hatch's hinges to the rear is that with the wing now attached to the chassis the hatch can't open. In case that wasn't obvious for people.
Bobby bothered because not only is it cheaper even shipped from the UK its much better quality polycarbonate and its not needing to be trimmed as its made to my specs and size so for the price paid to optic armour i or anyone should not need to be trimming it as thats just lazyness on their part.

I offered 4 versions from tint to hardcoat which is something OA does not list or do.

Plus why not have more options! If i can make something better i sure will do. You know me, since when ever do i settle for whats out there LOL
 
So I needed something to keep me occupied in this extended down time and finally lit a fire under my ass on a couple projects. I formed a company, John Freund Racing LLC (yes, I'm not creative) and will be selling products through it.


Don't mind the case quality here, these are prototypes and there are some printing issues I'm working on (see below).
20200229_175142.jpg

20200229_175529.jpg


PiLink: PiLink is a Raspberry Pi (read: mini computer) based system that runs ECMLink and automatically logs data from your ECMLink ECU whenever you're driving. If you've read this thread you know I built a system for this but many people have asked me to sell it. ECMLink is great for what it is but it has no built in datalogging. You have to hook up a laptop and precariously leave it in your car while driving, and the USB cable sometimes comes loose and you lose connectivity. You have to manually interact with the laptop to start and stop. PiLink is a simple little box that handles all this for you with a a lot of automated error handling and automation like automatic Cloud uploading. Aircraft grade 5-pin connect for input along with your USB ECMLink cable (which also is held in securely), along with an optional USB drive for storage. You can connect it to a screen to interact, or just leave it run headless. It can connect to your WiFi whenever it's near and synchronize your logs to Google Drive, and keeps proper timestamps for log files (and will let you know when the clock battery is low). It also can play startup music (which is one of my favorite things, mine plays the Knight Rider theme song hehehe).

PiLink
can be upgraded to also work as a rearview camera, providing the features listed below for the DMS. Also, I plan on playing with included Android Auto support as a bonus for those that want to be able to use that (though initial testing wasn't quite working, so no promises on when that gets online).

I put a ton of work into this project with designing and testing, and most recently got the codebase, hardware design, and build procedures to a place I feel comfortable selling it. Big thanks to Snowborder714 and Turbosax2 here on tuners for being prototype testers. Expect an announcement soon where I will do a group buy for the initial orders.

DMS (Digital Mirror System): I changed the name since the above prototype print case above though the camera case pictured is probably the design I'll keep (while improving print quality). This system is digital mirror replacement geared towards racers, though applicable to street cars as well. You get higher res and better framerate cameras without fisheye (you really don't want a fisheye when trying to see cars) attached to higher resolution screens than you can get in off the shelf commercial offerings typically for cars. Basically true 1080p (not 480i RCA cameras that falsely advertise 1080p output) 30fps water resistant cameras (the one pictured doesn't have the seals or plexiglass lens protector in place just yet) that can be connected to any HDMI display of your choice (I use a 1920x1200 screen for my rear view, and I think 1024x600 for my side, all 7"). The idea here is Crash Avoidance in a racing environment, and believe me from years of racing I can tell you mirrors may get you by on the street but they don't even compare to a nice bright 7" screen showing you what's around your car. Side mirrors on many cars can account for up to 5% of the drag and so removing them helps overall performance (see the Aston Martin Valkyrie, this is exactly why Adrian Newey did not want sideview mirrors on that car and has a digital system basically like mine, though mine was running in my car before I'd even heard of the Valkyrie). The system also includes dashcam-like rolling recording keeping 5 minute video chunks rotating on USB storage (a 16GB USB drive will keep over 125 minutes of footage). You can buy the systems separately or all three.

As a future upgrade I'm testing a radar based crash avoidance system similar to what Pratt & Miller developed with Bosch for the Corvette racing teams. They sell a basic version of this system with just basic right left warnings with speed indicators for over $4000 (and a super fancy one that puts arrows over cars with speed coloring for more). If I get mine to work it will be vastly under that price point. I may add side ultrasound detectors too if I get bored enough.


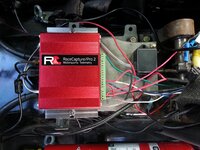
Heads-Up Display for RaceCapture: I built a really cool heads up display for my car last year to show me my predictive lap timing at a glance. It connects to the RaceCapture Pro datalogging system on boot and loads the RaceCapture application, loading directly to whatever dashboard you select. You can however run whatever dashboard display you want. My HUD sits in the bottom left of my windshield but I plan to offer a base that lets you place it elsewhere (i.e. the reflective material that lets you see through it but also the image will be on angled plexiglass).

I'll be officially posting about the PiLink and DMS products in the Classifieds soon. I don't imagine too many people on tuners have a RaceCapture so the HUD likely isn't of interest, but hey this is my thread and I can post about what I want :) I have other ideas too but they're all musings in my brain right now.

So what kind of kicked this into gear was someone asked me to build them a DMS, both side and rear, for his BMW car he races in the northeast. My first sale! At the time that he asked to buy the system my camera design was rather basic. It didn't have retention for the HDMI cable (I zip tie mine in my car) and no water proofing as I don't personally drive in the rain. He did and I thought I really should water proof the design if I'm going to sell these (I still wasn't sure). I didn't know how to 3D model and my current camera case design was from someone else, and I didn't have a printer. However I thought I could learn, and started reading and watching a couple videos. In about from 2 hours I had redesigned my case use this crazy easy 3D modelling for kids tool called Tinkercad (tinkercad.com). Now that first design wasn't great but it was a start. I also learned about a great website treatstock.com that lets you upload 3D models and pick amongst thousands of 3D printing services at super cheap prices. I uploaded my first prototype, found a printer in I think Oklahoma?, and got 3 prints of the designs made within a few days for maybe $15? It was nuts! I hadn't yet worked on anything but the camera case designs though, so had to use off the shelf cases that I modified for the internal electronics.
20200218_223741 (1).jpg


Things snowballed from there though. I started working on a PiLink case, and more refinements to the camera case designs, and then added gopro mounting options to the cameras, then redesigned my PiLink case from scratch for the DMS as it didn't need as much volume, then tried adding snap-in lids, then.... and then... and... well my friend Matt@Spoolinup (sponsor that gave me my ignition system's parts) said I could borrow his 3D printer. I borrowed his Ultimaker 2 and started going nuts, quickly burning through the filament he gave me with design after design after design. I even upgraded his printer a little bit as it had some outdated pieces (I think he got it in 2016).
20200229_174437 (1).jpg


Tons and tons of long hours went into designs and printing, along with researching 3D printing, intermixed with code enhancements to my products. I think most days in the last number of weeks I've been up until 3-4am, then waking up for work or the weekdn, and working on things immediately (admittedly sometimes during work...), and weirdly I don't feel all that tired. I'm pretty excited to be able to offer something people can use.

So the Ultimaker 2 I borrowed had lots of issues. Many were user error due to my lack of knowledge and experience, though some I think due to the age and antiquated design of the printer. I got so fed up with it I ended up ordering my own 3D printer, a Prusa i3 MK3S. Not terribly expensive but extremely well reviewed as a work horse that just "works". It's only like $750 assembled yourself. I am more than willing to invest in a super printer but thought if this is reviewed so well I'll try this out and go from there. It arrives on Monday (knock on wood). I've already got stacks of filament here waiting for it. It should improve my print consistency and quality dramatically.

I am working on my second DMS now (just waiting on parts) for my friend Don that runs the track store at Virginia International Raceway and a partner with TMI Racing Products. He needs one for his Honda Civic race car he's building because he says he's so tall he can't see out the windshield as the rearview mirror blocks his forward view. He brought up selling the system in the store. That'd be pretty damned cool :) We'll see how things play out.

So if you're interested in anything here, feel free to ask about them, or hold your questions for the for sale ads. They'll all be made to order, I don't plan on keeping inventory so there will be a lead time (some parts come from Japan so it can take a few weeks) once parts are in build time isn't so bad as I've been working through the build processes and refining things.
 
Bobby bothered because not only is it cheaper even shipped from the UK its much better quality polycarbonate and its not needing to be trimmed as its made to my specs and size so for the price paid to optic armour i or anyone should not need to be trimming it as thats just lazyness on their part.

I offered 4 versions from tint to hardcoat which is something OA does not list or do.

Optic Armor offers anti-fog, anti-scratch, and tint coatings. I know because I have all of them as options. You claim yours is "better quality polycarbonate" but have you actually held their product in hand or somehow discovered actual technical details about the chemical compositions of their products or manufacturing processes? What are you basing these claims on? This is a rhetorical question, not one I want answered here in this thread. You might have the cost point but you don't have anywhere near the experience their company does with this sort of product, nor a product proven over thousands of cars in the US. Good for you on trying to build something better, but let's be honest about what it is you're offering.

Either way let's keep your advertising out of my thread please. Optic Armor is a sponsor and I'm quite pleased with their product.
 
Last edited:
Wow I haven't posted in a while.

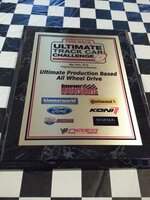
Hmm. Car's not even close to being ready to race and due to the shop not putting full time into my car it won't be for the Ultimate Track Car Challenge. I'll post more on that later.

I did a loooooot of work on PiLink for the launch and afterwards, and developed more products as well. A high quality 7" touch screen, an Action Camera (GoPro-like camera but is automated and runs on 12V power, no more shitty batteries and fiddling with buttons!), and Android Auto Upgrade for PiLink... and there's more to come. I just launched https://jfracing.net as my online store for John Freund Racing products. Please check it out and let me know what you think! Though in PM, probably best not to clutter this build thread with comments.

jfracing.net goes live.jpg


Since this thread is more about the car though, here's a couple quick pics of progress:

Wing upright templates being made:
83846664_533046154236655_9182237288225046528_n.jpg


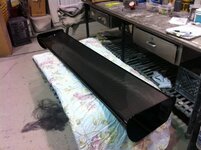
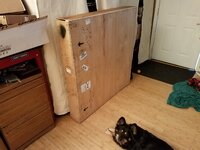
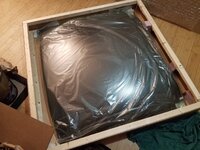
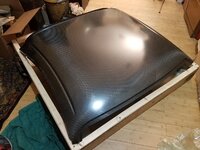
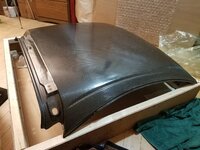
Carbonetics duckbill hatch test fit:
20200206_102535.jpg


Bumper cover test fit. This sucked, what a misshapen POS...
20200227_160717.jpg


Carbon Fiber uprights back from DHP Composites, test fitting here.
20200422_135707.jpg


Splitter/diffuser reinforced and mounts bonded.
20200608_124336.jpg


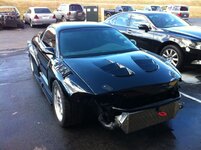
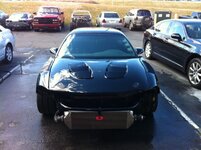
Splitter Mounted. Unfortunately they screwed up and put it too low and there is like a .5 to .75 inch gap with tbe bumper. Face palm. To move it up though we have to some some changes to the radiator cross support and engine support, which we already did to get it to this position.
20200708_130042.jpg
 
Inspirational for sure! Do you ever run MidOhio or Pittrace? Would love to see the car in person if you do.

Mid Ohio's just too far. Pitt Race is one I really wanted to go to. I skipped in 2019 because I was trying to ensure the car was in tip top shape for VIR that was happening the following month, and 2020 has been a complete wash thanks to the car work not being completed in a timely fashion. Next year I think I want to go check out Pitt Race finally but will probably run in HPDE 4 rather than TT since I don't know the track at all besides watching videos.
 
Even better as that's my local one! Thay have pumped a ton of money into expanding that track. I was just up there in my MR2 for an autocross and aside from the big main track expansion from a few years back they redid the VDP area as well as some of the other facilities. Please let me know so I can come fanboy over the car when you do make it this way.
 
I'll usually post where I'm going in this thread, so enabling notifications for it will give you a heads up.
 
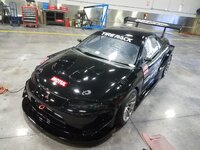
Wow it's been over three years since I posted anything. Mainly because COVID made recovery of the car a royal pain in the ass. Long and short of things is:
- 2021 spent waiting on the race fab shop to get the new aero stuff on. That didn't go quite well because of many reasons. Aero is hard, body panels were warped and not well made, and making this stuff work nicely so a one man race crew (me) can install/remove things is quite hard. They didn't quite finish what they should have and deferred much body installation to the body shop who didn't really know how to handle things either.
- 2022 spent trying to get the body shop to finish the body work. and as usual I had more ideas and so I added more complications to their long list of things to do. Got it back in the fall and while the engine seemed fine when the car was delivered, it would not idle when I picked it up.
- 2022-2023 race fab shop pulled the engine and scoped it. Crack with water leak in head, and two pistons looked absolutely destroyed around the top edges (though to them it looked like long term abuse from racing + maybe not the best tuning). Pulled the engine and sent it to Magnus Motorsports and Marco confirmed those issues and also that I had a hairline crack in the crank, so definitely time for a rebuild. He was unfortunately quite busy all year as his focus is not DSMs anymore and he's building a new shop in the US, going back and forth between them, so this hugely slowed the process.

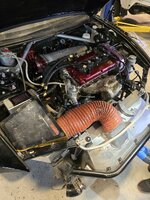
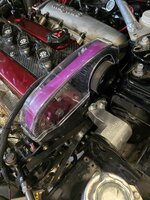
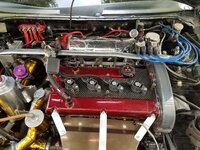
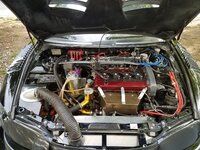
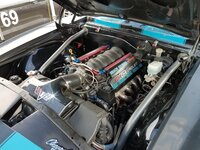
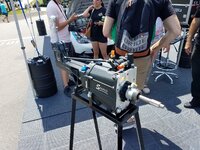
So now the engine is almost done and to be packed up. Here it is on a stand up on Toronto. Basically the engine is the same except one rather big thing. Can you tell what it is?
WhatsApp Image 2024-01-15 at 4.55.55 PM.jpeg


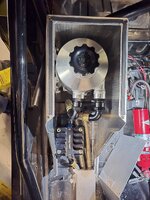
Unfortunately this change as usually triggers more complications for me... sigh. It was necessary though for the supposedly higher g-forces the new aero might afford me. Now I need to find a new place for the alternator as the rear location is now being used by the oil pump (probably putting the alternator back up front somehow), and of course the oil tank has to find a good home. Make one modification and it triggers umpteen more...

Hopefully this gets back to the race shop so we can put it in, and get to related modifications, fixing the drifting alignment issue, and re aligning and corner balancing the car.

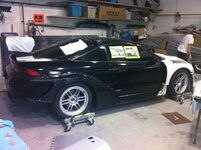
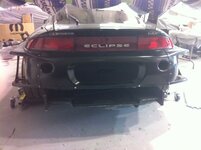
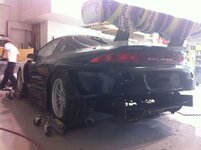
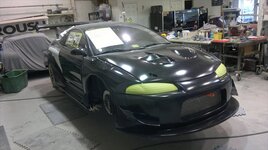
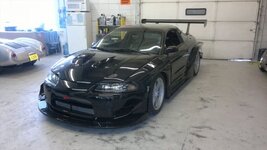
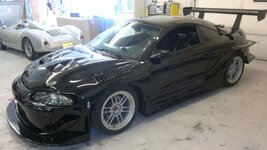
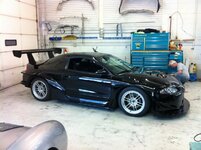
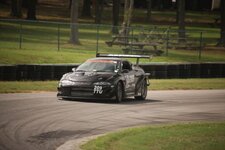
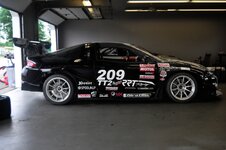
As for Aero/body work, here's what ended up being done:
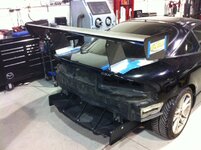
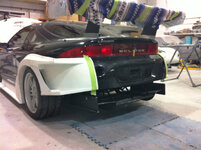
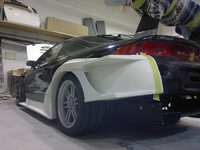
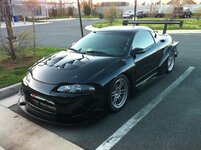
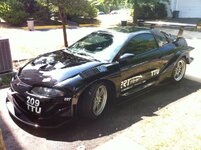
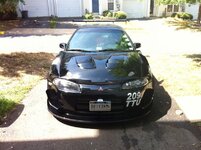
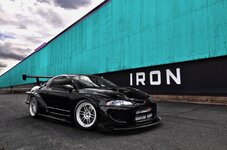
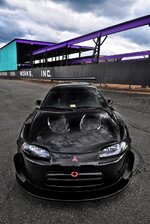
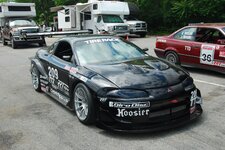
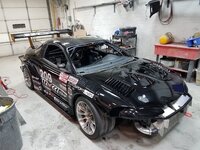
- the new splitter slides up and back into some hollow piping receivers and held in with pins that are wired to the car (so I don't lose them). This is so I can put on and take off the splitter by myself as it's absolutely necessary to get on and off the trailer now. Splitter has some carbon fiber end pieces attached to promote splitter performance.
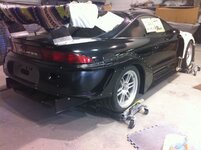
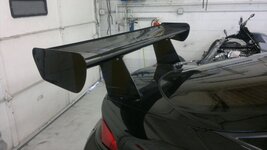
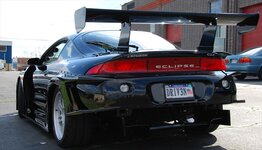
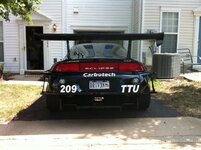
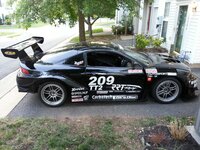
- apr gt-1000 dual element wing with custom carbon fiber uprights mounted to the chassis (think i share this earlier)
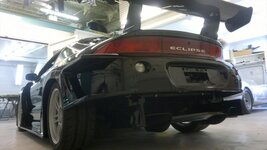
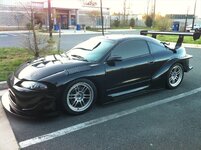
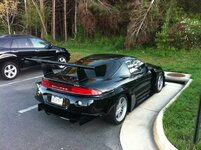
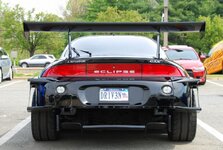
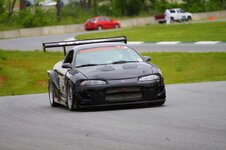
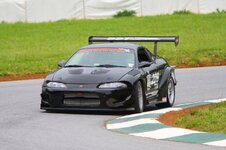
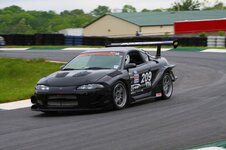
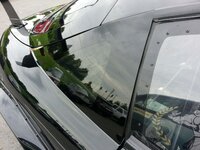
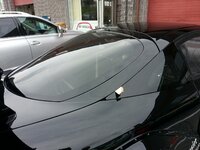
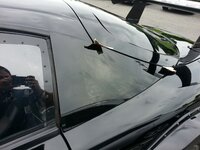
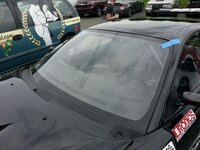
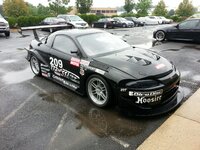
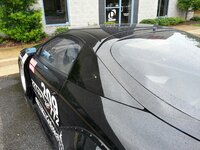
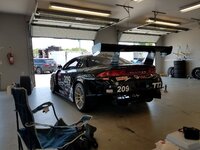
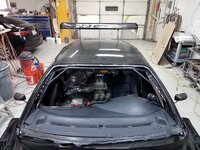
- Carbonetics carbon fiber hatch, held in with aerocatch latches. Has the duck lip which Andrew Brilliant said will actually improve rear wing performance.
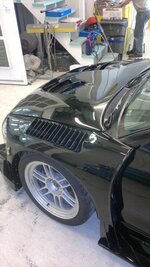
- Carbonetics rear quarter panel carbon fiber glass replacements. the old lexan I had in there had paint for the black "framing" done really poorly by the body shop and it was peeling.
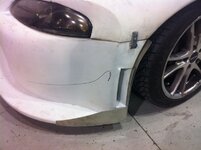
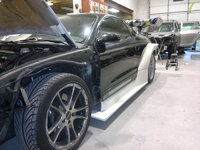
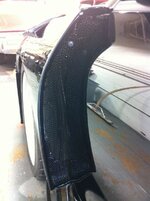
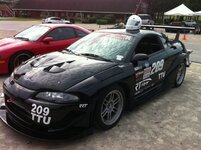
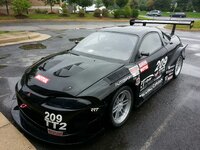
- added some carbon fiber gurney-like flaps to the tail ends of the front fenders. per Andrew Brilliant this helps create a lower pressure zone there which in turn helps promote fender air exhaust and thus reduced lift.
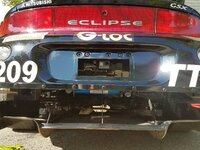
- cut out the rear license plate area and added a black mesh material there. This is to help some airflow get out from behind the bumper to maybe reduce drag, or maybe just look good, who knows :D This will mean I have to move my rear camera which will likely go to the rear hatch lock keyhole.
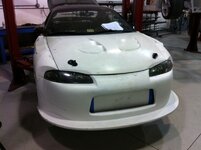
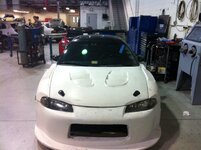
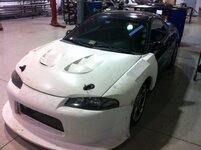
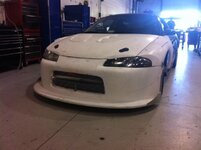
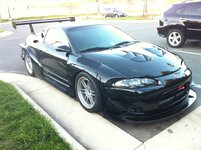
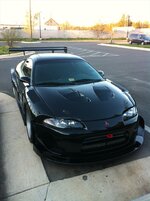
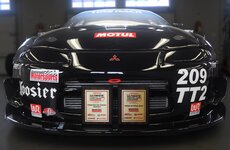
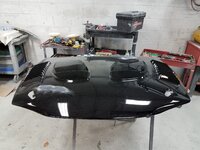
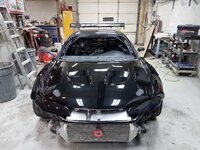
- front bumper has the Carbonetics (at least I THINK they're carbonetics) carbon fiber headlight blanks attached to the front bumper cover. front bumper cover attaches to a sealed bracked on the splitter with four dzus fasterners for quick/easy removal.
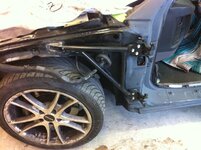
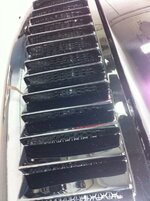
- changed the front fender well air fences from aluminum to carbon fiber (because it looked cool, and they needed to be redone for the new bumper/splitter).
20220301_123349.jpg

20220302_122623.jpg

20220301_124051.jpg

20220301_123933.jpg

20220301_123651.jpg


So maybe I will actually get on the track in 2024!
 
Actually yes, I do have a few updates.

I moved from Northern VA to the Baltimore, MD area in Mar 2023. When the engine came down to RRT who has been supporting my car for... ever, they had by then stopped most of their race car support and fabrication. Basically with Covid a lot of that business dried up, and that side of the garage was always tough to get to make a profit, so they pivoted to doing mostly street car work. They received the engine and were willing to do some basic drop in of the engine, but not fabricate all the solutions to get the dry sump system working.

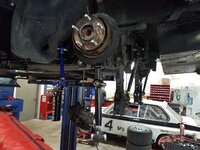
Found Mid-Atlantic Motorsports near my home that does tons of drift cars, not really many race cars. Very nice fabrication, but holy hell a high labor rate. Still, about the best I could find nearby, and they were very keen to work on my car and help, so I brought them the car in 2024. They helped custom fab a lot including:
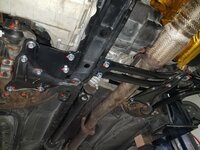
- dry sump system install
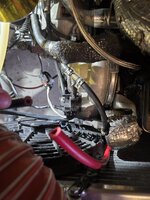
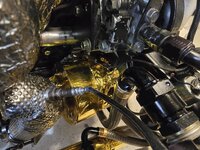
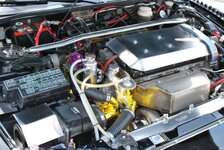
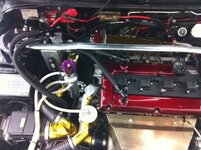
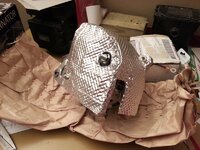
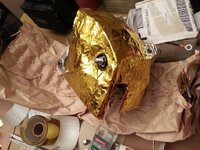
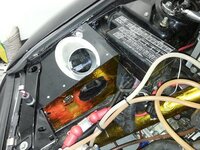
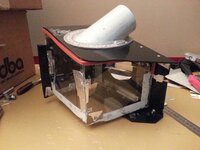
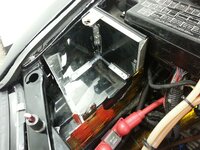
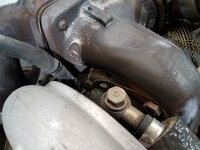
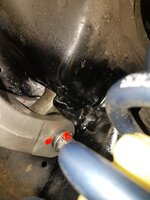
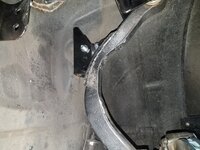
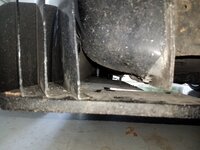
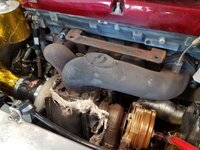
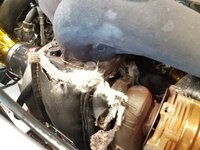
- relocated alternator now back to the OEM location. Needed a custom mount for this because of space issues with all my oil lines plus using a saturn alternator including major heat shielding that I REALLY hope hold up and keep the alternator alive.
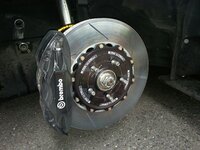
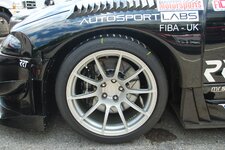
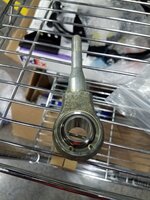
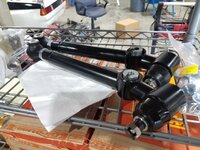
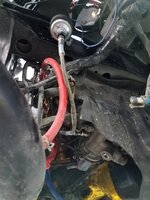
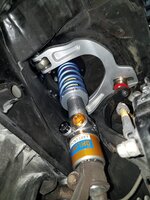
- install FIBA front compression arms with spherical bearings
- corner balancer the car and then align
- install the new dual element rear wing with proper leveling

20241125_145239 (1).jpg20241125_145249 (1).jpg20241125_141933 (1).jpg20241125_140121.jpg20250103_145140.jpg

When they were done they tried to fire up the car but couldn't. It wouldn't run at all for them. They were convinced my 1150 FICs injectors were bad, even testing them they said and said one was stuck and they couldn't fix it with cleaning. I ordered high-Z 1200 FICs and the car still wouldn't run. I went there and got the car to run, but extremely rough. They hadn't connected some things properly (they didn't know DSMs at all, so not really their fault and we have all those wire harness with the exact same shapes) but even after that I had to really hold the throttle to get it to fire up, and it smelled like fuel and ran poorly. As they didn't realy know DSMs and as I mentioned their rate was super high, I opted to get the car towed home last summer. It sat until recently.

The Loose brothers, if you know who they are (most old schoolers do with how prevalent they've been on the forums, helping EVERYONE with EVERYTHING) are good friends of mine, and they came down a few weekends ago to help. They found that fuel was filling up the cylinders, appearing like an injector was leaking. What was weird was even with cleaning, and even with moving injectors around, it always was in cylinder 1. We could pressurize the rail and fuel started pouring in there. We were really stumped. Then Brian thought about typing the symptoms into ChatGPT and it gave him the hint that it might be the fuel pressure regulator allowing fuel out through its vacuum line. Brian didn't tell us what he was doing and randomly asked "pull the vacuum line and pressurize the rail" and when we did fuel squirted out. Turned out there was a pinhole leak in the FPR diaphragm from I guess years of use. How does this explain cylinder 1 only? We happened to have the car jacked from the passenger side tilting the engine so fuel pouring into the intake manifold from this vacuum line simply ran into cylinder 1.

They also found my return line hose was leaking heavily, and that turned out to also simply be old age, it was basically just coming out all around the hose. This is why the car was jacked up on that side as they were investigating this leak.

With those two problems identified we were able to overnight parts from Japan... I mean Amazon, and test the theories. While it took like minutes of cranking, probably to clear the cylinder, the engine finally started up for the first time. Took it for a spin around the neighborhood a couple times even. Instagram post showing the engine finally running:

As we had time we also installed a KDN shifter that I had because, well, it seemed super cool. I'm getting some first gear lockout annoyingly and unsure yet how to resolve it, but going into second then first got me by on those test laps:

20260621_152524.jpg

sits kind of high, and I had no idea they later came out with a shorter shifter that I may get, but I'll drive it as-is for now.

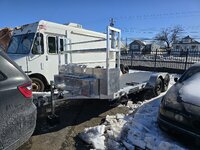
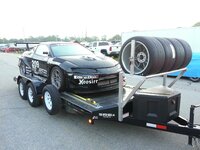
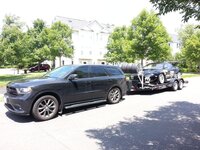
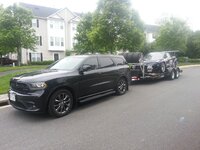
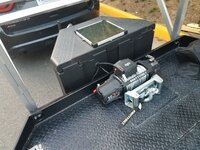
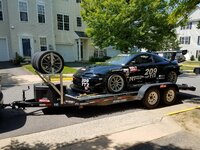
So other news, my trailer was stolen last year, so I had to get a new one. Got a really nice aluminum tilt one for a real steal from a John Freund Racing customer that I need to set up for L-track, and see if I can actually get the car on it without additional ramps.
20260207_135206.jpg

I need to also:
- boost leak test
- get the car re-tuned and ballast adjusted now that it runs
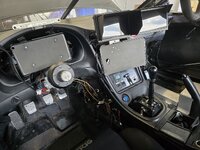
- reinstall the rear camera now through the key hole since I removed the lock
- lose a lot of weight because my fat ass gained a ton over the last number of years, and I don't fit into my racing suit :D

so got a lot to do, and I still have new house projects going on. So MAYBE I'll get on track for a shakedown this year but hard to say.a
 
Last edited:
using a saturn alternator including major heat shielding that I REALLY hope hold up and keep the alternator alive.

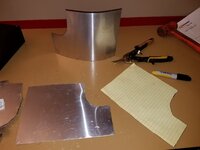
This is what I noticed first in the pics - it looks like the alternator is tightly wrapped all around including the back end. I always thought the alternator needs to be able to draw or push air through from one end to the other end, or from somewhere to somewhere, not sure how it works. Anyway, air flow through it. To keep temps down. So I figure the heat shield should be off away a little bit, enough to allow the normal amount of airflow through it, and that's how I made mine for stock position alternator. Was a lot more work than wrapping - because of the small amount of room for it, it has to zig-zag through the available spaces.
 
When I ran an OEM alternator they kept failing fast from heat in the OEM location and so I fabricated a similar heat shield with limited airflow, again due to space limitations in the area, and it worked like a charm and never had an alternator failure again. I think there is a post about it in this thread way back.

Different alternator this time so we will see. If this fails I likely have to just relocate the alternator some place exotic like running off the driveshaft.

Can't say this is ok for street cars or not, as I am on track at most 25 min in a stint.
 
That's where it was and quite happily. The dry sump pump unfortunately had to go there so we had to move the alternator back to the front.
 
That's where it was and quite happily. The dry sump pump unfortunately had to go there so we had to move the alternator back to the front.
Ah. Do you think a duct to and from it would help instead of encapsulating it from air flow?
 
Add Value - Be Respectful - No Trolling - No Misinformation - Participate Often!
Support Vendors who Support the DSM Community

Latest Classifieds

Back
Top