
The Central Hub for DSM Community and Information

For 1990-1999 Mitsubishi Eclipse, Eagle Talon, Plymouth Laser, and Galant VR-4 Owners. This is where the DSM platform history is documented and archived. Log in to help us in our mission, and to remove most ads from the browsing experience.

dsc00730d.jpg

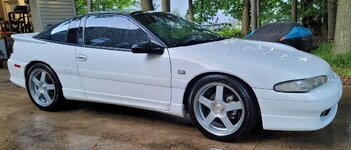
Paul's 1993 GSX - VMC Panda

This site may earn a commission from merchant affiliate links, including eBay, Amazon, and others.

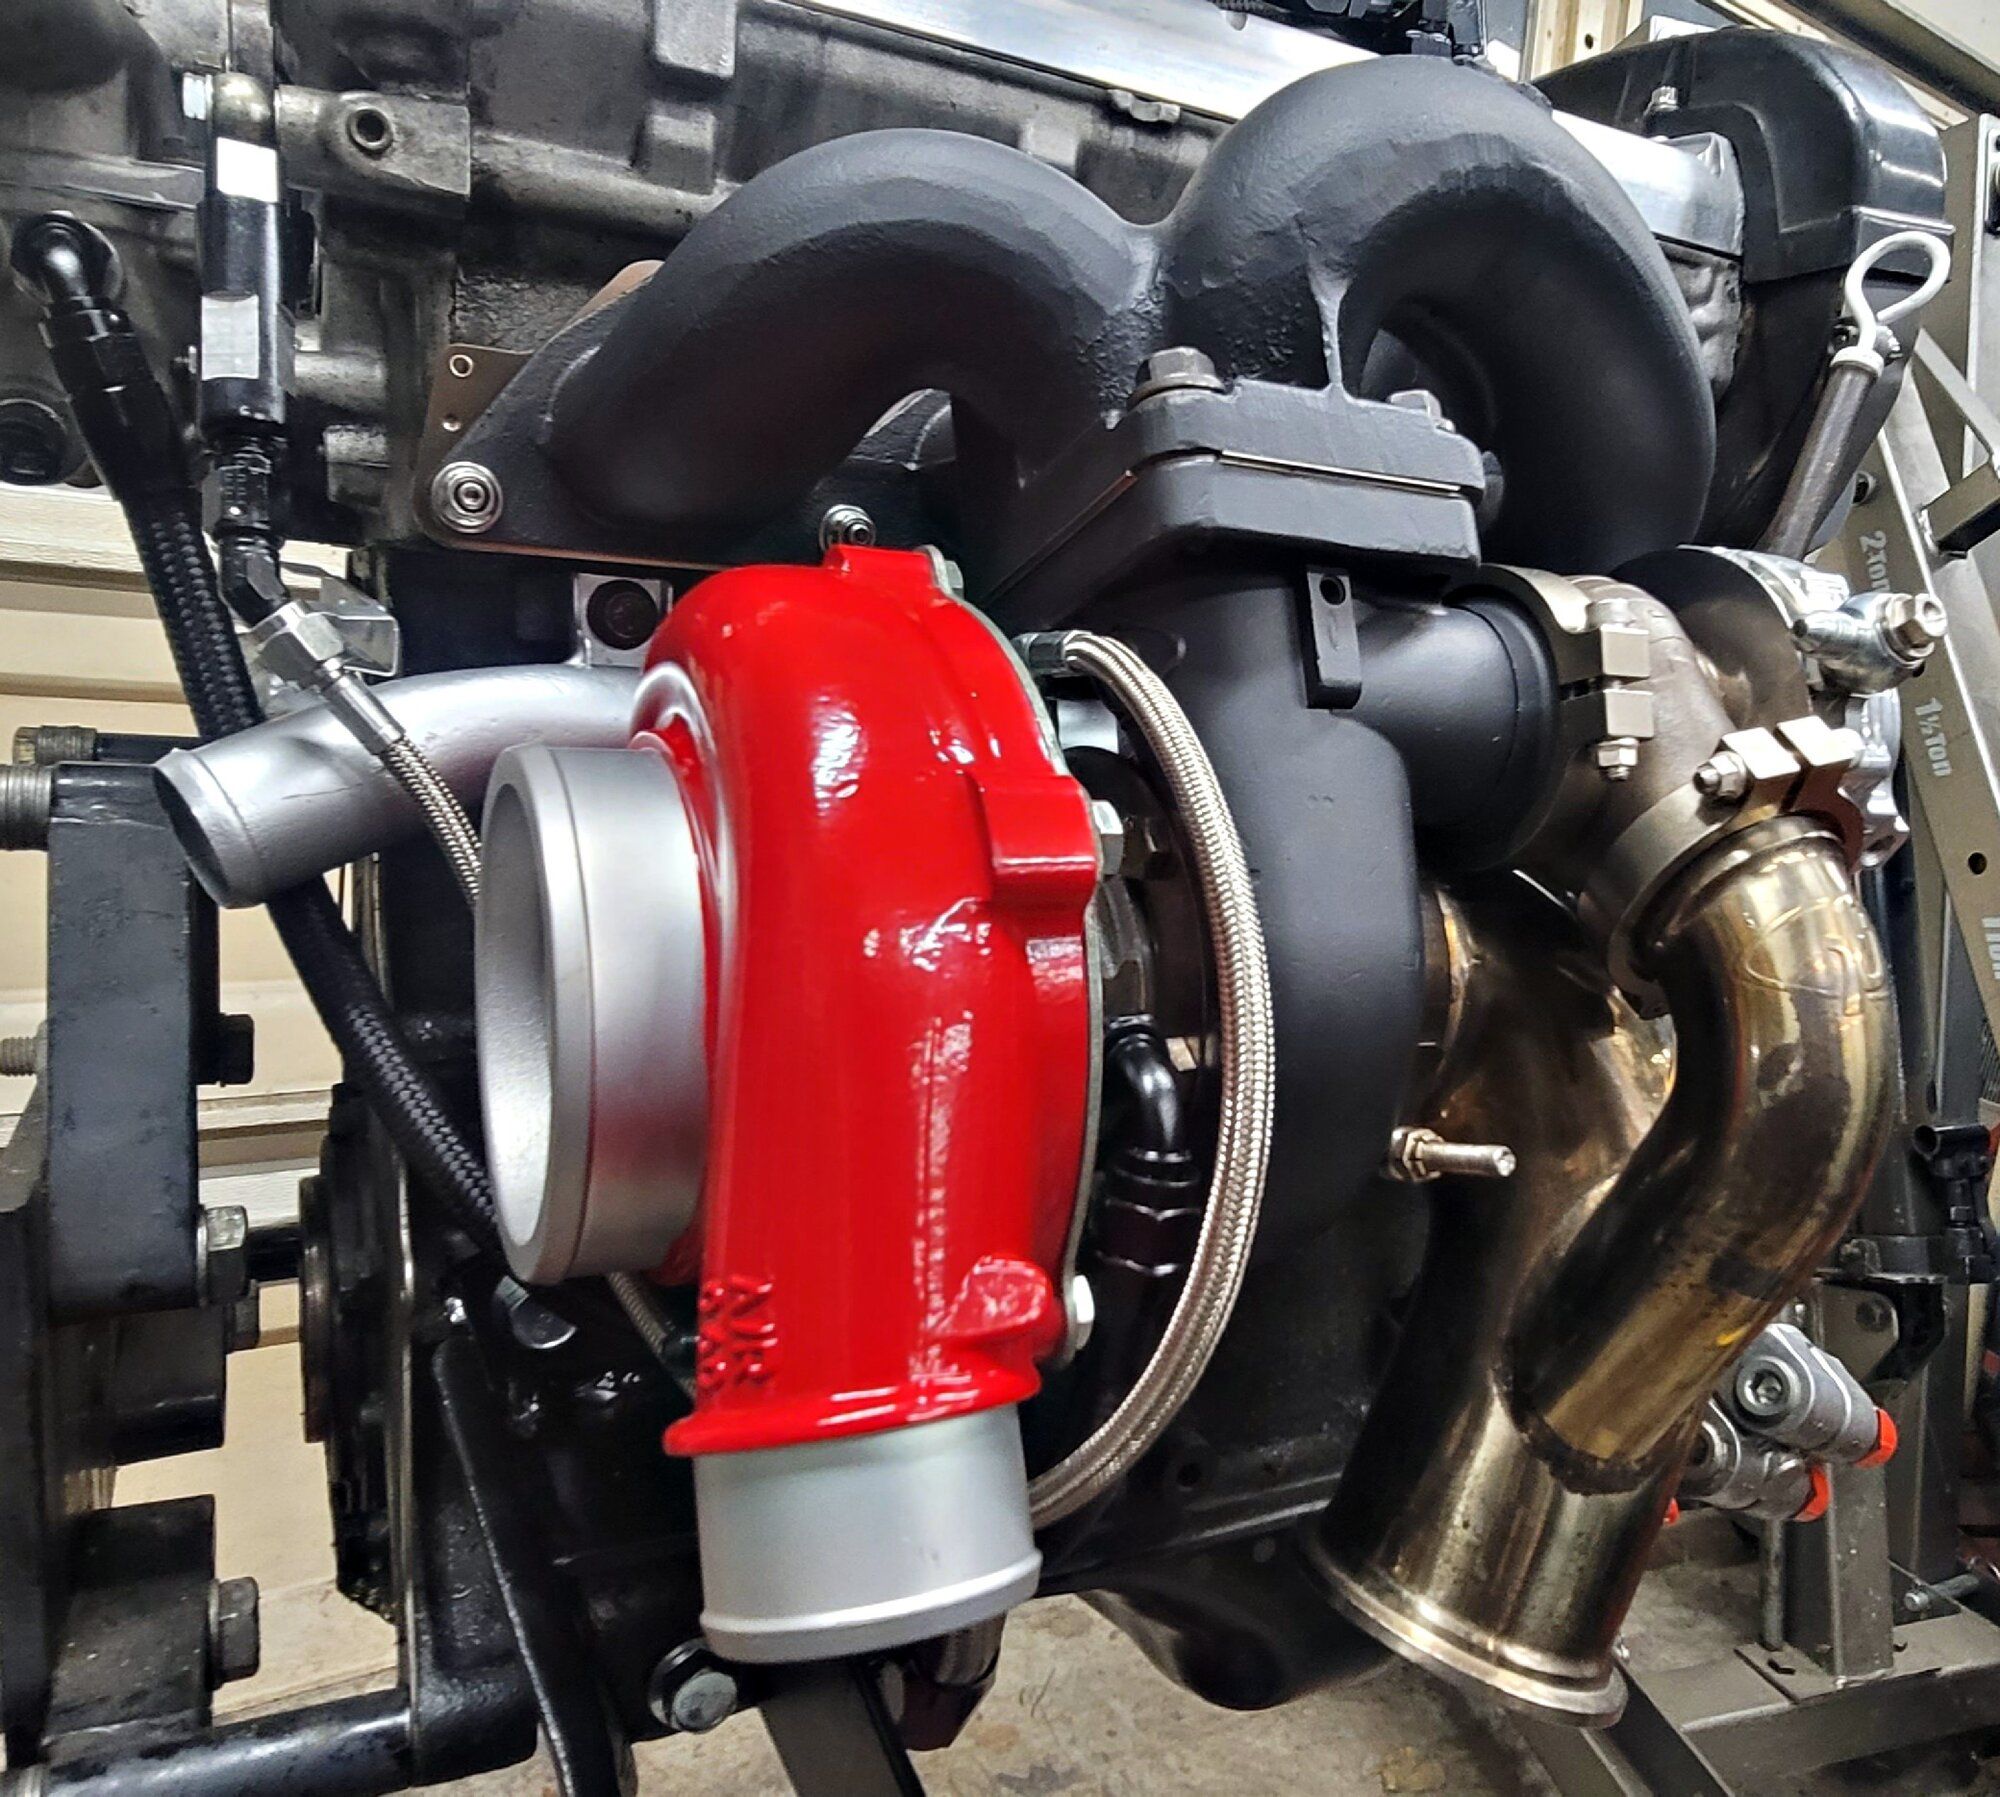
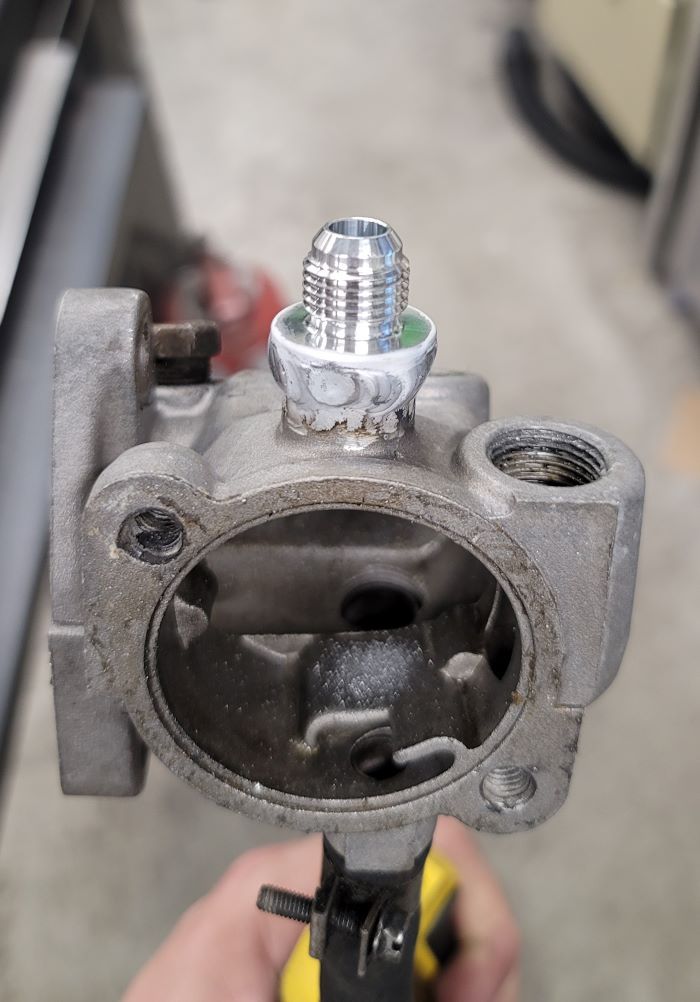
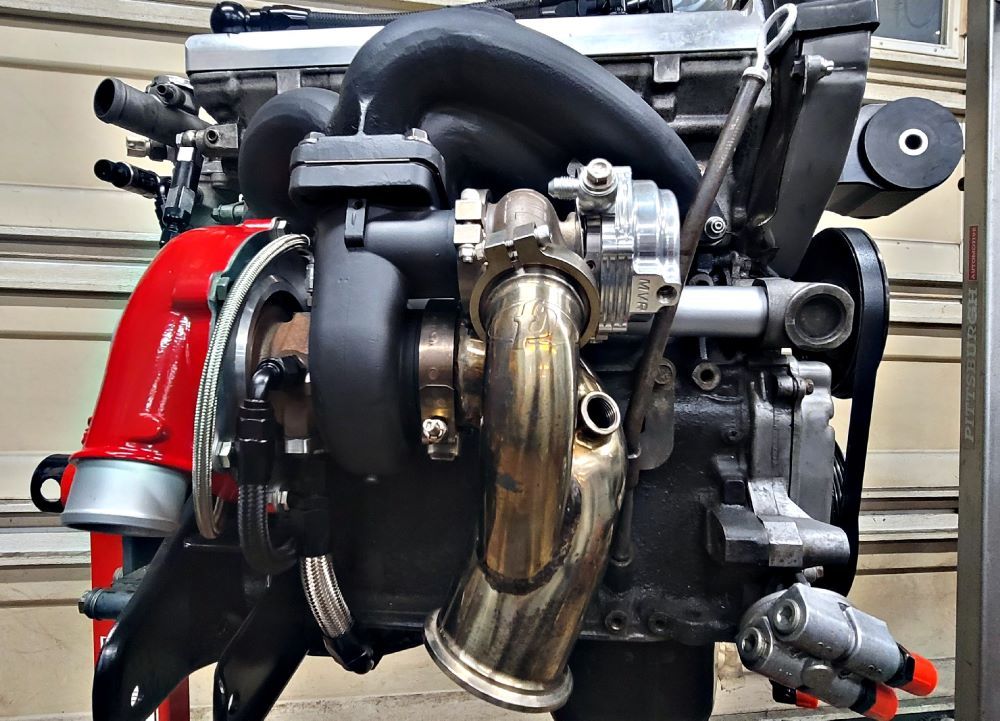
Next, I welded -6AN bungs on the thermostat housing and water pipe and ran new AN lines to the turbo. No more coolant leaks (hopefully). I ran a new oil feed and drain too just for good measure. I had the turbine housing and exhaust manifold ceramic coated, and the compressor cover powdercoated. The whole engine bay is basically black and silver, so I figured I'd give some color to the turbo to make it stand out a bit. I replaced the manifold studs with broached ARP's and installed new gaskets.

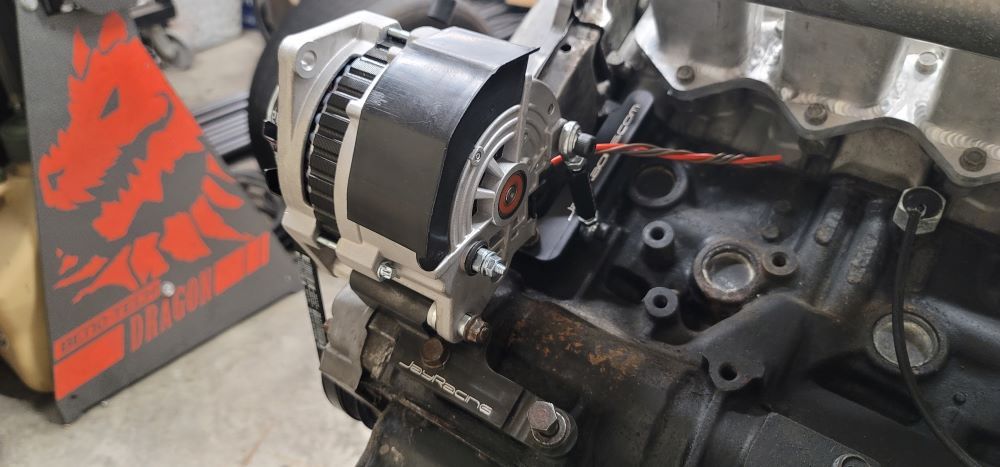
And I also swapped to a 105a Saturn alternator using a Jay Racing kit. I machined my own spacers to perfect alignment. Meanwhile, I shipped the FIC 2150's out to be cleaned and flow tested. More to come soon!
20230617_145056.jpg


cameringo_20230630_014727.jpg


cameringo_20230630_015849.jpg


cameringo_20230630_020104.jpg


cameringo_20230630_020311.jpg


20230616_232229.jpg
 
Because every street car should idle well. I finally got the nerve to pop 4 holes in just the right places on my RMR TB to bolt on an Evo 8 IAC. Now I just need to wire on the pigtail and locate an IAC map for Link G4. Fingers crossed that I won't need to throttle the car all the time anymore.

20230728_211218.jpg


20230728_215224.jpg


20230728_215252.jpg


20230728_215533.jpg


20230728_215543.jpg
 
Next, I welded -6AN bungs on the thermostat housing and water pipe and ran new AN lines to the turbo. No more coolant leaks (hopefully). I ran a new oil feed and drain too just for good measure. I had the turbine housing and exhaust manifold ceramic coated, and the compressor cover powdercoated. The whole engine bay is basically black and silver, so I figured I'd give some color to the turbo to make it stand out a bit. I replaced the manifold studs with broached ARP's and installed new gaskets.

And I also swapped to a 105a Saturn alternator using a Jay Racing kit. I machined my own spacers to perfect alignment. Meanwhile, I shipped the FIC 2150's out to be cleaned and flow tested. More to come soon!

View attachment 700589

View attachment 700590

View attachment 700591

View attachment 700592

View attachment 700593

View attachment 700594
Hey Paul , do you have any more pics of your turbo coolant lines? I have a HTA FP 3076 and I’m having a time with the water lines. I have a possible solution, but I wanted to see yours.
 
Hey Paul , do you have any more pics of your turbo coolant lines? I have a HTA FP 3076 and I’m having a time with the water lines. I have a possible solution, but I wanted to see yours.
Here's the best I can get images of with it all installed. I welded -6an bungs into the thermostat housing and water pipe. There's not alot of good options for running the lines and the way I have them seems about the tightest fit there is for AN lines.

20230731_184553.jpg


20230731_184544.jpg


20230731_184611.jpg
 
Some new parts. I ditched power steering. Traded my kidney, two gold bars, and a nephew for a manual rack. These things are getting tough to find!! I tore it down, cleaned it out, and reassembled it with new inner and outer tie rods ends and boots. It also got some fresh enamel and gear oil. I'm going to love having one less belt and a more decluttered bay. Also got a new ACT flywheel and 2600 clutch. And a Comp fork & pivot, and an OEM slave cylinder. Throwing that all in tonight and hopefully will have the engine and trans ready to drop back in tomorrow.

Also installed a 3G master cylinder today - sort of preparation for a better front brake set-up down the road. Last but not least, I repainted the frame rails. They were looking a little fugly and though my quick paint/clear job isn't perfect, it's a big improvement.

20230723_150741.jpg


20230805_210621.jpg


20230805_183644.jpg


20230723_162621.jpg
 
Update: Engine and trans are back in the car!

I found some boot and terminal damage on my Taylor 10.4mm plug wires and these are now discontinued, so I decided to repair them. I crimped on new terminals and epoxied on some new boots. The 90* boots fit much better than the straight boots did given how my coilpack is mounted.

20230622_215117.jpg


20230810_141304.jpg


I welded on a small bracket to hold a ball valve bulkhead and plumbed it to my catch can. Now just a quick 1/4-turn inside the wheelwell, and I can drain this thing as needed.

20230811_155032.jpg


20230811_155048.jpg


I also completely redid the rest of the fuel system. Last year the car got two new pumps. This year, I swapped in a new pressure regulator, post filter, and all new lines and fittings from the tank forward. I also whipped up a nifty new bracket to mount the fuel filter.

20230729_184009.jpg


20230811_170810.jpg


20230812_125317.jpg
 
Last edited:
Some good news: I got the engire fired up on Saturday and all is well. No more belt squeel!!! It also idles on it's own for the first time ever. Zero pedal manipulation and no stalling, and I haven't even played with the IAC idle map in the ECU yet. So that's promising. I was supposed to have it tuned again today, but missed that appointment because of the bad news.

Some bad news: We struggled to get the clutch to bleed. It's been screwed up since I owned the car. After spending a day unsuccessfully getting the clutch master and slave to bleed, I decided to pull the master. It was in pretty bad shape. not only was it not making pressure, but we had some old leakage and it had been previously welded on for more adjustment. It was adjusted out so far out of spec that it wasn't letting fluid to and from the slave. So I swapped in a new master, properly adjusted it, and got it to properly bleed. And this highlighted the next issue. I then discovered the clutch fork was way out of alignment. Apparently my new ACT flywheel is stepped incorrectly and it never occurred to me to check it. So, now I need to pull the trans again and shim the pivot ball to get this fork a bit right of center. Bad news is that I won't have time to get it on a lift til after the Shootout. So it will sit for a bit.

20230813_111457.jpg


20230813_142902.jpg
 
Update: Engine and trans are back in the car!

I found some boot and terminal damage on my Taylor 10.4mm plug wires and these are now discontinued, so I decided to repair them. I crimped on new terminals and epoxied om new boots. The 90* boots fit much better than the straight boots did given how my coilpack is mounted.

View attachment 704706

View attachment 704707


I welded on a small little bracket to hold a ball valve bulkhead and plumbed it to my catch can. Now just a quick little 1/4-turn inside the wheelwell, and I can drain this thing as needed.

View attachment 704710

View attachment 704711


I also completely redid the rest of the fuel system. Last year the car got two new pumps. This year, I swapped in a new pressure regulator, post filter, and all new lines and fittings from the tank forward. I also whipped up a nifty new bracket to mount the fuel filter.

View attachment 704714

View attachment 704715

View attachment 704716
Damn, looking real nice, man!

I'm about to drop the motor/trans back in myself! Hoping to have it stable enough to drive to the shootout. 🤘🤘

Edit; That's good you found the problem with the MC, but also sucks you won't have time to get to it until after the shootout. Who knows, though, maybe you will find some time! Would love to see this car at the shootout!


Rob
 
Paul, any updates on this beauty? Outstanding work thus far as always.
Thanks dude! No updates yet. Came out of storage this weekend. I'm planning to pull the trans again and shim the pivot ball, but wont have time til late June. Can't wait to start putting mile on this thing.
 
Updates!! I pulled the engine and trans again. Fixed a couple of broken spot welds on the engine mount, and re-shimmed the fork pivot ball. We tried 4 different shim thicknesses before we got something that moved the form enough. I believe it's a .120" shim, which seems excessive and I'm not sure why it requires so much. I did also measure the flywheel's step and it's dead on where it should be (~.609"). Engine and trans are back in. I still need to bleed the slave, but it's at least together and running.
 
Last edited:
I've been wanting to build a one-off fan shroud for a bit now and finally made it happen. A big thanks to my homie Jeremy at Fathouse Fab for taking care of the cutting and bending (my brake is too small).

My goal was to design it to be as thin as possible and to be as sealed as best as I could. I gasketed the fans to the shroud and the shroud to the radiator. It runs a beefy 13" and 10" Spal fans (13's don't normally fit on a DSM rad). Right around 2400 cfm total. Rad is made by Northern Radiator. Shroud also has a few flaps in case the fans get overran (they shouldn't ever though).

Initial mock-up showed the 10" fan motor sitting right against the wastegate's recirc tube. Bummer. So I ditched the FP cast O2 housing and built my own O2 and downpipe from scratch. Gained about 1.5" of fan clearance and clearances around the LICP are excellent too. Ran wiring was previously not great too, so it was nice to get in there and run all new power, grounds, relays, etc. Mission accomplished.
S1.jpg


S2.jpg


S3.jpg


S4.jpg


S5.jpg


S6.jpg


S7.jpg


S8.jpg


S9.jpg
 
Also, Dudes, these billet radiator hose clamps are the cat's meow. Leaps and bounds better than any worm clamp. They look good, fit is tidy/minimal, and clamping force is perfect. Made by Granatelli and only $10/ea at Summit.

Just wanted to share, as I didn't even know these existed 2 weeks ago. Ideal size for a Dizzum radiator hose is 1.654" to 1.732". Part number: GRN-971150


20240926_135617.jpg


20240926_135624.jpg
 
Also, Dudes, these billet radiator hose clamps are the cat's meow. Leaps and bounds better than any worm clamp. They look good, fit is tidy/minimal, and clamping force is perfect. Made by Granatelli and only $10/ea at Summit.

Just wanted to share, as I didn't even know these existed 2 weeks ago. Ideal size for a Dizzum radiator hose is 1.654" to 1.732". Part number: GRN-971150


View attachment 744824

View attachment 744825

Those also look incredible too.

Where’d you get those upper radiator mounts/brackets?
 
Very nice missed you at the shootout
Yeah, we skipped doing a booth this year just to be able to walk the pits and watch racing from the stands. It was a nice change of pace. Will be back to a booth next year. :)
 
Updates!! I pulled the engine and trans again. Fixed a couple of broken spot welds on the engine mount, and re-shimmed the fork pivot ball. We tried 4 different shim thicknesses before we got something that moved the form enough. I believe it's a .120" shim, which seems excessive and I'm not sure why it requires so much. I did also measure the flywheel's step and it's dead on where it should be (~.609"). Engine and trans are back in. I still need to bleed the slave, but it's at least together and running.
I'm wondering if these ACTs are incorrectly made with respect to backspacing. When the flywheel is installed, the step itself is sitting a hairs breadth too close to the engine block. Basically, the measurement from the backside where it meets the crank to the top of the step where it meets the pressure plate is too thin.

We measure the step height and get .609 (I did as well) but if the relative distance from the top of the step to the block itself is reduced, that would cause the fork end to go left of center.

Either that, or theyre making pressure plates with fingers that go too damn flat nowadays.
I looked at old photos of my 1g with a fidanza 4 puck and PP with their alum flywheel and the fingers were visually similar with the fork to the right.. but my eyes don't measure in tenths of an inch. I had an OEM fork, though.
 
I'm wondering if these ACTs are incorrectly made with respect to backspacing. When the flywheel is installed, the step itself is sitting a hairs breadth too close to the engine block. Basically, the measurement from the backside where it meets the crank to the top of the step where it meets the pressure plate is too thin.

We measure the step height and get .609 (I did as well) but if the relative distance from the top of the step to the block itself is reduced, that would cause the fork end to go left of center.

Either that, or theyre making pressure plates with fingers that go too damn flat nowadays.
I looked at old photos of my 1g with a fidanza 4 puck and PP with their alum flywheel and the fingers were visually similar with the fork to the right.. but my eyes don't measure in tenths of an inch. I had an OEM fork, though.
I was thinking about that a couple weeks after bolting it all back up. Step height isn't the only important dimension in relation to fork angle. I wish I had measure that too. I'll be sure to next time it's all apart, though I'm not sure of the OEM/target dimension.
 
I just realized last week that the car didn't have a coolant overflow tank and I don't have a great spot in the engine bay for one. I whipped up a simple aluminum bracket, shot it with some black paint, and mounted a universal 1L tank in the front corner under the bumper cover. Good fit and out of the way. Mission accomplished. Next is a custom battery tray for my new lithium battery. Fabbing that tomorrow and I'll update when it's back from the powercoater next week.

Excuse the fingerprints in the paint. I was too impatient for the paint to dry, LOL.

20240927_224847.jpg


20240927_225844.jpg
 
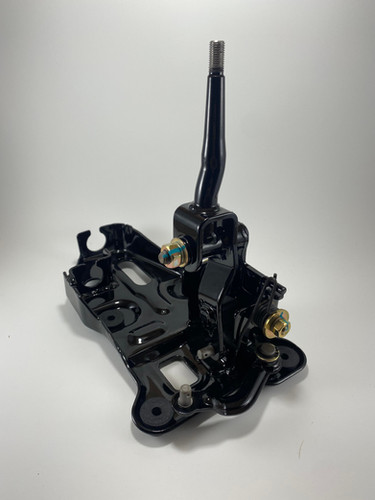
I finally got around to installing the shifter assembly that I scooped up at Shootout '23. These are remastered assemblies by DSM 3D Creations. They do a wonderful job at making these things feel better than new again and these guys are awesome to work with.


20241103_005320.jpg


20241103_005326.jpg


20241103_010147.jpg


I also needed these front bumper supports for this car and discovered that Mitsubishi discontinued these some time ago. So I had a few sets laser cut and coated.

20241112_205230.jpg
 
Last edited:
Add Value - Be Respectful - No Trolling - No Misinformation - Participate Often!
Support Vendors who Support the DSM Community

Build Thread Updates

Latest Classifieds

  • Wanted 1g 1991 Black Cherry Eagle Talon
    5-speed
    • bamatalon
    • Updated:
    • Expires
  • For sale Misc Left Over Parts
    Hello, I have a few left over parts for sale, these do not include shipping, please pm me for a...
    • r3dmak
    • Updated:
    • Expires
  • For sale Alpha Injection Clinic 2200cc for 4G63 DSM/EVO
    I have a set of Alpha Injection Clinic 2200cc high z injectors for DSM/EVO. I am stepping up to...
    • spoolinpos
    • Updated:
    • Expires
  • Wanted WTB 2g half rad
    ISO of a 2g koyo half rad or something equivalent.
    • Michael Wucher
    • Updated:
    • Expires
  • For sale Coilover Springs
    Used pair of Eibach coilover springs from an old set of Ground Control coilovers. 2.5" inner...
    • RamenPride
    • Updated:
    • Expires
Back
Top