


- Thread starter
- #101
Justin DuBois
DSM Wiseman
- 3,326
- 3,297
- Aug 15, 2019
-
Oakland,
California
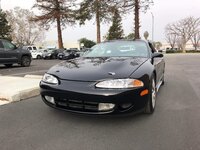
Nope - in the end it will look like a 2GA. Not sure why the holes look hidden.The low wing will be used.Will you be doing a 2gb conversion on this? It looks like the low rise spoiler holes are filled on the rear quarters.

 My tool box sticker collection runs deep.


