DSMtuners is a massive archive of DSM information - but more importantly, it's a COMMUNITY! Join in and participate with other DSMers, and invite all of your DSM friends to make this place their home. Chat with others, create a build thread, post questions and answers. Get involved! Logging in will also remove many of the advertisements, along with this notice. ;)
Positives:
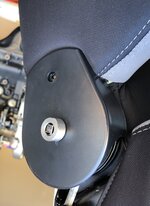
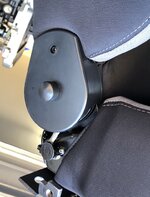
Firm - but not hard, hugs my sides and my hips, belts really snug you in, and the color is perfect. Seat does not touch the door or headliner in any way. Seat slides and tilts WAY far back and really close forward. The recline handles are 1/4" square keyed and can be removed and flipped as you like - in 90 deg positions. This turns out to be important to avoid crushing the handle with the seat belts.
Negatives:
Slightly off center*. Not really "bolt in" but when I'm done it will be. Sparco sliders are set WIDE compared to others and that is actually a problem when you want to get as close to the center console as you can, cause you can't put the inboard slider all the way out on the edge of the bracket. Seatbelt tab could be shorter, and I could not work out a way to bend it cause it's stronger than everything it is attached to. The plastic handles break tabs easy, so if you can work it out to attach them one time and be done, you will thank me.
*I'm still tweaking. Once I shift over 1.25" more I'll check center again.
Other things:
I'm a narrow 5'9" 133lb COVID sloth build. I can slide a bit left and right in the seat, which is totally fine. I'm looking at filling gaps with padding and lumbar support. This falls into the realm of "driver customization".
The R100 Sparco seat height feels lower than stock on WEDGE with the sliders. (wow really?) yeah. I actually lowered my steering wheel, which I usually have in the full up position.
In order to slide the seat over a bit more, I'll be adding 3/16" x1.5" bars on the bottom of the seat, and offset on top of the slider. Wish me luck.
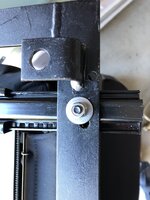
Fixed this
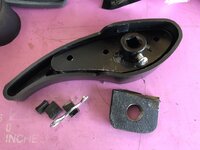
Removed these:
Made this, 3/8" SS collar with set screw, 3/4" plastic cap cover:
Finally - everything where it goes, slider handle bent to fit.
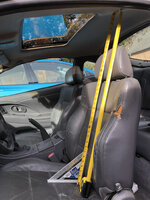
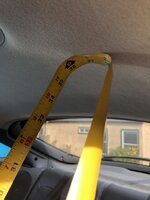
Right up close to the center console without rubbing, still have 3 fingers to the headliner.
The most difficult bolt to reach is now easier to reach (thumbs up)
As close as I can without touching.
Profile view
I tried to replicate the stock seat measurement position for comparison - Note the seat base is less tilted than stock, so the aluminum bar is to the front edge, which compares better.
Passenger side holes drilled and bolted up. Note, I chose to leave a little more room for the inside seatbelt, so a 3pt belt "could" be used, but I'm not. I'm going to remove the 3pt belts and save a little weight/clutter. This solution is slightly heavier than stock at 42.5 lbs, compared to the manual leather passengers seat at 38.2lb. +4.3lbs, so removing the 3pt belts will help offset the difference.
A few curse words at this bracket, which I managed to find a way to bend this time instead of cut, as the offset on the seat is less. I also smoothed off the rough edges on the tab to save my seat fabric.
One of my wish list items is to trigger the Lap timer function on the Stack dash. I "could" just buy $500+ STACK track side beacon and in car receiver - which only does one thing - Press the Lap/Trip button for me.
OR - we go for another solution which offers a lot more capability down the road. RaceCapture! Race Capture is this really nice product that allows for Track GPS, Telemetry, data logging, has CAN bus support to collect data as well as scripting to control CAN bus output, WiFi GoPro camera triggers, custom software dashboards etc. Its one very capable box.
What I'm looking at is using the built in RaceCapture scripting to trigger a CAN bus device that pushes the STACK Lap timer button for me.
The upshot is much more elegant GPS based solution than a track side beacon (which you inevitably forget at the track, or have a hassle to setup and remember)
The best news is the BETA software appears to be compatible with Open Auto Pro version of PiLink. The app Launches!
Started a long overdue maintenance of the rubber at the fuel pump, and inspection of the fuel level sender.
Line wrenches were successful to break loose the high pressure line.
As the OEM hose is un-findable, (seriously, I can’t figure out the part number, and I don’t think it is available even if that were known) the plan is to build a -6an replacement with two -an to bubble flair adaptors from STM.
The Supra Green fuel pump is what we see here, still working. I can finally access the fuel level sender to test it.
Ugh, well I built an OBD2 cable so I could connect into a known good CAN network in my Rav4, only the can dump didn't see any traffic.
O-Scope on the Rav4 CAN showed the High and Low square wave pattern in pulses, CHECK
Resistance Between High and Low CAN bus was 60 ohms, CHECK
This was measured at the USB->CAN adaptor, so I know I got the OBD2 pinout's wired corretly.
I guess now I could try the same in reverse, and put the scope on the adaptor while trying to send CAN messages? Yeah. Lets see what that does. Maybe its just a baud rate issue.
Yeah - nope. This USB to CAN adaptor is too hard to setup for Linux. No aparent support for it in the current version of python-can. Seems to work on a windows device ok.
This USB to CAN Analyzer Adapter can be used with these devices. You can easily import the acquired CAN-BUS data to your computer for analysis. With the help of the supporting software, you can use this USB-CAN Analyzer to develop, test, manage, and maintain CAN Bus network, as well as...