The Central Hub for DSM Community and Information

For 1990-1999 Mitsubishi Eclipse, Eagle Talon, Plymouth Laser, and Galant VR-4 Owners. This is where the DSM platform history is documented and archived. Log in to help us in our mission, and to remove most ads from the browsing experience.

20231029_160050.jpg

My old highschool car

I regret getting rid of this car but have it back again!!!

This site may earn a commission from merchant affiliate links, including eBay, Amazon, and others.

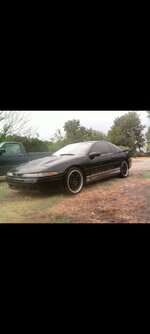
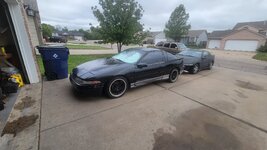
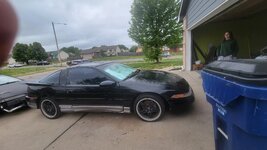
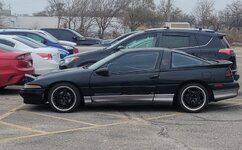
Update, Still running great! Thank you Gary and everyone else that helped.

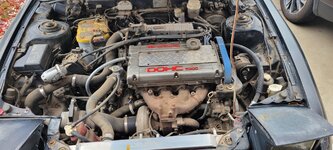
Today I did a full send pull as i watched the gauge. For sure pegged the gauge at 20 psi and I could feel it like start to break up so I got out of it as soon as it stopped being smooth.

Definitely gotta get a lower boost level so I will get the vacuum lines re ran and won't use the T that's in it now.

Sounds good. Yeah the wastegate hose should go to the turbo outlet, and the BOV hose should go to the intake manifold. Two separate hoses, not Teed to each other.

The wastegate hose, you don't want it to get blown off of its connection because if that happens you lose all the air pressure to the wastegate and then all of a sudden you have maximum boost instead of minimum! So that hose should be tied on at each end with a nylon zip tie. I mean that's the simplest way. Most kinds of hose clamps don't work right when they are that small because they don't stay round enough. The small clamps I know of that do stay round are called Corbin clamps. They are spring steel. They should be ok, but you'd have to fool around with finding the right size. Nylon zip ties are easy. My car has nylon zip ties on the small hoses and it's been ok. Oh I see you have a black zip tie on your wastegate in the current setup. Like that is ok.

In a couple days here I'll cook up some reduced timing numbers for those low-LoadFactor areas where you had some knock in the last log.
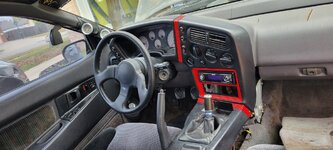
What psi does your boost gauge scale go up to? Does it end at 20 or does it go higher?
 
The boost gauge stops at 20, again thank you.

My voltage is still not going above 12.5 volts. I am thinking the cables themselves might be the culprit from being 35 years old and corroded. This weekend I will be adding a 0 gauge wire going from alternator to battery and add another 0 gauge wire for the ground to body and I'm hoping and thinking I will see a good increase. If not then we know it's the regulator on the alternator.
 
Well today on the way home the injectors clogged full of rust again. Should of put a in line fuel filter before the rail.

About to look up and see what I can do to empty out the tank or flush it out.
Oh bummer.
It could look really awful inside the fuel tank. That's what I would suspect. The "sock" on the fuel pump inlet will be interesting. The stock sock for the stock fuel pump was made actually a lot nicer than the ones that come with the Walbro install kits, so if it cleans up well without tearing it might be re-usable. It has a plastic frame that is pretty sturdy. The screen parts of it are thin and a little fragile, but the original one I took out of my car in 2009 is in great shape with no tears or holes.
Anyway, it's time to take a look inside the tank.
 
From my understanding, the fuel enters the driver side fuel rail and empties back into the passanger side fuel filter then back into the tank right?

For a inline fuel filter to catch rust before the injectors, i would put it before the fpr on the driver side correct? or do i put it on the passanger side?

This is a temporary solution, I am taking injectors back to get cleaned again tomorow & will address the tank issue in time.
 
Last edited:
From my understanding, the fuel enters the driver side fuel rail and empties back into the passanger side fuel filter then back into the tank right?
No it goes the other way. The fuel goes into the passenger side end of the fuel rail and goes out the driver's side end of it.
The stock fuel line is a steel tube from tank to engine bay. It runs under the car and comes up into the engine bay on the passenger side on the firewall and that is where the stock fuel filter is.

So the stock fuel filter is in a good place. There is only a couple feet of fuel hose from the fuel filter to the rail. You shouldn't need to add another fuel filter there since the stock one is already in a perfect place. You can't add like a transparent plastic fuel filter there because the fuel pressure is high, it wouldn't be safe.

I have to wonder why the stock fuel filter didn't stop the debris. Maybe it did and it's clogged to death.
I've never messed with the stock fuel filter and it's not on my car anymore so I can't even look at it. So here I'll post what the FSM has to show for it.
I notice that the Wix filter for this application is actually a "universal" filter. Hmm, don't know how that works out. I'm curious now. Tonight I'll look to see if Mitsu still sells these filters.

fuel filter - 1g DSM from the FSM page 14-103.PNGfuel filter - 1g DSM from the FSM page 14-104.PNG
 
Last edited:
I notice that the Wix filter for this application is actually a "universal" filter. Hmm, don't know how that works out. I'm curious now. Tonight I'll look to see if Mitsu still sells these filters.
Yeah Mitsu doesn't sell them anymore. MB504761

But Wix, and Beck/Arnely, and Hastings all show a filter with MB504761 as an interchange number.
So the Wix 33502 or the Beck/Arnley 0430918 should be good.

The Beck/Arnley has more complete pictures (5 pics) and they have a line in the Features that says "Designed to work with the OE bracket on vehicle if applicable" which should be a plus.
So I'd probably get the Beck/Arnley.
Anyway here they are listed on Rock Auto in the Daily Driver section:
1990 Talon fuel filters
 
Got the new filter out on and the old one was so plugged I couldn't even blow through LOL

I will be replacing the filter every week to get me by and as a prevention.

Dropped the injectors off and here are what the filters looked like next to a new one. I will be picking them up Sunday.

Also got a 0 gauge wire ran from alternator to battery and upgraded ground to body also

20250411_133203.jpg


20250411_184117.jpg
 
Last edited:
here are what the filters looked like next to a new one
Holy cats I don't get it what those filters are. They look tiny. Do they fit inside the hose or something?
The real filters are like 4 inches long and over 2 inches in diameter.
Here's what the Wix filter looks like. The Hastings and Beck/Arnley look pretty much identical.

Wix 33502 fuel filter - is a 'Universal' filter that they recommend for 1990 Talon .jpg
 
Got injectors back and will put them on later today & i have a new fuel filter on.

Before putting the filter on, I pulled the ignition coil pack plug and cranked to flush out line before new filter install.

Almost 500cc for stock 450. Maybe that's normal. idk but sounds good to me LOL😆

20250414_150040.jpg
 
Last edited:
Got injectors back and will put them on later today & i have a new fuel filter on.
Test sheet is interesting - even the worst injector was only down 1.8% from the best one. That's not much. The bar graphs make it look like a lot, but when you look at the actual numbers, it's only the difference between 490cc and 499cc, at the worst.


Before putting the filter on, I pulled the ignition coil pack plug and cranked to flush out line before new filter install.
That's good, although I see "Activate Fuel Pump" on the Misc tab in your V3 Lite.
So instead of cranking the starter, you could just turn on the fuel pump with the engine not running and run the pump as long as you want.
Pic:
ECMlink - showing 'Activate fuel pump' on the Misc tab.PNG


Almost 500cc for stock 450. Maybe that's normal. idk but sounds good to me
Yes that's fine. The factory might have measured them in a slightly different way, could also be why.
 
Here is a log of me driving it today. The voltage is so much better & is where it should be 14 volts while running. Adding a 0 gauge wire from alternator to the battery and adding ofc wire for ground did the trick. Figured the wires were old and corroded.

Thank you, I did not know that about dsm link. That is cool and will definitely use that when i replace this fuel filter in a week.
 

Attachments

Yes, I did the big 3 upgrade on stock electrical. So i actually have 2 0 gauge power wires, 1 is power wire from battery to amp for sub then 2nd one is battery to alternator.

When i started the car & saw 14volts i was excited LOL.

Also, The cruise control i am going to take out. It stopped working and the engine bay looks better without it.

20250414_163243.jpg
 
Last edited:
It looks like you have a large fuse in the big green wire that is laying there. That's good. I like the way the conductive metal parts on each end of the fuse body are covered up by the clear plastic housing around it.
Do you have a fuse like that in the big alternator wire also? It's better (safer) if you do. The stock setup has one - a 100 amp alternator fuse. Actually the early 1g's came with an 80 amp alternator fuse but most of us have put an identical footprint 100 amp fuse in that location.
 
New fuel filter installed and it was a duralast one. It leaked out the bottom. took it out and re installed it, we'll same thing.

So i switched it out with another wix and no more leak.

I would stay away from the duralast fuel filter. Just a heads up for anyone reading or contemplating on what fuel filter to get.

Also I got 3 wix filters shipped to my door for $42 from rock auto. Where 1 wix filter from orilleys is $35

Screenshot_20250425_203421_Samsung Internet.jpg


Screenshot_20250425_192338_Samsung Internet.jpg
 
So i switched it out with another wix and no more leak.

I would stay away from the duralast fuel filter. Just a heads up for anyone reading or contemplating on what fuel filter to get.
Agreed!


Also I got 3 wix filters shipped to my door for $42 from rock auto. Where 1 wix filter from orilleys is $35
Good going!


I keep remembering to cook up some more timing numbers for trying to reduce the little knock areas that we saw at LoadFactors around 0.5 or so. Going to do it!

Also, before you put in your Walbro 255, or when you get close to doing that, be aware that the o-ring that comes with the Walbro install kit is a joke. It is an 8mm ID o-ring with a ring thickness of 3.5mm. The ID is too big. That is one reason why they leak. Another problem is that their install kit assumes you are going to keep the original hard plastic spacer that goes under the o-ring. That plastic spacer doesn't even fit at all on the newer Walbro 255's which are made different on the top now. There is no room for that spacer to seat at all on the newer pumps.
An o-ring would work if it was a 7mm ID o-ring with 4.0mm ring thickness (Usually written 4.0mm x 7mm) and if it had a short section of nitrile hose under it instead of the old plastic spacer. Plus the cap from the install kit on the very top of the pipe. This is actually how English Racing put my 255 in when they replaced it in 2016. The slightly tricky part is getting 5/16" fuel hose that is either nitrile or Viton on both inside and outside and cutting it nice and square on each end to the right length to be the spacer. So I've been working on that a little bit lately with a spare Wally 255 that I have lying around here, and some all-nitrile hose that I have.

That's one way to do it. Another way is to cut the bell mouth off of the pump hanger pipe and use 5/16" submersible high pressure fuel hose (Viton with internal braid) to connect the pump outlet to what's left of the pump hanger pipe. Then you have to secure the pump with 1 or 2 large hose clamps, because you don't have the rigid pipe to hold it in position anymore. Which I'm never going to do on my own car, but it's another way to do it.

Sometime could you shoot a picture of your Walbro 255 so I can see what style the top of it is (newer or older style)? It would be good to have this all sorted out before you even get started on it.

Note: Both the 4mm x 7mm and the 3.5mm x 8mm o-rings have an OD of 15mm. The difference is the ID and how "fat" they are.
 
Last edited:
Yes, I will get a pic of that uploaded and thank you!

I do have a O-ring assortment pack i bought when replacing the O-ring for the power steering pump, so i will see if i have one that size 4mm x 7mm in there.

At some point i need to get the fuel gauge workning. That will happen when i get the fpr & afr gauge to get the fuel system upgraded.

I cant find a new fuel sendin unit tho for these cars tho so hopefully the float is stuck. I have tried multiple clusters and not one worked.
 
Did you test the float to verify it is the problem?

No I have not yet. I do need to tho and maybe the gauge will start working. Also once I am in there I can look around the tank and see what it looks like inside.

Before I can see it I have to remove a floor we put over the rear hump to make the hatch flat for distribution block, amps & etc I had back in the day. Here is what I have in there now. I have had these for over 2 years and only have 1 in there with a small amp. In time I will get it all done but car & home maintenance come first LOL.

Adulting was fun they said 🤣😂

20250429_134003.jpg


20250429_134237.jpg


20250425_104719.jpg


20250404_111820.jpg


20240816_192208.jpg
 
Add Value - Be Respectful - No Trolling - No Misinformation - Participate Often!
Support Vendors who Support the DSM Community

Build Thread Updates

Latest Classifieds

Back
Top