The Top DSM Community on the Web

For 1990-1999 Mitsubishi Eclipse, Eagle Talon, Plymouth Laser, and Galant VR-4 Owners. Log in to remove most ads.

Please Support JNZ Tuning
Please Support Morrison Fabrication

AWD Conversion/Swap Guys Enter Here - Advanced. [Merged 2-07]

This site may earn a commission from merchant
affiliate links, including eBay, Amazon, and others.

This site may earn a commission from merchant affiliate links, including eBay, Amazon, and others.

I am smack in the middle of my spyder AWD conversion (and built 6bolt swap... go figure) and I have a few questions/statements. First, if anyone needs any spyder pictures for locations, let me know and i'll post them.

Question 1 Do you guys have enough clearance behind the AWD fuel tank, once installed, to weld up the rear carrier bearing bracket? Or should I install the tank AFTER i weld it in? The guide says to do it after you install the tank, but it doesn't look like there will be room to weld.


Question 2 (the hard one) This is mainly for spyder owners. Everything has gone PERFECT so far, with one exception. The stupid front bolts for the subframe. The new location for them would normally be easily accessible from the top on a regular GST/TSI, but the frame for the convertible top is covering the area. There would be so much drilling, cutting, and welding to get that convertible frame off to cut the hole for the bolt that it would make the whole swap not worth it. How the hell did you guys get the new bolts in???? The only thing I can think of is actually going under the car and cutting a rectangle into the side support frame that the bolt is supposed to drop into, put the bolt in, then weld it shut again. Cutting sheet metal is one thing, but I want to make sure I am not compromising the integrity of the bar that the subframe bolts to by welding it back shut.

If we figure this out, I'll put together a modified walkthrough for spyder owners.

If the second part of question 2 doesnt make sense, tell me and I will take pictures of what I am planning to do.
 
Edit: both of mine are 1G's

Also, what kind of welders are you guys using? Arc?(seems like they wouldn't be best suited for this) MIG?(seems ideal to me, just wanna be sure)
This thread pertains to 2G's only. 1G's are totally different design and much less practical to swap due to a much higher difficulty level.

Yes, I used a MIG welder for mine.
 
This thread pertains to 2G's only. 1G's are totally different design and much less practical to swap due to a much higher difficulty level.

Yes, I used a MIG welder for mine.

Yes, I shortly found that info after looking here. There's no driveshaft tunnel in the 1g's :(

Awesome, I'll look at investing in a MIG
 
I am smack in the middle of my spyder AWD conversion (and built 6bolt swap... go figure) and I have a few questions/statements. First, if anyone needs any spyder pictures for locations, let me know and i'll post them.

Question 1 Do you guys have enough clearance behind the AWD fuel tank, once installed, to weld up the rear carrier bearing bracket? Or should I install the tank AFTER i weld it in? The guide says to do it after you install the tank, but it doesn't look like there will be room to weld.

It's best to first weld the carrier bearing bracket in place, then mount the fuel tank, and then the subframe. Make sure you hook up the fuel tank's filler neck before mounting the subframe. That was a mistake I made and it resulted in me dropping the subframe to get to the filler hook-ups. There's probably enough room to weld the carrier bearing mount in after everything else is already installed, but I'm sure it's much easier to do it without the tank in the way.

Regarding the front Spyder subframe bolts, IIRC, most guys cut and removed that convertable frame section. Then after inserting the sunframe bolts, you weld/reattach the frame section. Make sure this is correct though. Mine is not a Spyder, so I don't know about this part from experience.
 
I did exactly what you said and cut a rectangle in the side of the "frame" then welded it back up. I just looked through my awd swap pics and could not find a pic but thats what I did and I havent had any problems. Mine has been done for about a year and 8 months and I did mine on a budget with probably less tools then anybody. I am proof you can build a awd Spyder and motor and rewire one with a hammer, hand tools, solder, soldering iron and a cheap socket set. :thumb:
 
I am almost finished doing an awd swap on my GS-T(Waiting to get back the tranny from getting rebuilt). Me and my buddy did it in two days, it really isn't very difficult. If you are too attached to sell your fwd dsm and have the time, money, and tools then I say go for it! :thumb:
 
Another quick question for the Spyder guys-- the cross-bracing that is installed behind the convertible top storage area looks like it's partially covering the area I would need to cut away to access the rear subframe bolts. That's at least what I can tell when guessing from underneath the car and comparing the location of the cutting I did inside the donor car. Were you guys able to completely remove the rear bolts without disturbing these braces? It looks like there's maybe enough clearance behind them, but that's not something I'm willing to test without knowing for sure.

Any experience (or better yet, pics) regarding this would be really appreciated.
 
I have a small issue as well.

Everything works smoothly after the swap, except for one thing. I don't have a working fuel level gauge anymore. I'm sure this has happened before - I just do want to rush into it and replace the sender if I'm unsure of the problem.

What did you guys do to diagnose where the problem is coming from? I'm pretty sure my wiring was done correctly, but I'm not 100% sure. Is there a way to test a sending unit to see if it's fully functioning?
 
Another quick question for the Spyder guys-- the cross-bracing that is installed behind the convertible top storage area looks like it's partially covering the area I would need to cut away to access the rear subframe bolts. That's at least what I can tell when guessing from underneath the car and comparing the location of the cutting I did inside the donor car. Were you guys able to completely remove the rear bolts without disturbing these braces? It looks like there's maybe enough clearance behind them, but that's not something I'm willing to test without knowing for sure.

Any experience (or better yet, pics) regarding this would be really appreciated.

I am at the same exact point. I was able to get the passenger side without any problem at all, but the drivers side is literally covered up but the X frame support. How the hell did you guys get that bolt out? Did you cut out the X frame? I hope not. This is the last piece of the puzzle too. : /
 
I was thinking about my problem last night. I can't really tell, but it looks like there is only one bolt holding the X bracket to the floor. I don't see any welds, but I may have missed them. If you make a straight cut across the pipe and unbolt it from the floor, it may come right out. It should be fairly easy to weld it back on to the pole.

The only problem is that there is only one way to find out and if it is welded on to the floor; if it is, you are in trouble. Can someone confirm that these are not welded, but only bolted to the floor?
 
You were able to get the passenger side out by cutting behind the bracket? Looking at mine it appears that the bracing is completely symmetrical, so it seems weird that you'd be able to get to one but not the other. Any chance you feel like posting a pic?
 
No, it's not symmetrical. That's what I thought at first too! I'll post pics tonight when I get home. I cut the right side out without a hassle through the trunk of the car. I cut a hole in the same spot on the drivers side and there was nothing under where I cut. Then I looked closer at the frame and discovered it is about an 1-2" further back toward the back of the car, effectively covering the bolt.
 
Right you are, Sir. My problem was that I hadn't yet removed the passenger side trim panel in the trunk, which effectively masked the difference in locations. Looking at it again, I see exactly what you mean.

I called the fellas at RRE today and discussed this for a little while with them. They also confirm that we'll need to cut out the lower portion of the brace to access that bolt. If they're able to dig up a picture of it, I'll be sure to share it with you. In the meantime, I've got plenty of work to do with the fuel tank and carrier bearing mounts to keep me good and occupied.
 
Done and done. I'll post pics as soon as I get them off my phone.

I made a cut in the middle of the lower left part of the X. The corner piece came right out and I was able to drop the new bolt in. All I have to do is weld it back up where I cut it.

I can confirm that the bottom piece of the X is NOT welded to the frame, it is only bolted and glued.


Let me give you some carrier bearing advice. The first one by the tank isn't hard to place correctly. Get it in. For the next one, if I could do it again, I would put the full rear end in, mount up the driveshaft into the rear end and first carrier bearing bracket, have someone hold the front up OR put it in the transfer case if you have the tranny in, THEN tack the bracket on. Perfect alignment. I think mine was a little off because the bolts don't line up 100% correctly in the holes. It still goes on, but it isn't dead center in the bolt holes.

pics soon.
 
Let me give you some carrier bearing advice. The first one by the tank isn't hard to place correctly. Get it in. For the next one, if I could do it again, I would put the full rear end in, mount up the driveshaft into the rear end and first carrier bearing bracket, have someone hold the front up OR put it in the transfer case if you have the tranny in, THEN tack the bracket on. Perfect alignment. I think mine was a little off because the bolts don't line up 100% correctly in the holes. It still goes on, but it isn't dead center in the bolt holes.

I'd recommend using your existing carrier bearing bracket up front. The FWD bracket works fine.

I used a spot weld removal bit and cut mine off my GST. Then I purchased appropriate bolts and welding them on through the backside. Then I grabbed some .500" tubing and a couple washers and fabbed up some exhaust hangers to weld to the bracket. Then, when you line it back up on the car, all of your drill holes will line up, ensuring that you have it welded back perfectly straight in the factory location.

And like you said, the rear is pretty easy.


PS - Do me a favor guys; when you do the fuel tank wiring, can you please verify that my diagram is correct? Report back with any discrepancies and/or findings.
 
Thanks for verifying that, Sharkcus. I was pretty sure the bracket wasn't welded in, but I wouldn't have been surprised if it was. I've already wasted the effort pulling the front bearing mount off the donor car, so I'll probably go with that one still, but tack it on after the rear end is in like you mentioned. Funny, I had contemplated doing exactly that before, so it's good to hear it would actually be worthwhile.

Paul, it looks like your method is pretty much what RRE does, or at least did on the car I saw. From their pictures, it looks like they didn't even fully remove the bracket from the car, but I can't be sure of it. You be the judge:

http://www.roadraceengineering.com/eclipsetech/awd2gconversion/arispyder-centerdriveshaftbolts.jpg (Courtesy of RRE)

Oh, and I'll be sure to get back with you as well after I've wired my fuel tank.
 
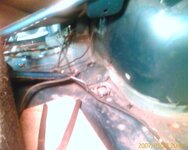
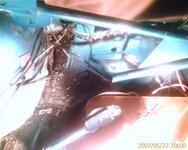
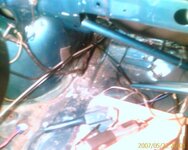
Here are the pics. Bad quality, but I didn't have my camera with me, just my phone.

104: Drivers side where i cut the support.


105: Passenger side where I cut before the bracket.


106: Drivers side again.
 

Attachments

  • IMAGE_00105.jpg
    IMAGE_00105.jpg
    40.5 KB · Views: 1,424
  • IMAGE_00104.jpg
    IMAGE_00104.jpg
    48.7 KB · Views: 1,387
  • IMAGE_00106.jpg
    IMAGE_00106.jpg
    45 KB · Views: 1,369
I am also HUGELY interested in a fuel tank wiring diagram with verified fuel gauge operation. I have the same problem as mentioned by 99gst_racer using his diagram. Can someone give a little insight please? My wife won't even drive it until the fuel gauge works... go figure.
 
I am also HUGELY interested in a fuel tank wiring diagram with verified fuel gauge operation. I have the same problem as mentioned by 99gst_racer using his diagram. Can someone give a little insight please? My wife won't even drive it until the fuel gauge works... go figure.
Interesting.

I hope someone finds a simple error with my diagram, so I can fix it and my car. Keep me posted gentlemen. :thumb:
 
Interesting.

I hope someone finds a simple error with my diagram, so I can fix it and my car. Keep me posted gentlemen. :thumb:

I used your diagram and my gauge works. The only thing is that the gauge reads a little over half full when in reality the tank is completely full but I do not think that has anything to do with how the wires are connected. That seems like more of a sender unit problem :confused:. Everything else is working great so a small detail like this doesn't bother me :rocks:
By the way, AWD is awesome! I will never own another fwd dsm again :p
 
I am smack in the middle of my spyder AWD conversion (and built 6bolt swap... go figure) and I have a few questions/statements. First, if anyone needs any spyder pictures for locations, let me know and i'll post them.

.

I just bought a donor car to do an AWD conversion on my spyder. I must admit that I am already having second thoughts.......
Has anyone kept an acurate time log of of how many hours the conversion has cost them?
Estimates?

I will start stripping the donar this w/e what should I be trying to save? I notice some mention of the long square head bolts - are they worth trying to save or would I save a lot of time by replacing them?

sharkcus I would like all of the picture that you have - I will pm you with my address, thanks.
John
 
I just bought a donor car to do an AWD conversion on my spyder. I must admit that I am already having second thoughts.......
Has anyone kept an acurate time log of of how many hours the conversion has cost them?
Estimates?
Depends. If you have a welder and a lift and air tools, it really speeds up the process.
Your personally level of skill also plays a large role in quickness of completion.

Now that I've done it once, if I had a lift, I could probably do one again in 2-3 days with one capable helper.


Freight your cars over to me - I'll do the swap for you. :D
 
Last edited:
Depends. If you have a welder and a lift and air tools, it really speeds up the process.
You personally level of skill also play a large role in quickness of completion.

Now that I've done it once, if I can a lift, I could probably do one again in 2-3 days with one capable helper.


Freight your cars over to me - I'll do the swap for you. :D

I have a welder, air tools, cutoff tools, floor jacks and a overhead crane. I can not lift the car in the air so will be crawling under it on jack stands and the like.
I have never taken on a project quite this big, just the usual engine rebuilds and clutch replacement.
The project itself does not scare me, just the amount of time required. I would hate to have my car in the garage for the next two months. I may even pull the parts and do the swap this winter. Beside the center driveshaft carriers is there any hardware type items that I need to make sure to remove?

If it weren't for me having to wait for my tranny to get rebuilt, My buddy and I would have finished this project in about 3 days. You need to remove the stock fwd gas tank mounts. Everything will make a lot more sense once you have everything out of both cars. Good luck
 
Support Vendors who Support the DSM Community
Boosted Fabrication ECM Tuning ExtremePSI Fuel Injector Clinic Innovation Products Jacks Transmissions JNZ Tuning Kiggly Racing Morrison Fabrications MyMitsubishiStore.com RixRacing RockAuto RTM Racing STM Tuned

Latest posts

Build Thread Updates

Vendor Updates

Latest Classifieds

Back
Top