- Thread starter
- #26
TCB91GSX
Proven Member
- 259
- 251
- Jan 11, 2021
-
Denver,
Colorado
Follow along with the video below to see how to install our site as a web app on your home screen.
Note: This feature may not be available in some browsers.
For 1990-1999 Mitsubishi Eclipse, Eagle Talon, Plymouth Laser, and Galant VR-4 Owners. This is where the DSM platform history is documented and archived. Log in to help us in our mission, and to remove most ads from the browsing experience.

This site may earn a commission from merchant affiliate links, including eBay, Amazon, and others.
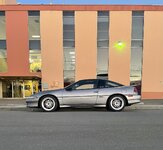
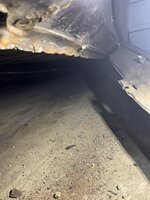
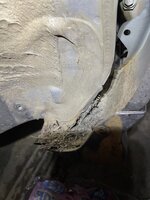
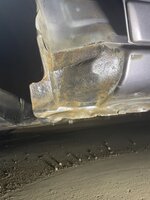
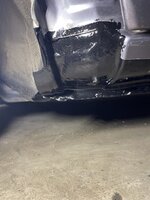
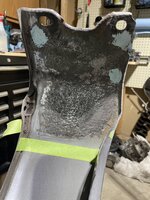
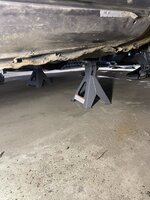
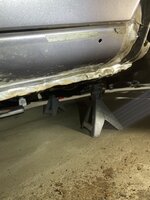
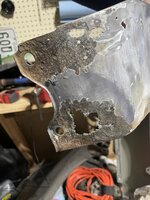
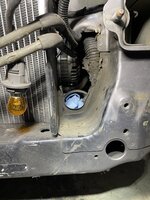
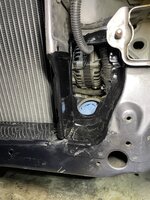
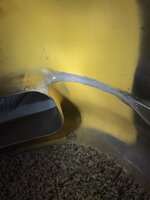
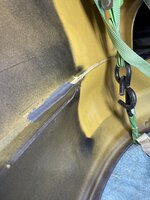
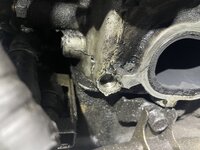
I found the same when I removed my fender. It rusted the lower part of the fender. Everyone with a 1g should take a lookMy pinch welds have always bothered me on this car as the driver side was bent completely into the frame but that’s not what started where I’m at right now.
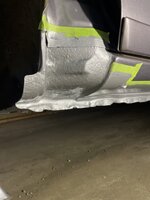
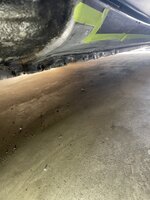
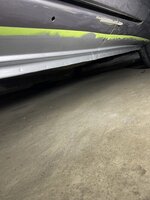
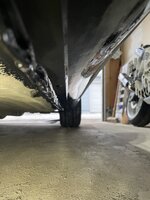
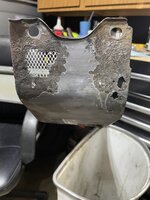
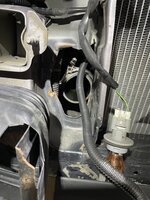
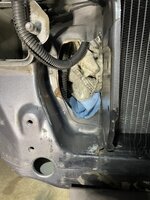
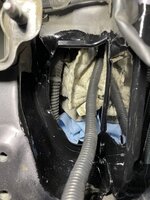
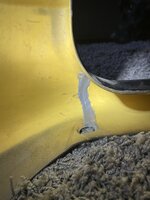
When entering my car I noticed some pine needles/dirt/leaves in between my fender and the body of the car when the door is open. Thought to myself, I should clean that out one day. Well here we are. I tried to brush it out with the door open and made little progress. Fast forward to pulling my fender liner and then pulling my fender off to the mound of dirt I found back there. Down the wormhole we go, so I after the fender, I pulled the side skirt and that thing just had literal chunks of built of dirt in it. Surprisingly only broke one of the bottom fender bolts and luckily it was the outer one. Some torch and vice grip time later I was able to work out the shaft of the bolt and keep the threads intact.
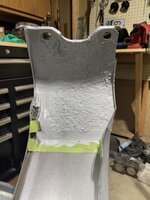
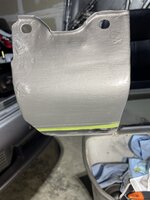
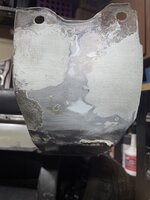
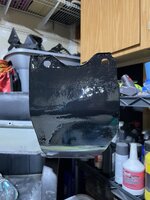
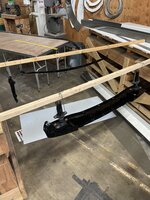
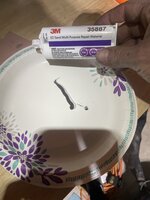
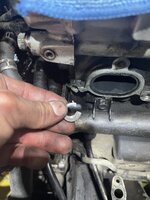
Next I used some heat and an adjustable wrench to straighten out my pinch welds. I am in the process of prepping for Rust Bullet automotive/black shell coating. Looks like it makes sense to do the entire length of the pinch weld and the interior of the fender. I found minimal rust so I’ll continue to clean it up and use the coating to contain it.
This is a laborious task with little reward…
….. anyways I recommend taking a look behind your side skirt/fender next opportunity you have.

If the passenger side goes as well as the driver side I can manage. I am worried about the lower fender bolts, but we'll see! I hate drilling out bolts.The reward is knowing there is no longer a bunch of mud packed in the car and a rust-time-bomb ticking.
I never regret doing this kind of deep clean/maintenance on my car. It’s from Florida, and fine white sand is EVERYWHERE. The only regret is when I break something in the process, which definitely does happen.
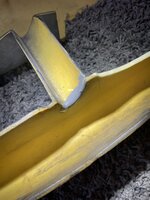
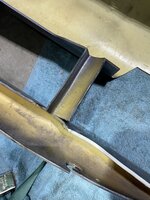
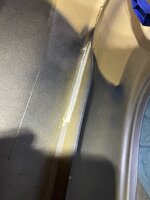
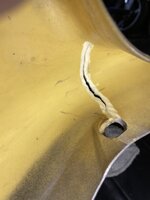
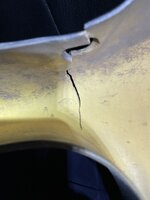
 . After stripping it further, it looked like Swiss cheese. Very sad.
 ")

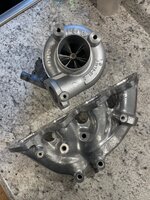
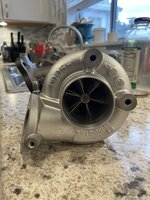
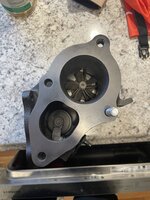
Bastard 20G built by the legend & cerakoted Evo3 manifold. Just received the turbo. Sourcing gaskets and should have this on soon!
It is the 5/5 TD05HF turbine, so if that’s the one you speak of then yesIs that the new 5+5 turbine wheel? Supposed to be the cats pajamas as far as spool and power goes. Where did you get the cerakote done?
Keep us updated on spool and general power characteristics. Looking good. Definitely could not live without my A/C though.
 .
.It is the 5/5 TD05HF turbine, so if that’s the one you speak of then yes
I purchased it cerakoted, I’m hoping it holds up. It was more of a it happened to be cerakoted and I bought it vs I bought it based on that aspect.
Will definitely report back and post a video or two.
This car is pretty weekend/nighttime specific so no a/c isn’t really too bothersome for me but it cools off pretty well in the evenings here so I could understand not being to live without in a different climate !