The Top DSM Community on the Web

For 1990-1999 Mitsubishi Eclipse, Eagle Talon, Plymouth Laser, and Galant VR-4 Owners. Log in to remove most ads.

Please Support JNZ Tuning
Please Support ExtremePSI

Blue Bones

This site may earn a commission from merchant
affiliate links, including eBay, Amazon, and others.

This site may earn a commission from merchant affiliate links, including eBay, Amazon, and others.

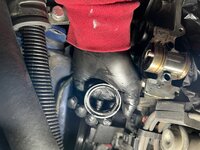
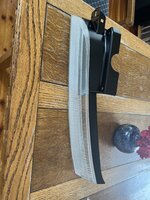
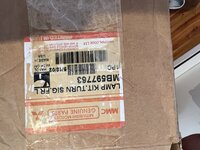
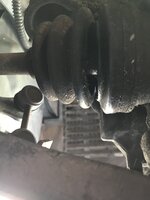
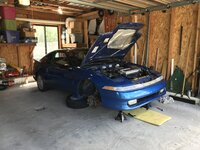
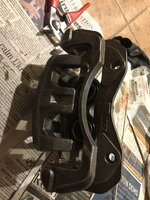
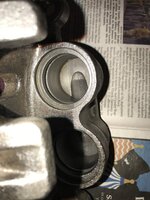
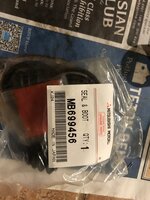
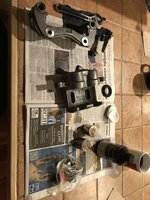
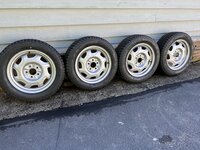
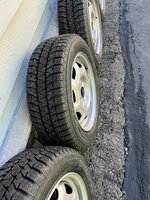
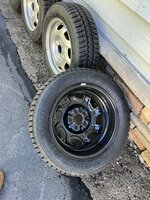
I finally started obtaining some parts and specialty tools the past two years for the car I've been waiting 20+ years to finally rebuild. I'm starting to get terrified I've waited too long with all the NLA parts talk. I know I can't but wanting to just go max out all the cards and buy everything I can now for the build. I don't know what I'll do if I can't finish this life long goal. FML.
 
Got the new tranny in, but no shocker: the unshimmed pivot had the fork end just left of center in the bellhousing window. So I pulled it back out again.

7C57705B-B00F-4847-BE89-C94784F43339.jpeg


5DFD0FAF-A9F8-424C-88EF-898B788A396A.jpeg
 
It was actually harder to separate the trans and motor this time. Had to get under and pry a bit. But it came out OK. Used a floor jack to remove and install it twice by myself. You can pump the jack with one foot while your hands are guiding the trans home.
I used a fairly stout grade 8, 3/8” washer to shim. Now the fork rests about one fork-end-width to the right of center.
Really want to work on it more, but too cold in the garage to get anything done.

27B56945-5C12-4A09-9299-509A12EE1ACA.jpeg


A06FE71B-DE59-4560-BC63-25495904D184.jpeg


21C8D386-D955-444B-8708-C99CA2DAE8DA.jpeg


19F1068E-2010-4237-AD41-5DCB275AF35F.jpeg


9D1C4007-255B-4809-91AC-387BEAD01B14.jpeg


23B20278-BABD-4B79-8066-4B0F7AC6237F.jpeg
 
Progress notes on the trans swap: Prop shaft all mounted and torqued. Front driveshafts reinstalled, new axle washers and nuts torqued. New transfer case installed. Slave mounted and hydraulic lines fastened. System filled and bled (initial).
Went to adjust the shifter. Found that the cable and the shifter arm were now misaligned, when they used to be OK with the old trans. After comparing a lot of old & new, I swapped out the selector lever on the transmission for the one off my old transmission. This is the bracket with bell crank mounted that conveys the selector cable movement to slide the control rail up and down. While they looked the same when compared side by side, mounting the old bracket on my new transmission helped with the alignment considerably. If I take a dremel to the ends of the cable and cable eye threads on the selector at the shifter end, and lop off about 3-4 threads per side, it could be made just perfect, in terms of shift knob centered side-to-side.

I forgot that I had to drain the motor when I did the rear main seal, so yesterday I got new oil & filter. Funny how fluids are really parts of the car, but we don't think of them that way. You don't worry about lug nuts leaking onto the driveway, but every fluid in the car not only has to be the right composition and amount to do it's job, it must stay contained within the vehicle system needs it.

I have it on my list to next adjust the clutch. This would be by turning the m.c. pushrod in the clevis fork. Only the more I think about how I did this the last time according to Jack's Transmissions video, the more I wonder why I would need to perform this again. Essentially it describes that the right process carried out will adjust the m.c. to provide the greatest volume of fluid to the slave cyclinder, thereby producing the most travel in the clutch fork/ t.o. bearing possible, exerting the most release movement of the pp. So by swapping out the transmission, clutch, and whatall in the engine bay, I haven't touched the m.c. or pedal. So why would I re-adjust those? It should already be supplying the max volume of fluid by depressing the pedal. I still may have some final bleeding to do on the circuit, but I might take it for a test drive, and do the clutch-drag check before fiddling with it further. Only the intake and battery left (and getting off jack stands) before I get this thing driving again. Even the outside temps are cooperating. After weeks of -10 overnight, we're now getting balmy +10's and even some +20's in the morning. My garage got so warm the other day that the ice on the floor started melting!
 

Attachments

  • IMG_6974[1].JPG
    IMG_6974[1].JPG
    396.6 KB · Views: 57
  • IMG_6972[1].JPG
    IMG_6972[1].JPG
    426.9 KB · Views: 53
Went to adjust the shifter. Found that the cable and the shifter arm were now misaligned, when they used to be OK with the old trans. After comparing a lot of old & new, I swapped out the selector lever on the transmission for the one off my old transmission. This is the bracket with bell crank mounted that conveys the selector cable movement to slide the control rail up and down. While they looked the same when compared side by side, mounting the old bracket on my new transmission helped with the alignment considerably. If I take a dremel to the ends of the cable and cable eye threads on the selector at the shifter end, and lop off about 3-4 threads per side, it could be made just perfect, in terms of shift knob centered side-to-side.

This is bugging me a little - about the mis-match somewhere in the shift linkage. It looks like all your stuff is 1990. The shifter I can see is 1990 and you bought that new OEM just a few years ago right? The trans is 1990 and rebuilt by a guy who totally knows what he is doing. The cables and brackets I don't know what they are. It seems to me that if everything is 1990 and it's all bolted to a 1990 car, it should all line up. What about this bracket that is shown in the last 3 pics on this vfaq page? You've got that 1990 too?
Also in the 2nd paragraph way at the top of the article Tom says this "The shifter arms on the trannies are different too (91-up have different length arms)"

http://www.vfaq.com/mods/shifter-diffs.html
 
Last edited:
Everything is oem for a 90 as far as I can tell. The selector pivot arms ( mounted on the tranny) look very similar to the eye, but swapping the “new” one that came on the rebuilt tranny for the one that was already in the car solved 85% of the mismatch. The shift knob doesn’t sit perfectly centered, but it’s shifting ok. Keep in mind that I purchased the core for my rebuilt trans from another dsmer, and perhaps it had been used in a 91+ at some point, and the selector pivot assembly could have been switched. According to the parts catalog, there were actually two different part numbers for the “90” models, so not sure how that factors in. Actually took it for a short test drive last night. Worked well for first time out. I tried the clutch drag test and did get the car to roll slightly around 6k rpm. I’ll repeat the bleed and adjust again. Ultimately the cable mismatch issue can be solved with a dremel cutoff wheel. I might get a die and cut more threads on the cable end.
Otherwise, I’ve now done a trans/clutch replacement, so a little proud with that. Wasn’t super hard, but certainly not trivial from a wrenching perspective.
 
Forgot to post these showing that Ive finally removed the “noise reduction filter “, as it is termed. I can’t figure if that means noise as in what people hear (so acting as a muffler of sorts), or is it noise as in an electrical sensor (the air flow sensor) that somehow allows the air flow readings to be more accurate? I’m sure so many folks have removed this that if there were drawbacks, it would be discussed.
Couple this ‘mod’ or ‘hack’ or whatever describes it with my, emm, performance cat, and Im jumping on the tuner-train.whoop-whoop!
Drove the eclipse to work today, and my wife even carpooled with me. Had time before we left to swap out the “passing control” relay and now my pop-ups are popping up for the first time since I’ve owned the car.

75A5D97F-D635-4E36-8627-DEFC5FB8061F.jpeg


B676FF8C-9864-498D-AEFE-5A5AC9C16891.jpeg


966A0A62-D110-4BD5-B4E2-F21976AE5C61.jpeg


8307DB03-CB6A-40C3-BAC8-5E59D73D1A3F.jpeg
 
Finally rebuilt a twin-piston caliper. This thing was a dirty, rusty mess when I acquired it. I did all the wire bushing, sand paper, and Evaporust soaking you’d expect. Used an oem rebuild kit and it took a bit over an hour to assemble. Getting the seals in their grooves was a tricky; it seems like their too long until their in. The dust boots were a bit trickier still. Packing a little orange grease above the piston circumference with a toothpick, I found it best to have the piston all the way in the cylinder. Getting the lockwire in was easier than I was expecting.

I have a purchased an alreadyrebuilt caliper (Nugeon??) for the other side. This Spring I should be able to get rotors and pads, and swap out my single piston fronts. I did get the twin-piston prop. Valve, too. I’m sure I’ll do the hoses while I’m at it.
 

Attachments

  • 1941C266-DB3C-4E8B-9DF3-683D3770AC54.jpeg
    1941C266-DB3C-4E8B-9DF3-683D3770AC54.jpeg
    441.3 KB · Views: 50
  • 113953BB-EF8D-444C-846A-49D64CB1198D.jpeg
    113953BB-EF8D-444C-846A-49D64CB1198D.jpeg
    455.7 KB · Views: 49
  • EE81CAAF-B6DF-45F5-96B2-AEDCAC17F880.jpeg
    EE81CAAF-B6DF-45F5-96B2-AEDCAC17F880.jpeg
    422.7 KB · Views: 48
  • 271FF866-1BE8-4BD2-B2F1-FCF820B36D08.jpeg
    271FF866-1BE8-4BD2-B2F1-FCF820B36D08.jpeg
    555.9 KB · Views: 51
Latest report on this car is I’m finally getting to Drive it! I have a new job and now must commute 32 miles each way. The fun part is that I go in the opposite direction of traffic, and often I will go 10 or 20 mile stretches without being behind another vehicle. The FUNner part is the route goes over Teton Pass, which has about 2,000ft. vertical rise, and all the twisties and scenery that you’d expect in the Heart of the Rocky Mtns.

Items I’m currently postponing include finding and fixing an oil leak in the ofh region (even though I have the gaskets and seals to do it). It doesn’t get the tbelt wet, so ignoring it for now.
I also need to change trans and xfer lube, as I’ve now gone at least 500 mi since installing them. Probably shouldn’t put that off much longer. I did get some snow tires today, Blizzak WS90 for $111/ea. I have an order placed for 4 factory dsm 16” steel wheels. Curious what condition they will be in, but probably not a high demand ($80/ea., but $150 shp for 4). So with mounting cost will be just over $1k for a winter set. Will come in handy on the new commute when December rolls around.
I will need to get the pop-ups working, and there is a rain leak in the lift gate to chase down. Milage has been 27.5mpg, and I’ve not been light on the go pedal.

E69652DE-6C67-4176-889D-B798F418C359.jpeg
 
The FUNner part is the route goes over Teton Pass, which has about 2,000ft. vertical rise, and all the twisties and scenery that you’d expect in the Heart of the Rocky Mtns.

Oh man, I haven't been on those roads for a really long time, but my fave roads of all time were those mountain roads in Wyoming, Montana, and Idaho. I think Alt 14 (14A) was my favorite one. But then Highway 212 over Bear Tooth Pass was another. And Highway 12 over Lolo Pass. In those days my cars were first a 1965 High Performance 289 Mustang, then a 1968 SS350 Camaro, then a 1970 Peugeot 504. Yeah it was a long time ago. Teton Pass was a little far south for my usual drives between Washington and Wisconsin. So it's possible I was never there. I'm trying to remember haha!
Enjoy!
 
Winter ready!
Original steel wheels and Blizzaks. Now I need new lug nuts and maybe some center caps.
 

Attachments

  • F6028F89-41FC-4FC6-ACAB-831113341CA3.jpeg
    F6028F89-41FC-4FC6-ACAB-831113341CA3.jpeg
    798.4 KB · Views: 37
  • F7CAC3D1-F132-4CA5-9352-714915744539.jpeg
    F7CAC3D1-F132-4CA5-9352-714915744539.jpeg
    635.5 KB · Views: 38
  • 192D10D7-40A6-4C51-9B80-141D17BA9B11.jpeg
    192D10D7-40A6-4C51-9B80-141D17BA9B11.jpeg
    830.2 KB · Views: 42
  • 1C68C86A-5106-464D-B2A0-9EC8256C7F71.jpeg
    1C68C86A-5106-464D-B2A0-9EC8256C7F71.jpeg
    934.1 KB · Views: 36
100k mi !!
When I bought the car it had 94K and change. This morning's commute ticked over 100k, right in downtown Victor ID. It was fun to watch all those digits turn at once. I hadn't really thought about how that would look, and it was kind of fascinating. Now I wished I had video'd it, but it might have caused me to crash.
 

Attachments

  • IMG_8439[1].JPG
    IMG_8439[1].JPG
    308.7 KB · Views: 43
Suspected fuel delivery issues. Very hard cold start (almost impossible w/o starting fluid), and one episode of driveability issues. Also seeping fuel tank drain plug. Just drained tank and removed pump. Some rust inside. Plan to check pump and fuel gague sending unit w/ multimeter, and replace fuel filter. Also have replaced spark plugs (didn’t solve starting issue).

Once I get the tank drain plug to stop seeping, I can get it in the garage on stands, and examine the p/s leak (completely empties in 1-2 days).
With my first DSM I had the same problem that the car wouldn't start without starting fluid turned out to be the sensor in the thermostat housing that sends the temperature to the ecu. After I replace it the car started fine.
 
Got the car running again after clutch MC failed at a stoplight. Ended up replacing slave, all pedal bushings, swapped 2G clevis rod, new brake MC, replaced a crappy short shifter with an OEM + new bushings and 2g knob. Clutch engagement is now near top of pedal (per Jack’s instruction video), and shifting is far improved. With the shorter knob, thows are about the same as the short shift w/ 1g knob. Also, finally, a few easy fixes. I have gotten the cruise control working by simply installing the little rubber bumper on the clutch pedal arm. Would have been nice to have had it working when I drove cross-county. Also got around to reading the fault causing check engine light. Using a $10 analog meter, got code 31: knock sensor. Popped the hood to find it was simply unplugged. Plugged it back in, No more fault! Up next: getting headlight pop-ups and rear wiper working. After that will be chasing down some squeaks and rattles.
Can you provide a URL for “Jack’s instruction video”?
 
I started to this morning but had to head out for day’s adventures.
Thanks Dericsh.
I will say that there is a load of info posted on Jack’s website, so worth poking around when you have the time.
 
So I am finally addressing my oil leak, now that temps here are getting into the teens at night, 30's daytime, and my little space heaters are good for about 20F above ambient. I have removed the alternator which is caked in oily grime. This is what I believe is causing some phantom warning lights to glow dimly or flash (battery, brake and coolant level, all exactly in sync).

I've gotten as far as removing the OFH at this stage.It has seemed like one of the most oily parts every time I looked under the car. Will likely remove the front case, cam seals and vc gasket. There is no shortage of oil all over the place, driveway included. Note the nice groove my ac belt has been chewing in my lower timing cover. I bought that new from JNZ not more than a year or two ago (losing track of time) to replace one that was about sawed in half. That was when I did the tbelts and all associated pulleys. Josh advised me to put some loctite on any bolt that did not have a lock washer. Did I follow that advice? No, I was much too smart, and knew if I just torqued them properly they'd stay nice and snug. Let's just say that a few of the bolts were missing entirely, and several others were finger loose. Trying to decide if I want another new lower cover, or if I can put some kind of thin patch on the inside of this one. I should probably just pony up and pay the $125 penalty for stupidity. Add in the $26 for a bolt kit, since they are specific lengths, and would be difficult to sub in hardware store pieces. Also my upper cover has a crack (that way when I bought the car), so I should probably do that one. Only the black ones are available now. Too bad, I kind of like the silver. Trying to decide if I should replace the timing belt, though it looks dry and only has a few thousand miles. There is some oil inside the covers, though it seems like it has stayed off the moving parts, and has just been seeping along the front case. Could be cam seals, vc, maybe balance shaft seal... I'm replacing all that stuff.
I'm also going to change out my lower arm ball joints while the wheels are off and it's all lifted up. Also need a new washer nozzle, and fix the pop-ups. Winter means more driving in the dark, and I don't like driving with the lights up all the time in "manual" (hand crank) mode. They're cool when they work. Right now, not so cool.
 

Attachments

  • IMG_8730[1].JPG
    IMG_8730[1].JPG
    407.3 KB · Views: 48
  • IMG_8736[1].JPG
    IMG_8736[1].JPG
    592.7 KB · Views: 48
Yeah, I don't know how many of those lower timing covers (MD141454) are still in existence new, but STM is selling their remaining stock at x2 the price. I do see them for $126 still on MitsubishPartsNow. That's about what they were in 2018. So it might be now or never!

I’m a little puzzled though about why the AC belt is such a problem for the cover. I’ve never had one on my car, so I don’t have any experience with it.

The bolt kit that I see, like on RTM, looks pretty good, looks like the right stuff. If you ever wanted to buy bolts like that some other way, you can usually get them from Bolt Depot. I imagine you’ve bought some from them already. There are 2 pages on their site that cover it I think, and that’s where I bought mine.
JIS flange head, class 10.9, 6mm x 1.0mm, zinc plated. In some cases you’d wind up using bolts that are 2 or 3 mm longer than what the VFAQ shows. The OEM bolts are lower class than 10 but otherwise are really good quality. My usual thing with bolt depot is I’ll buy 4 or 5 times what I actually need at the moment, so I wind up with all this stuff in stock at home, plus a selection of stainless steel, allen head, and class 12.9 bolts.

https://www.boltdepot.com/Metric_fl...Zinc_plated_class_10.9_steel_6mm_x_1.0mm.aspx

https://www.boltdepot.com/Metric_fl...Zinc_plated_class_10.9_steel_6mm_x_1.0mm.aspx
 
Thanks for the source on those bolts. I never have ordered from them, that that will definitely come in handy. To your other question about the ac belt, it was all fine until those bolts loosened and the cover made contact with it. The belt looks still pretty usable, but I haven’t had the time to inspect it much yet. They’re not expensive, so I won’t hesitate to replace it. Replacing the lower cover isn’t exactly cheap, but your point about how much longer they’ll be for sale is a concern on nearly every part of the car. Thanks for that nudge.

Dericsh, I’ll pm you to continue about the upper cover.
 
Interesting comparison of a stock steelie with snow tire vs stock “turbine” with hi performance all season. Same scale moments apart. I expected more delta.
 

Attachments

  • 0E73E5E3-4C50-4360-AD34-DE2E28AC2903.jpeg
    0E73E5E3-4C50-4360-AD34-DE2E28AC2903.jpeg
    635.9 KB · Views: 42
  • 2A55819E-F615-4B53-80B7-115EF55EE375.jpeg
    2A55819E-F615-4B53-80B7-115EF55EE375.jpeg
    382.3 KB · Views: 39
  • A79F96DB-3268-4207-A66B-10F50BD4093D.jpeg
    A79F96DB-3268-4207-A66B-10F50BD4093D.jpeg
    849.4 KB · Views: 44
  • 3E5911DF-F653-4CBE-86BE-B3F507757958.jpeg
    3E5911DF-F653-4CBE-86BE-B3F507757958.jpeg
    494.4 KB · Views: 51
More wrenching. Got all the timing parts off the front case. Pulled the front cam caps and found the seals were toast. Pieces crumbled out, and they are like brittle plastic now. Dig the little springs showing. Only the crank seal looks good so far, though I’ll do them all while I have it apart. Got the d/s axle out, so pan is next. A surprising amount of trans fluid poured out when I pulled the axle. Could be the angle the car is at: tilted nose up and slightly lower on d/s.
 

Attachments

  • E8282771-2051-4D44-A507-67FBC1508362.jpeg
    E8282771-2051-4D44-A507-67FBC1508362.jpeg
    515 KB · Views: 43
  • E9AAEC78-7FFA-410E-AA93-4D8490115A09.jpeg
    E9AAEC78-7FFA-410E-AA93-4D8490115A09.jpeg
    533.9 KB · Views: 44
Total ebay score. Original front lens for $40. This comes in second to the original 90 NIB throttle body I got for $175 when I first bought the car. This lens assembly was listed for $177 on Amayama, but turned out to be NLA when I tried to buy one. This one had free shipping, and FedEx even delivered it on New Years Eve. Made my year!
 

Attachments

  • A1D5E326-5950-47AE-9D11-C500917B8D3C.jpeg
    A1D5E326-5950-47AE-9D11-C500917B8D3C.jpeg
    692.1 KB · Views: 42
  • DF8287DE-2880-48E9-8E2B-DA4964B11CAC.jpeg
    DF8287DE-2880-48E9-8E2B-DA4964B11CAC.jpeg
    488.6 KB · Views: 37
Support Vendors who Support the DSM Community
Boosted Fabrication ECM Tuning ExtremePSI Fuel Injector Clinic Innovation Products Jacks Transmissions JNZ Tuning Kiggly Racing Morrison Fabrications MyMitsubishiStore.com RixRacing RockAuto RTM Racing STM Tuned

Latest posts

Build Thread Updates

Vendor Updates

Latest Classifieds

Back
Top