The Top DSM Community on the Web

For 1990-1999 Mitsubishi Eclipse, Eagle Talon, Plymouth Laser, and Galant VR-4 Owners. Log in to remove most ads.

Please Support Morrison Fabrications
Please Support STM Tuned

93 Tsi budget warrior

This site may earn a commission from merchant
affiliate links, including eBay, Amazon, and others.

This site may earn a commission from merchant affiliate links, including eBay, Amazon, and others.

Since MOD 2013 in Bloomington i have been steadily driving the talon minus a few hickups here and there but nothing major. I am in need of an alignment and new power steering lines so that i can put it back on. Also been teaching myself how to operate with DSMLINK and the tuning process is going to be getting deeper as the next few weeks go by. I'm sure I will be posting asking for help and such but that will be on the proper forum.

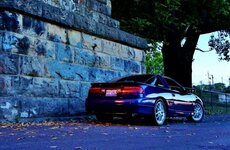
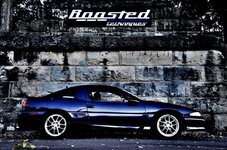
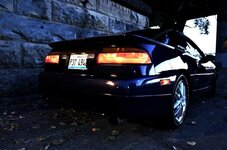
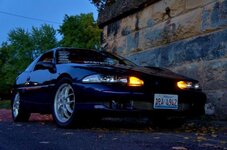
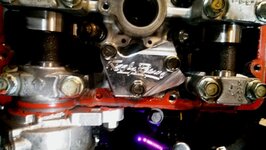
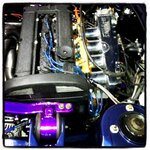
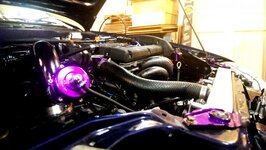
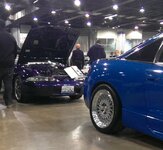
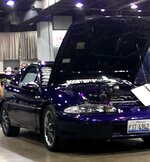
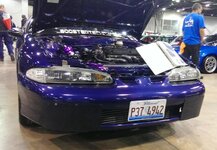
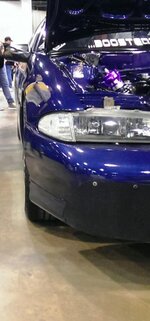
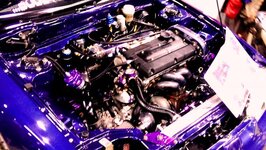
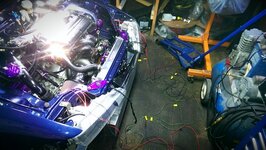
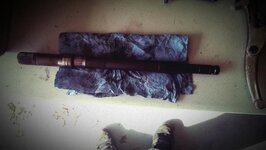
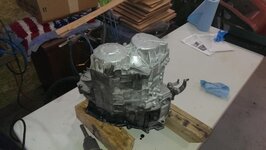
Over the past weekend I was able to get some decent pics while involved in the BoostedTechniques photo shoot #1. Here are a few good pics of the TSI and there will be more to come! Thanks for looking and feedback is always welcome!!
 

Attachments

  • IMG_347974254000217.jpg
    IMG_347974254000217.jpg
    68.4 KB · Views: 124
  • IMG_348006779652585.jpg
    IMG_348006779652585.jpg
    77.8 KB · Views: 125
  • IMG_348053117268938.jpg
    IMG_348053117268938.jpg
    45.9 KB · Views: 115
  • IMG_348081256777557.jpg
    IMG_348081256777557.jpg
    48.8 KB · Views: 120
Thanks. Hoping to get a good tune on it for now and then take it to Boostin Performance in Chitwn with my income taxes. Also buy a different set of wheels (which will be a hard decision).
 
Devin does great work, I just got my car tuned last weekend. You won't be disappointed.
 
Devin does great work, I just got my car tuned last weekend. You won't be disappointed.

:thumb:Nice, I was up there for the fall open house / dyno day a few weeks ago. Its definetly a friendly atmosphere and they are very nice people! Just curious, if you are willing to share what did you make with what setup?
 
Quality job man, paint looks gorgeous. Must have a big budget seeing what you all got done haha

:thumb: Thank you for the positive remarks. My budget doesnt really play into it too much as I just spend what extra funds I have on the car rather than other things. I dont play games or drink or anything like that so that free's up a decent amount of $$. Plus it has been a two year build and its not even close to the final product yet. My plan for next year is to build another engine during the spring, throw a holset on it and try to hit the 500hp range. i also want to try to keep it on pump gas due to the availability around here. I will have to drive 20 miles to get E85 which isnt too bad but theres always those moments when you forget to get gas that morning, then what do you do LOL.

Sent you a PM.

:thumb: Thanks for the info, gives me an idea of what i can make in the next few months!
 
Just a little update for the past week.

Got my TPS adjusted mechanically and have ZERO adjustments to make in link, however just found out that after doing so the throttle cable had been sticking open a bit due to the changes. Re-adjusted the throttle cable and idle switch (bump stop) and now the idle is quite a bit better. Also got the tune settled down a bit and getting it pretty close the 24psi mark with nearly no complications. Going to be doing a few more logs throughout the week to make some more tweaks to the settings but its starting to come along nicely. Pulls very strong and im very happr with how it is currenlty running. My oil pressure is a little on the high side so i will be ordering a KIGGLY HLA in the near future as well as another new oil filter housing to do some of the porting to the relief spring.

Also picked up another longblock to put aside and start piecing together my HX35 setup and some other changes in certain areas! Those pics will follow along later this winter and next spring.

Got some new wheels for the talon as well. 5Zigen FN01-C 17's. They are flat black now but im thinking about using the method on dipmycar.com to make them the dark bronze color, how do you guys think that would look? Trying to gather opinions to get a good color combo!! :D
 
Last edited:
Havent done much to the talon over the last few weeks/months but drive it occasionally. I will be putting it up for the winter here in a week or so once i get my GVR4 running and out of the garage. My plans for the winter are to mainly focus on getting the oil pressure taken care of and this will be accomplished by a grocery list of tasks that i plan to tackle including:

smoothing out the oil journals on the block behind the oil pump/front case (jafro on youtube explains)
small amount of porting on the OFH
larger oil clearance bearings?

This leads me to a question for any of the machinist guys on here or engine building guru's. The crankshaft that is currently in the car has been turned a decent amount and I am currently running ACL Aluglide "FULL GROOVE" main bearings at .010" (.25mm o/s) and ACL Aluglide Rod bearings at .030" (.75mm o/s). Should I try to find a new oem uncut crankshaft to replace the current one with or can I go just a bit larger on the bearings to achieve a little more oil clearance. When i assembled the short block and plasti-gaged the clearances they were on the high side and measured out to .019/.020 which is right on the edge of service limitations. Since I was going to be breaking the engine in, i went ahead and used a good bearing and got the mileage on it. This winter however I want to get this taken care of for next years racing season.

The main reason for doing this is because the oil pressure is maxing out at 100/110 on a cold start now that it is winter and during the summer it still hits 90 +/- at full throttle or even first startup. I am metering using an AEM Digital OIl Pressure gauge running off the oem pressure sender location.

Any and all advice will be greatly appreciated!
 
I would personally get an unturned crank and even try to find rods that will accept non oversized bearings. I had major issues 2dsm's ago with a 7bolt talon that had a turned crand and rods that were.02 over, kept chewing up bearings until it crankwalked.
 
Thanks for the input.

I think i will try to find a nice OEM crank and swap that out since I dont really trust a cut crankshaft too well. The rods should be fine, they are OEM and havent been cut on or anything! Maybe i can get my hands on a good OEM unit and then have Darren do the "BUTCHER" work to it :)
 
HAPPY NEW YEAR!!!!

Been some time since the last time that I have updated the progress on the Budget Warrior but I have made some progress!

Over the last few weeks I have kept the car in the garage for the most part due to the freakin snow that we have been getting so that left me with plenty of opportunities to get some things done.

I recently sold the GVR4 that I picked up a few months back and having done so I ordered a few goodies for the talon. Recent mods to the TSI include:

TIAL Q 50mm bov
FIAV blockoff plate
Speed Density kit
Oil catch can
KIGGLY HLA
FP RED bolt on turbo w/ lines (have to get the punishment o2 setup, ext. WG)
Magnus SMIM


Most of these items are already installed or being installed as we speak (type). Here are a couple pics of the progress over the last few weeks!

Enjoy (feedback welcome)

I will be finishing up the SMIM install this weekend and will get some better pics of the engine bay once completed!

Thanks!
 

Attachments

  • IMAG0333.jpg
    IMAG0333.jpg
    41.8 KB · Views: 107
  • IMAG0331.jpg
    IMAG0331.jpg
    52.3 KB · Views: 111
  • IMG_20140206_130426.jpg
    IMG_20140206_130426.jpg
    27.7 KB · Views: 213
  • IMAG0343.jpg
    IMAG0343.jpg
    49.2 KB · Views: 103
Wowzers, I haven't updated this post for quite some time now and don't really know where to start.

I guess Ill start with a short write up on the TSI Warriors first car show appearance. There was a pretty large show (World of wheels: Tuner Galleria) at the Donald E. Stephens convention center in the Chicago Illinois area on March 1st that I entered the car into. We were also going to be checking it out before planning on taking the car and it was only an additional $15 to enter the vehicle, so why not LOL. Given that the talon is not completely finished I still wanted to make an appearance and did the best I could to get it all cleaned up with the help of a few friends and some elbow grease. I was not able to find a new set of wheels like I had wanted to so we just painted the oem gsx wheels with some VHT wheel paint in gunmetal and they didn't turn out too bad. That along with some tire shine, glass cleaner and Maguire's billet polish and it didn't look too bad! Here are a few pics from the event that I had on my phone:

The show was a blast and there were only a handful of DSM's there but hey, at least there was a few to let the world know we still exist :thumb:

**Im going to post multiple updates for less confusion**
 

Attachments

  • TunerGalleria2014.v6.jpg
    TunerGalleria2014.v6.jpg
    56.1 KB · Views: 101
  • TunerGalleria2014.v5.jpg
    TunerGalleria2014.v5.jpg
    52.7 KB · Views: 103
  • TunerGalleria2014.v3.jpg
    TunerGalleria2014.v3.jpg
    58.7 KB · Views: 105
  • TunerGalleria2014.v2.jpg
    TunerGalleria2014.v2.jpg
    34.4 KB · Views: 107
  • TunerGalleria2014.v1.jpg
    TunerGalleria2014.v1.jpg
    73.8 KB · Views: 104
After the car show I decided that I did not like the location of the fusebox that I had chosen the first time of relocation. I had built a box under my bumper and had it mounted near the radiator but was not happy with the routing of the wiring and the fact that in order to change the fuses I had to pull the bumper (this came up when an alternator issue arose).

So, this lead me to start the next wire delete and relocation of the fuse box. This time I have removed all unnecessary wiring and decided to locate it in the center console. Much easier to change fuses, out of site and much cleaner. Basically I removed anything that did not pertain to the charging system, lighting or ignition. My A/C has been long gone, the horns were never reinstalled and my fans are on a separate circuit of their own now. This allowed me to remove another 30-45' of wire from the group and made routing much easier. This process took approximately two hours due to cutting the factory loom and tape off and then chasing the wires throughout the twisted factory mess!

After removal of all the not-needed wires, I then started to plug things in where they go and plan out the routing of the wires and start lengthening them to the destination. The pic below of the front end shows all the lighting wires hanging over the front of the car. One key factor about the lighting wires is that most tie into each other inside the car so you can tie them together in other areas to make it easier to run them into the interior as single wires leaving the tie in out in the engine bay hidden. Basically its two sets of the following: headlamps, corners and turn signals. I removed the fog light wiring as well!! This process takes some time and I would estimate that I have nearly 12 hours in doing so, but constantly change my mind of different routings.

Placing the fuse box in the center console was not too bad of a task once all the wires are loomed together because you can run them right through the area where the shift linkages are and secure them to the bracket so that it does not move around and interfere with the shifter. This does require a bit of trimming on the actual fuse box but its mostly the old mounting points and places where the plastic bulges out. I tool my cut off wheel and zipped these areas off to make the box slide down inside the console. Spent maybe an hour doing so!

To mount the physical fuse box to the center console I have cut out the bottom of the pocket and saved it for a future idea that I may use and I will also be using one or two screws/bolts to secure it as well. Pics will come!!

I should be finishing this up within the next few days but its very close to being completed and tested! Pics below for your viewing pleasure!!

:hellyeah:
 

Attachments

  • IMAG0466.jpg
    IMAG0466.jpg
    63.4 KB · Views: 88
  • IMAG0465.jpg
    IMAG0465.jpg
    54.4 KB · Views: 103
  • IMAG0444_1.jpg
    IMAG0444_1.jpg
    60.2 KB · Views: 112
  • IMAG0443_1.jpg
    IMAG0443_1.jpg
    62 KB · Views: 96
  • IMAG0442_1.jpg
    IMAG0442_1.jpg
    53.7 KB · Views: 101
  • IMAG0441.jpg
    IMAG0441.jpg
    53.9 KB · Views: 94
  • IMAG0431_1.jpg
    IMAG0431_1.jpg
    64.6 KB · Views: 102
While in the process of doing the wire tuck I figured now would be a good time to replace the slipping clutch that has come about in the last couple weeks. No big deal since the car is down for the time being anyway!

After a few days of researching and trying to decide what clutch to go with I ordered the Comp Stage 4, unsprung from extremepsi.com. After using my earned points and catching a sale I got it for $305 shipped to my door. Pretty good deal!! :thumb:

Once the clutch showed up in the mail the excitement of getting the trans and old clutch ripped out took over and the following weekend it was torn apart. This however did not lead to a positive finding. The entire inside of the bell housing was soaked in trans fluid and I now knew that the clutch had failed due to a leaking input or output shaft seal and it was time for a complete tear down.

The last few times that I had any trans work performed I had a local fellow DSMer do it and at a very fair price. This time, I have decided to do the tear down myself and teach myself the trade of 1g awd dsm transmission rebuilding. This was due to the fact that in order to change your input/output seals you have to tear the trans nearly all the way apart. So, I did my homework and got it torn apart last week while waiting on my new seals from Jacks Transmissions.

Should be putting it back together this weekend if I have time. Going to be attending (spectating) at IFO in St. Luis and a few local car gatherings.

Here are some pics of the tear down!!
 

Attachments

  • IMAG0436_1.jpg
    IMAG0436_1.jpg
    44.1 KB · Views: 80
  • IMAG0435_1.jpg
    IMAG0435_1.jpg
    54.3 KB · Views: 86
  • IMAG0495.jpg
    IMAG0495.jpg
    53.7 KB · Views: 93
  • IMAG0493.jpg
    IMAG0493.jpg
    50.2 KB · Views: 88
  • IMAG0489.jpg
    IMAG0489.jpg
    32.2 KB · Views: 100
  • IMAG0482.jpg
    IMAG0482.jpg
    35 KB · Views: 88
Well, now that i have figured out how to get to my build thread with this new layout i guess its time for the quarterly update on the talon :thumb:

Over the past few months I have entered the car in a few different local car shows and cruise inns but a local car enthusiast has posted some serious competition with her sons mkIII supra (son passed away and they built his dream car, pretty awesome). I am not one bit upset about their car winning over mine given the circumstances and the fact that my car is not just for show but also for beating on. The two of us have some of the nicer tuner cars in the area as some of the older gear heads would call them LOL. The next gathering will be MOD in Bloomington mid September, cant wait!

Now before I start with the past few months history on the car I will start by updating the goodies list on the car. The following items have been purchased new and installed: Spark Tech COP setup, Dynatech ARC 2 CDI, FIC 850cc injectors, Punishment o2 housing with external Tial waste gate so that i could install the FP Red that i picked up and a few other little things.

I would like to thank Punishment Racing for providing such an awesome piece of craftsmanship because the fitment is amazing and the product is a very nice addition to any engine bay. Their o2 housing / waste gate combo FTW!

i would also like to thank Spark Tech ignitions for providing such an awesome COP setup and the plate fits very nicely. Also for allowing the very easy installation for the "do it yourself" wiring and companionship with the Dyna Tech CDI. These two items made a huge difference in the way the car runs especially at full throttle. :thumb:

So, during the last few posts I had updated the status with the purchase of the new clutch that i got at an awesome price thanks to www.extremepsi.com and got that installed. Well, I did not persist to explain the amount of anger that came with this install. Upon the first few drives with the new 6 puck clutch installed I had found my trans grinding into 1st and reverse pretty badly, bad enough to not wanting to drive the car. This lead me to believe that the clutch was not disengaging properly and caused a few transmission removals during the diagnosis. After replacing the clutch master, clutch fork, pivot ball and slave cylinder, adjusting the master cylinder multiple times and about to give up I finally removed the ACT Streetlight flywheel that i had on the car and replaced it with a Fidanza Lightened Aluminum unit and PROBLEM SOLVED. The ACT surface was a little out of the recommended spec (.610") and was not very flat across the surface area which was fine with the stock clutch but anything more it was not good news. Thankfully, this issue is now resolved!! :hellyeah:

During the last few months after figuring out the clutch issue I had put nearly 1000 miles on the car until randomly one day it started running poorly again and i wasn't sure why. Hooked the trusty laptop up to the ecu and out of the blue i was getting a "Throttle Position Circuit Malfunction". Hmm, why did this happen? I thought maybe I had pinched a wire during the removal of the transmission during the clutch issue and checked all the wiring but didn't seem to find anything worrisome so the investigation started. One day while inspecting the wiring with the engine running and tracing it back to the firewall listening for any noises or signs of a short in the connection I had reached down to grab a bundle of wiring and when i moved them the engine stalled. Weird! So, there is obviously an issue in the wiring somewhere and the reason I have not yet discovered. Now being that this was the second tuck harness that I had created I was not about to tear it back apart and start over again so i contacted MILLER IMPORT PARTS and got a factory harness from them to put in until this winter when i tear the car back down for some chassis work. Wiring issues are now solved as well. :thumb: This winter I will be using new connectors from Sheridan Engineering and all new wiring so that the possibilities of broken wires is very slim.

Now, for the good stuff. The summer months were fun, driving the car to local area cruises and hooning around on the streets under the moonlight but i needed just a bit more out of her. One evening after a St. Jude cruise Inn at the area Lowe's a group of us decided to go for a short cruise afterwards. This included a few DSM's, a GVR4 and some American muscle as they would say :tease: One of the American Muscle cars was a buddy of ours Mitch who owns a nearly brand new Camaro SS with a supercharger on it. Needless to say, this cruise was pretty interesting and the outcome was the talk of the night. Before this evening the camaro and I had never lined up or anything of that nature and neither of us knew much about the others car. All I knew was that his camaro had put down 576whp on a dyno just a few weeks before when getting the supercharged 1le dyno tuned. This had me a little worried that I would straight get spanked but it was worth the shot and would give me a good idea of where i stood with the current setup.

After a few minutes of cruising through town we finally came to a decent straightaway and that's when the excitement sets in. This race was started at a 30mph roll and i was not able to get into second gear (this was before the new flywheel) so third gear it was. We did a 30-120 run and the camaro only took me by about 3/4 car in the end.

Now i hope you are ready for the amazing part of the story.... This entire summer I had been beating on the talon, tearing up the streets and filling up on domestic snack cakes all while running an amazing tune on stock 450cc injectors. Yes, OEM 450cc injectors and ecmlink tuning was rocketing the car around flawlessly. I had spent months tuning the car and trying to get the best numbers possible out of the injectors before upgrading and after this race it was time to upgrade. i was limited to 18psi and only through 3rd gear because at the middle of 4th i would start to run out of fuel. Not too Shabby :hellyeah:

Over the past few months I have upgraded to FIC 850cc injectors and gotten the tune set up pretty good with no knock at 24 psi and an ECMLink est of 506hp. This psi level was limited due to the light spring in the Hallman Pro boost controller but over the weekend I switched to the heavy spring and have yet to go out and get it set up. I have considered just getting the ECMLink Ingersall controller but will let the Hallman do its job for a short while.

Near future updates will include the current project status of installing a Kirkey Pro Street Drag seat and starting on the tubular K member and A arms. I friend of mine got me hooked up with his dad who is an excellent fabricator and we are soon to start the project of the tubular goodies.

Thanks for reading and as always feedback is much appreciated! :dsm:
 

Attachments

  • IMAG0647.jpg
    IMAG0647.jpg
    324.2 KB · Views: 98
So as usual I have failed to keep my build thread updated throughout the year and now I have a short story update to type up. Oh well, what better to do than tackle this while at work :D

The last update was in regards to some street action and minor upgrades that had been handled throughout the remaining summer months which was a blast. I had a pregnant wife throughout the spring and summer months, into the fall so i had to have all the fun i could before I was to devote all my free time to helping with the Baby. The last event that the car made an appearance to was a test-n-tune night at Cordova Dragway park in Illinois at the end of September. This was the first time the car had been taken to the track and the first time for me with an awd platform. On the streets this car is a beast but the track is always a much different situation, but a blast none the less. :dsm:

Off the trailer and unable to log the first pass due to freaking windows updates on the laptop the car bogged badly at the line and went a 14.7 :banghead:
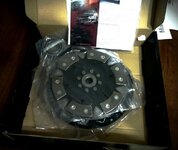
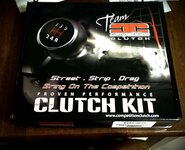
. This was horrible and i had to redeem myself a.s.a.p so lap number two was hot lapped and went 13.1 with a slightly better launch so i guess the stage 4 clutch was doing its job at making the tires move. :hellyeah:

Third pass was a bit better but shifting was a bit slower in between gears to prevent any failures and the car went 12.9 @ 115mph. This launch was a bit better and i feel that i could have hit mid 12's with some faster shifting but you live and you learn. This will be something that i work on in the coming drag racing events. :(

Final pass of the night was bound to be the Bad Ass Hero pass of the night and seemed to be that way after an amazing launch. The launch was near perfect however the tires broke loose and I spun through first gear, hitting second nicely but then getting slightly locked out of 3rd for a brief moment. This pass was a 13.1 at 114mph and the car started to get hot so I was not able to make any more passes this evening. Not too bad for the first time to the track but I have full faith that this setup should have went mid 11's and have witnessed as well. :cry:

All of which being done on a 93/110 pump gas tune @ 25 psi (no knock, running well)

After that evenings festivities and the multiple outings on the local highways there was something that really bugged me and that was the super slow spool time of the FP Red turbo that was being utilized during these times. The top end power and airflow was amazing but the 4k spool up time was a little irritating to me but I guess that happens when you go from a 16g to a much larger turbo. :thumb:

The car has been sitting in the garage since this event while we prepared for the arrival of baby girl number two, Reagan Leigh who was born on October 17th as a bright eyed healthy baby girl. My first daughter, Riley, has been mind warped into the girly stuff via my wife but with baby #2 I am going to try my hardest to get her involved in the car scene :D Anyways, back to the build!!

Over the past few months I haven't spent much time in the garage other than tearing off a few items that I had planned to upgrade during these winter months. Most of which went on to be used and abused by local fellow DSMers which I was glad to hook up. Actually, my buddy Spencer Shaw who had bought my GVR4 from me earlier in the year bought most of the items that i had removed to install on his galant :hellyeah:

So, here is my end of the year and start to another year build update:

My build plans for this winter are to rip off the cylinder head and send it to Boostin performance or similar for some machining and port work and replace all other parts that have been removed and sold. I will be buying a new set of cams, putting together a new turbo setup with a little larger intake manifold as well as a set of High Z 1650 or larger injectors to switch from the 93/110 mix to E85 to get that extra power out of the setup. I am going to continue to run the oem pistons and rods until i build a different short block but that will be later in the year. My current short block is rebuilt and has some ARP goodies to help hold it together so hopefully all goes well.

I have removed the following items for winter upgrades:
FP Red JB turbo
Exhaust header
Punishment o2 housing w/g setup
Punishment fmic kit (kept my Tial BOV :hellyeah:)
D/Kelford 272's
Magnus smim
Rebuilt OEM throttle body
FIC 850cc injectors


At this point SANTA CLAUS is bringing (or I have purchased) me a S90 74mm throttle body, a set of Kelford cams (280/276), Holset HX40 w/ billet 60mm wheel and the BEP T3 .70a/r v-band hot side :D The remaining items will be budgeted into the beginning of next year as I am returning to college in the spring to continue towards my degree (BORING, but why not).

I am also stuck between upgrading to the FULL BLOWN double pumper sending unit with two Walbro 255 pumps or a single Walbro 450 (e85) pump. Any of you have any input towards the right path? :idontknow:

Thanks for reading and input is much appreciated.

P.S. I will try my hardest to remember to take lots of pics during the winter updates and post them up (sometime in the next few months LOL).
 
Amazing build, and I LOVE the 2g GSX wheels on the car, they look awesome.

Thanks for the comment. I agree, they did look good and I wish I would have kept them but I will be looking for something that allows for more tire like a set of Rota's or similar with some drag radials.
 
Support Vendors who Support the DSM Community
Boosted Fabrication ECM Tuning ExtremePSI Fuel Injector Clinic Innovation Products Jacks Transmissions JNZ Tuning Kiggly Racing Morrison Fabrications MyMitsubishiStore.com RixRacing RockAuto RTM Racing STM Tuned

Latest posts

Build Thread Updates

Vendor Updates

Latest Classifieds

Back
Top