The following is a guide to replacing your valve stem seals with the head still on the block. There is a vfaq on this but not one on dsmtuners and not one without the expensive head on block valve spring compressors.
Vfaq link: Valvespring compressors
This procedure is not technically that difficult. It requires a good amount of labor as removing the valve springs is a tedious process, and requires removal of numerous other items. This does require the removal of the timing belt so an adequate knowledge of the timing belt install is needed. The one absolute requirement in my opinion is a good valve spring removal tool. When I installed the cams and valve springs previously I followed this homemade valve spring compressor tutorial.
Link: My Homemade Spring Compressor
It worked but it was a bloody battle. With that tool you have to put pressure on the c-clamp to compress the valve spring, then either grab the keepers with a magnet to remove then, or keep pressure on the c-clamp while trying to reinstall the keepers. Not fun. And the thing is the c-clamp is only touching the cross bar running from one end of the head to the other in one small spot, so the c-clamp wants to keep bending left or right. If it does bend either way then you have to unscrew the c-clamp and start over again. So not only do you have to manually compress the valve spring but also keep the clamp from bending one way or the other, all while trying to put keepers on the end of a valve. Took me 3 days to replace the valve springs with this thing. (I'm not an office guy either)
I knew I was going to have to do this sooner or later so I began looking for a decently priced valve spring compressor. I found a nice one on eBay that I liked. It bolts down on the outer side of the head where the cam caps were, and has 4 threaded holes where a bolt screws down to a circular piece that fits over the retainer. The piece has an opening where you can access the keepers and the four threaded spots all correspond to 4 of the valves.
This is a link to the guys ebay store. The compressor will be under the tools tab.
eBay Store - The Racing Shop: PARTS, HONDA VTEC, CIVIC PISTONS
http://www.dsmtuners.com/forums/attachment.php?attachmentid=88640&stc=1&d=1224815062
I am replacing my valve stem seals because the car has recently begun smoking at idle and I noticed some oil around the exhaust manifold. Recently I installed new cams and valve springs but neglected the valve stem seals. So here I am again. When the camshafts were installed I also replaced the timing belt and all timing components so I will be reusing the timing components. These parts have less than 1k on them. Anyone doing this should consider a new timing component system including belt, idler and tensioner pulleys, and tensioner.
First get a good clean work area and put the car on jack stands. You will need to remove the driver side wheel so it would be a good idea to loosen the lug nuts before jacking. Once you have the car off ground you'll need to put a jack under the oil pan to support the motor because we will be removing the driver side motor mount. I put a piece of wood and a towel between the jack and oil pan. Go ahead and take off the wheel. The motor mount needs to be removed to access the timing area and to remove the accessory pulleys. There are two studs sticking up. Remove the nuts holding them on and the one 14mm bolt. Then remove the 17mm bolt holding the mount to the chassis. The mount should slide up and out of the way.
http://www.dsmtuners.com/forums/attachment.php?attachmentid=88641&stc=1&d=1224815062
Next the spark plug wires, pcv hose, breather hose, and upper timing cover have to come off. I went ahead and loosened all the valve cover bolts.
http://www.dsmtuners.com/forums/attachment.php?attachmentid=88642&stc=1&d=1224815062
Next you'll need to get the alternator and power steering belt off. Simply loosen the alternator tensioning bolt and lift up on the alternator and the belt will slip off. The power steering pump has two bolts on the left side of it that need to be loosened and one on the right side that can be accessed by rotating the pulley. Then pry up on the pump and slide the belt off. The water pump pulleys have to come out next. The bolts are 10mm. Once they are out mangle the pulleys out of there and notice there position for reinstallation. Next the crankshaft pulley has to go. I put a ½ extension in the hole and wedge the ratchet against the chassis to keep it in place. Then unscrew the 4 12mm bolts and pry it off. Be careful not to hammer it because the crankshaft pulley is known to separate.
Now the timing cover can come off. There are several 10mm bolts holding that sucker in. Did I mention you should have a chiltons manual? Two of the bolts are longer right above the crank sprocket.
http://www.dsmtuners.com/forums/attachment.php?attachmentid=88643&stc=1&d=1224815062
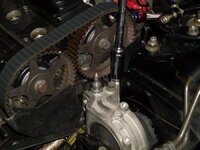
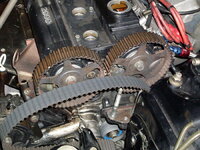
Now you need to put the motor at tdc. Take the ½ drive socket and rotate the motor clockwise via the crankshaft sprocket until the two dowel pins on the cam gears are straight up and the marks on the cam gears are all in one line even with the top of the head.
Now you have access to the timing components. If you are replacing everything then you can just take off everything and cut the belt. As for me, I loosened the tensioner pulley (blue one), then took off the tensioner and put it in a c-clamp, and pulled the belt up and out of the way.
http://www.dsmtuners.com/forums/attachment.php?attachmentid=88644&stc=1&d=1224815062
Now take off the valve cover. The inner bolts are smaller than the outer ones so don't mix them up. If you have a Cas then you'll need to remove it. On the outer edge of the nut holding it in place I marked its position to get it right back where it was. You'll want to check your ignition timing once you get through to make sure its still on. Mine was right on just by putting it back where my marks were. If you are installing new cams then you will need to break the cam gear bolt off now. Have a buddy and a large breaker bar ready for that. If you are not replacing cams then just leave the cam gears on the cam. Then proceed to remove the cam caps of each respective cam. KEEP THEM IN ORDER! In the chiltons manual there is a removal sequence for the caps. Once you get the bolts out take a rubber mallet and whack it a couple times. I take a flathead and put it in the hole for the bolt and pry it back and forth until it pops out. Again keep the caps in order.
http://www.dsmtuners.com/forums/attachment.php?attachmentid=88645&stc=1&d=1224816033
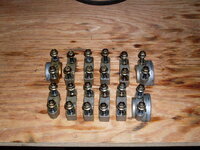
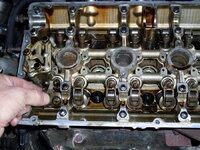
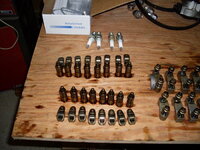
Now the camshafts will lift up and out of place. Set them aside and note which one is the intake cam and exhaust cam. Now take off the rockers. They simply lift up and off the end of the valve and lifter. I don't think they need to be kept in order but I do so anyway. Next take out the lifters. Just grab the end of them and pull them out from the head. Their order does not matter either. They technically don't have to come out but its easier with them out of the way.
http://www.dsmtuners.com/forums/attachment.php?attachmentid=88646&stc=1&d=1224816033
http://www.dsmtuners.com/forums/attachment.php?attachmentid=88647&stc=1&d=1224816033
Go ahead and pull the spark plugs so you can have access to the cylinder. Next before we start compressing some springs, we need some way to keep the valves up. There are two ways to do this. One being take a compression tester and screw an air compressor fitting on to the end of it. Then pressurize the cylinder you are working on so the valves don't fall. The other way is to feed some rope into each cylinder. I chose to feed some rope into the cylinder because I was wary of the compressed air somehow leaking and the valves falling, however it is a proven method if you have a compressor.
Now if the motor is still at tdc like it should be then cylinders 1 and 4 are all the way up. I took some ¼ twisted nylon rope and fed it through the spark plug hole until it was full. It took about a foot and a half of rope. I also took some rope and filled the oil passages in case a keeper flew out and fell down to no mans land. There is one on each side of the top of the head and two in the middle of the head.
Now on to the valve compressor. Place the compressor tool on the head where the cam caps were. Bolt it down and insert the threaded compressor screw in the spot where the valve spring you want to start with is.
http://www.dsmtuners.com/forums/attachment.php?attachmentid=88648&stc=1&d=1224816033
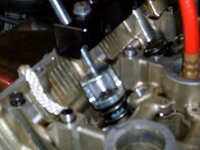
Place the socket looking piece over the valve spring retainer and screw the bolt down to start compressing the valve spring.
http://www.dsmtuners.com/forums/attachment.php?attachmentid=88649&stc=1&d=1224816033
Attachments
-
 SDC10024.jpg56.7 KB · Views: 4,066
 -
 SDC10014.jpg50.6 KB · Views: 3,684
 -
 SDC10015.jpg74.9 KB · Views: 3,343
 -
 SDC10016.jpg54.9 KB · Views: 3,410
 -
 SDC10017.jpg86.3 KB · Views: 4,070
 -
 SDC10019.jpg68.8 KB · Views: 3,300
 -
 SDC10020.jpg90.2 KB · Views: 3,592
 -
 SDC10021.jpg68.7 KB · Views: 3,271
 -
 SDC10028.jpg67 KB · Views: 3,896
 -
 SDC10027.jpg39.2 KB · Views: 3,651
Last edited by a moderator:


