The Central Hub for DSM Community and Information

For 1990-1999 Mitsubishi Eclipse, Eagle Talon, Plymouth Laser, and Galant VR-4 Owners. This is where the DSM platform history is documented and archived. Log in to help us in our mission, and to remove most ads from the browsing experience.

onroad.jpg

Crash89s Spyder build!

This site may earn a commission from merchant affiliate links, including eBay, Amazon, and others.

Got primer sprayed tonight!!

All taped up
464964[/ATTACH]"]
prime.jpg


Everything cleaned up and in place to spray
464966[/ATTACH]"]
prime2.jpg


First coat!
464968[/ATTACH]"]
prime3.jpg


Buddy got a couple shots of me spraying the second coat.
464970[/ATTACH]"]
prime7.jpg


464972[/ATTACH]"]
prime8.jpg


464974[/ATTACH]"]
prime4.jpg


And finally, a tracer coat.
464976[/ATTACH]"]
prime6.jpg


Guess what I get to do tomorrow!?! Yep, more sanding! Once I sand down a little with 400 on this tracer coat I'll be able to see/make sure the body is straight and see if I missed any small dings! Paint in a couple weeks. After we fix my hood!
 

Attachments

sanding YEY!!!!!!!!!!! NOT LOL
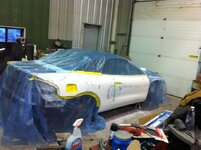
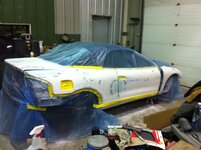
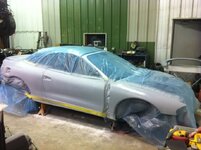
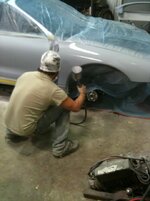
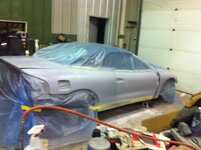
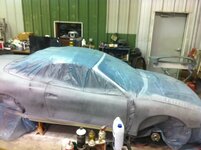
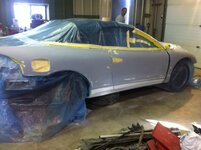
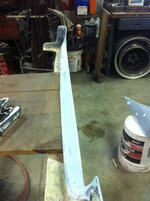
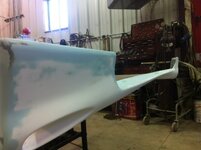
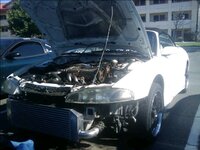
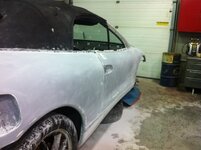
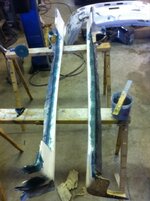
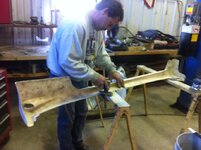
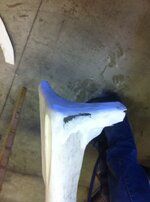
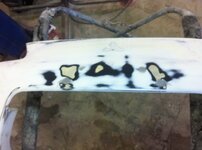
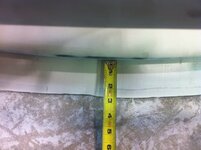
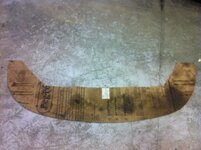
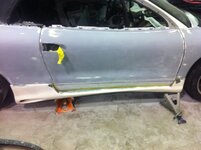
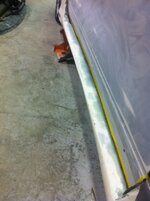
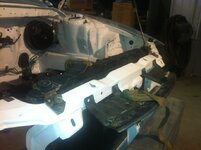
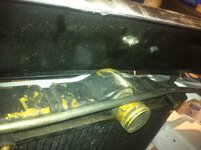
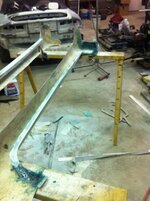
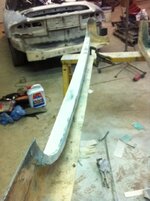
... i love doing body work like cuttin out and replacing sheet metal (i form part with shrinker/stretcher instead of aftermarket patch panels) but man do i hate sanding, probably one of the things i dread most in all aspects of things to dread in life LOL
 
Hey guys, havent really done much to the eclipse since it was primed. But a couple days ago I picked up my windows from the tint guy to have them redone, mine was all peeling and just looked bad.. And I decided to clean up the shop a little bit..

465247[/ATTACH]"]
newtint.jpg


Look whos walking again!! :D
465249[/ATTACH]"]
wheelson2.jpg


465251[/ATTACH]"]
wheelson.jpg


I really need to get my ass in gear and get my hood prepped, Im hoping for paint this weekend. We'll see though.
 

Attachments

The last couple days I 1) started wet sanding the car down again. and 2) started digging into the fuse box wire harness. I didnt get any pictures of the car, but I did of the harness. I deleted anything a/c related and the ABS system and both radiator fans since Im going to wire my new slim fans differently anyways.

What I started with.
465583[/ATTACH]"]
fbharness-1.jpg


Holy ABS wires batman!!
465585[/ATTACH]"]
fbharness2.jpg


All wires eliminated.
465587[/ATTACH]"]
fbharness5.jpg


fuse box.
465589[/ATTACH]"]
fbharness6.jpg
 

Attachments

Well guys, the body itself is ready for paint!! I need to prep my bumpers and tackle the hood portion. Going to do that tonight. Hopefully paint this weekend!! I know Ive said that like 4 times! LOL

466243[/ATTACH]"]
prime9.jpg


Pics dont do this justice, this thing is so smooth and straight its crazy!
466245[/ATTACH]"]
prime10.jpg


466247[/ATTACH]"]
prime11.jpg


Oh and for kicks I thought Id hit the motor mount with a wire brush!
466249[/ATTACH]"]
motormount.jpg


466251[/ATTACH]"]
motormount2.jpg


466253[/ATTACH]"]
motormount3.jpg


466255[/ATTACH]"]
motormount4.jpg
 

Attachments

Well guys, Im slowly getting progress done. Im getting really tired of sanding this thing and I barely have any finger prints left.. Seriously.. haha. Past couple days Ive been sanding on the bumpers and fixing some cracks and filling holes as well as fixing my aftermarket skirts. They're fiberglass and have looked like ass since I bought them. Pics!

466797[/ATTACH]"]
bumper.jpg


filled license plate holes
466799[/ATTACH]"]
bumper2.jpg


466801[/ATTACH]"]
skirt.jpg


My old man helpin me with some fiberglass work
466803[/ATTACH]"]
skirt2.jpg


Mad a little lip that will hold 2 sided tape to hold the skirt to the rocker
466805[/ATTACH]"]
skirt3.jpg


Then I got thinking, with how low the car is I didnt want to be scuffing up my freshly painted bumper on driveways and such so I thought "what could I do to help avoid this?!" This is what I came up with!

Picked up a big sheet of Kemlite at my local trucking company (ive got an inside pull! :p )
466807[/ATTACH]"]
lip8.jpg


466809[/ATTACH]"]
lip.jpg


466811[/ATTACH]"]
lip4.jpg
 

Attachments

466813[/ATTACH]"]
lip6.jpg


466815[/ATTACH]"]
lip7.jpg


466817[/ATTACH]"]
lip9.jpg


Now, I know this will not be totally functional like a "real" splitter. This isnt completely finished, Im going to get some kind of turnbuckle for extra support. This is mostly for a little more aggressive look and to protect from messing up my new painted bumper.
466819[/ATTACH]"]
lip12.jpg


Lets hear what you think!!
 

Attachments

Not knocking your build looks good! U have that stream line car with those ugly hood pins, my opinon. Isnt thier a company that makes lever style hood catches that fit sort of flush with the hood that u just pull a lever on each side. Those would smooth out your hood big time.

Aero hood latches. Sorry cant link.
 
Yea, I know. The hood pins were already on the hood when I bought it. I decided against fixing this hood and am just going to buy a new one. So, once I do that Ill have the opportunity to get new latches.

All those pics and you noticed the hood pins.. LOL! ;)
 
Got some more done fellas.. Finished up the front and rear bumper covers and did some more fiberglass work on the skirts the last couple days. Kind of sucks that fiberglass takes so long to really cure, you cant really make much progress in a day with it.

Bumpers ready for primer
467308[/ATTACH]"]
bumper3.jpg


The passenger side skirt fits like a damn glove!! Driver side on the other hand.. LOL

skirt4.jpg


We wanted to strengthen the lip we made so we laid another good layer on the back side of the old glass, then kind of forced it where we wanted it to be in hopes of when the glass cures itll hold this shape.
467312[/ATTACH]"]
skirt5.jpg


Passenger skirt being held in place as well.
467314[/ATTACH]"]
skirt6.jpg


467316[/ATTACH]"]
skirt7.jpg
 

Attachments

I Know its been a little while since the last update. Its been kind of slow going to get these side skirts to fit just right. Lay fiberglass just to grind it back off again.. haha!! I also picked up a 1g radiator to accommodate for my RedJack manifold.. Soldered some brass tabs on the bottom and had to fab up my upper mounts because I didnt like how looked all crooked.

468688[/ATTACH]"]
radfit.jpg


Shows how far off the top pins are from the bolt holes.
468690[/ATTACH]"]
radfit2.jpg


With my 2g radiator, I had to kind of dent the side to fit my VRspeed IC. I made the pins on the bottom to fit without any denting!
468692[/ATTACH]"]
radfit3.jpg


Cant really see in the pic, but my hood was hitting on the top of the radiator. Now I also wanted to push the radiator back just a little bit to clear the hood.
468694[/ATTACH]"]
radfit4.jpg


Heres the brackets tacked together.
468696[/ATTACH]"]
radfit6.jpg


Spread some bond-o on them and smoothed them out and painted!!
468698[/ATTACH]"]
radfit7.jpg


My driver side skirt FINALLY fits right.
468700[/ATTACH]"]
skirt8.jpg


Passenger side needs just a liiiiittle bit more
468702[/ATTACH]"]
skirt9.jpg
 

Attachments

well guys its hard to type this update for reasons that will be shown shortly LOL. Primed the car one last time tonight and am sanding it down for the last time this week.. Paint for real on saturday this weekend!!!!!

Well after getting everything all prepped and set up, my old man started spraying the car.. While he was doing that I was setting up a little fan to circulate the air out of the shop.. It was a dual electric fan out of a car using a jump pack to power it.. Well in the midst of things, I got the fan going and propped it between the door and door sill and it slipped and fell toward me. out of reflex I tried to catch it.. BAMM!! Hand in the turning fan blades.. Cut my day short and made a trip to the ER..

On the bright side we did get the car primed after getting back I just forgot to snap some pics.. Weel here we go!!

469033[/ATTACH]"]
primer2.jpg


469035[/ATTACH]"]
primer21.jpg


finished side skirts!!
469037[/ATTACH]"]
primer22.jpg


469039[/ATTACH]"]
primer23.jpg


469041[/ATTACH]"]
primer24.jpg


AAAAND the carnage!
469043[/ATTACH]"]
hand.jpg


Did you know blood is thicker than water? You do now!!
469045[/ATTACH]"]
hand2.jpg


After its been cleaned up and in bandages for 4 hours..
469047[/ATTACH]"]
hand3.jpg
 

Attachments

Add Value - Be Respectful - No Trolling - No Misinformation - Participate Often!
Support Vendors who Support the DSM Community

Latest Classifieds

  • For sale 2g 2G DSM Link V3
    2G DSM Link V3 $600 + shipping and paypal fees* no cable included * cables are 75 on the...
    • jersygsx
    • Updated:
    • Expires
  • Wanted 2g Shot in the dark (2g Pass strut cut out)
    Need 2g strut tower to save time.
    • frosh29
    • Updated:
    • Expires
  • For sale 2g 2G Mishimoto Radiator & Fan Shroud
    2G Mishimoto Radiator & Fan Shroud $200 + shipping and paypal feesYou must be registered to...
    • jersygsx
    • Updated:
    • Expires
  • For sale VIRGIN 4G63 6-BOLT TURBO HEAD
    Came off a virgin stock AWD Auto 1G DMS (91), also have matching block and crank which are also...
    • The_Partout_Spot
    • Updated:
    • Expires
  • For sale 1G DSM 4G63 6-BOLT TIMING COVER
    Used, see condition in photos. Buyer covers shipping / fees.
    • The_Partout_Spot
    • Updated:
    • Expires
Back
Top