The Top DSM Community on the Web

For 1990-1999 Mitsubishi Eclipse, Eagle Talon, Plymouth Laser, and Galant VR-4 Owners. Log in to remove most ads.

Please Support STM Tuned
Please Support Morrison Fabrication

97 Eclipse (EVO) Creation

This site may earn a commission from merchant
affiliate links, including eBay, Amazon, and others.

This site may earn a commission from merchant affiliate links, including eBay, Amazon, and others.

Miasma

10+ Year Contributor
397
4
Aug 22, 2012
Calgary, AB_Canada
Well I think it's finally time I began to divulge some information about my build. Some members have been asking me to start a build journal here to show you what I'm up to, so here it goes.

I still have a long way to go before I consider myself even close to done, but this should you all a good start.

I first got my car in April 2012 from a guy who had only owned it a short time. He bought the car from the person who imported it into Canada from the US. The car had history of being in an accident, which caused a lot of damage cosmetically to the car. The eclipse is a gs model so had a n/a 420a which ran quite well, so I was happy enough. At the time of buying this car, I had minimal knowledge of dsms since I previously was into mopar while driving my srt 4. Because of the accident, the cars rear quarter panel was filled with body filler and was full of cracks that needed to be repaired, the hood was smashed up, and the side skirts were full of wholes.

I looked at the car, and figured it would be a great project car and it has been ever since. I had experience in auto body since I have restored other cars in the past, so I looked at this car as a challenge. Luckily it ran good, so I was able to drive it around for awhile until I was ready to start the rebuild. Best of all the car had limited rust.

Initially I bought a cheap turbo kit for the car and slapped it on and called it good. Which worked for quite awhile with out problems. Then after a few months of doing work I started running into lots of small problems with the engine, and at this point I had increased my knowledge of dsms 10 fold and figured to do something very very different with this car.

I am building my eclipse to be the first 2.4 long rod evo 8 combination that I know of. I am using a 4g64 block that came from a 2003 Mitsubishi Outlander, and a evo 8 cylinder head, and tranny t-case. My axels will be custom made to fit the tranny spline count and eclipse hubs. I will converting my car into awd, the same as any other gst owner who has performed this swap. The difference being that I may use a evo 8 rear differential as well.

I'll end all the typing now since I could go on and on, but now lets start showing you some pictures of how this project began from the beginning.

Enjoy, and feel free to bombard me with questions. :thumb::p

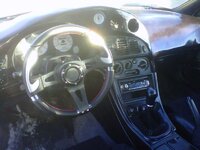
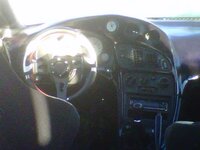
Here's a look at the car shortly after I got it...
photo2_zps5b030778.jpg


Unfortunately I didn't take pictures of the process installing my turbo kit, but this is how it sat after the install...
photo3_zpsa8d5c764.jpg

Then did some details to make it look a little better
IMG00505-20120703-1344.jpg


After putting on the turbo, I started working on the body a little. This was the beginning to a very long process. All along the sides of the car were multiple holes that need to repaired. I also had some blitz side skirts laying around that were to go with the rear bumper, so after cutting them to the right size I started molding them into the car.
IMG00514-20120718-1708_zps7fd3e495.jpg


I bolted the skirts to the car on the inside of the front and rear fender to hold them in place. I used fiberglass tape along the cap between the original side skirt and the new side skirt. Filled the gaps with body filler and then sanded it all smooth. I had false hopes that this wouldn't crack, but after not to long it surely did and I had to redo most of it, applying layers of fiberglass.

After all the fiberglass and sanding it was nice and smooth. Then gave it a quick primer with some high build.

photo4_zps7e7dec52.jpg


Now that the sides were fixed it was back to fixing that smashed up hood I had. The largest dent was conveniently in front of the hump on our hoods. So I decided to cut this dent out and make a carbon fiber scoop to fill the whole. This took a lot of work, and in the end turned out OK...but in the end this will not be a permanent hood. I am currently waiting on my new full carbon fiber oem hood.

But here's a look at how it turned out.
photo5_zpsb654c567.jpg

IMG00674-20130222-1402_zpsb00a4401.jpg


I would like to say that although the body work in these pictures does not seem like a lot, for me it took quite a long time. By only being able to do it on weekends and having a family it was tough to find time. I learned from my mistakes but in the end was able to perfect my contour lines through out the car and am very happy with the outcome.

:)
 
Next up was to change up my interior. I have shown some pictures in the past from when I made my custom dash board, but here is a little bit more in depth version of it's creation....ENJOY

My interior began the same as everyone else...grey fabric...

My idea was to color coordinate my interior to match my future goals for the cars color scheme which is black and red with a twist ( BLACK CHERRY )

I wanted a different approach to my gauge pod, so instead of going with the usual a pillar pod, I decided to make my own dash which would hold three primary gauges. My boost, oil pressure, and air fuel gauges.

I started this during the cold winter of CANADA, and here is a look at what I was working in.
IMG00584-20121202-1413.jpg

And out goes the dash for the first time.
IMG00582-20121202-1412.jpg


I sketched an idea of what I wanted my dash to look like, please excuse my lack of artistry.
dashsketch-1.png


For my dash I would be deleting the air bags. I had to think of how I would make a skeleton for my molding, and do to this I used a couple coat hangers bent to shape my new dash on top of the existing dash. I had some suede fabric laying around so I stretched it across my wire skeleton to give support to my first layers of resin. ALL done on my kitchen table, thank you to my girl friend not killing me during this process. :p
IMG00587-20121202-1652.jpg

IMG00591-20121202-1856.jpg


I used a polyester resin to harden the fabric before I could apply any filler and fiberglass.
IMG00595-20121203-1552.jpg


After the resin had hardened I started filling and shaping the dash with A LOT of bondo. After sanding each time I would add a layer of fiberglass to give more strength to the dash.
IMG00606-20121217-1605_zpsa9456064.jpg


And then once the shape was finally what I wanted I applied a couple top layers of fiberglass to prevent any surface cracks.
IMG00627-20121229-1302_zps00cff73a.jpg


Now it was staring to look like a dash again. I cut out three wholes for my gauges and sanded down the dash so I could prime it for paint.
IMG00640-20121230-1122_zps211b47e3.jpg

IMG00641-20121230-1224_zps821c9dbc.jpg

IMG00642-20121230-1754_zps6d1fcff7.jpg


The color I choose for my interior was a single part black cherry manufactured by mazda. I had my local painter mix the paint for me and then sprayed it and was quite happy with how it turned out.

IMG00644-20130101-1622_zpsaf32ea33.jpg


Time to get it back in the car and finish the rest of the interior.

IMG00649-20130106-1418_zps173aa911.jpg


Through out my entire interior I sanded and sprayed everything black cherry and other pieces black. I installed black suede racing bucket seats, my head liner, center consel, rear seats, and door fabric is also black suede. My steering wheel is a quick release after market. And I skinned most my plastic panels such as a pillars in carbon fiber.

:)

Next up…
Now was time to start considering my engine plans. I knew I was going to swap my engine and build an evo 2.4 long rod. So I also needed to think about my turbo options. Well around this time, I happened to find a genuine Holset hx40 turbo for sale locally from a guy in the city. So I jumped over to pick it up. It is a 8 blade hx40 that has never been modified. It needed a rebuild, so I ordered the kit and rebuilt and polished it.

I will be machining this turbo for a 6 blade batmowheel in the future after my engine is built.

But here is a look at the turbo before and after I rebuilt it.

IMG00695-20130305-1213_zpsa4a74aa5.jpg

Holset_zps995e9604.jpg

It still needs more polishing to get it to a mirror finish like I want, but I'm going to wait until after I have the compressor cove machined.

Comparison photo to my old 50 trim.
IMG00694-20130305-1210_zps22ec156c.jpg


:)
 
Spring was on the horizon and sun was melting, which meant it was finally time to tear out that old 420a block, and get down to business. :sneaky:

The first day snow stared melting and it was warmer than 5*c here I started removing everything from the engine bay and labeling my engine harness.
strippedengine_zps24004005.jpg


This was going to be my first engine pull so I took my time to make sure I knew what I was doing. I bought a 2 ton hoist and got to it.

And out it goes!
strippedenginebay_zps4ecb8d20.jpg

Sitting in the bay was my brother giving me a hand.
578195_10151543731467559_1345743896_n_zps308a90c8.jpg


Since I was going to paint the exterior of the car, I needed to paint the engine bay as well. So to do this a lot of cleaning was required, but soon enough it was ready to be primed.
IMG00723-20130418-1714_zpsc13ae66e.jpg

Clean and primed for paint.
IMG00730-20130504-1623_zps43237599.jpg


Along with priming the engine bay I also under coated my wheel wells.
IMG00732-20130504-1623_zps1d06c1b1.jpg


I had thought back and forth about how I wanted to paint the engine bay. Whether I wanted a shiny finish to match the exterior or a flat black to hide the dirt. I chose to use a flat black pearl.

And there she is all clean and black.
IMG00734-20130505-1449_zps4539a5ea.jpg


:)

While I had all my fronts suspension and my sub frame out, it was time to grind away the surface rust and refinish them to look like new. I didn't have any pictures of how they looked before, but I'm sure you can all imagine the amounts of grease and rust that cover these parts. I had to scrub and sand blast all these parts before re coating them.

I used a high heat red metallic on these parts and then re-installed them all. Looking pretty good, I think.

IMG00741-20130507-2013_zpsdd171d22.jpg


After refinishing all my front suspension components, I also had to order new front wheel bearing assemblies since my had seized after beating them out with a three pound hammer haha. But once the wheel were on the ground it was time to start prepping the car for its paint job. I scuffed the whole car and then sprayed a black epoxy primer.

photo_2_zps0ff72d49.jpg

photo1_zps50a4aa6c.jpg


:)
 
Now it was time for a break from all the body work I have been doing over the last year, and time to shopping for an engine.

Again locally I managed to find a 2003 Mitsubishi Outlander 4g64 long block for $100. The owner said it had spun a number 2 rod bearing, but I wasn't to concerned since I new I would be rebuilding this engine anyway.

My reason for using a 3g 4g64 block is that the engine sits at the same orientation as a 420a engine in eclipse gs models. So by using this engine I will be able to mount it with minimal difficulty for my engine swap.

photo10_2_zpsb92f3ae6.jpg


After I tore into the motor, I found that the rotating assembly was in great shape. The cylinder walls were great, bearings had next to no scoring and most of all none of the bearings had spun. The one thing I did find however was that the number two intake valves were cracked around the seat, which would lead to bad compression and could have made the owner suspect a spun bearing. I was super happy to find this block be in this good of shape, and only have paid $100.

For my build I am using a Mitsubishi Evo 8 cylinder head, so the fact that the 4g64 cylinder head was in rough shape meant nothing to me. And I actually managed to sell the 4g64 sohc cylinder for $150 to someone, so made $50 bucks of the block already. :p

photo12_2_zpsc4802c77.jpg

photo16_zpsb31580ff.jpg


I cleaned up the block and gave it a fresh coat of black engine enamel.
photo19_2_zps4ad835d6.jpg


Here's a look at the 100mm crank shaft from the block. I will most likely reuse this crank since it is still within spec and can easily hold my hp goal of 600.
photo21_2_zps8bb31350.jpg


I cleaned up my front oil case, whether or not I use it I'm not sure yet but...we'll see.
photo5_zps57b24a07.jpg

photo7_zps50d15bf0.jpg


I also ported my main oil galleries along the front of the block.

When a 4g64/63 engine is sand casted it leaves rough sand casting along the inside and outside of the block. While using a race type engine, this sort of thing can cause problems in your oil assembly. The loose sand in the casting can break off and built up over time so to prevent anything like this I ported and smoothed out my main gallery.

I would explain in greater detail about this process and why it is good, but I do not know enough about it to properly do so. I will leave it to the pros to explain. I think Bogus has a how to on this, as well as jafromobile on youtube.

I will also be using glyptal on the inside of my block to assist in oil flow.

I masked off the front side of the block and plugged the number one gallery so that nothing got into the block.
photo10_zpsc8c3ff63.jpg


I used my electric dremel with a round carbide bit and some sanding wheels for this task. And then finished it off with some wet sand paper.

photo12_zpse3ee3cfe.jpg


:)

Last thursday, August 29, 2013 my evo 8 cylinder head arrived from a guy on the evo forum site. I managed to get this for a good price and was very happy with the packaging it came in.

This head has 25k miles on it and has cosworth high rpm single springs, and I also bought cosworth m2 272 cam shafts.

IMG_2524_zps744cbd51.jpg

IMG_2525_zps96ea305d.jpg

IMG_2526_zps2ee66658.jpg

IMG_2527_zps58ac6dca.jpg


Perfect fit on my 4g64 block
IMG_2528_zpse07ddf0c.jpg


I'm currently looking for a good valve spring compressor so that I can take the block apart to clean and glyptal the inside and port polish the outside.

:)
 
Later this day I went to pick up a u haul trailer so I could haul my car to Edmonton, Alberta where I would be painting it... Some of you may have just seen my Paint is Done thread.

Over the long weekend I finally was able to paint my car. I have been working on building my engine as well, so to move my car I needed a trailer. After I got the car to the destination I built a make shift paint booth with poly film, and box fan, and some filters.

I used a 12.5 cfm 120 gallon compressor and an hvlp gun to the job. I spent about a year perfecting the body work the best that I could. I have a blitz rear bumper and side skirts which have been molded into the car with lots of fiberglass and bondo. I used the fiberglass layers to ensure strength and that no cracking would appear. Being that I was never a trained auto body tech, I spent many hours fixing mistakes and learning as much as possible.

I used a two part urethane base coat with is a black metallic paint, consisting of different blue, yellow, red, and green pearls. And then I bought a red pearl powder and mixed into my first stages of clear coat to create my top coat layer. Then finished it with clear coat. I used 3 layers of base, 2 layers of top coat, and 3 layers of clear coat.

Now I've got to finish wetsanding and buffing the car, which I expect will take me about 3 days to finish off and on.

This is the first start to finish car I have ever painted before, spraying the jams and engine bay. I'm very happy with the out come and hope everyone likes how it turned out.

IMG_2529_zps5c795be7.jpg

IMG_2535_zpsa0ef6e7b.jpg

IMG_2531_zps054dee4f.jpg

IMG_2539_zpsbe0e0a6b.jpg

IMG_2543_zps3e1a8a3b.jpg

IMG_2548_zpsd38b5048.jpg

IMG_2549_zps58a90024.jpg

IMG_2547_zps723c5259.jpg

IMG_2550_zps29de3f94.jpg

IMG_2551_zps35f43f18.jpg


Now that the paint is done all I need to do I wetsand and buff polish it to really make it shine. I am very happy with how well the paint came out, especially since I was not in a professional booth. :thumb:

As things sit now, I am waiting to get my new carbon fiber hood, and I still have a lot of work to put into the engine.

My engine is going to consist of:

100mm oem 4g64 crankshaft
Manley H Plus 156 mm rods
Manley Racing Pistons 9.1:1
ACL Race main and rod bearings
ARP main and head studs
Balance Shaft Delete
Fluidamper

Mitsubishi Evo 8 Cylinder Head
Cosworth Single Springs
Cosworth M2 272 cams
1mm oversized valves

Other parts still need to be obtained and lots of time to put in. I'm heading back to school again, so things will be back on a budget for a while.

Stay tuned for more, and sorry for such a long read but I had to update you all on everything I've done...

:)
 
what transmission are you going to be using?

I am using a mitsubishi evo 8, 5 speed transmission and t-case, I still need to buy it but this is the plan.

kayosfrawg - I'm using 1201 Red Enamel Glyptal. The reason for this is to add a smoother surface to the inside of block to increase oil flow. I got the idea for this from the old big block guys who used glyptal in there engines. There is no harm when glyptal is applied properly, so I see no negative to using it. It is only one more thing I can do to increase oil efficiency in my engine.
 
Will the front sub-frame clear the t-case from the evo transmission?

What is the plan if it does not clear?

^hopefully you could go into full detail for the front sub-frame when you get to that part.
 
Jesse2012 -

I will probably be looking at either tein ss or megan racing coilovers. I still need to look further into my suspension and braking options for this car. I have until I get the engine in to decide haha. But I'll be looking into different options to best suit my use as a street/drag car.

I have been looking at either Nitto or Hoosier tires. It will depend on which tire variation I decide to go with. I know that I want to run 22540R17 at the minimum, possibly wider, but no wider than 245 since then I would need to do a lot of modification to fit them.

I'm open to suggestions for suspension, just keep in mind I will be awd.

2gnt -

The 2g N/T sub frame will most likely not clear the t-case. It will clear the transmission if converted to fwd with a welded front diff. I know that I want to convert my car into awd, so my options are either:

-Modify my current sub frame by cutting to fit, which would be a bit of a hack job
-I could try using a 2g gst/gsx sub frame
-Or go with a chromoly sub frame, this will be expensive but most likely the route that I go with. I should be able to order one from someone here and instead of them welding the rear transmission mount on the passenger side, have them weld it on the drive side to fit my engine/tranny orientation.

So ultimately I refinished my sub frame red for nothing, but at least it looks good for now while it sits.

Just finished taking my evo 8 head apart. I made a valve compressor by cutting a piece of pipe to fit with my c clamp and popped out my keepers.

Now that the head is fully disassembled, I need to get it all cleaned up.

I was looking for some advice on what everyone thinks I should do about porting?

I will be using Cosworth single springs, cosworth m2 272 cams, 1mm oversized valves on both intake and exhaust. At the very least I will clean the rough casting inside the ports, but my goal is 600hp with room to grow. So I'm wondering how much of a port job you would recommend for this power?

Hoping for a wiseman to chime in on this topic, thanks!
 
Support Vendors who Support the DSM Community
Boosted Fabrication ECM Tuning ExtremePSI Fuel Injector Clinic Innovation Products Jacks Transmissions JNZ Tuning Kiggly Racing Morrison Fabrications MyMitsubishiStore.com RixRacing RockAuto RTM Racing STM Tuned

Latest posts

Build Thread Updates

Vendor Updates

Latest Classifieds

Back
Top