JoshGSX95
Probationary Member
- 24
- 18
- Aug 31, 2022
-
Providence,
Rhode Island
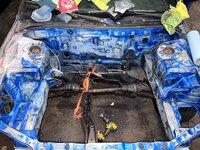
This is the Build Thread for 95’ Eagle Talon TSI. Reply below.
Last edited by a moderator:
Follow along with the video below to see how to install our site as a web app on your home screen.
Note: This feature may not be available in some browsers.
For 1990-1999 Mitsubishi Eclipse, Eagle Talon, Plymouth Laser, and Galant VR-4 Owners. This is where the DSM platform history is documented and archived. Log in to help us in our mission, and to remove most ads from the browsing experience.

This site may earn a commission from merchant affiliate links, including eBay, Amazon, and others.
 .
. . With that beings said, although I have a power goal that stock internals can handle I plan on rebuilding with stronger internals to essentially bulletproof the engine for anything I can throw at it. Remember! This is how the snowball starts if you don’t catch yourself early!
 with that being said, here’s the plans for the engine.
| clean crank / hot tank | $100 |
| Balance crank | $150 |
| Polish crank | $100 |
| Clean / hot tank | $50 |
| Pressure test check for cracks | $50 |
| deck head | $100 |
| valve job (more details to come) | $300 |
| Oil port mod | No charge |
| oil drain back clean up | No charge |
| Clean block | $100 |
| Magnaflux block | $50 |
| deck block surface | $150 |
| Bore .20 over | $350 |
| line hone mains | $250 |
| new bearings / balance shaft delete | $75 |
| Balance rods + pistons | $150 |
 .
.Hey! thanks man i appreciate it & Thanks for checking it out. This is my first time building a car so I thought it would be cool to document the journey. I’m glad to know others enjoy watching and following along it helps give me some motivation.Looking good man! I just went through a bunch a this stuff on the Talon I got. Good to see people still doing real build threads. It's a dying art!
Nobody comments, they just hit like now. Facebook ruined the forums :/
I have known that car since 09, always wished it was something! Finally got to make it how I wanted it.Hey! thanks man i appreciate it & Thanks for checking it out. This is my first time building a car so I thought it would be cool to document the journey. I’m glad to know others enjoy watching and following along it helps give me some motivation.
I’m a relatively new member to the website so I’m not familiar with how things used to be, but I’m glad I can contribute to the build thread space.
I just checked your build thread out quickly you put some serious time into that car!
") .
.
| Gasket name | Part number |
| Head gasket MLS x2 | MD349347 |
| Metal Rear main seal housing | MD172170 |
| Rear main seal | MD359158 |
| Oil cap seal | MD311638 |
| Valve cover gasket | MD186784 |
| Spark plug gasket x4 | MD186785 |
| Half moon seal | MD050536 |
| Camshaft seal x2 | MD372536 |
| Front cover gasket | 1064A040 |
| Front main seal | MD343563 |
| Balance shaft seal | MD343565 |
| Oil pump drive shaft seal | MD365697 |
| Oil filter housing gasket | MD185528 |
| Int. mani. gasket | MD192031 |
| Ex. mani. gasket (Evo MLS) | MR323654 |
| Water pipe O ring | MD030764 |
| Castle nut O ring | MD041021 |
| Oil pickup tube gasket | MD183240 |
| Trans / tcase | |
| Tcase input | MD723202 |
| Tcase output | MR983368 |
| Axel seals | |
| Front left | MD719710 |
| Front right | MD707184 |
| Rear | MD707184 |
| Tranny output | MD723202 |

I needed this thank youKEEP GOING!!!!
 I should have another update soon. The short block is patiently waiting for me to get to it. PATIENTLY. It’s practically harassing me at this point. I have everything ready for assembly.
