


all black 4G63
5+ Year Contributor
- 270
- 50
- Aug 5, 2019
-
Chicago,
Illinois
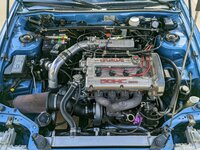
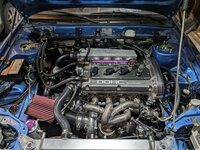
nice build man! just curious, where did you come up with the idea to use the MOPAR style knock sensor? also, I notice you installed the slim fan mounting hardware using the springs between the tab and radiator. Is this the proper way?? I have the same and could not find an answer for that from Mishimoto. and is your radiator lower support modified to bring the radiator back at the bottom or is that stock. What are those radiator support brackets?


