The Top DSM Community on the Web

For 1990-1999 Mitsubishi Eclipse, Eagle Talon, Plymouth Laser, and Galant VR-4 Owners. Log in to remove most ads.

Please Support Fuel Injector Clinic

What to check next ?

This site may earn a commission from merchant
affiliate links, including eBay, Amazon, and others.

This site may earn a commission from merchant affiliate links, including eBay, Amazon, and others.

NHerron

10+ Year Contributor
2,776
58
Nov 5, 2011
Missoula, Montana
Hey guys I have 2 CEL's that's been driving me nuts. Car is 97' turbo, stock ECU, 6 bolt swapped but did not have this problem before I rebuilt the same 6 bolt. Did not mess with the emissions wiring.

P0403 - Exhaust Gas Recirculation Circuit Malfunction

P0443 - Evaporative Emission Control System Purge Control Valve Circuit

These link's gave me a good explanation and ways to check the problem out

OBD-II Trouble Code: P0403 Exhaust Gas Recirculation Circuit Malfunction
OBD-II Trouble Code: P0443 Evaporative Emission Control System Purge Control Valve Circuit

Between those links and my FSM tech diagrams I see no reason why I still get these CEL's

Middle of firewall, behind intake manifold, I unplugged the EGR solenoid and got 75 ohms resistance. Ok good. Unplugged the EVAP solenoid and got 43 ohms resistance. Right on

Checked voltage on the disconnected connector for each solenoid and got source voltage between the pins, key on engine not running. Plugged them back in and no more ground, just 12V on each wire.

So I have source voltage between the pins unplugged, but when plugged in, the ECU disconnects ground for each solenoid.

All this tells me my solenoids are good, and power and ground wires are okay. I have yet to check ECU pins for the ground wires of each solenoid but since I got said results I don't see why I would need to.

What else is there to check? Better yet, how is the fault detected for each code? Please help, this is a new build with less than 400 miles and I'd like to rely on my CEL for things that actually matter to me :coy:
 
Well I know that the ecu looks for a particular resistance at key on for those solenoids. So that's more than likely why your tripping the codes. Try this and see if your light quits coming on. Find which wire on each is the 12v. Stick a temp wire in each and run to a ground like battery, firewall, engine. If the light stays off, follow the original grounds to find the fault. I don't remember for sure but I don't believe those grounds go back to the ecu anyway.
 
Okay I tried a few more things today. Looking at ECUlink's PDF file
http://www.dsmlink.com/images/forums/2GECUPinout.pdf
-I pulled pins 6 & 9 to check for 12V, key on engine not running. Since the solenoid was still connected I got 12V, as I should.
-Then I disconnected each solenoids connector and both pins 6 & 9 to see if possibly there was a short before the ECU. I got infinite resistance, *no shorts*.

Maybe there is resistance in one of the wires. So I took a 1/4W resistor which was rated a little less resistance than each solenoid and put them into each connector (to get more current flow)
Well I still get the codes :(

What else is there to do? Should I be testing things differently?
 
Yes engine not running it's 12.5/6 and running it's 14 +/- .5

I was thinking of placing the solenoid right next to ECU to eliminate any wiring problems but hoping someone had a better idea before I do that
 
Last edited:
Yeah I did. Just like FSM shows I applied a vacuum and it held fine no leaks. Of course I also have done a BLT with only the injector seals leaking. But I'm not too worried about that since I'll be dropping in the new 780's sometime next week

This whole situation is real annoying. Once I figure it out, I'm thinking about doing a full emissions delete and maybe fiddle with some resistors to get rid of even the solenoids. It's Montana but I'd still make everything reversible in case I ever leave the state

Tomorrow I'll try sticking the solenoid next to the ECU and see if the code goes away
 
Can someone give me more insight to the code P0403, I don't have anymore ideas and exhausted the search

I directly wired the EGR solenoid next to the ECU to see if the code would disappear, but it didn't. Tapped pin 6 (LgB) on ECU and ran to one pin of solenoid. Then ran other solenoids pin to cigarette lighter positive (since it's +12V anytime key is on)
 
I unplugged the EGR solenoid and got 75 ohms resistance. Ok good. Unplugged the EVAP solenoid and got 43 ohms resistance.

Both of those are out of range for measuring resistance between the solenoid pins.

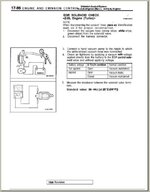
EGR solenoid resistance standard value: 36-44 Ohms at 68*F
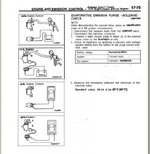
EVAP solenoid resistance standard value: 17-21 Ohms at 68*F
 
Hey Zach, I could have sworn I double and triple checked the specs in my FSM and now that I look again my FSM is similar to what you posted

I'll go work on that now

Thanks, I'll post back
 
have to think these 2 are related in some way, too curious they both keep coming back...
This is the only access info I have @ home, but the diagnostics for a PO403;

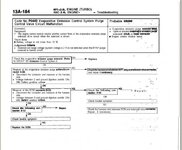
DTC P0403 - EXHAUST GAS RECIRCULATION (EGR) FLOW MALFUNCTION
NOTE:For terminal identification, see TERMINAL IDENTIFICATION in SELF-DIAGNOSTICS section. For circuit and wire color identification, see WIRING DIAGRAMS - 2.0L - TURBO article.

1)Install a "T" fitting between vacuum hose (Green-striped) and EGR solenoid nipple. Connect hand vacuum pump to "T" fitting. Start engine. Monitor vacuum while racing engine. If engine coolant temperature is 68°F (20°C) or less, vacuum should not exist. If engine coolant temperature is 176°F (80°C) or more, vacuum should momentarily rise over 3.9 in. Hg. Go to next step.

2)If vacuum is as specified, go to step 5 . If vacuum is not as specified, disconnect EGR vacuum hose (Green-striped) from throttle body nipple. Connect hand vacuum pump to nipple. Start engine and gradually increase RPM. Vacuum reading should remain constant as RPM increases. If vacuum is as specified, go to next step. If no vacuum exists, check throttle body purge port for obstructions.

3)Turn engine off. Label and disconnect vacuum hoses from solenoid valve. Disconnect electrical connector. Connect hand vacuum pump to solenoid valve nipple where White-striped hose was connected. Apply vacuum to solenoid valve. Vacuum should hold.

4)Apply battery voltage across terminals of solenoid valve. Vacuum should bleed down when voltage is applied to terminals. Using an ohmmeter, check resistance across solenoid valve terminals. If resistance at 68°F (20°C) is 36 to 44 ohms, go to next step. If resistance is not as specified, replace solenoid valve.

5)Disconnect EGR solenoid connector. Turn ignition on. Check voltage between ground and EGR solenoid connector terminal No. 1. If battery voltage exists, go to next step. If battery voltage does not exist, check wiring harness between MFI relay and EGR solenoid.

6)Turn ignition off. Disconnect PCM connector. Turn ignition on. Check voltage between ground and PCM connector terminal No. 6. If battery voltage exists, check PCM connector. If PCM connector is okay, replace PCM. If battery voltage does not exist, check EGR solenoid connector. If connector is okay, check wiring harness between PCM and EGR solenoid.

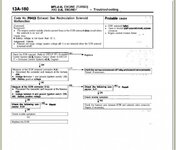
DTC P0443 - EVAPORATIVE (EVAP) CONTROL SYSTEM PURGE CONTROL VALVE CIRCUIT MALFUNCTION
NOTE:For terminal identification, see TERMINAL IDENTIFICATION in SELF-DIAGNOSTICS section. For circuit and wire color identification, see WIRING DIAGRAMS - 2.0L - TURBO article.

1)Turn engine off. Label and disconnect vacuum hose (Red hose) from purge solenoid valve. Disconnect electrical connector. Connect hand vacuum pump to solenoid valve nipple where hose was connected. Apply vacuum to solenoid valve. If solenoid valve holds vacuum, go to next step. If solenoid valve does not hold vacuum, replace solenoid valve.

2)Apply battery voltage across terminals of solenoid. Vacuum should bleed down when voltage is applied to terminals. Using an ohmmeter, check resistance across solenoid terminals. If resistance at 68°F (20°C) is 36 to 44 ohms, go to next step. If solenoid does not test as specified, replace solenoid.

3)Disconnect purge solenoid vacuum hose (Brown hose) from purge solenoid valve. Connect hand vacuum pump to Brown vacuum hose. Start engine and gradually increase RPM. Vacuum should exist at part throttle. If vacuum exists, go to next step. If vacuum does not exists, check throttle body purge port for obstruction.

4)Disconnect purge solenoid electrical connector. Check voltage between ground and purge solenoid connector terminal No. 2. Turn ignition on. If battery voltage exists, go to next step. If battery voltage does not exist, check wiring harness between MFI relay and purge solenoid connector.

5)Turn ignition off. Disconnect PCM connector. Turn ignition on. Check voltage between ground and PCM connector terminal No. 9. If battery voltage exists, check PCM connector. If PCM connector is okay, replace PCM. If battery voltage does not exist, check purge solenoid connector and wiring harness between PCM and purge solenoid connector. Repair as necessary.
 
Last edited:
Sorry getting back to this late. I just been taking a break from the whole thing

Wrencher, thanks that helped alot. Unfortunatly, everything checked out with the testing. EXCEPT for the solenoid resistance, which turned out to be 75 ohms

Though I'm not sure if buying a new solenoid would help. I put a 39 ohm resistor in the EGR connector and I still get the code. With that still occuring, I'm hesistant on paying the price for an OEM solenoid of course

Does that code solely point to electrical issues or something else additionally? I'm going to wire in the resistor next to the ECU for the next few days and see if maybe the issue clears up. Maybe it takes so many key turns for the ECU to realize the problem has been fixed?

Thanks again for the help. Are you a Mitsu tech currently?
 
Was at a dealer many years ago.
I'm @ an independant shop now....

They're not clear on the code monitoring in the info I have access @ home.
But it is an emissions system.
So it will fall under a non-continuously monitored system.
In otherwords enabling conditions must be present for it to run the particular monitor.
That & it likely has to run it a few times to self clear.
Not unlike the same it does to turn the light on.

But by the testing description it seems like it is an electrical code, but is looking for system feedback by it's actions.
Likely 02 reaction from EGR & purge commands during the monitor in certain conditions to ensure the systems operation.

I can search other info to see if I can get a more detailed descriptor of the monitors exact conditions.
But rarely is it just electrical with these 2 systems.
 
Great news in theory! And in the making...

Good thing I took a break from all this because I wasn't looking at things right. I missed the specs in the manual for the solenoids fer' one thing and thought they were good. I mean, they were good six months ago when the car was parked... ya I know shame on me for thinking that :p

Yeah... but who cares if the solenoids tested bad, why the hell wasn't the resistors trick working to mimic a GOOD solenoid!?

Well strangely enough, I got exicted finding out why. :sneaky: It also made me realize how much I love electronics and should persue that fantasy engineering degree...

So I knew that the ECU looks at the current flow but what I didn't think about was voltage spikes from when an inductor discharges... And as it turns out, the ECU looks for this! Ah tricky tricky!... They anticipated people like me with the idea of bypassing clunky solenoids with a tiny resistor :notgood:

But that's not going to stop me. Once I confirm proper operation with buying a couple new solenoids, I'll balance between cost, looks, and shear sanity to come up with a good bypassing solution :D

Eventually after all this, I think a brief write up on the matter would let people know about how and why these infamous codes show up to the party uninvited...

FSM pictures attached (97'-99')
 

Attachments

  • p0403.jpg
    p0403.jpg
    58.6 KB · Views: 365
  • EGR.jpg
    EGR.jpg
    44.6 KB · Views: 344
  • p0443.jpg
    p0443.jpg
    59.6 KB · Views: 322
  • EVAP.jpg
    EVAP.jpg
    63.1 KB · Views: 420
Support Vendors who Support the DSM Community
Boosted Fabrication ECM Tuning ExtremePSI Fuel Injector Clinic Innovation Products Jacks Transmissions JNZ Tuning Kiggly Racing Morrison Fabrications MyMitsubishiStore.com RixRacing RockAuto RTM Racing STM Tuned

Latest posts

Build Thread Updates

Vendor Updates

Latest Classifieds

Back
Top