The Central Hub for DSM Community and Information

For 1990-1999 Mitsubishi Eclipse, Eagle Talon, Plymouth Laser, and Galant VR-4 Owners. This is where the DSM platform history is documented and archived. Log in to help us in our mission, and to remove most ads from the browsing experience.

IMG_20220213_120301.jpg

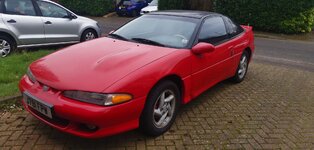
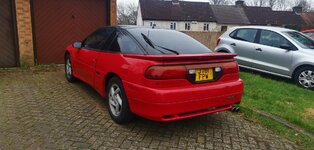
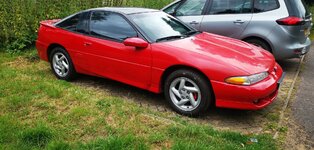
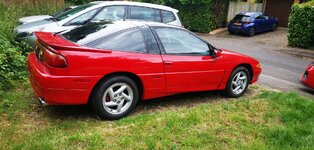
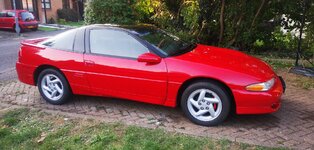
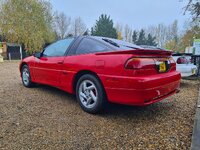
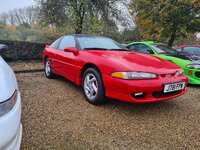
Stock resto

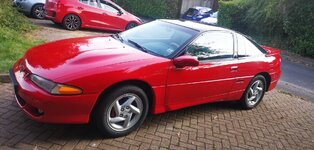
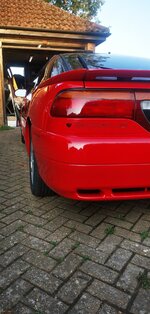
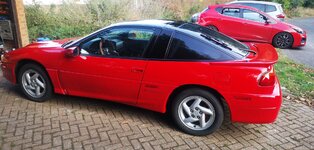
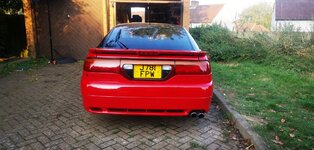
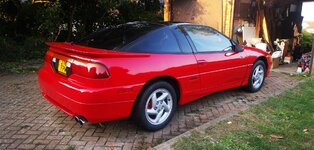
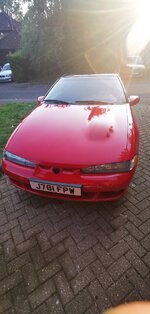
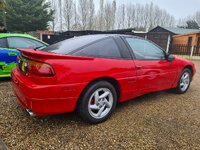
Will be almost a stock-ish build! it's virtually RUST FREE!!! bare minimum surface paint flaking so I could not pass this up!

This site may earn a commission from merchant affiliate links, including eBay, Amazon, and others.

FIBA M - EC17PSE

Supporting Vendor
6,752
5,158
Nov 1, 2008
Orlando, Florida
So I picked it up this morning yay. drive back was ok but nervous as an older car and not knowing the full history! but I made it back all ok and well.

there are some problems with it but im currently helping my 91 Talon friend here restore him so I have to get his done first before i can start mine.

current known problems are listed below!!

* Cold start issue! possible ecu temp sensor or fiav issue. intake temp sensor was replaced i was told but to rule it out i might do this again myself with a good known brand i trust so its up to my spec and detail

* suspension needs addressing! its soft and its old so thats pretty simple for me to tackle.

* tires are old and soft / deflating so i got 2 option here! replace the tires and refurb the oem wheels or....... put my rare 17" bridgestone wheels on and new tires? if i did this then i would need to lower it a bit but that might be part of the suspension refresh plans?

* the trans is stuck in third gear so its not nice on a highway nor pulling away! so for this i plan to drop the pan and clean the entire valve body out and install a new filter. I dont know whether to install a shift kit while im here to make it a better system overall? OD does not work so It may need a good clean and dismantle anyway.

* the timing is an unknown so thats one of my vital parts to get done and out the way also. all fluids will be refreshed inc any sensors and stat along the way! might as well.

other then those issues its a really nice car! I got all the oem parts with it so things like the air intake will go back to oem and also the steering wheel might go back to oem also as i dont like the one thats on it.

for a 67k mile car it shows its very clean and really rust free!

other small bits i need to address are passenger window sticks and seatbelt does not work so never owned a 1G before I now have some new learning to do.


the other long question is............. do i put my old turbo kit on it from my 2G?? this maybe something I do later on if I do decide to upgrade it.
 
Actually decided and had time to work on this talon! Shocking...

So over the last 2 weeks i have started to work on the main things and a clean up of parts.

AT, the valve body came out as i wanted to install a shiftkit and change the fluids and filter anyway. Part of new ownership is going through it all. The fluid was dirty snd filter was some weird double sided filter mesh so i got a NOS oem unit and plenty of spares LOL. Shift kit went in ok as normal and done a few of these now so getting quicker at them. The seperator plate was in good condition thankfully so did not need a spare but with little miles its no wonder its not damaged. This is now back in currently and just awaiting the atf fluid to turn up then i can finish this all up.

The TCU i read was an issue so i took this out to confirm the capacitor had leaked and its not that bad, i got new ones on order in the exact same as oem so once out will clean around it snd protect it once all back together.

Working on some of the corroded parts im blasting to remove rust, flaked paint and painting these to look nicer and fresh again. And it makes a huge difference. The valve cover is next and i will be re painting it in oem colors just so its as original as possible. It needed a clean so its being unltransolic cleaned as under the cover was a bit of oil staining which is not nice so will clean that off and inside the baffles also due to the age.

I have everything for the new timing belt and pullys and stat to go on so this will be 100% new also.

Once all this is done im hoping i got all gears again and its now possible to get the yearly i spection done. I would love to use this during the summer months this year. Me and another local 1G (gsx) i am restoring shortly will roll around together, he will be faster but having TWO oem cars is something of a great thing. He trust me to do his restoration and work on his chassis as no one else likes to for somereason LOL so I am happy to help him and get stuck in for him on the chassis as he is the original owner also! Together our chassis will be amazing to drive about as a pair.

IMG_20240408_070623.jpg
IMG_20240408_070628.jpg
IMG_20240412_174957.jpg
IMG_20240412_175011.jpg
IMG_20240412_175019.jpg
IMG_20240413_140455.jpg
IMG_20240413_140556.jpg
IMG_20240413_140621.jpg
IMG_20240413_140618.jpg
IMG_20240413_140610.jpg
 
Semi productive weekend on the 1G.

Got rained out and was cold so only could do so much but did what I was able to do as I got stuck on 2 things but all being sorted.

This car was an unknown to me I want to go through everything, so I removed the timing belt and pullys to find the oem belt had been replaced with a gates belt BUT the pullys were old and shot! Even the balance belt was changed but seems as if they did not bother with bearings at all!!! Pump was very old! This is why doing maintenance on a car you got is key as you DONT know the history and best to do it while you own it now so it's peace of mind.

I then cleaned a few things up along the way started on the oil service and plugs, did fuel filter also which came of nice and easy for the banjo bolts.

Timing cover looks brand new apart from the rubber being dried up but im trying out some new degreaser lemon cleaner and its doing an amazing job this far of making things really really clean.

Since sunday has been a washout i decided to clean up the TCU! I read some tips on clean up and preventive maintenance once done so that's good to know and learn more on PCB boards. the damage and leak was not as wide spread as i have seen online but still messy. Clean up was slow but fine brushes helped in the small gaps and looks a whole lot better than before! Then i got to de-solder the capacitor then clean under there which also makes life easier. Removal was harder then the install of the new one only because you needed to heat, hold and pry the old one out but it all released ok and the new one looks right at home once again but just smaller due to modern technology and sizes. So with that done, I HOPE this has solved the 3rd gear only limp mode! Time will tell when i can get it all timed up and started and hope when i select 1st i get movement..... Will be amazing if it does!


Thats about all for now. I have some cool pics shortly as i have gone over some parts to really help make it refreshed and clean once again!

IMG_20240427_100814.jpg
IMG_20240428_100706.jpg
IMG_20240428_100712.jpg
IMG_20240428_190606.jpg
IMG_20240428_190547.jpg
IMG_20240428_190652.jpg
 
Last edited:
Another weekend and another eventful time on the 1G trying to bring it back!

Was a great weekend (mostly)

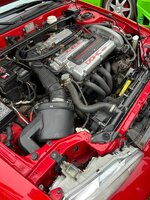
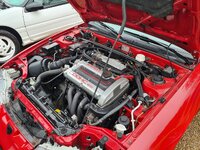
I have blasted and painted alot of parts! Pullys, intake, random covers and brackets that had surface corrosion that was right in your eye sight so those were taken care of. Then i had the VC cleaned up and it took a bath in the ultrasonic tank as it has never been cleaned! The old paint was flaking from alloy corrosion, the amount of carbon that was inside the baffles was shocking! Its all 100% clean now and i opted to paint it a slightly lighter metalic silver. I like the darker silver but switched it up some so the sun hits it then you see some nice speckles for a modern touch! Also the VC bolts were replaced with noce new shiney ones. Old rusty bolts here would not look nice so is the ONLY big change really from oem.

I used my very new still red Toda belts. All new components though. This is hidden so no worries on it but i know its a strong belt.

Engine was put back together and re timed and managed to fire it up! Woop woop. I still have a cold starting issue even though a few sensors are new so i have to go and test a few like the TPS, CAS and see why its not picking up straight away. I have fuel/pressure and spark! Its just not igniting it straight away!

When it ran for a bit the cel came back on so im borrowing an odb scanner and using the obd2-1 adaptor going to see what that shows me as the problem! But i do believe it is a sensor of somekind! Just got to figure out what sensor??? I have a new cas on hold incase its that which is the later 93/94 dome cas as its better,

Transmission was all filled and works but... Stuck in 3rd gear still! (Damn it) So the TCU capacitor was not a solve so i dont know what now on that so i have printed off alot of the manual for testing circuits and eed to make one of those test rigs with lights or switches i have seen. @1990TSIAWDTALON did i read you made one to test trannys on? I believe it was you but no idea where i saw this or what you used?


Other then that the car does move and driver forwards and such. So thats a good result and knowing all pullys are new and not old and corroded as they were very bad! Like bad bad. I have peace of mind now on that part.

Next parts are as follows.

* Replace the vac hoses to all black and confirm the route of them also. (FSM manual printed off for this).
* Start looking more into the trans issues again.
* Do more yesting for the cold start problem.

So not much more but a noying ones to do and time consuming of everything.

IMG_20240505_122938.jpg
IMG_20240505_122935.jpg
IMG_20240505_122925.jpg
IMG_20240505_085430.jpg
IMG_20240505_085414.jpg
IMG_20240505_085400.jpg
IMG_20240505_085347.jpg
IMG_20240504_163238.jpg
IMG_20240504_113817.jpg
IMG_20240504_113812.jpg
 
Not had much time on the 1G recently, today was all I can do and even that was to fault find my current issues it has and see what i can find out.

baseline on problems as maybe someone knows the best way to resolve it vs what I am trying.

*1 Hard cold starts
*2 once started tapping the throttle kills the engine
*3 once hot and moved and back into part idle shoots up to 1600 rpm
*4 still stuck in limp mode 3rd gear on TCU!


So TODAY was to concentrate on the ENGINE SIDE ONLY! So *4 is out for this one.

decided to try a different CAS to see if that was a problem with the cold starting - FAILED!!! makes no difference and works with it still
Once I did that I then went to pull codes and I got 4 which are
13 IAT
14 TPS
21 ECT
25 Baro temp

from here I go into checking mode for things.

* TPS - Checked 2 of these and both come back fine with resistance in spec of about 5 ohms, REALLY not sure as to why this is coming up then. does the 1g throttle stop sensor/clip throw a CEL if not plugged in or corrosion as inside its a bit corroded? I don't know otherwise why the TPS code came up and all I can think of is replace it or is it the ECU problem causing this to throw up?

* ECT - THIS is brand new! out the box and non OEM but doubtful it's bad. I guess testing in hot water and resistance is required for this one?

* IAT & Baro temp - This shows me it's possibly the MAF sensor but I plugged in a new one (OEM) as the car ran the same, once you unplug the sensor it tries to die. unsure of the test procedure here as nothing is really listed for the DSM. just a temp test but forget where I even saw that now

I also checked the ISC as for some reason the BISS is all the way in!!! like fully in! Turns out the ISC coil 3 is dead and does not move or respond. So I got a spare tan one so can test that and see if it helps part of the issues along the way of something working again. i might just get a black one to be safe and new.

once all those were checked I pulled the ECU as people say they are a problem in the 1G like the TCU's are. bloody things LOL
once home I opened it up to find it had been worked on before, it's not a NEAT job by any means, there is surface corrosion still but not green and the covering is all white so possibly bad covering PVA glue or it's overheated causing this.

IC105 and 107 look good so they have not blown from the ISC so that's good to find. but I'm concerned the caps have not been replaced greatly with the covering over the corrosion still and now flaking off! So I am considering either redoing it or sending it to ECMlink to get the ECU fully tested and replace and recoat the thing since I have zero way to test the entire ECU working


OH and to finish off the VC looks great in the sun with the metallic sparkle.

IMG_20240512_183526.jpg
IMG_20240512_185755.jpg
IMG_20240512_185742.jpg
IMG_20240512_183535.jpg
IMG_20240512_183517.jpg
IMG_20240512_101829.jpg
IMG_20240512_101838.jpg
 
Been a while but an update for this 1G is due as its GREAT NEWS!!!


so in my first post i go through the KNOWN issues and one is starting. WELL not anymore! as that's been 100% fixed and ticked off the list finally!

Big thanks to Thomas D and ECMtuning and his team as my ECU had a bodge job of a fix repair on the caps, it had 2 damaged tracks and it was not allowing the analog to digital converter to work and the other was killing 2 outputs of the ISC. so that might be why the ISC had a bad coil also perhaps. But now its resolved and looks really good inside the ECU the car firs straight up and ZERO CEL's come on to! so i was worrying about the MAF when infact it was the ECU and I did lean this way based on some other reading and research i did during these codes pulled.

Just goes to show that if to many codes in 1 area come out its going to be a reason for that. and in this case was the ECU. just to note on this I did buy a spare ecu incase which needs a clean up and caps done but its something I can do a lot better then the previous owner had tried on this current ECU. nice to have a spare but likely wont need it now.

I tried to adjust the BISS but i need to adjust the ISC stopper as its not closing enough as I'm only able to get down to 900 revs so the ISC needs adjusting for the rest and then I can redo idle and then timing again.


I decided I wanted to repaint the wheels as they were chipping and paint was old now. so I'm waiting on the 2K paint to come in for that which is similar to the valve cover and metallic also. These JUST about fit into works shot blasting cabnet and came out really nice and prepped for the paint. Im excited to get this done and looking super fresh!
When i took the wheels off the rotors were corroded from age and sitting about and the pads are green stuff and clashed with the red calipers (HELL NO)

I took them to work and blasted all of those and painted them in a strong black coating. This now blended in the pads to be subtle and discrete! and the rotors will now remain fresh on all the areas NOT in contact with the pad itself for many years to come.

it is all moving along slowly but nicely and once done I have left to figure out the Trans and if its still stuck in third because of electrical or mechanical. but that's a TBC when I can get back to it.

IMG_20240616_100004.jpg


IMG_20240616_095956.jpg


IMG_20240616_095915.jpg


IMG_20240616_095948.jpg


IMG_20240611_173500.jpg


IMG_20240611_173457.jpg


IMG_20240611_173446.jpg


IMG_20240611_173443.jpg


IMG_20240611_171742.jpg


IMG_20240611_171737.jpg


IMG_20240611_171727.jpg


IMG_20240611_171724.jpg


IMG_20240608_145928.jpg


IMG_20240608_145937.jpg


IMG_20240608_173802.jpg
 
It was me that pioneered the toggle switches to test/use as a temporary shiftbox. Super easy, just find the yellow and orange solenoid wires at the TCU. Run each one to its own dedicated toggle switch, and run a 12v power to the other terminal of the toggle. Shift pattern is easy to remember too.


Both on: 1st Gear
Solenoid A off Solenoid B on = 2nd Gear
Both off: 3rd Gear
Solenoid A on/Solenoid B off = OD/4th.
 
It was me that pioneered the toggle switches to test/use as a temporary shiftbox. Super easy, just find the yellow and orange solenoid wires at the TCU. Run each one to its own dedicated toggle switch, and run a 12v power to the other terminal of the toggle. Shift pattern is easy to remember too.


Both on: 1st Gear
Solenoid A off Solenoid B on = 2nd Gear
Both off: 3rd Gear
Solenoid A on/Solenoid B off = OD/4th.
Arh awesome! Sorry for my memory on that. I forget who does what after reading once so super sorry for the mistake.

I will look at making this and seeing if it works. Hopefully this will help me figure out the problem. I do recall someone saying about lights also and when they change but i dont remember who. I thought it was transdude but found nothing but do believe i saw it on tuners somewhere, possibly even with a drawing of some kind. Does this ring a bell with you and your memory? As i really wish to resolve this trans problem fully
 
Arh awesome! Sorry for my memory on that. I forget who does what after reading once so super sorry for the mistake.

I will look at making this and seeing if it works. Hopefully this will help me figure out the problem. I do recall someone saying about lights also and when they change but i dont remember who. I thought it was transdude but found nothing but do believe i saw it on tuners somewhere, possibly even with a drawing of some kind. Does this ring a bell with you and your memory? As i really wish to resolve this trans problem fully


Not sure about the lights thing unless it used a lighted toggle switch to show when it’s powered or not. Or an in-line diode to see when the solenoid is being activated by the TCU.

Bud/welcome wagon here has a good write up on how to do it. My old username was Unwythe and I gave him the how to/instructions once upon a blue moon and he made the write up on his own vehicle.
 
Not sure about the lights thing unless it used a lighted toggle switch to show when it’s powered or not. Or an in-line diode to see when the solenoid is being activated by the TCU.

Bud/welcome wagon here has a good write up on how to do it. My old username was Unwythe and I gave him the how to/instructions once upon a blue moon and he made the write up on his own vehicle.
Sweet, i shall check it all out and get ordering parts for this step. Its going to be the last step and then i can get it tested and then road legal once again!
 
Sweetm i shall check it all out and get ordering parts for this step. Its going to be the last step and then i can get it tested snd then road legal once again!


If the toggle switches work, I’d highly recommend doing the kiggly shifter mod. It makes an auto dsm a joy to drive. Almost manual like. And no need to worry about accidentally skipping gears. Lol.
 
If the toggle switches work, I’d highly recommend doing the kiggly shifter mod. It makes an auto dsm a joy to drive. Almost manual like. And no need to worry about accidentally skipping gears. Lol.
I want to keep it as oem as i can so no mods really. I know brakes are not oem but in terms of engine and function its how i want it and i have just gotten the stock air box brackets to mount that as oem was. Last piece of the puzzle done. So the wire mod is not where i want to head down but the wiring for the switches is doable as its to test it and reverseable.
 
I want to keep it as oem as i can so no mods really. I know brakes are not oem but in terms of engine and function its how i want it and i have just gotten the stock air box brackets to mount that as oem was. Last piece of the puzzle done. So the wire mod is not where i want to head down but the wiring for the switches is doable as its to test it and reverseable.

Fair point. But the kiggly shifter mod uses the stock shifter and is reversible. You just need another shift selector or pigtail for the shift selector that you can add the resistors to. If you looked in the bay or in the interior it would look 100% OEM.
 
Fair point. But the kiggly shifter mod uses the stock shifter and is reversible. You just need another shift selector or pigtail for the shift selector that you can add the resistors to. If you looked in the bay or in the interior it would look 100% OEM.
I shall take a deeper look into it if its all going to look stock and work sith oem parts. Thanks for the tip dude
 
Take me to your leader!!! 👽👽👽
Sorry could not resist that comment. There is a reason for this and I shall update on the weekend once all completed!

IMG_20240619_182657.jpg
 
Well the last pic is the reason for my Alien like state. I was re painting my wheels but this was 2K paint so super bad for you and protection must be taken to use this paint! Nasty stuff.

Well here is the final result! Its a close match to my valve cover so its a silver metallic gloss and its a higher temp rating with strong hardner for brake fluids etc. its great stuff and durable also! I used it on my daily drivers calipers not long ago in a matt black and its super tough.


I wanted to make the wheels and looks abit more modern vs the stock grey and diamond like lip. It never lasts and im not a fan of it really, so this is my version of subtle with a bit of POW included with the metallic effect. These came out really nice and im super happy with the result and looks vs how they were before! (Not seen old pics yet scroll above a few posts) And you will see how HORRIBLE they were.....

Now with tires on as of today and all balanced ready for mounting! Small changes make a huge impact and i like it.

These wet looking ones were once sprayed.
IMG_20240619_182718.jpg
IMG_20240619_182730.jpg
IMG_20240619_182754.jpg


These below are the very next day after the initial cure. Still soft at this point.
IMG_20240620_132347.jpg
IMG_20240620_132413.jpg
IMG_20240620_132425.jpg


Now with all tires on after 2 days of curing. I love how its got DSM in the wheels. Thats pretty cool to see.
IMG_20240621_165343.jpg


I painted the hub mounting black as its a thin layer and paint between the two can crack and corrode the alloy and hub. Plus its not accurate either so i did the bore and mounting face in the stone chip i like and its thin and wont crack. A smidge of copper grease will also help here and keep moisture out.
IMG_20240621_165352.jpg
IMG_20240621_165455.jpg
IMG_20240621_165832.jpg
IMG_20240621_165813.jpg
IMG_20240621_165500.jpg
 
Got my refurbished stock intake bolx brackets on. Now i finally have a solid mounted intake and no movement YAY.

Wheels are also on and man they look amazing! Vs what was on there this has made it look alot nicer and fresh.

No pics of this but i blasted snd re painted my wiper arms as they had faded snd got very matte and rough to the touch, so those got a nice gloss black finish to make them real nice again.


Then i moved my friends 1GA over as Im restoring the underside completely very soon! EVERYTHING is coming off and getting refurbished! Big job but its the last piece for this chassis to look good again as oddly enough even though its never driven in the snow and hardly in the rain its underside is worse looking then my 1GB! We think as the garage has lack of air flow thats the reason so the garage is going to have a solar fan installed to circulate and remove air to keep it moving better.


IMG_20240622_102655.jpg
IMG_20240622_102704.jpg
IMG_20240622_135746.jpg
IMG_20240622_135733.jpg
IMG_20240622_134328.jpg
 
Another WIN for me this week and DSM's!!!

Got my friends (panda) done and is ready for its inspection tomorrow and now today (sunday) I finally have gears!!!!!!!!! What a WIN..... 2 DSM's sorted in a week, oh yeah.

So I found on Tuners a new old V3 roadsurge shiftkit. Small display version but still they no longer used and i snapped it up real fast! These are great units.

Since I could not get the stock TCU fixed no matter how much i tried I had no option to use a shiftkit.
Wiring it in I decided to make it easy and reversable so later on should i find a stock good working TCU I can then run both and the switch to toggle on/off.


This is a major major thing and means its ready for my inspection now.

Next weekend will be a full wash, clean and polish then I shall book the inspection. It does feel amazing to finally have gears and even a starting car! As that was also a thing i had to fix as you know from above.


Great to finally see another DSM fully working and operational once again.

 
Back onto mine for a bit now

First call was paint correction! Its sat for a while and under a cover for a bit which did not help. My fault as its not the best cover going.

So i had to do a deep clean. This involved a machine cut and renovate and then a final hand wax but a dual stage wax.

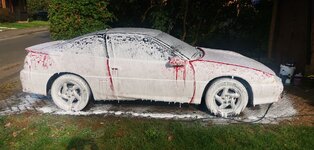
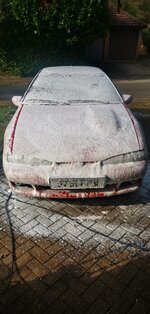
* The first step is always washing the car. Or rather pre-wash to remove the loose debris and dirt. Then I snowfoam it and let it work its magic, then rinse it off.

* After that i get nice soapy hot water and give it a nice bath.

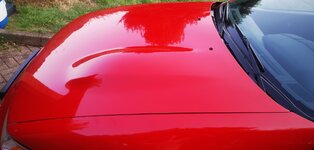
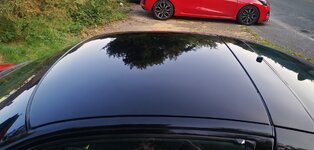
**The next stage's are the cut of the paint! This is done using a G3 product and a machine. I only needed to concentrate on the Hood, roof and tailgate spoiler, and front fenders on the upper portion. These had the worst damage which was only light and surface dullness.

Cutting takes a good bit of time, it's messy but works to remove the top layer of the clear coat that has gone hazy. Keeping it wet is key and light pressure.

* After the cut is a renovator which seals up the marks and brings back the color to some extent.

* Once all that's done it's on to another snow foam and then wash to remove all the copound from everywhere. It loves to get into grooves so washing helps get rid of this.

* Once all dried off I then do the hard work, (machine could be used but it is better by hand to feel the compound)
So I start off with a super wax from G3, it's a nice product but leaves a white powder which is annoying but cleans off well. NOT useful for rubber trim! This really bring the color back to a deep gloss look and is a great stage to do.

Then I move on to the good stuff! Canuba was... I forget the brand but it's about £60 a bottle! And not a big bottle at that.
This is great for trim so it goes onto that aswel as the lights and panels. Once dry to a haze it's polished off to leave a nice shine and now we have 2 great layers of was for protection.

It's hard work but it has never had this paint treatment in its lifetime!

CRAZY hard work is done... phew

--------------------------------------------------------------------------------------------------------------------------------------------------------------------------------------------------------------------------------------------------------------------------------------------

Once that was done I then removed the front doors window tints. These were abit illegal and i dont want that. So pulled those off and a lot of fun (hell no) removing the glue which was annoying and horrible, but i did it in the end.

Overall a great longgggg day.

My inspection is booked in a week and a half from now so once it passes i will be super happy!!!!! 🤘🤘🤘


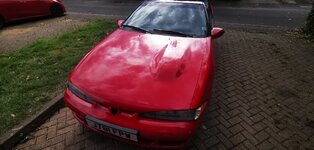
Note that the first FEW pics are the way the paint WAS before the correction! You will notice the difference 100%.

IMG_20240921_095805.jpg
IMG_20240921_095810.jpg
IMG_20240921_095826.jpg
IMG_20240921_095829.jpg
IMG_20240921_095839.jpg
IMG_20240921_095852.jpg
IMG_20240921_101309.jpg
IMG_20240921_101317.jpg
IMG_20240921_152930.jpg
IMG_20240921_152936.jpg
IMG_20240921_152946.jpg
IMG_20240921_152953.jpg
IMG_20240921_153114.jpg
IMG_20240921_173939.jpg
IMG_20240921_173956.jpg
IMG_20240921_174005.jpg
IMG_20240921_174012.jpg
IMG_20240921_174022.jpg
IMG_20240921_174036.jpg
IMG_20240921_174045.jpg
IMG_20240921_174105.jpg
IMG_20240921_174100.jpg
IMG_20240921_174113.jpg
IMG_20240921_174125.jpg
 
Last edited:
So not much going on with this. After the deep paint correction I put it through the MOT which is the UK's Yearly test to make sure ite road legal and it PASSED with zero major issues! only things picked up on is a crack in the DP and also the headlights off line due to LHD being on a RHD country. To remidy this I bought some light reflectors that stop the beam passing onto on coming drivers and it helps straighten the beam a small amount. not much ease can be done otherwise.

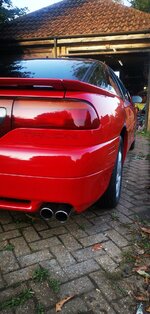
Today though 20th oct I fitted new shocks all around. I knew the stocks were funky and a drive last week confirmed I hated it and was not safe so i had to resolve this, turning a corner witht eh high sidewall tires was a hell no from me LOL.

Thus the NEW KYB oem spec shocks. Nothing exciting here as its stock and its what I call now ALL NOISE AND NO GO car LOL. it makes nice exhaust noise but lacks power and get up and go LOLLOLLOL. SORRY for the crappy pics, it was raining all day so I was outside doing this in on/off rain


Everything came off nicely and nothing broke or gave me hell. so all in all a simple job for this 1GB Talon and much needed (upgrade)

Now this is done I will start to use it a bit more before the winter fully kicks in.


NEXT plans.
These consist of rebuilding the throttle body as my IPS is bad and I cannot solve it so a 4 pin 2G TPS is being installed so along with the FIAV bypass and rebuild TB this will be a great finish the the light restoration required for this chassis.

463840555_10167625964111337_5583990380193230392_n.jpg
464008405_10167625964121337_86966411427701599_n.jpg
463979877_10167625963971337_3940495784875961344_n.jpg
463891558_10167625964176337_3320102818688218317_n.jpg
463959651_10167625963941337_1021070337924876795_n.jpg
463825214_10167625963936337_5672612291381872999_n.jpg
 
Add Value - Be Respectful - No Trolling - No Misinformation - Participate Often!
Support Vendors who Support the DSM Community

Build Thread Updates

Latest Classifieds

  • For sale 4G63 Forge Motorsports BOV
    Original Forge Motorsports bov. Adjustable with over 80 clicks on the dial. Nice to use for...
    • Galant665
    • Updated:
  • Wanted 1g 1991 Black Cherry Eagle Talon
    5-speed
    • bamatalon
    • Updated:
    • Expires
  • For sale Misc Left Over Parts
    Hello, I have a few left over parts for sale, these do not include shipping, please pm me for a...
    • r3dmak
    • Updated:
    • Expires
  • For sale Alpha Injection Clinic 2200cc for 4G63 DSM/EVO
    I have a set of Alpha Injection Clinic 2200cc high z injectors for DSM/EVO. I am stepping up to...
    • spoolinpos
    • Updated:
    • Expires
  • Wanted WTB 2g half rad
    ISO of a 2g koyo half rad or something equivalent.
    • Michael Wucher
    • Updated:
    • Expires
Back
Top










