The Top DSM Community on the Web

For 1990-1999 Mitsubishi Eclipse, Eagle Talon, Plymouth Laser, and Galant VR-4 Owners. Log in to remove most ads.

Please Support ExtremePSI
Please Support Morrison Fabrication

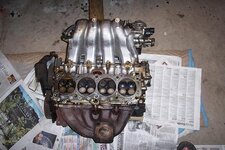
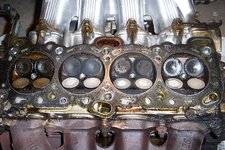
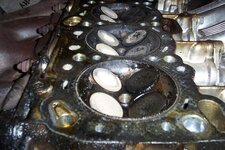
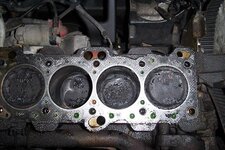
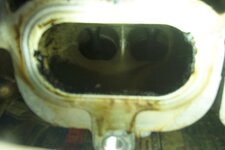
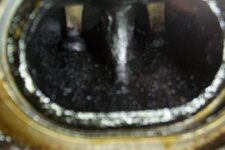
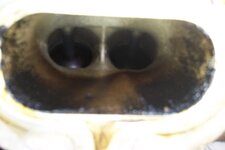
Pulled head for the first time. See Pics. Opinions please.

This site may earn a commission from merchant
affiliate links, including eBay, Amazon, and others.

This site may earn a commission from merchant affiliate links, including eBay, Amazon, and others.

tommiman

15+ Year Contributor
273
5
Aug 31, 2004
Vaughan, Ontario_Canada
So I pulled my head for the first time after seeing white smoke at idle.

See http://www.dsmtuners.com/forums/showthread.php?t=232749 for more info.

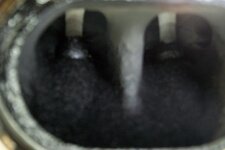
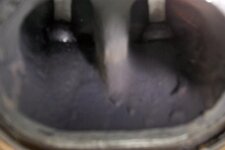
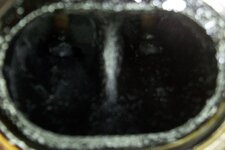
I didn’t see anything wrong with the head gasket. Maybe it wasn’t sealing well. Anyhow would you more experienced DSMers have a look at the pics and give me some opinions please.

TIA :thumb:
 

Attachments

  • Talon Engine 016.JPG
    Talon Engine 016.JPG
    69.2 KB · Views: 1,715
  • Talon Engine 017.JPG
    Talon Engine 017.JPG
    85.9 KB · Views: 1,710
  • Talon Engine 018.JPG
    Talon Engine 018.JPG
    61.8 KB · Views: 1,716
  • Talon Engine 019.JPG
    Talon Engine 019.JPG
    76.3 KB · Views: 1,707
it blew on #1 clyinder. Easy to see looking at the head. It's cleaner than the other cylinders from the water and the valve isn't all white as the steam kept it cooler and it didn't burn off the coolant. #4 also looks to be having oil coming down your exhaust valve stems. It's possible it also poped but doesn't really appear that way. But their is definitly an valve seal problem. Maybe even a guide problem if it's a high milage head that hasn't had any work done on it. I would have it checked out and at least put new seals on all the valves.

Pull the manifolds off and i'm sure the #1 port will look different than the rest. With a good tune your runners will be fairly tanish brown. Maybe black for like an inch maybe.
 
Its time for a valve job, new valve seals, head clean and resurface, and have the valve guides checked out too. Maybe throw in some revise lifters while your in there. Make sure to clean up the block surface to. I'd wet/draw sand it after cleaning as much off first w/ a razor blade and brake cleaner. It all depends on what HG you'll be going with as to what the surface finish needs to be. A composite oem or felpro will seal on just about anything somewhat smooth.
 
WOW... looks just like my engine bay... greesy! hahaha! I don't see a lot saying blown head gasket so much as burning oil... Did you do a leak down before removal? It is odd about the carboon coming off in the chamber. That does hint at the head gasket. You might wanna replace as many copper crush washers as you can while you in there. Looks like what you've got is leaking washers near the turbo with all the oily grime on the underside of the head all on the perimeter.

Hard to tell but # 3 looks to have a bent intake.... could be wrong.... fill test with a solvent of some kind would tell.
 
From what I see, #1 was trying to burn a lot of oil, and I doubt it's from the valve stems. How do the cylinder walls look?
I'd suspect tired rings.
It'd have been a little better if you'd kept the head and block orientation the same in your posts instead of swapping them end-for-end.
 
The head and rings are bad? I need a new engine? The only reason I pulled the head was b/c it was smoking white at idle:

http://www.dsmtuners.com/forums/showthread.php?t=232749

There were no other problems. When I did a compression test it read 170ish across the board. There was slight oil consumption around a litre per 3000 miles.

You guys certain that I need a new engine??? It has 115000 original miles on it.

:confused:
 
Bottom end seems like it could be fine. But I would look into rebuilding that head and getting it resurfaced. Now would also be the time to do water pump, timing belt and tensioner, and maybe upgrade to some APR Head studs.
 
Maglin said:
it blew on #1 clyinder. Easy to see looking at the head. It's cleaner than the other cylinders from the water and the valve isn't all white as the steam kept it cooler and it didn't burn off the coolant.

#1 looks to be covered in oil to me, not clean. Also looks like #4 has oil and is shiney. When you pull a head off of a properly running motor, none of it should look wet like that. Cylinders 2-3 look a bit more normal (though the valves should be a bit more tanish brown).

Other than the smoke, were you having any other symptoms of head gasket failure? Overheating, bubbling coolant, loosing coolant? As Defiant posted in that thread, a head gasket failure will not always show up on a compression test. I pressure tested my cooling system, no oil/coolant mixing, did cold/warm wet/dry compression tests with no luck. The only thing that proved it for me was a hydrocarbon test on my coolant.

You can see in this pic that the gasket blew out right between 2-3 cylinders to the nearest coolant jacket.

You must be logged in to view this image or video.
 
blackGSX2g said:
Other than the smoke, were you having any other symptoms of head gasket failure? Overheating, bubbling coolant, loosing coolant? As Defiant posted in that thread, a head gasket failure will not always show up on a compression test. I pressure tested my cooling system, no oil/coolant mixing, did cold/warm wet/dry compression tests with no luck. The only thing that proved it for me was a hydrocarbon test on my coolant.


You must be logged in to view this image or video.


There were no other symptoms. When I drained the coolant it was like new but the oil looked a little dirty for having been in there for about 1000 miles.

I don't mind getting a rebuilt head but a rebuilt engine installed might be out of my budget.
 
Anyhow, I just got a quote to get the head rebuilt.

I was quoted $250 CDN which is about $225 US.

They will change all the seals, resurface, and grind the valves.

This was the least expensive quote.

What do you guys think?
 
It's a little hard to tell in the pictures. White smoke is water. The carbon on #1 isn't really their as it is on all the others. The valves have not been getting as hot. So by looking at pics and not the exhaust manifold or both sides of the HG I would stick with what I said.

Either way now it's off. Get a top end set and get the head looked at. I do all my own head work minus the milling as I don't have that machinery handy.
 
tommiman said:
Anyhow, I just got a quote to get the head rebuilt.

I was quoted $250 CDN which is about $225 US.

They will change all the seals, resurface, and grind the valves.

This was the least expensive quote.

What do you guys think?


Make sure they check the guides as well.
 
Thanks for the feedback guys.

Since I'm down to the block I'm considering putting on new rings. I know there is one thread where someone says this can be done without removing the block from the engine bay.

If I had more space, time and energy I would take the whole thing out and drop in a rebuilt 6 bolt.

Just wondering how to do this. What I'm thinking is:

1) Drop the oil pan.
2) Disconnect the connecting rods from the crankshaft.
3) Remove the crankshaft and pistons/connecting rods.
4) Take old rings off.
5) Ball hone the cylinders.
6) Put new rings on.
7) Put the crankshaft back on.
8) Drop the pistons/connecting rods in the cylinders.
9) Connect the connecting rods to the crankshaft.
10) Put the oil pan back on.


Please correct me if I'm wrong or if I'm on the right track.
 
you cant just drop the crank, you would have to remove the trans to get that out. You can just pull out the rods and pistons and hone it and do everything else you stated.
 
tommiman said:
Thanks for the feedback guys.

Since I'm down to the block I'm considering putting on new rings. I know there is one thread where someone says this can be done without removing the block from the engine bay.

If I had more space, time and energy I would take the whole thing out and drop in a rebuilt 6 bolt.

Just wondering how to do this. What I'm thinking is:

1) Drop the oil pan.
2) Disconnect the connecting rods from the crankshaft.
3) Remove the crankshaft and pistons/connecting rods.
4) Take old rings off.
5) Ball hone the cylinders.
6) Put new rings on.
7) Put the crankshaft back on.
8) Drop the pistons/connecting rods in the cylinders.
9) Connect the connecting rods to the crankshaft.
10) Put the oil pan back on.


Please correct me if I'm wrong or if I'm on the right track.

It's much easier to pull the motor and put it on a stand.
 
DNA666 said:
It's much easier to pull the motor and put it on a stand.


LOL... I guess that means I won't be doing the rings... Not enough space in my garage to bring in an engine hoist. (Single car garage.) Next time I should back it in so the front faces the garage door. :thumb:
 
you could just push it out and and back backwards. You don't really want to do this without pulling the motor. When you go to put the pistons back in you would risk knicking the crank. You need to put caps on the rod bolts to prevent that. I don't recomend just putting rings on as the cylinder maybe worn to much and without a gauge to check it you won't know. The gauge costs more than taking it to a machine shop to have it bored.
 
I'll just clean out as much carbon as possible with a rag and fuel from the cylinders and pistons. Just took the manifolds off of the head. Left the camshaft, sprockets, and camshaft sensor. (Not sure if I have to leave or take these off to have the head rebuilt.)

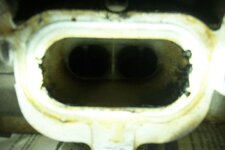
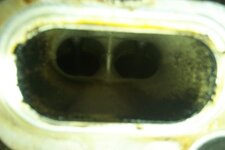
Anyhow, here are pics earlier requested of the exhaust and intake valves as seen from the manifold side.

They are in the following order:

exhaust 1 - 4
intake 1 - 4

Let me know what you guys think.

:rocks:
 

Attachments

  • Intake #1.JPG
    Intake #1.JPG
    29.1 KB · Views: 1,565
  • Exhaust #4.JPG
    Exhaust #4.JPG
    27.8 KB · Views: 1,574
  • Exhaust #3.JPG
    Exhaust #3.JPG
    25.2 KB · Views: 1,568
  • Exhaust #2.JPG
    Exhaust #2.JPG
    33.3 KB · Views: 1,585
  • Exhaust #1.JPG
    Exhaust #1.JPG
    38.2 KB · Views: 1,584
  • Intake #2.JPG
    Intake #2.JPG
    26.5 KB · Views: 1,561
  • Intake #3.JPG
    Intake #3.JPG
    29.4 KB · Views: 1,552
  • Intake #4.JPG
    Intake #4.JPG
    26.9 KB · Views: 1,545
My oppinion is, you have already done 1/3 of the work to remove the engine. Do the rest. It will wil be easier to also rebuild the motor and put the timing belt on with motor removed. I really hated redoing my timing belt with the motor still in the car....

Then if budget and time allows redo the bottom end of the motor. Otherwise, degrease it, clean it up and possibly paint it to make it look pretty and shiny. Then reinstall the head, put the timing belt on, align the balance shaft and reinstall the motor. It is more work and time, but since you started it kind of would be a waste to not go the extra work to do it right.

Also you can always push the car in and out of the stall to work on the motor.
 
Looking at the pics again the top pics are the exhaust ports and with oil build up like that on the exhaust side im sure the the rings are shot causing the oil to go past the rings and out the exhaust port. You really need a new motor dude or rebuild that one. May want to look into getting a nice used 6 bolt. May guys on here have had good sucsess finding real clean used motors.
 
TSIfreek said:
Looking at the pics again the top pics are the exhaust ports and with oil build up like that on the exhaust side im sure the the rings are shot causing the oil to go past the rings and out the exhaust port. You really need a new motor dude or rebuild that one. May want to look into getting a nice used 6 bolt. May guys on here have had good sucsess finding real clean used motors.


I just got off the phone with the machine shop. They finished rebuilding the head. They said that the seals were in really bad shape.

Is there anyway I can check the rings with the engine still in and the head taken off?
 
The oil build up on the exuhaust ports is very likely to have come from the calve seals.
What did your last compression test look like? Are there any scratches or scuffs on the cylender walls?
 
diablos991 said:
The oil build up on the exuhaust ports is very likely to have come from the calve seals.
What did your last compression test look like? Are there any scratches or scuffs on the cylender walls?

The compression test showed 170ish across the board... I actually had someone follow me to see if it smoked other than at idle... Apparently, when I floored it there would be a brief split second worth of black smoke.
 
Well to me it seems like your bottom end would be fine without a rebuild. (however, it is something to consider since its taken apart) The black smoke was your car running rich, so thats ok. Also symptoms of leaky valve seals are smoking on startup and smoking after idling for a while.
 
tommiman said:
The compression test showed 170ish across the board... I actually had someone follow me to see if it smoked other than at idle... Apparently, when I floored it there would be a brief split second worth of black smoke.
Tommiman...just put the head back on. Clean up a few things before you reinstall them. Also, someone pointed out to replace the copper crush washers on the oil lines...do it.
 
Support Vendors who Support the DSM Community
Boosted Fabrication ECM Tuning ExtremePSI Fuel Injector Clinic Innovation Products Jacks Transmissions JNZ Tuning Kiggly Racing Morrison Fabrications MyMitsubishiStore.com RixRacing RockAuto RTM Racing STM Tuned

Latest posts

Build Thread Updates

Vendor Updates

Latest Classifieds

Back
Top