The Central Hub for DSM Community and Information

For 1990-1999 Mitsubishi Eclipse, Eagle Talon, Plymouth Laser, and Galant VR-4 Owners. This is where the DSM platform history is documented and archived. Log in to help us in our mission, and to remove most ads from the browsing experience.

20231029_160050.jpg

My old highschool car

I regret getting rid of this car but have it back again!!!

This site may earn a commission from merchant affiliate links, including eBay, Amazon, and others.

Something worth knowing is that 5/16" fuel injection hose fits kind of perfectly over the OD of the steel pipe that comes out of the fuel pump sending unit. So if you had to, you could just saw the fitting off the end of that pipe, slide 5/16" fuel injection hose over the pipe, about an inch, and clamp it with 2 fuel injection type hose clamps like the ones I sent you. It won't leak and it won't blow off either. Mine is actually like that now. I didn't exactly want it that way, but English Racing cut off the fitting on the end of the sending unit pipe, so there it is. It seems fine.

Then the problem is what to do with the other end of the hose. Well, the steel pipe that runs under the car to the stock fuel filter is, I think, the same OD as the sending unit pipe. And that end of it I'm not familiar with because I never had to do anything with mine, or with the stock fuel filter. But it seems to me that you could find a place somewhere where you could cut the pipe and push the 5/16" hose onto it and clamp it with fuel injection hose clamps just like on the sending unit. The pipe OD would have to be reasonably clean of course, still round LOL, in decent shape. It's something you guys would have to look at and figure out if it's something you could do with the tools available.

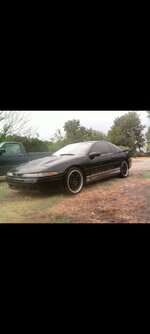
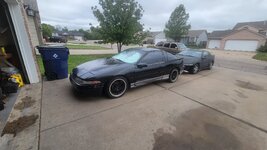
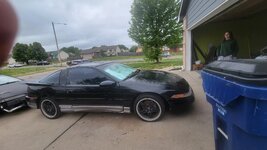
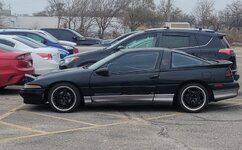
You can buy excellent quality modern high pressure 5/16" fuel injection hose, Gates Barricade, 15 feet for $60. I used this hose to hook up my fuel filter, which you can see on my Specs and Photos page.

What I'm saying about where you would cut the pipe on the sending unit is, you'd cut it at the red line here (pic below).
You'd cut it after taking the whole thing out of the car first of course, and you'd have to first cut the rubber hose before you could do that.

Talon stock hose barb after you remove the hose - with red cut line.jpg
 
And just to clarify the Grey Sharpie tube is the little one you’re talking about to use correct? Now it goes over were the red cap is or brown sorry just a bit confused on that part LOL, I’m trying to go back and piece together the install on this from what you have explained but I guess you could say I’m just confused on the correct route to go since you have given a couple to go from. I do agree with Viton method could you elaborate on that a little more so I have a better understanding LOL

The red cap that is there now is on the outlet pipe. After you take the red cap off, then you put the viton tube on that pipe and push it all the way down so it looks exactly like the pics I showed in post #455. That's the same piece of viton I sent you. It does have one silver sharpie mark on the side that has the little chamfer at the bottom. The viton when it's all the way down covers the whole length of the pipe. It's about 23mm long. The chamfer is to allow it to fit in that narrow space between the pipe and the electrical block.

The brown cap in your pics is on the other end of the pump. That's the inlet end. That's where the filter sock goes.


And just to clarify the Grey Sharpie tube is the little one you’re talking about to use correct
The little one? Well, the 2 short rubber tubes are the nitrile ones and you don't use those at all if you are going to use the viton one.
The short rubber tubes are 13mm long. If you don't have a mm ruler, measure in inches (decimal inches) and multiply the inch number by 25.4 to get mm. For example, half an inch (0.5 inches) is 0.5 x 25.4 = 12.7mm
So those short pieces are just a little over half an inch long.

The viton one is almost 15/16 inch long.
 
It bothers me a little that the Weldon replacement filter elements are so expensive.
The 10 micron stainless element is $52. The 10 micron cellulose element is $26.
Those are perfectly normal prices for an aftermarket filter like this, but it's a far cry from the $10 each that Nick was buying the Wix filters for from Rock Auto.

So what bothers me is, we don't know yet how well you are going to be able to clean out the fuel tank. If you continue to have fine dust of rust coming through and plugging up the filter, you might be better off with a system that keeps using the stock type fuel filter which is cheap.

I called STM sales (not tech support because I thought that might take too long LOL) and asked if the 10 micron stainless element is cleanable, like can you take it out, clean it, and re-use it. The guy said, not very well. The Coarser ones like the 40 micron ones you can. But 10 microns is so small that you usually can only shush out the loose stuff, but not the tiny stuff that is actually what's clogging it. And 40 microns is too coarse to filter out the kind of stuff that Nick was showing in his pics.

The cellulose element would never be cleanable, you just throw those away.

So I don't know, it's something to figure out probably after you get a look inside the tank, and maybe you can drain or pump out all the gas that is in it for a better look.
Absolutely! I’m very curious myself if it’s anything to crazy, would replacing the fuel tank in general be more of a feasible idea at that point? I can say I haven’t been having any fuel cuts or surges and it seems to be running fine so I’m not sure if that’s a good thing🤣
 
Absolutely! I’m very curious myself if it’s anything to crazy, would replacing the fuel tank in general be more of a feasible idea at that point?
I don't think it's possible to buy a new stock type tank for these cars.
But people put race tanks in these cars. Usually it's for racing because they are smaller capacity. I don't know what all you have to do to fit them in and get it all ready to use. The race tanks are made out of aluminum.
It would be expensive. It would be a project.
 
Here's the best pic I have of the bottom end of a Walbro with a new sock on it, and the rubber base, and the bottom bracket, all put together. The rubber base is in the install kit. You put the sock on first and lock it on with the little metal ring. Then you fit that rubber base onto it. That's a little fiddly but it fits.
In this picture I was still reusing the old 5mm Phillips head screw to hold the bottom bracket on. You could replace that with one of the new 5mm stainless socket screws (using a 4mm allen wrench).

DSCN1333  Walbro, end view of bottom with sock and rubber base.JPG
 
Here's the best pic I have of the bottom end of a Walbro with a new sock on it, and the rubber base, and the bottom bracket, all put together. The rubber base is in the install kit. You put the sock on first and lock it on with the little metal ring. Then you fit that rubber base onto it. That's a little fiddly but it fits.
In this picture I was still reusing the old 5mm Phillips head screw to hold the bottom bracket on. You could replace that with one of the new 5mm stainless socket screws (using a 4mm allen wrench).

View attachment 777092
Okay perfect thank you for that picture to use as a reference! I can’t wait tomorrow to get everything in and I will also send a picture of the FMIC
 
Update the tank was good it had a couple little rust spots what you see with the fuel pump was the worst! We cleaned it as good as we can and sand blasted all the rust off and just installed everything! Finishing up putting the Injectors in then load up V3 an set everything.
 
Update the tank was good it had a couple little rust spots what you see with the fuel pump was the worst! We cleaned it as good as we can and sand blasted all the rust off and just installed everything! Finishing up putting the Injectors in then load up V3 an set everything.
Awesome!
Man, everything above the "waterline" on that pump hanger looks like things we have in the ocean here.
The pump was the original one like we figured. It should get some kind of award for still working.
I see you got the fitting apart where the hose connects. The flare and the threads there still look really good.
Awesome!
 
This might be a good time to know about another way you could work around not having cranking fuel adjust. You can save ECU Config settings real-time while the engine is running.
You put a check in the checkbox that says "Save changes to ECU as they are made".
So you could be Connected and on the Fuel page, and before cranking a cold start you could put a small number into the Global fuel field like -10 or whatever, to make it richer.
Then the engine starts, right?
Then about 5 or 10 seconds after the engine starts, you run that number back to what you actually want it to be set at. Or to whatever makes it run good at the moment, and then gradually run it back to the setting you want it to run at.

You can't do this on Direct Access pages. Only on ECU Config pages.
The checkbox is at the bottom of the page towards the right.
 
Gary could you please tell me again what I need to do in ECMLink since I have everything in before start up?
 
Gary could you please tell me again what I need to do in ECMLink since I have everything in before start up?

On the "Dash" tab, change Knock CEL threshold to 3 degrees retard (instead of 5 degrees)

On the Fuel tab, push the "Calculate" button, put in 900 for the Injector size, and push "Calculate" and then push "Use". That's all in the little Calculator pop-up.
Now you should see -50% in the blank for your Global Fuel number.
(ECM says the PTE 1000's are more like 940cc, and it's better to start out a little richer just for safety, so that’s why I’m suggesting 900cc instead of 1000cc)


Turn on MAF Clamp which is in ECU Config on the MAF Clamp tab.
On that tab there is a checkbox that says "Enable MAF clamp function".
Just check that box and then Copy to ECU.

When you start logging, turn on Captured Values for ISCPosition and CrankingFuelAdjust.

And look at my previous post (post #490) for another work-around for Cranking Fuel Adjust.

🙂
 
Okay Gary here is a log of the car after install and the drive home, it absolutely needs to be looked over the idle was okay at first but now keeps going really low like it wants to die but does not. Rather than that everything seems to be fine so far.
 

Attachments

Well I’m glad you could drive it home. That’s a pretty good day’s work then!

Ok, it is quite a bit too lean in this log.

It did manage to stay in closed loop to the end though, which is good.

We might end up having to change the Global fuel to make it richer but I’m not so sure, because right at 313.983 sec it peeps into open loop for about 4 clicks on the right arrow key, and it looks ok to me right in those 4 clicks. (InjOn time jumps up a little from where it had been in closed loop)

So, there’s a 0 right now in the Global Deadtime field on the Fuel page.

Let’s put 400 in there.

You do have good battery voltage and you have 645 microseconds of deadtime in the InjBatteryAdj at 14 volts. So I’m not so sure that adding Global deadtime is the right thing either. But let’s try it.

That would give you 645 + 400 = 1045 total deadtime at 14 volts, which is more than what the ECM wiki says for the PTE 1000cc injector (that wiki says 450 µsec deadtime). The info in that wiki could be talking about a different generation of PTE 1000 too, I have no idea.

But let’s try it. It should effect the idle and low speed running quite a bit, higher load running not much.

Then when you drive it next time, try to eek it into some open loop running more than you did in this drive.
Could you elaborate a little more on the open loop running? I’m not understand that part LOL sorry just want clarification I guess my question would be how would I go about doing that LOL
 
Add Value - Be Respectful - No Trolling - No Misinformation - Participate Often!
Support Vendors who Support the DSM Community

Build Thread Updates

Latest Classifieds

Back
Top