The Top DSM Community on the Web

For 1990-1999 Mitsubishi Eclipse, Eagle Talon, Plymouth Laser, and Galant VR-4 Owners. Log in to remove most ads.

Please Support JNZ Tuning
Please Support STM Tuned

Street Build ITFLYS - 1Gina2G

This site may earn a commission from merchant
affiliate links, including eBay, Amazon, and others.

This site may earn a commission from merchant affiliate links, including eBay, Amazon, and others.

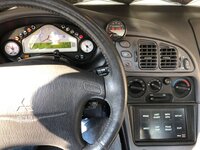
Now to start hardening the Interior trim plastic.
Before the epoxy, the smaller bits that are cracked and falling off get tacked together with superglue. The thin liquid seeps into the cracks, and improves handling for the steps ahead.
CCC00505-2F05-4D89-9C25-3D0E66197F83.jpeg
 
Last edited:
Got out the epoxy, ziplock bag, scissors and masking tape. Made a dam with the tape and created a valley to fill to strengthen the thin plastic support holding onto the screw mount.

FA4A5AC7-3C56-4E94-8098-13ABB863FBDE.jpeg


Pushed some epoxy into the bag to mix:
55F7845B-3064-4B1B-9E8F-C7B379711522.jpeg


Then I cut the corner of the bag and dispensed the mixed epoxy into the voids, and edges that could use some support
4E4890C2-7E05-4852-8930-86E533AFDA0F.jpeg

9F4A4FCB-485E-4002-B35C-BDA13650FD7C.jpeg

D9F5A5B2-FFEB-41E9-B161-AC72F4E55DCA.jpeg

And a not pretty but done - support behind the plastic tabs.
55FB82C3-98E6-416B-B7F2-DECD1D5BDF5D.jpeg


Now leave it for 24hrs, and check it and hope all the epoxy has cured.
 
Last edited:
Looks like pb blast in the background raging again two oreilly
Panels look better than oem
Standard stuff for DSM work

new tool
AFE20C81-803D-47D4-8E1D-6CAD3C73BFCD.jpeg


The price was great - not built for speed, but if you don’t have a valve spring compressor, better than nothing!

I’ll see if this will allow for a valve stem seal replacement.
 
new tool
View attachment 664593

The price was great - not built for speed, but if you don’t have a valve spring compressor, better than nothing!

I’ll see if this will allow for a valve stem seal replacement.

100% need the same thing done, so I’ll be waiting to see how it works out for you.
 
Pump the cylinder with compressed air through the spark plug hole and the valves should stay up. :thumb:
You ever done it with air?? If I tap on the spring to release the retainers, I'd worry that the tap would break the seal and release the pressure - allowing the valve to fall. That, and I don't have a fitting for my compression tester to put air into the piston.

I'm going to use nylon rope in the combustion chamber, and back up the rope with the piston.
 
I’m honestly just gonna remove the head and get it checked anyway. So while it’s out I might experiment or I honestly might be lazy and just have the machinist do it.
 
On the cleanup bench, I took some time with a wire brush, carb cleaner, breakclean, and good old dawn soap in water.

before
B427FD82-C132-4330-AE7B-CD1017792CEE.jpeg

after
20BC289F-BF72-41C1-8D90-F4B66E1CF0FE.jpeg

9D4E8200-ED3E-491F-A127-F3367434E0F4.jpeg

ok, so on the big spring clip I used red abrasive pad on a 90deg angle grinder air tool.

not shown
The arm on the old WG actuator was crusty, so I abrasive pad grinder took it back to shiny with lots of pitting. I hit it with cold galvanizing spray, and probably finish it with Steelit, and now I see the old actuator is not the actuator I will be using, because the China E3 turbine housing has a different size flapper arm pin. So no need to finish it at the moment.
 
Last edited:
You ever done it with air?? If I tap on the spring to release the retainers, I'd worry that the tap would break the seal and release the pressure - allowing the valve to fall. That, and I don't have a fitting for my compression tester to put air into the piston.

I'm going to use nylon rope in the combustion chamber, and back up the rope with the piston.
I use the hose from a compression tester kit. Youll have the cylinder at TDC. The piston will stop the valve if it does fall.
 
The dental floss method works well
i don’t know this sorcery

Remove intake CAM
FAAE5BD5-C609-4876-82B2-7B8BF6C7C856.jpeg

9309376A-CA92-408B-B74B-B2FEC31AB096.jpeg


97 CAM sensor needs threads to bolt up the trigger adaptor so I drilled and tapped the end of the 1G intake CAM:
AE925651-357E-48E7-AE27-974C263BD47F.jpeg

52D79E66-4EFD-4CE0-890E-EB300B8C4262.jpeg

17/64 tap drill
M8x1.25 taps - first the pointy ones, then the flat ended bottoming tap.

Lots of cutting oil, and compressed air to evacuate the shavings.
 
While I have the cover off, I located a 12pt 14mm deep socket, and checked to see if the ARP head studs are sill 90ft lb tight.
Only 3 moved at all, and only a few degrees.
 
successful I think 🤔
Here we continue with cam and valve work, Located a pile of new seals and gaskets:
E91426D7-585C-4B9A-BFAE-ED83D2815A3A.jpeg

Exaust CAM removed
BE1CB3A1-FD88-4C05-839D-AAF8126C94A5.jpeg

And now turn the crank back to lower the #1 piston.
3B02CFE4-61B8-457A-B8BE-7C724382D820.jpeg

And I fed as much rope as I could into the cylinder. Note tape is protecting the piston from the end of the long driver, being used as a visual depth gauge while messing with crank position.
D34DA4C2-896D-43E6-9546-C0E555BEADAD.jpeg

I advanced the crank by hand until the piston pushed all the rope up against the valves and head, holding light pressure to prevent valve pressure from moving the crank.
This allows the valve spring compressor to push the top down releasing the retainer clips.
90706A74-CF0C-4481-8A74-8EBE142DCBEA.jpeg

Down to business, old seal comes off with long pliers.
E45A9DFA-94E8-435D-9AE9-2ECB38FEA3EC.jpeg


81FAD839-0F9F-4E1F-BC9B-84D232D6300C.jpeg


And new seals go on, with a deep socket 10mm and hand pressure after an initial tap with a mallet.
859C566C-A41A-4AA6-82BE-A8E85359AD6E.jpeg

Aw dang- see this is why we look close at the pictures. I f-ed up the one on the right. pushed it on too hard. Fixed it.

And the reverse - tricky part was getting the retainers into position with a light magnet on a stick, and getting it back inside the opening in the tool.
0C4C9EBC-D313-4220-8BFD-4B10FED018B9.jpeg

All rope removed and everything timed to TDC, and then the CAMs go in. CAM guard lube.
68397495-F81C-4E0F-ABFD-BA540C7D3117.jpeg
 
Last edited:
Timing belt back on
D212D83E-A015-4215-957D-E35B4530DC36.jpeg

So annoying setting the tension in the car. Trial and error finally gets it so the tensioner pin slides out smoothly.

Cover on, and now the new 97 CAM sensor housing can go on.
A8734325-9CF2-4AC4-9AE8-4216DB7D59BE.jpeg

CAM sensor adaptor installed
A485425F-3333-4D90-AF51-E9AB28BEA20F.jpeg

ACCE5515-2867-494E-B0B6-C656667976A1.jpeg


Brick by brick - The 97 CAS fits the space better than the 1G black top CAS. This is possible to use now that a Kiggly crank sensor is installed. I'm looking forward to seeing how stable these two sensors perform.
878478D8-5E60-46E2-A745-43D61D890732.jpeg

8E8D1FBD-0BD4-43AE-A369-E14913E2CC49.jpeg

I like this shot of the water lines
 
Last edited:
Lets see the list:

Phase 1 (Exterior)
Things to locate:
2” thick 2Ga Eclipse door caps - Looking!

Body Shop:
Paint 2Ga door caps
Protective film install

Phase 2 (Engine and Interior)
Things to locate:
Grey plastic interior door switch trim - Looking!
Low profile adjustable CAM gear hardware for AEM gears (completed)
Valve spring compressor (completed)


In progress:
Hood Latch clearance (completed)
Interior Mirror Trim - epoxy reinforcement (completed)
Cyl 1 Valve guide seals (completed!)
Drill and tap 1G intake cam for 2Gb CAS (completed!)
2Gb CAS install - (completed)
Wiring for 2Gb CAS (completed)

TD05H turbo rebuild
Refinish 3" exhaust components
Front bumper brackets and misc powder coating
Hot parts refurbish (spot welding)
 
Last edited:
New sensor, new wiring harness
C0D676F1-60A0-4AF7-91AF-11ABEAC0DC2A.jpeg


This pops up here next to the egr valve, and goes under the Intake Manifold.
2F067BE0-E8EF-45FA-BA07-F7B8033D2035.jpeg

behind the engine, and over to a bracket hanging on the timing cover, 2Ga style
D599B53A-3302-47B8-8290-E217201246FE.jpeg


hot today
F1AD24F0-0C11-49F1-A9C4-BFB10F32048B.jpeg
 
So, I am learning. The “upgrade” TD05H rebuild kit thrust washers needs a little more than the stock cartridge allows, so I’m working out how.
CE8D4F85-B3DF-48D8-A666-92AA1D4F3F16.jpeg

FECFFE16-00A7-4235-AEEB-E743153130F9.jpeg


4D42D0ED-A942-4FC0-9BEE-2F96D3DEA5DD.jpeg
 
Last edited:
Support Vendors who Support the DSM Community
Boosted Fabrication ECM Tuning ExtremePSI Fuel Injector Clinic Innovation Products Jacks Transmissions JNZ Tuning Kiggly Racing Morrison Fabrications MyMitsubishiStore.com RixRacing RockAuto RTM Racing STM Tuned

Latest posts

Build Thread Updates

Vendor Updates

Latest Classifieds

Back
Top