The Central Hub for DSM Community and Information

For 1990-1999 Mitsubishi Eclipse, Eagle Talon, Plymouth Laser, and Galant VR-4 Owners. This is where the DSM platform history is documented and archived. Log in to help us in our mission, and to remove most ads from the browsing experience.

IMG_1183.JPG

First 2G street car

98 TSI. Excellent body and drives like a dream

This site may earn a commission from merchant affiliate links, including eBay, Amazon, and others.

Another rainy day; so I did some light messing around with the car. Had an issue with the brake and tail lights going out when pressed and were intermittent. So did some good ground cleaning work and freshen'd up all the grounds I could find and it did the trick perfectly. Cleaned up the engine bay a little bit, and I'm just dreaming of a day when I can have a tucked engine bay. Still waiting on the Feal coilovers to get here and the new FMIC, then it will be time for some real fun. Good tip of the day, always freshen up your grounds! LOL
 

Attachments

More parts showed up today and I'm super stoked to get this ETS kit on. Its in great shape with a nice powder coated ETS piping kit and a greddy BOV. It's a race kit 10.5 core so I know I'm in for a little modification of the bumper to get it to fit in there nice, but i think its going to be awesome. Hoping to get some wrench time in there tonight.
 

Attachments

Very nice TSI. Post up when you get that intercooler setup installed. I am planning on getting the ETS short route in the near future
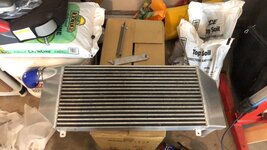
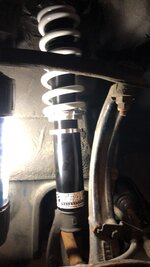
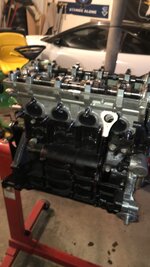
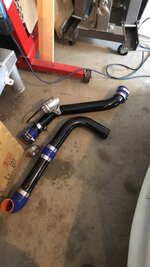
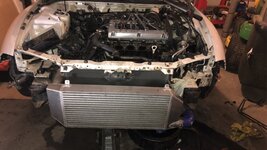
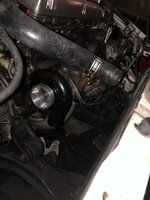
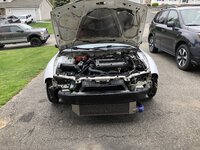
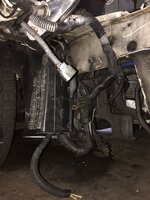
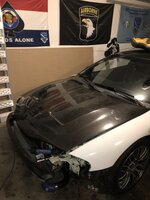
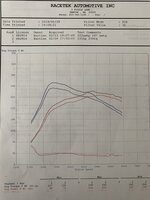
Yessir, that will be going on in a couple weeks. Made the dyno appointment, so its going on just before that.
 
The Feals came in this week and I cant wait to see how the car sits with these on them. Not lowering the car to much. The installation went smooth until I ran into the passenger side sway bar end link from hell. Wasted over an hour working one bolt and this couldn't get it free. Luckily local auto parts store had one in stock for 25 bucks, so this stubborn end link is meeting with the cut off saw tonight. I''l post up some more pictures when they're all on and sitting pretty.
 

Attachments

Finished the install of the Feals this morning and took the car out for a rip and they ride absolutely beautiful. Car feels so solid, and will be even better once I replace all the bushings to poly. Overall the install was pretty straight forward, they fit great and are easily adjustable. The worst part was running into a 21 year old end link that did not want to be removed. I've run into these before on my 1g and the best advice I can give people when you run into a stubborn one is just cut the bastard off with a dremmel and save yourself the trouble and heartache. You're going to end up mangling it with heat, wrenches and vise grips eventually, so save your time and sanity and take the 5 minutes to just cut it off. They're 25 bucks from autozone for replacements and mine were worn already anyways. I Did a couple rounds of fine tuning once it was on the ground to get the ride height where it needed to be. Its actually a little bit lower than I was anticipating in the rear, and makes a huge difference in the look of the car. The dampers were adjusted to -10 of the hard setting and its still a pretty comfy ride without to much roughness over bumps and stuff. So far no clearance issues or rubbing but I'm going to keep an eye on it over the next few days. Ended up blowing the turbo coolant line while test driving but luckily I have plenty of 10m tubing kicking around, and it decided to let go on my street... Theres always something to fix on these I swear.
 

Attachments

Been a busy couple weeks around here, haven't had a chance to update stuff but I got some good work done, and definitely did some serious shopping this week. About 2 weeks ago I pulled the entire interior out for a good deep cleaning and inspection. Found some nice solid floorboards below, pressure washed the carpets and then reinstalled. After that I hit the undercarriage with the POR kit because some areas of the undercoating have worn or rubbed off, So I POR 15'd under that and then added on their Rubberized undercoating on top of that. Luckily the only spot of rust I found were in the rear fenders where the drainplugs are. 1 small hole in each side thats going to the body shop for a proper repair. Luckily there was no extension.
After all that was said and done I did a little shopping. The motor on my car is all stock and its a little worn and tired I'd say, and running 20 pounds on an old motor is just waiting for trouble. After doing some thinking, and comparing how much it cost me to build my 1G motor, I decided to search for a built longblock, and a stroke of luck and some help from the guys at performance partout led me to a great find. I found a fully built x-code split thrust block. Manely rods, CP pistons, ARP everything, literally every structural bolt is ARP its crazy, BSE kit. Kiggly street springs and retainers, brass guides, SS valves, Kiggly HLA, ARP headstuds, and cam bolts, HKS 272's. Great compression and leakdown, and I could not be happier, it's an absolute gem. So I got it all home safely and its on the stand waiting to go to the builder for install and tuning. Hoping to get the car there the first week of July. Lot more stuff coming up the next week, I'll keep ya'll posted.
 

Attachments

Well it's been a minute since I've been on here but this quarantine life has free'd up some time to mess around with the talon a bit more. In the past few days I did a little reducing and deleting. Started by removing the cruise control components and added in a new non cruise throttle cable. Then went on and removed all the excess emissions stuff, EGR, FPS, PCS, EVAP and charcoal cannisters are out and threw a blockout plate on the intake manifold. Got thrown through a loop because I did not know the charcoal canister was moved to under the drivers headlights on the later 2g's, so that was a little extra work than I had anticipated but still wasn't too bad and I got time to kill. Added in the new fuel lab fuel pressure regulator as well and installation wasn't too bad. Hopefully going to put the new 255 pump in tonight or tomorrow, and replace the 195 that's in there. Hopefully this will be enough fuel for the new motor and turbo I've still got sitting waiting to go in, I talked to the guys over at RRT and will hopefully be able to get the car over there for them to swap in the new motor and turbo setup and get it tuned in about 2 weeks. I've procrastinated long enough so it's time to get it in there. Hope everyone's well and spending some time on their cars. Stay safe!
 

Attachments

More quarantine fun this week. Went ahead and tackled the fuel pump yesterday, and removed the 195 and added in the new 255 which should be enough to reach my goals for the new motor and turbo setup. Fuel pump wasn't too bad but ran into an issue with the o-ring not seating properly in the assembly so had to do it all twice which was great practice. Once that was seated, dialed the fpr in and she's running like a champ once again. So far no issues with all the emissions deleted so I'm excited for the motor swap and hopefully have all my supporting mods in place to get me over the 400hp hump, from there who knows. I'll keep you guys posted and hope everyones doing well and getting some time on their cars.
 

Attachments

Got to spend quite a bit of time working on the talon yesterday. The project was to get the FMIC mounted up and add in the new 20G turbo and FP manifold combo. It was a long day but pretty happy with the results. The new turbo and manifold are all bolted in and it looks awesome. Running an MVS external gate right now with the 11lbs spring, may adjust that spring pressure more when it gets in the tuners hands but for now I'm trying to keep it as similar to the 16G setup until its tuned.
The FMIC wasn't too troubling to find a spot. It's bolted to the lower and upper radiator support and feels solid, it's an ETS 10.5 inch short route kit. Im planning to trim the crash bar to fit around / over because I want to keep the extra support for the bumper. I ended up making a smaller version of the power steering cooling hard line and it's hidden behind the FMIC, after reading through a few post this seemed like the best option to have some relative cooling effect and being able to move the lines to where I wanted.
Hoping to get this wrapped up later tonight or tomorrow and go for a startup, very excited to get this setup over to the tuner to max it out! Take care all
 
Finally got the car all back together, in total it ended up being like a week long project to mount the FMIC and swap the turbo's and manifold around, but so far I'm happy and it was worth it to me. Car is now running at 14lbs on the 20G as I'm trying to keep the boost relatively low while I figure out if the turbos solid before going back up to 20LBS and so far it seems that way. The car sounds great with the FP manifold on there what a difference that makes in just the sound alone. The manifold combined with the new SSQV bov and having the external wastegate dump make the car sound pretty nasty when you're getting on it. Overall I'm happy with how it came out and how the FMIC mounted and how little trimming I had to do to get it to fit. I actually ended up taking way more out of my crash bar than was necessary but I'll keep an eye on the junkyard and pick one up to retrim it a little better. Other than that I only had to trim about a 1" strip out of the lower front bumper to get the fit right. Since I ditched my fog lights I'm hoping to pick up some carbon fiber canards to cover those holes up, sorry I didn't get a picture of it fully reassembled yet, I'll wash it up and post some.

On the first test drive I blew the upper IC pipe off and absolutely scared the shit out of myself and thought I trashed the motor right there. I was very happy to find out that it was just the coupler letting go. Refit the IC pipe and all seems well now, took it out yesterday for an hour long trip and had no issues. Please pardon some of the ghetto ass pictures and my sweet gatorade coolant overflow tank. Waiting on my new overflow from gamble garage to come in still. Oh and I had to ditch the AC fan to get the MVS to fit with the dump tube, with the AC fan in there it was pushing very hard against the fan shroud and there was no way to fit the dump tube on there and I was not ok with dumping those hot gases all over the fan/radiator and inside the engine bay. I'm going to revisit my radiator and fan setups at a later date but for now the cooling is plenty adequate even with one fan. Next steps are extending the wiring harness and moving the battery, hopefully will do that when the motors out of the car and I think I want to go with speed density as well to clean up the bay a bit more. I've had no issues with the factory MAF but that damn near 6 feet of intake is getting old and taking up a lot of space.
 

Attachments

Last edited:
This week is all about relocating the battery and what I'm calling the ghetto wire tuck. I've been wanting to do this for a while but for me to pull the entire Harness and extend it to where I want just is not an option right now as I'm rushing to put it back together for its tune appointment during the first week of June. But thanks to some older threads and a little creativity I was able to somewhat accomplish both goals of moving the battery to the trunk, and cleaning the space around the passenger fender of wiring and the master fuse box. I elected to move the master fuse box to stock SMIC location and the oem brackets mounts perfectly to two bolt holes in the body where the SMIC used to mount. This helped in a number of ways and all I had to do was extend the 4 white wires that usually go to the positive terminal. I replaced all 4 of those with 10G wire and those will now be run to a busbar instead. While doing this I pulled the motor mounts and floated the engine on the crane enough to where I could route the main parts of the harness kind of down near the transmission where they are a bit more out of sight. This isn't a full wire tuck but it cleans up the passenger side so much now. I still need to make up some kind of protective cover for the fuse box to keep it a little safer, but my car is only a fair weather queen anyways so I'm not too worried.

So now I've got the battery in the trunk Positive goes to the killswitch with an inline 150A fuse between there, From killswitch to 150A circuit breaker all the way to the busbar in the engine bay with all new 2G wire. I ran my fuel pump relay and amplifier to the Positive side of the killswitch as well and those lines are all separately fused as well. I put in a new 4G power line from the starter to the busbar and made all new 2G grounds for the engine areas. I took 10G wire and made all new lines for the fusebox and made them long enough to reach the busbar. If you've looked at the battery relocation simplified thread I pretty much followed that and found it really simple and not to labor intensive. Hoping when I get off work tomorrow that I can get it all put back together and fired up. Hopefully it won't catch on fire.

And yea I desperately need new fender liners and clips
 

Attachments

Last edited:
So I finished up the battery relocation to the trunk and everything is running great and working as it should. Very happy with how the project turned out. Also struck some gold this week and found a local dam’er selling off a brandy new VIS carbon hood, so I picked that up for a great price and didn’t have to pay any shipping, so I’m very happy about that find it looks awesome on there. I still need to install the aero catch hood pins but the car is heading to the tuner tomorrow so I’m not sure if I’ll have time. Going to be driving very slowly until those are in LOL
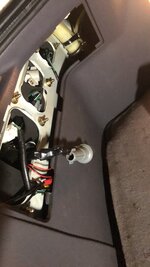
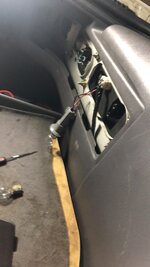
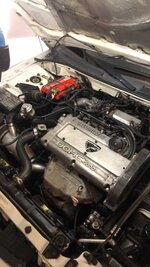
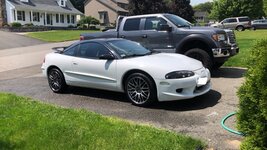
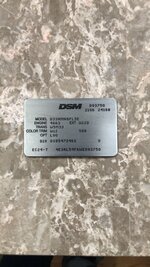
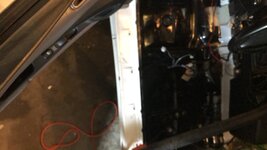
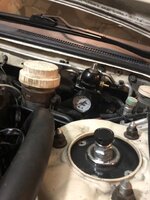
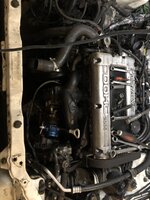
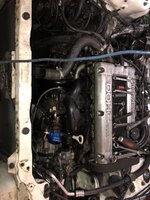
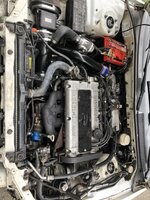
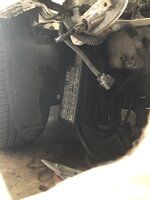
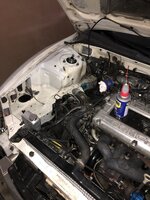
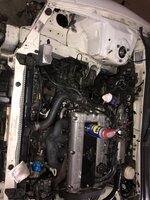
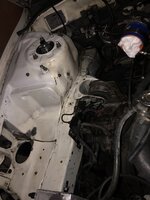
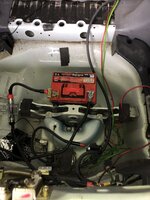
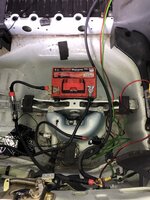
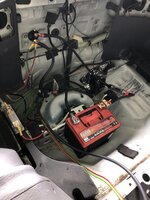
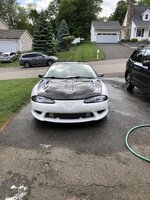
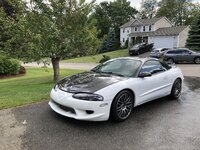
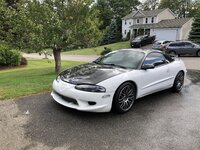
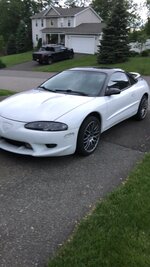
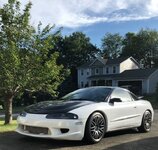
. Lots of progress the last few weeks. The trunk still looks a bit messy because I haven’t put the tray in yet and figured out how I want my tie down stuff. But it will all be hidden by the trunk “floor”.
 

Attachments

Thanks for the support gents, very excited to get the dyno results back and I'll have them posted up as soon as I can.
@flying_eagle The firewall tags are done by a fellow DSM'er Jason Drew, he's on the forums and in most of the facebook groups also. You can check out his work and order tags @ http://under-your-skin.com/jdf/

Thanks,
John
 
Add Value - Be Respectful - No Trolling - No Misinformation - Participate Often!
Support Vendors who Support the DSM Community

Build Thread Updates

Latest Classifieds

Back
Top