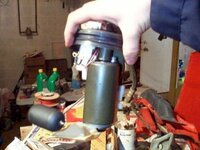
Est. time: .5 to 1.5 hrs
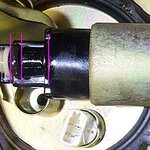
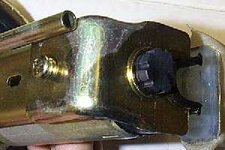
The popular fuel pump upgrades are the Walbro 190 or Walbro 255 + AFPR. However, the Walbro is notorious for its whining noises and a possible design flaw that causes clogging & failure. The solution is simple: the OEM Lancer Evo fuel pump.
The Evo pump flows a wee bit less than the 190, but is cheaper, OEM quality, quiet, and even easier to install! The pump is a Denso unit, a well-known company that makes most Japanese OEM parts, including the well-liked Supra pump. Here's the flow data from RRE (14v is rewired):
Evo 8 pump:
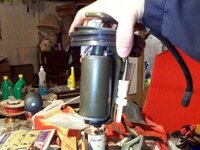
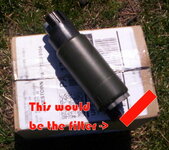
You can easily get an Evo pump from (duh) an Evo owner who's upgrading his pump. Just to get an idea, I got mine with 3k miles on it for $25 shipped, so like I said, these are CHEAP! Be sure to get one with the filter and everything, it'll make the install a lot easier!
The installation took Grant B and I roughly 1.5 hours on an 2g AWD, that's with us carrying on a conversation too. The following will be heavily based on the VFAQ, with the extra steps for the Walbro taken out.
Parts needed:
Acknowledgements:
Big thanks to Grant B for helping me w/the install!
Thanks to Tom Stangl for the excellent write-up that made this one possible.
DSMunknown for the part #'s.
The popular fuel pump upgrades are the Walbro 190 or Walbro 255 + AFPR. However, the Walbro is notorious for its whining noises and a possible design flaw that causes clogging & failure. The solution is simple: the OEM Lancer Evo fuel pump.
You must be logged in to view this image or video.
The Evo pump flows a wee bit less than the 190, but is cheaper, OEM quality, quiet, and even easier to install! The pump is a Denso unit, a well-known company that makes most Japanese OEM parts, including the well-liked Supra pump. Here's the flow data from RRE (14v is rewired):
Evo 8 pump:
Volts PSI Amps Ltr/Hr
12.5 43 10.8 159.62
12.5 58 11.9 119.24
12.5 73 12.9 63.09
14 43 12.1 201.89
14 58 13 157.73
14 73 14 112.93
Walbro 190:12.5 43 10.8 159.62
12.5 58 11.9 119.24
12.5 73 12.9 63.09
14 43 12.1 201.89
14 58 13 157.73
14 73 14 112.93
Volts PSI Amps Ltr/Hr
12.5 43 6 168.45
12.5 58 7 145.11
12.5 73 8 88.96
14 43 6.5 208.83
14 58 7.5 162.78
14 73 9.5 104.10
12.5 43 6 168.45
12.5 58 7 145.11
12.5 73 8 88.96
14 43 6.5 208.83
14 58 7.5 162.78
14 73 9.5 104.10
You can easily get an Evo pump from (duh) an Evo owner who's upgrading his pump. Just to get an idea, I got mine with 3k miles on it for $25 shipped, so like I said, these are CHEAP! Be sure to get one with the filter and everything, it'll make the install a lot easier!
The installation took Grant B and I roughly 1.5 hours on an 2g AWD, that's with us carrying on a conversation too. The following will be heavily based on the VFAQ, with the extra steps for the Walbro taken out.
Parts needed:
- Evo fuel pump, part #'s below:
- MR571545 fuel pump housing (reuse existing one)
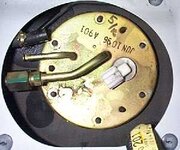
- MR571544 fuel pump
- MR431121 fuel pump outlet grommet
- 14mm and 19mm (can substitute 3/4") flare nut wrenches
- One Phillips screwdriver
- One flathead screwdriver
- One hammer (don't worry
 )
) - One visegrips / "channel locks"
- One container for the fuel to drip into below the pump
- You must be logged in to view this image or video.
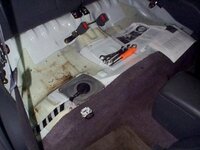
First, make sure you are below 3/4 tank, preferably 1/2, or you may have a LOT of fuel everywhere when you open up the tank. Next, pull the rear seat bottom. NOTE that unlike the first gens, that have the latch on the seat, the 2g's have the latch on the car. So pull the seat release then lift up on the seat to remove it. - You must be logged in to view this image or video.
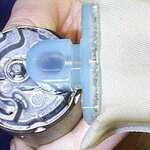
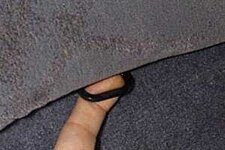
Here is the rear seat area. The grey cover on the left is where you will find the fuel pump. Remove the four screws at each corner of the grey cover, and the screw holding down the plastic piece for the wiring. Then gently lift the cover up about an inch or two, and disconnect the white plug (you can see a picture of the plug below). It's simply a little push tab facing towards the front of the car. - You must be logged in to view this image or video.
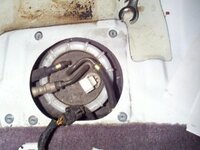
Now that the cover is removed and pushed out of the way. You can see that the assembly is quite different than the FWD one. The rubber line on the top left is the return line, the rubber line to the right is the suction line for the other half of the tank, the rubber line on the bottom left is the feed line to the fuel rail (the big metal thing is the top fuel line fitting). Do NOT bother trying to remove it here, you risk breaking the assembly. The fittings on this end of the feed line do not have swivel fittings. If you try to spin it loose here, you will twist the line and possibly tear it (it has happened to people). Instead, we're going to attack it from the bottom. - You must be logged in to view this image or video.
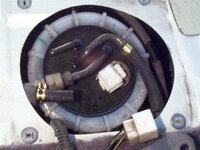
Now you should open your gas cap and try to start the car a few times to try to get as much fuel out of the line as possible. Here is a picture with the ventline removed. Yes, you will spill quite a bit of fuel when you disconnect it. Enjoy the smell
- You must be logged in to view this image or video.
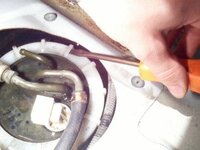
Now we need to remove that plastic ring that keeps the assembly in place. Unscrew the plastic ring by using the screwdriver & hammer to tap on the little lips on the top, slowly but surely. I think it took about three complete rotations or so to get it off, so it'll take a few minutes. - You must be logged in to view this image or video.
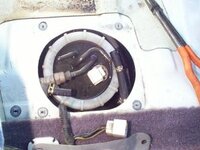
Next remove the return line, as shown here. - You must be logged in to view this image or video.
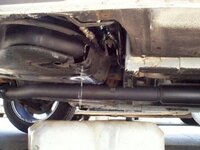
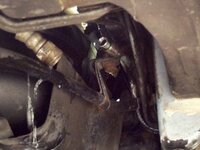
Jack up the rear passenger side of the car. This will give you plenty of access to get to the bottom fitting. You can just follow it up to the fuel pump if in doubt. Use a drain pan to catch the fuel that will leak out. The trick to removing the fitting is to first put the 19mm flare nut wrench on the big nut, and then slide the 14mm flare nut wrench on the little one. Hold the 19mm one in place and concentrate your efforts on unscrewing the small nut from the big one. You can see that behind the 14mm nut the hardline is threaded, so that's how it'll unscrew. - You must be logged in to view this image or video.
It'll take quite a bit of effort, but with the flare nut wrenches, chances are 99% certain that you won't strip the nuts. Once you break it loose, fuel will start coming out of the line and down your arm, keep working on that 14mm until it's completely free from the larger one. Now get back into the car. - You must be logged in to view this image or video.
Now comes the scary part - use the same technique on the top fitting as you did on the bottom fitting. BE CAREFUL not to cut the line on the side. After you unscrewed the line, just drop it down to be safe so that it won't get cut up. - Continued in next post due to picture limit.
Acknowledgements:
Big thanks to Grant B for helping me w/the install!
Thanks to Tom Stangl for the excellent write-up that made this one possible.
DSMunknown for the part #'s.
Attachments
-
 Evo fuel pump R.jpg32.6 KB · Views: 14,581
 -
 fp00b.jpg7.9 KB · Views: 14,128
 -
 fp01.jpg15.1 KB · Views: 14,197
 -
 fp03.jpg16.3 KB · Views: 14,144
 -
 fp04.jpg16.6 KB · Views: 13,736
 -
 fp06.jpg15.2 KB · Views: 13,817
 -
 fp07.jpg17.6 KB · Views: 13,762
 -
 fp08.jpg17.1 KB · Views: 13,800
 -
 fp09.jpg15 KB · Views: 13,674
 -
 pic2.jpg12.5 KB · Views: 13,607


