talonxgirl
Proven Member
- 212
- 1
- Nov 16, 2012
-
Indian Mound,
Tennessee
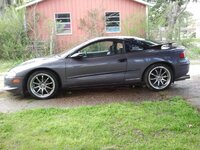
Oh wow. It looks so beautiful! And it's driving! Yay!!! XD

Follow along with the video below to see how to install our site as a web app on your home screen.
Note: This feature may not be available in some browsers.
For 1990-1999 Mitsubishi Eclipse, Eagle Talon, Plymouth Laser, and Galant VR-4 Owners. This is where the DSM platform history is documented and archived. Log in to help us in our mission, and to remove most ads from the browsing experience.

This site may earn a commission from merchant affiliate links, including eBay, Amazon, and others.

Sadly I don't. =/ Guess an electronic gauge is in my near future. I don't like the idea of running hot oil into the cabin of my car.


. Sorry about the snow..... Thought you all would be immune to that silly white stuff that plagues the north.Car looks amazing!. Sorry about the snow..... Thought you all would be immune to that silly white stuff that plagues the north.

)As most of us know, there are 3 methods to install your lifters, two of which are extremely fast and easy while the third involves removing your cam shafts completely. Let's focus on the popular alternative methods.
Alternative Method 1 :
http://www.dsmtuners.com/forums/articles-engine-fuel/265060-how-replace-lash-adjusters-lifters.html
Alternative Method 2 :
http://www.dsmtuners.com/forums/articles-engine-fuel/289034-diy-lash-adjuster-lifter-removal-tool.html
Alternative Method #1
involves prying up on the rocker to get it into it's seated location. While this is a decent method and I'm sure there are little to no concerns with it - I was far too scared of it slipping and me scarring the cam lobe.
Alternative Method #2
is about as good as it gets, but it involves a special tool, and if you don't have the availability to make one or order one, you're out of luck there. IN the video, it's shown exactly how easy this method is.
But let's say that you don't have a special tool, don't have time (or money for some reason) to order one, and you don't have the huevos to risk slamming a nice scar into the cam lobes. Welcome to Alternative Method #3
Alternative Method #3 :
is a simple and quick way to reinstall your lifters without the use of any special tools. So let's just skip straight to it. You've already removed your lifters, cleaned them, bled them, or simply purchased new ones and prepped them for install. So with that in mind and the lifters able to fully compress, It's time to get to work.
In this image you see that I have already dropped in a few lifters. You'll need to rotate the crank at the crank pulley to rotate the cam lobe humps away from the lifter seats in order to slide them in. Be very careful not to scrape the lifters against the cam lobes. I found it a little more calming to make sure the lifters and cam lobes were coated in oil to ensure easy install and lessen the possibility of any dry scrapes.
Now, once you have the lifters in and the cam lobe humps facing away from the lifters, put your rocker arm on the lifter and slide it forward towards the valve. Press down against the lifter and the tip of the rocker will slide up and into a "ready" position where it's sloped lip will be ready to 'slide' on. You will not be able to press it any further. Be sure that the lip of the rocker arm looks like the image and is not down against the valve top. You don't want to go digging into it.
Next, grab something with a solid backing - I used a Nut Driver as it has a natural ability to cup the back of the rocker. With the rocker arm in the "Ready" position, press the nut driver up firmly against the back of the rocker. Take a small hammer, or if you're man enough you can use your palm, and firmly tap the nut driver. Two to three times and you'll feel the rocker arm press forward, roll under the cam, open the valve just slightly, and viola! It's in place! I recommend using a rag to drape over the rockers just in case it goes elsewhere, however I did not have this issue as the rocker naturally guides itself onto the valve.
Once you're done your rocker should look like this. Notice how it is fully seated on the valve and the natural slope on the rocker has guided itself over the lip of the valve. Be sure to grab the rocker arm and wiggle it just in case.
Note that I did this with a set of dual valve spring installed and it was absolutely cake to install using this method. There are no scars, no scratches, and the rockers simply rolled themselves right into place with a couple of firm taps. Doing this in opposition of prying around with a crowbar/prybar, I feel, gives me a little more piece of mind that I'm not going to slip and slam a giant piece of iron into something that needs to be smooth.
Once you're finished, make sure everything is nice and clean, ensure you left nothing in the head, reinstall your valve cover, and have yourself a nice cold one!
You can knock two off that number. I sent two to the junkyard because the frames rotted out from under me. Stupid Chicago salt. >.< Hope you get the tires soon. I want to see it driving! XD


Noooooooooooooooooooooooooooooooooooooooo~
Wait.. 2GB? ._.
I do too! I'm hoping to get it done this week, but who the heck knows.

You wouldn't happen to still have the VINs handy would you? Old insurance card/bill, emissions test, etc?
If you do, PM them to me or fill out my data form so we can add them to the "deceased" category in my database
Yeah. Both 97 ESis. Chicago rust killed them both.
I might. I probably do somewhere.
It sounds great! What kind of exhaust is that? It sounds and looks a lot like the 3A I used to have on my old Christine.
Figured I'd leave this here.
Next update is coming soon - Her first drive through town.
Nooo! You killed two of them! >.< Did you at least keep things like the bumpers?
The exhaust is a full 3" Apexi setup running off of a ported 2g Exhaust Manifold and Open Dump Stainless 02 Housing. I'm going to be fixing in a resonator with it to give it a slightly lower tone in the near future.
but at least I was able to save the door panels and controls. Toothless needs them badly. 
We've come a long way.
No break downs, knocking, etc. Just good ole' running. Really loving it so far.