The Top DSM Community on the Web

For 1990-1999 Mitsubishi Eclipse, Eagle Talon, Plymouth Laser, and Galant VR-4 Owners. Log in to remove most ads.

Please Support STM Tuned
Please Support Morrison Fabrication

1G 1GB Quad HID Retrofit in Progress

This site may earn a commission from merchant
affiliate links, including eBay, Amazon, and others.

This site may earn a commission from merchant affiliate links, including eBay, Amazon, and others.

Watch the LEDs, heat will shorten their life span.

Looks good though. Nice to see someone doing HIDs right.

WTF Heat is a direct correlation to current. I'm pretty sure he will not be running them anywhere near there peak current lvls.

I could not find a hidden bottle anywhere....:( Id love to check these out in person when there done
 
Watch the LEDs, heat will shorten their life span.

Looks good though. Nice to see someone doing HIDs right.

Yeah i know.... Im gonna do it as best as i can and see how long it lasts. if it lasts a few years, I wont mind reopening to replace leds every 3 years or so.

I know you did red demon eyes or led something or other. how long did it last?

The Red will never be on when the projectors are on, and will rarely be on since they are illegal.

The halos will only be on as DRLs, so when the projectors are off. I never drive during dusk so I shouldnt have to worry about the hot headlamp HID burning the halo while its on as a DRL.

I do plan on under-powering them in an attempt to prolong life.

I could not find a hidden bottle anywhere

You are not looking hard enough. its in 2 of the 3 pics of the last post.
 
the only bottle I can see is in the top left over by the SD card. Looks like some kind of spice to me. thats all I can really make of it though
 
Woodford, gallon, on sale regularly in MoCo. Doc recommended it, as I get older my blood thickens, so that's how I go about thinning it.

I double Pwn'd the PWM. Shrinkage. Now It should fit nicely somewhere. and it still works LOL. If these pics dont explain how to make one on your own... well you are screwed. dont bother.

500 ohm resistor may be replaced, with up to anything, but at 100k ohms you should be really close(actually full brightness 99.9% of the time, you wont be able to see the <.1% ) to full brightness. DO NOT GO BELOW 50 OHM. the resistor or 555 timer will blow or both.

I would love to retrofit my new clear headliights..But I don't want to mess with there ballerness.

I will be following the progress.:thumb:

Dont be scurrrrrreeeeedddddd. buy some cheap oems in the JY. bake at 210* for 10 min in a wet towel. try to pry, if fail, repeat until you can do it. any higher than 250* and you risk melting plastic. the goo is easy when it is ~200* practice to get a feel for it.


********* The wiring diagram is slightly wrong (not really, but misleading possibly)************

Pin 3 on the 555 timer is the output (pulsed) represented by the graph below in pulses per .5 second (about 70hz, better than the first LCD tvs of 60 hz, and better than the 24hz of movies in theaters) all you have to do is tap into the 3 pin between the pin, and the 670 ohm resistor. thats the pulsed output exactly how I wired it.

If too many people have questions I can use paint or Photoshop to fix it. the output is same voltage as input, anywhere from 3v to 15v should be safe. the rest of the diagram is 100% accurate.
 

Attachments

  • IMG_9634.jpg
    IMG_9634.jpg
    35.1 KB · Views: 126
  • IMG_9635.jpg
    IMG_9635.jpg
    31.5 KB · Views: 124
  • wiring diagram PWM 12v.jpg
    wiring diagram PWM 12v.jpg
    35.8 KB · Views: 132
Last edited by a moderator:
WTF Heat is a direct correlation to current. I'm pretty sure he will not be running them anywhere near there peak current lvls.

I could not find a hidden bottle anywhere....:( Id love to check these out in person when there done

Ambiant temps effect LEDs also even when they are are off or so I've been told.

Yeah i know.... Im gonna do it as best as i can and see how long it lasts. if it lasts a few years, I wont mind reopening to replace leds every 3 years or so.

I know you did red demon eyes or led something or other. how long did it last?

The Red will never be on when the projectors are on, and will rarely be on since they are illegal.

The halos will only be on as DRLs, so when the projectors are off. I never drive during dusk so I shouldnt have to worry about the hot headlamp HID burning the halo while its on as a DRL.

I do plan on under-powering them in an attempt to prolong life.


You are not looking hard enough. its in 2 of the 3 pics of the last post.

I never actually ran my LED demon eyes so I can't be of muc help.
Sorry.
 
Nice work with the retro-fit I like the style and look of the lights and bulb placement. Hope to see these available for purchase soon maybe?? Looks good keep up the great RandD
Dan
 
Nice work with the retro-fit I like the style and look of the lights and bulb placement. Hope to see these available for purchase soon maybe?? Looks good keep up the great RandD
Dan

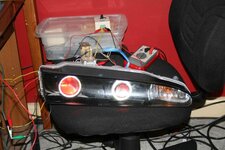
Thanks. The second set of projectors are shipping (inner, highbeam location pair). In a few days I will have another major update. and the Philips lumileds are shipping also so the demon eyes should be done, with some decent circuitry to protect them. Updated the first post to show actual parts list used for assembly (not complete, summary only of small components).

These are a one off, I will never have the resources to mass produce these in any way, and given their high cost in parts alone, and intensive labor, there is just too much risk in making a pair out of faith alone that they will sell. PM me if you are serious about asking me to make a setup for you if you supply the parts. You can expect to pay almost $1000 alone in parts for what I plan to do. So if you don't wanna spend well over $600...(for a minimalist setup) go on ebay and buy the terrible cheap crap kits on ebay for 60 bux and get blinding glare headlight tickets all day. see first post for approx price breakdown.

The 60mm special special order halos are still somewhere between the manufacturer and distributor i bought from... god only knows when they will find me. :banghead:
 
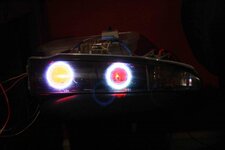
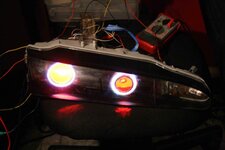
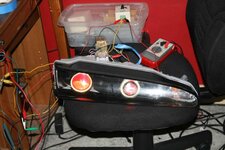
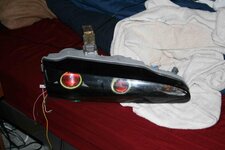
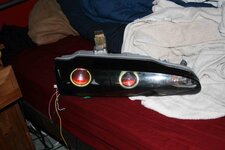
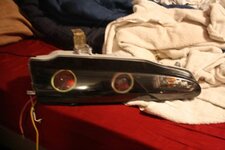
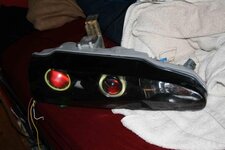
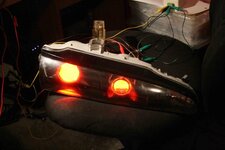
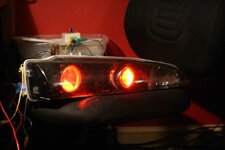
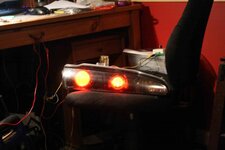
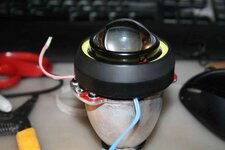
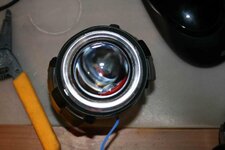
I just got a package... and now I have everything! I have my job now, but heres a sneek peek as to how this should turn out... you should be ably to tell the no flash pics from the flash pics. These are with no leds attached or on. All in room lighting.

the reflector red paint looks kind of orange, its pure red...

ALMOST DONE, these are looking sexy, I should call in sick today.
 

Attachments

  • IMG_9688 copy.jpg
    IMG_9688 copy.jpg
    37.6 KB · Views: 146
  • IMG_9685 copy.jpg
    IMG_9685 copy.jpg
    40.6 KB · Views: 149
  • IMG_9683 copy.jpg
    IMG_9683 copy.jpg
    35.5 KB · Views: 151
  • IMG_9678 copy.jpg
    IMG_9678 copy.jpg
    28.3 KB · Views: 144
  • IMG_9682 copy.jpg
    IMG_9682 copy.jpg
    36.1 KB · Views: 150
  • IMG_9677 copy.jpg
    IMG_9677 copy.jpg
    34.9 KB · Views: 161
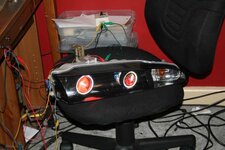
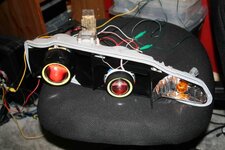
I mocked them up one last time with the latest progress. I cheated and threw them loosley together, I just couldnt wait to see what it looked like. Just a few things to fix, let the paint cure for a week, and wait for the replacement halo to come in, they should be complete. mean as hell i think. I forgot to take pics of the demon eyes only. they look so sick without the LED halos.
 

Attachments

  • IMG_9719 copy.jpg
    IMG_9719 copy.jpg
    51.3 KB · Views: 131
  • IMG_9716 copy.jpg
    IMG_9716 copy.jpg
    20.5 KB · Views: 131
  • IMG_9713 copy.jpg
    IMG_9713 copy.jpg
    32.1 KB · Views: 121
  • IMG_9711 copy.jpg
    IMG_9711 copy.jpg
    52.1 KB · Views: 143
  • IMG_9708 copy.jpg
    IMG_9708 copy.jpg
    37.8 KB · Views: 126
  • IMG_9704 copy.jpg
    IMG_9704 copy.jpg
    37.3 KB · Views: 126
  • IMG_9697 copy.jpg
    IMG_9697 copy.jpg
    35.3 KB · Views: 130
  • IMG_9695 copy.jpg
    IMG_9695 copy.jpg
    37.3 KB · Views: 141
Very nice work! Glad to see they are almost finally finished. They look mean as hell and would love to also build a set for myself but it just sucks how much it costs to build a set like yours:cry:. I have bought complete running dsm's for less than what is cost to build those lights. Hopefully some aftermarket company will soon take notice of the demand for a set of lights like yours and give people a affordable option that looks close to what you have built.
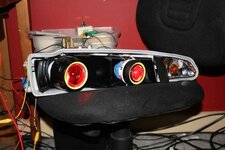
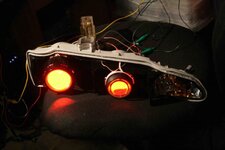
 
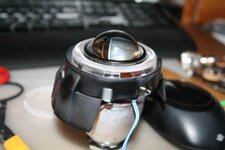
Yet another side step.... The shroud for the inner/secondary/"matchbox" projectors was way too big, even massive trimming ciuldnt get it to fit, its time to make my own shrouds. A PVC coupler from home depot is almost perfect, and once black will match the other, and the halo will show through matching even more... I like the look so far better than the oversize diffuser anyway.
 

Attachments

  • IMG_9732 copy.jpg
    IMG_9732 copy.jpg
    49.8 KB · Views: 122
  • IMG_9730 copy.jpg
    IMG_9730 copy.jpg
    52.2 KB · Views: 135
  • IMG_9726 copy.jpg
    IMG_9726 copy.jpg
    20.6 KB · Views: 129
  • IMG_9733 copy.jpg
    IMG_9733 copy.jpg
    39.5 KB · Views: 114
  • IMG_9735 copy.jpg
    IMG_9735 copy.jpg
    37.7 KB · Views: 122
Looks like a Terminator eye! But seriously though......that is just badass. You have great skill!
 
Main beams are finished:
Painted
shrouded
Demon eyes (3x3 Superflux LED array, run @25-70mA, 30mA in pics)
LED halo
DONE.

So technically, now, I'm halfway done (or better).

I am 99% final on my plans for the secondary beams, and like 50% done on them overall:

Painted
LED halo
Demon eyes (planned, need a better mounting solution, prefer more than just 4...)
Shrouds (planned, the front portions are complete, need paint. the rear portions need to be finalized, as well as a secure mounting method)

I also need some custom bushings CNC'd to align the LED halos to the projector, and space them off of the shoulders.

SOMEONE PLEASE TELL ME YOU CAN HOOK ME UP ON THIS!!!!!!!
I have a quote from a custom bushing company for $60 +shipping and 4 weeks wait on these. Made of black Delrin plastic. PVC should work just fine too even if I have to paint them black.

I would be willing to pay up to $60 for a pair or more of quality pieces. this is a crucial step for completion.

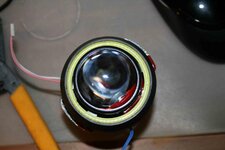
These pics are similar to the last, except the updated prototype for the secondary projector shroud, and demon eye only pics are in.

Old projector vs new, then some more action cheat shots.

I got some sort of solution for my "bushing" the 100% DIY method cost $21, and about 30 minutes of experimental learning.

I made a "CAD" type design of one, that goes to a 3D printing company "shapeways"

pretty cool company concept overall.
 

Attachments

  • IMG_9802 copy.jpg
    IMG_9802 copy.jpg
    48.9 KB · Views: 124
  • IMG_9796 copy.jpg
    IMG_9796 copy.jpg
    32.8 KB · Views: 120
  • IMG_9793 copy.jpg
    IMG_9793 copy.jpg
    35.7 KB · Views: 117
  • IMG_9779 copy.jpg
    IMG_9779 copy.jpg
    28.5 KB · Views: 125
  • IMG_9772 copy.jpg
    IMG_9772 copy.jpg
    29.4 KB · Views: 116
  • IMG_9745 copy.jpg
    IMG_9745 copy.jpg
    49.3 KB · Views: 119
  • IMG_9740 copy.jpg
    IMG_9740 copy.jpg
    32.1 KB · Views: 113
  • IMG_9739 copy.jpg
    IMG_9739 copy.jpg
    29.4 KB · Views: 113
  • IMG_9738 copy.jpg
    IMG_9738 copy.jpg
    33.6 KB · Views: 113
  • IMG_9737 copy.jpg
    IMG_9737 copy.jpg
    33.2 KB · Views: 120
  • IMG_9816 copy.jpg
    IMG_9816 copy.jpg
    53.6 KB · Views: 119
  • CAD bushing.jpg
    CAD bushing.jpg
    50.3 KB · Views: 117
I followed a tip to Shapeways.com

I designed my own spacers in the shape of flanged bushings. I hope the plastic can handle the temperatures... Otherwise I may go a different material.

The fit is excellent. Perfectly snug with no play, and easy to assemble/remove. Exceeded my expectations. I will either use these, or keep the dimensions to cnc nylon 6/6. I need to CAD a base for my shroud, and finalize (aka build and wire, already planned) LED demon eyes for the matchboxes.

Then I am done!!!!! finally! I cant wait.
 

Attachments

  • IMG_1422 copy.jpg
    IMG_1422 copy.jpg
    30.1 KB · Views: 111
  • IMG_1420 copy.jpg
    IMG_1420 copy.jpg
    25.1 KB · Views: 125
  • IMG_1423 copy.jpg
    IMG_1423 copy.jpg
    22.7 KB · Views: 110
  • IMG_1427 copy.jpg
    IMG_1427 copy.jpg
    37.7 KB · Views: 109
  • IMG_1429 copy.jpg
    IMG_1429 copy.jpg
    30.6 KB · Views: 95
How/where are you mounting your LEDS for the demon eyes? I was in the middle of a basic Mini H1 retro when I found this thread so I had to tear mine apart and paint my shields blue, I'd like to do some blue LEDs as well but not sure the best way to go about it.

Also, very nice work. I am still in progress of making clear lenses for my headlights as I am using OEM lights.
 
I am still in progress of making clear lenses for my headlights as I am using OEM lights.

That is quite the endeavor LOL. I am sure you will find mounting LEDs an easier problem to tackle.

But anyway, I used the smallest pc board you can buy at radioshack two 15x16 hole boards that are mounted together. split it into two separate 15x16, and made a 3x3 array (in diamond formation) on each. You can see the wiring diagrams. My method is to really underpower them to maximize life under heat.

Mounting them depends on what you are doing for blue effects. If you did the coke can lower painted shield mod (which I highly recommend doing, for non-illuminated color) then you have to mount LEDs up top. or the shield will create a shadow that you don't want.

If there is no lower shield mod, then it would be ideal to mount most of the LEDs on the sides where there will be less heat from convection. You may mount a few up top anyway. I would say 3 per side and 3 up top for max light output, and superflux LEDs should never exceed a string of 3 because of automotive voltage limitations.

I soldered resistor leads (just the wire, no resistor) to empty holes in the PCB. they should hold the board for the remainder of its life. I drilled small holes in the plastic lens holder on the mh1 and "laced" amputated resistor leads, one through each hole. That gives me a confident/solid mount that shouldn't fail from heat or vibration.

I really dont want to take apart my MH1's to show you because I cleaned them and sealed them up until the final installation.

I can photoshop diagrams for ya but most of my pics should show whats going on there along with my explanation.
 
Also, very nice work. I am still in progress of making clear lenses for my headlights as I am using OEM lights.

Can you show some of your progress on that, or make a separate thread about it? Been thinking of doing the same thing...
 
Support Vendors who Support the DSM Community
Boosted Fabrication ECM Tuning ExtremePSI Fuel Injector Clinic Innovation Products Jacks Transmissions JNZ Tuning Kiggly Racing Morrison Fabrications MyMitsubishiStore.com RixRacing RockAuto RTM Racing STM Tuned

Latest posts

Build Thread Updates

Vendor Updates

Latest Classifieds

Back
Top