The Central Hub for DSM Community and Information

For 1990-1999 Mitsubishi Eclipse, Eagle Talon, Plymouth Laser, and Galant VR-4 Owners. This is where the DSM platform history is documented and archived. Log in to help us in our mission, and to remove most ads from the browsing experience.

IMG952013091495224024.jpg

ManticSHadow 95 GSX 2.4l 450whp Build

This site may earn a commission from merchant affiliate links, including eBay, Amazon, and others.

ManticSHadow

15+ Year Contributor
234
7
Oct 3, 2009
Bentonville, Arkansas
Post Build History Break Down
- Post#1-History, Engine Swap, New Parts.
- Post#5-Tank Gas Leak, Transfer case Recall Fix, Stuck Injector and new seals, Driveshaft clean up.
- Post#6 - Build Plans and Check Off List
- Post#8 - ECMlink, Throttle Body Rebuild Kit
- Post#11- Old Engine Tear Down.
- Post#12- Throttle Body Rebuild and a bit of shine!
- Post#13- New Rims!
- Post#17- 4g64 Junk yard blocks new home!
- Post#22- Surprises Surprises!
- Post#25- New toys, Friends, and progress.
- Post#26-
Clearing the engine bay cobwebs.
- Post#27- Paint Happens?....
- Post#28- Engine paint and junk.

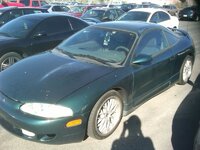
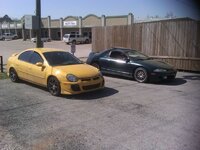
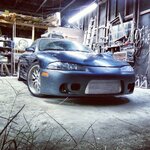
I was living in Utah in 2009 and everyday on the way to work I would drive past this green eclipse and id always eyeball it, never moved ever, always thought it would be great if it was a GSX and for sell! Well I accidentally got my wish while browsing craigslist"that car looks familiar", got on the phone and a week later I had my GSX well turn to 2010 moved back to Arkansas, 2 cats and loaded with all my stuff, it all fit LOL. Well after 3 good months it developed a knock (4g63 engine noise - YouTube) Well empty wallet with no money and none coming in I joined the military and the car sat for 2 years as I got out of the army and job search, finally got a job, met some skinny dude named Tyler who bagged trucks and played with little sports cars and had a place to tear into a car so roll around too 2013 the first start of the build commenced! Yes that is also my MR2.
20130217_164257.jpg

First Engine Swap
So saved up my first batch of mulah for a new engine and extra parts along with extra for random odd and ends that I knew would have to be replaced little did I know how much of a burden it would become.
  1. New engine forged pistons 3 angle valve job.
  2. FP Manifold
  3. 2GB Front Bumper
  4. AEM Wideband
  5. Punishment Racing Fmic
  6. 2GB Headlights
  7. Small 16g Rebuild kit
  8. New 16g Turbine Shaft.
  9. New Custom Rotors
  10. SS AutoChrome 3inch Turbo back
Thats just the immediate hole in my wallet that comes to mind!:sosad:
On to the fun of tearing it apart if I didnt have my friend Tyler id still be stuck in a engine with nothing learned onto the disaster!
03/13-08/13
20130406_203211.jpg
20130406_203237.jpg
20130406_220004.jpg
20130406_225920.jpg
20130406_225927.jpg
20130721_020137.jpg
20130217_1643120.jpg
Then of course the set backs started showing themselves:toobad:
New block had missing plug.:nono:
20130408_044956.jpg
Torn Boot!
20130406_203220.jpg
Bad ball joints on driver side(also noted that driver side door paint was newer then rest of car:hmm:)
20130406_203245.jpg
Now the "preciou..uh shiny stuff!"
(Not Pictured)
Fuel Lab Fpr
Wix Fuel Filter.
20130225_144528.jpg
20130226_123326.jpg
20130228_023114.jpg
20130304_132753.jpg
2013020895205600.jpg
2013050495143148.jpg
fp_dsm_race_manifold.jpg
20130712_133338.jpg


Swap comes together
20130428_011058.jpg
20130428_011100.jpg
20130420_205326.jpg
20130527_212351.jpg
20130727_190401.jpg
2013042995200522.jpg
2013042995200514.jpg
2013042995200345.jpg
20130823_100530.jpg
20130713_181807.jpg
freshveiw.jpg


First Start
[ame]

Fun revving me!
[ame]
 
Last edited:
Leaky as come a long way.

Looks good and when you finish your build it'll be awesome.
 
Looking good so far! Couple question..what details do you have on this "new engine?" 6bolt or 7? And what are you using to tune the new setup with?
 
Looking good so far! Couple question..what details do you have on this "new engine?" 6bolt or 7? And what are you using to tune the new setup with?

Well its just a replacment 7bolt nothin special, the details of it are as known just the three angle valve job and mystery forged pistons, im going to update this soon with the present work done and then details with the full rebuild and 2.4l setup going on next year.
 
So with the new engine in all seemed well except for some usual hiccups, we took her for a test drive and next thing you know shes got water spilling from the back of the blockWTF. Turns out the freeze/cast plugs were apparently not sealing correctly so we went ahead and replaced them with sealant this time, all was good got her in good enough shape to drive her home, which went fine cept for the strong fuel smell all the way there then she was parked in the garage where she decided to spill gas all over the garage floor. Stinking up the whole house! Didnt take long to find the problem.

20130927_154322.jpg

The fuel pump sealing ring was just too far gone to seal anymore so a quick hope online to jnztuning.com was all I needed and got her a new seal and ended up making the assembly nice and clean before reinstall.

Didnt take long for the next problem to hit me, she just wouldnt start :banghead: and air was blowing back into the intake during cranking :barf: so i thought the worst bust timing checked out, it didnt make since then instead of panicking I started simple and pulled the spark plugs low and behold something wasnt right. Cylinder Plug number 2 was just way to burnt for such new plugs.

20131004_123452.jpg

The cylinder smelt of straight fuel so the fuel injector was stuck open, well a quick trip to the junkyard and for $30 bucks had myself 4 more injectors and an extra fuel rail:hellyeah: replaced the injector along with a new plug and a new set of Fuel Injector Clinic OEM injector seals.(The fuel was washing the cylinder wall causing the piston rings to not seal which was where I was getting my loss of compression no start situation)

20131024_213642.jpg

Once again she lived! then it was on to my next leak the infamous transfer case yoke leak so off came the the driveshaft and transfer case. Id just like to say I hate rusty surfaces and well ill let the pics do the talking here.

20131110_155214.jpg
20131110_155212.jpg

So a good scrub down sume time with sanding a prime then a full can of weatherproof roll bar and chassis paint gloss black looked alot better!

20131117_143853.jpg
20131117_143844.jpg
20131117_160653.jpg
20131117_160649.jpg

After that I got back on trusty ole JNZ and ordered up a recall kit.

20131101_144259.jpg

Im just going to go ahead and say and suggest a socket and hammer is a easy way to remove the old yoke BUT is not the way to install a new one:cool::banghead: well I struggled and couldnt for the life of me get the second c-clip in well after an entire day I removed the new joint to find one of the needle bearings had falling and I was just recklessly smashing it against the cap so tossed that one but kept the yoke and in a fit of annoyance and rage I purchased the whole driveshaft rebuild kit from JNZ but ive only so far used one of the recall yokes and buying proper tools and a c-clamp installed it effortlessly. "do it once do it right", right?:applause:

So put her back together replaced fluids in the transfercase and rear differential which that thing I dont believe has been replaced in a long while PO included but didnt look bad but im sure its happy with the new royal purple for now. Also replaced the oil with VR1 which the break in oil reaked of gas.

Then after trying to pull her out of the garage about a week ago shes losing water from the rear of the block again:banghead: so thats where my build stands, and also begins for the new year. Moving into a new house with a big garage and more money, shes going to be torn apart and built back up quality this time and attention to detail with a fun 2.4l and 7bolt head stay tuned!
 
So I've been slowly putting a budget together on the 2.4l and planning out my setup, looks like I'll be heading out of state to get a split thrust bearing year 4g64 out of a 98 galant but the short block plans are as follow.

  1. 98 4g64 split thrust bearing block.Done 04-06-14
  2. oil port/oil galley debur.
  3. Honed/decked/hot tanked usual machine work.
  4. Stock crank magnafluxed
  5. ACL tri-metal bearings Done 06-22-14
  6. Rods- Manley long rod Done 06-22-14
  7. Pistons-Manley Strokers
  8. DSMlinkDone 03-03-14
  9. FP turbo still undecided
  10. I'm gonna steal all the accessories from my newer engine.
  11. Newer gaskets, copper where applicable
  12. Usual random replacement parts.
  13. Window Caulk for sealing everything WTF Kidding!!!!!

Of course this list is still up for opinion, suggestions and change but that ball on the build is rolling.
 
Last edited:
So some thinking has been happening and as such some plans have changed the 2.4 bottom end build is being postponed in favor of building up the car around the car which is the smart way to go. So first order DSM Link v3 has been ordered and work on getting the freeze plugs to stop leaking has begun along with a possible throttle body rebuild. Pictures soonLOL Goal is still the same so all upgrade where needed will be geared toward a 4g64 block.
 
Yay ROFL updates so ECMlink has been received.

000_0001.jpg

Then since the throttle body's coming off for the fix I decided to go with, fresh none 20 year old parts from snowborder714 with the metal encased seals. His Rebuild Kit--->Throttle Body Rebuild Kit - DSM Classifieds

000_0003.jpg

Awesome little fun update other than the snow blocking any current repair work :boring: 
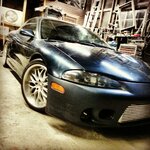
my friend traded me a VIS Carbonfiber hood for mine and 125 on top. If you look close you may see it peeking out of the snow!

000_0004.jpg

000_0005.jpg

More updates to come as weather warms:hellyeah:
 
Nice! I haven't seen Leaky in months. After I get some crap together i'll have to stop by sometime.

My question is... Why was she out in the snow like that?
 
Well finally tore the old engine apart with quite some interesting stuff got some headstuds and mains arps that I can possibly reuse in the next block and some pristine eagle rods and arias pistons that Ill be selling the arias carbon build up prove just how dirty the old engine was running


100_0045a.jpg

100_0046a.jpg


Bearing 4 is the one that spun you can see the line in the bearing and the oiling holes were near nonexistent.

100_0043a.jpg

100_0048a.jpg

The crank looks good no gouges from what I can tell there is bearing material built up on crank journal 4 but its built material and would machine off supposedly this is an evo crank.

100_0039a.jpg

100_0041a.jpg
 
So finally got time to post this up, got the throttle body rebuilt and intake both, painted, just so they were less of an eyesore when they go back in but transmission has to drop first, oh got new stuff for the trans drop too!ROFL

Dirty Business

100_0028.jpg

Disrepair

100_0030.jpg

Biss(Base Idle Set Screw) Just Too Far Gone

100_0034.jpg

Easy Out Bro!:thumb:

100_0035.jpg

Pretty and!

100_0038.jpg

Painted!!

100_0037.jpg
 
Fun times new stuff, well traded off the old 18s HP Designs Rims to my friend for some more tire and better handling Kosei K1s 17x8s:p

100_0054.jpg

Also received some back up GS wheels to for any needs.

100_0055.jpg
 
Nice build so far man, rims should look sick. How was the TB to rebuild? I got a rebuild kit for mine and I've been kicking around the idea of doing it where or not its leaking.

Rebuild was no problem at all just took everything apart gave it a chemical soak then hit it with a dremel with bronze cup brush to clean everything off and out. DONT USE STEEL. Then use the rebuild kit to put back together in reverse. Paint first if you prefer.:thumb:
 
After two good days ratcheting Ive got my 4g64 block:hellyeah: . Friday I spent my time in the yard getting stuff disconnected. Then today with my best friend tyler helped me big time with the stuff i couldnt do and we got that engine pulled. So 1998 4g64 block from a galant.

100_0059.jpg

Dat Profile!

100_0057.jpg

Dirty Dirty...

100_0060.jpg
 
Sorry if I missed it but what did you use to paint the intake manifold??

Looks good:hellyeah:
 
Sorry if I missed it but what did you use to paint the intake manifold??

Looks good:hellyeah:

Yes my apologies I didnt mention the paint I used. I always use VHT high heat paint it just seems to hold up better compared to any others I clean really well, use their High Heat primer, follow the instruction for proper coverage then the same for the top coat, gloss black holds up really well when prepared correctly, also used the high heat for my fp manifold still looks great! :sneaky:
 
I still get a good smile or two thinking about all that time we spent in the shop messing with your 2ga gsx. Ddddaaaaaammmmmnnnnn, lots of fun times in that shop. Glad I could be of assistance through this build so far. This gsx has changed ssssssooooooooo much since we started. Glad to see constant change everytime I stop by. After your gsx is back in line, and driving again. It will soon be my turn to tear down my 2gb. :hellyeah:
 
I still get a good smile or two thinking about all that time we spent in the shop messing with your 2ga gsx. Ddddaaaaaammmmmnnnnn, lots of fun times in that shop. Glad I could be of assistance through this build so far. This gsx has changed ssssssooooooooo much since we started. Glad to see constant change everytime I stop by. After your gsx is back in line, and driving again. It will soon be my turn to tear down my 2gb. :hellyeah:

Hey Tyler! Your time cant come soon enough see ya later today:p
 
Well ups and downs considered been wanting to update forever, but someone took it upon themselves to steal and relieve my AW11 of my digital camera:mad: so havent been able to take pictures of progress so progress stopped. Thats over now got a better camera so time for updates:cool:!

I swear these cars,:rolleyes: I started dropping the transmission to replace some things and fix a leak well what was strait forward has turned into a project" i know whats new" first off was the beauty that is lower ball joints,"what a joy these things are in my life" well driver side spun, and then the passenger side I literally had to remove the strait arm and stand on it awkwardly to get it to drop out :notgood:. Pictures!!

Passenger side lower ball joint, boot is gone.

gedc0016.jpg

Really had to stand on this for removal:aha: boot also gone.

gedc0018.jpg

Next annoying thing nothing but positives in this garage:rolleyes:, somehow while removing that passenger side arm, something popped, something popped,Something popped!! Eibach spring:

gedc0022.jpg

Further back :

gedc0023.jpg

Well steaks to ramen noodles happens quick, so with the bad aside and more likely to come, heres a hint of fun on its way with more boxes flowing in.:sneaky:

gedc0026.jpg
 
Well my friend Tyler came over to motivate me to get off my butt and get somewhere and what can I say he's a great motivator which mostly meant that I spend money, take pictures and he works too hard and leaves with stuff I dont need ROFL

So we started off the day by taking a trip to Harbor Freight and grabbing a new toy we needed.

gedc0165.jpg


With that we as in alot more him:p got the garage cleaned and cleared so we had room to move. Then after a bit more motivation :rocks: went ahead and spent the night wrenching and with in a record breaking hour had a baby engine. Again!

gedc0163.jpg


gedc0164.jpg


Got the car back on the ground and rollable hoist chain set up.

gedc0167.jpg

gedc0169.jpg


Up and Out!

gedc0178.jpg


And nice and comfy!

gedc0180.jpg

Dirty open canvas:cool:

gedc0184.jpg

Well all in all a very fun and accomplished day till next weekend. Its a start and were getting there, and more thanks to tyler. Alot and I mean alot more to come! Stay tuned..
 
Add Value - Be Respectful - No Trolling - No Misinformation - Participate Often!
Support Vendors who Support the DSM Community

Build Thread Updates

Latest Classifieds

  • For sale 2g 2G DSM Link V3
    2G DSM Link V3 $600 + shipping and paypal fees* no cable included * cables are 75 on the...
    • jersygsx
    • Updated:
    • Expires
  • Wanted 2g Shot in the dark (2g Pass strut cut out)
    Need 2g strut tower to save time.
    • frosh29
    • Updated:
    • Expires
  • For sale 2g 2G Mishimoto Radiator & Fan Shroud
    2G Mishimoto Radiator & Fan Shroud $200 + shipping and paypal feesYou must be registered to...
    • jersygsx
    • Updated:
    • Expires
  • For sale VIRGIN 4G63 6-BOLT TURBO HEAD
    Came off a virgin stock AWD Auto 1G DMS (91), also have matching block and crank which are also...
    • The_Partout_Spot
    • Updated:
    • Expires
  • For sale 1G DSM 4G63 6-BOLT TIMING COVER
    Used, see condition in photos. Buyer covers shipping / fees.
    • The_Partout_Spot
    • Updated:
    • Expires
Back
Top