ImperfectTruth
Probationary Member
- 8
- 1
- Feb 12, 2012
-
Portland,
Indiana
Disclaimer: I am aware of a similar thread located here: http://www.dsmtuners.com/forums/appearance-interior-exterior/407391-replaced-power-window-regulator-motor-assy-pic.html
Reference this for a better picture of the regulator mounting points as my pictures show it actually mounted in the door. I am starting a new thread with the hopes of being more inclusive; perhaps the 'end all thread' for this topic..
Getting Started
You will need the following:
Removal
Once your tools are gathered you will need to remove your door panel. If you need further instruction on how to do this, perhaps you shouldn't meddle with the window regulator.
Once the door panel is removed (and the plastic if you are the lucky owner of a virgin door) roll the window all the way down. Also go ahead and pull the inner seal/weather strip. Illustrated above I have the mounting points circled. These are short bolts with a phillips head but it is best to remove/install these with a 10mm socket.
Next, remove the 10mm nuts securing the window studs onto the regulator itself. One is located in the speaker hole, the other in the lower right access hole. Be sure to hold the window up slightly with your hand as you do this, as it will no longer be supported and will drop into the bottom of the door. Once everything is free, unplug the regulator from the chassis harness and pull the window up all the way. Have someone hold it in the full up position while you collapse the old unit and wiggle it out of the door.
Installation
With your helper still holding the glass, collapse the new unit and slide it back through the hole in the door. It will take some patience to get the regulator back into position with all the mounting holes lined up. I found it easier to start with the four holes around the motor first, the other two are cake. Once all the bolts are in go ahead and guide the window back down slowly and reattach it with the two nuts. While you want these snug, do not over tighten these or you run the risk of breaking the glass. Plug the new regulator back into the harness and your job is mostly done.
Adjustment and Finishing Touches
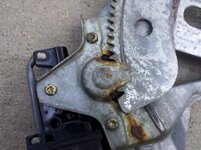
Now would be a great time to clean any debris/old broken hardware from the inside of the door, inspect surrounding areas for problems, and things of that nature. Be sure to lubricate the front and rear tracks the window is guided on to allow for smooth operation. The next step is very important and puzzled me at first. The four mounting holes around the motor are no brainers, but if you look at one of the back two bolts, it is an adjustment point. Pictured below is how I had the regulator installed to begin with.
Note the adjustment on the front bolt. Pictured here is exactly what you don't want. Well, in my case it wasn't I suppose it could be different for you. With everything tightened down this way my window would roll up too far in the front and was sagging down in the back. This may also result in popping noises, like it's off track/coming off track as the window is rolled up/down. Simply loosening this bolt a bit, sliding it up as far as it would go and re-tightening was perfection. My conclusion - this is the 'angle adjustment' of the window as it sits in the tracks. Lesson learned - would be a good idea to mark how this bolt is positioned before you remove the old unit. If everything is working properly, of course. If you have any of the above symptoms, try adjusting this bolt!
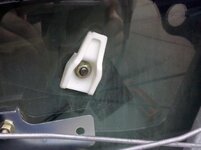
Next on the agenda is part of the '2G window rattle fix'. Pictured below is one of the 'adjustment pads' as I'll call them. This is the one at the back of glass/door.
It is bolted on with two 12mm nuts and two threaded studs with the 5/32" allen head.
These should be slightly pressing up against the glass and supporting it. They help keep the window adjusted (as these are what the plastic stops grab onto when you roll the window up) and they also keep the rattling down when closing the door with the window partially rolled down. To adjust these, simply loosen the two 12mm nuts and crank on each stud with the allen wrench. You want to keep these as even as possible. Turning clockwise runs the stud into the bracket, thus pulling it away from the glass. Counter-clockwise obviously does the opposite and pushes the pad closer to the window.
A note on adjustment - the stud will let you know when to stop as you're adjusting this towards the glass, as you will feel it tighten. Once you've done this to each stud tighten the nuts back down.
There you go, once you're satisfied make sure you test everything a few times to ensure it's all working properly. Close the door and make sure the window is far enough up and making good contact with the weather strip all along the glass. Throw the door panel and inner seal/weather strip back on and enjoy your freshly functioning window, as well as all the money you saved doing it yourself!
Reference this for a better picture of the regulator mounting points as my pictures show it actually mounted in the door. I am starting a new thread with the hopes of being more inclusive; perhaps the 'end all thread' for this topic..

Getting Started
You must be logged in to view this image or video.
You will need the following:
- Lubricant for the window tracks
- 5/32" Allen Wrench
- Rachet(s) with 10mm and 12mm sockets, extensions/deep well sockets
- #2 Phillips Screwdriver
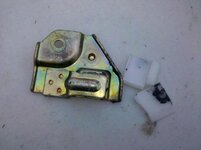
- Replacement Regulator Unit (old unit is pictured)
- Beverage of choice
Removal
You must be logged in to view this image or video.
Once your tools are gathered you will need to remove your door panel. If you need further instruction on how to do this, perhaps you shouldn't meddle with the window regulator.

Once the door panel is removed (and the plastic if you are the lucky owner of a virgin door) roll the window all the way down. Also go ahead and pull the inner seal/weather strip. Illustrated above I have the mounting points circled. These are short bolts with a phillips head but it is best to remove/install these with a 10mm socket.
Next, remove the 10mm nuts securing the window studs onto the regulator itself. One is located in the speaker hole, the other in the lower right access hole. Be sure to hold the window up slightly with your hand as you do this, as it will no longer be supported and will drop into the bottom of the door. Once everything is free, unplug the regulator from the chassis harness and pull the window up all the way. Have someone hold it in the full up position while you collapse the old unit and wiggle it out of the door.
Installation
With your helper still holding the glass, collapse the new unit and slide it back through the hole in the door. It will take some patience to get the regulator back into position with all the mounting holes lined up. I found it easier to start with the four holes around the motor first, the other two are cake. Once all the bolts are in go ahead and guide the window back down slowly and reattach it with the two nuts. While you want these snug, do not over tighten these or you run the risk of breaking the glass. Plug the new regulator back into the harness and your job is mostly done.
Adjustment and Finishing Touches
Now would be a great time to clean any debris/old broken hardware from the inside of the door, inspect surrounding areas for problems, and things of that nature. Be sure to lubricate the front and rear tracks the window is guided on to allow for smooth operation. The next step is very important and puzzled me at first. The four mounting holes around the motor are no brainers, but if you look at one of the back two bolts, it is an adjustment point. Pictured below is how I had the regulator installed to begin with.
You must be logged in to view this image or video.
Note the adjustment on the front bolt. Pictured here is exactly what you don't want. Well, in my case it wasn't I suppose it could be different for you. With everything tightened down this way my window would roll up too far in the front and was sagging down in the back. This may also result in popping noises, like it's off track/coming off track as the window is rolled up/down. Simply loosening this bolt a bit, sliding it up as far as it would go and re-tightening was perfection. My conclusion - this is the 'angle adjustment' of the window as it sits in the tracks. Lesson learned - would be a good idea to mark how this bolt is positioned before you remove the old unit. If everything is working properly, of course. If you have any of the above symptoms, try adjusting this bolt!

Next on the agenda is part of the '2G window rattle fix'. Pictured below is one of the 'adjustment pads' as I'll call them. This is the one at the back of glass/door.
You must be logged in to view this image or video.
It is bolted on with two 12mm nuts and two threaded studs with the 5/32" allen head.
You must be logged in to view this image or video.
These should be slightly pressing up against the glass and supporting it. They help keep the window adjusted (as these are what the plastic stops grab onto when you roll the window up) and they also keep the rattling down when closing the door with the window partially rolled down. To adjust these, simply loosen the two 12mm nuts and crank on each stud with the allen wrench. You want to keep these as even as possible. Turning clockwise runs the stud into the bracket, thus pulling it away from the glass. Counter-clockwise obviously does the opposite and pushes the pad closer to the window.
A note on adjustment - the stud will let you know when to stop as you're adjusting this towards the glass, as you will feel it tighten. Once you've done this to each stud tighten the nuts back down.
There you go, once you're satisfied make sure you test everything a few times to ensure it's all working properly. Close the door and make sure the window is far enough up and making good contact with the weather strip all along the glass. Throw the door panel and inner seal/weather strip back on and enjoy your freshly functioning window, as well as all the money you saved doing it yourself!


 WHOOOO!!!! (thanks for the write up!)


 .
.


