The Top DSM Community on the Web

For 1990-1999 Mitsubishi Eclipse, Eagle Talon, Plymouth Laser, and Galant VR-4 Owners. Log in to remove most ads.

Please Support Fuel Injector Clinic
Please Support STM Tuned

1992 Talon Tsi AWD Re-habilitation

This site may earn a commission from merchant
affiliate links, including eBay, Amazon, and others.

This site may earn a commission from merchant affiliate links, including eBay, Amazon, and others.

6/4/15:
My JNZ order came in, and with an added surprise in the box from Nate Pharr:

VxVFt8Th.jpg


That's right, old school Technomotive TMO logger cable, brings back so many memories.

Anyway, on to tonight, checked on my plastidipped door trim piece, there's no way to get the original look back, which is like a plastic/rubber coating, but this is probably the closest thing you can get to having some sort of professional work on it:

3Z6cHoFh.jpg


Mounted up the front bumper cover with all new hardware, and painted all the bolts for the headlights as well:
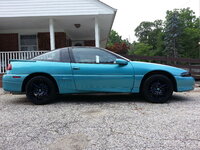
Ehi9R5eh.jpg


Front end complete:

5XRYzdVh.jpg


Splash guards mostly installed, need a few more of those black plastic screw clip things:

kaairkoh.jpg


And the main reason for the JNZ order, new clutch fork dust shield:

C0LZCp5h.jpg


Tomorrow's itinerary is adjust the clutch pedal rod, because I forget where I left it when I put the pedal assembly back in, and bleed the clutch :)
 
Last edited:
6/10/15:
Well well well, here's my 2 babies, born 23 years apart:
GdbgIcI.jpg


i'm at a point where i bled the clutch tonight, tested for clutch drag and still had some at high rpm.

new oem master
new aisin slave
new ss clutch from master to slave
new comp. clutch. steel flywheel
new " " stage 3 clutch
new " " forged clutch fork and ball (left the plastic washer on the ball since i didn't have any instructions)
jack's rebuild with 4 spyder upgrade
new starter plate
all dowel pins
new trans to block bolts

as stated last weekend, i pulled the trans because jack's left my original ball in, and the fork sat a little to the left of center.
so i put the new cc ball in w/ the plastic washer, and it changed, like, none.

any followers have any suggestions ?
 
Idk if it was done how is the pedal assembly.I know you basically rebuilt the whole car but I have to ask. Maybe the master to the pedal assembly may need a little more adjustment.

There is a video jacks does where if you can't push in the slave then it's too far.
 
6/10/15:
Well well well, here's my 2 babies, born 23 years apart:
View attachment 270361

i'm at a point where i bled the clutch tonight, tested for clutch drag and still had some at high rpm.

new oem master
new aisin slave
new ss clutch from master to slave
new comp. clutch. steel flywheel
new " " stage 3 clutch
new " " forged clutch fork and ball (left the plastic washer on the ball since i didn't have any instructions)
jack's rebuild with 4 spyder upgrade
new starter plate
all dowel pins
new trans to block bolts

as stated last weekend, i pulled the trans because jack's left my original ball in, and the fork sat a little to the left of center.
so i put the new cc ball in w/ the plastic washer, and it changed, like, none.

any followers have any suggestions ?


I've herd with after market pressure plates you sometimes need the extended slave cylinder rod it's soposto be just a little longer to avoid having clutch drag I bought one but the tsi isn't together to try it but I bought it from extreampsi psi not sure who makes it might be worth doing some research
 
6/13/15:
Up we go again!

noisZQFh.jpg


Took the nylon washer the CompClutch ball comes with off, and installed 2 metal washers:

BmimDath.jpg


Took a measurement of this, not sure why, but hell, why not:

RPEhtykh.jpg


Maybe if more people do it, we can have a database of different finger to clutch face measurements. Mine turned out to be right around 14mm, checked along a few different fingers to the metal surround of the clutch spline metal bushing:

s24IJgWh.jpg


I have no idea if this is useful or not. Whatever. Mounted the trans back up, and here's how the fork sits:

M6RgVVXh.jpg


Definitely to the right of center :) for comparison, here's the old placement:

NfZOvGkh.jpg


Definitely to the left of center.

I'm beat for today, going to Atco for the "thrill show", and tomorrow I'll put the axles, t-case, etc back in and see how she does.
 
6/17/15:
Did some more idle tuning, and to warm up the engine so I could change the oil for the first time. So far its been about 5 idle sessions, with 30-45 minutes total run-time.

4W9NgAah.jpg


Glitter oil time! Cracked open the PureOne filter, all the pleats were filled with muck.

YjVRBk2h.jpg


Filter and magnet were doing their jobs. Oil coming out was beautiful looking as it was draining, nothing out of the ordinary.

Time for some fresh stuff and a new fat 1g wix filter:

XnfwdBBh.jpg
 
6/21/15:
Since most other things are kinda done, my list is short of stuff left to do....

1. I did leave a thread or two of adjustment on the clutch adjustment rod, so I want to "flush" that with the bracket, so I'll get a little more pushing-in of the clutch.

2. Alignment, TBD

3. I/C piping, what I'm working on now....

Found an old WRX intake in my shed, which was kind of U-shaped, so I cut off a 90, and it'll work pretty damn near perfectly for the uicp-to-tb section:

5rJPVcah.jpg


So I'll chop off a little of the uicp, expand the 2.5" to mate up with the 3" section, get that welded, weld a bead on the tb end, and have the AIT bung welded on too.

Then over to the turbo-to-ic side, chopped up the piping the car came with, made a few angled trim pieces, and came up with this:

u0Ljps5h.jpg


So I need to get that welded too. Ordered a 45 coupler and a straight length of piping off ebay, and should be able to finish the mock-up and get it all welded together. Then I can have BEWST!
 
6/29/15:
A rather uneventful week. Although I found a guy right in my town that welds aluminum, but I had to take the pipes to him. So I did, nice welds, but he welded the AIT bung on upside down, so I cut that back off, and the piping was off just a tad from my marks, so I had to re-cut them too.

I think I have it figured out all the way now tho:
pVfascFh.jpg


In the previous post, you can kind of compare the little piece I was holding, which now is about 2/3 its size in the above photo.

so i'll get that joint welded again, and here's how it looks over to the compressor:
r0ZSNWkh.jpg


About a 6" length of hose there, which allows for some movement, and also insulates the pipe from the 1pc crossmember for reduced vibration.

If you're looking UP at the car, say if your eyeballs were on the ground, you can see the piping hang down below the bumper cover:
o29h91Ah.jpg


But if your even with the fat part of the bumper cover, like straight-on looking at the car, you can barely see a smidge of it:

0VWA2fph.jpg


So I'm satisfied. Still waiting for the pipe expander tool I ordered to mate the 2.5" to the 3" at the throttle body elbow, then I'll take it back for a final welding and this chapter should be done :hellyeah:
 
6/30/15:
Took the stuff back over to Chris for a final welding and everything worked out great!

v7QZR8Lh.jpg


So we're all hooked up, bumper and splash guards back on, ready for road trials and alignment :)

zJQSy4Jh.jpg
 
7/4/15:
Aside from tuning and other crap, I've realized that 4awg from the hatch is too small. At initial crank, I see my voltage drop to 6.9v, then 9v for the next 2 seconds, then finally 13.8 when the alternator is finally spinning after start-up. So I'll need to replace all the 4awg with 0awg from the hatch to engine bay and see how that makes out. For the time being, i jacked up my 7v and 9v injbatteryadjust in link to see if that helps out with the choppy idle for the first 10-20 seconds.

Yesterday took my car to get alignment, everything was able to put to spec except rear passenger toe, which we ran out of adjustment on the eccentric bolt, but could manually jiggle the wheel and get it in spec, so something must not be tight:

IiYaHFBh.jpg


Today I threw it back on the lift and rear lower ball joint nut was able to be tightened some more, so I did that. Gonna let the suspesion settle with driving it a little for a month or so, then take it back for another alignment.

Also took the car and the evo test pipe i bought off ebay (because I needed a flange and some straight 304 stainless to match the thermal, and it was $26 shipped for a length of pipe and 2 flanges this way) and he fixed that up for me:

0gUR7C3h.jpg


While up on the lift, put the front subframe kidney plates back on:

eemLcA6h.jpg


And i was kinda disgusted with the paint chipping off because of my 3 install/removals to get the washers under the fork ball, so I gave that a little paint touch up.

Bearing for the the a/c pulley came, so i pressed that in:
aAltIWSh.jpg


Gave the pulley bracket a paint job, just waiting for that to dry.

When I go to replace the 3 poly motor mounts I did with new replacement oem type mounts, I'll install the a/c pulley bracket and belt, cuz I need muh AC!
 
7/4/15 weekend:

Dirty piggy got a bath and some tire shine:

lSjqaLWh.jpg


THqO8IXh.jpg


Also started tuning. Here's last nights 3rd gear pull to 6500rpm:

SKHRJdwh.jpg


Still at w/g pressure of ~15psi, because I'm scared. Also because there's still a trace of the 8 year old stale gas in there, mixed in with the fresh 93. The tank's getting pretty empty now tho, so I can do another fill of 93 and keep dwindling what was left in there. Also not sure of the car's actual weight yet, so the default 3400lbs is what link is using to calculate hp/torque.... which probably isn't too far off. If stock curb weight is 3100, I'm 280, plus fmic setup, larger/heavier turbo/exhaust, bazooka tube, laptop, etc... so that could be pretty darn close to 3400. I'll have to find a scale and see.
 
7/12/15:
Spent 2 days touch-up painting rock chips on the hood, wet sanding, washing, compounding, and waxing it she looks pretty good now..

h3NgpHQh.jpg


YDwhXLfh.jpg


vR03fzYh.jpg


Also sanded/painted the cowl and wiper arms flat black:

EV94X7Ah.jpg
 
9/21/15:
Felt like taking a break from working for a few minutes, and since I haven't posted an update in quite a while (over 2 months, shew!). But weather here in NJ in July and August was quite humid, and I wasn't going to subject the car or myself to that, so a couple short nighttime drives have been accomplished and she currently has 199.1 miles on her since the rebuild.

I dipped the passenger side window trim to match the driver's side, and installed the m3 mirror on that side, so now the exterior matches on both sides. Also painted the rear wiper arm and replaced the antenna with a half-height wired rigid antenna.

So the passenger side:
kxtfKq4h.jpg


...now matches the driver's side:
DsJRbJ4h.jpg


plus new antenna and painted rear wiper arm w/ new wiper.

Mainly my night time runs were for tuning. I know I posted a pic of a log a few posts ago, but I'd like to start from scratch here with all that I've learned so far....

After idle and cruise tuning, which always seems to be on-going, I got around to some WOT tuning. First a few low rpm WOT pulls were tuned, then I started moving up to higher rpm pulls:

9Aj7kYDh.jpg


This one's to 6500, and is explained in a previous post. Made some adjustments to the VE table, then did another pull to 7000:

QmgsUWBh.jpg


I started learning how the computer reacts to the changes, noticing the richness at throttle tip-in, and also started using LinkTools for my WOT tuning. It's pretty nice to see your Wideband follow along the AFRest line.

These pulls were on direct compressor outlet to w/g nipple, and the boost would creep anyway, so I finally decided to install the solenoid that comes with the SCG-1. I tried some initial safe settings based on what I saw in my logs, figuring I had a 13psi spring in the tial 41mm wg, and 0% duty cycle so that I knew the w/g wouldn't operate, to verify the boost would still make its way thru the solenoid and to the w/g.

Then I tried upping the w/g duty cycle thru the SCG-1 slowly, I think this is at 10%, with the start spring pressure at 13psi:
ZsLoPKBh.jpg


White solid is MAP, white dashed is boostEst. As you can see here, there's some 'dolphining' of boost.

I increased the duty cycle to 12%, and it got a little smoother, but still see a little bump there:

Ln833Ixh.jpg


I have also used the Innovate logworks at the same time as ecmlink, to compare the map/rpm/etc values to what the ecu is receiving, which I think is pretty darn neat, and the numbers are really close too:

vm4O0Oxh.jpg


I think I have most of these in a timeline, but not sure, either way, I have progressed. Using LinkTools I've done 2 global VE table/fuel offsets so far, which means the entire table changes based on a maximum VE. At one point, my highest VE was like 118, so you globally offset it back to 100, which changes the entire table as well as your global fuel value. Then you have to tweak your idle and cruise again. That's the point I'm at now, as well as fine tuning the boost control with the SCG-1. I have lowered the w/g start pressure to 11psi, and w/g duty back down to 10%, but haven't tested it yet.

Only issue I have so far is oil pressure, when hot, at idle. Sometimes my readings are 4psi, sometimes they are a scary 0-1psi. When I see that, i give the throttle a little punch and it goes right to 18psi or so because of the rev, then drops back down. These readings come in-line from the ofh to the turbo. This is a -4an line without a restrictor. I think that because this is a -4an line, it almost becomes a short circuit when the oil is hot and thin, and flows pretty damn freely thru that 4an line and into the hx35 and out the 3/4" drain. So today I ordered a cute little .035" restrictor that is 4an male/female, so I can screw that right on the inlet fitting on the hx35 and it'll only take about a minute to install with no mess.
 
Last edited:
Nice Tony! Are you on E85 yet or going to be? I converted over this weekend. Noticeable difference! Still have this stupid spit/sput over 5000 and at more than 15lbs of boost so I am trying to figure it out. You are doing great!
 
no e85 for me, 93 octane is what i planned on all along, and the sunoco is right down the street.
 
I thought I could get away with 93-95 octane and was mixing 110 with 91 for a 95 octane concoction but it still saw knock with only 6 degrees of timing so I pulled the trigger and went to the station 15 miles away and started her on E85 but right now its only E58 even though I ran the darn thing as low on fuel as I was comfortable with. Got rid of a lot of knock so I can put timing back in her but still has some bugs. SIGH
 
9/23/15:
Well this took all of 2 minutes to install....

-4an male/female .031" Orifice restrictor fitting compared to current -4an fitting on the turbo:

89TIVNah.jpg


Installed easy-peasy:

NkGB45Bh.jpg


Also don't think I ever got a shot of where I moved the Vibrant block to, as well as the SCG-1 boost control solenoid:

w4vu0Erh.jpg


And Jason Drew sent me a new DSM plate, since the first one faded for some reason. So that's JBWelded on over the original sticker:

ocGTt4Th.jpg
 
Support Vendors who Support the DSM Community
Boosted Fabrication ECM Tuning ExtremePSI Fuel Injector Clinic Innovation Products Jacks Transmissions JNZ Tuning Kiggly Racing Morrison Fabrications MyMitsubishiStore.com RixRacing RockAuto RTM Racing STM Tuned

Latest posts

Build Thread Updates

Vendor Updates

Latest Classifieds

Back
Top