The Central Hub for DSM Community and Information
For 1990-1999 Mitsubishi Eclipse, Eagle Talon, Plymouth Laser, and Galant VR-4 Owners. This is where the DSM platform history is documented and archived. Log in to help us in our mission, and to remove most ads from the browsing experience.
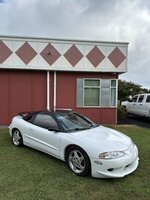
Bird
- Thread starterglang99
- Start date
Bone stock when i bought it and have no intentions of molesting it, just spicing her up.

This site may earn a commission from merchant affiliate links, including eBay, Amazon, and others.
Similar threads


Support Vendors who Support the DSM Community
Latest posts
- 4G63 Galant GTi N/A tailpipe and oil cap smoke. Help.
- Latest: DaddyV4G63
- 1G 90 OFH cleaning/rebuild options?
- Latest: athlete3344
- Turbo Blanket
- Latest: Lukas90tsi
- 93-94 Rear 4 Bolt Axle Boots, Replacement in 2026?
- Latest: Car Cannibal
 Spyder New DSM P0300
- Latest: 1990TSIAWDTALON
 2G Help ID part/ re assemble T-case- end case.
- Latest: miliman13
 Defiant - the man, the myth, the legend
- Latest: Ludachris
 ECMlink 98 GST Idle tuning
- Latest: dwb
- How to remove interior fuse box cover without breaking it on 95 gsx
- Latest: randizzle420
 ECMlink Another AEM Wideband Calibration Help Thread
- Latest: kyler021
Build Thread Updates
 Long awaited decade long project
- Latest: Justin DuBois
- Dirty 2g
- Latest: Blackdsm666
 1990 Eagle Talon TSI
- Latest: 1GDSMatt
 6266 Build or Bust
- Latest: We're on Boost
Vendor Updates
 RockAuto.com Discount Code Rock Auto Rockauto
- Latest: James92
 What should FIBA Motorsport look to release next? HAVE YOUR SAY...
- Latest: spooled_u_1st
 FIBA Motorsport product updates 1G - 2G - EVO
- Latest: TerminalTalon
Latest Classifieds
 For sale 4G63 Forge Motorsports BOVOriginal Forge Motorsports bov. Adjustable with over 80 clicks on the dial. Nice to use for...
- Galant665
- Updated:
 For sale Misc Left Over PartsHello, I have a few left over parts for sale, these do not include shipping, please pm me for a...
- r3dmak
- Updated:
- Expires
 For sale Alpha Injection Clinic 2200cc for 4G63 DSM/EVOI have a set of Alpha Injection Clinic 2200cc high z injectors for DSM/EVO. I am stepping up to...
- spoolinpos
- Updated:
- Expires
 Wanted WTB 2g half radISO of a 2g koyo half rad or something equivalent.
- Michael Wucher
- Updated:
- Expires