The Top DSM Community on the Web

For 1990-1999 Mitsubishi Eclipse, Eagle Talon, Plymouth Laser, and Galant VR-4 Owners. Log in to remove most ads.

Please Support RTM Racing
Please Support STM Tuned

Any 1G Clutch Pedal Pic Requests?

This site may earn a commission from merchant
affiliate links, including eBay, Amazon, and others.

This site may earn a commission from merchant affiliate links, including eBay, Amazon, and others.

DarthBulk

15+ Year Contributor
644
9
Jun 11, 2003
Waukesha, Wisconsin
Ok, I just pulled my pedal assembly because I had about 1.5 inches of free play at the pedal, because of the worn hole by the lever arm. I searched through all the threads here, and found there are some good articles on fixing this problem, but not a lot of good pictures of it. So my question is this: Does anyone see a need for some good pictures of the assembly, the worn areas, both adjustment points, or anything else in particular regarding this? I will be replacing the clutch pedal, the lever arm for the master cylinder, and all the bushings for the clutch and brake pedal with new Mitsubishi parts. Just thought I would see if there is a need for any more pictures on this as long as I have everything out and disassembled.
 
Do a faq on it. I'd like to see more pics always.
 
Definitely yes, most 1g owner will most likely have to go through this procedure so the more information the better, especially now that the Taboo site is down. If you need some one to read through your final draft before you post it, I'll be glad to help. :thumb:
 
Ok, I'll put something together on it. My parts are all supposed to be in at the Mitsubishi Dealer tomorrow (that's what they told me) so I'll do a write up with photos and all the part numbers that I used too.
 
Ok, after a few delays in getting all the parts for the 1G clutch pedal, I finally got a call from the dealer saying they are in! So, I'll be taking pictures and writing this up as I assemble it over the next few days.

And then comes the back-wrenching task of putting it back in the car :)
 
DarthBulk said:
And then comes the back-wrenching task of putting it back in the car :)
I didn't remove my front seat when I did mine but it would have been the first thing I do if I knew how much of a pita it was, have fun... ROFL
 
DarthBulk said:
Ok, after a few delays in getting all the parts for the 1G clutch pedal, I finally got a call from the dealer saying they are in! So, I'll be taking pictures and writing this up as I assemble it over the next few days.

And then comes the back-wrenching task of putting it back in the car :)


hehe i can take out my clutch pedal assembly in like 50 mins

although i did cheat and bent the relay bracket thing back alot
 
h3o said:
although i did cheat and bent the relay bracket thing back alot
I just cut that part of the bracket off... :shhh: ROFL
 
OK, I have the removal procedure written up, with photos. Now I will be writing the overhaul procedure. I'll post it all at once, when I am done.
 
I'm going to have to do this in a little while and lots of pictures are always a big help. Thanx!! :thumb:
 
This is a how-to for removing a 1G clutch pedal assembly, and replacing the worn parts with factory new ones. I did this on my car for the following reason. I had just installed a Shep rebuilt transmission, ACT 2600 clutch and Streetlite flywheel, new clutch slave cylinder, clutch hard line on the transmission, and SS braided clutch flexible line. I bled the system, and noticed a major problem. My clutch pedal went about 2/3 of the way to the floor before it started to disengage the clutch! So after doing some research, I found that I had two problems. The end of the clutch fork that sticks out of the transmission was tilted towards the passenger side of the car, indicating a worn fulcrum or clutch fork. Ouch. That means taking the transmission back out of the car. The second problem was my clutch pedal. I checked the clutch master cylinder rod under the dash, and found that it was already as far out as it could be adjusted. That meant only one thing. The square rod/square hole interface between the lever arm and the clutch pedal axle was worn! So that is what this artice is about. How to remove the clutch pedal assembly to replace all worn parts and eliminate the relative motion between the clutch pedal and the lever arm on the end of it, using factory new parts.
Here is a list of the parts required, and the approximate cost from Mitsubishi. Be sure to have these in hand before starting this project, if you don't want your car to be down for a long period of time.
<TABLE>
<TR>
<TD>MB599233</TD><TD>Clutch Pedal</TD><TD>35.08</TD>
</TR>
<TR>
<TD>MB012212</TD><TD>Clutch Return Spring</TD><TD>3.43</TD>
</TR>
<TR>
<TD>MB534210</TD><TD>Bushing</TD><TD>3.68</TD><TD>Qty (2)</TD>
</TR>
<TR>
<TD>MB534211</TD><TD>Bushing</TD><TD>5.72</TD>
</TR>
<TR>
<TD>MB058634</TD><TD>Bushing</TD><TD>2.08</TD>
</TR>
<TR>
<TD>MB599879</TD><TD>Lever Assembly</TD><TD>21.85</TD>
</TR>
<TR>
<TD>MB555171</TD><TD>Bushing, Clutch Clevis Pin</TD><TD>1.46</TD>
</TR>
<TR>
<TD>MB151298</TD><TD>Rubber Stopper</TD><TD>1.57</TD><TD>Qty (3)</TD>
</TR>
</TABLE>

Total Price – 81.69

With parts in hand, the first step in this project is to get the complete pedal assembly out of the car. Here is how to do that:

Step 1. Remove the dash panel from beneath the steering wheel. You will have to undo the hood release cable from the handle in this panel, before you can take the panel out of the car.

<IMG SRC=http://www.dsmtuners.com/forums/attachment.php?attachmentid=56028&stc=1>
</IMG>

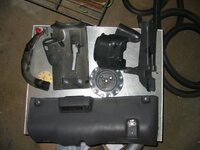
Step 2. Remove the two plastic panels covering the steering column.
Step 3. Remove the plastic air ducts from under the steering column, which fed the vent in the dash panel you removed. These ducts simply pull out.

The next picture shows all this plastic removed.

<IMG SRC=http://www.dsmtuners.com/forums/attachment.php?attachmentid=56029&stc=1>
</IMG>

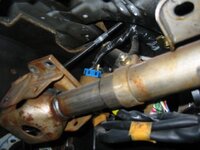
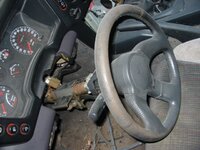
Step 4. Remove the brackets holding the steering column up to the dash. I simply let the steering column fall down until the steering wheel was resting on the driver's seat. From there, I could swing it left and right as needed. The next 3 pictures show the two brackets, and the steering wheel dropped and resting on the seat.

<IMG SRC=http://www.dsmtuners.com/forums/attachment.php?attachmentid=56030&stc=1>
</IMG>

<IMG SRC=http://www.dsmtuners.com/forums/attachment.php?attachmentid=56031&stc=1>
</IMG>

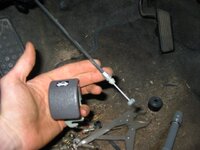
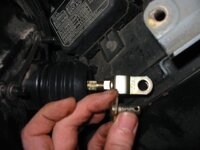
Step 5. Now you can crawl under the dash, and remove the pins from the brake booster clevis, and the clutch master cylinder clevis. They are held in with cotter pins. I cut the cotter pins with a diagonal cutter to get them out. The clevis pin for the brake booster is shown (removed) in the following picture.

<IMG SRC=http://www.dsmtuners.com/forums/attachment.php?attachmentid=56034&stc=1>
</IMG>

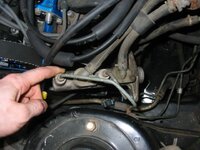
Step 6. Go to your engine bay, and unbolt the brake master cylinder from the brake booster. Pull it back out of the way, being careful not to damage any of the brake lines.

<IMG SRC=http://www.dsmtuners.com/forums/attachment.php?attachmentid=56039&stc=1>
</IMG>

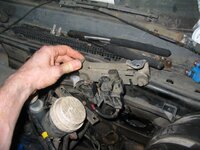
Step 7. Unbolt the vacuum switch bracket from the firewall, next to the brake booster and pull it back out of the way.

<IMG SRC=http://www.dsmtuners.com/forums/attachment.php?attachmentid=56035&stc=1>
</IMG>

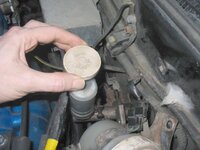
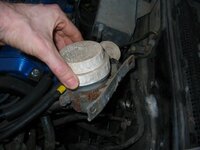
Step 8. Unbolt the brake fluid reservoir from the firwall, and pull it back out of the way.

<IMG SRC=http://www.dsmtuners.com/forums/attachment.php?attachmentid=56040&stc=1>
</IMG>

Step 9. Unbolt the clutch master cylinder from the firewall, and pull it back out of the way.

<IMG SRC=http://www.dsmtuners.com/forums/attachment.php?attachmentid=56036&stc=1>
</IMG>
 

Attachments

  • Hood Release Cable and Assembly.jpg
    Hood Release Cable and Assembly.jpg
    45.4 KB · Views: 3,921
  • Dash Panel, Air Ducts, Steering Column Covers.jpg
    Dash Panel, Air Ducts, Steering Column Covers.jpg
    46 KB · Views: 3,814
  • Steering Column Bracket Back.jpg
    Steering Column Bracket Back.jpg
    43 KB · Views: 3,825
  • Steering Column Bracket Front.jpg
    Steering Column Bracket Front.jpg
    48.4 KB · Views: 3,822
  • Dropped Steering Wheel.jpg
    Dropped Steering Wheel.jpg
    60.4 KB · Views: 1,620
  • Clutch Master Cylinder 2.jpg
    Clutch Master Cylinder 2.jpg
    51.6 KB · Views: 3,740
  • Vacuum Switch Bracket 2.jpg
    Vacuum Switch Bracket 2.jpg
    62.9 KB · Views: 3,802
  • Clevis and Pin.jpg
    Clevis and Pin.jpg
    47.4 KB · Views: 4,813
  • Brake Master Cylinder Removal.jpg
    Brake Master Cylinder Removal.jpg
    54.6 KB · Views: 3,792
  • Brake Fluid Reservoir.jpg
    Brake Fluid Reservoir.jpg
    41.8 KB · Views: 3,758
Step 10. Go crawl back under your dash, and remove the bolts holding the brake booster to the pedal assembly. There are four bolts doing this. The fifth bolt, at the bottom, is just a stud. You must unbolt that as well.

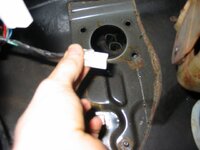
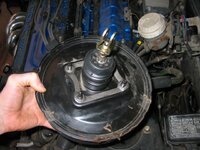
Step 11. Now you can go back to your engine compartment and pull the brake booster back, carefully so you don't damage the rubber boot going through the firewall. Set it out of the way. You must have it pulled back far enough so that the rod and clevis end are completely pulled out of the firewall, or else you will have trouble pulling the pedal assembly out from under the dash.

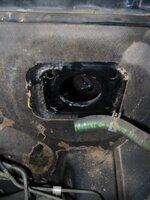
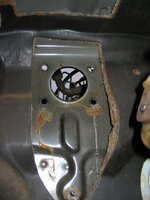
The next 2 pictures show the hole left in the firewall after the brake booster is removed, from inside the engine compartment and also from under the dash. The third picture shows the brake booster pulled back into the engine compartment.

<IMG SRC=http://www.dsmtuners.com/forums/attachment.php?attachmentid=56042&stc=1>
</IMG>

<IMG SRC=http://www.dsmtuners.com/forums/attachment.php?attachmentid=56043&stc=1>
</IMG>

<IMG SRC=http://www.dsmtuners.com/forums/attachment.php?attachmentid=56044&stc=1>
</IMG>

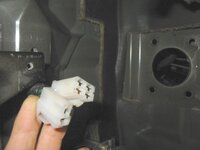
Step 12. Go back under your dash and unplug the 2 clutch pedal electrical switches, and the brake switch. The first picture is the clutch disengagement switch, on the end of the clutch pedal axle. The second picture is the clutch and brake pedal switches.

<IMG SRC=http://www.dsmtuners.com/forums/attachment.php?attachmentid=56046&stc=1>
</IMG>

<IMG SRC=http://www.dsmtuners.com/forums/attachment.php?attachmentid=56045&stc=1>
</IMG>

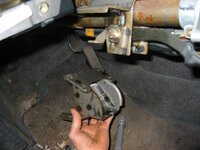
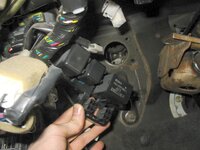
Step 13. You will also want to unbolt this relay bracket, and swing it out of the way from under the dash, on the left side by the clutch pedal.

<IMG SRC=http://www.dsmtuners.com/forums/attachment.php?attachmentid=56047&stc=1>
</IMG>

Step 14. Now this part is a little tricky. You must look up under the dash, and remove all the bolts holding the pedal assembly to the dash. Some of them are hard to see, and get at. But make sure you get them all out! You might have to swing the steering column left or right to get at them all. This is where you will get a sore back! It is too difficult to get under there with a camera to take pictures of all those bolt locations, but if you look hard enough you will find them all.

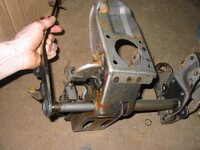
Step 15. Once all the bolts are out, pull the pedal assembly off the last stud where it was bolted to the brake booster, and rotate it counter clockwise (to get it over the steering column) and pull that thing out!

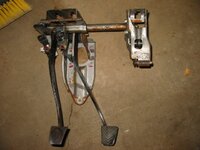
The next picture shows the pedal assembly freshly removed from the vehicle!

<IMG SRC=http://www.dsmtuners.com/forums/attachment.php?attachmentid=56048&stc=1>
</IMG>
 

Attachments

  • Clutch Disengaged Switch.jpg
    Clutch Disengaged Switch.jpg
    45.7 KB · Views: 3,645
  • Clutch and Brake Switches.jpg
    Clutch and Brake Switches.jpg
    40.8 KB · Views: 3,586
  • Brake Booster.jpg
    Brake Booster.jpg
    64.8 KB · Views: 3,637
  • Brake Booster Hole.jpg
    Brake Booster Hole.jpg
    54.4 KB · Views: 3,651
  • Brake Booster Hole Inside.jpg
    Brake Booster Hole Inside.jpg
    48.3 KB · Views: 3,614
  • Relay Bracket.jpg
    Relay Bracket.jpg
    53.5 KB · Views: 3,763
  • Freshly Removed Assembly.jpg
    Freshly Removed Assembly.jpg
    49.4 KB · Views: 3,632
Any suggestions or questions? Next, I will be posting up the entire overhaul procedure for the pedal assembly using factory new parts. I just completed mine, and all I can say is WOW, what a difference. Those pedals have no slop now, and are tighter than...well, fill in your own idea here.
 
Not sure why you pulled the clutch master cylinder all the way off. I know I just undid the linkage from the pedal and that was it. And of course for the brake booster, you shouldn't have to pull it all the way off like you did but guess it helps for clarity. And the vacuum switch bracket, I didn't even touch that. Still nice job on the write up. Not enough people are doing it and it really helps out the guys who are 1st timers. :thumb:
 
Thanks for the critique :) I know I didn't have to pull the clutch master cylinder all the way out, but it just makes it easier (one less thing for the pedal assembly to get caught on, when you rotate it out from under the dash. Also, I am putting a new one in :thumb: .

As for the brake booster, with that rod sticking through the hole in the pedal assembly bracket, you really have to pull the pedal assembly a long way off the firewall before you can rotate it. Again, pulling the brake booster out just made things a lot easier under the dash. The same is true for the vacuum switch bracket. It makes it easier to get your hands down by the clutch master cylinder.
 
Ive done this before. Looking at your pictures just gave me the most sickening feeling in the pit of my stomach.
 
It's not that bad after the 1st time you do it. The only sucky part about the whole thing is just getting your hands into the tight spaces. Extensions and ratchet wrenches are my friends.

Couple of tips though that might help for you newb guys at this job. If you remove the steering wheel column to make this easier, make SURE you mark the column where the splines go in otherwise you'll have a hard time trying to get it to line back up right once you throw it back in and your steering wheel will be off. Use some whiteout or something but be careful not to smear it off.

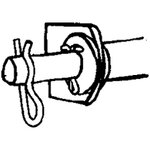
Another tip, get rid of the crappy cotter pin that goes thru the pin for the clutch pedal assembly and anywhere else that has one. Don't even use it. It's such a hassle to get it in there with one hand and keep the rod from spinning around as you're trying to bend the tabs over. Instead, go to a hardware store and get a clevis pin (I think that's the right name for it) to go thru it instead (take the lil rod with you as well so that you get the correct size). It's like a cotter pin but it's straight on one side and curved on the other. The straight side goes thru the hole, the curved side goes around the pin. This keeps it from falling out but you can pull it out and put it back in as many times as you need to and it save you from the headache that the cotter pin will give you. This also works well for the shifter cables on the tranny.

You must be logged in to view this image or video.
 
That pin you are talking about is usually called a hitch pin clip at a hardware store. That's a good idea to use those. I cut off the cotter pins when removing my clevis pins, because of the extreme hassle of trying to work them out, while working under the dash. There is no room for your left hand to help your right hand under there. Those pins look like this...I assume this is what you meant, right?
 

Attachments

  • Hitch Pin Clip.jpg
    Hitch Pin Clip.jpg
    13.7 KB · Views: 2,357
Yeah, that's exactly what I meant. Just couldn't remember the name of it. Thanks for the help there.
 
OK, I got so busy on building my car that I didn't have time to post the overhaul procedure for the clutch pedal assembly! Right now I am waiting for my AEM EMS and a few other things, so I have a chance to finish this write-up. I will start posting it now, hope it will help some people.
 
<TABLE>
<TR>
<TD><B>Step 1</B></TD>
</TR>
<TR>
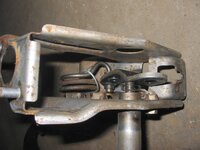
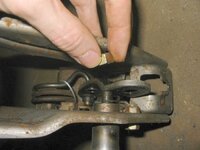
<TD><B>WARNING!</B> I don't know if this is necessary, but it is what I did as a safety precaution. The very first thing I did was to wrap a heavy piece of wire around my turnover spring, to keep it from violently releasing when I removed the clamp holding it in place. Perhaps someone else can chime in and say if this was necessary, but it is what I did and it worked. Maybe it isn't under any load at rest, but I didn't want to take that chance. You can see in the following pictures how I wrapped a piece of wire around it. Once you have that spring secured, remove the bolt holding its clamp to the pedal assembly, and then remove the spring and clamp. One of the pictures I took after the rebuild, because I forgot to take a good picture of that turnover spring before I started.
</TD>
</TR>
</TABLE>

<IMG SRC=http://www.dsmtuners.com/forums/attachment.php?attachmentid=58093&stc=1>
</IMG>

<IMG SRC=http://www.dsmtuners.com/forums/attachment.php?attachmentid=58092&stc=1>
</IMG>
 

Attachments

  • Step 1b Turnover Spring.JPG
    Step 1b Turnover Spring.JPG
    73.3 KB · Views: 3,122
  • Step 1 Turnover Spring.JPG
    Step 1 Turnover Spring.JPG
    60.4 KB · Views: 3,644
<TABLE>
<TR>
<TD><B>Step 2</B></TD>
</TR>
<TR>
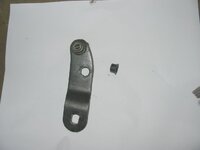
<TD>Now you want to remove the old worn lever arm from the end of the clutch pedal axle. In the following picture, you can see me removing the nut holding it on. Note the position of each piece here. There is the nut, then a lock washer, then a flat washer, then the lever arm, and then the wave washer between the lever arm and the bushing. After taking off the nut, remove the lever arm and discard it (Unless you want to weld it in position, you don't need it anymore. Use a new one.) You can see the lever arm after removal in the picture below. Notice the small bushing that came out of it, where the master cylinder clevis attaches to it. You will be replacing this with a new bushing too, as it is usually quite worn.
</TD>
</TR>
</TABLE>

<IMG SRC=http://www.dsmtuners.com/forums/attachment.php?attachmentid=58094&stc=1>
</IMG>

<IMG SRC=http://www.dsmtuners.com/forums/attachment.php?attachmentid=58095&stc=1>
</IMG>
 

Attachments

  • Step 2 Lever Arm Nut.JPG
    Step 2 Lever Arm Nut.JPG
    55.5 KB · Views: 3,055
  • Step 2b Lever Arm.JPG
    Step 2b Lever Arm.JPG
    22.7 KB · Views: 3,065
<TABLE>
<TR>
<TD><B>Step 3</B></TD>
</TR>
<TR>
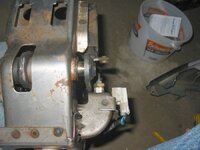
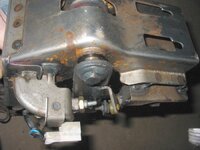
<TD>The next step is to pull the clutch pedal assembly out of the entire pedal carrier frame. To do this, you need to remove the clutch pedal switch, the one that activates when the pedal is pushed to the floor, which lets you start your car. You can see it in the following pictures. As you can see, the pedal assembly will hit this switch if you try to pull the pedal out without removing the switch. Just unscrew the locking nut on the switch, and then unscrew the switch from the pedal frame. Save it for re-installation, unless you bought a new one.
</TD>
</TR>
</TABLE>

<IMG SRC=http://www.dsmtuners.com/forums/attachment.php?attachmentid=58097&stc=1>
</IMG>

<IMG SRC=http://www.dsmtuners.com/forums/attachment.php?attachmentid=58098&stc=1>
</IMG>
 

Attachments

  • Step 3 Clutch Depression Switch.JPG
    Step 3 Clutch Depression Switch.JPG
    56.6 KB · Views: 2,924
  • Step 3b Clutch Pressed Switch.JPG
    Step 3b Clutch Pressed Switch.JPG
    60.9 KB · Views: 2,955
<TABLE>
<TR>
<TD><B>Step 4</B></TD>
</TR>
<TR>
<TD>After removing the clutch pedal depression switch, you can pull the clutch pedal axle out of the entire pedal assembly as shown in the following picture. Note the plastic bushings on each end of the axle. These are worn, and you will replace them with your new ones to remove any slop in the pedal.
</TD>
</TR>
</TABLE>

<IMG SRC=http://www.dsmtuners.com/forums/attachment.php?attachmentid=58099&stc=1>
</IMG>
 

Attachments

  • Step 4 Clutch Pedal Axle Pull Out.JPG
    Step 4 Clutch Pedal Axle Pull Out.JPG
    66.8 KB · Views: 2,952
<TABLE>
<TR>
<TD><B>Step 5</B></TD>
</TR>
<TR>
<TD>As long as you nearly broke your back getting this blasted thing out of the car, you might as well replace the brake pedal bushings as well, and remove any slop in that pedal too. I can't imagine doing all this work and not replacing those things, for a few dollars more. Remove the bolt in the following picture, and you can pull the brake pedal carrier frame off of the pedal assembly.
</TD>
</TR>
</TABLE>

<IMG SRC=http://www.dsmtuners.com/forums/attachment.php?attachmentid=58100&stc=1>
</IMG>

Where did my picture go?
 
Support Vendors who Support the DSM Community
Boosted Fabrication ECM Tuning ExtremePSI Fuel Injector Clinic Innovation Products Jacks Transmissions JNZ Tuning Kiggly Racing Morrison Fabrications MyMitsubishiStore.com RixRacing RockAuto RTM Racing STM Tuned

Latest posts

Build Thread Updates

Vendor Updates

Latest Classifieds

Back
Top