The Top DSM Community on the Web

For 1990-1999 Mitsubishi Eclipse, Eagle Talon, Plymouth Laser, and Galant VR-4 Owners. Log in to remove most ads.

Please Support Fuel Injector Clinic
Please Support Rix Racing

A summer of racing...my 2g Talon!

This site may earn a commission from merchant
affiliate links, including eBay, Amazon, and others.

This site may earn a commission from merchant affiliate links, including eBay, Amazon, and others.

awdfun

20+ Year Contributor
68
4
Mar 2, 2003
Flagstaff, Arizona
I've been wanting to do this for a while, but just haven't found time. I've got some time to kill (and a good drink) this evening, so I'll start this thread in hopes that it motivates others, excites others, or just gives you guys a good read about racing DSM's.

This is all about my 1995 Talon TSi AWD - from the day I purchased it to (eventually) my most recent trip to the track.

It was in Jan. of 2007 I settled the insurance claim for the '97 GSX that I totaled on a freeway on-ramp. I was just turning into the corner, and before I knew it the car was spinning in salt and dirt left on the road from a recent snow, and into a big cement sign post I went. Long story short, I realized in the next few days that you will never get out of a car what you put into it.

But it was too late. I'd felt boost. Turned up the boost. Made grown men giggle like little girls...

It took me about 6 weeks, but I found a 1995 Talon in Vegas that was still mostly stock, and ran pretty well. I purchased the car, and started the 4 hour drive home. It made it...with very low coolant, a shredded alternator belt, and low on oil. Crap...wrong car to buy.

I fixed all that stuff and finally got around to using most of the remaining insurance payment to buy a few aftermarket things. First things first I installed all the parts I kept from my GSX: Intake and full exhuast, DSMlink, 16g turbo, 1g throttle body, RM sway bars, boost controller and boost gauge. Finally got a FMIC and found some JIC FLT-A2's that had been Muellerized. It was starting to come together, I was quite excited!

I finally get the car together, and start driving it to work out the quirks. I get the alignment, fill it up with gas, and just enjoy pulling it out of the garage every morning. I finally get some time to do some tuning...and work my way up to 19 psi. Car felt awesome! So naturally, I crank in the boost controller and go to 20 psi.

First pull goes clean - all through 3rd gear, tune looks good, so I hit the cruise control smiling my ass off driving to work. And all of a sudden...THWAP...and I have no power. I coast to a stop, pop the hood and see part of a timing belt sticking out of the upper timing cover. OMG I was mad...wrong car to buy!

I get it home and eventually tear it apart to find all 16 valve are bent and every one of the pistons have that signature crescent moon dug into the top.

So what did I do? Realized this is an opportunity to build my dream Street Modified car for Autocross, a competitive Time Trials car for track days, and a car that I can still drive to work and drive on the other road trips I've done in my GSX...Mexico, southern California, northern Colorado...this had to be a STREETABLE yet competitive car. That right there is the boost sickness. I could have given up. Did I? No...

To be continued...
 
Awesome read~! Im in the same boat! Im not into the drag racing like a lot of dsmers and want to get into the road corse racing... I have a 91 TSi AWD that I want to do this in... Also has to be streetable... Good luck and maybe ill see ya on the track~!
 
It took me 7 months over the winter, but the car was completely rebuilt under the hood.

Looking at the NASA time trials rules, I didn't want a 20 point hit for a stroker motor when most of the road racers told me a well built 2.0 may be prefferable. And I wanted a streetable car - I put over 90,000 miles on my GSX, and I plan to do the same to this car.

So off the stock 7 bolt short block went to the machine shop. The rods, block, and crank were fine, so I opted for a set of used 2g oem pistons (which turned out to be 0.0005" bigger on average than my previous pistons, sweet!) with new rings. ACL rod and crank bearings, and $500 later I had a ready to go short block.

Before anyone suggests a 6 bolt: I've got one, but it will only be a replacement motor, not a proactive upgrade.

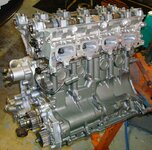
So along with the lower end, I completely rebuilt the top end as well. I had picked up a good 2g head (luckily) previously, and had already stripped it down for a full rebuild after my chosen machine shop had pressure tested it and gave it a clean bill of health. I spent somewhere between 20 and 30 hours in porting/polishing after many more hours of research on atomization of fuel, angle of entry, lower and upper radius flow, etc. I even pulled out my thermo and fluids books at one point.

Instead of going crazy porting away the head, those hours were spent cleaning up every single casting mark, matching the intake manifold to the intake ports (and going a bit higher on the roof), polishing the exhaust side, a nice 3 angle valve job, and CC'ing the combustion chambers followed by a good combustion chamber polish.

My replacement 2g oem head chambers (untouched) measured 46.2 46.1, 45.6, and 45.2 mL.
After the CC'ing, I was at 46.2, 46.1, 45.9, and 45.8.
Within 1%? I'll take it! Honestly I probably wouldn't have touched the head how it was, but wanted to get my hands dirty and learn something the hard way.

So I lapped in the valves, cleaned everything up, and installed 3rd rev lifters, new valve stem seals, 1g cams+valvesprings+retainers, an MLS mitsu head gasket and ARP head studs.

Something I'll write up someday is the fact that the 1g valve springs are stiffer than the 2g springs. And the 1g retainers are lighter than the 2g... but probably not statistically significant. And from the quick look at the spring data, it appears as though they are not a very linear spring rate near max lift. It just so happened a Quality/Testing Engineer owed me a favor at work, and I got to sit down in front of a $100,000 Instron with three complete sets of valve springs. I think it was one set of 1g springs, and 2 sets of 2g springs (all oem). I've got lots of data if anyone gets bored...

Leaving out lots of details, the motor was assembled with the following:
Repainting of half the engine bay, the block, valve cover, and intake manifold
Balance shaft removal, new front cover, new water pump and ALL new gaskets.
FP flywheel hardware kit after bottom tapping the crank, with a fidanza flywheel.
RRE "X" or "no-name" pressure plate with a CompClutch "ironman" 6 puck disk.
All new timing belt parts, knock sensor, and cam seals + valve cover gaskets
All new water lines, coolant hoses, belts, throwout bearing, fulcrum ball and t.o. bearing
Energy front and rear motor mount inserts, and I filled the side mounts with polyurethane
Oh...and I splurged on a FP race exhaust manifold.

Another thing while I was in there - since I had struggled with a slight delay from the time I stomp the brake pedal till the time you'd get brake action...
The 2g brake booster is discontinued. I bought a 3g mitsu eclipse booster (MR527042) and it fit...barely! I set the clearance for the master cylinder at 0.027", and that was not enough. If anyone tries this in the future, I'd go with something around 0.035" of clearance, as within my first 3 miles the brakes pumped up and locked. I had to fix it by readjusting the master cylinder rod, as I cannot see any possibility of getting that booster out with the motor in the car.

As I was saying, it took me 7 months of cold nights and persistance...but I completed the whole thing myself (with the exception of the valve job and bottom end assembly).

Did it start? Yup :D second crank it fired up and purred like a kitten.

I let it idle for 5 minutes to get up to temp, and drove it around the block. Very Gingerly. That clutch is TOUCHY!

I pulled into the garage all smiles. I did a thorough inspection of every intercooler clamp, radiator line, wiring, boost controller lines, oil and coolant turbo lines, etc. Everything looked fine, so off I went to start the motor and clutch break in. Motoman style!

I ran through his procedure running about 15 psi, and had about 27 miles on the motor when I changed the oil for the first time. The magnetic drain plug looked better than my old motor, though the Etch-a-sketch metallic sediment in the oil definately reminded me that this was a new motor. I continued driving it hard, on and off the gas.

200 miles into the rebuild, my compression numbers were:
144, 146, 144, 145. Dang, I was awefully happy.
And those numbers were tested at 7000 feet elevation so don't worry about the low average.

My next step was to start the tuning process all over. After finding the limits of my Swagelok fuel line and filter setup (thanks to the supplier, it was awefully cheap!) I installed a Supra pump and an Aeromotive AFPR with -6AN lines and the big Aeromotive fuel filter. Things were great, the car ran great, I was starting to put some miles on it and get to know the car better.

But I was getting pissed with cranking the car over 5 times when it was cold before it would stay running. I pulled out the supra pump and installed a new viton oring on the pump, and a new oem oring over that, hoping fuel pressure was leaking out the old oring. I greased up both orings, slid it into the fuel pump assembly, and also drilled out the siphon to 1/8" (after reading that it was the siphon that was the restriction in the 2g return line). Well, the orings didn't help anything. Same cold start problems. I think it is the Aeromotive FPR bleeding down, but haven't done any testing there yet.

No worries. Spring had arrived and it was starting to get warm out. Which also meant...racing season!!

Next up I'll start adding a couple dozen pics. Then get into the racing and related mods.
 
I know there's a lot of DSM owners that get fustrated when there rides don't or won't work. So a thread like this with goals and the path you take to get there is very motivating. Very nice read....would like to see the outcome.:thumb:
 
Liked the post very much. Great to see you did almost all of the work yourself and did not let any set backs get you down. Now get sthose pics up so we can see what we have been reading about :D

Cant wait to see what mods you are looking into for racing. As I have a kein interest in what other DSMers do when road racing. Good Luck :thumb:
 
Thanks for the input guys! This may be a pretty long thread as there is lots more to come. I'm a pretty detail oriented engineer, so let me know if I go too deeply into anything...

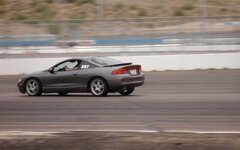
For those that don't like to read the last page of the story first, don't look at the attached pic :cool:
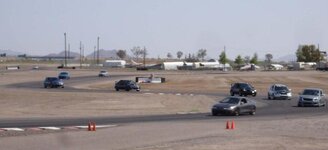
I completed 6 autocrosses and 3 track days this year. I learned ALOT, and had one hell of a good time in the process!

I'll try and keep the file sizes really small, so let me know if you want full resolution pics of anything.
 

Attachments

  • TalonApril08small.jpg
    TalonApril08small.jpg
    22.2 KB · Views: 1,438
I'm giving up on the promised order of pics, as I can't figure out how to get this forum to do this in order...
(anyone know how to insert pics vs attaching them?)

Attached you'll find the following:
First - Repainting of half the engine bay is shown with a three pic sequence - how I had purchased the car, after masking and sanding, and the final product...beautiful!
I used a PPG 2 part epoxy after sanding and a baking soda scrub (to neutralize the batery acid), and a 1995 Eagle paint match in a PPG urethane single stage paint. It only pissed me off that the one side of the engine bay was beautiful, and the once 'good' side is now the crappy side!

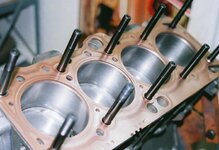
Second - A pic of the short block, polished piston tops, and the MLS head gasket with a light copper spray layer.

Third - Bottom tapping the crank for the FP flywheel hardware kit and ACT flywheel.

Fourth - RRE "X" or "no-name" pressure plate with a CompClutch "ironman" 6 puck disk.

Fifth - the brake booster.

Give me some input on the pics, there are a ton more to come, and I think this method of attaching them isn't the optimal way...

Hope you enjoy!
 

Attachments

  • 2gTalonEngBayPaint wText.jpg
    2gTalonEngBayPaint wText.jpg
    30.9 KB · Views: 1,403
  • MLS ARP small.jpg
    MLS ARP small.jpg
    48 KB · Views: 1,422
  • FP bottom tap.jpg
    FP bottom tap.jpg
    64.2 KB · Views: 1,410
  • talon motor w clutch small.jpg
    talon motor w clutch small.jpg
    71 KB · Views: 1,398
  • 10-01-07_2243.jpg
    10-01-07_2243.jpg
    66.7 KB · Views: 1,386
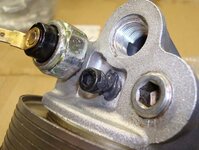
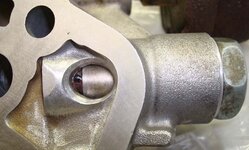
I few pics of my 7 bolt oil filter housing:
- I did the mod to prevent the inner threaded tube from backing out, hoping that may some day prevent an oil filter coming loose.
- I also ported the oil pressure relief opening a bit.

Then a pic of the lower end with the head and cams bolted up, ready for cam gears and timing belt components.

Next I'll include a few pics of the head porting and combustion chamber work.
 

Attachments

  • 7bolt oilfltr housing bkout screw small.jpg
    7bolt oilfltr housing bkout screw small.jpg
    62.1 KB · Views: 1,329
  • 7bolt oilfltr housing ported small.jpg
    7bolt oilfltr housing ported small.jpg
    50.8 KB · Views: 1,326
  • 7bolt wo timing belt small.jpg
    7bolt wo timing belt small.jpg
    101.1 KB · Views: 1,338
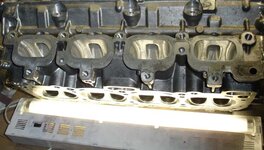
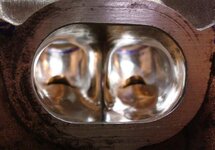
Porting my 2g head:

On the intake side I had just roughed out the long/upper radius and was working on the bowl to throat transitions. That's a tricky part, as you don't want to remove any material from the short side radius/floor of the port.

I spent a few hours after that with 200 and 400 grit paper making sure all the transitions were smooth as possible with my fat fingers. That may be the bloodiest I've ever gotten my knuckles, trying to reach the bowl areas from the intake manny side.
 

Attachments

  • InSidePorting small.jpg
    InSidePorting small.jpg
    51.7 KB · Views: 1,335
  • InBowlThroat small.jpg
    InBowlThroat small.jpg
    45.8 KB · Views: 1,334
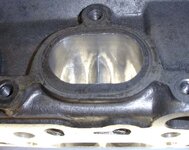
On the exhaust side you can see I didn't take a whole lot off, just got at all the casting flash, and reworked the upper/long radius a touch.

Oh, and polished it up really good:sneaky:
 

Attachments

  • ExSidePorted small.jpg
    ExSidePorted small.jpg
    63.2 KB · Views: 1,333
  • ExSidePolished small.jpg
    ExSidePolished small.jpg
    47.5 KB · Views: 1,324
Some of the valve work:

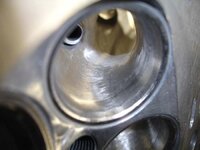
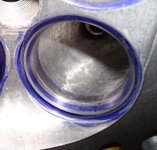
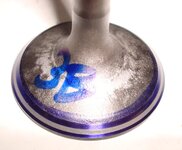
I started by getting a good valve job (I'm 100% sure I never touched the valve seats after all that porting LOL) and I had the stock valves refaced. I ran some 600 grit over the fresh valve job to break any edges, cleaned it all up, and went to town with some blue Dykem.
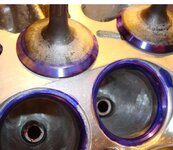
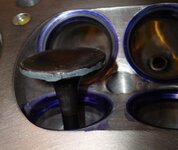
The second pic shows the valve lapping compound. A guy can drink alot of beer spinning 16 valves to the point of perfection.

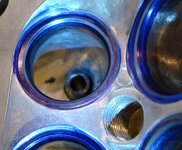
In the third picture, you can see the valve seat is ALMOST fully lapped. There is just a touch of the blue left in the middle of where the valve lapped up against the valve seat. If you look close where the flash reflection was you can see it. Sorry, I'm not a very good photographer... but you can see what I'm getting at.
 

Attachments

  • valve wdykem before small.jpg
    valve wdykem before small.jpg
    73.2 KB · Views: 1,320
  • lapping compound small.jpg
    lapping compound small.jpg
    47 KB · Views: 1,292
  • lapped seat almost done small.jpg
    lapped seat almost done small.jpg
    74.7 KB · Views: 1,293
And what the valve and seat look like when they are done.

See where the blue ink has been lapped off the valve? You can really get into the dynamics of valve jobs and airflow by making that seat area wider or skinnier. Wider is the usual street car scenario - larger surface area means higher reliability on the valve-to-seat seal throughout the years. Really skinny means you have a much higher seat pressure loading but higher airflows. The drawback there is you may not get a whole lot of run time out of that uuuber high airflow valve job due to wear, or a very minor piece of crud getting in there and causing pitting or scratching.

That's probably plenty of detail for the engine rebuild :boring:.

Next I'll get into the suspension, brakes, and the other important stuff!
 

Attachments

  • seat lapped small.jpg
    seat lapped small.jpg
    51.9 KB · Views: 1,420
  • valve lapped small.jpg
    valve lapped small.jpg
    46.5 KB · Views: 1,423
So after the car Motoman break in and a few oil changes, I was back on track to have some fun with the car.

I was a bit burnt out on working on the car after the timing belt issue, so I decided the current suspension and brake setup was plenty for the summer autocrosses being held locally.

My setup for the SM class in 2008 consisted of:
RM Racing sway bars
SSR Integral 17x8 +38 wheels
Kumho MX 245/40 tires
Rolled rear fenders
Lower front tie brace (RRE)
All new front control and compression arms
New front oem knuckles and wheel bearings
Energy front suspension bushings
Oem front 2 piston calipers w/the AEM big rotor kit
R4-S pads front and rear
stainless brake lines and Motul RBF600 fluid

The alignment specs were:
Front caster: L = 3.8, R = 4.1
Front camber: L = -1.4, R = -2.0
Rear camber: L = -1.2, R = -1.7
Toe was zero'd front and rear.
I was unable to adjust much of anything due to the stock upper arms and no camber/caster widgets quite yet, but I was too excited to go racing than let the car sit in the garage for another weeked.

The first weekend event was quite a learning experience. The lot was small, and the course quite tight. I hadn't installed the 16g at this point. Even the T25 seemed like it took forever to spool. That was pretty dissapointing considering the 16g wasn't going to help at all. But for the most part I had alot of fun, and pretty much left the car in second gear and lived without boost allowing me to concentrate more on the right line and handling characteristics of my car.

On day one I had a heck of a time with the front end pushing wether I was turning in, or getting on the power coming out. After a few adjustments, the car was much more responsive on day two. I adjusted the suspension clickers front and rear, which made a nice difference. Along with a touch more air pressure in front (as the tires were rolling over onto the edge a bit).

The second event I had an idea of where to start with tire pressures and suspension clickers, and actually had the opportunity to walk - and study - the course. Boy does that make a difference. I ended up with the JIC's at 8 out in the front, and 3 out in the rear (from full clockwise/in). I still wasn't overly happy with the response time and handling of the car with the tight corners, but I figured the street tires and lack of camber and caster was a big part of it. No worries, I was getting faster and learning the car was too mucy fun!

I'll tell you something...to drive this setup on the street makes for quite a tail happy car. I could not believe how differently the car behaved on the usual drive to work with the autocross tire pressures and suspension settings. Note to self - always back off the rear clickers a few turns when driving home!

The third event (all the events were two day events, I'm trying to keep this short) was quite a bit of fun. I had the 16g installed, a DV/DT FMIC installed, and I even had time to get a rough DSMLink tune on the car :D

Side note on tuning - I usually tune with 3rd gear pulls and pump gas, but after my first two weekend events I realized I MIGHT have gotten to 60 mph ONCE. Third gear tuning turned out to be overly conservative with the tune, and since I used about 4 gallons of gas over two events...I splurged for a little 100 octane.
So I tuned with second gear pulls and race gas. I just can't believe what a difference the tune makes. My race gas tune on a 16g with a front mount (and all suporting mods) was hitting harder at 3000 rpm than my pump gas T25 tune. And for anyone that has never experienced a stutter box launch with an AWD car on 245's and not lifting for the 1-2 shift...what a freeking kick in the pants!

So back to the third event. I ended up being one of the two course designers for both days, so I did my best to open it up for the local Vette and Viper guys (wink..wink). And I was happy to...as my 16g tune was pulling HARD. I had a decent idea of where to start with tire pressure, suspension clickers, and since I knew the track better than most, I figured I'd do pretty well.

My first run out I wanted to take it easy, see how the course flowed, watch for any safety concerns with the layout...and just enjoy that the car is still running after the beating it took during race gas tuning! Things looked good. No safety concerns, and the event rolled right along without issue.

Each and ever run I got after it a bit harder. By the fourth run...I was ready for a full on launch and go-for-broke to get that last 0.2 sec on a buddy in a modded out CTS-V. And my girlfriend had just shown up, so I told her to grab a helmet and jump in.

Pulling up to the start line, I gave her that quick smirk and said "I'm gonna launch it hard, ready?" She shakes her head and gives me a look with her big eyes that didn't 100% agree with what her head nod had just indicated.

I get the signal, and to the floor the pedal goes. Let out that clutch nice and smooth...the exhaust note changes, the rear end squats, and I take off knowing full well that's the hardest launch I've ever done. Super stoked, I leave my foot to the floor and hit the clutch for second gear. The shift is perfect, and the tires chirp as I let the clutch out. At this point I'm watching corner 1 come up faster than I'm used to. I decide I'll be cocky and see if I can get around without touching the brakes. I do a quick lift, get the back end light, and turn in hard. As the back end comes around, I'm back on the gas immediately. It was one fluid motion - and I was now coming into corner 2 (90 degrees to the right) about a full gear too fast. Crap, so much for thinking ahead.

So I'm on the brakes heavy, turn in nice and easy...but the car goes sideways. There is a line of 4 cones on the outside of the corner, and I knew they had my name written all over 'em. Ah well, don't look at the cones, right? So back on the gas, straighten the car, and into the cones I go. There was this quick scream from the drivers seat as my girlfriend wasn't quite used to the sound of cones hitting the side of your car at full boogie. I pulled it together, ran a nice clean line for the rest of the course, and knew I blew the possibility of picking up that last 0.2 seconds.

Ah well :coy: we laughed about that for weeks after the event!
In hind sight, one thing that I had issues with all year was tire pressure, and the front tires rolling over. By the last event this year, I was at 46 psi and still rolling the tires over. Most everyone I talked to said I needed more camber, and a wider tire. Well...on the 245's I was just touching the front fenders, so that wouldn't be an immediate option.

After the summer's events I knew the next mods involved adjustable camber and caster, to be able to balance and hold a more agressive alignment.

So I picked up a few things. First was a full set of polyurethane rear suspension bushings. I knew I had a frozen stock bushing in my upper rear control arm, so that was a priority. I also picked up a set of the SPC adjustable upper A arms for the front.

And then I signed up for my first HPDE day...
 
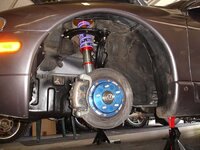
A few more pics of the car, mostly front suspension stuff.

I installed the Energy bushings on the inside of the new control arms, but not the outer one as RRE told me they will wear parts out too fast. Lucky for me I have access to a large press that makes the stock bushing removal pretty easy. Oh, and brand new arms make the job 100 times easier as well. When they are rusted it takes ALOT more force!

The JICs were in really good condition when I got them. I'm sure they will need a rebuild one of these days, but so far they have been incredible on the track. And still have a decent ride on the street. Along with the JIC's I also installed all new control and compression arms, knuckles, wheel bearings, and the upper A-arm Energy bushings. I'm the guy that likes to do things right the first time and not worry about it again.

I ran the AEM big rotors and stock calipers for almost a year, and the rotors had been on my GSX for over 60,000 miles! I had completely rebuilt the calipers with new piston seals and boots...I'm always amazed at the crap that comes out of them. I tried three pads on the front AEM's: Metal Matrix, R4S and R4E. I was pretty close to what RRE said - screw the noise and run the R4E's, cause when you want to stop, they STOP! I could get the Metal Matrix pads to fade on my commute to work, and the R4S was a good street pad but I faded them even in DE1 traffic...

And another HPDE picture, one of my favorites. Thanks to a good friend that hung out in the heat all day and took a few pics for me!
 

Attachments

  • frt arms w wo energy bushing small.jpg
    frt arms w wo energy bushing small.jpg
    54 KB · Views: 1,213
  • Energy frt bushing small.jpg
    Energy frt bushing small.jpg
    69.9 KB · Views: 1,196
  • JIC AEM drivers corner small.jpg
    JIC AEM drivers corner small.jpg
    62.9 KB · Views: 1,208
  • JIC new arms small.jpg
    JIC new arms small.jpg
    67.4 KB · Views: 1,206
  • Talon Corner5 maybe small.jpg
    Talon Corner5 maybe small.jpg
    46.7 KB · Views: 1,219
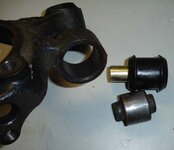
On to the rear suspension bushings.
I used the Energy kit, which does not come with the four inner bushings for the lower arms and toe control arms. And those bushings were in the worst shape of any in my car...figures, right?
So I plan to make some delrin bushings after I graduate into the TT stuff. For now I'll leave the rubber in there so I don't make the ride any worse.

My axles did not want to come out of the hubs. I ended up using a huge gear puller, and my 11 lb maul I use for splitting fire wood. It worked, but boy did it take a while.
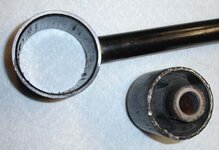
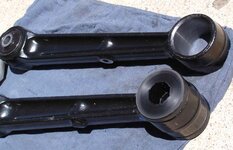
Something else that was a complete pain in my ass were the trailing arm bushings. I gave up on those, and even the machine shop had a hard time. They ended up using a punch and rolling the outer sleeve into the rubber, then pressing on the rolled edge. See the pics below.

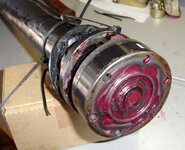
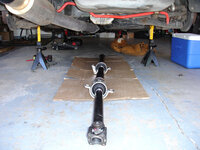
And while the rear of the car was in the air I decided it was time to do the yolk recall kit along with rebuilding the rest of the driveline. I had heard some driveline noise developing on deceleration after the 60+ launches I did at the autocrosses this summer, and I was hoping it was just a bad u-joint or carrier bearing.
(It wasn't, the noise is still there, though not quite as bad.)
By the way, that Lobro joint is awefully fun to figure out the first time...you've been warned:nono:

I also filled the carrier bearings with silicone. Yup, I filled 2g carrier bearings with silicone. You can't do it on the car, or the silicone will drain out as the rubber bushing is does not hold the silicone in, like the 1g mounts do. After receiving the new 2g carier bearings I filled them with silicone and let them sit face up for a week while I completed the rear bushings and front SPC arms.
 

Attachments

  • TrailArmNoBushing.jpg
    TrailArmNoBushing.jpg
    49.3 KB · Views: 1,266
  • RearAxleNoArms.jpg
    RearAxleNoArms.jpg
    50.5 KB · Views: 1,257
  • 2gLobroGreased.jpg
    2gLobroGreased.jpg
    47.2 KB · Views: 1,261
  • AllNewDriveline.jpg
    AllNewDriveline.jpg
    48.6 KB · Views: 1,270
  • 2gRearKnuckle.jpg
    2gRearKnuckle.jpg
    40.8 KB · Views: 1,263
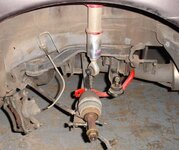
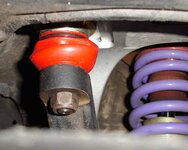
Onto the SPC front arms. I've read quite a bit about clearancing the arms before install but I wanted to get them in and drive on them for a bit to see where exactly the contact was on my car. The install was as simple as it should have been. I wasn't real happy with the ball joint boot, but I fixed it by pulling that useless spring clip/retainer thing out and getting a good (but really small) zip tie in there to hold it in place. Thats the pic below of the red boot and the black zip tie.


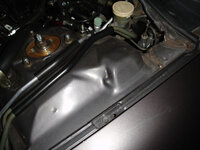
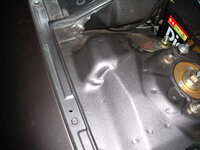
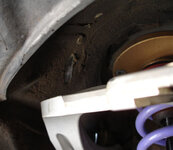
So after a track day, there was contact mainly in one area. The far end from the pivot points, where the ball joint is. You can see from the pics where the dents outside of my strut towers ended up, it's that little area without paint.

There was a little contact on the arcs as well. Next time I take the front end apart I'll get better pics and probably do some minor edge removal to get that quarter or half inch of travel back.

I can say that after the car was back together and a full alignment, it was a completely different car. I did one u-turn about two miles from the alignment shop and knew my oversteering, tires rolling over, pushing behavior was gone!

I ran -2.1 and -2.2 degrees of camber in the front, and with 4.6 and 4.3 degrees of caster. It wasn't a big difference from what I was running before, but it was a huge difference in terms of car behavior. After my track day I'm going to aim for -2.8 to -3.0 in front and another degree of caster and see how that feels.
 

Attachments

  • SPCboot.jpg
    SPCboot.jpg
    44.3 KB · Views: 1,205
  • TalonSPCDriversDent.jpg
    TalonSPCDriversDent.jpg
    30.2 KB · Views: 1,206
  • TalonSPCPassDent.jpg
    TalonSPCPassDent.jpg
    35.6 KB · Views: 1,233
  • SPCwheelwellrubbing.jpg
    SPCwheelwellrubbing.jpg
    48.8 KB · Views: 1,212
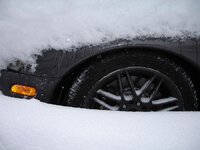
It's been a while since I updated this thread, forgive me as we have gotten a ton of snow here in AZ and I haven't made it to the track in a while. Yep, snow in AZ. Here is a pic to prove it (oh, and that new big brake kit :D)

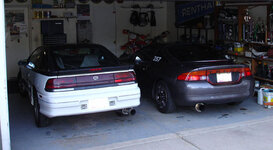
Another excuse for not updating this thread is because I took a few months to work out the bugs on my new daily driver - a 1g awd 5 speed.

Ya know what that means? My competitive daily driver and track duty car is probably going to sway more to the track side :hellyeah:

I'll add on to this soon with the details of the 13x1.1" BSL6n Wilwood kit.
First impressions: Call up TCE and upgrade. Just do it. You will NEVER look back!
 

Attachments

  • Wilwoods in the snow dec08.jpg
    Wilwoods in the snow dec08.jpg
    40.2 KB · Views: 969
  • Garage After smallest.jpg
    Garage After smallest.jpg
    43.3 KB · Views: 955
What happened with SPC controll arms? Guess they still hit?
I was talking to Mueller and trying to figure out, if I should put stiffer springs on my JIC's to stop the travel. I am very disapointed with PSC as a company, after so many years with problems with our cars they havent take the time to fix flaw in their desingn.
Here a couple pics of how bad is the hitting on my car.
You must be logged in to view this image or video.


You must be logged in to view this image or video.


-MSR

I'm in the same boat with my SPC control arms. What spring rates are you running? I run a 12kg/mm spring in the front without that much damage.
 
12kg on the front too.

I may be going with 14kg and see if this helps.

-MSR

Not meaning to hi-jack this thread.
 
Not really hijacking, it is a legitimate issue that even the OP is having. What spring rate would you put on the rear? I run an 8kg/mm spring in the rear, I feel it may be plenty.
Ever look at Swift springs? I think Eibach will do it too. You give them the spring dimensions and stiffness you need and they will build you a spring. Endless/Zeal also makes spring for coilovers with different inner diameters and stiffness.
 
Support Vendors who Support the DSM Community
Boosted Fabrication ECM Tuning ExtremePSI Fuel Injector Clinic Innovation Products Jacks Transmissions JNZ Tuning Kiggly Racing Morrison Fabrications MyMitsubishiStore.com RixRacing RockAuto RTM Racing STM Tuned

Latest posts

Build Thread Updates

Vendor Updates

Latest Classifieds

Back
Top