
TSimage
Supporting VIP
- 1,842
- 18
- Jan 10, 2006
-
Sacramento,
California
Ask and yee shall receive!
To do a recap on where we last left off I had begun the tedious task of pulling the wiring harness to ready myself for stripping down the harness and getting it race/ tuck ready. This process will include removing a MAJORITY, yes, more sh*t is removed than kept, of the unneeded bull crap from the harness. Relocating it to a more hidden location ad above all else actually rerouting the wires so that they can better be branched from a central location rather than the OEM method that is beyond embarrassing to lay eyes upon for anyone with even a minor any any type of engineering that branches into electrical. *sigh*
And here was our stopping point when I last posted:

Intimidating to say the least but confidences is key. If you are familiar with these cars it makes it a LOT easier but you'll definitely want to use our available tech articles (which are a b*tch to find *especially for the 1Gs) so I'ma do you a favor and post em for ya.
The primary 2 sites I used were: Project Zero G -
:: Project Zero G :: - Wiring Home
This site is the main site that gives you the lay out of the secondary plugs on the engine harness than other places like VFAQ totally ignore. If you look through the menu you will find the ECU harness pin out as well -
:: Project Zero G :: - Wiring Information
Now a site I ignored at first but later became my bible was this one here from the mirage-performance tech guys -
1Gb DSM 4G63 Turbo Wiring Harness Diagram
With that site you can identify every single plug and relay on the harness which at some point will come in handy just in case you get a little carried away. I have done a few 1GB harness before but I was thrown off by this 90 harness (first 90 harness I have messed with) and since it had been a minute since I uninstalled all of it I forgot that there are lots of differences so I WASTED a lot of time looking for connectors and wires that were right in front of my face but were different sized/type of connectors or were wired slightly different.
Another helpful one that I didn't need but some others might benefit from is this site that shows you the Engine harness pinout with the color coded wires off to the sides... Very useful for those less familiar with the wiring. -
http://www.dsmtalk.com/gallery/data/500/Drawing2_Model_1_.jpg
Now as for you 2G guys.. you have an ABUNDANT amount of info to do your tuck. Regardless of having more wires it is a lot easier. There are threads for 2Gs that have damn near every single plug identified and decade long threads dedicated solely to tucking 2Gs.. Ef you guys! 1Gs still look better in the end. >=P
_____
So now the dirty work begins, I assembled a nice set of tools to begins tripping the harness:

1. Med-large box
2. Gloves
3. Utility scissors
4. Razor blade
5. 1/2-3/4" masking tape
6. Netbook/Laptop/IPad/Desktop
In this picture you'll see a nice sized box naturally to put all the crap in.. Get rid of the wires as you take em off or else they will only help to confuse you later on.
Next up is a pair of gloves. My harness was fairly clean but either way you'll be dealing with either dirt and or sticky residue from the tape when you pull it off which will leave your fingers icky and black and will get on anything you touch and just make you miserable.
I chose utility scissors over snips just because of the ease of use. and the ability to cut multiple wires at ones which can help you line up a bunch of wires for some clean work. Also once you get to the point where you are cutting anything they do a hell of a lot better job at cutting through rubber boots etc than the blade.
The blade is the speed tool. Find the groove in the harness cover and run the blade along it to open it up quick and fast like gutting a fish. Also using the blade with finesse allows you to open up the loom with out fear of cutting through wires like you would with the scissors as well as getting into tight spots.
Don't do what I did and start off with friggin' 2" wide tape. It WILL piss you off and slow you down. At this size it is perfect for everything from labeling wires to connectors to bundling the harness to help you organize the chaos. Very important! I chose the masking tape over the Painters tape because it comes off easier. It hats the dirt and the electrical tape goo and it will stick once and only once and come off with ease but only when you want it to.
And finally some type of computer. You WILL run into a snag and need to look it up. Don't guess, spend the extra time and do it right the first time!
First up.. Remove all of the wire wire loom...

The method I used for the engine harness was to use the sites I mentioned before to find the pins and snip the wires at the connector and fish em out. (I can always slice back into those connectors later on if I want to use them for anything.. Specifically the solenoids which I will be using to control my nitrous) Be careful because plenty of them are bundled so don't get too happy. The Project Zero site actually shows you everything you can remove in a basic harness tuck. I went above and beyond so it took em having a better understanding on what I needed and didn't to make it happen.:

Take your time and never get over whelmed, if you get antsy, take a break and come back, don't rush this. It'll be a million times worse if you have to trouble shoot when its all said and done. Keep your removed wires out of the way and out of sight. NO DISTRACTIONS! Once you get to a point where you are ready to lay out your harness begin taping the harness to keep it under control. The masking tape is hard enough that it will allow you to still pull wires through them without losing shape or breaking which is awesome!:

Before you know it you will have something that half way resembles a wiring harness of some sort.. In the picture you'll notice that my harness is wired similar to stock where the coolant lines are at the end of the harness which will force you to loop it. Also a few other issues with the way the stock harness is setup just wont work for what I want so plan it out in your head like I did or if it helps you you can draw it out and then get your final layout down:
The injectors begin the harness, the coil pack is relocated since I use a COP and the MSD anyways, everything will be very much hidden underneath the massive Magnus manifold. The coolant lines have been relocated so they can branch out on their own in a thin harness branch that will be easy to hide and if I can I'll have my sensors relocated to the rear of the housing to make it even easier, we'll see..
Look at that rats nest I removed!
You might notice some special things about the harness.. Yes I have my AEM map sensor wired in the harness. My IAT wires are there I just don't yet have the pig tail. All of the branches are untouched and much longer than they will be when I put the flex loom on. You'll notice too that the injector plugs are the updated plugs with the built in clips:

Out of all of those plugs 2 of them are check wires (speed/tach and fuel) and they will be tucked away so I reduced a 40 connector harness to a handful of connectors which is what you want. I also managed to re rout things so that the Ignition relay is right inside the firewall out of sight. The 90 wire harness allows you to tuck your harness a little more simply because there are no plugs on top of the TPS or the CAS.
Now, for the main harness/ chassis harness/ fusebox harness... OR what ever the hell you want to call it, my methods changed.
There are no layouts of the connectors so instead I chose to begin my sniping at the fuse box itself. Tracing from this centralized point made life a lot easier.. Ironically removing my fog lights alone got rid of damn near an entire connector. Pull the retaining tab and go to work. Remove the fuses and relays as you delete said items.

Do work son! This harness is most likely cut (you have to cut it to remove it) so if you have it labeled well you can delete wires on the fuse box side and trace it on over to the harness end. Again, try to work clean and focus on the task.

What a difference that makes on both ends! *Notce the box-o-wires!*

Its getting there but remember that this harness begins on the drivers side of the car and travels to the front, along the front core, up the frame and all the way to the passenger shock tower. Naturally its LONG!:

Time to once again, mock up your wire path in the actual car, in your head or on a piece of paper and determine where you can safely cut the harness of course remembering you will have to extend the headlight wires. If your like me and relocating your alternator to behind the motor you'll find your alternator connector is WAY too long as well..
Re tag your wires so work with your newly desired length and snip-snip. Look how much more was removed!:
Yes, I literally hacked the harness in half if not more! Now the fun part begins..
_____
Onto our next tool/item list...
1. Soldering iron
2. Quality solder
3. Heat shrink - Multiple lengths and sizes
4. Heat gun
5. Good set of multi-use wire stripers/crimpers.. (I have the auto ones as well but it all works the same)
6. Zipties
This list is pretty much self explanatory. Make sure to use heat shrink and not electrical tape. Don't ghetto rig such a vital part of your car and risk some big issues down the line that WILL come from using electrical tape. Do it right and solder the wires as well as heat shrinking the connection. As always, try to stagger as many of the connections as possible.
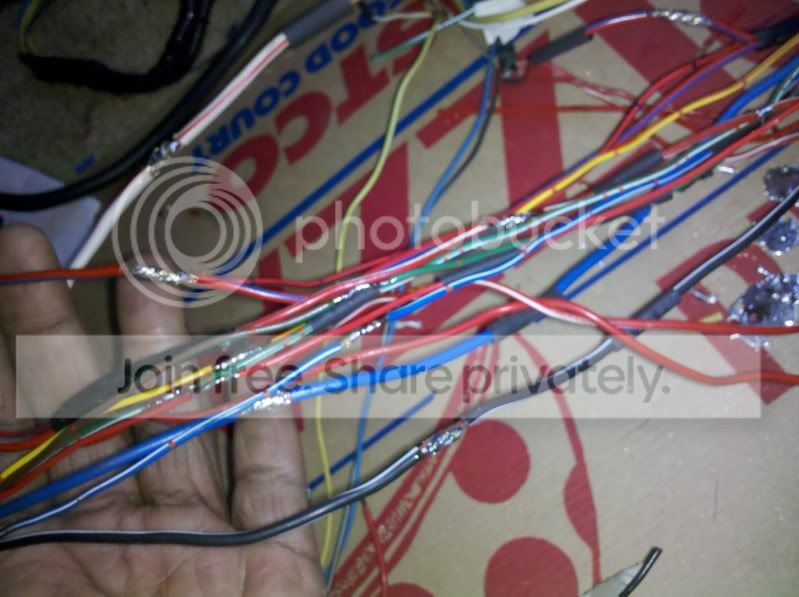
The finish em off:
And viola!

What a CRAZY difference... Just looking under the fuse box you can see how much was removed alone from there.

The mass of wires removed from both harnesses filled up that entire box!:

7 LBS removed in wires alone!

So this is how the wire harnesses will stay until everything else is installed. Then the harness is placed and the final measurements and routes for the wires and set in and the masking tape then turns into electrical tape and zipties (more permanent) and finally the Flex loop will be applied to finish it off. Hopefully you wont see it regardless.. While I am patiently waiting on more parts to come in and the motor progress I am tempted to pull the entire interior harness as well and go to town. I've almost 100% decided on doing it although there isn't much to gain from it since its pretty isolated. All in all when you consider that all I need are my wires for the rear lights and fuel pump and that all the other wires are useless.. I'm still on the fence as to whether I got manual windows or not, I still need to find the final numbers on how much weight I'll save. Not until then will I make the decision to strip the interior harness too. Literally all it needs is ignition, fuel pump (actually only like 2-3 out of the 15 fuel pump wires) the rare lights and the rest can go... Having m dash board off and having to star at the huge harness every time I get in doesn't help..
To do a recap on where we last left off I had begun the tedious task of pulling the wiring harness to ready myself for stripping down the harness and getting it race/ tuck ready. This process will include removing a MAJORITY, yes, more sh*t is removed than kept, of the unneeded bull crap from the harness. Relocating it to a more hidden location ad above all else actually rerouting the wires so that they can better be branched from a central location rather than the OEM method that is beyond embarrassing to lay eyes upon for anyone with even a minor any any type of engineering that branches into electrical. *sigh*
And here was our stopping point when I last posted:
Intimidating to say the least but confidences is key. If you are familiar with these cars it makes it a LOT easier but you'll definitely want to use our available tech articles (which are a b*tch to find *especially for the 1Gs) so I'ma do you a favor and post em for ya.
The primary 2 sites I used were: Project Zero G -
:: Project Zero G :: - Wiring Home
This site is the main site that gives you the lay out of the secondary plugs on the engine harness than other places like VFAQ totally ignore. If you look through the menu you will find the ECU harness pin out as well -
:: Project Zero G :: - Wiring Information
Now a site I ignored at first but later became my bible was this one here from the mirage-performance tech guys -
1Gb DSM 4G63 Turbo Wiring Harness Diagram
With that site you can identify every single plug and relay on the harness which at some point will come in handy just in case you get a little carried away. I have done a few 1GB harness before but I was thrown off by this 90 harness (first 90 harness I have messed with) and since it had been a minute since I uninstalled all of it I forgot that there are lots of differences so I WASTED a lot of time looking for connectors and wires that were right in front of my face but were different sized/type of connectors or were wired slightly different.
Another helpful one that I didn't need but some others might benefit from is this site that shows you the Engine harness pinout with the color coded wires off to the sides... Very useful for those less familiar with the wiring. -
http://www.dsmtalk.com/gallery/data/500/Drawing2_Model_1_.jpg
Now as for you 2G guys.. you have an ABUNDANT amount of info to do your tuck. Regardless of having more wires it is a lot easier. There are threads for 2Gs that have damn near every single plug identified and decade long threads dedicated solely to tucking 2Gs.. Ef you guys! 1Gs still look better in the end. >=P
_____
So now the dirty work begins, I assembled a nice set of tools to begins tripping the harness:
1. Med-large box
2. Gloves
3. Utility scissors
4. Razor blade
5. 1/2-3/4" masking tape
6. Netbook/Laptop/IPad/Desktop
In this picture you'll see a nice sized box naturally to put all the crap in.. Get rid of the wires as you take em off or else they will only help to confuse you later on.
Next up is a pair of gloves. My harness was fairly clean but either way you'll be dealing with either dirt and or sticky residue from the tape when you pull it off which will leave your fingers icky and black and will get on anything you touch and just make you miserable.
I chose utility scissors over snips just because of the ease of use. and the ability to cut multiple wires at ones which can help you line up a bunch of wires for some clean work. Also once you get to the point where you are cutting anything they do a hell of a lot better job at cutting through rubber boots etc than the blade.
The blade is the speed tool. Find the groove in the harness cover and run the blade along it to open it up quick and fast like gutting a fish. Also using the blade with finesse allows you to open up the loom with out fear of cutting through wires like you would with the scissors as well as getting into tight spots.
Don't do what I did and start off with friggin' 2" wide tape. It WILL piss you off and slow you down. At this size it is perfect for everything from labeling wires to connectors to bundling the harness to help you organize the chaos. Very important! I chose the masking tape over the Painters tape because it comes off easier. It hats the dirt and the electrical tape goo and it will stick once and only once and come off with ease but only when you want it to.
And finally some type of computer. You WILL run into a snag and need to look it up. Don't guess, spend the extra time and do it right the first time!
First up.. Remove all of the wire wire loom...
The method I used for the engine harness was to use the sites I mentioned before to find the pins and snip the wires at the connector and fish em out. (I can always slice back into those connectors later on if I want to use them for anything.. Specifically the solenoids which I will be using to control my nitrous) Be careful because plenty of them are bundled so don't get too happy. The Project Zero site actually shows you everything you can remove in a basic harness tuck. I went above and beyond so it took em having a better understanding on what I needed and didn't to make it happen.:
Take your time and never get over whelmed, if you get antsy, take a break and come back, don't rush this. It'll be a million times worse if you have to trouble shoot when its all said and done. Keep your removed wires out of the way and out of sight. NO DISTRACTIONS! Once you get to a point where you are ready to lay out your harness begin taping the harness to keep it under control. The masking tape is hard enough that it will allow you to still pull wires through them without losing shape or breaking which is awesome!:
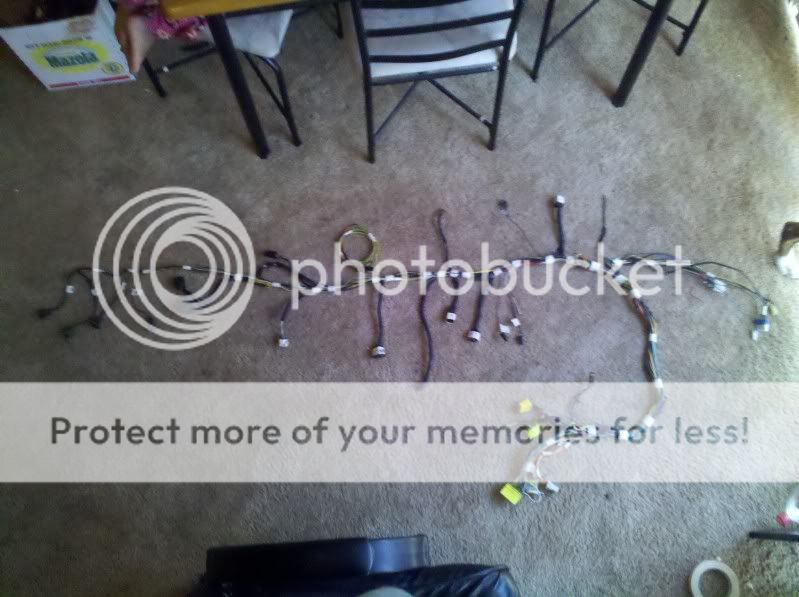
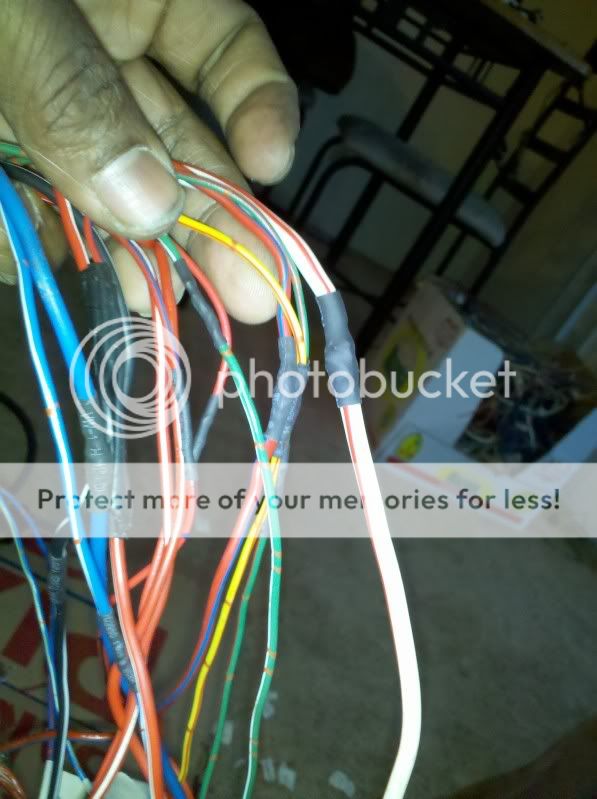
Before you know it you will have something that half way resembles a wiring harness of some sort.. In the picture you'll notice that my harness is wired similar to stock where the coolant lines are at the end of the harness which will force you to loop it. Also a few other issues with the way the stock harness is setup just wont work for what I want so plan it out in your head like I did or if it helps you you can draw it out and then get your final layout down:
The injectors begin the harness, the coil pack is relocated since I use a COP and the MSD anyways, everything will be very much hidden underneath the massive Magnus manifold. The coolant lines have been relocated so they can branch out on their own in a thin harness branch that will be easy to hide and if I can I'll have my sensors relocated to the rear of the housing to make it even easier, we'll see..
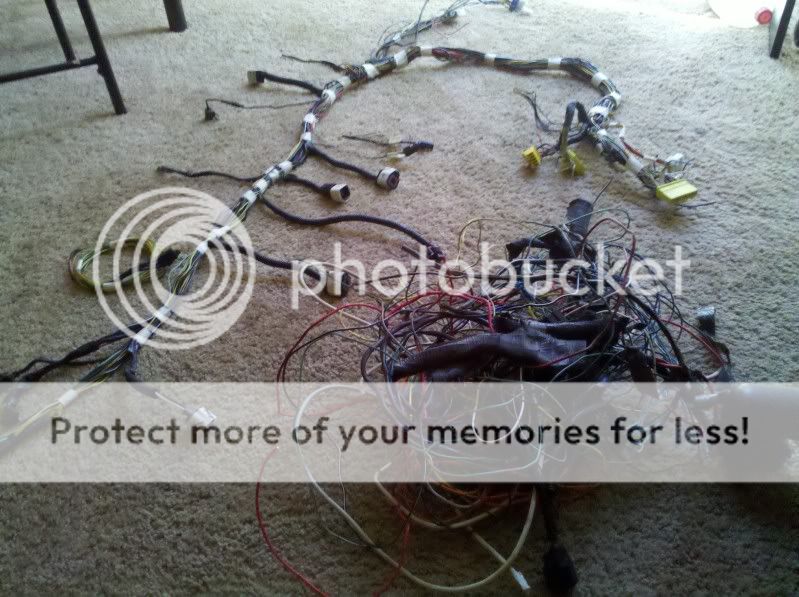
Look at that rats nest I removed!
You might notice some special things about the harness.. Yes I have my AEM map sensor wired in the harness. My IAT wires are there I just don't yet have the pig tail. All of the branches are untouched and much longer than they will be when I put the flex loom on. You'll notice too that the injector plugs are the updated plugs with the built in clips:
Out of all of those plugs 2 of them are check wires (speed/tach and fuel) and they will be tucked away so I reduced a 40 connector harness to a handful of connectors which is what you want. I also managed to re rout things so that the Ignition relay is right inside the firewall out of sight. The 90 wire harness allows you to tuck your harness a little more simply because there are no plugs on top of the TPS or the CAS.
Now, for the main harness/ chassis harness/ fusebox harness... OR what ever the hell you want to call it, my methods changed.
There are no layouts of the connectors so instead I chose to begin my sniping at the fuse box itself. Tracing from this centralized point made life a lot easier.. Ironically removing my fog lights alone got rid of damn near an entire connector. Pull the retaining tab and go to work. Remove the fuses and relays as you delete said items.
Do work son! This harness is most likely cut (you have to cut it to remove it) so if you have it labeled well you can delete wires on the fuse box side and trace it on over to the harness end. Again, try to work clean and focus on the task.
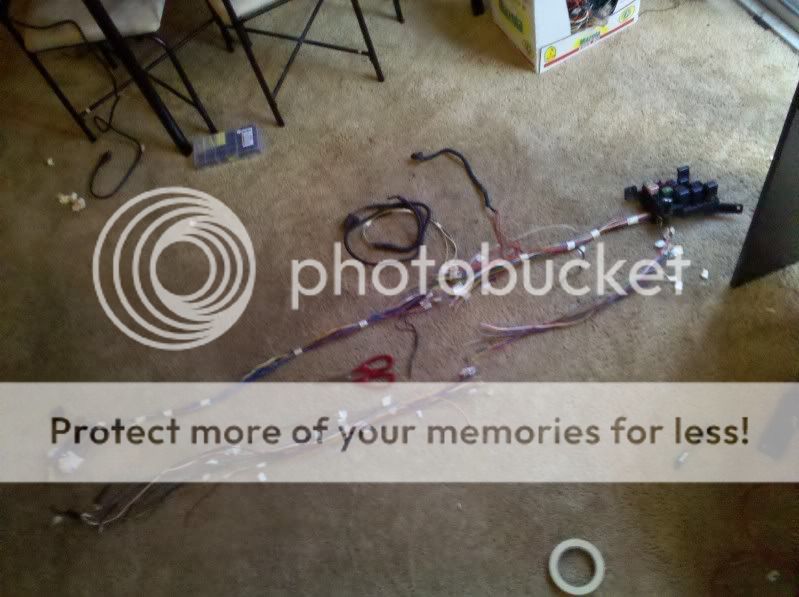
What a difference that makes on both ends! *Notce the box-o-wires!*
Its getting there but remember that this harness begins on the drivers side of the car and travels to the front, along the front core, up the frame and all the way to the passenger shock tower. Naturally its LONG!:
Time to once again, mock up your wire path in the actual car, in your head or on a piece of paper and determine where you can safely cut the harness of course remembering you will have to extend the headlight wires. If your like me and relocating your alternator to behind the motor you'll find your alternator connector is WAY too long as well..
Re tag your wires so work with your newly desired length and snip-snip. Look how much more was removed!:
Yes, I literally hacked the harness in half if not more! Now the fun part begins..
_____
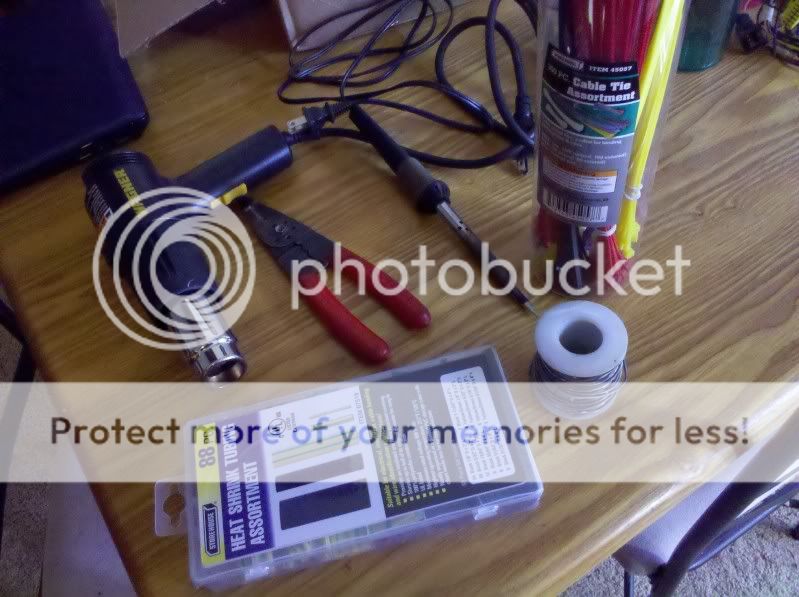
Onto our next tool/item list...
1. Soldering iron
2. Quality solder
3. Heat shrink - Multiple lengths and sizes
4. Heat gun
5. Good set of multi-use wire stripers/crimpers.. (I have the auto ones as well but it all works the same)
6. Zipties
This list is pretty much self explanatory. Make sure to use heat shrink and not electrical tape. Don't ghetto rig such a vital part of your car and risk some big issues down the line that WILL come from using electrical tape. Do it right and solder the wires as well as heat shrinking the connection. As always, try to stagger as many of the connections as possible.
The finish em off:
And viola!
What a CRAZY difference... Just looking under the fuse box you can see how much was removed alone from there.
The mass of wires removed from both harnesses filled up that entire box!:
7 LBS removed in wires alone!
So this is how the wire harnesses will stay until everything else is installed. Then the harness is placed and the final measurements and routes for the wires and set in and the masking tape then turns into electrical tape and zipties (more permanent) and finally the Flex loop will be applied to finish it off. Hopefully you wont see it regardless.. While I am patiently waiting on more parts to come in and the motor progress I am tempted to pull the entire interior harness as well and go to town. I've almost 100% decided on doing it although there isn't much to gain from it since its pretty isolated. All in all when you consider that all I need are my wires for the rear lights and fuel pump and that all the other wires are useless.. I'm still on the fence as to whether I got manual windows or not, I still need to find the final numbers on how much weight I'll save. Not until then will I make the decision to strip the interior harness too. Literally all it needs is ignition, fuel pump (actually only like 2-3 out of the 15 fuel pump wires) the rare lights and the rest can go... Having m dash board off and having to star at the huge harness every time I get in doesn't help..
 ! No worries.. The whole point is for it to be hidden. My block and transmission are both black as will be my wire loom.
 Thanks for the props.

