The Central Hub for DSM Community and Information

For 1990-1999 Mitsubishi Eclipse, Eagle Talon, Plymouth Laser, and Galant VR-4 Owners. This is where the DSM platform history is documented and archived. Log in to help us in our mission, and to remove most ads from the browsing experience.

crtzmedia-cbul-eclipse-6.jpg

Street Build Dihtung Glava's Eclipse

A 6 bolt swapped 2G with all the problems, slowly becoming whole again.

This site may earn a commission from merchant affiliate links, including eBay, Amazon, and others.

Well f*** me boys, apparently I lied - car started yesterday!!!

First things first - I decided to delete the oil cooler sandwich plate that goes between the oil filter housing and the oil filter. I talked about it a bunch on this thread. Long story short - it was cracked because my brother overtightened it in hopes of stopping the oil filter coming undone every couple of laps. It worked, but it brought on a new problem.

View attachment 692811View attachment 692812

I'll just write oil cooler oil cooler oil cooler oil cooler sandwich plate oil cooler sandwich plate oil cooler sandiwch plate a bunch so that if anyone is searching by those words they find this - DO NOT OVERTIGHTEN THE OIL COOLER SANDWICH PLATE. This might be common knowledge to most people but it was mine and my brother's first encounter with it, so we did the dumb. Water channels in there are so thin, the slightest excess of pressure from the bolt will crack them. Just one crack is enough to start mixing the water and oil that run through it.

So if your car starts making milkshakes, and you are confident it's not the head gasket, check the oil cooler. My mechanic friend suggested I run a garden hose through it since it's under about the same pressure as coolant in an engine (4 bar). You do this by taking the cooler off, plugging one pipe shut and sticking a garden hose on the other. I did it twice because I got nothing the first time but I really didn't want it to be the head gasket again so I went back and tried it again and eventually spotted a tiny leak.

To eliminate the cracked cooler I needed a shorter bolt, one with a really thin hex on it as well since the filter is shallow and the housing is perfectly flat so the hex shape would have nowhere to be.

View attachment 692813View attachment 692814

When I went to buy hose to connect the two water ports on the engine that used to be the inlet and outlet for the oil cooler together, that same store actually also had a bunch of fittings really similiar to what I needed. Something like this would be ideal:

View attachment 692815

But the closest thing I could find was this:

View attachment 692816

If anyone else is doing this, the threads are M20x1.5 on both the filter and the housing and the hole that goes through the bolt is 14mm in diameter.
As I've said, the hex on this fitting was too big and too thick, so I dropped the thing off at a lathe operator and he did straigh up magic. Took him 20 minutes to do what would likely have taken me the rest of the day (and I'd probably even mess it up somehow):

View attachment 692817

He drilled the 14mm hole through (the original fitting had a tiny 6mm-or-so hole), he cut the hex shape down to about a 23mm diameter and a 2.5mm thickness and he cut the rest of the M20 thread into the space he made when reducing the hex.
I then filed two flat spots into the 23mm diameter to fit a 22 wrench and cleaned everything up so that no metal shavings would make it into the oil.

View attachment 692818View attachment 692819

I fits great! The threads that stick out are a little long for my liking, so I might not be utilising the whole oil filter to its fullest at the moment. I'll keep an eye on the oil pressure for a while and cut the bolt shorter if there's any issues.
You can also see the new oil-cooler-delete hose in action in those pictures.

I'd like to thank @Kryndon @Justin DuBois @19Eclipse90 and @99dsmer4g63 for their help on the thread I linked above. They answered all my questions fast and with a ton of info, which helped immensely.

After connecting everything, filling up the fluids, tightening all the bolts and sacrificing two baby lambs to satan himself, I cranked the ignition. I cranked for what felt like an eternity but the car would not get oil pressure. I called around, googled a bunch and came up with nothing. I didn't f*** with any of the pumps or the oil pickup when I was removing the oil pan and I could hear everything running so it had no reason not to cycle the oil. I was beginning to doubt my work... maybe I did mess up the pickup?

As one last resort before having to take the oil pan off again, I got my dad to give up 5 more liters of his 10W-40 to fill up the engine even further. And good lord, with 10 liters of oil in the engine - we had pressure! We drained the extra 5 liters we added right after and the pressure remained. The car started right away too. It was so good hearing it run again.

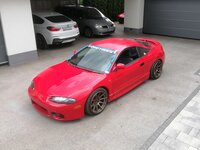
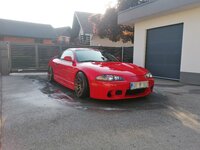
I would have taken it for a spin by now but I'm still waiting for someone to replace my broken windshield LOL And I know I haven't posted the whole car in a minute but it's for a good reason - I've got a couple more aesthetic updates in the works ;).

But as always, it's not all perfect - spotted a couple spots in the driveway -

View attachment 692820

- thought I might just have the first dry DSM in the world after removing the broken cooler and replacing the oil pan gasket, but no.

Anyways, that's it for now. Thanks for always responding to my threads and thanks for reading these :)
I am right now in the process of doing the same thing. Cant find a Front facing housing for a 1G any longer. I have the threaded filter adapter "thingy" which will work fine with my relocation kit. The only thing that was scaring me a little is the oil pressure to the engine changing. Cant find many people simply removing the cooler and using the same housing with a shorted threaded shaft. I wasnt sure if the Cooler part provided some restriction it needed for building the correct amount of oil pressure. I was worried If I removed it too much flow would happen. Did this work fine for you?
 
I am right now in the process of doing the same thing. Cant find a Front facing housing for a 1G any longer. I have the threaded filter adapter "thingy" which will work fine with my relocation kit. The only thing that was scaring me a little is the oil pressure to the engine changing. Cant find many people simply removing the cooler and using the same housing with a shorted threaded shaft. I wasnt sure if the Cooler part provided some restriction it needed for building the correct amount of oil pressure. I was worried If I removed it too much flow would happen. Did this work fine for you?
It worked fine for me. I did start seeing a little bit of oil pressure drop above 6k rpm recently, but I don't think it's related. I did delete my balance shafts though, if that makes any difference to you. I also swapped the M20 fitting from the long one I described in the update you're quoting to a really short one during my latest oil change so I'll see if that does anything and I'll write an update.

If you're afraid you'll have too much flow, you can also leave the center bore on the fitting smaller. When I bought mine it had a 6 mm bore and I took it to 13 or 14 mm. I did the same on the new one. Good luck.
 
Alrighty, stuff has been adding up, so I'll write a little quality of life update now, just so the next one doesn't end up being 3 pages long.

Shortly after the last update, the EVO VIII BOSCH fuel pump arrived, so I replaced that. I also swapped the hangers around from my parts car because mine had a kink in the hardline.
1725469576121.jpeg
1725469871964.jpeg

Here's the old setup vs the new one:
1725470349555.jpeg
1725470382025.jpeg

Way cleaner and way better. It didn't fix the issue where the car lost power halfway through pulls, but it did make it so that the car starts right up when I crank the ignition, where before, I would sometimes have to pump the gas pedal a bit. Plus, it's another trace of the previous owners' hackjob removed, so It's a win.

Next, I showed some TLC to the parts car by finally removing the front axles from the empty engine bay - this was really for my benefit more than anything - I wanted to roll it around and that was hard to do with axles still in the hubs, flopping around and getting stuck on suspension parts. An important note if you have an empty chassis like this is to put nuts and bolts in place of the axles, DO NOT just roll it around with empty hubs. The wheel bearings need axial support, otherwise they will come apart and you'll have an unecessary repair on your hands. I did this with a M20x100 mm bolt on each side, with a 44 mm washer on the outside and a 56 mm washer on the inside.
1725471596580.jpeg
1725471634399.jpeg

This simulates the axle and holds the bearing together. Once I could roll the car into the driveway, I took a bunch of parts off of it to be sold and I'm happy to report it's finally making me some money back. The biggest issue I had with it was the power steering lines; they were plugged off when I pulled the engine and the pressure buildup from turning the wheels made power steering fluid shoot everywhere. And just as I managed to properly re-route it on the declipse, I noticed a similar leak on my main car:
1725472033233.jpeg

The return line for my 2G power steering pump cracked along its lenght and a bunch of fluid poured down onto the alternator. It was also eating up the asphalt on my driveway so I was beyond done with it. Turns out you can't even buy these as spare parts, because OEM pumps came with the fittings installed and replacement pumps expect you to re-use the old ones. I desperately needed to stop the leak and I didn't have time to go full out and get AN fittings so I decided on a quick and dirty fix, which was sealing the crack with borax solder:
1725472477925.jpeg

It's not pretty, but it holds, so I'm keeping it for now. I feel like I'm slowly becoming the previous owner💀. For real though, If anyone is willing to sell me the factory 2G power steering pump return line - hit me up, I want to replace this ASAP.

In other news, I hit the mileage for the first oil change during this time (960 km/600 miles, but I hit it in the middle of a road trip and went over a bit - 1060 km/658 miles), so I took the time to re-do the custom oil filter fitting I made a while back.
1725477535367.jpeg

Both of these started off as an M20 hydraulic fitting - I described what was done to the first one (right) in update #21. The new one (left) I wanted shorter and with a wider hex. The old one was absolutely too long, but that's only because I was being too careful then. On this new one, me and my lathe guy both miscalculated and went a bit too short - I was going to use the longer threads on the oil filter housing side and the shorter ones on the oil filter side, but we cut the filter side too short to actually reach all of the threads in the filter. I fixed this by turning the thing around, but now the filter bottoms out right where there's a space in the threads. It works OK, but I might get the urge to re-do it again come next oil change😅. I also increased the center bore to 14 mm for more flow. (It was 13 mm on the old one, not 14 mm like I wrote originally)

Other than that, I tried to set my timing advance and that didn't fix any of the problems I described in the last update, though I'm not 100% sure I did it right. I do have the brown ECU-grounding connector on my firewall but I also have a really old timing light and no data logger. I just grounded the brown connector and turned the cam angle sensor until the light was showing around 5° before TDC on the crank. The mark wasn't visible on every flash though, more like every 5th flash, so yeah - idk if I did that right.

I also looked into the check engine light; my OBDII reader wasn't working at first so I went on a wild chase, trying to find where on its way from the ECU to the OBD port the pink signal wire loses continuity. Here's a thread I hijacked. Turns out (this is for all my fellow Europeans) it gets lost in the immobiliser box, under the steering wheel:
1725483389050.jpeg

I'm pretty sure mine doesn't do anything, so I just unplugged it and jumpered the pink wire right at the connector:
1725483506016.png

Now I am become d̶e̶a̶t̶h̶ previous owner, the destroyer of w̶o̶r̶l̶d̶s̶ automotive wiring.

Regardless, that did the job and the OBD port was getting signal again. I got codes P0135, P0141, P1104, P1105, P1400 and P1500. The first two are basically just O2 sensor heater faults, third and fourth are fuel pressure solenoid and wastegate solenoid errors (don't have them, so that's no problem), P1400 is a manifold pressure sensor error (also don't have it) and P1500 is an alternator wiring fault. The last one is actually real, I still have the 1G/2G hybrid front wiring harness that I have to replace, so hopefully it goes away then. I don't think any of these codes are related to the loss of power I'm experiencing, but that check engine light is annoying nonetheless.
Or maybe the O2 sensors are more broken than the codes lead to believe. I might look into that.

I also still want to do a boost leak test, at first I thought it couldn't possibly be a problem, but now that I'm slowly running out of suspects, I would very much like it to be some extremely obvious boost leak. Maybe even on the side-mount intercooler... then I'll have no excuse not to get a proper front-mount😏😏.

Anyways, feel free to comment if you have any ideas as to what I might be dealing with, but other than that, that's it for this update.

Thanks for reading.
 
Last edited:
Third suspension job

It's been a minute since I've talked about my suspension on here so here's an update on that. Last time I said that I wanted more toe (out) in the rear, but I quickly learned that even with the rear toe bolts adjusted all the way, I still had about +0°45' of combined toe in. This is a result of me absolutely wrecking my suspension geometry when I lowered the car as much as I did. This really doesn't work for me, because as soon as I hit an uneven strech of asphalt, the tires can't follow a straight line and the weight on the rear starts oscillating from one wheel to the other. You can really feel the rear of the car jumping left/right, and that's when driving in a straight line, I can't imagine what would happen if I were to upset the rear in a corner.

I did not intend to find out, so I ordered a set of adjustable rear toe arms off of eBay:
1727102008836.jpeg

I normaly don't go for eBay parts, but the overseas shipping on all other brands was simply too expensive. These took their sweet time to get here, but at 115€ and 60€ shipping I had no problem with that. I also didn't find anything concerning about them upon inspection, so I am satisfied with my purchase.
1727102880762.jpeg

I figured these would be a quick install, but I heavily understimated just how seized the eccentric bolts were in the old toe arm bushings. I got the nuts off eventually, but I could not get the bolts out for the life of me. A couple minutes of searching the forum later and I learned that this is very common and that no amount of heat or hammer smacks will get them out - they have to be cut.
1727103405663.jpeg

2 ruined sawzall blades and 2 hours later the old toe arms were ready to come out. Luckily for us 2G owners, the rear subframe is wide enough to wiggle the arms out with just the heads of the bolts cut, most other cars need to have the bolts cut on both ends to set the bushing free. I let my dad try and get what was left of the bolts free, once I had the arms out, and even he had to admit defeat eventually:
1727103688104.jpeg

This is after roasting the bushings with a blowtorch and smacking the bolt with a sledgehammer. Pro tip if you are doing this: Give up. Cut the bolts. Order new ones. They will NOT come out.

I didn't order new eccentric ones though, I decided to eliminate them altogether to avoid having 2 points of adjustment on the new arms. I bought standard M12 bolts, nuts and matching washers. They would replace the eccentric bolts and become a fixed point of articulation with no adjustment. The washers were the thick variant as I wanted to be sure they could hold the load.
1727104196294.jpeg
1727104212030.jpeg

I had to turn them from the original 35 mm diameter to 32.5 mm on a lathe, so that they fit into the spot for the factory eccentric washer. After making sure everything fit together OK, I welded them to the bolts and nuts, so that even if they ever get loose, they won't be able to move in their spot and throw off my alignment.
1727104596375.jpeg

I made sure to put a ton of grease into the toe arm bushings and under the washers so that they don't seize again anytime soon. Or hopefully ever.

After this, I went back to my local alignment shop, for the third time, to finally dial in the car right. Normally you'd want your rear toe to be pretty much straight for most applications, but with my obnoxious camber (more than -3°30' per side) that leaves a very narrow contact patch for the tire and results in uneven wear. My alignment guy normaly counters this with a bit of toe in but, as stated above, that doesn't work for me. I asked him to abandon his beliefs and for 10 minutes completely forget that tire wear exists and give me toe out. This is closer to what FWD race car drivers will usually do, as it lets the outside tire better follow the radius of a corner, rather than resist it (with toe in). He reluctantly agreed and we settled on a combined toe out of -0°14'.

I am happy to report that this has indeed fixed my rear end stability. And I am not too concerned with wear, as I want to swap this set of tires out pretty soon. Plus, I really only drive the car in the spring and summer months, so the tires aren't getting abused all year round. With winter just around the corner, I'll try to enjoy this refreshed setup and handling as much as I can before I take the car off the road again, while also working out the bugs I've mentioned in the last update (an update on those will be out soon).

Thanks for reading.
 
Last edited:
i dont think you mentioned it, but you need to get a boost gauge installed on the car to see if you are actually losing boost, or over boosting and causing fuel cut.

boost leaks typically feel like the car is getting slower when boost hits, fuel cut from over boosting feels like hitting a big misfire

also is it running a 97 gst factory ecu? factory 450cc injectors? what turbo is it?

edit: ok its a 14b turbo. that ecu isnt going to like anything more than 14psi or it will hit fuel cut. what size exhaust are you running, its possible you are getting boost creep and the car is cutting fuel
Hi, thanks for commenting. Yeah, I was going to get a boost gauge, but I belive I've tracked down the problem now, so it's not happening yet.

I for sure have a boost leak, several even. I'm currently working them out, I'll put out the update on that as soon as I'm done.

It's a factory 97' Talon TSi ECU, factory 1G 450cc injectors and a 14b turbo. I have the matching O2 housing elbow, going into a factory 2.5 inch downpipe and exhaust.
Lep pozdrav na početku.
Moje ime je Nikola i dolazim iz Hrvaške.
Lepo za videti da u susjedstvu ima jos tak lepih Eclipsa kak je tvoj. Auto je bomba. 👌😀 svaka cast na dnevniku kaj ga pises.👍
Stvarno si vec puno toga napravio. Ja imam 2G iz 98. Vse je jos serijski... htio bi ga malo spustiti.. kod tebe sam vidio TEIN gewinde. Gdje si ih nabavio? Imaju TUV? A nebi htio da bude pre tvrdo.. ja sam tek pocetnik kaj se tice mehanike..,a vidim da si ti pravi mojster😉 ako moze mala pomoc oko toga..

Vnaprej se zahvaljujem.

Lp
Fixing the stance/First suspension job:

Ok, I'm gonna try to make this short becase last time I wrote this post up, I made it to long to process. Long story short; car was waaay to soft for my liking - after hitting a bump the thing would rock like a boat and oscillate for way to long, so I wanted suspension that would give me a solid ride as well as lower the stance a bit to complement the new wheels. After checking out a bunch of options, I went with TEIN Street Basis Z coilvers. Not to be confused with their Street Advance Z's, as those are the next step-up from these.
View attachment 695462
The difference being that these don't come with adjustable damping or adjustable lower mounts, which means the height is determined solely by the preload on the springs. This gives them a lower price point while still retaining that name-brand feel. You also cannot send them back to be rebuilt if anything breaks like with some higher-spec TEIN models.

I took the old struts apart like an absolute gangster (read: "Idiot" ) :
View attachment 695463
(Don't try this at home)

The only problem I had was with the left rear strut which appeared to be blown, with the top hat and collar rusted solid to the piston rod. I broke the top hat off eventualy, but the little collar I would have to make myself. Hit up the old lathe and produced this little feller:
View attachment 695464


After I had the old suspension out and disassembled, I could use the parts to put together the new coilovers:
View attachment 695465View attachment 695466

They went together very easily, paying for a name brand like this really shows, even in the details of the instructions. You can see they are quite a bit shorter than the stock struts with lowering springs. I set the spring perches on all four corners to 4 cm (1.57 inch) along the threaded body, as the instructions state is the reference point for these. They went in with no problems (well, that is after messing with a rusted sway bar link for 3 actual hours):
View attachment 695467

They left the car at 345 mm (13.58 inches) from the center of the wheel to the edge of each fender. I couldn't find any pictures online, so here is mine if anyone is looking to get these:
View attachment 695468

They'll leave a 2G quite a bit lower than stock, but at no means "slammed". As for the drive; it's about a hundred times better on these than on 20 year old lowering springs and one blown strut. Could be a bit harder if you ask me though, but generaly, it does feel like a nice split between sporty and comfy if you are looking to put these on a daily driver. The spring rates are 9 kg/mm (88.3 N/mm) in the front and 4 kg/mm (39.2 N/mm) in the rear so that's a good bit harder than the stock 45 N/mm and 26.5 N/mm. This car was on ancient Eibach lowering springs thought, so I have no idea what rates I started out with, just that these are better.

I still wanted to go lower despite all - the website quotes a 77 and 88 mm (3 and 3.46 inch) drop front and rear for these, so I got the car on jacks again and dropped the spring perch collars to about 2 cm (0.78 inch) in the front and 2.5 cm (0.98 inch) in the rear. That is 2 cm (0.78 inch) lower than reference value and leaves the springs with no preload when the suspension is unloaded. Don't try this at home. Since this isn't a race car and I don't plan on racing it, I am not too concerned with the car coming off the ground, but I will drive very carefully for a bit, while also listening for any metal clunking noises which would indicate a spring moving around.

The rolling safety hazard now looks like this:
View attachment 695469

I absolutely love this stance and I like the ride, so I would consider this upgrade worth the money. I might look into stiffer springs still, or some helper springs at least, just to be safe, though thus far the only noises I've heard were the tires rubbing. I'll most likely have to roll the fenders pretty soon and give them a little pull as well. I should probably glue the new windshield in too, so that it's not just held in with duct tape but you know, prioritiesLOL
Lep pozdrav na početku.
Moje ime je Nikola i dolazim iz Hrvaške.
gdje si nabavio TEIN gewinde? maju TUV? ako moze mala pomoc oko toga..

Vnaprej se zahvaljujem.

Lp
 
Lep pozdrav na početku.
Moje ime je Nikola i dolazim iz Hrvaške.
Lepo za videti da u susjedstvu ima jos tak lepih Eclipsa kak je tvoj. Auto je bomba. 👌😀 svaka cast na dnevniku kaj ga pises.👍
Stvarno si vec puno toga napravio. Ja imam 2G iz 98. Vse je jos serijski... htio bi ga malo spustiti.. kod tebe sam vidio TEIN gewinde. Gdje si ih nabavio? Imaju TUV? A nebi htio da bude pre tvrdo.. ja sam tek pocetnik kaj se tice mehanike..,a vidim da si ti pravi mojster😉 ako moze mala pomoc oko toga..

Vnaprej se zahvaljujem.

Lp

Lep pozdrav na početku.
Moje ime je Nikola i dolazim iz Hrvaške.
gdje si nabavio TEIN gewinde? maju TUV? ako moze mala pomoc oko toga..

Vnaprej se zahvaljujem.

Lp
Lep pozdrav i tebi.

hvala ti na lijepim riječima o autu i dnevniku, jako to cijenim. Pisao sam ti u privat chat glede gewind, da ne smetava ovdje gdje je sve na engleskom.

Čujemo se!
 
Last edited:
Small bug fixes/patch notes #2:

I lost the clutch mid-drive. Nothing catastrophic, but I wasn't really sure what broke in the moment, so I was a little worried while limping the car home. Turns out the hinge between the clutch pedal and the master cylinder gave out. I was running errands for a couple of hours in the city and I guess the constant stopping and going was just too much for the stock assembly. The ACT 2100 is a pretty heavy pressure plate, so this was bound to happen eventually.

I drew a little MS Paint diagram again to describe what I'm talking about, since European GS models seem to have a different clutch pedal assembly than the US models:
1728140523528.png

The blue washer is placed over the nut in the housing, which is then bent at the cuts to lock it in. The washer being plastic, allows for a little movement between the nut and the housing, which is dampened by the rubber piece underneath. But it also means the washer gets hard and brittle with age and eventually, it breaks:
1728205124205.jpeg
1728205110263.jpeg

This was causing the master cylinder rod to be able to bend up and out of the way, instead of into the cylinder when I stepped on the clutch. It was a pretty simple fix though, I filed down a standard galvanized steel metric washer to fit the housing and hammered the cuts back over it:
1728205485407.jpeg

The assembly still fits the rubber damper and allows for a little movement. It should be fine for the forseeable future, but if it does break again, I'll take out the rubber piece and weld the nut straight onto the housing.

Another fix was my passenger door card, that thing has been bugging me for the last 2 years. Here's a picture of where the screws (red) and plastic rivets (blue) are on the door:
1728206348192.jpeg

The second rivet on the top side kept popping loose on mine whenever someone shut the door. Then, the edge of the door card would shift out and get stuck on the rubber window trim and it was getting all bent and wrinkled and the door card would flop around and it was just really annoying.
1728207972946.jpeg

I got new plastic rivets from a local parts store, but they weren't any stronger so one day, I went on a shopping spree on AliExpress and Temu and I ordered about 600 of them from different manufacturers.
1728207535904.jpeg
1728207897336.png

They are ranked here left-to-right from easiest to pop out to the hardest. The first and second rivet are from the auto parts store and OEM. All others are cheap online orders. I'm not gonna provide links because, like everything else on those sites, they keep getting unlisted and re-listed elsewhere. Just take note of the shape of the last two rivets and look for that if you need something tougher than OEM.

The last 2 actually held so well that the rivets themselves would break before they would pop out:
1728208485401.jpeg

In the end I had to take the passenger door card on and off about 10 times, but I believe I finally figured out a way to make this work: A reinforced Chinese rivet!
1728208603426.jpeg

I drove a wood screw through the stem of the rivet and it gives just enough support to the flat piece that it doesn't bend or break off. It's been a week now and the door card seems to be holding. I'm happy that my fix worked, but now I'm kind of worried about how I'm going to get it off if I ever need to😅.

Anyways, that's it for now, boost leak update is up next, thanks for reading.
 
Last edited:
Alright, boost leak update - here we go.

In update #50 I wrote that I had 3 main issues after the first drive. The biggest one was a power cut @ around 5-6k RPM and 0 boost in second and third gear. I knew for a fact the fuel pump was hacked so I installed an EVO VIII unit, which had some benefits, but didn't fix the main issue. I also tried to adjust my ignition timing advance without a mitsubishi scan tool to no avail (probably did it wrong though), so I was running out of suspects. It was time to do a boost leak test. I don't have a gauge (yet), since the car was originally n/a, so I threw a little makeshift boost leak tester together:
1728562255841.jpeg

It's a valve stem from an old tractor tire tube, hose clamped onto a lenght of plastic plumbing pipe, that fits snugly into my (probably not OEM) rubber/braided charge pipe. I used my air compressor to pump air into the intake system and I kept track of the pressure on the built-in manometer. I couldn't even get it to 1 bar (14.5 psi) as I could hear a leak right away. It was very obviously coming from the ancient side-mounted intercooler (SMIC) the previous owners had installed.
1728564503445.jpeg
1728563682655.jpeg

The support had clearly cracked a while ago, but the leak was actually coming from the weld around the outlet pipe. I paid a buddy 50€ to redo it for the time being, but the plan is definitely to upgrade to a front mount when the time comes.
1728564470313.jpeg
1728564553406.jpeg

I asked him to reinforce the entire seam, just so I won't have to deal with this thing again.

I put the car back together and ran my boost leak test again and wouldn't you know it, I wasn't done. The SMIC was holding pressure, but now I could hear a bunch of leaks around the throttle body. I figured I would be redoing gaskets so I ordered gasket paper online (which is why this update took so long to make) and I took the intake apart.
1728566992066.jpeg

My dad made the old gaskets for me out of Tesnit (compressed sheet of synthetic or mineral fibers, fillers, and a vulcanized rubber binder). He really wanted to help, but to be fair, he had a lot going against him. The sheet that we had at home was really tough and really thin, so it just wasn't the right choice for this job. You can see where the left gasket was letting pressure out, past the bolt hole on the top right.

I cut new gaskets out of 1 mm thick Artein universal gasket paper. I even bought a set of punches to get the bolt holes perfect and I believe it was worth it.
1728569137247.jpeg


Besides the gaskets, air was also escaping past the throttle plate shaft; the left seal had hardened and crumbled into dirt:
1728567446106.jpeg

The shaft seals (for this particular 89' throttle body) are radial seals 10x14x3 HM4 R. I read that some throttle bodies use a smaller, 8x12x3 HM4 R seal on one side, but mine only has 2 of the large ones. The factory seals have a metal outer ring and a rubber inner lip for the shaft, but my local shop only had them in full rubber, with a metal ring encased. They are WAOK NBR DTM 10x14x3; the description says that they are oil seals but I can confirm that they work just fine here.
1728567863508.jpeg
1728567877701.jpeg

If you have done this before, you'll know the 2 screws that hold the throttle plate are punched from the back side, so that the ends spread out and can't back out and fall into the intake. This makes it really hard to get them out and some people apparently resort to drilling. Mine came out alright though. When I reassembled the whole thing, I gave them each 2 smacks with a center punch to recreate that spread.
1728569503547.jpeg

It doesn't look like much, but I tried getting them out after and they hold great. It goes without saying that the shaft should be supported from the other side when you are punching the screws, otherwise you risk bending it.

I also tied the vacuum lines on the throttle body to each other, since the hillbilly sealing screws weren't holding very well.
1728569833079.jpeg

The system now holds about 1.5 bars (21.75 psi) of pressure. It doesn't leak at 1.5 bars, but for some reason the blow off valve opens at that point and lets the pressure out. I'm genuinely baffled by this because it's supposed to be the pressure in the intake manifold that keeps it shut in the first place? I'm afraid that I may have broken it with my testing as people tell me the turbo and stock ECU weren't even really ment for more than 1 bar (14.5 psi) of boost.

In similar fashion, the car still doesn't feel like 200hp - I have definitely revived some of these ponies, but the power cut isn't entirely gone, it just moved from 5-6k RPM to 6k+ RPM. I'm afraid we might be reaching engine-managment-territory in terms of troubleshooting now. I do want to set my timing advance again, with a mitsubishi scan tool this time. The car also idles kinda' high - the lowest idle I've seen was 1300 RPM, with the adjustment screw all the way in. I can't help but feel like it's still out of wack, despite everything I've done so far and I don't have a clear vision on how I'm going to go about this.

If anyone has any suggestions, please comment.

Until next time, thanks for reading.
 
Last edited:
Well, I finally gave in and re-adjusted my ignition timing. It's getting cold here, but we still get a few sunny days a week and I didn't want to spend them only wishing the car was running better. I was scared, but this had to be done.

I went and borrowed a MUT-II scan tool from a local Mitsubishi dealer, as well as a timing light, and me and my dad went at it.
1729710065082.jpeg

This thing is so freaking cool, I really want one. It's got all your standard OBD functions as well as a bunch of engine data that you can monitor while you drive. And you can log drives as well, but I didn't have a memory card free to do it (they are also very big and very cool). I got it to display a graph of ignition timing advance in real time, which was exactly what we needed.
1729710236184.jpeg
1729710262127.jpeg

A little confusion arose when it was time to ground the ECU though... if you've been reading for a while, you'll know I've got a 89' engine, a 98' n/a wiring harness and a 97' turbo ECU.
1729713571533.jpeg

From what I've read on here, all 1Gs have a plug that you have to ground, that makes the ECU keep the ignition advance steady, while you set the CAS (Camshaft Angle Sensor) to match. I've also read that 2Gs DON'T have that plug, so you can't ground the ECU to do this. Well... mine has that plug:
1729711060438.jpeg

Idk how or why I have it (or if it even works), but I went ahead and grounded it just in case. Then it was time to match the advance the timing light was showing to the advance the MUT-II was showing. This turned out to be impossible because, when we turned the CAS, both the physical advance AND the advance on the ECU changed. And not even by the same amount. After two rounds of this I felt really lost, because it's something I would probably struggle with, even on a stock car, let alone this collection of parts from different years.

While I was sitting in the driver seat and searching the forum, my dad started messing with the idle settings. I wrote last time that I had a really high idle (1300 RPM), even with the idle adjustment screw all the way closed. It was another one of these things where I didn't know what else I could try, but now dad called out the stopper switch on the throttle body:
1729712842625.jpeg

It hadn't even crossed my mind that this thing might need adjusting. The locking nut was marked with hi-vis paint, so I just figured it was set properly. I should have learned by now that nothing the previous owners did was done properly. Turns out it was keeping the throttle body open just enough to raise the idle. We turned it and the idle adjustment screw out 1/4 turn and we had a 850-900 RPM idle. Just like that.

We tried adjusting the ignition advance again, now at 900 RPM, instead of 1300 and we noticed the advance on the logger was moving around way less than before. We were able to match the physical advance and the ECU advance to about 6,5°.
1729713734611.jpeg

The car immediately started running better. The idle was lower, it sounded deeper and stronger, the smell of gas in the exhaust was gone, the throttle was responsive... just a happier engine all around. I think that when we set the idle speed below 1200 RPM, the ECU went into timing adjustment mode and helped us out. I read about this here, but I don't know if it's something all generations have, or if it's exclusive to 1G's and we just got lucky. Either way, the car definitely feels like 200 hp now. It honestly scares me a little. I literally ordered new brakes before I stared writing this update 😂.

In other news, I recived new O2 sensors today, so those went in as well:
1729715185872.jpeg
1729715200444.jpeg

The downstream one was a different design for some reason, so I hope that's alright - I would hate to have to fish the connector out from under the seat again 😡. The old ones came out with a little help from the blowtorch:
1729715876133.jpeg
1729715902510.jpeg

You know what they say: can't be tight if it's a liquid! For real though, these do need some heat to come loose and you best make sure you wiggle them back and forth when you have a wrench on there, so that you don't strip the threads. When putting new ones in, use plenty of high temperature grease. And a specialised socket doesn't hurt either 😁.
1729716199126.jpeg

For some reason I'm still getting the P0141 fault code, which is a downstream O2 sensor heater circuit malfunction, but then again - not having a catalytic converter could have something to do with that 😂.

That's it for now, thanks for reading!
 
Last edited:
Short report from a test I ran recently -

With the car running better, I wanted to test my fuel consumption and fuel tank capacity. I always felt like the needle on my fuel gauge was dropping way too fast - if I took the 4 spaces on the fuel gauge as the supposed 64 liters (16,9 US gallon) the tank holds and divided them with distance traveled on the trip meter, I got a fuel consumption of more than 18 liters/100km (less than 13 mpg). I was never sure if something was wrong with the car or if my math was off, so I decided to throw a small gas can in the trunk as backup and just drive until the car dies to see what my actual consumption is.

Starting with a full tank of gas - the needle was about half a space above the "full" mark. I drove normally (speed limit + a couple of pulls here and there) and accumulated about 370 km (~230 miles) on the trip meter in a couple of days. At this point the needle was starting to touch the "empty" mark on the gauge.
1730398161796.jpeg

This was the first time I ever saw the low fuel light come on since I've owned this car. It wasn't on all the time though, it was coming on and off, which I think is normal, according to the forum.

At 400 km (~250 miles) the needle was right on the bottom mark and the low fuel light was on constantly. I was expecting the fuel cut any second at this point, so I started doing shorter laps around town. I had my gas can, but I didn't want the car to die on some busy road really far away. And... it didn't. It just kept driving normally for the rest of the night. At around 1 AM I had been driving aimlessly for about 2 hours, on top of an entire day of driving, so I called it a night.

The next day I didn't drive very far anymore; with the gauge well below "empty" I figured I had a couple of minutes left at most.
1730400098504.jpeg

But once again, I was wrong. I was driving around, running errands and sweating bullets the whole day, amassing 500 km (310 miles) and the car was still running.
1730453422096.jpeg

Next morning, it finally happened; the engine stuttered in the mid-range of third gear. I let off the gas for a second and continued cautiously. The same thing happend again a couple minutes later and then again after that. At 535 km (332 miles), I decided to call the test done and I poured the backup gas can in the tank. I stopped at a gas station and I was able to get 62 liters (16,4 gallons) in the tank. Dividing that by 535 km, that brings us to 11,58 liters/100km or 20,3 mpg. Thats not exactly what the manual said when these cars were new, but it's pretty close and it's a lot better than what I thought it was at first. Apparently the gauge is just a "glass half empty" kind of gauge 😂 . Now I know that I can still go about 135 km (~84 miles) after the low fuel light comes on.

The only casualty of this entire test was my driver side rear wheel:
1730452679352.jpeg
1730452699943.jpeg
1730452716589.jpeg

On one of my laps, while I was overtaking a small van, the woman driving started drifting into the left lane, just as we were side-by-side. She was on her phone. I had to react and I dipped two wheels onto the gravel shoulder for half a second. That was enough for the front tire to kick up a flurry of pebbles which then riddled my rear wheel. I guess this is just something you risk with an agressive fitment, but it still hurts a bit.

Anyways, that's it for now. No actual work done on the car today, but that's not necessarily a bad thing. Thanks for reading!
 
Last edited:
Big(ger) Brake Kit!

The brakes on this car were starting to become a major weak point recently. Since it started as a non-turbo model and later a turbo model with major engine issues and little power, the original (small DSM) brakes were fine for a long time. But since I've rebuilt the engine and installed bigger wheels they proved to be sub-par. They couldn't even lock up the new wheels. I cut the discs on a lathe, installed new pads and bled the lines but the braking performance was the same. Not to mention how silly and small they looked compared to the rim:
1735656408388.jpeg

It was time for and upgrade. But as much as I would love to fill out the whole rim, I just don't have the budget (or the need, really) for a true big brake kit. So I decided to go for the "Outlander bigger brake upgrade".
1735772397581.jpeg

With this upgrade you get 4 extra cm of brake disc (1,57 inch) and 2-piston calipers that fit onto the factory knuckle without any modification.
1735774375688.jpeg
1735774391288.jpeg

Since I don't have an actual Outlander to dismantle, I ordered all the parts for this upgrade separately online. I went on a hunt for the part numbers before to make sure everything would fit. Here's that list in case anyone is looking for it:
  • The part number for the caliper brackets is in the post I linked above, MR307282; these are identical left/right
  • Possible numbers for the right brake caliper are MB950177, MR249965 and MR370776
  • Left brake caliper is MB950176, MR249964 and MR370775
  • The brake discs are MR128659, MR307376, MR205215; these are also identical left/right
I got all of these brand new for about 360€ ($372), including shipping. I then decided to throw just a little more money in there and paint the calipers as well. I also sanded the faces smooth...
1735775651509.jpeg
1735775690350.jpeg

...and put a Mitsubishi logo on there before the clear coat.
1735775908269.jpeg

I think it was worth it, I really like how they turned out.

The install went pretty smoothly, the only thing you really have to do on the car is bend the dust shields flat, so that they clear the larger brake discs. You can do this by grabbing the edges with pliars and simply unfolding them a bit.
1735776221256.jpeg

I wanted to take mine off to bend them on the bench and I broke one of the rusty 10 mm bolts that hold them in the process. Then I realised you can't even get them off over the wheel bearing anyway. And I couldn't drill out the broken bolt because the wheel bearing is in the way. To avoid future rattling, I decided I'd just cut that shield and remove it.
1735774943491.jpeg

I might put it back on if I'm ever replacing the wheel bearing and I get the chance to drill out the broken bolt. Until then we'll call this "weight reduction" and not "a mistake".

Here's the first picture again, next to one with the Outlander kit for comparison:
1735656408388.jpeg
1735776740554.jpeg

Solid upgrade in my opinion, the wheels lock up now and they look a little better as well. I can't wait to test them out properly in the spring.😁

Thanks for reading!
 
Last edited:
Cleaning up the engine bay a little bit

I wrote at the end of update #46 how much the front passenger corner of my engine bay was bugging me. For those that don't know, this is what it looks like:
1739702017696.jpeg

You'll notice that it's quite a bit different from US eclipse models, but let me tell you - it's also quite a bit different from EU eclipse models. The most obvious is the airbox. It's half of a Honda civic airbox with the exposed filter just staring into the fuse box bracket. This is something the previous owners did when they put a turbo on what used to be a GS model. The fuse box is also kind of strange. It is OEM, but because it's a little larger than on the US models, it has a dedicated bracket that it sits on. This is what it looks like on my GS parts car:
1739703353750.jpeg

The stock air intake piping comes in from the passenger fender and goes through that bracket into the engine bay. The bracket and air intake take up a lot of space in the front right corner. Not to mention, my car also has intercooler piping coming through there since it's a turbo swap. All of this made it really hard to replace that Honda civic intake with anything stock or aftermarket.

But I knew I would have to figure it out eventually, so I just went ahead and bought an Injen intake anyways.
1739704035172.jpeg

I got a used one that was just the aluminum elbow and 2 couplers, so I added my own MAF sensor, short air filter and the blue BOW (blow-off valve) hose. With it in the car, there was absolutely no room for the fuse box bracket or the fuse box anymore.
1739704361061.jpeg

I figured I could turn the fuse box 90° and twist the wiring in a way that would let it sit on the frame rail, under the intake.
1739704605879.jpeg

It looked like that could work so I took the OEM bracket and cut out the part that the fuse box sits on, to make a smaller one:
1739704691134.jpeg
1739704721295.jpeg

I bent all the edges I cut 90° in a similar fashion to the original, so that it would look OEM. I welded 2 supports onto the back to sink the bolts in, so that the fuse box could sit flush againts the bracket. I also welded the seams of the edges I bent, even though the material was really thin. I am fortunate to have a good enough welding machine that lets me do welding like this.
1739704855536.jpeg

I painted the new bracket black to make it look as OEM as possible and I have to say I'm pretty happy with how it turned out.
1739705242457.jpeg
1739705199937.jpeg

I also wanted to brace the new intake, so that it wouldn't just flop around if I hit a bump or something. I made a prototype support for it out of wood...
1739705534508.jpeg

...and once I was happy, got it laser cut out of stainless steel:
1739705595618.jpeg
1739705626530.jpeg

1739705727744.jpeg

That whole corner looks a lot nicer now, the only thing that's still not attached anywhere is the coolant overflow bottle. I have this nice OEM one lying around, I just need to find somewhere to mount it.
1739705841057.jpeg
1739705869993.jpeg

The factory spot for it is right where my blow-off valve currently is, so I might be lazy and just leave it loose like this until I get a front mount intercooler and re-route that piping.😬

Thanks for reading!
 
Last edited:
Thanks for taking the time and effort to post your build! Very informative and helpful.
It should make things a little easier for me and others. looking forward to your updates,
 
Thanks for taking the time and effort to post your build! Very informative and helpful.
It should make things a little easier for me and others. looking forward to your updates,
Thank you for the kind words! If this thread helps at least one person, it's already more than I could hope for. Thanks for reading, good luck with your project!
 
Small bug fixes/patch notes #2:

I lost the clutch mid-drive. Nothing catastrophic, but I wasn't really sure what broke in the moment, so I was a little worried while limping the car home. Turns out the hinge between the clutch pedal and the master cylinder gave out. I was running errands for a couple of hours in the city and I guess the constant stopping and going was just too much for the stock assembly. The ACT 2100 is a pretty heavy pressure plate, so this was bound to happen eventually.

I drew a little MS Paint diagram again to describe what I'm talking about, since European GS models seem to have a different clutch pedal assembly than the US models:
View attachment 745659
The blue washer is placed over the nut in the housing, which is then bent at the cuts to lock it in. The washer being plastic, allows for a little movement between the nut and the housing, which is dampened by the rubber piece underneath. But it also means the washer gets hard and brittle with age and eventually, it breaks:
View attachment 745705View attachment 745704
This was causing the master cylinder rod to be able to bend up and out of the way, instead of into the cylinder when I stepped on the clutch. It was a pretty simple fix though, I filed down a standard galvanized steel metric washer to fit the housing and hammered the cuts back over it:
View attachment 745706
The assembly still fits the rubber damper and allows for a little movement. It should be fine for the forseeable future, but if it does break again, I'll take out the rubber piece and weld the nut straight onto the housing.

I stumbled across one of these clevises you’ve described here. Do you have pictures of the body of the master cylinder? Just want to compare what I have against what you have.

IMG_4813.jpeg
 
I stumbled across one of these clevises you’ve described here. Do you have pictures of the body of the master cylinder? Just want to compare what I have against what you have.

View attachment 761028
I tried to take some shots of it for you... suprisingly hard to fit a phone in there😅
20250405_101047.jpg
20250405_101031.jpg
20250405_101017.jpg

Let me know if you need anything else.
 
Follow up as to why I asked. Did some part number searching in Mitsubishi’s European version of ASA and it appears that your clutch master cylinder is part number MB911650. It is the only master cylinder part number that shows available for 2Gs that went overseas.

Interestingly, that’s the same part number as the 2G non-turbo cars in the U.S., both the 420A and 4G64 versions. Here is a photo grab from RockAuto’s 420A DSM selection of master cylinders, all with that clevis:
IMG_4874.jpeg


So, maybe it was just a non-turbo thing for the 2G.

I bought this, supposedly a MB555133 (wish the tag was more clear, that is what the seller advertised it as), from an overseas source.

IMG_4845.jpeg


IMG_4844.jpeg


The MB555133 is the only part number listed for the 1G DSMs overseas. It also matches the part number for all U.S. market 1991-1994 DSMs and all 1990 models without cruise control. Interestingly, it doesn’t appear that any 1G master cylinder has that style of clevis anymore.

IMG_4875.jpeg


Assuming what I received is actually a MB555133, somewhere along the line Mitsubishi revised the design. For the reason you detailed, I can see it being problematic in the long run. But then, why they decided to use it again in the 2G non-turbo cars….

Sorry, thought I’d fill in the details even though I didn’t resolve the “mystery” completely.
 
Exhaust manifold heat shield

The shiny new intake really freshened up the engine bay, so I started looking at other parts that could do the same. The old exhaust manifold heat shield was kind of an eyesore, so I started there.
1747498158035.jpeg

I folded a cardboard template around the OEM manifold and drew it in CAD:
1747498275240.jpeg

I converted the solid part to sheet metal and got the flat pattern laser cut out of 1 mm thick stainless steel. I made a tiny oversight though, when converting to sheet metal, where I left the gaps in the front too wide - this made welding the seams a b*tch, but I just closed my eyes and powered through anyways.
1747498599132.jpeg
1747498620448.jpeg

After a bit of grinding and polishing, you couldn't even tell😉
1747498799061.jpeg

For real though, I did kind of half-ass this project. I just used whatever filler I had on the welding machine spool at the time, that for sure was not stainless, so the seams are starting to show a bit of discoloration. The plan is to eventually get a bigger turbo, which means a custom manifold as well, so I chose not to spend too much time on this particular project, I just wanted to see if I could do it. If anyone wants the file to make this thing for yourself, feel free to DM me. (I fixed the seams, so it's easier to weld now 😇)

Thanks for reading.
 
Assuming what I received is actually a MB555133, somewhere along the line Mitsubishi revised the design. For the reason you detailed, I can see it being problematic in the long run. But then, why they decided to use it again in the 2G non-turbo cars….
I'd actually consider the clevice you and I have to be the more "modern" one of the two. I figure Mitsubishi wanted to add another level of comfort to the pedal, so they added the rubber damper. They just didn't account for 2100 lbs clutch pressure plates, which is why I'm assuming mine broke.

I recently ordered a new master cylinder with the more "simple" clevice design, just to see what the differences are.
 
Add Value - Be Respectful - No Trolling - No Misinformation - Participate Often!
Support Vendors who Support the DSM Community

Build Thread Updates

Latest Classifieds

Back
Top