OK, I thought I'd give a shot at giving back here. I don't have rights to post anywhere else yet so if this is useful have at it!
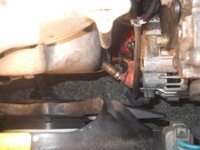
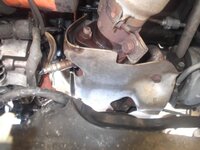
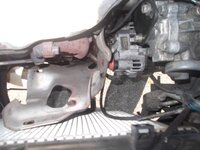
I didn't see any step by steps for the O2 sensor install on a 97 GST so here is my version. I have photos as well but it seems I can't post them either. At least not more than three: One is a view showing the sensor from the top, one shows the bottom view and one shows everything out of the way and the shield loosened.
Remove the + battery cable. You are working near the alternator and a mis-step near that + post will be exciting
Remove the fan so you get more room to work. Undo the modular plug and 4 10mm bolts - 2 top, 2 bottom. Let it down through the bottom of bay.
You will also do well to remove the oil dipstick - it gets in the way as well. One 14mm bolt holds that on. I needed to back off the coolant hose right next to it so I could get the socket to it. Not all the way or you will have a mess when it starts pouring out! Just far enough to get a socket in past it. The dipstick holder pulls out of the engine - it takes a pretty good tug as there is a seal near the end.
I also unplugged the alternator - the wires were getting in the way when I was screwing the O2 sensor back in.
The lower heat shield has 5 12mm bolts - well mine had 4 but there are 5 holes The lower left one and the one nearest the O2 sensor are easier to get at from underneath.
I didn't bother trying to remove the shield as I had plenty of room to back it off and expose the O2 sensor.
I am not sure what on O2 sensor wrench is but a 22mm did the trick for me. The plug is buried under the large air intake hose that goes to the intake manifold. I got to it by reaching around all that. The plug is mounted on a slide on the head - it slides off to the rear.
I found that a battery cable cleaner brush was just about perfect for cleaning out the threads in the manifold. Per directions I put a little anti-seize on both the manifold side and the threads of the new O2 sensor. I assume you should be careful not to get it on the sensor area itself. I didn't see any torque specs - mostly just get it on tight so I did.
Be sure to screw the O2 sensor through the heat shield - I left it loose again so I could wrench the sensor back on with it in place. Re-route the wiring where the old one was. I had three clips across the top of the upper heat shield before it went around the side.
Put the connector back on the alternator, put the dipstick back on - again it takes a little effort to get it seated all the way. I did a few visual checks from underneath until I got it all the way down. The bolt won't go back in until you get it anyway.
Slide the coolant hose back into place.
Tighten the bolts on the heat shield. Put the fan back into place and re-connect the plug. After a quick visual check of the compartment I found I had disconnected one of the lines from the air injector when I was messing with the plug so that got put back on. Back goes the battery cable and you are in business.
I didn't see any step by steps for the O2 sensor install on a 97 GST so here is my version. I have photos as well but it seems I can't post them either. At least not more than three: One is a view showing the sensor from the top, one shows the bottom view and one shows everything out of the way and the shield loosened.
Remove the + battery cable. You are working near the alternator and a mis-step near that + post will be exciting

Remove the fan so you get more room to work. Undo the modular plug and 4 10mm bolts - 2 top, 2 bottom. Let it down through the bottom of bay.
You will also do well to remove the oil dipstick - it gets in the way as well. One 14mm bolt holds that on. I needed to back off the coolant hose right next to it so I could get the socket to it. Not all the way or you will have a mess when it starts pouring out! Just far enough to get a socket in past it. The dipstick holder pulls out of the engine - it takes a pretty good tug as there is a seal near the end.
I also unplugged the alternator - the wires were getting in the way when I was screwing the O2 sensor back in.
The lower heat shield has 5 12mm bolts - well mine had 4 but there are 5 holes
 The lower left one and the one nearest the O2 sensor are easier to get at from underneath.
 I didn't bother trying to remove the shield as I had plenty of room to back it off and expose the O2 sensor.
I am not sure what on O2 sensor wrench is but a 22mm did the trick for me. The plug is buried under the large air intake hose that goes to the intake manifold. I got to it by reaching around all that. The plug is mounted on a slide on the head - it slides off to the rear.
I found that a battery cable cleaner brush was just about perfect for cleaning out the threads in the manifold. Per directions I put a little anti-seize on both the manifold side and the threads of the new O2 sensor. I assume you should be careful not to get it on the sensor area itself. I didn't see any torque specs - mostly just get it on tight so I did.
Be sure to screw the O2 sensor through the heat shield - I left it loose again so I could wrench the sensor back on with it in place. Re-route the wiring where the old one was. I had three clips across the top of the upper heat shield before it went around the side.
Put the connector back on the alternator, put the dipstick back on - again it takes a little effort to get it seated all the way. I did a few visual checks from underneath until I got it all the way down. The bolt won't go back in until you get it anyway.
Slide the coolant hose back into place.
Tighten the bolts on the heat shield. Put the fan back into place and re-connect the plug. After a quick visual check of the compartment I found I had disconnected one of the lines from the air injector when I was messing with the plug so that got put back on. Back goes the battery cable and you are in business.


