
Insane20
10+ Year Contributor
- 545
- 11
- Jun 12, 2012
-
Natrona Heights,
Pennsylvania
Hey guys, I figured I would finally start one of theses on my 95 talon tsi awd. I should have started one long ago, so forgive me for the lack of pics.
So about 2 years ago I was a honda guy, but i was getting sick of hondas to be honest so i was looking for a new project. I was really looking for a gsx and since i am a mechanic it really didnt matter to me if it needed work on not. I searched all over trying to find one that wasnt rotting away when i came acrossed this purple and black talon tsi awd. it had a the 6 bolt swap done on it "90k on the motor" and around 116 on the dash. it had a full 3 inch srs exhaust, knock off greddy bov, a fmic with hard piping,and 20g airesearch turbo with no supporting mods. it oviously needed a paint job, a few interior peices and the turbo was blown. the previous owner is a member on here so ill post up the build journal he started on the car so you guys can have a little backround on it.
http://www.dsmtuners.com/forums/photoshop-photography-forum/422977-story-saving-talon-newest-pics.html
The previous owner did a good job getting it that far, but it still needed some work. so anyways i ended up buying the talon for 2800 bucks. I fell in love with it the second that turbo spooled on the test drive. On the way home i noticed a few things wrong with the car, it was boosting to 17 psi on that 20g with no supporting mods. so i knew that it was running lean even though it didnt have a wideband and since the turbo was shot i figured i would just start from scratch with a new turbo. also on the drive home the suspension was making a lot of noise, the RR wheel bearing was humming really bad and the aftermarket radio SUCKED! .
.
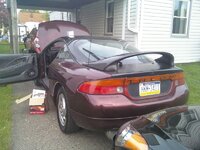
heres a pic of it the day i got it.
 [/url][/IMG]
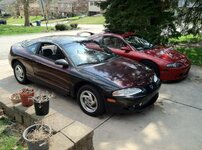
so the fist thing i did was get rid of the thumb nail wing. i know i will be bashed for this but i put the eclipse high rise on so bash away. i really like the way it looks though.
 [/url][/IMG]
so after that i started doing maintnence. once i did all of that i slowly started upgrading. ill give a list of the mods that i did, but remember this has been over the course of 2 years so sorry if i forget anything.
LIST OF CURRENT MODS:
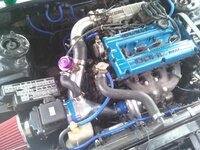
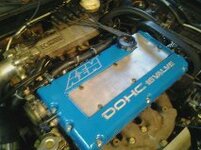
BOLT ONS- MHI evo3 16g built by justin, SRS 3 inch turbo back exhaust, EBAY intake pipe + MAF adapter, EBAY FMIC+ hard piping, custom MBC, Godspeed 38mm external wastegate, fowardautomotive external wg o2 housing, STM spring-loaded dipstick, custom catch can, custom intercooler sprayer, greddy knock off adjustable BOV, rear mounted battery
 [/URL][/IMG]
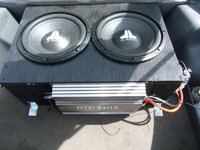
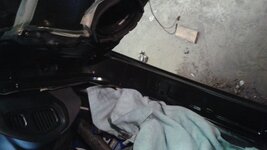
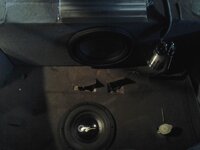
AUDIO- 1 alpine type r 12inch subwoofer in a custom box, 1 cz audio 10 inch subwoofer mounted in trunk floor, 2 rear pioneer 6x9s, 2 pioneer door speakers, 2 pioneer tweeter mounted in stock tweeter location. pioneer head unit with bluetooth
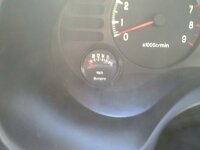
GAUGES/TUNING- Sunpro volt gauge "mounted in place of stock boost gauge, apexi turbo timer, apexi safc2, aem wideband, glowshift boost gauge/water temp gauge/oil pressure gauge
DRIVETRAIN-Dsm grave yard thick rear race axles
SUSPENSION/WHEELS-16 inch ford probe wheels,tokico hp struts and lowering springs
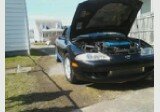
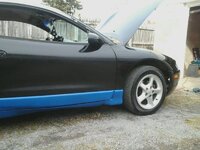
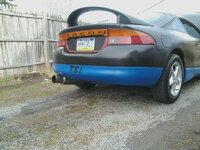
as it sits today
 [/url][/IMG]
 [/url][/IMG]
 [/URL][/IMG]
its spray painted in those pics but as of right now it is down to bare metal sitting in the garage. this is the first winter i get to put it away and while its down i plan on dong a real paint job the right way. i also plan on doing rear brakes, a wire tuck, a 190lph fuel pump, 550cc injectors or 560 evo injectors. my goal is for 18- 20 psi this spring. ill post pics and updates of my progress!
So about 2 years ago I was a honda guy, but i was getting sick of hondas to be honest so i was looking for a new project. I was really looking for a gsx and since i am a mechanic it really didnt matter to me if it needed work on not. I searched all over trying to find one that wasnt rotting away when i came acrossed this purple and black talon tsi awd. it had a the 6 bolt swap done on it "90k on the motor" and around 116 on the dash. it had a full 3 inch srs exhaust, knock off greddy bov, a fmic with hard piping,and 20g airesearch turbo with no supporting mods. it oviously needed a paint job, a few interior peices and the turbo was blown. the previous owner is a member on here so ill post up the build journal he started on the car so you guys can have a little backround on it.
http://www.dsmtuners.com/forums/photoshop-photography-forum/422977-story-saving-talon-newest-pics.html
The previous owner did a good job getting it that far, but it still needed some work. so anyways i ended up buying the talon for 2800 bucks. I fell in love with it the second that turbo spooled on the test drive. On the way home i noticed a few things wrong with the car, it was boosting to 17 psi on that 20g with no supporting mods. so i knew that it was running lean even though it didnt have a wideband and since the turbo was shot i figured i would just start from scratch with a new turbo. also on the drive home the suspension was making a lot of noise, the RR wheel bearing was humming really bad and the aftermarket radio SUCKED!
.heres a pic of it the day i got it.
so the fist thing i did was get rid of the thumb nail wing. i know i will be bashed for this but i put the eclipse high rise on so bash away. i really like the way it looks though.
so after that i started doing maintnence. once i did all of that i slowly started upgrading. ill give a list of the mods that i did, but remember this has been over the course of 2 years so sorry if i forget anything.
LIST OF CURRENT MODS:
BOLT ONS- MHI evo3 16g built by justin, SRS 3 inch turbo back exhaust, EBAY intake pipe + MAF adapter, EBAY FMIC+ hard piping, custom MBC, Godspeed 38mm external wastegate, fowardautomotive external wg o2 housing, STM spring-loaded dipstick, custom catch can, custom intercooler sprayer, greddy knock off adjustable BOV, rear mounted battery
AUDIO- 1 alpine type r 12inch subwoofer in a custom box, 1 cz audio 10 inch subwoofer mounted in trunk floor, 2 rear pioneer 6x9s, 2 pioneer door speakers, 2 pioneer tweeter mounted in stock tweeter location. pioneer head unit with bluetooth
GAUGES/TUNING- Sunpro volt gauge "mounted in place of stock boost gauge, apexi turbo timer, apexi safc2, aem wideband, glowshift boost gauge/water temp gauge/oil pressure gauge
DRIVETRAIN-Dsm grave yard thick rear race axles
SUSPENSION/WHEELS-16 inch ford probe wheels,tokico hp struts and lowering springs
as it sits today
its spray painted in those pics but as of right now it is down to bare metal sitting in the garage. this is the first winter i get to put it away and while its down i plan on dong a real paint job the right way. i also plan on doing rear brakes, a wire tuck, a 190lph fuel pump, 550cc injectors or 560 evo injectors. my goal is for 18- 20 psi this spring. ill post pics and updates of my progress!


