Calan
DSM Wiseman
- 7,250
- 400
- Jan 16, 2007
-
OKC,
Oklahoma
It's ALIVE!
It started right up, and other than a couple of very minor issues it has been running pretty well. The only real "problem" I've had so far is a weeping turbo oil feed line that just doesn't want to go away. It's not enough to even smoke or drip, but still...I'll probably end up going to a stainless line with AN fittings in the next week or so.
In the interest of being complete, I figured I better add one more post to wrap things up and cover the rest of the details.
The first of the remaining projects that I tackled was getting the fans and radiator mounted. Once the fans were attached to the radiator, I wired in the stock temp switch and tied them both together so that they both always run.
View attachment 1150
And then it was on to the J-pipe and lower IC piping. Pretty straight-forward stuff here.
View attachment 1152 View attachment 1153
Once the piping was complete, I put together a custom MBC and bracket, and mounted it behind the passenger-side headlight. Lines run through grommets in the rear headlight wall over to the J-pipe nipple and WGA actuator. The image below shows it before I inserted the grommets and ran the lines.
View attachment 1155
********************
EDIT:
And here it is after I wired up the $0 DIY dual-stage boost controller I came up with. The second pic shows the "go faster" switch on the left side of the console. And before the ricer comments start flying, I have my reasons for needing to this.
View attachment 1163 View attachment 1164
********************
I fabricated some "invisible" screens for the lower front clip to protect the oil cooler, IC, and air filter. I'm not a big fan of the obvious chicken-wire looking stuff, so these screens were made from a fine steel mesh, and painted black. This made them blend nicely with the white front clip, and the visible polished aluminum behind makes them almost unnoticable.
The screens were tightly formed to the back of the front clip, and are attached with small screws where the thickness of the fiberglass edges make it possible. I used heavy-duty zip ties across the top of the main opening.
View attachment 1159 View attachment 1160
After all the pre-start stuff was finished (filling/bleeding fluids, checking the electrical, etc.), I finally fired it up at 11:30pm Sep 23rd, and surprisingly it started immediately on the first crank.
After setting the timing, BISS, and getting the ECU somewhat dialed in the next day, I took it around the block for the maiden voyage on Friday the 25th. The pic below shows the car when I first rolled it out of the garage, still missing the hood, headlights, heatshield, and a few other odds and ends.
View attachment 1154
One thing became immediately obvious...the vibration level wasn't gonna cut it. I'm no stranger to vibrating hotrods, but this was excessive. It felt like I had installed really good solid mounts rather than Prothanes, and I was only a day or two away from loosing the rear-view mirror and what little sanity I have left.
After a bit of detective work, I decided that the driver's side mount was the culprit. The problem was that:
1). The Prothane insert had very little flex, and more importantly
2). The inserts were too wide, causing them to bind in the frame mount and thus not allowing the mount to work as it's designed too.
Since I didn't have much to loose, I decided to experiment rather than go back to stock (and spend more $$$ I don't have). What I came up with was to drill two "arcs" made up of three 1/2" holes each, basically where the cutouts were in the stock mount, and two 3/8" holes at the front and back. This should provide some vibration damping without weakening the mount or making it soft-feeling.
BTW - The prothane inserts were surprisingly easy to machine; common drill and router bits left nice clean holes and surfaces, which usually isn't the case with rubber and some polyurethanes.
For the binding problem, I chucked up a 1/2" straight router bit in my drill press running at the highest speed, and milled 1/16" off the outer surface of each of the inserts. This allows the metal sleeve in the center to clamp properly in the frame, and gives the insert the clearance it needs to flex with the engine vibrations.
WARNING: If you try this, be sure to keep your fingers clear, hold the insert tightly, and use a sharp bit. It cuts pretty well, but like with any rubber or polyurethane, the bit can and will tend to grab a little. I accept no responsibility for missing finger tips or other body parts.
Notice in the last pic below that there is now some space between the sides of the inserts and the frame opening, which allows the mount to actually work as designed.
View attachment 1156 View attachment 1157 View attachment 1158
The improvement is like night and day. The violent shaking is completely gone, but it still has that firm feel to it and feedback from the motor/drivetrain is much more precise now.
Last but not least, the factory hood prop had to go. A trip to O'Reilly's and a bit of experimentation and number crunching yielded a pair of Mighty Lift hood struts. I welded nuts to the hood, and then notched the engine bay "rails" and welded nuts into them as well for the ball studs to screw into, and clipped the struts into place.
Although the struts are way nicer than the factory hood prop, the ones I bought are a bit too strong, and they are also VERY close to rubbing the hood. So I'll probably be tweaking them in the next few weeks for a better fit.
View attachment 1151 View attachment 1161
I'm also printing some custom decals (on automotive vinyl) for the engine bay fuse boxes. The image below shows the artwork; I'll edit this blog entry with another pic or two once they are installed.
View attachment 1162
*****************************************
Overall, I'm pretty pleased. It was a ton of work and a lot of time (around 750-800 hours at my best guess), but well worth it.
I've got around 250 miles on the motor now, and have it mildly tuned at 15psi. In the next few weeks (or days) I'll be upping that to 20psi and dialing it in. Future plans include that new built tranny that I couldn't afford this time around, and hopefully in a few months I'll be bolting on an HX35.
If any of you have questions on anything, send me an email or post it below. (I'll try to keep up with the questions and comments on here as much as possible).
Thanks for playing along!
It started right up, and other than a couple of very minor issues it has been running pretty well. The only real "problem" I've had so far is a weeping turbo oil feed line that just doesn't want to go away. It's not enough to even smoke or drip, but still...I'll probably end up going to a stainless line with AN fittings in the next week or so.
In the interest of being complete, I figured I better add one more post to wrap things up and cover the rest of the details.
The first of the remaining projects that I tackled was getting the fans and radiator mounted. Once the fans were attached to the radiator, I wired in the stock temp switch and tied them both together so that they both always run.
View attachment 1150
And then it was on to the J-pipe and lower IC piping. Pretty straight-forward stuff here.
View attachment 1152 View attachment 1153
Once the piping was complete, I put together a custom MBC and bracket, and mounted it behind the passenger-side headlight. Lines run through grommets in the rear headlight wall over to the J-pipe nipple and WGA actuator. The image below shows it before I inserted the grommets and ran the lines.
View attachment 1155
********************
EDIT:
And here it is after I wired up the $0 DIY dual-stage boost controller I came up with. The second pic shows the "go faster" switch on the left side of the console. And before the ricer comments start flying, I have my reasons for needing to this.
View attachment 1163 View attachment 1164
********************
I fabricated some "invisible" screens for the lower front clip to protect the oil cooler, IC, and air filter. I'm not a big fan of the obvious chicken-wire looking stuff, so these screens were made from a fine steel mesh, and painted black. This made them blend nicely with the white front clip, and the visible polished aluminum behind makes them almost unnoticable.
The screens were tightly formed to the back of the front clip, and are attached with small screws where the thickness of the fiberglass edges make it possible. I used heavy-duty zip ties across the top of the main opening.
View attachment 1159 View attachment 1160
After all the pre-start stuff was finished (filling/bleeding fluids, checking the electrical, etc.), I finally fired it up at 11:30pm Sep 23rd, and surprisingly it started immediately on the first crank.
After setting the timing, BISS, and getting the ECU somewhat dialed in the next day, I took it around the block for the maiden voyage on Friday the 25th. The pic below shows the car when I first rolled it out of the garage, still missing the hood, headlights, heatshield, and a few other odds and ends.
View attachment 1154
One thing became immediately obvious...the vibration level wasn't gonna cut it. I'm no stranger to vibrating hotrods, but this was excessive. It felt like I had installed really good solid mounts rather than Prothanes, and I was only a day or two away from loosing the rear-view mirror and what little sanity I have left.
After a bit of detective work, I decided that the driver's side mount was the culprit. The problem was that:
1). The Prothane insert had very little flex, and more importantly
2). The inserts were too wide, causing them to bind in the frame mount and thus not allowing the mount to work as it's designed too.
Since I didn't have much to loose, I decided to experiment rather than go back to stock (and spend more $$$ I don't have). What I came up with was to drill two "arcs" made up of three 1/2" holes each, basically where the cutouts were in the stock mount, and two 3/8" holes at the front and back. This should provide some vibration damping without weakening the mount or making it soft-feeling.
BTW - The prothane inserts were surprisingly easy to machine; common drill and router bits left nice clean holes and surfaces, which usually isn't the case with rubber and some polyurethanes.
For the binding problem, I chucked up a 1/2" straight router bit in my drill press running at the highest speed, and milled 1/16" off the outer surface of each of the inserts. This allows the metal sleeve in the center to clamp properly in the frame, and gives the insert the clearance it needs to flex with the engine vibrations.
WARNING: If you try this, be sure to keep your fingers clear, hold the insert tightly, and use a sharp bit. It cuts pretty well, but like with any rubber or polyurethane, the bit can and will tend to grab a little. I accept no responsibility for missing finger tips or other body parts.
Notice in the last pic below that there is now some space between the sides of the inserts and the frame opening, which allows the mount to actually work as designed.
View attachment 1156 View attachment 1157 View attachment 1158
The improvement is like night and day. The violent shaking is completely gone, but it still has that firm feel to it and feedback from the motor/drivetrain is much more precise now.
Last but not least, the factory hood prop had to go. A trip to O'Reilly's and a bit of experimentation and number crunching yielded a pair of Mighty Lift hood struts. I welded nuts to the hood, and then notched the engine bay "rails" and welded nuts into them as well for the ball studs to screw into, and clipped the struts into place.
Although the struts are way nicer than the factory hood prop, the ones I bought are a bit too strong, and they are also VERY close to rubbing the hood. So I'll probably be tweaking them in the next few weeks for a better fit.
View attachment 1151 View attachment 1161
I'm also printing some custom decals (on automotive vinyl) for the engine bay fuse boxes. The image below shows the artwork; I'll edit this blog entry with another pic or two once they are installed.
View attachment 1162
*****************************************
Overall, I'm pretty pleased. It was a ton of work and a lot of time (around 750-800 hours at my best guess), but well worth it.
I've got around 250 miles on the motor now, and have it mildly tuned at 15psi. In the next few weeks (or days) I'll be upping that to 20psi and dialing it in. Future plans include that new built tranny that I couldn't afford this time around, and hopefully in a few months I'll be bolting on an HX35.
If any of you have questions on anything, send me an email or post it below. (I'll try to keep up with the questions and comments on here as much as possible).
Thanks for playing along!


 ? Looks good by the way. Thumbs up!


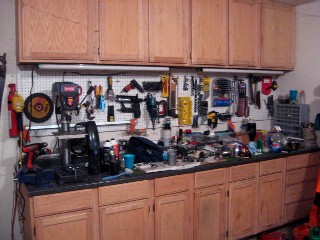
 ), but here's a pic of the messy bench: