
The Central Hub for DSM Community and Information

For 1990-1999 Mitsubishi Eclipse, Eagle Talon, Plymouth Laser, and Galant VR-4 Owners. This is where the DSM platform history is documented and archived. Log in to help us in our mission, and to remove most ads from the browsing experience.

image.jpeg

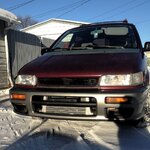
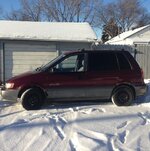
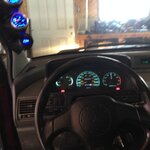
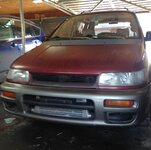
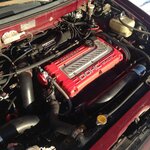
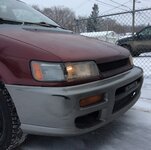
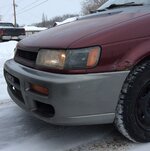
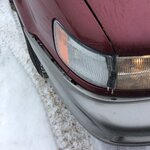
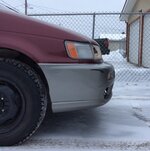
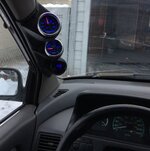
1992 Colt AWD Space Runner RVR EVO

AWD 4g63t swapped sleeper family minivan.

This site may earn a commission from merchant affiliate links, including eBay, Amazon, and others.

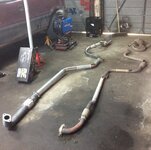
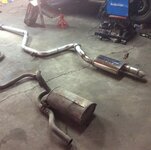
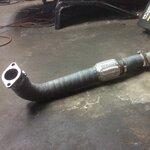
I am currently working on fitting a 3" exhaust onto the van. Trying to keep the exhaust quiet. I have not chosen a muffler yet, i might install the stock 1g TSI muffler to the 3" pipe for the time being till i find a good quiet 3" muffler for a decent price. I don't believe the stock 4g64 van muffler was designed to be in a high flow turbocharged system... I will post some pictures later.
 
stock exhaust is super restrictive as far as turbo use goes. will be a massive upgrade to get a 3" on the car. I dont like the way the factory exhaust is routed in the back. just snakes around too much. but there is lots of room for two good size mufflers before rear axle. so I am initially going to try a quiet two muffler side exit setup. if that doesnt work out I will add the final rear section. anxious to hear how much the factory setup weighs. looks heavy.

for those who have never seen one of these the gas tank does not have a big tunnel in it. only enough room for the axle to pass. the exhaust is routed around the tank. then up and over rear axle similar to mirage or FWD eclipse. pretty much biggest snake I have seen.
 
EGLTAWLN updated 1992 Colt AWD Space Runner RVR EVO


View updates to this DSM profile...

250757-ee9ac47d4d2fbc0ff37b2035c9250fb7.jpg
250749-38985174242e3ef29a80e51dd3c5d1d6.jpg
250751-20a9c490f28ebffbe86eefc4399ac0fe.jpg

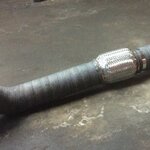
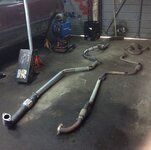
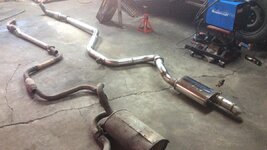
This is the completed 3" exhaust system i built this weekend. Mig welded with fluxcore .035 wire. Exhaust tone is really nice. I need to redo the tip, but i like it.
But now my tune is out to lunch. My ECu has the old exhaust massive back pressure tune. Now i have zero back pressure, its flowing way more and my 14b seems to be out of control spiking to 24psi before i can get off the gas.
So ill probably be swapping out to a 16g with turbine housing ported as soon as i figure out if i can control the boost creep/spike. If the 14b settles down with a good tune, i might rock it for a while longer yet.

Stock exhaust weighed in at 35lbs minus cat, new exhaust complete system is 34lbs.
 

Attachments

Last edited:
are you logging boost to see this spike? gauges can easily have a false spike on fast spooling turbos. needles have mass that cant stop quickly. I have seen 5psi needle overrun on hta green size turbo.
 
Yes i am logging boost. Boost controller was set to 18psi, but the new exhaust pushed past that 18psi boost controller barrier no problem.
After some tuning, i have found the turbo spikes to 24-25 psi and then settles to 20 by redline. I had to increase my VE numbers quite a bit and now i am over 100 in most cells where the turbo is spooling up. So now its back to rescaling global and retuning the VE chart.
I think the "spike" i am seeing is how fast the turbo spools without the factory N/A exhaust holding it back. Lots of popping and misfiring going on with the tune being so lean right off the bat. I may have to take down the spark plug gap a few sizes if it doesn't clear up.
 
Swapped out my spark plugs to BR7ES today. The BR8 series plugs i had been trying were too cold for my setup and caused spark blow-out at WOT unless i took the gap down to 0.018, but then my idle would suffer as it introduced a random misfire. Gapped the new plugs to 0.025. Then I removed my coils and sanded off all the electrical connectors till they were shiny. Then I shined up and re-bent the spark plug wire ends that go into the coils so that they would make contact better.
I re-plumbed my vacuum lines so that my boost gauge goes to the P port, and FPR and MAP are teed together off the manifold.
 
I got some bpr6eix plugs today. $40! I couldn't find 7 series iridium plugs either of my local part stores. They stocked 6's and 8's series but no 7's. So i put them in gapped at .025 and let her idle for a minute and it seems the idle miss/stumble is gone.
Here's hoping it holds under mad 14b WOT boost pressure.
 
I swapped out coils today with a good set from out of my talon and the WOT miss is gone! I decided to swap the spark plugs to the br7es i had on the shelf gaped to .021 and at WOT it pulls nice and there is no miss at idle anymore. I didn't quite like how the Iridium plugs felt on the butt dyno.
I have decided to go get bpr7es plugs and gap them to 0.021-0.025 and see if it behaves at WOT as i would like to achieve the better combustion that comes with a protruding plug.
I gaped them to 0.022 and it idles very nice and WOT is solid.
I also stole the holset wastegate off the talon and installed it on the van. Good for 20+ psi stock.
Time for final tune!
 
Last edited:
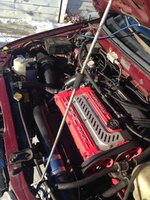
I really wanted to put a Cyclone on the van, but i did not have enough money to blow on parts, so I pulled ANOTHER part off my talon and bolted it up to my van. I have a Cyclone on both my Talon and Galant, but I am daily driving my van. So I decided since I can't have 3 Cyclones right now, the talon is going back to stock intake manifold and van gets the cool manifold technology.
I have AC still on the van and had read that the cyclone interferes with the AC compressor on a domestic 1g but it was grind-able. I decided to try and make it work.

This is not really a project that you want to do with the engine in the engine bay.

Once i got to the point that i was in deep, test fitting the manifold on the van, i could not see the interference issue, too much stuff in the way. And i had to use the van for work the next day... So i mocked up a spare engine complete with head gasket and head and AC bracket and spare crap AC compressor. I put the Cyclone on and immediately the problem jumped out. The aluminium AC supply hose housing was preventing the Cyclone from mateing to the head. I tried the grinding method with a flapper wheel, but was uncomfortable grinding the Cyclone very much as I didn't want to trash it. So I kept taking material off the aluminium housing, but then I was uncomfortable with how much I was removing but still not making clearance. It was gonna leak soon...

So I stepped back and thought about it and decided the AC compressor needed to pivot down and stay square to make this work. The AC bracket for a 1g has a "shelf" on the bottom of it to assist installing it. I cut these "shelves" off with a grinder to allow the AC compressor to pivot down. I put 5 - 1/8" flat washers between the bracket and compressor on both top studs and left the bottom 2 studs alone, then I tightened it all down. The long stud bolts flexed nicely and the compressor snugged up to the bracket, and the AC compressor was out of the way!
The Cyclone then went on with no problems(ya right) with almost a 1/4" clearance between the compressor and the Cyclone. Got it bolted on and running by the end of the night.
AC belt was a little tighter, but no issue.
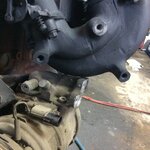
So here are the pictures.
van3-jpg.292794.jpg
First pic shows the gap at the head and the manifold touching the AC compressor and shows the "shelf" under the compressor that need to be cut off.
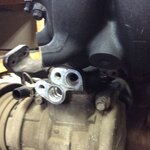
van1-jpg.292792.jpg
Second pic shows the interference closer
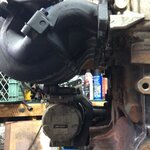
van2-jpg.292793.jpg
Third pic another interference shot
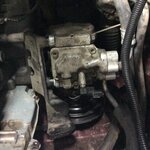
van4-jpg.292795.jpg
Fourth pic shows the 5 washers installed on modified bracket installed on my van prior to installing Cyclone
van5-jpg.292796.jpg
Last picture shows final clearance achieved on the mock up engine with 5 washers installed and the Cyclone mated to the head properly.
 
Last edited:
I attempted to do a front ball joint repair on the van this weekend and almost rendered the vehicle useless!
When i bought the van it had shot ball joints, i couldn't locate oem replacement ball joints, only replacement control arms that had new aftermarket ball joints installed. I purchased 2 dorman control arms from rockauto last spring for $60 each and installed them without too many issues.
Within 3 months i noticed the outer boots cracking on the ball joints. I was disappointed and did a lot of searching and i did source out some aftermarket ball joints from Febest for mitsubishi expo's and rvrs. looked like decent quality so i bought 2.
I got around to installing them this weekend, only once i had the old ball joint pressed out, the new ball joint was incorrect. It didn't want to press in it was way too loose! So i tried my parts store for some 1g talon ball joints. Got an aftermarket nascar ball joint and it didn't fit either, but it was much closer to the same size and the one i pressed out.
Then i did more research and found mitsubishi did not offer replacement ball joints in many of their vehicles and they wanted you to purchase a new control arm assembly instead.
So my aftermarket dorman control arm has some random sized ball joint pressed into it that i can't source out. I either source out a oem control arm assembly or i can buy another dorman that will fail in a year....
So i am waiting to see what my options are for a oem control arm and see how much that will cost me.
I cleaned out the old ball joint i removed and regreased it and pressed it back in and put a new boot on it for now. Put it all back together and it does sound better. Still need to fix it properly. To be continued...
 
Same thing happened to me in my scion xB. Was doing a brake job and noticed the ball joint was loose as hell. The control arm was previously under 5k miles but was 2-3 years old.

Bought a aftermarket Bjoint and didn't even have to press it in, very floppy. I said F-it and bought another damn dorman control arm from autozone.

So0o0 yeah I feel you on that LOL
 
shoot that sucks. I put those new doorman arms on as well. but I did keep my old ones in case I wanted to rebuild them with doorman parts. the parts to rebuilt was around 43 per side, the new doorman 56, and the new mitsu ones around 170 per side. I also tried to find a sheetmetal arm that would swap from another car. the stock arms are 12lbs a side made of cast. early evo/mirage and talon arms dont have same dimensions.

the new arms did make car ride nicer. I did find the quality not so great. the boot for ball joint sucks. it didnt compress down well and looked like it might become a problem with use. the tab for sway bar was also not made with proper angle/clearance. I had to bent the tab so link joint would clear without rubbing. I had to bend them so much I was worried they would snap off.
 
Last edited:
I also tried to find a sheetmetal arm that would swap from another car. the stock arms are 12lbs a side made of cast. early evo/mirage and talon arms dont have same dimensions.
i was wondering if another arm would fit... crazy cast iron control arms! Why mitsu? Stupid heavy arms. Most solid piece of metal on the whole car, besides the block.
 
I did find the the evo 8 arms (7ish lbs) are the correct geometry. but ball joint mount and rear mount is wrong. the evo 5-6 arms should swap in. but they fetch near 300 on ebay and they would have lots of miles on them. beck arney has arms on rock auto for 129. I bet they are factory like quality.
 
I did find the the evo 8 arms (7ish lbs) are the correct geometry. but ball joint mount and rear mount is wrong. the evo 5-6 arms should swap in. but they fetch near 300 on ebay and they would have lots of miles on them. beck arney has arms on rock auto for 129. I bet they are factory like quality.

i'm gonna look into the evo arms thanks for the tip.
i saw those beck arney's, but i am getting sick of buying non proven things, just like i did with the dormans. i should have done more research before starting my trek down this control arm replacement path.

I JUST WANT A DAMN BALL JOINT! sigh...
 
This weekend i decided to tackle the power door lock system on the van.

The vans power door lock system was pretty basic, with a button on the dash and passenger door to lock and unlock all the doors.

The key did not activate the power lock system, so if you came up to the passenger side with a baby, you had to open the passenger lock, open the door reach inside and hit the unlock button and then you could get into the back door finally.
Same with the drivers side, open the lock open the door reach to the dash hit the button then everything opens.

I liked the system on my Galant where key goes in and all doors unlock or lock.

So I have a Talon parts car in my backyard that had power locks. I removed the two door actuators, the master relay and the power door controller box from the Talon. Armed with these free parts, I modified my van and now I have proper power door function!

It was a pain in the ass to run one more wire into each door to make the circuit work, I had to unbolt the doors and remove then to wire it up. But it works! Turning the key in either the drivers or passengers doors activates the power lock system.

The button on the dash no longer works and neither does the one on the passenger door, but I might try to figure out how to wire them in to the new setup...
 
Last edited:
wow such an aggressive move to get remote locks. thing is all these cars come from factory with remote lock system prewired. you just have to remove panel behind driver seat and plug it in. hard part is finding parts car that has the system with remote still intact. I was lucky enough to score one for 30 shipped.
IMG_2247_zpsfmnutjar.jpg
IMG_2248_zpswh3hfpky.jpg
 
I wish I had the factory remote system! My van didn't come with the option.
I really didn't want a key FOB, just ANOTHER thing on my already too big keychain. I was looking at a ebay remote kit that gives you alot of options for remote functions, only $15, but I still don't want a FOB. And if I had a FOB, it would have to have a car starter and 2 way alarm, which I may add later....
I figure my approach was the best I could get for free without adding a FOB. It has greatly improved access into the vehicle, wife is happy, and it gave me a project to do. Although I almost regretted starting on it a few times during install. I had a wire come loose after i had the system already working and suddenly the system was dead, I thought I burned out something for a while then I found the loose wire and everything worked again, whew!
 
I ordered a new set of 2g ignition coils and new set of 1g NGK spark plug wires from Jnz Tuning. I modified the 2g bracket to mount to the top of the 1g intake manifold as the 2g coils are a mirror image of the 1g coils and they don't quite "bolt up" like had hoped. I opened up the spark plug gap to 0.022 and idle misfire has almost disappeared, and still no blow out at WOT 24psi.
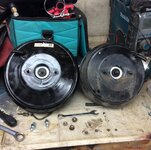
I also ordered up new rear drum brake from rockauto and new rear wheel bearing. Hope they show up before next weekend.
 
Add Value - Be Respectful - No Trolling - No Misinformation - Participate Often!
Support Vendors who Support the DSM Community

Build Thread Updates

Latest Classifieds

  • For sale 4G63 3 inch Magnaflow SS high flow cat
    3 inch Magnaflow stainless cat. High flow. 18.25 inches. Flange holes are 4 1/8 center. Has...
    • Galant665
    • Updated:
  • For sale 4G63 Forge Motorsports BOV
    Original Forge Motorsports bov. Adjustable with over 80 clicks on the dial. Nice to use for...
    • Galant665
    • Updated:
  • Wanted 1g 1991 Black Cherry Eagle Talon
    5-speed
    • bamatalon
    • Updated:
    • Expires
  • For sale Misc Left Over Parts
    Hello, I have a few left over parts for sale, these do not include shipping, please pm me for a...
    • r3dmak
    • Updated:
    • Expires
  • For sale Alpha Injection Clinic 2200cc for 4G63 DSM/EVO
    I have a set of Alpha Injection Clinic 2200cc high z injectors for DSM/EVO. I am stepping up to...
    • spoolinpos
    • Updated:
    • Expires
Back
Top