

The Central Hub for DSM Community and Information

For 1990-1999 Mitsubishi Eclipse, Eagle Talon, Plymouth Laser, and Galant VR-4 Owners. This is where the DSM platform history is documented and archived. Log in to help us in our mission, and to remove most ads from the browsing experience.

galant 1.jpg

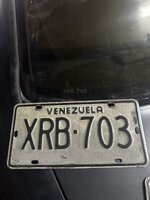
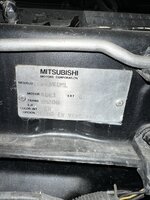
Venezuelan E33A

My very broken Galant VI

This site may earn a commission from merchant affiliate links, including eBay, Amazon, and others.

So some friend told me to put the sending unit in clorhydric acid and I did. It removed all the rust from it. Then I washed it with sodium bicarbonate and after that the parts that were not reached by the CA got cleaned with a brush. This is the end result. I'm actually quite happy :)

View attachment 777649

Maybe tomorrow I will be putting it all together in the car and filling it up with gas. THEN SOME CRANKING TILL IT STARTS
FYI once fuel pressure is up and that's only a second or two it should start immediately. No need to crank 10 or 15 sec. This is true even if you just did a fresh pump install like you are.
 
hello again fellow DSMers, if i had a penny for every time i had said this i would be a millionaire, but i'll say it anyways: it's been a while. a couple days ago i was checking old photos in my phone and found the first one i took when i bought the car, june 8 2023. this POS has been parked for 3 years straight and now, since i've found some glorious motivation, i will be puting max effort into making a drivable car by august. there is a long long list of things i have to do, and things i don't like but can't really change (the tolerances in the engine for starters, and the fact that the block is bored out to 040, the crank being 030/030) but i'm not dwelling on that anymore. rn my hands are pretty full since i started college last year (MechE) and has been a fun but really demanding ride so far.

anyways, i know some of you kinda care about this project and wanted to give a little update. also by making this i'm putting myself on the hook, so now i really have to finish it and can't back down.

i'll try to post as much as possible, and in the future there might be something really fun coming my way, i'll let you know.
 
Thanks for update - share pics when you can !! Real impressive your resourcefulness, big fan.

Hope to see more.
Thanks man! I try to do things by the book, but sometimes you just gotta wing it and see what happens.

Really happy to see that people care, rn my Vitara and uni got my tied up, but that thing is gonna run this year. Shout out to my broken Vitara, it gave me the motivation I needed to get back in the project and fall in love with being a mechanic once again.

Here are some pictures of that beautiful car, isn't she lovely? I gotta say that engine is very impressive, J20A

Anywho, in about two or three weeks i'll be getting back to the galant. Till then!

9DCA54E8-C294-4DF9-9EE1-80142014532D.jpeg


E2CD988C-5322-41FB-9706-CA0C168C2F11.jpeg


B0358D84-833E-44D1-B27B-E8A412932F81.jpeg


60B88BC6-AABC-48D6-80D6-B459E8A08661.jpeg
 
Also wanted to share some of the thoughts i had the past week.

Since i got motivated to finish the car, the big question came: what are you going to do with it? So I (kinda) came up with a plan for the car

As i said before i really don't trust how that engine was machined, and being 100% honest, i'm not completely satified by how that engine was assambled (I did it, yes, i'm the problem), but I have expended way too much money on an NA 1G 7 bolt (iirc this is the one that likes to crankwalk, and the crank was kinda fudged up before i sent it to the machine shop), so I'll just start it and see what happens.

Option 1: I start it and doesn't explode

If this happens I'll just use the car as a daily and fix all the little gremlins that will show up (cause they will) and try to make it look as decent as possible, if it keeps running good I'll problably, maybe, could be, who knows, throw a little turbo at it and see what happens (max boost 10 psi)

Option 2: the engine blows up

I'll just find a 6 bolt, new gaskets and it's going in.

If option 1 happens, i'll just have fun with it for a while, change the electronics to some modern ones, learn how to tune, boost control, etc. but to me the end game is a 6 bolt

For context, the car rn has a 1G 7 bolt and a Hyundai F5M22. A friend told me that I should just throw a turbo at it and everything will hold, he said he has done it but i'll take it with a grain of salt.

Anywho, back to the plans, i was thinking

Get the 6 bolt
Get a F5M33
Get a turbo that will take me to 300 whp
Enjoy

Ik there are a lot of misc things in the way but this is the general idea. The problem came when I was wondering how should I build the engine. My first thought was to hop on STM and make a "little" cart. When I saw the total (about 4500$ and wasn't finished), my brain said "this makes absolutely 0 sense for a 300 whp FWD car", so i went back to old recipes like putting 22 mm pistons on 6 bolt rods. I was thinking about going even a step further and make the rods full-floating. Some dude said "that's changing the rod way too much" but it is still on my mind. Also wanted to get a 9:1 CR, but the 7 bolt pistons are 8.5:1 IIRC. Still an improvement over the 7.8:1 on the 6 bolt. Keep the same crank, maybe aftermarket cams, a little port and polish, idk what else.

Where i'm not going to hold back at all is on electronics and engine management. Someone might say it's overkill getting a stand alone for a 300 hp car, but my ecu can't get Link and i'm not even in USA to send it for the chip (don't even know how that works).

but i digress. If anyone has any advice for the future, it's always welcome. For now, i'll just get this little car running and go from there.
 
Where i'm not going to hold back at all is on electronics and engine management. Someone might say it's overkill getting a stand alone for a 300 hp car, but my ecu can't get Link and i'm not even in USA to send it for the chip (don't even know how that works)
If for what ever reason you can’t get link or use ECMLink, since your an engineering student you may feel comfortable with Speed-duino a stand alone ECU you make based on the Arduino platform. - just a thought 💭.

Look into it if it interest you.
 
So! The time has come!

Hopefully by the end of the month the engine will be running. I have drawn a plan to finish the car this year and this is step 1. The coming week is going to determine how far I was from reality!

I'll be updating
A1385910-183F-40C8-A8C2-565F03A43DBA.jpeg
 
another little step! I'm sending the radiator to get checked, hopefully there will be no need for a new one.

IMG_1792.jpeg


More news tomorrow!
 
Greetings. I think I'll be hearing from the radiator shop today or tomorrow, hoping for good news.

In the meantime, gonna keep working on setting everything up. So today I installed new lower radiator bushings and tried to install the front engine mount, but one of the bolts decided to destroy the threads :p, will be fixing that with a helicoil.

Also wanted to ask two things:

First, is this the right CAS for a 1991 model?

IMG_1809.jpeg

IMG_1810.jpeg


Second, got these VCs, want your input in which should I use. The red/wine paint is going away

IMG_1811.jpeg


More news tomorrow!
 
Good news! the radiator shop said it was all good and got it home. Installed it and fitted perfectly, but decided to put it in the back for now since I have to take all the wiring out and fix it. Many wires were exposed, broken or badly fixed; so I think is in my best interest to take my time with that and make sure everything is nice and tidy.

More good news! the bolt hole in the block does not need a helicoil, just cleaned it up with a thread chaser and is just fine, need a new bolt tho.

One bolt everyday!

This is how I plan to finish this first stage of the process:
-chase the bolt hole for the front engine mount
-install the front engine mount to block
-install the cross member
-put the bolts on the front and back engine mount
-pull out the driver side engine mount
-pull out the 6 bolt timing cover
-install the driver side engine mount
-install the alternator and the p/s pump
-take out the gearbox
-fix the holes for the engine-transmission bolts
-install back the trans
-install the fixed wiring
-install the fuel tank
-new fuel filter
-new thermostat, upper and lower radiator hoses
-new radiator fan
-start the engine (and pray to every god there is that it doesn't blows itself out)

if this all happens, stage one will be done! then into getting the car to move

more news tomorrow!
 
It’s def a green top 1G CAS.

But the 89-90 version I believe has the wires coming out of the top of the sensor,
Did you have another style sensor before ?
I really don't know, back when I bought the car didn't pay attention to any of that, but I think is the one that came with the broken engine. this is a 1991 model, SNGML to be exact. mmm maybe I can check the part number for the CAS. anywho, kinda pretty sure is the original one
 
THE GOOD NEWS NEVER STOP!

today I did some minor work, bought the engine mount bolt I needed, thermostat and front engine mount. Thankfully the threads on the block just required a minor chase, so that was done and the bolt threaded beautifully

IMG_1842.jpeg

After that I was going to put the cross member on, but the jack was in the other car and the jackstands in my room, so I got lazy and just left it for tomorrow.

Also took off the exhaust and one of the studs pulled the threads. I knew about that back in May 2025 when assembled the engine but said "ehhh fudge it, we ball", but now I'll get the helicoil, probably a "new" stud and the exhaust comes back in.

IMG_1841.jpeg


For my very good luck, the stud that damaged the threads wasn't the one that goes into the head

Also, was doing a little cleaning and found the culprit of killing the previous engine

IMG_1838.jpeg

IMG_1839.jpeg


(Can't remember if I shared the video of what we found in the engine the day the car got home)

Lastly, took all the engine harness to a side and checked it for any damage. Last year some repairs were done (CAS, TPS, inyectors and Power Module connectors were replaced), I'll have to re-repair some of those since wasn't done pretty nice.

Took a video of the whole harness and many pictures. Some of the connectors are missing and some I don't know were they go, so I'll share it with you guys and hope someone can give some guidance.


DB1C87EF-702B-44C5-942E-73B2BBA84460.jpeg


Here is the CAS, TPS, Inyectors, power module, coil, and that one wire that is near the power module I don't know what it's for

E09B36DE-3793-455D-8E49-917B3025FA27.jpeg


IIRC those are IAC and the one that goes on top of the throttle

767F3531-1709-4771-9AE2-20B4141C4ABB.jpeg


These IDK and there is a bare wire there

311EC579-43A0-4728-BDD2-1D8948D9BD3B.jpeg


I think this is the AC compressor


34EC7F2F-79AB-403E-A7BA-436C8828E74B.jpeg


This is the one part that goes near the break booster

09CFA323-AED8-49DF-B5C6-A900CC80199B.jpeg


These are pretty obvious were they go. Don't know the name of the parts or what they do, but at least I know where to plug them

ADF93FF4-1410-4C49-85B7-63D1B3ED2D6E.jpeg


Didn't know what it was, then realized it was the windshield wipers motor

C9A59572-6EE3-4CED-AAAE-56C2F83B983B.jpeg


The one I'm holding most probably is the MAF one, the two wire connector IDK, and the other connects to the harness that comes from the fuse box

All in all, I think this side of the harness is in acceptable condition, still gotta figure what some of those are/go

Here is the video I took


More news tomorrow!
 
greetings, everyone. About a week ago I was doing some work to the car, was nice, but i think I will be taking a couple steps back with this engine. When i first assembled it in may 2025, when the cam caps were torqued, the camshaft wouln't turn. I had some old cam caps and "cleaned" them up, installed it, so it turned. Back then I just said "f*** it, we ball", but 2026 me kept thinking about that, making me call a pretty good machine shop, that's also pretty far away. The machinist called me, itialian guy, we talked for a bit and the conclusion was that the engine should be taking apart, checked and reassembled. Thankfully I hace every gasket I need, and actually there are some part stores that sell the eristic gasket set. A little step bacj, but don't want to see that engine blow up at the first start after all the time and effort ($) I have already given it.

So, the engine is coming apart soon, but in the meantime I'll move forward with some other things in the car

IMG_1848.jpeg


Here is a photo of the last time I worked on the car

More, hopefully good, news soon!
 
Add Value - Be Respectful - No Trolling - No Misinformation - Participate Often!
Support Vendors who Support the DSM Community

Build Thread Updates

Latest Classifieds

  • Wanted 1g Pop-up light button
    Looking for a 1ga pop up light button / switch
    • steelcurtaindsm
    • Updated:
    • Expires
  • Wanted Anyone selling Plymouth laser wheels can bring to the shootout?
    I'm looking to purchase a full set of Plymouth laser wheels if someone can bring to the shootout I
    • Syclone#334
    • Updated:
    • Expires
  • For sale DeatschWerks fuel pump
    DeatschWerks DW200 fuel pump. Probably has less than 1000 miles on it. Was keeping it as a...
    • RamenPride
    • Updated:
    • Expires
  • For sale 2g 2G Grey A Pillar Plastic Set
    2G Grey A Pillar Plastic Set $50 + shipping & paypal fees* all tabs and clips are on the...
    • jersygsx
    • Updated:
    • Expires
  • For sale 2g GSX/GST OEM Front Knuckle Set
    2G GSX/GST OEM Front Knuckle Set $140 + shipping & paypal feesYou must be registered to see...
    • jersygsx
    • Updated:
    • Expires
Back
Top










