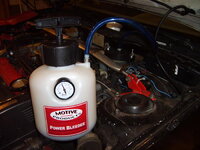
I bought MachV's SS brake lines, and in the process i decided to give the PowerBleeder a shot. I bought the setup and when received i decided to do it when my buddy was gonna drop my tranny and install my new clutch and fly! Alright, i pull the bleeder tank out and take notice the very nice quality that was put into this thing! all pressure lines were pre-assembled so no leaks  the directions are very easy to follow;
POWERBLEEDER
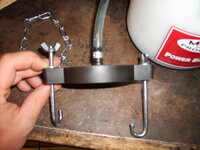
1. you take the power bleeder and attach the supplied J-Hooks through the holes on the cap.
2. to hole the J-Hooks in place use the washers and wing nuts, also supplied
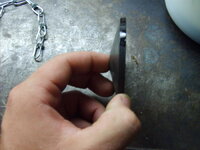
3. now take the rubber gasket and attach it to the reservoir cap cone side down
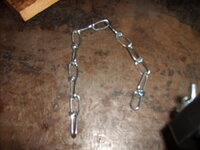
4. string the chain underneath the reservoir and attach to the j-hooks now tighten down the wing nuts to seal the gasket on the reservoir
5.now you want to do a DRY test by pumping the tank handle to NO MORE THAN 20psi."this is a boost leak test in general " you pump and listen and watch the gauge thats attached to the tank. i went slow and listened as i went and tighten the wing nuts as i went.
6.once the leaks are gone and you can hold 20psi you SLOWLY open the tank cap and release the press.
7. the tank tells you to add up to 2qts of fluid i added 1qts and still had leftovers
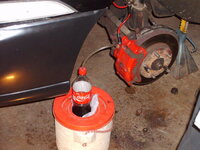
8.they give you an extra 8" of nylon hose to put on your bleeders for draining the fluid, i used a punch, 1L pop bottle. used the punch to put a hole in the pop cap and fed the hose through only about 1/8" or so just to allow the fluid to drain in. (You want to have your bleeder line below the level of the bleeder bottle fluid so you can see bubbles.)
9. tighten cap good and secure and your ready to get started like a normal brake bleeding procedure
10. crack the bleeder on the brake about 2 turns and take the pump and start pumping i did about 3-5 good pumps per brake i believe BUT every car will be different.
11. when no air is in the line tighten and repeat on the next 3
12. when done slowly release the pressure by CAREFULLY loosening the tank cap
13. then remove the reservoir piece along with the chain
now just put the brake reservoir cap on and your good to go
 the directions are very easy to follow;
 POWERBLEEDER
1. you take the power bleeder and attach the supplied J-Hooks through the holes on the cap.
2. to hole the J-Hooks in place use the washers and wing nuts, also supplied
3. now take the rubber gasket and attach it to the reservoir cap cone side down
4. string the chain underneath the reservoir and attach to the j-hooks now tighten down the wing nuts to seal the gasket on the reservoir
5.now you want to do a DRY test by pumping the tank handle to NO MORE THAN 20psi."this is a boost leak test in general
 " you pump and listen and watch the gauge thats attached to the tank. i went slow and listened as i went and tighten the wing nuts as i went.
6.once the leaks are gone and you can hold 20psi you SLOWLY open the tank cap and release the press.
7. the tank tells you to add up to 2qts of fluid i added 1qts and still had leftovers

8.they give you an extra 8" of nylon hose to put on your bleeders for draining the fluid, i used a punch, 1L pop bottle. used the punch to put a hole in the pop cap and fed the hose through only about 1/8" or so just to allow the fluid to drain in. (You want to have your bleeder line below the level of the bleeder bottle fluid so you can see bubbles.)
9. tighten cap good and secure and your ready to get started like a normal brake bleeding procedure
10. crack the bleeder on the brake about 2 turns and take the pump and start pumping i did about 3-5 good pumps per brake i believe BUT every car will be different.
11. when no air is in the line tighten and repeat on the next 3
12. when done slowly release the pressure by CAREFULLY loosening the tank cap
13. then remove the reservoir piece along with the chain
now just put the brake reservoir cap on and your good to go


