
Navigation
Install the app
How to install the app on iOS
Follow along with the video below to see how to install our site as a web app on your home screen.
Note: This feature may not be available in some browsers.
More options
The Central Hub for DSM Community and Information
For 1990-1999 Mitsubishi Eclipse, Eagle Talon, Plymouth Laser, and Galant VR-4 Owners. This is where the DSM platform history is documented and archived. Log in to help us in our mission, and to remove most ads from the browsing experience.
You are using an out of date browser. It may not display this or other websites correctly.
You should upgrade or use an alternative browser.
You should upgrade or use an alternative browser.
Dream Car
- Thread starterjukematt
- Start date

This site may earn a commission from merchant affiliate links, including eBay, Amazon, and others.
- Thread starter
- #2

jukematt
15+ Year Contributor
- 291
- 40
- Jun 13, 2009
-
Portland Metro,
Oregon
Alright, I've finally decided to do a build thread. I still love this car so much and I want to document things I've done but I've also learned some things that maybe others will find helpful. I had to add a new vehicle and copy everything over to get the build thread to auto generate. I'm trying to figure out how to delete my other one now.
Story time!
2009: This car was a dream car of mine (on the more affordable list, ie. sub-$200,000 ). But I didn't really look that much into it. I just figured "one day..." Well, I kept seeing this beautiful white one in a strip mall parking lot and discovered that a cashier there owned it. She showed me pictures one time as I was making my purchase and I asked if she was selling it. She glared at me like I was insane and might murder me but in my defense I had never known anyone to take pictures of their cars before then. Anyway, she drove me around a bit in "Fox", which is an automatic GSX. That only fueled my wish to own one. Reading a bit more, I wanted a late '97+ to minimize crank walk, a GSX, and preferably a '99 to get those rare white-faced gauges. Black leather too please!
The ones I was finding were either not my preference, a major project, or heavily modified and very expensive. I had to get a car loan to get it too so I had to stay at market value. I even considered a Talon though I preferred the Eclipse look.
Well, I finally found one. 1999 black GSX with black leather interior. We drove out there and looked it over, then went for a test drive. Coming out of a left hand turn, the clutch pedal stuck to the floor. The seller (well, not the seller but the seller's dad. The seller was not present.) yelled to shut the car off and reached over and turned it off himself. I reached down and popped it back up, started up again and drove the rest of the way up the driveway. Needless to say we were freaked out thinking it had crank walk after all. My friend talked to her contacts and from what we gathered, most people at the time said that '99's don't walk, likely due to the revised split thrust bearings. But the guy wouldn't budge on the price and the son wasn't there to negotiate. We left saddened.
I kept looking and found another a couple of weeks later. Turns out it was the same car! Another kid bought it and now it sat not running in his driveway and an angry HOA told him he couldn't park a car in his driveway. Since it wasn't running, he took a loss and I got it at a significant discount. Apparently the alternator was bad. The battery in it was also not powerful enough. We changed the alternator in the kid's driveway and drove it about a block and the alternator belt snapped. We didn't replace it yet since we were just trying to get it running. Fox's owner had another friend with a Galant GSX and was familiar with the platform. He towed the car the next day and got it running for me.
Oh and the reason the clutch pedal hit the floor? The clutch fluid needed to be bled. No more issues after that.
When I got this car, I didn't even know how to change my own oil. My friend with the white GSX showed me how along with a lot of other maintenance and repairs. She also named my car: Kitsune. Basically, Japanese for Fox! Diving into the folklore, I came across this:
"They seem to take pleasure in teaching humility to and punishing hubris in the proud, greedy, and powerful." Quite fitting for a car, especially with this platform, don't you think?
However, Fox's owner started calling my car cursed. We think that prior owner to the kid we bought it from may have had some upgrades on it but he put the car back to stock to sell it. The only mods the car had was a boost gauge, oil pressure, and EGT along with a heavy clutch (unknown at the time but suspected 2600lb). The T-25 turbo went out within a few months. I started billowing smoke out the back even at idle once the car warmed up. Talk about shaft play! I still have the turbo too. I got a 14B after that and LOVED the sound of it. That thing had a beautiful loud whistle sound. My current small 16G isn't as loud.
Anyway, a few more details. My car had the world famous clear coat failure that a lot of Dodge/Chrysler cars had in the 90s. I recall someone saying because these are water-based paints? I never looked that up though. The clear coat failure has only gotten worse over time. When I get her running again, I know someone who likes to wrap cars for fun so that's what I plan to do. Later, when I have my own place with a garage, I'll repaint her.
My goal has been to keep her around 300-350 HP, but I want to stay under 400 since I figured she would be more reliable and I can keep stock internals.
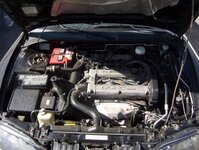
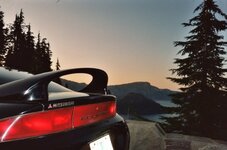
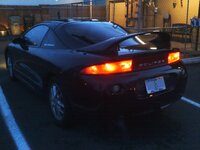
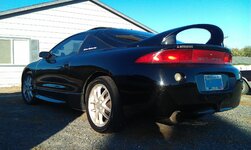
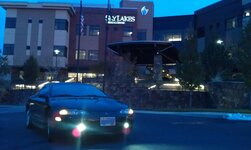
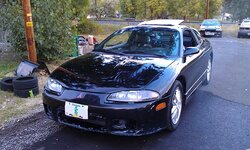
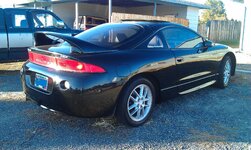
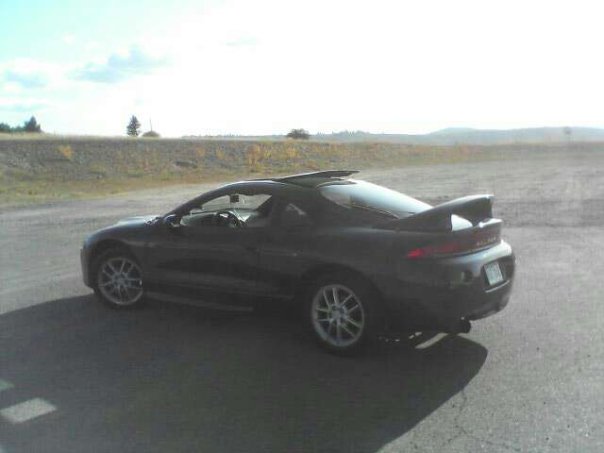
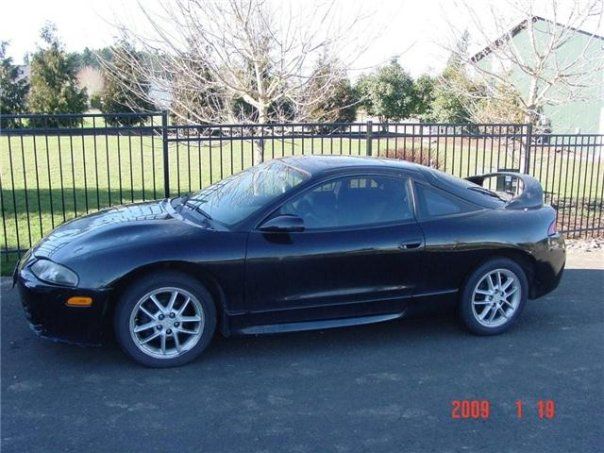
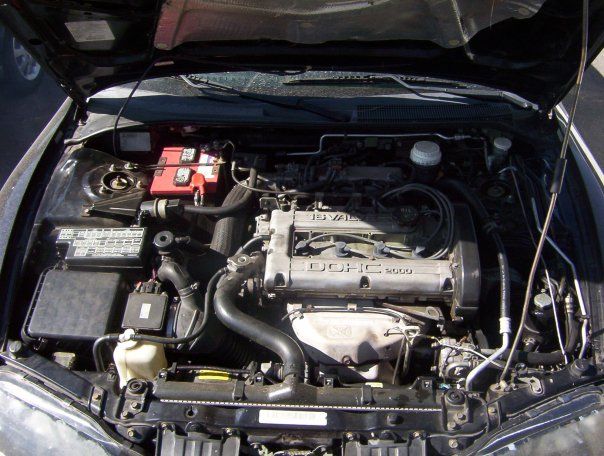
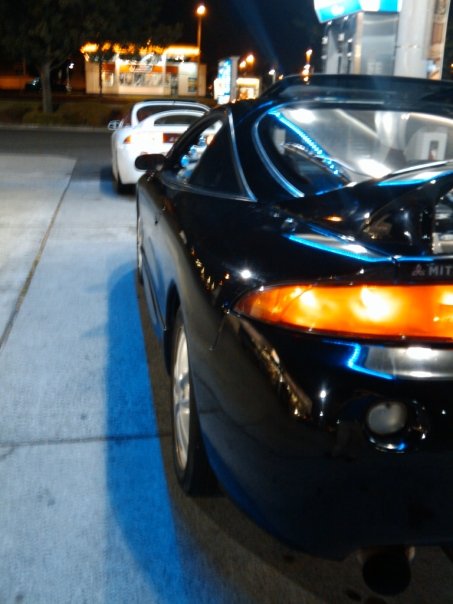
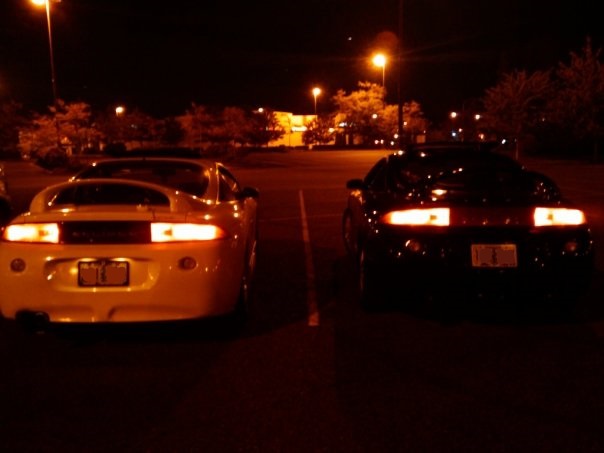
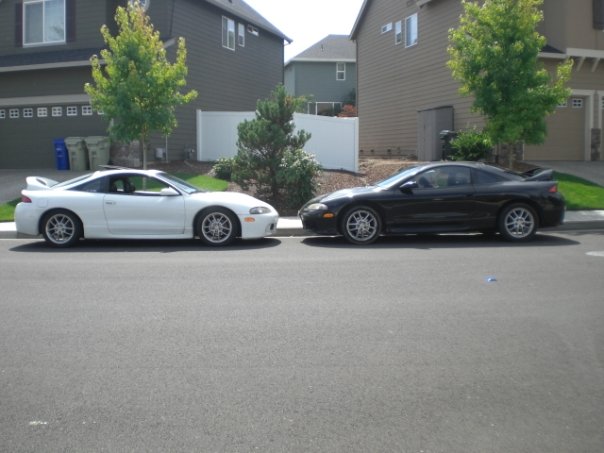
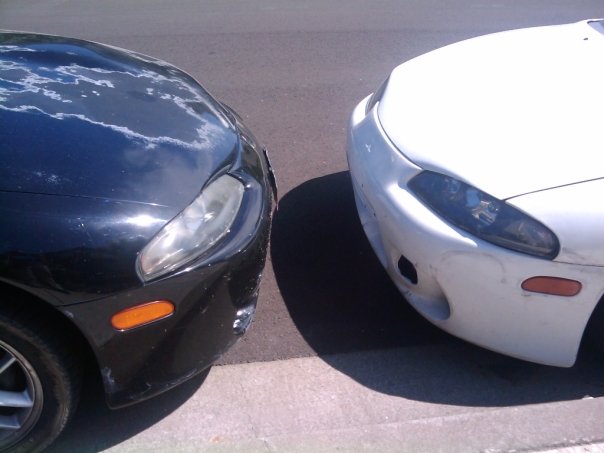
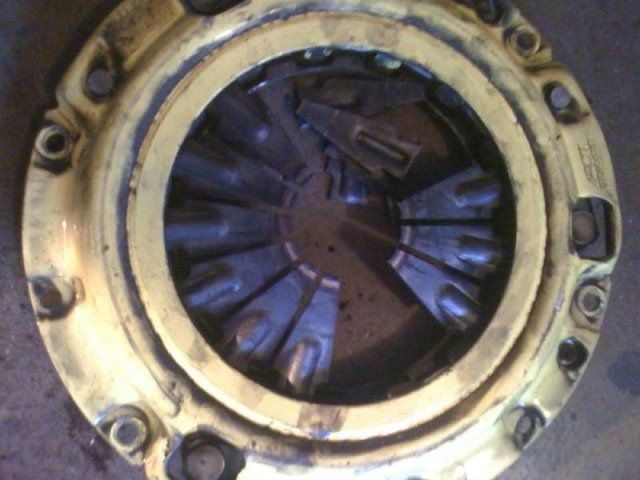
Here are a few early on pictures including the Craigslist ones and with Fox. The driver side rear quarter is the first picture I took of the car at the gas station! The car had around 13X,XXX miles when I got it. The last pic is the second major issue after the T-25 going out which occurred in August, 2010. It was an ACT 2600 clutch and people were saying the throw out bearing was installed incorrectly. Idk, but I replaced it with an ACT 2100 with organic street disc (MB1-HDSS), ACT Streetlite flywheel, and OEM throw out bearing, fork, and pivot ball.
Story time!
2009: This car was a dream car of mine (on the more affordable list, ie. sub-$200,000
). But I didn't really look that much into it. I just figured "one day..." Well, I kept seeing this beautiful white one in a strip mall parking lot and discovered that a cashier there owned it. She showed me pictures one time as I was making my purchase and I asked if she was selling it. She glared at me like I was insane and might murder me but in my defense I had never known anyone to take pictures of their cars before then. Anyway, she drove me around a bit in "Fox", which is an automatic GSX. That only fueled my wish to own one. Reading a bit more, I wanted a late '97+ to minimize crank walk, a GSX, and preferably a '99 to get those rare white-faced gauges. Black leather too please!The ones I was finding were either not my preference, a major project, or heavily modified and very expensive. I had to get a car loan to get it too so I had to stay at market value. I even considered a Talon though I preferred the Eclipse look.
Well, I finally found one. 1999 black GSX with black leather interior. We drove out there and looked it over, then went for a test drive. Coming out of a left hand turn, the clutch pedal stuck to the floor. The seller (well, not the seller but the seller's dad. The seller was not present.) yelled to shut the car off and reached over and turned it off himself. I reached down and popped it back up, started up again and drove the rest of the way up the driveway. Needless to say we were freaked out thinking it had crank walk after all. My friend talked to her contacts and from what we gathered, most people at the time said that '99's don't walk, likely due to the revised split thrust bearings. But the guy wouldn't budge on the price and the son wasn't there to negotiate. We left saddened.
I kept looking and found another a couple of weeks later. Turns out it was the same car! Another kid bought it and now it sat not running in his driveway and an angry HOA told him he couldn't park a car in his driveway. Since it wasn't running, he took a loss and I got it at a significant discount. Apparently the alternator was bad. The battery in it was also not powerful enough. We changed the alternator in the kid's driveway and drove it about a block and the alternator belt snapped. We didn't replace it yet since we were just trying to get it running. Fox's owner had another friend with a Galant GSX and was familiar with the platform. He towed the car the next day and got it running for me.
Oh and the reason the clutch pedal hit the floor? The clutch fluid needed to be bled. No more issues after that.
When I got this car, I didn't even know how to change my own oil. My friend with the white GSX showed me how along with a lot of other maintenance and repairs. She also named my car: Kitsune. Basically, Japanese for Fox! Diving into the folklore, I came across this:
"They seem to take pleasure in teaching humility to and punishing hubris in the proud, greedy, and powerful." Quite fitting for a car, especially with this platform, don't you think?
However, Fox's owner started calling my car cursed. We think that prior owner to the kid we bought it from may have had some upgrades on it but he put the car back to stock to sell it. The only mods the car had was a boost gauge, oil pressure, and EGT along with a heavy clutch (unknown at the time but suspected 2600lb). The T-25 turbo went out within a few months. I started billowing smoke out the back even at idle once the car warmed up. Talk about shaft play! I still have the turbo too. I got a 14B after that and LOVED the sound of it. That thing had a beautiful loud whistle sound. My current small 16G isn't as loud.
Anyway, a few more details. My car had the world famous clear coat failure that a lot of Dodge/Chrysler cars had in the 90s. I recall someone saying because these are water-based paints? I never looked that up though. The clear coat failure has only gotten worse over time. When I get her running again, I know someone who likes to wrap cars for fun so that's what I plan to do. Later, when I have my own place with a garage, I'll repaint her.
My goal has been to keep her around 300-350 HP, but I want to stay under 400 since I figured she would be more reliable and I can keep stock internals.
Here are a few early on pictures including the Craigslist ones and with Fox. The driver side rear quarter is the first picture I took of the car at the gas station! The car had around 13X,XXX miles when I got it. The last pic is the second major issue after the T-25 going out which occurred in August, 2010. It was an ACT 2600 clutch and people were saying the throw out bearing was installed incorrectly. Idk, but I replaced it with an ACT 2100 with organic street disc (MB1-HDSS), ACT Streetlite flywheel, and OEM throw out bearing, fork, and pivot ball.
Last edited:
- Thread starter
- #3
jukematt
15+ Year Contributor
- 291
- 40
- Jun 13, 2009
-
Portland Metro,
Oregon
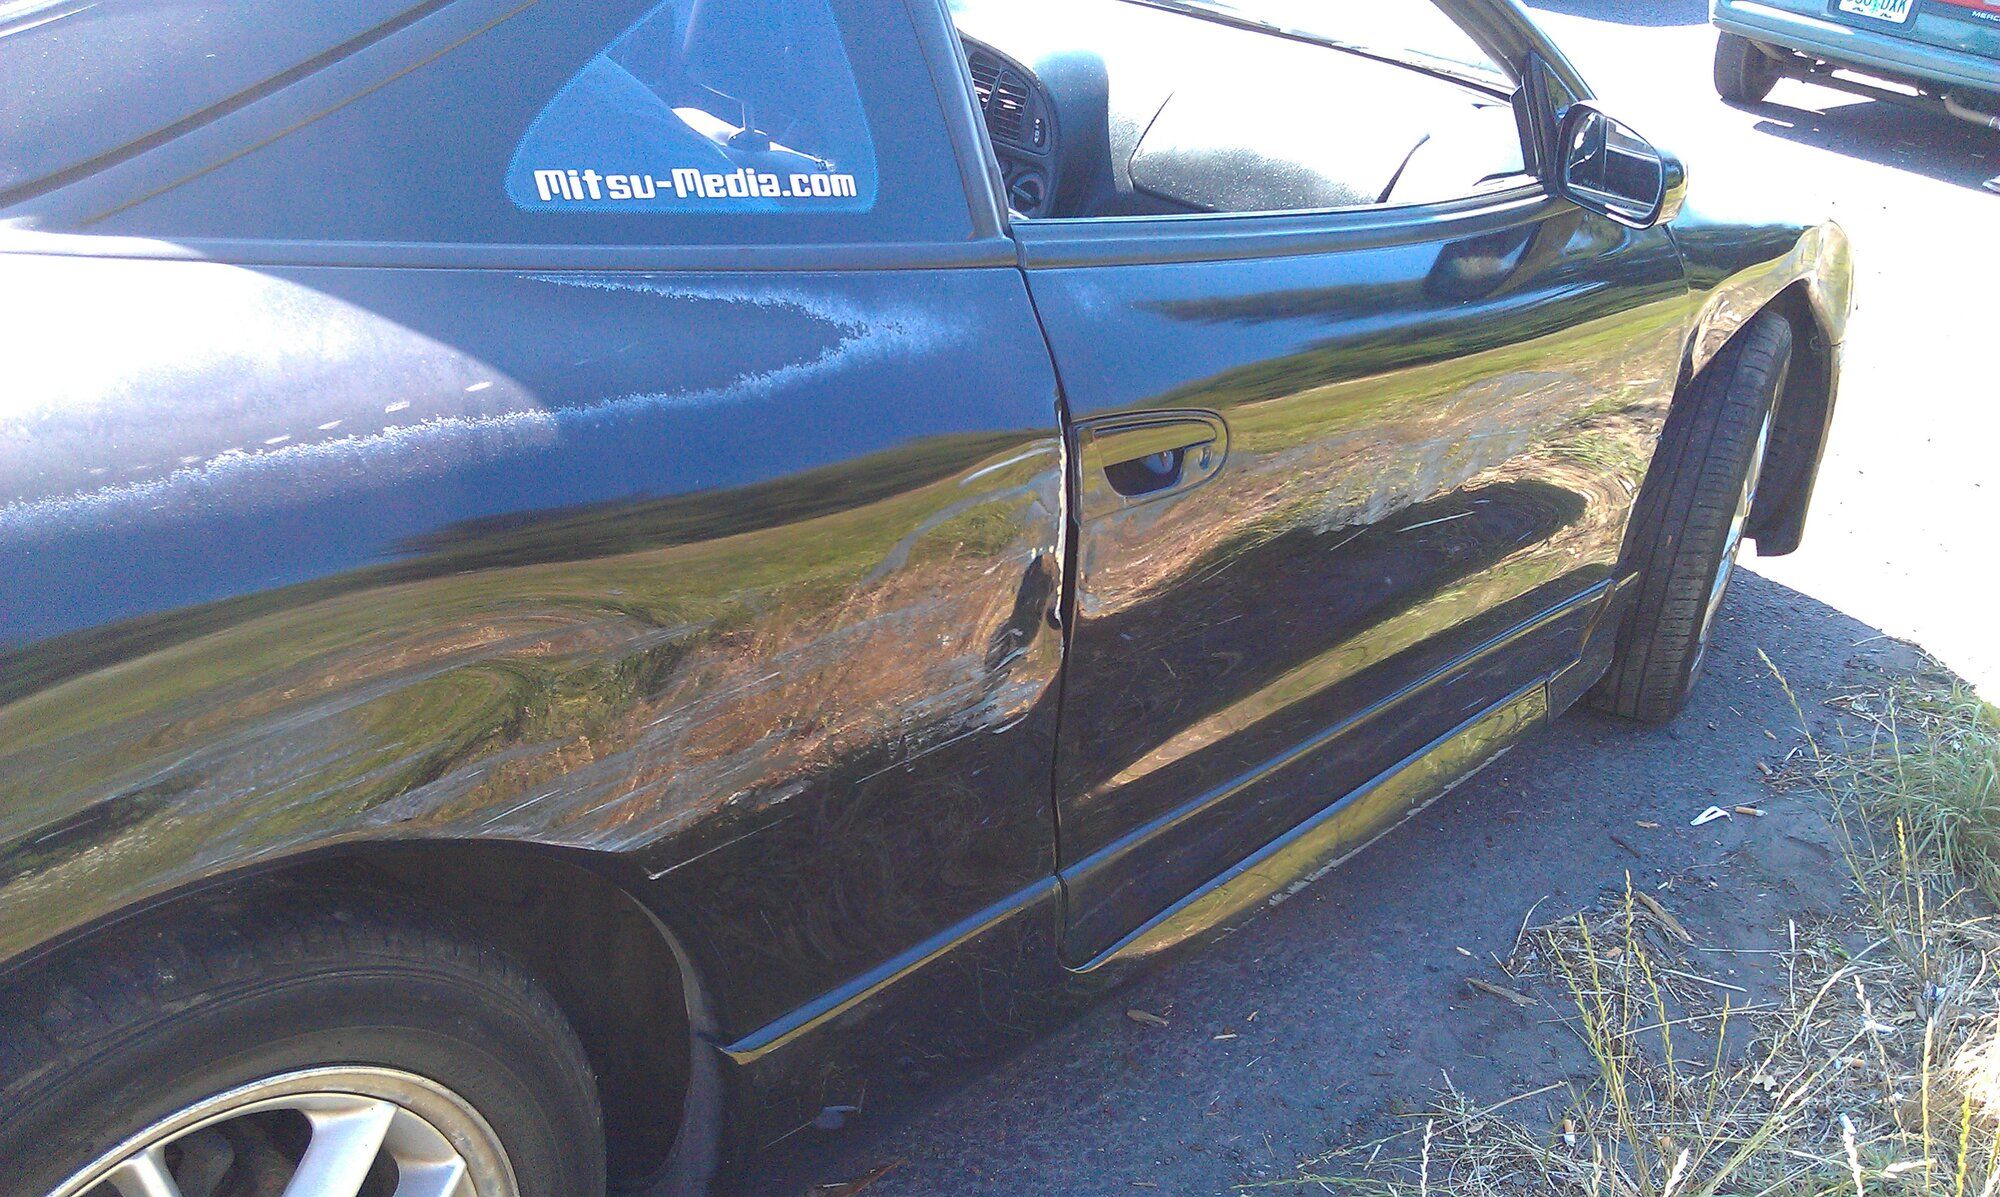
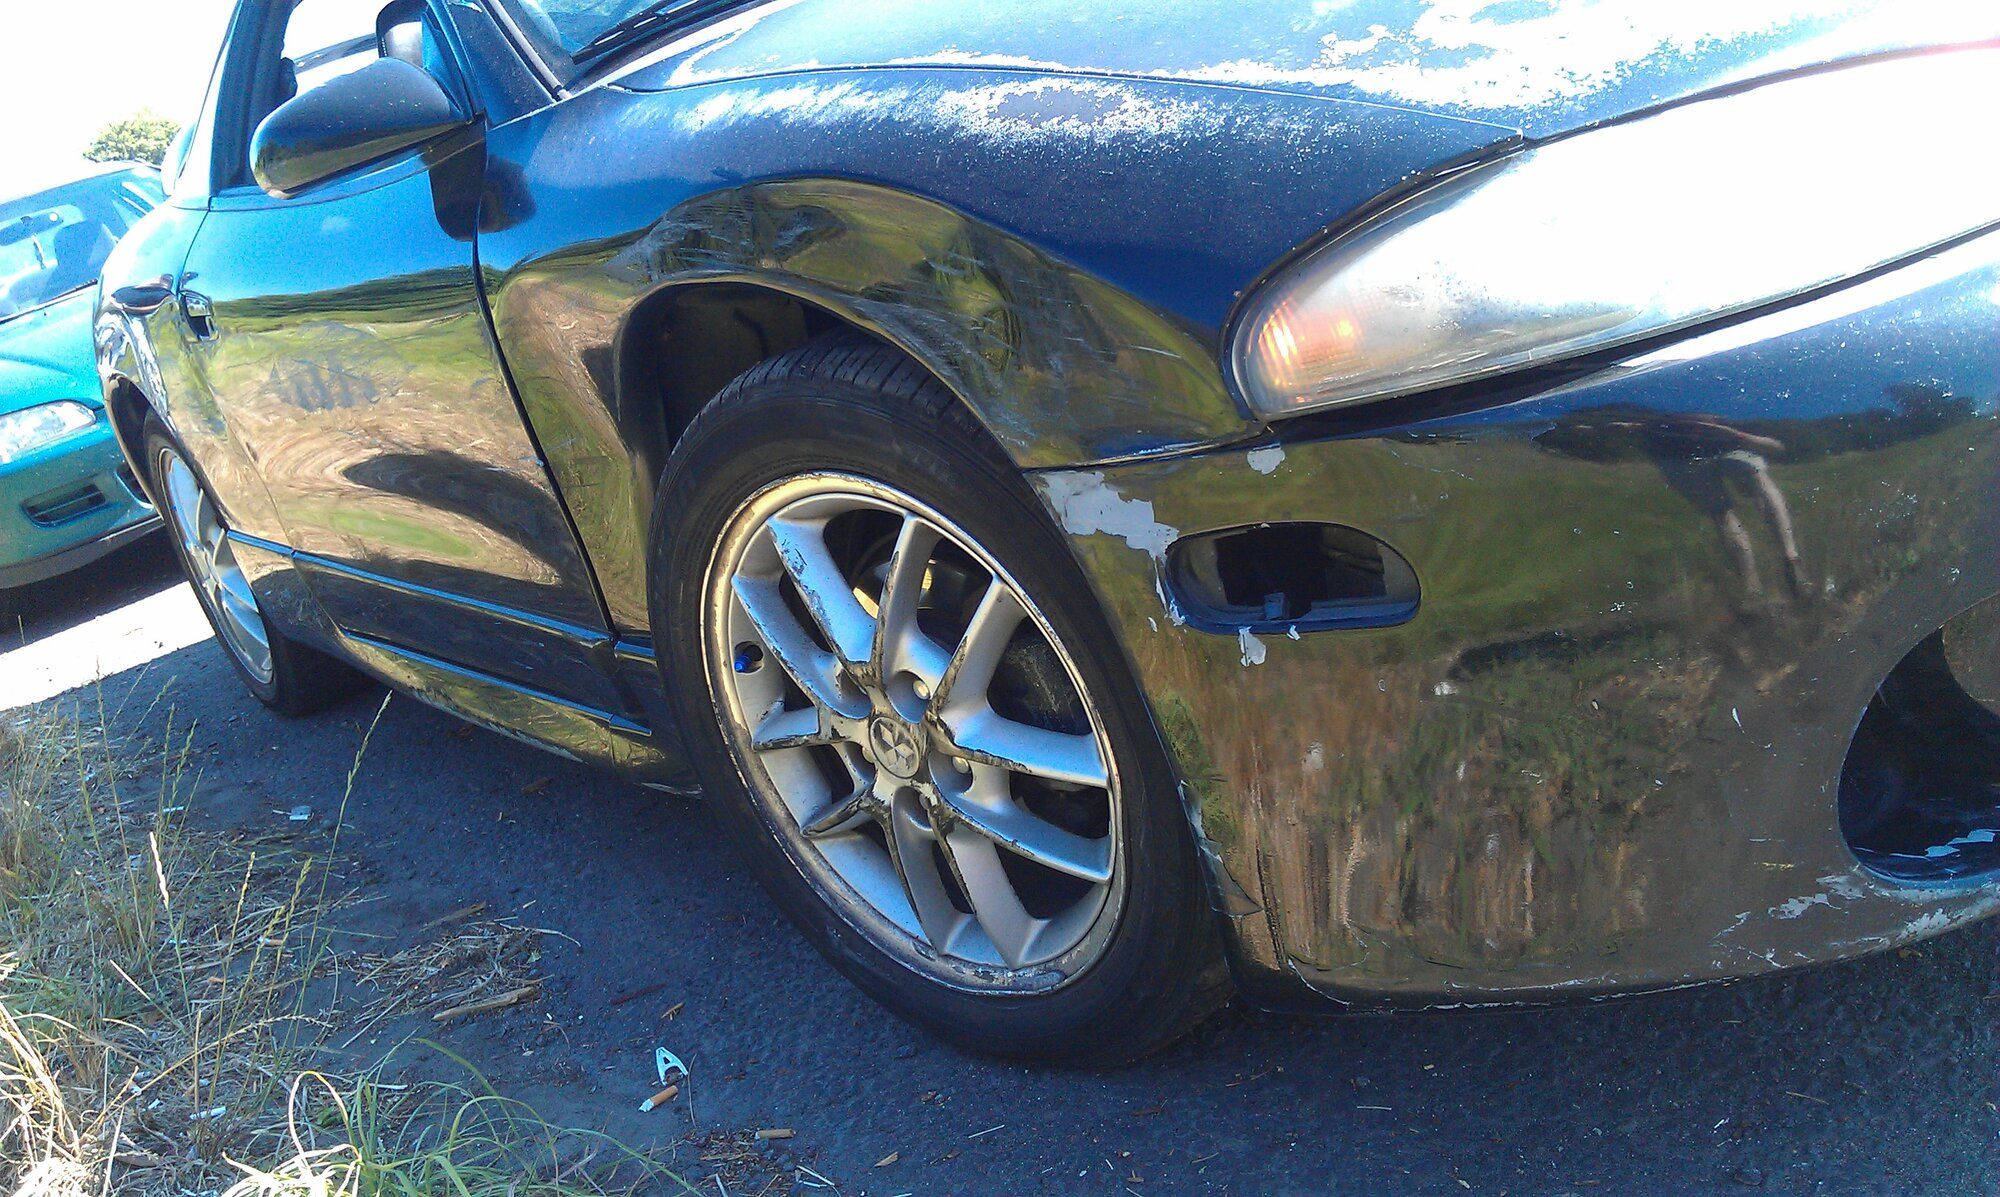
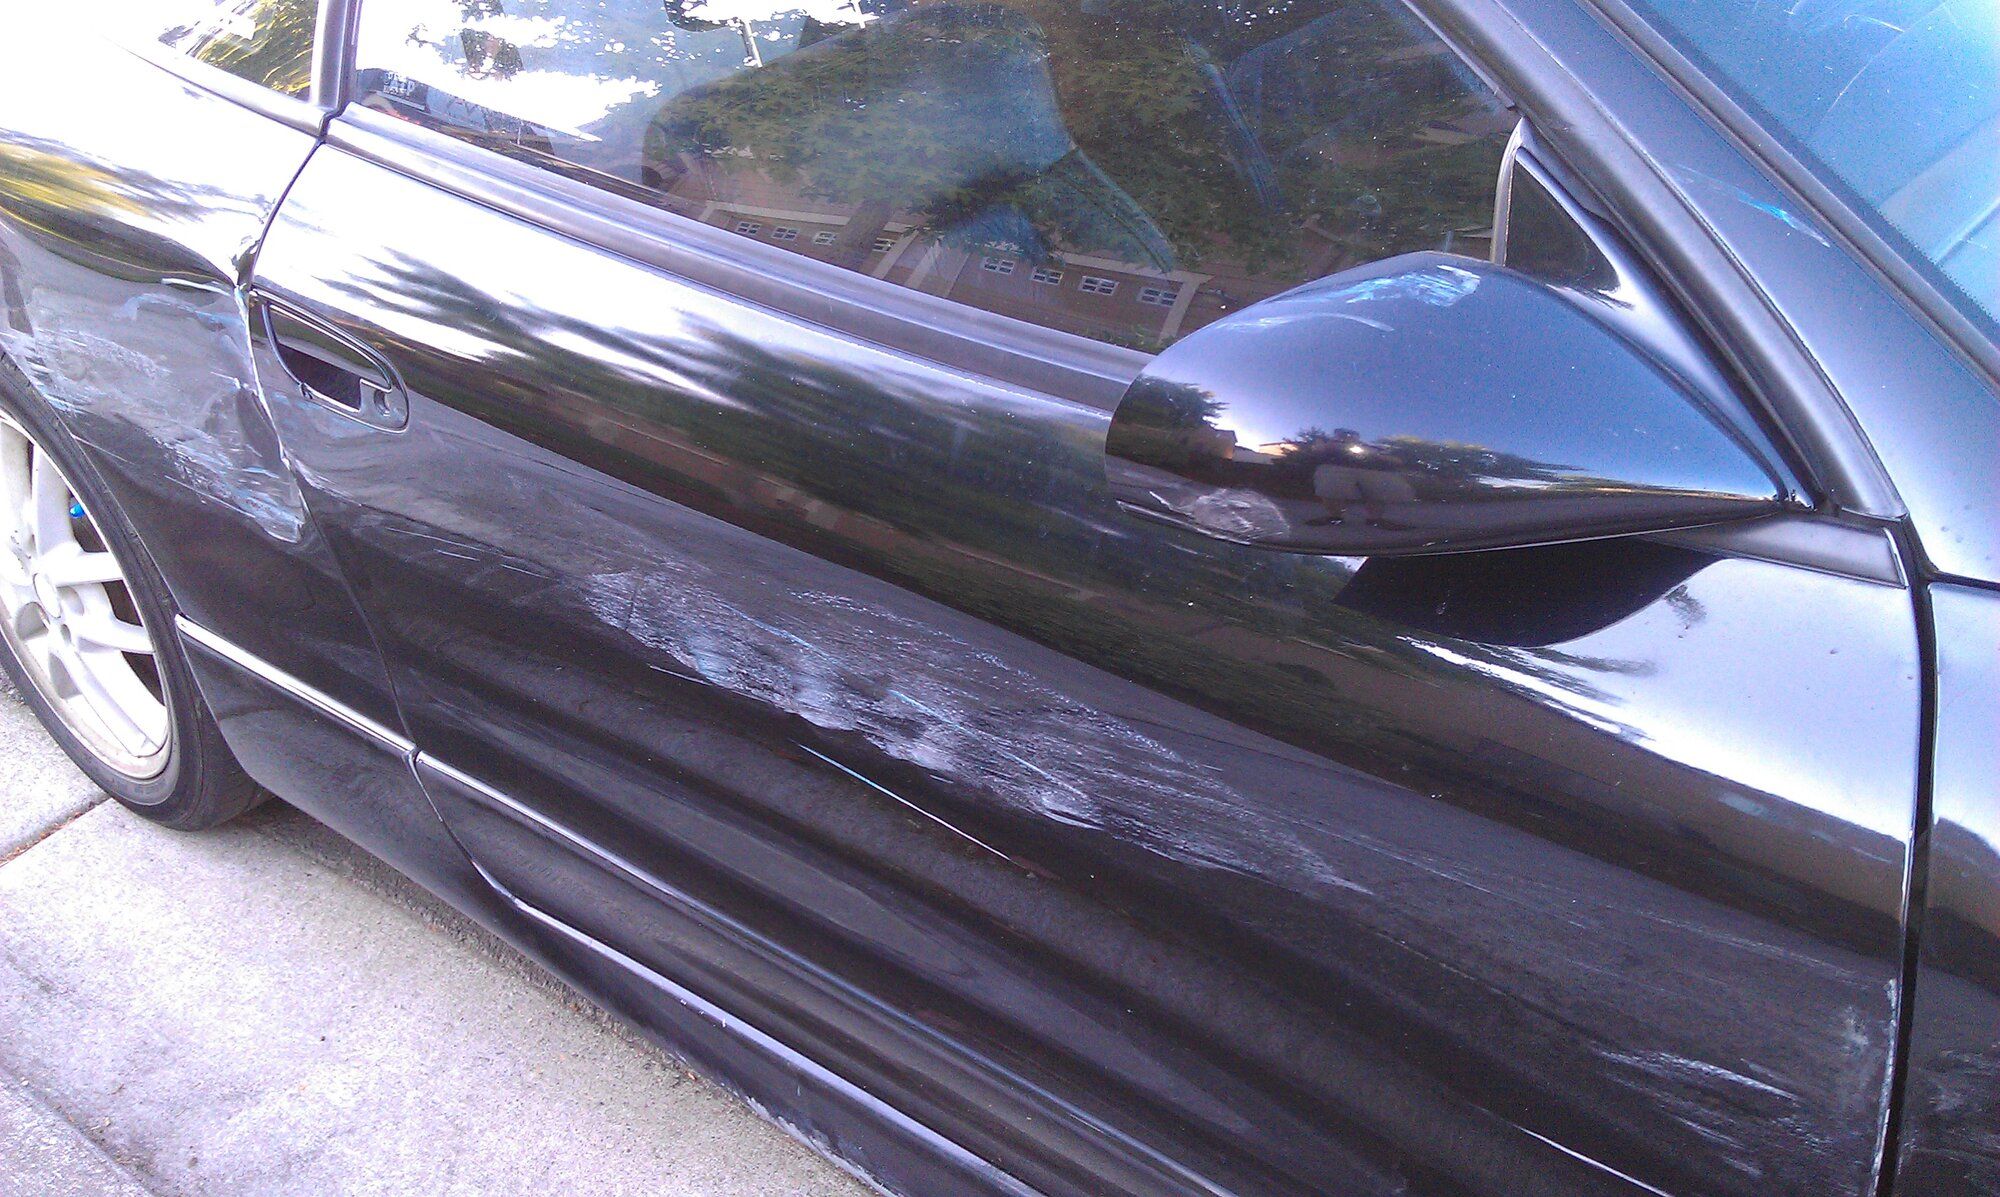
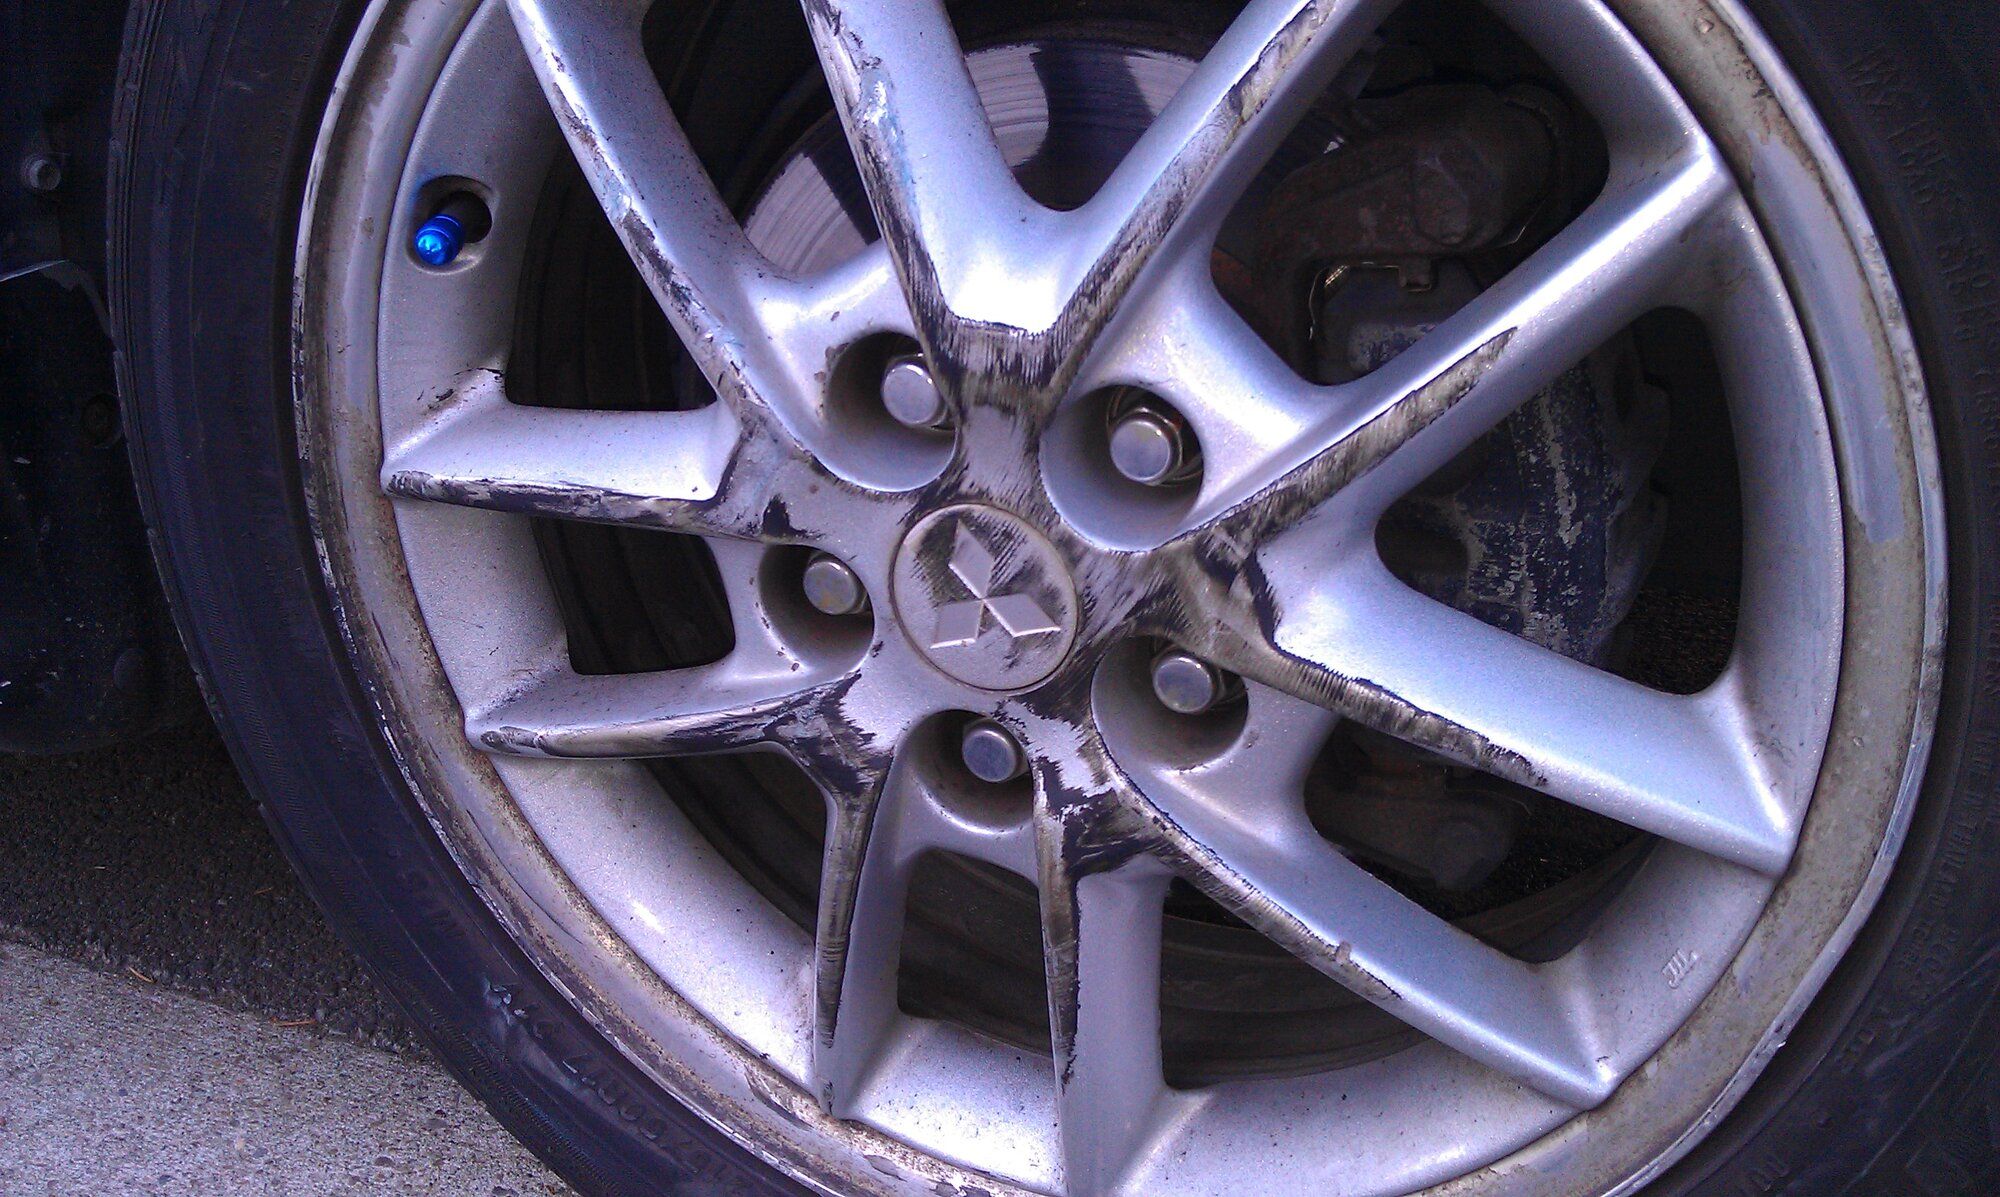
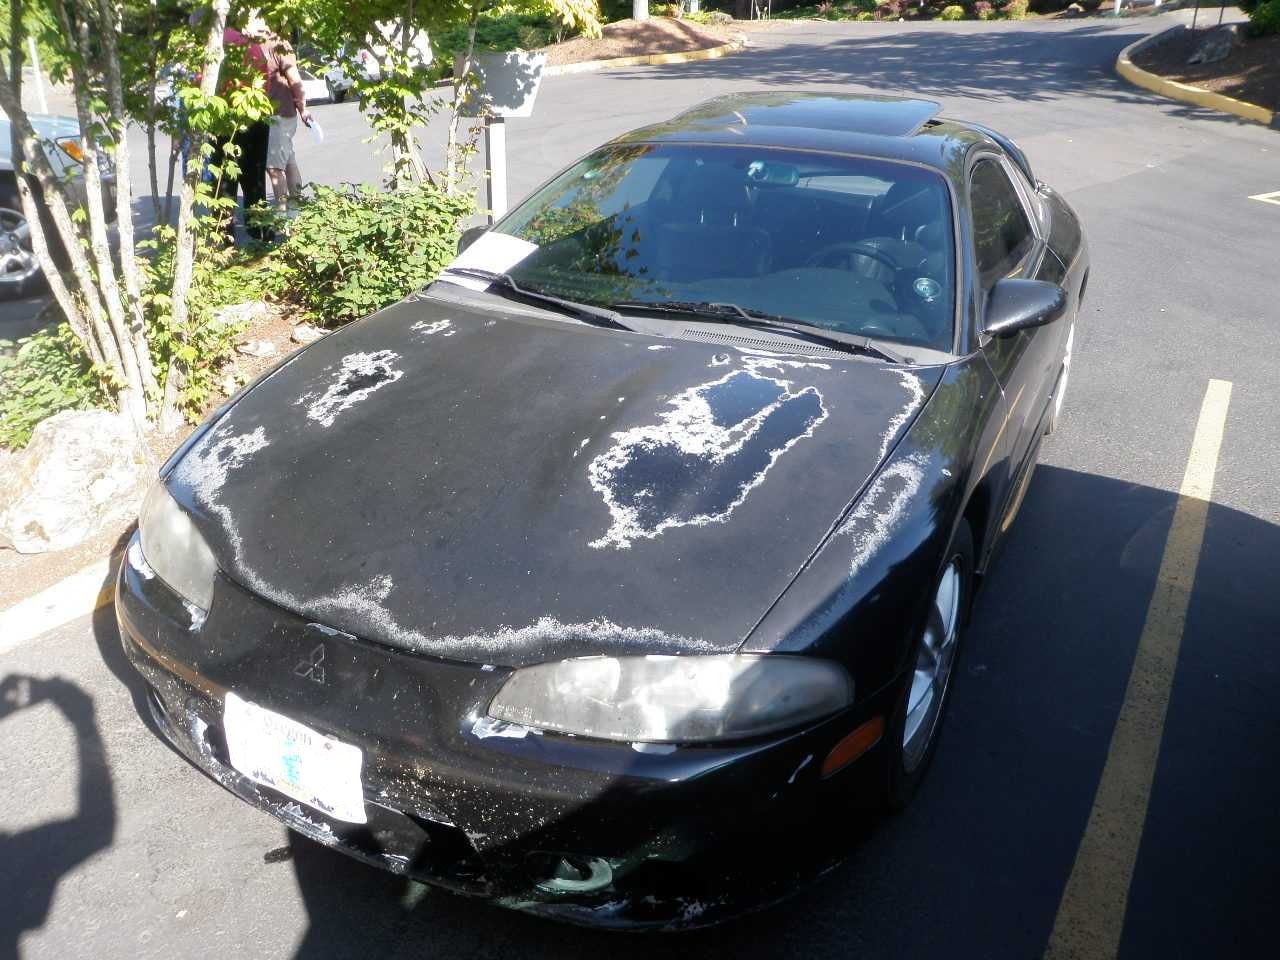
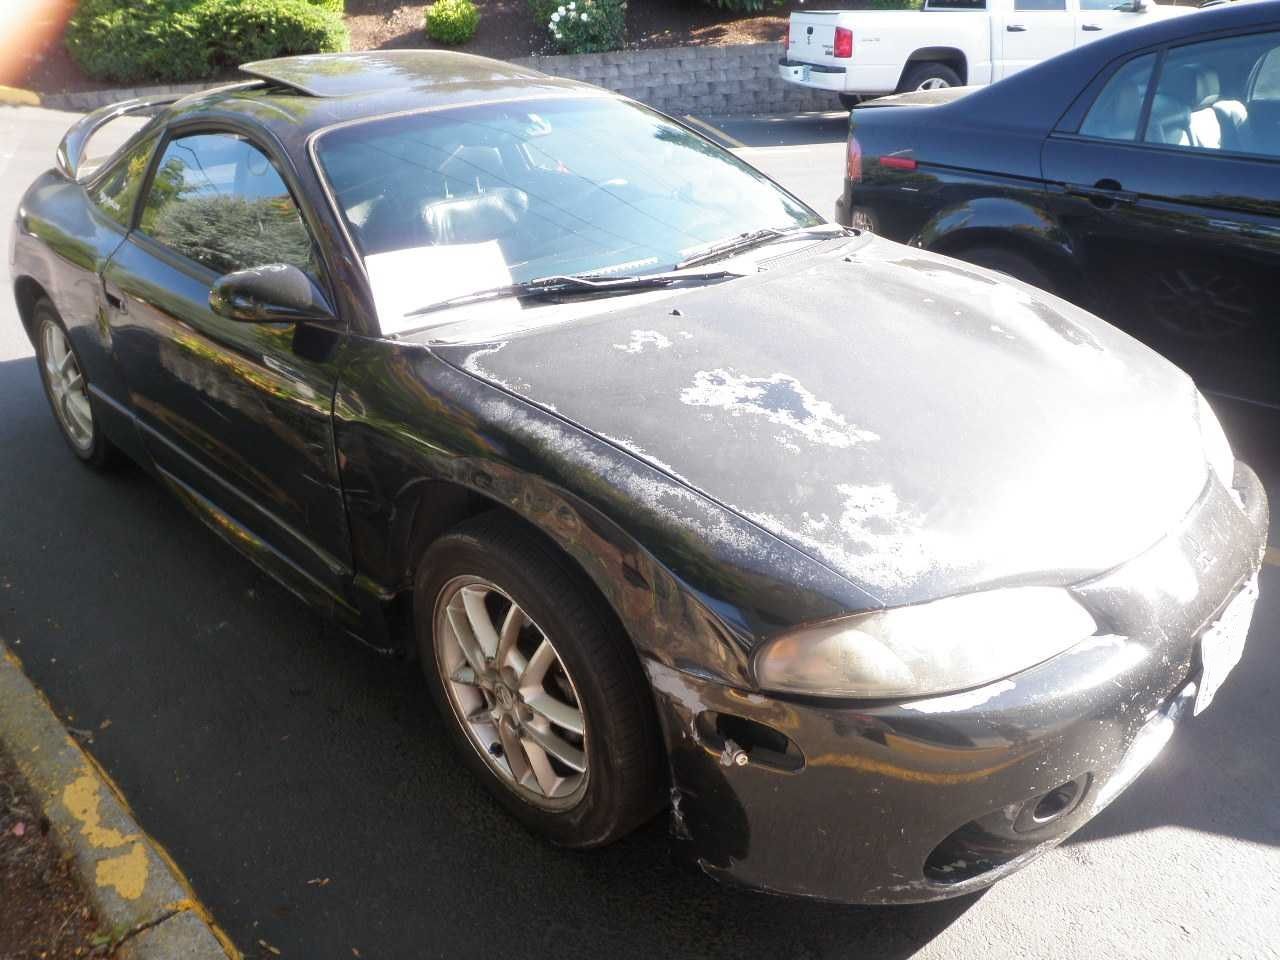
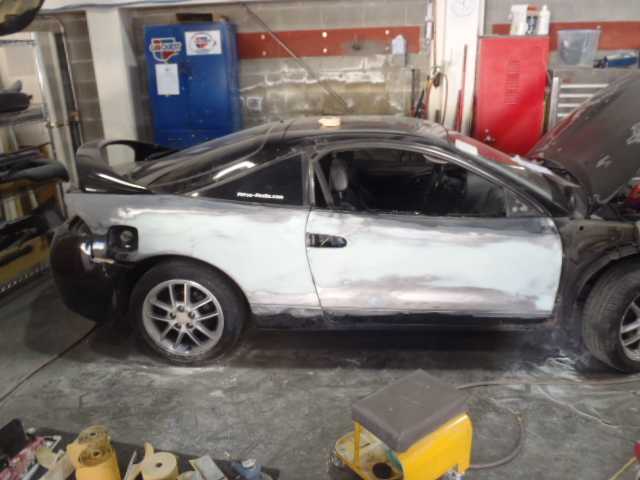
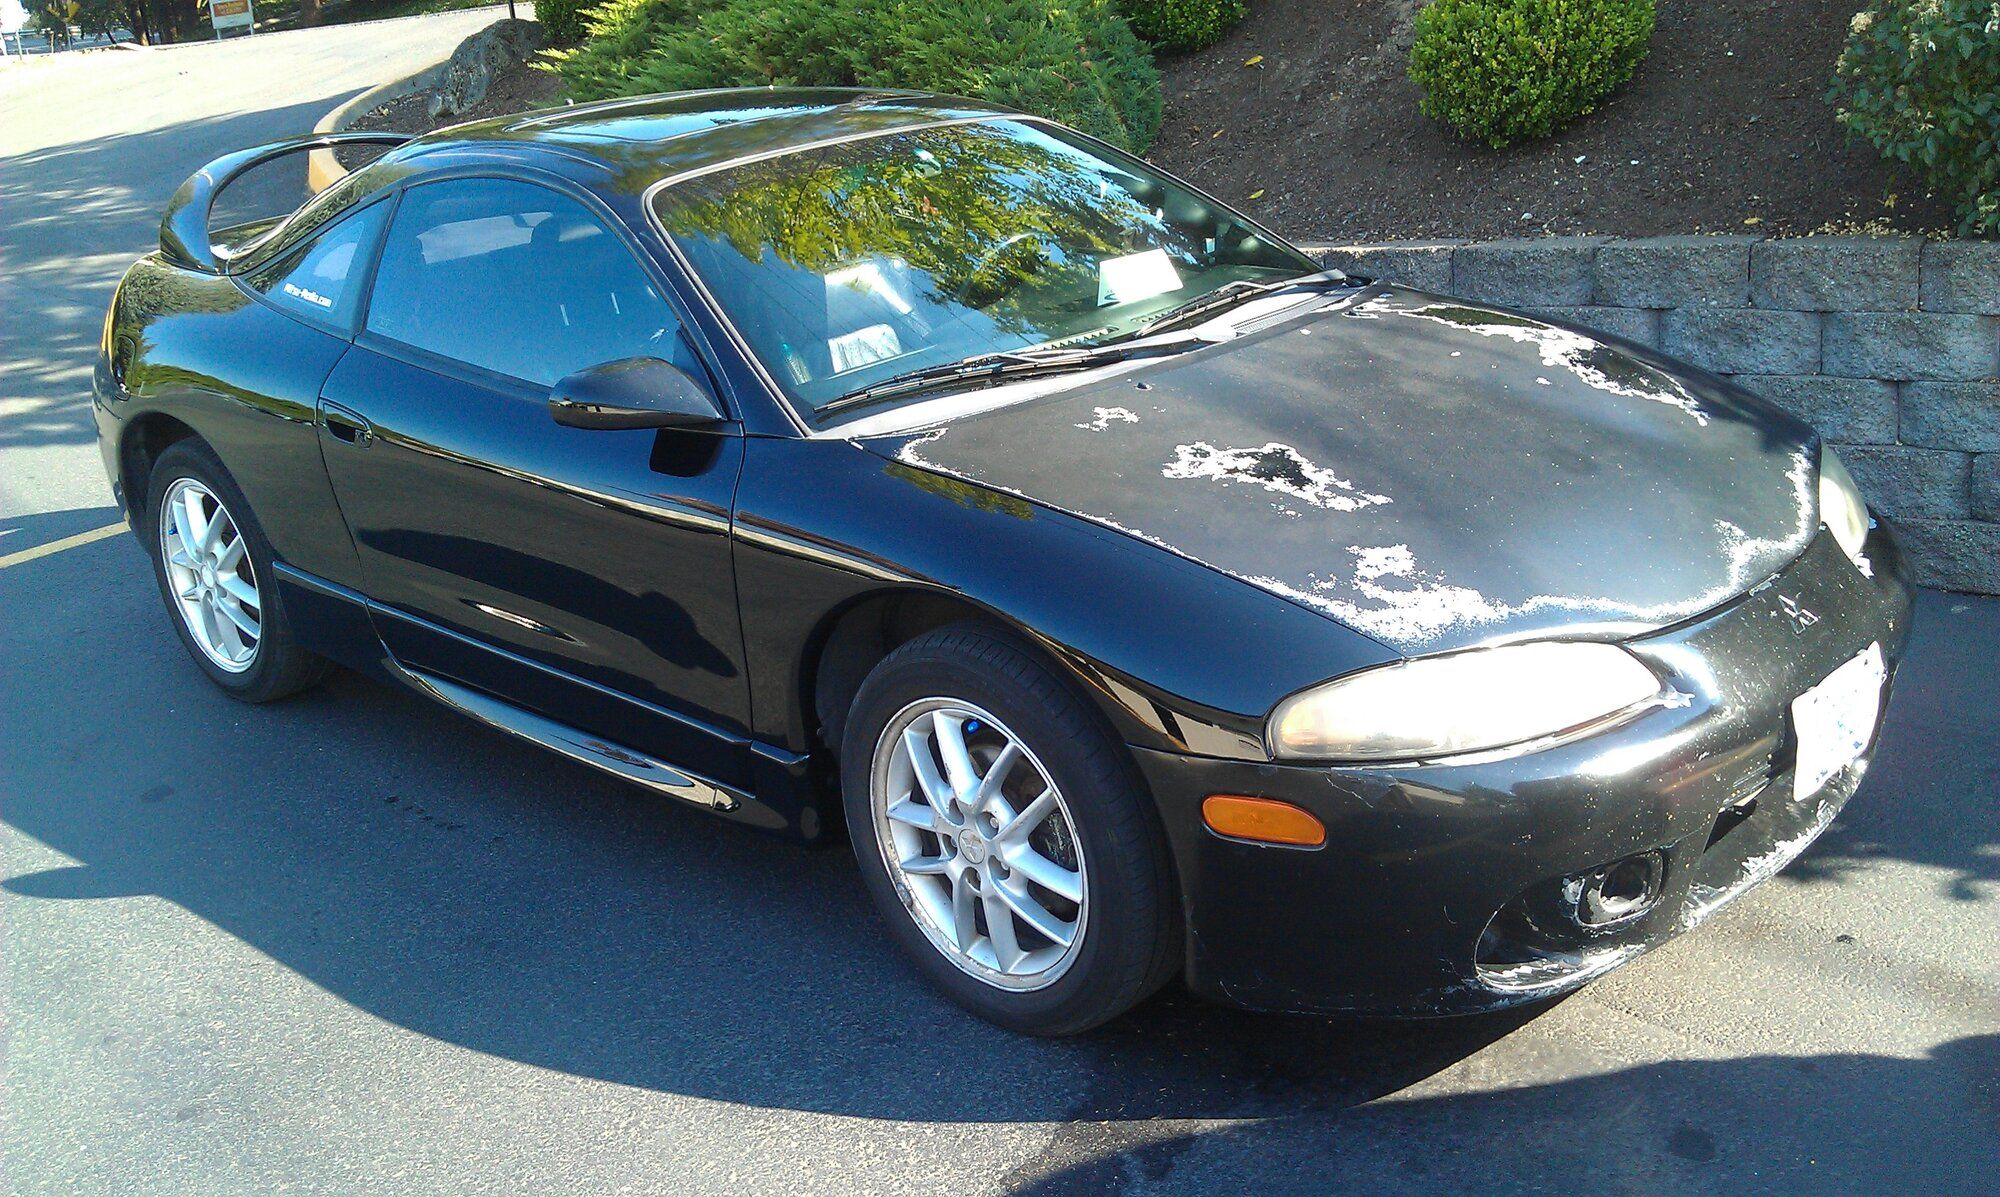
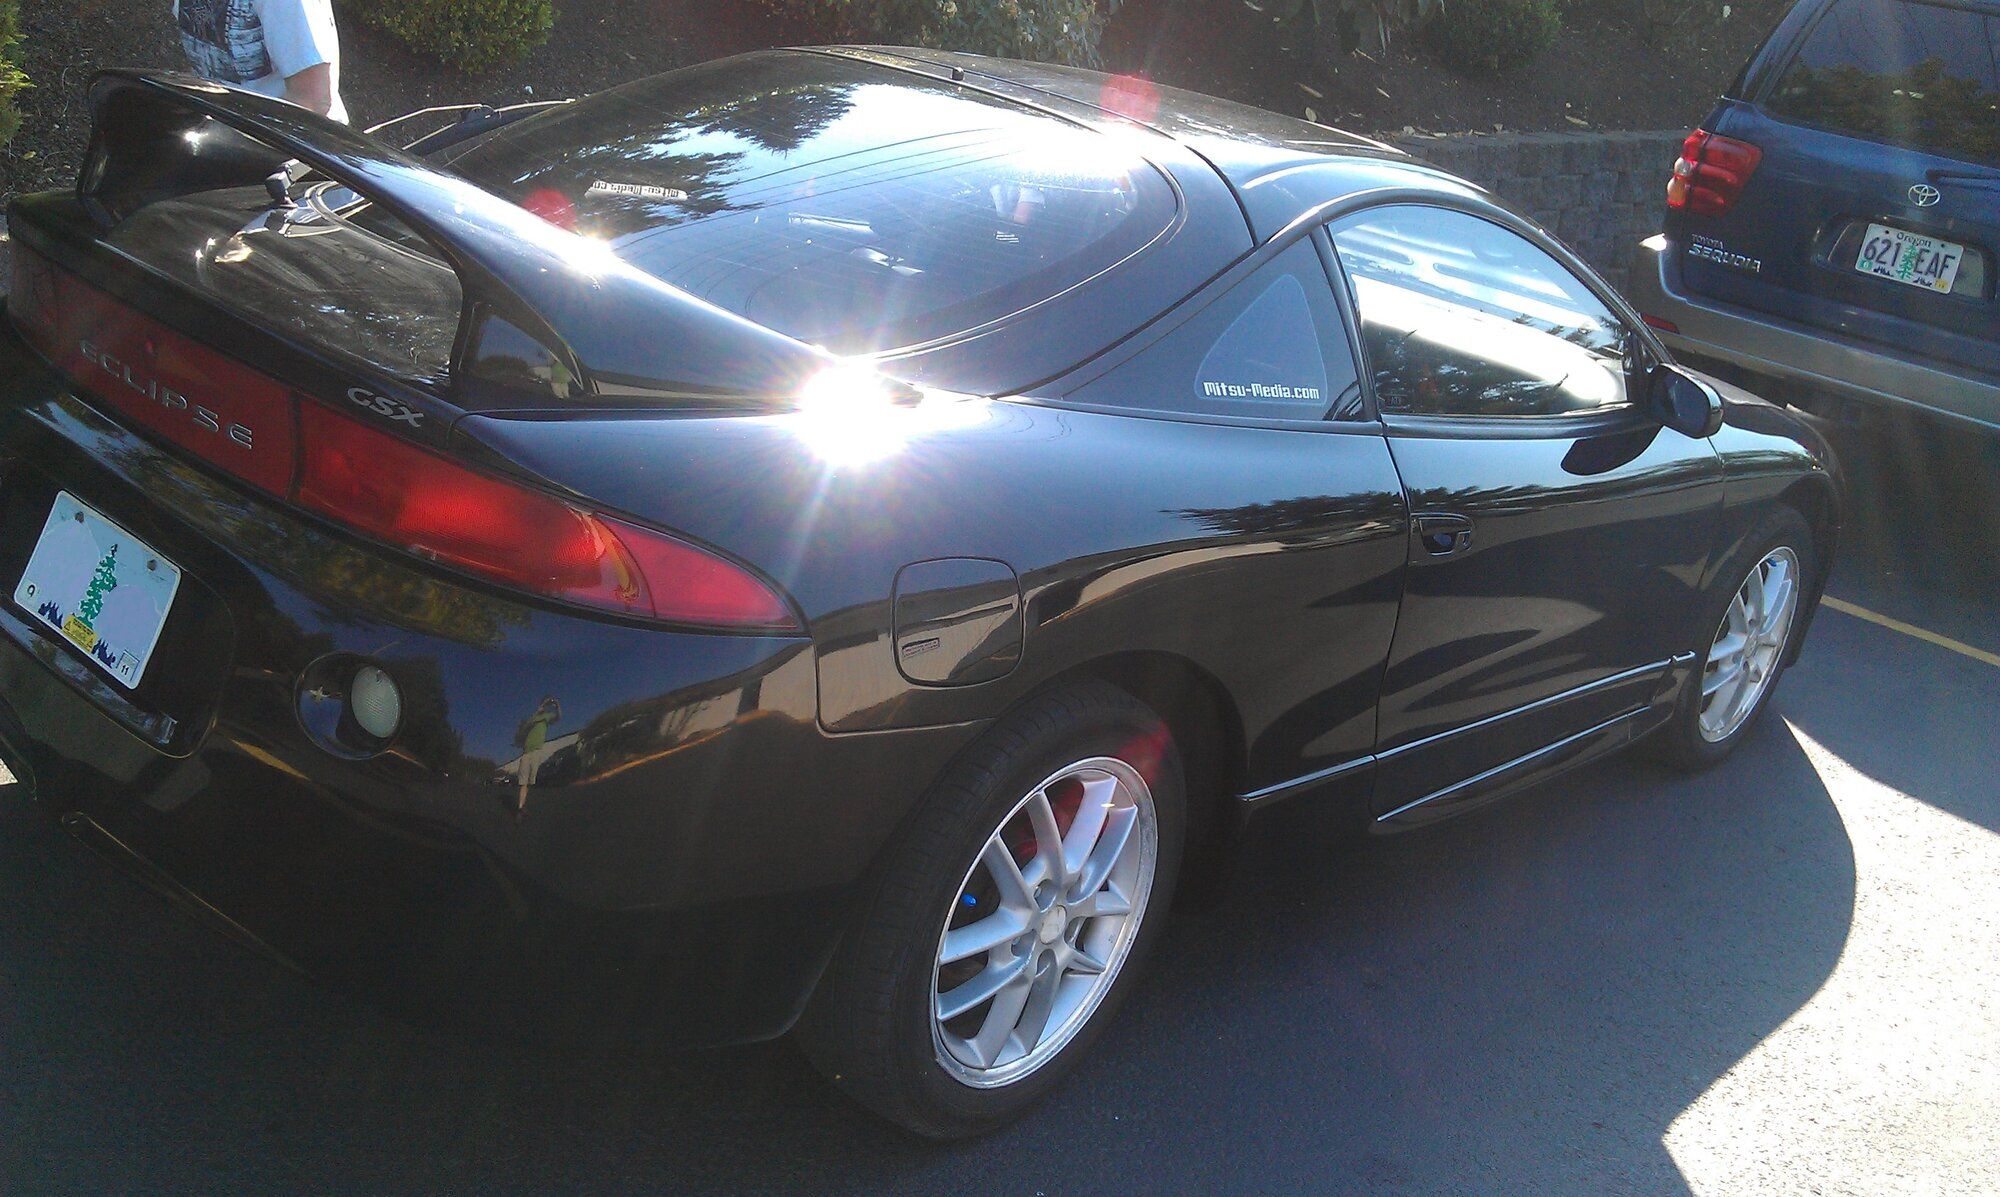
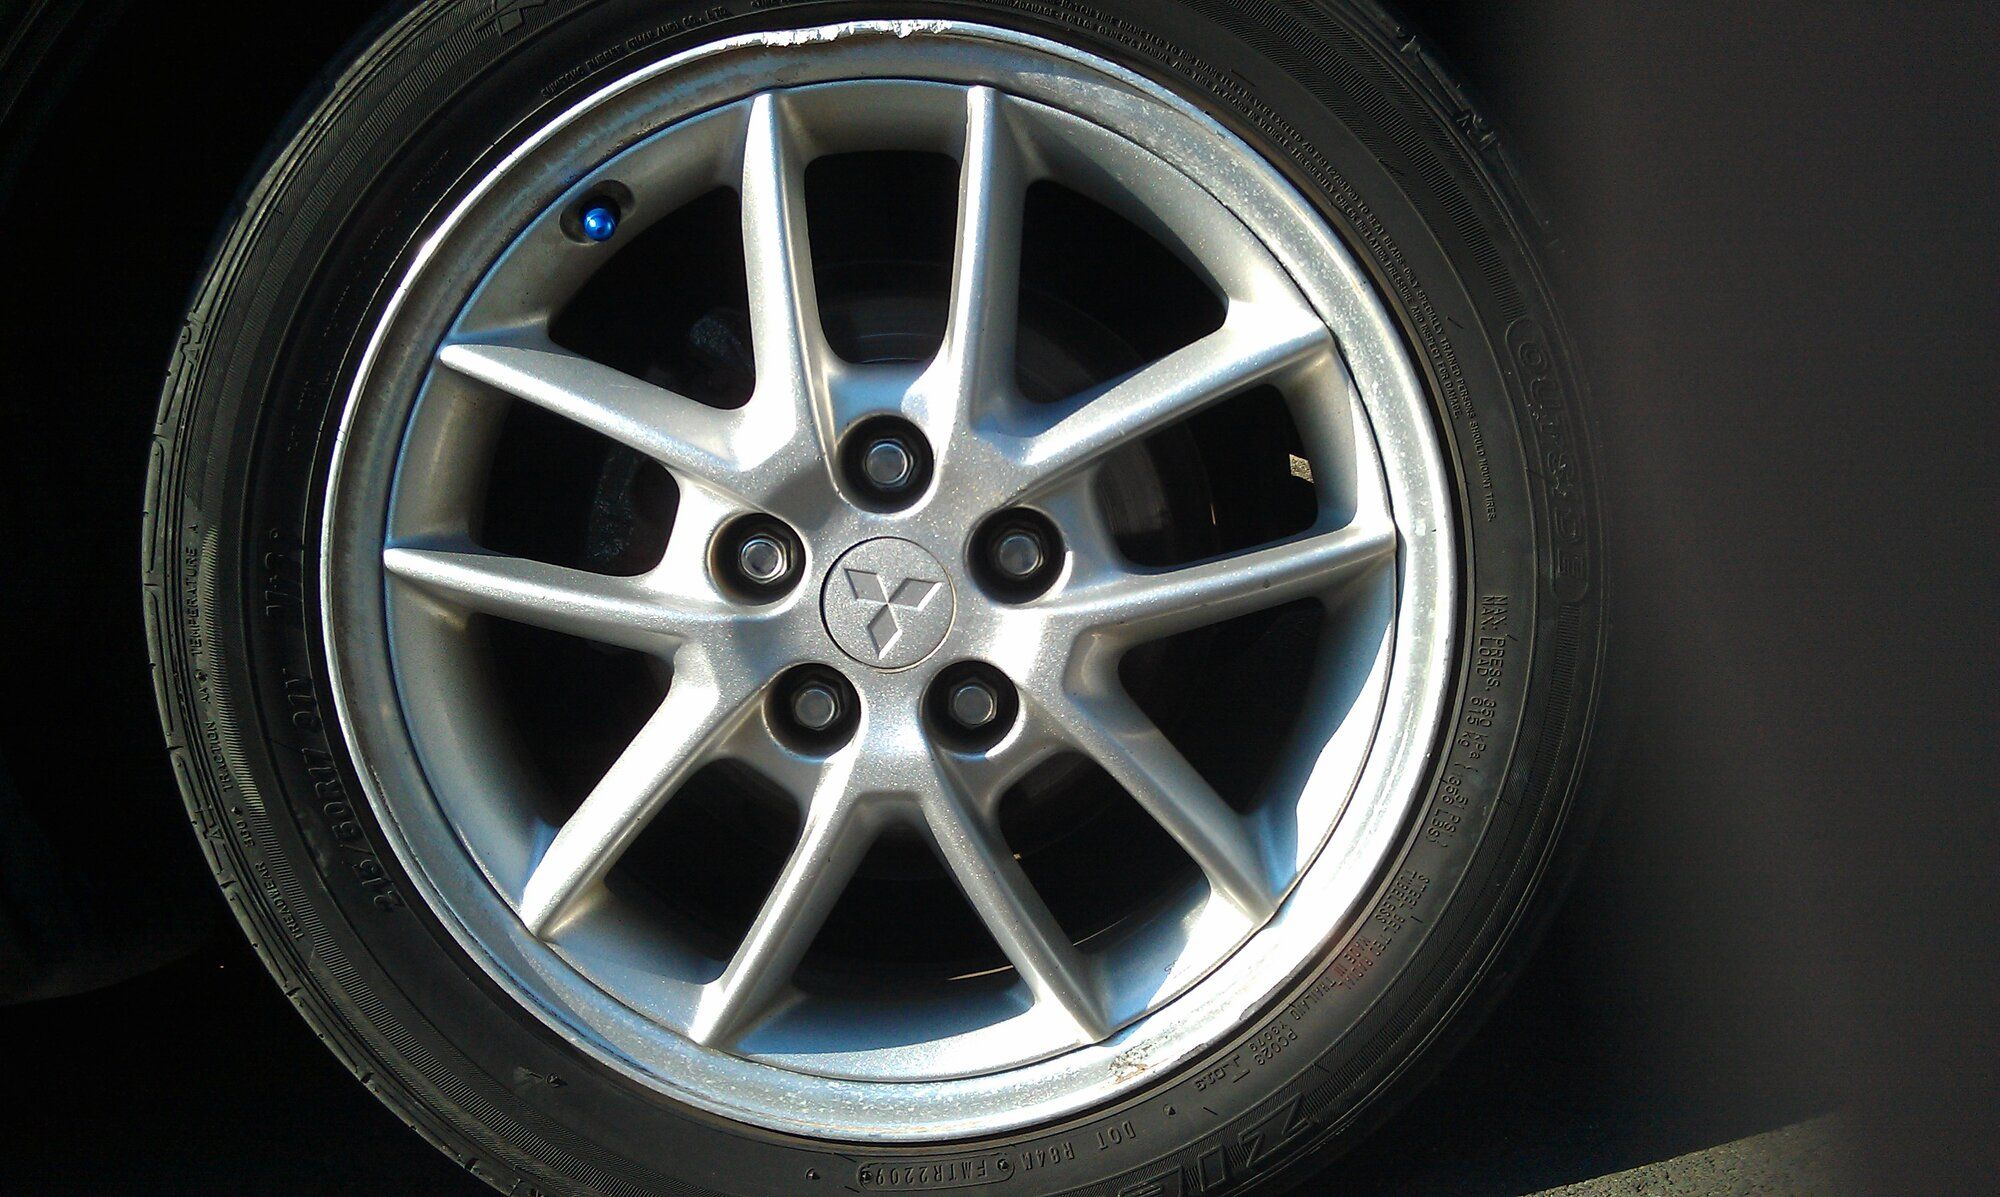
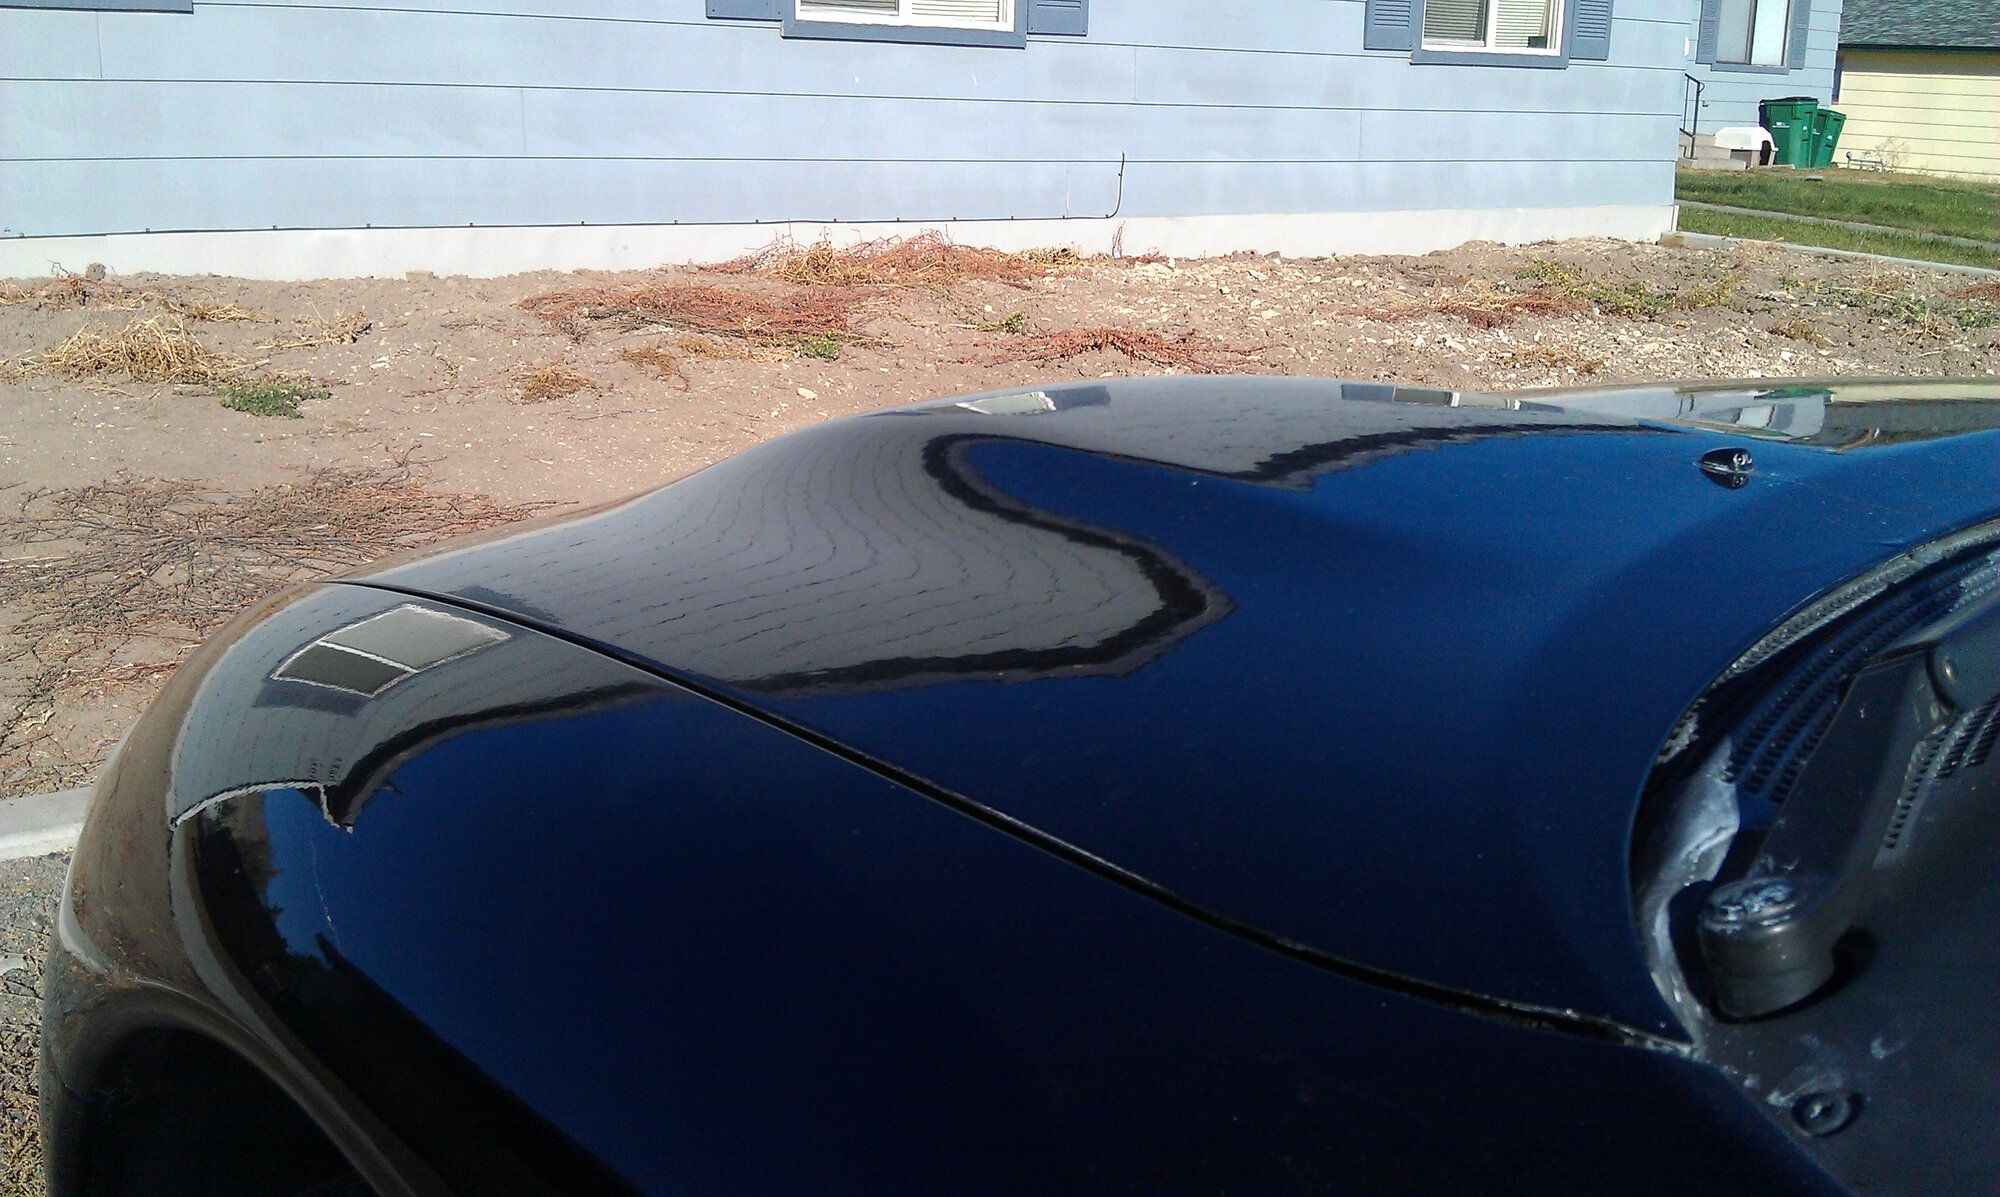
I'll start mostly chronologically but highlighting some of the more significant headaches. First up is the accident I got into in August, 2011 at 141,640 miles. I side-swiped another car to avoid a collision of my front end. The dent started just behind my headlight and all the way back to my gas cap. [SIDE NOTE: In the pictures you can also see the terrible clear coat failure. The hood was the worst.] The shop provided pictures through the process and I was able to skirt the line of being totaled due to them discussing with me what to leave off such as the dent in the wheel in the last pic to keep cost down below the threshold. So shiny afterward!
Last edited:
- Thread starter
- #4
jukematt
15+ Year Contributor
- 291
- 40
- Jun 13, 2009
-
Portland Metro,
Oregon
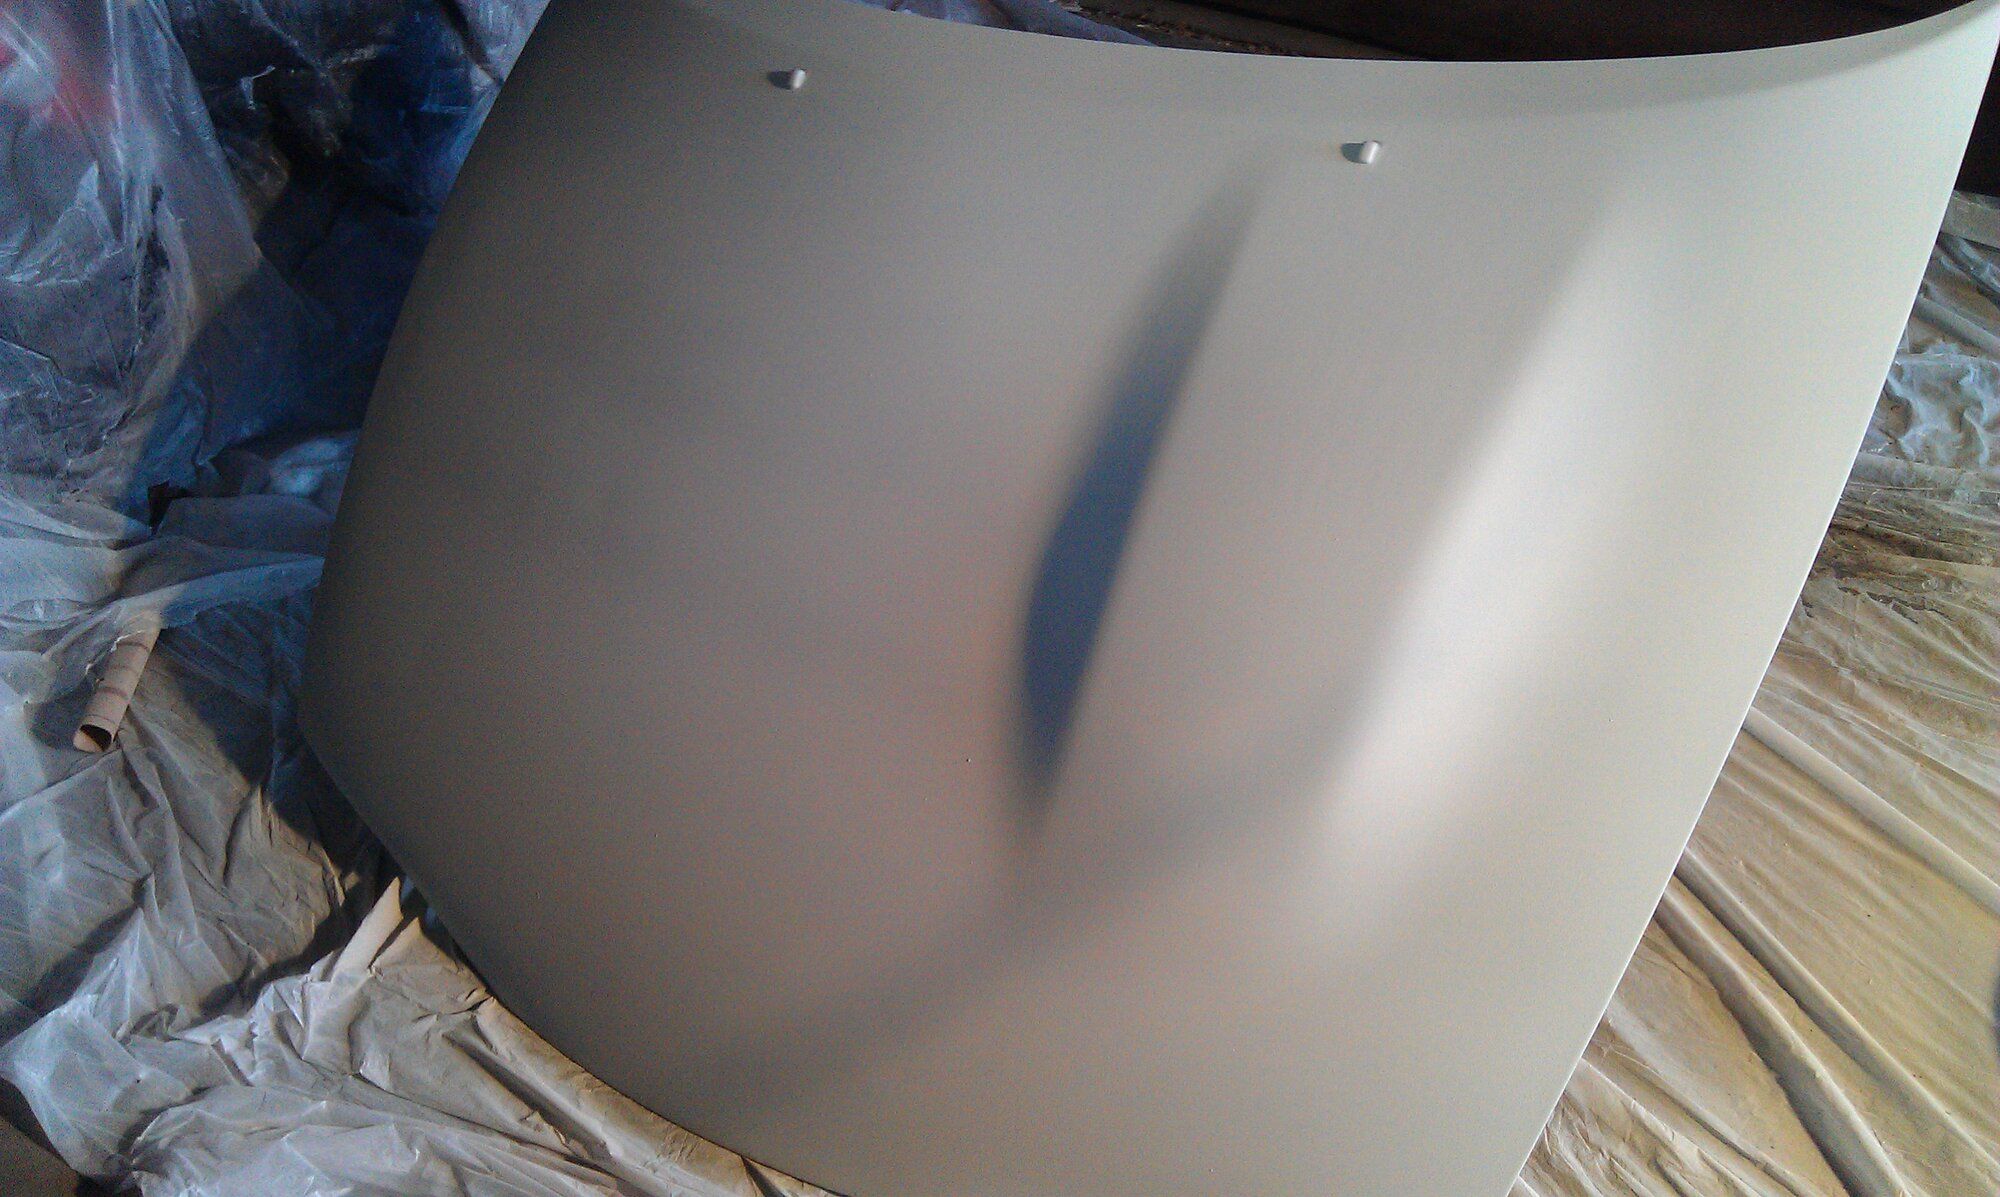
October, 2011. Painting the hood and driver fender.
That hood and fender clashed so hard with the beautiful passenger side and when I washed the car you couldn't tell so much so I really wanted it to look nice. My friend offered to help me paint the worst offenders. The problem is, we did it in his garage in the winter so we couldn't cure it properly. It worked, but the paint flaked off in places. I was also new to painting and we didn't wear any breathing apparatus. He just didn't worry about it and said he had painted cars before and didn't wear one. Well, at one point I went to blow my nose and it came out black. Yeah I was done at that point without anything to filter my breathing. Lesson learned for me. We also failed to paint the inside of the fender outside of the primer coat so to this day you can see it, especially when you open the driver door.
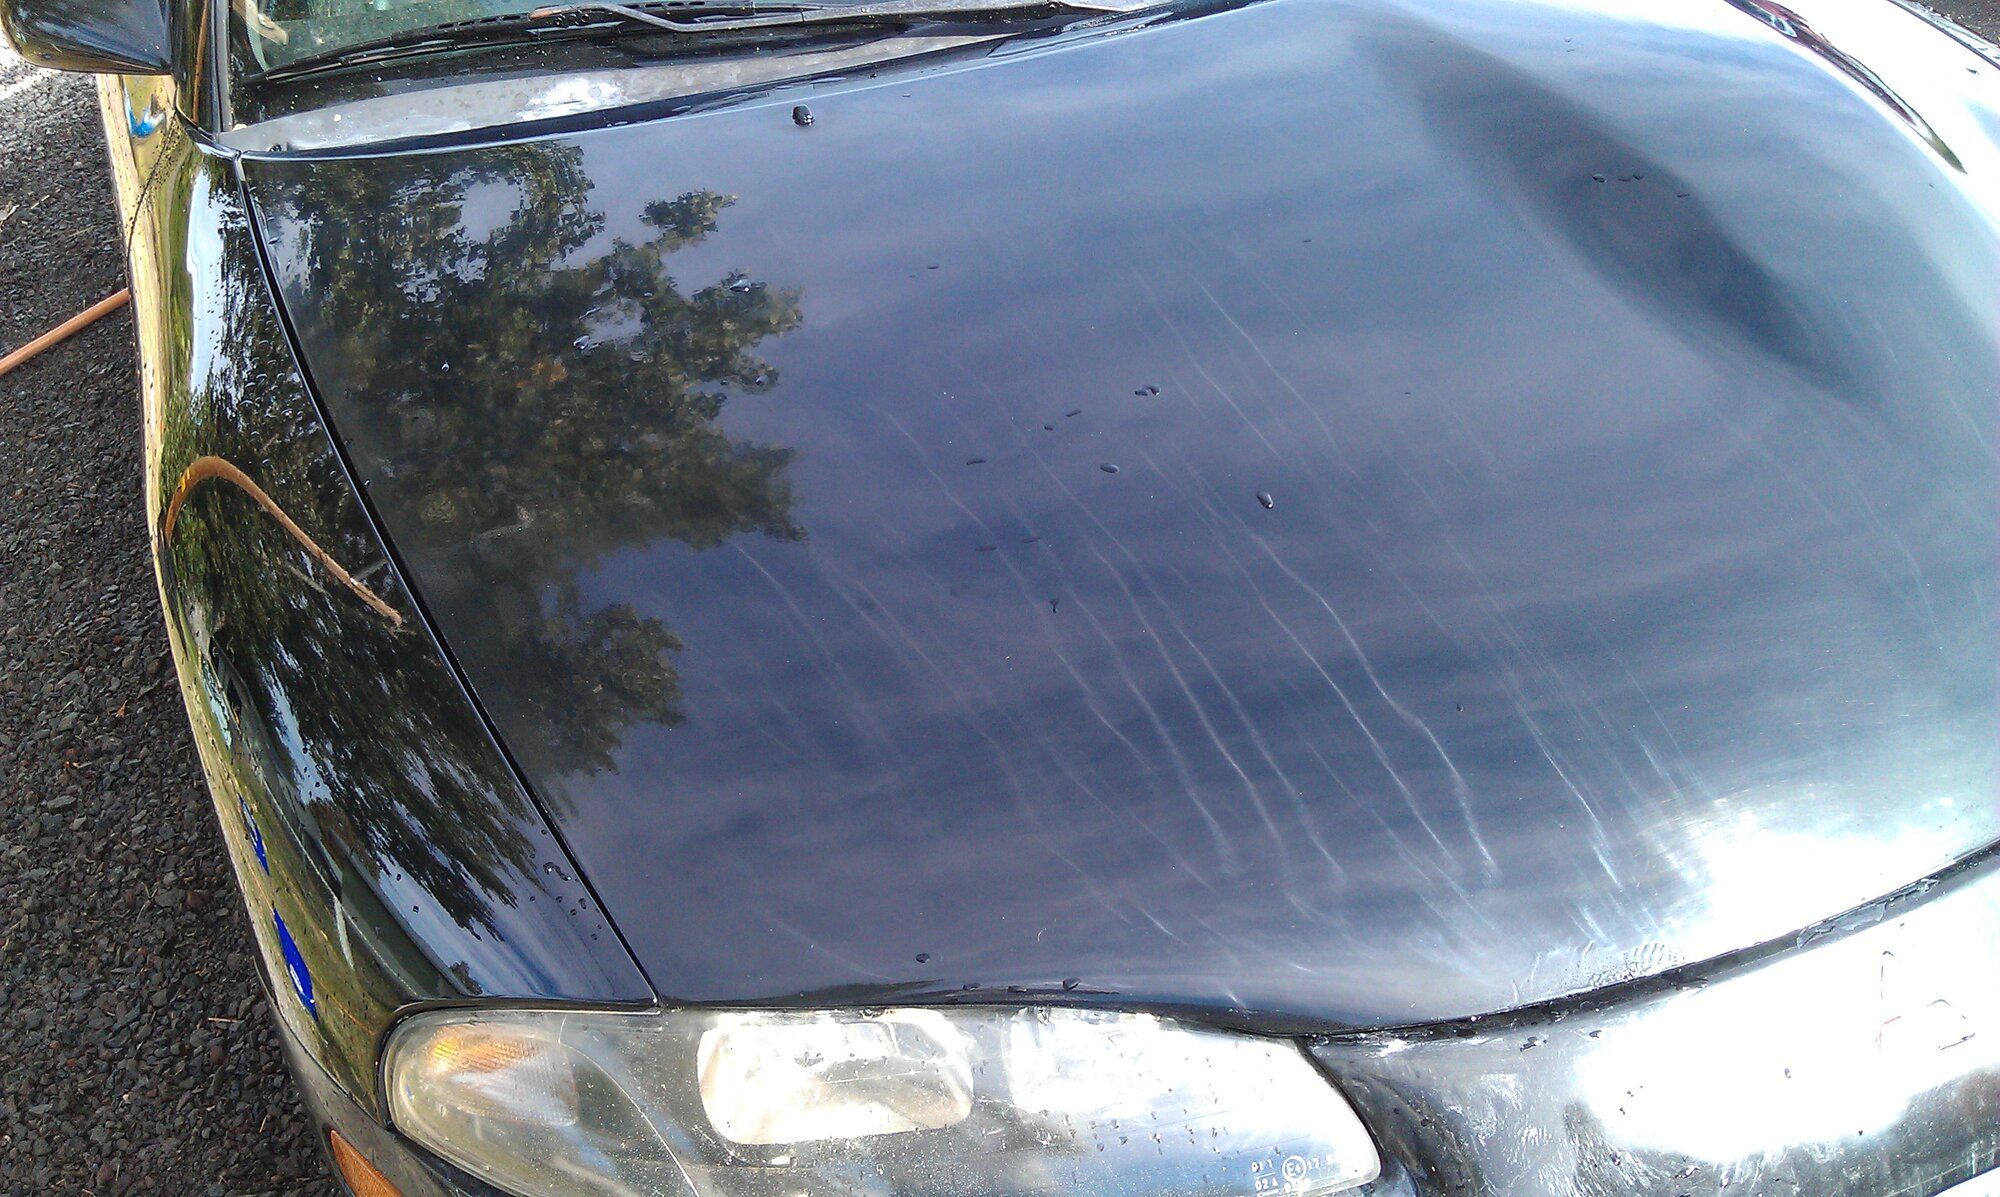
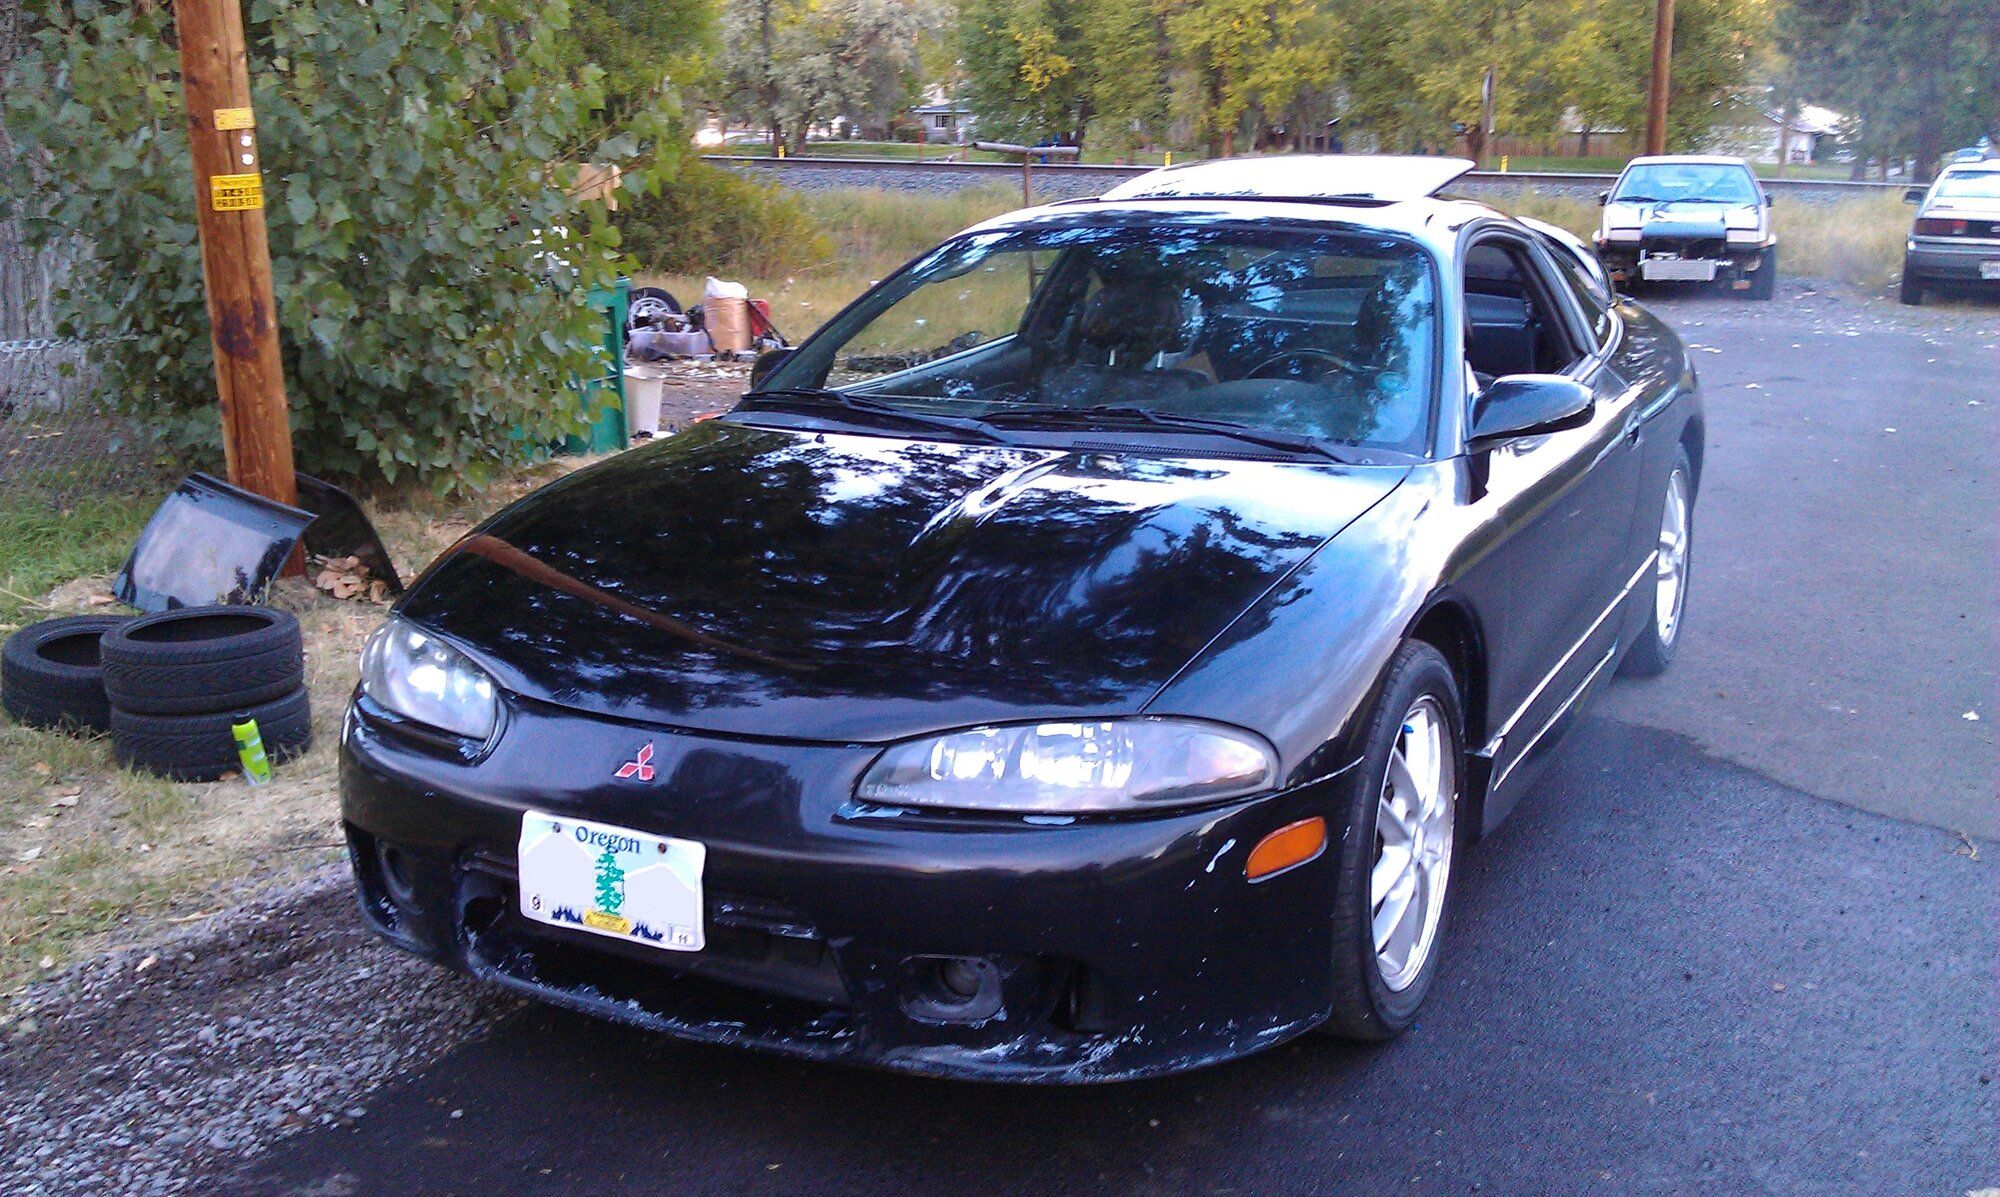
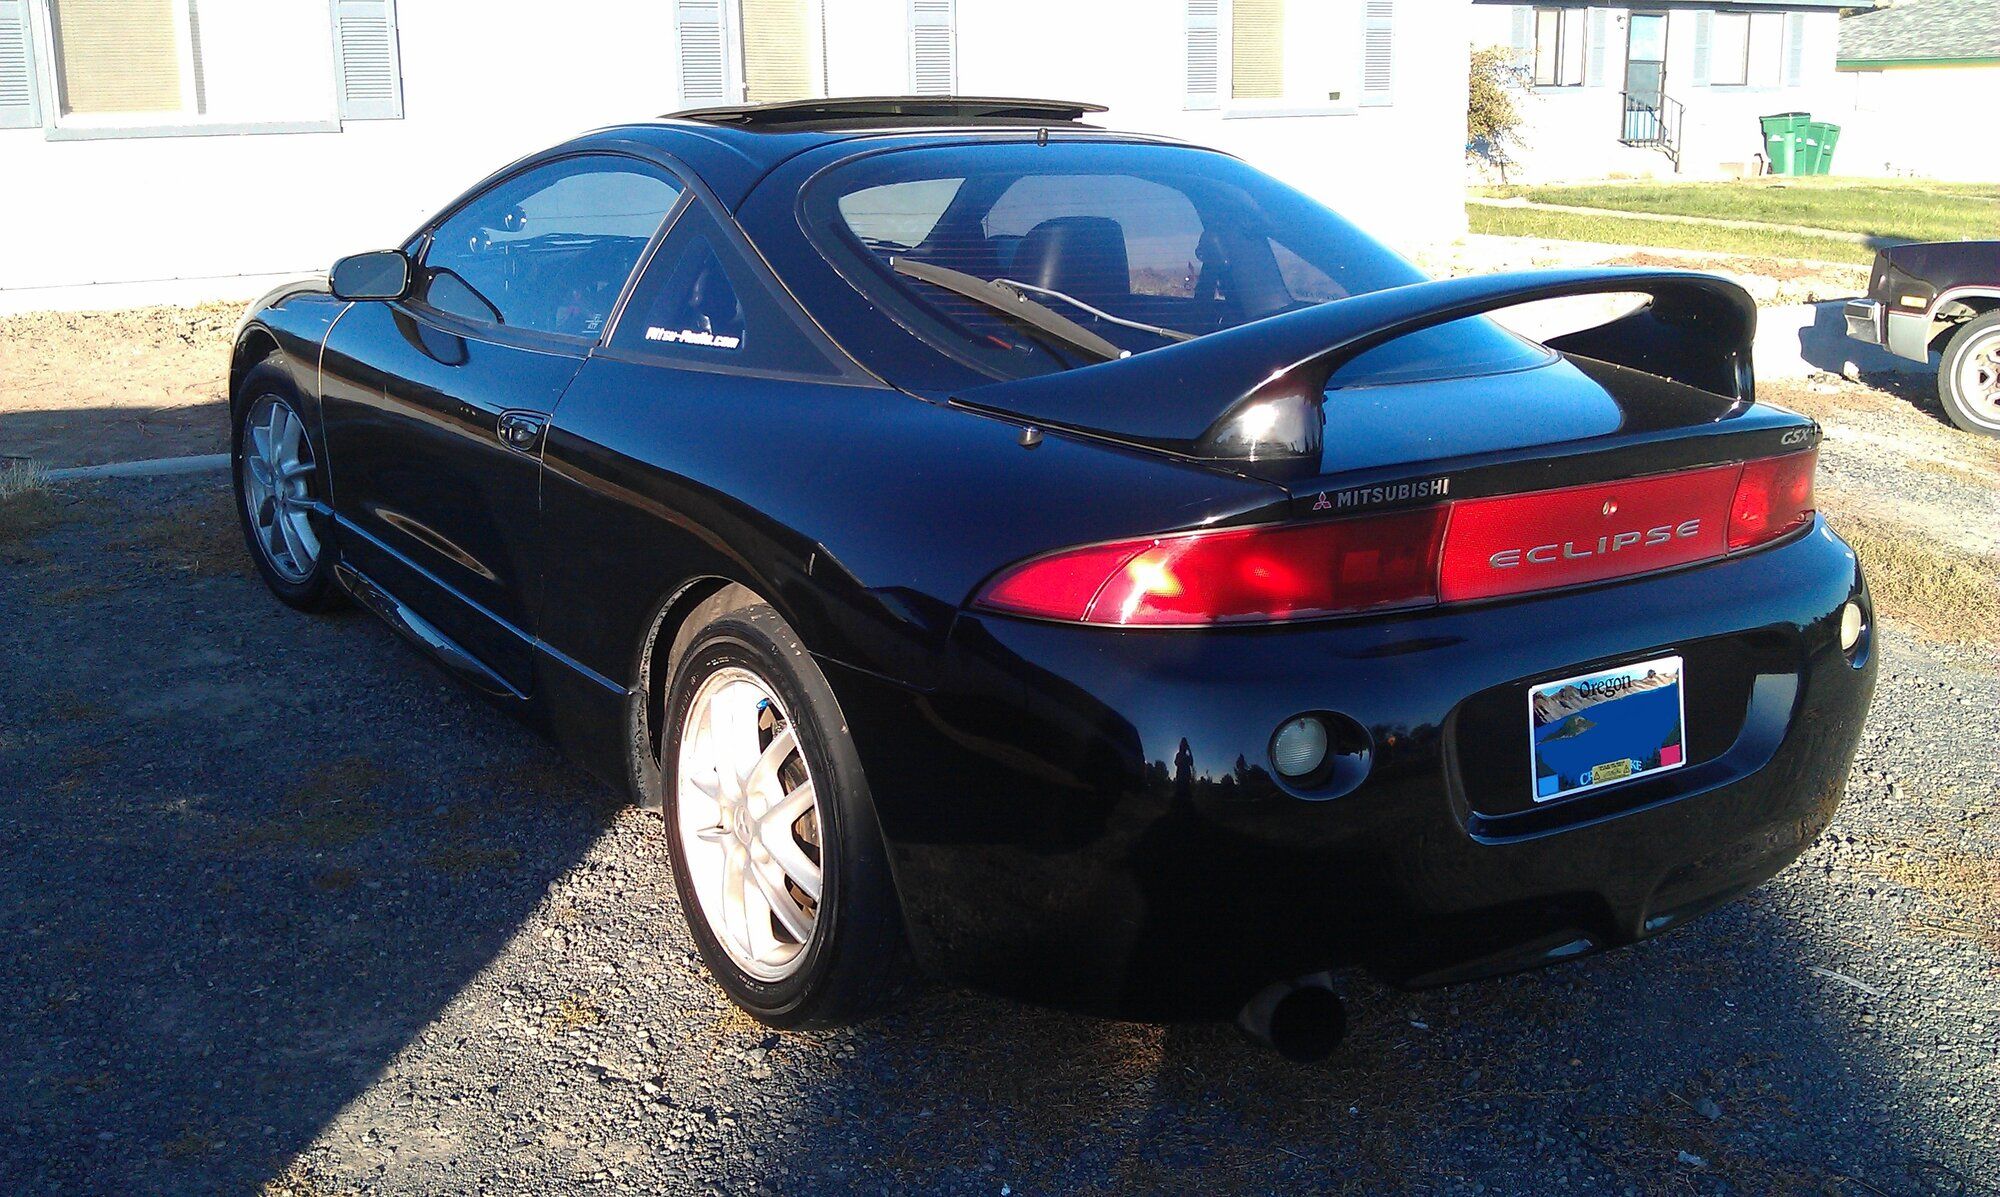
Second pic is also before painting but wet from a wash. See how nice she looks? And then the second pic is after she dried . After painting, there were these streaks that actually looked three dimensional and kind of cool but I didn't want them. After buffing she was looking really nice!
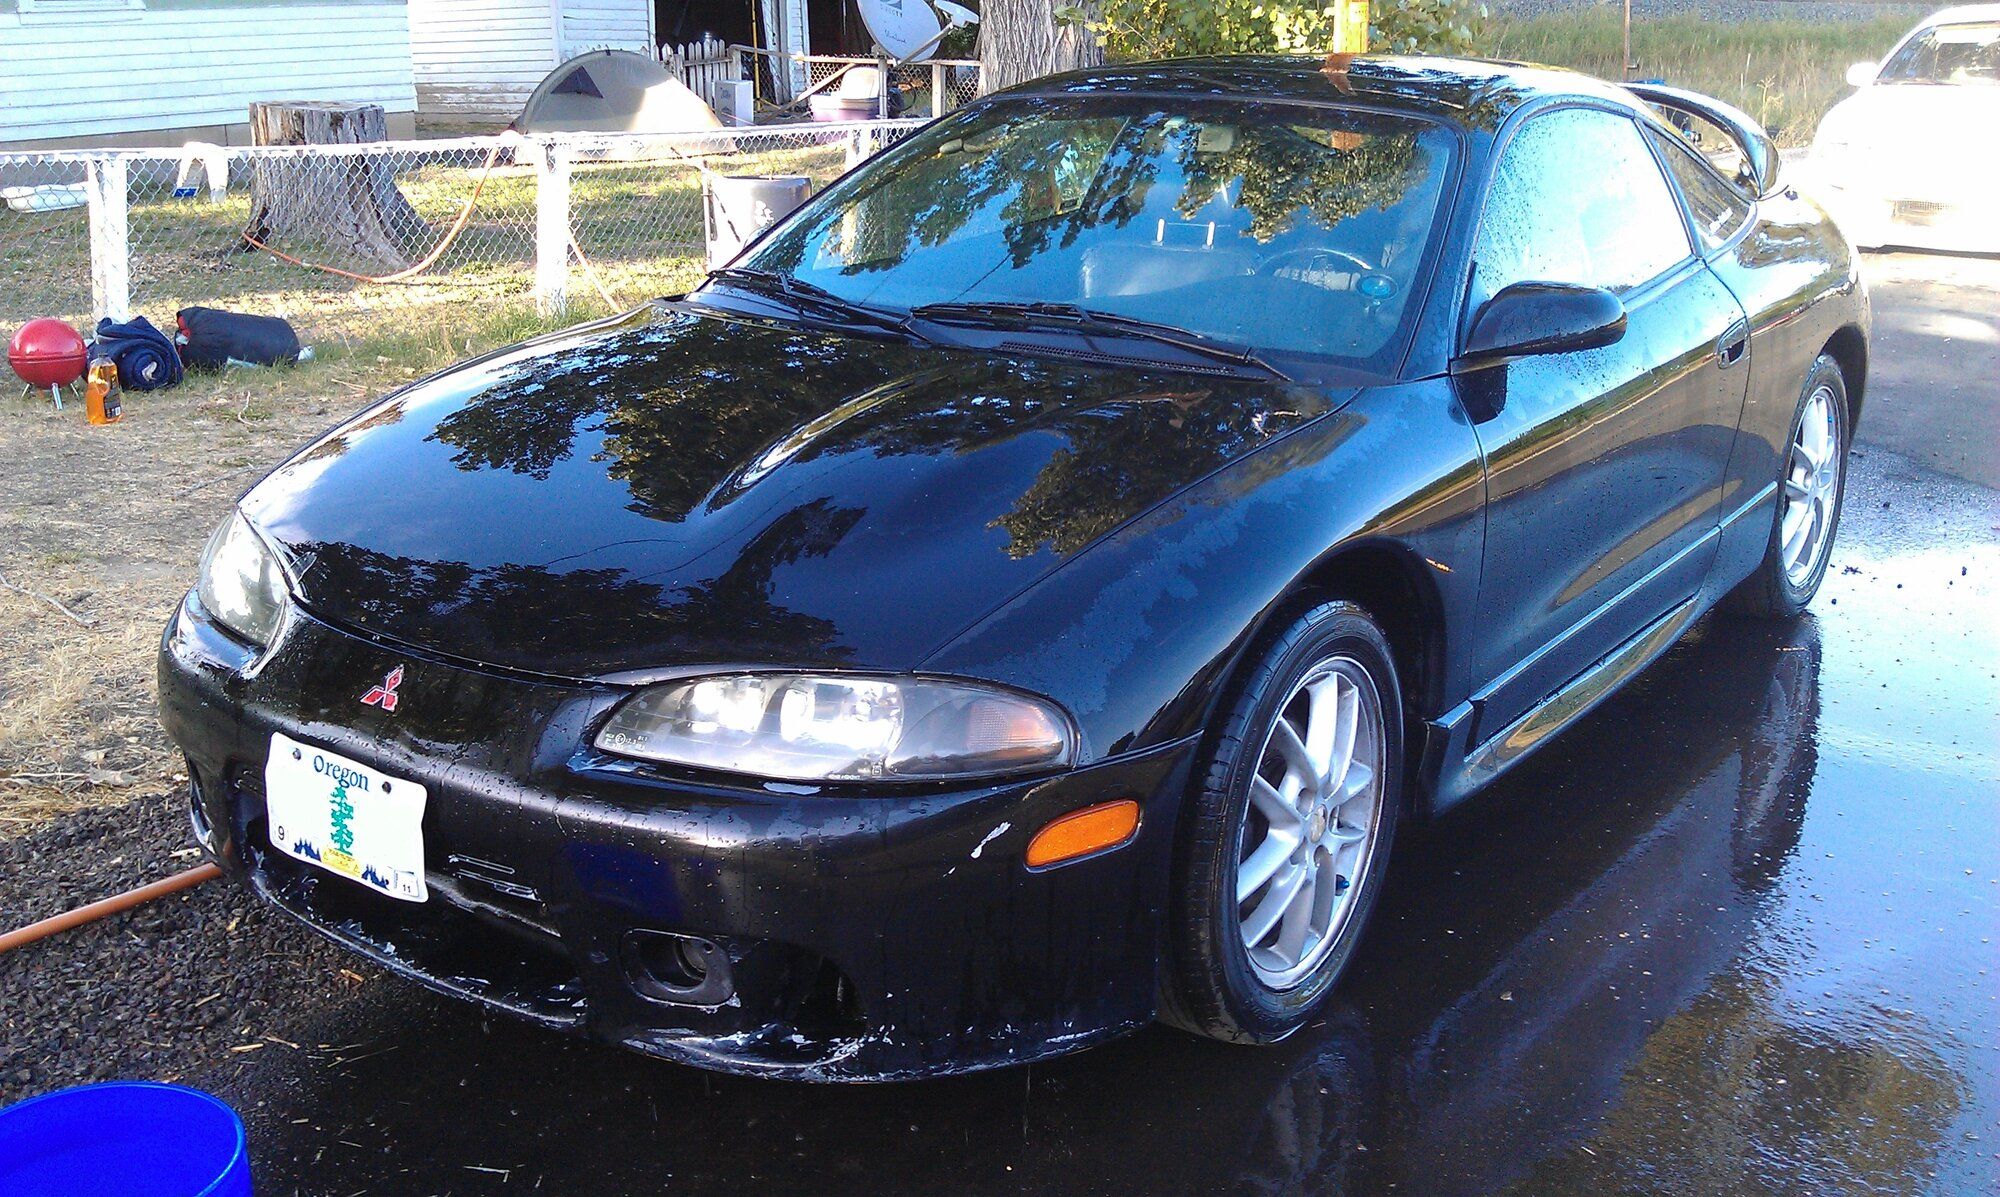
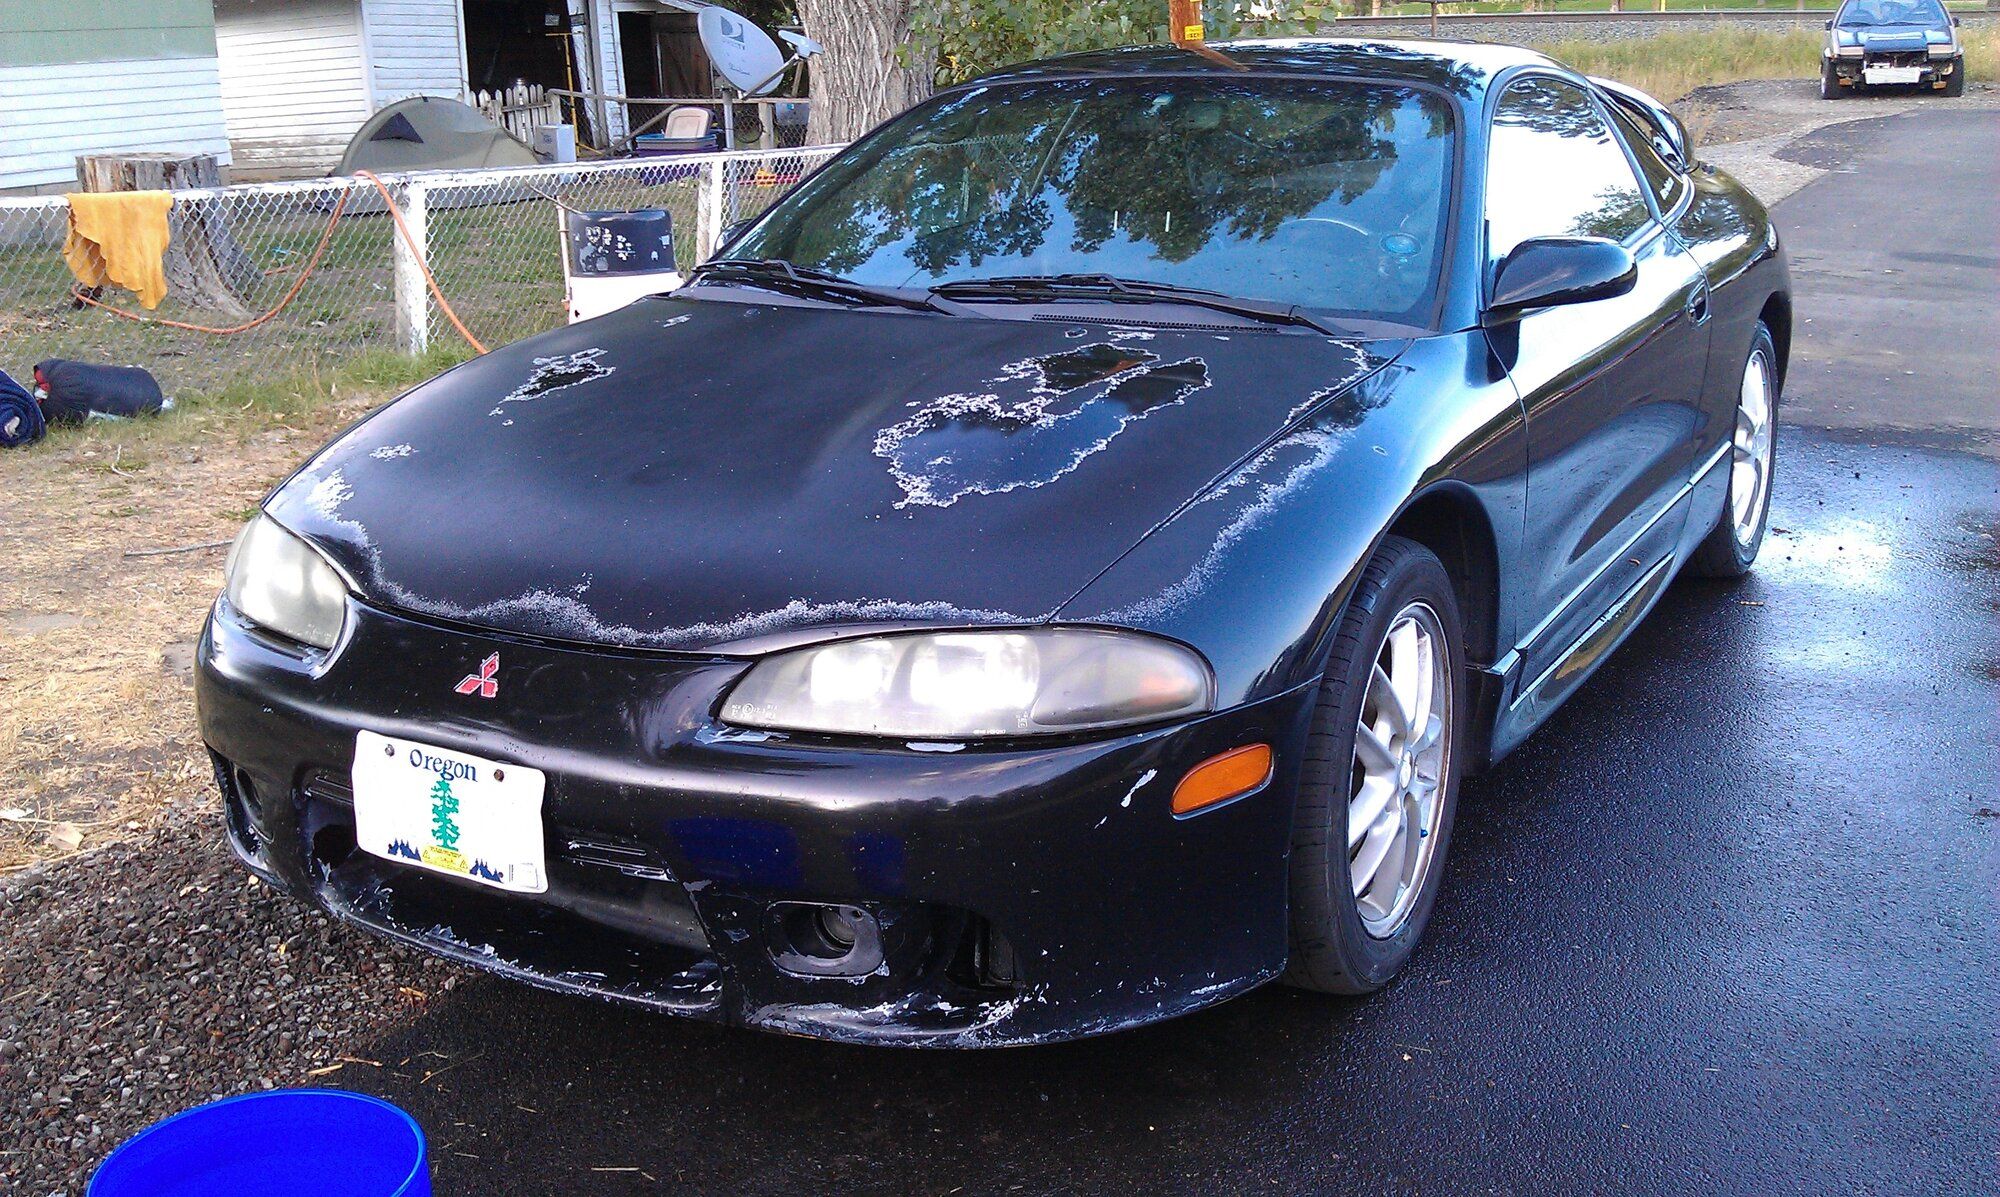
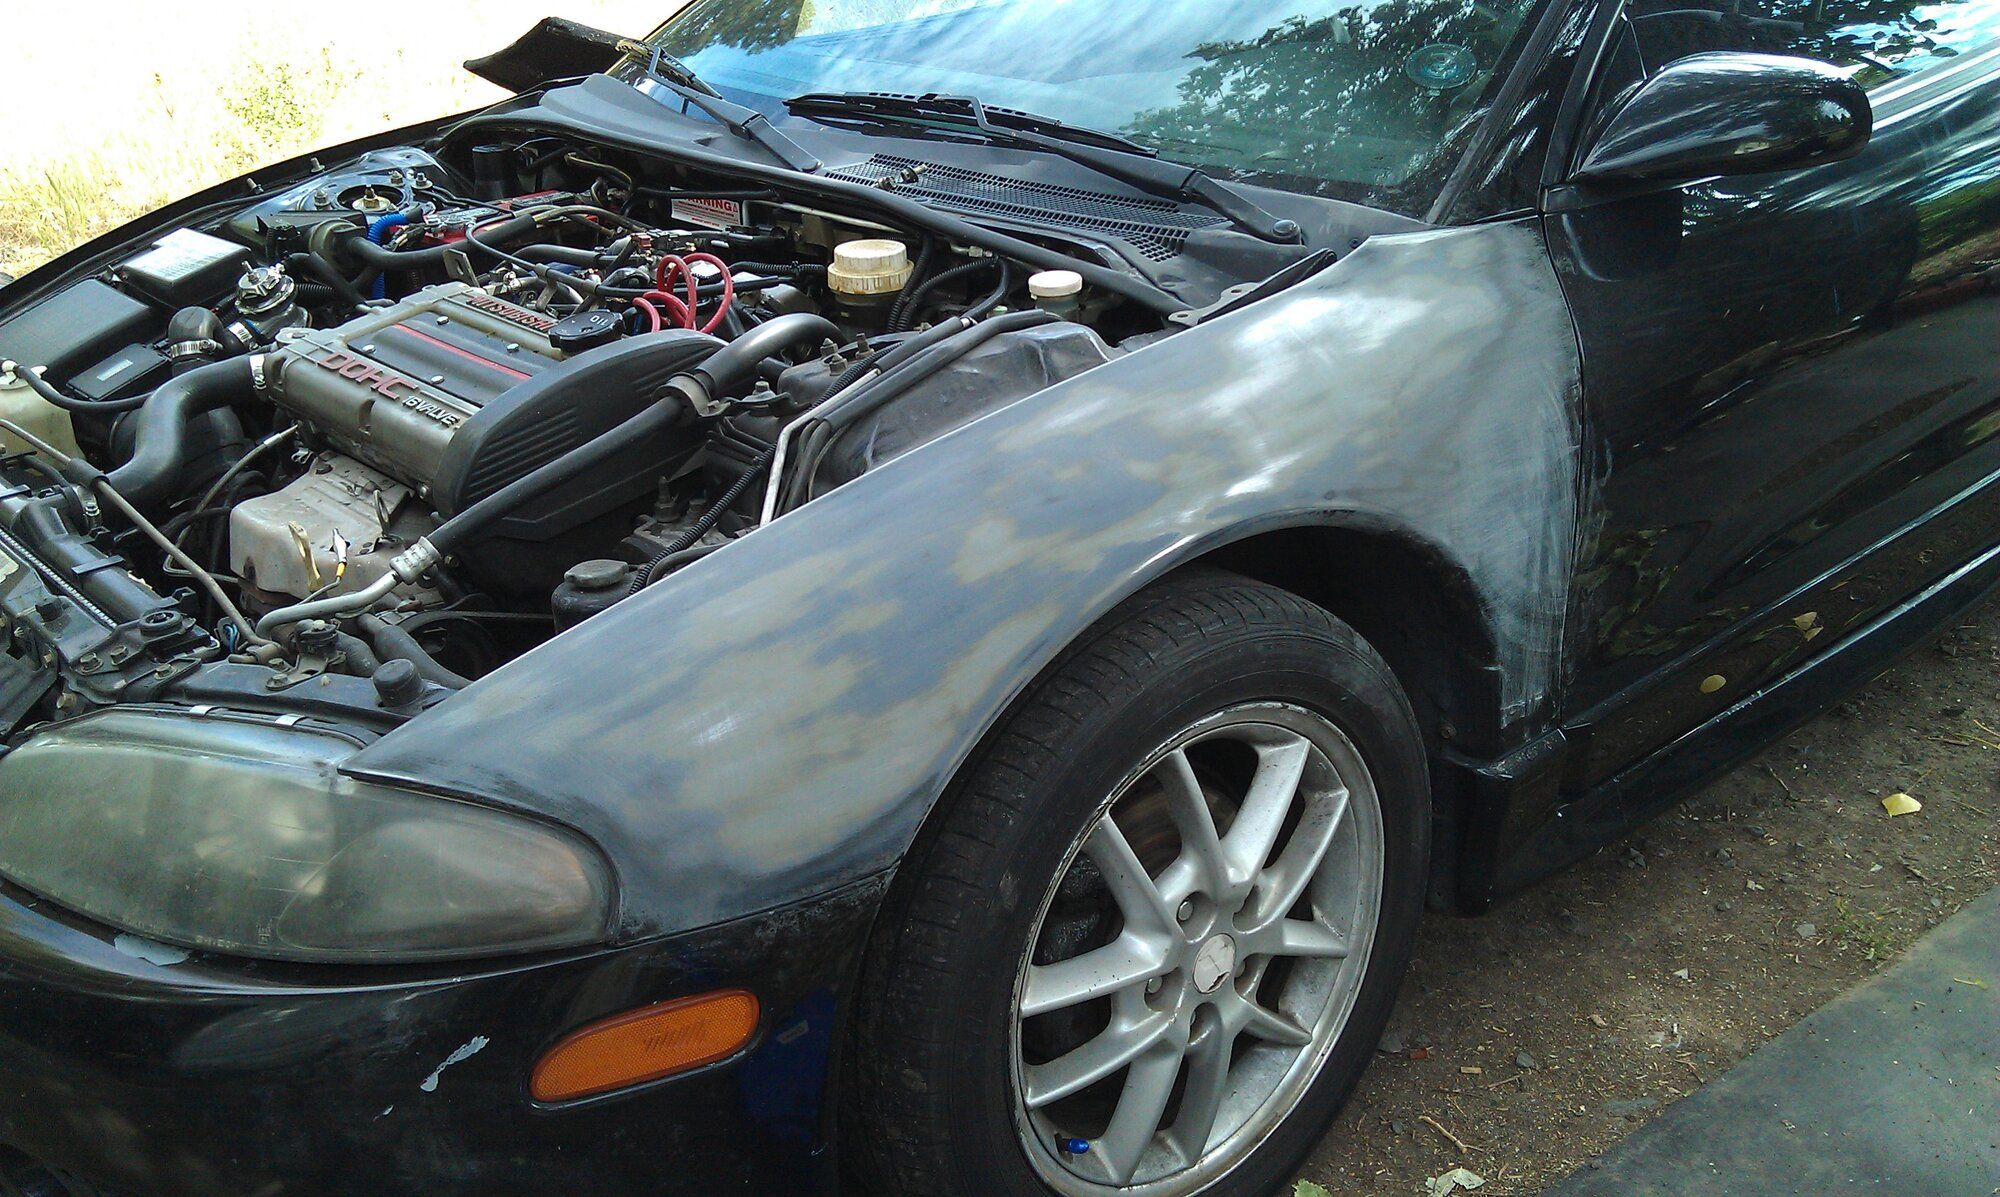
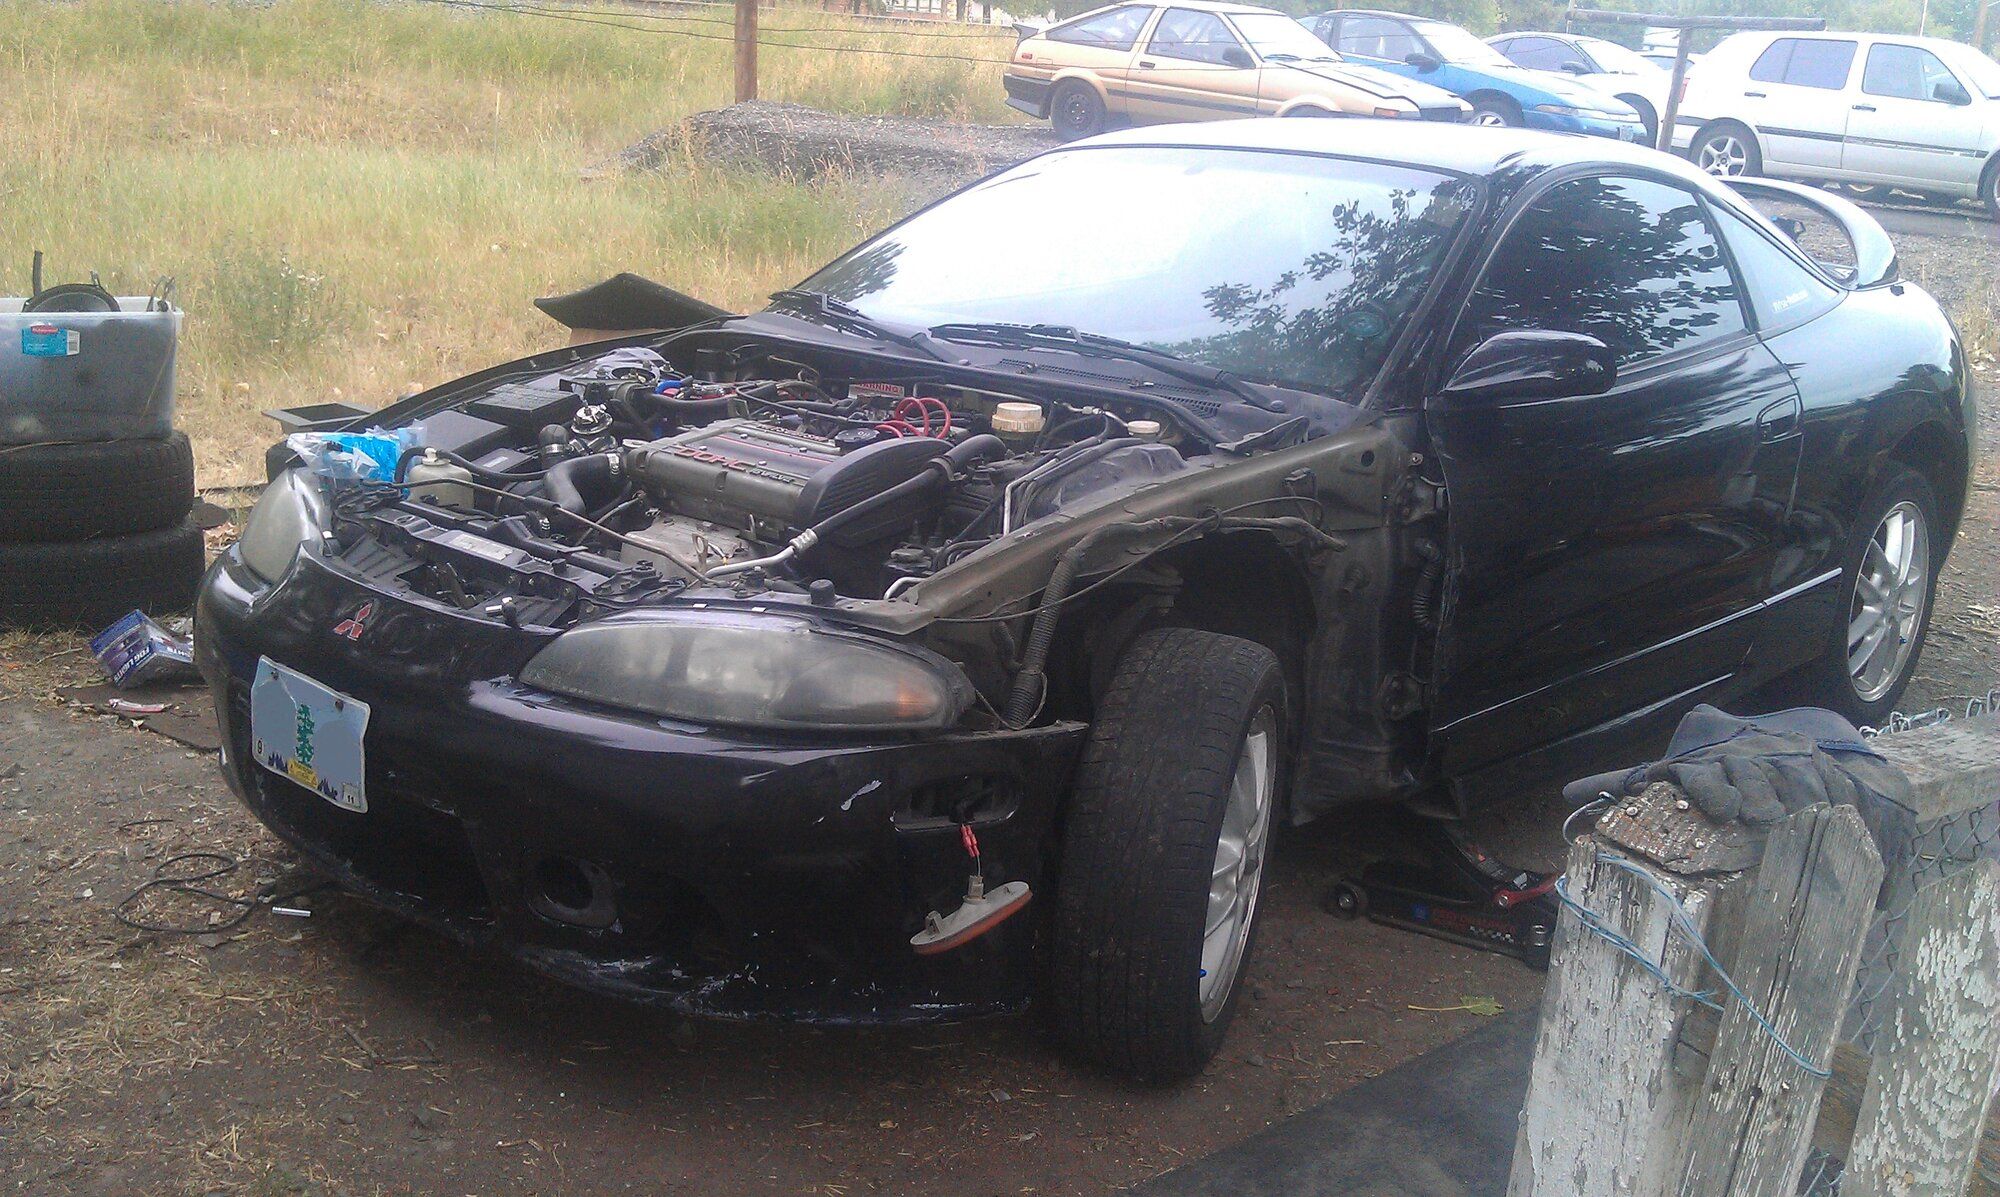
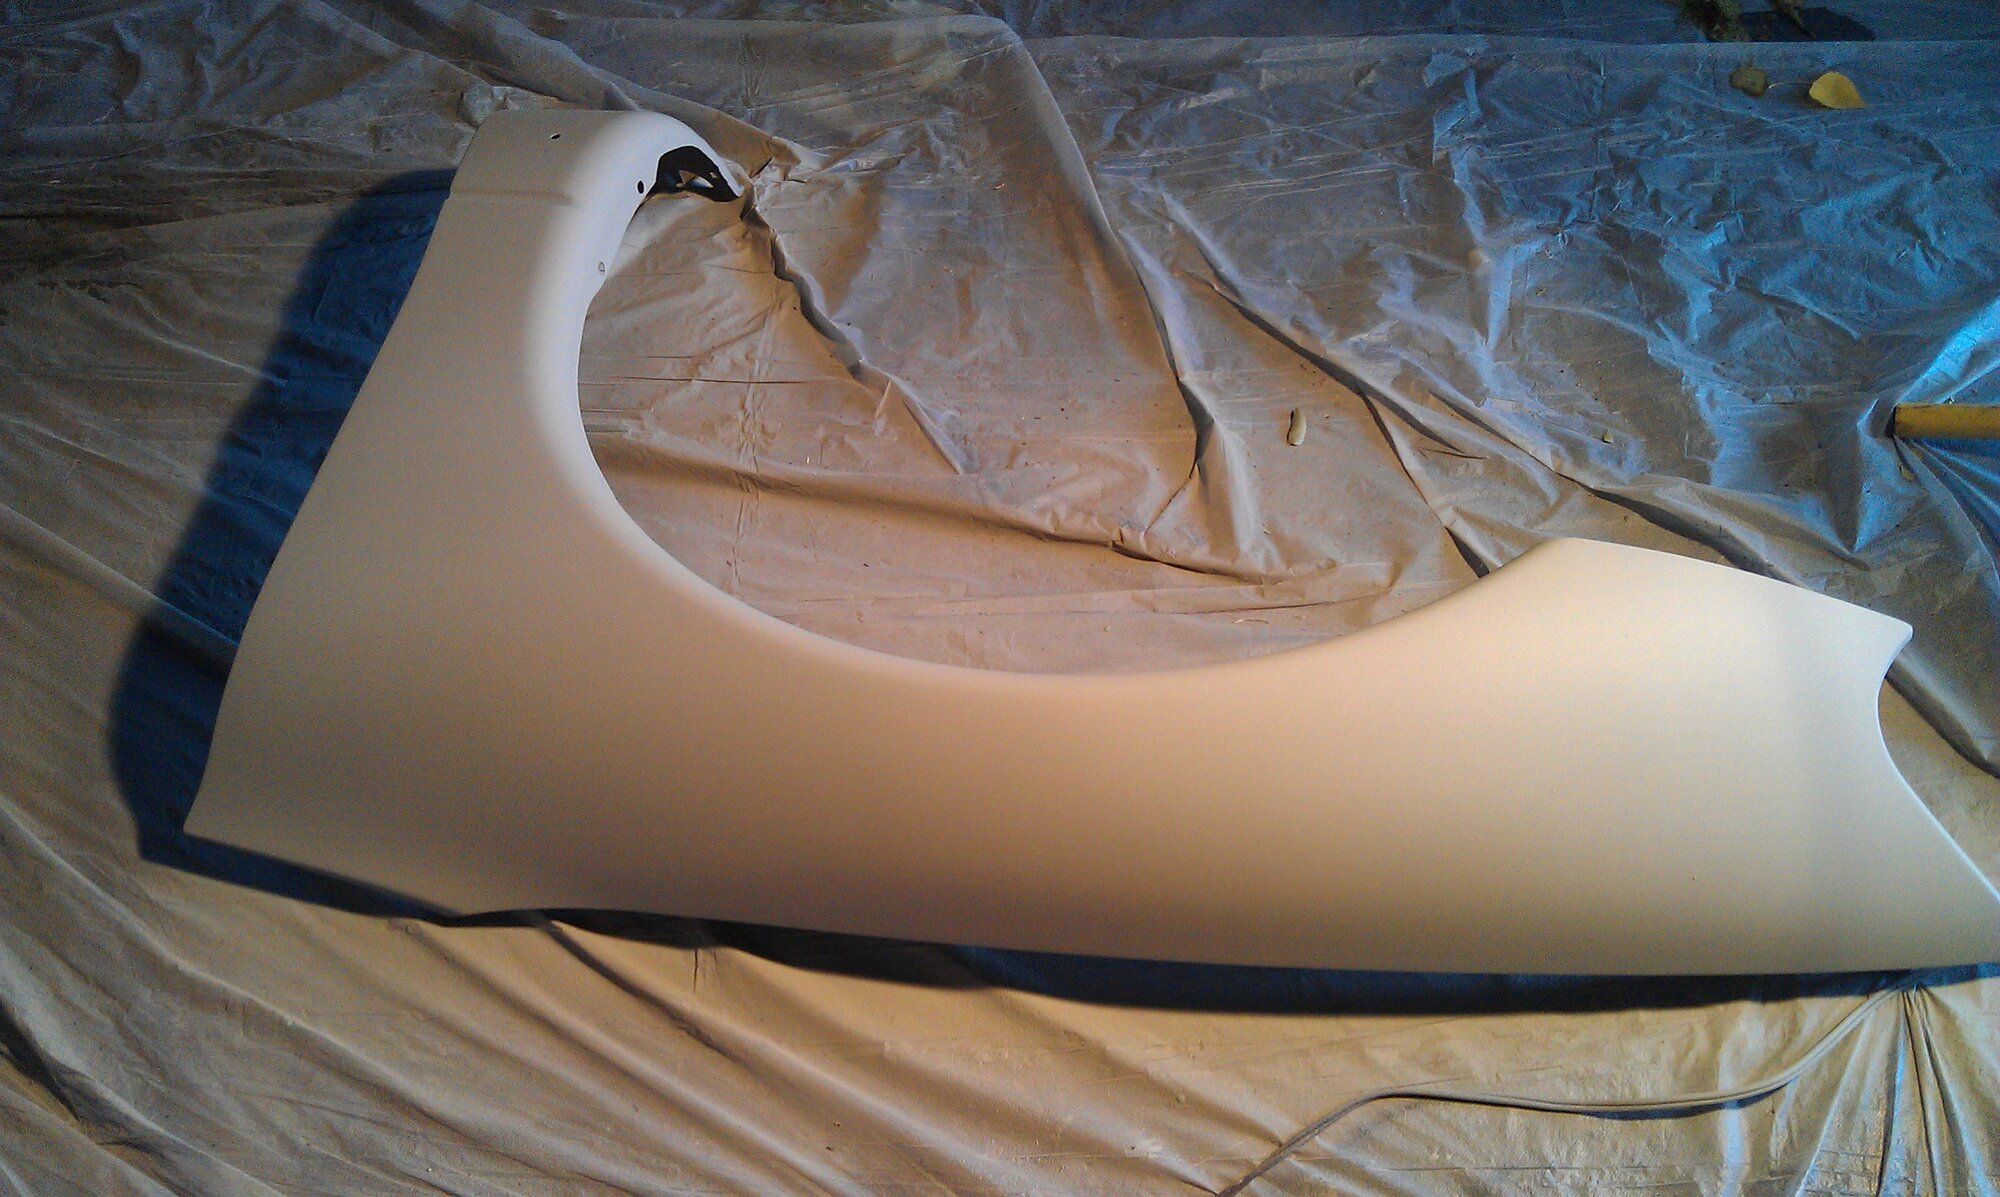
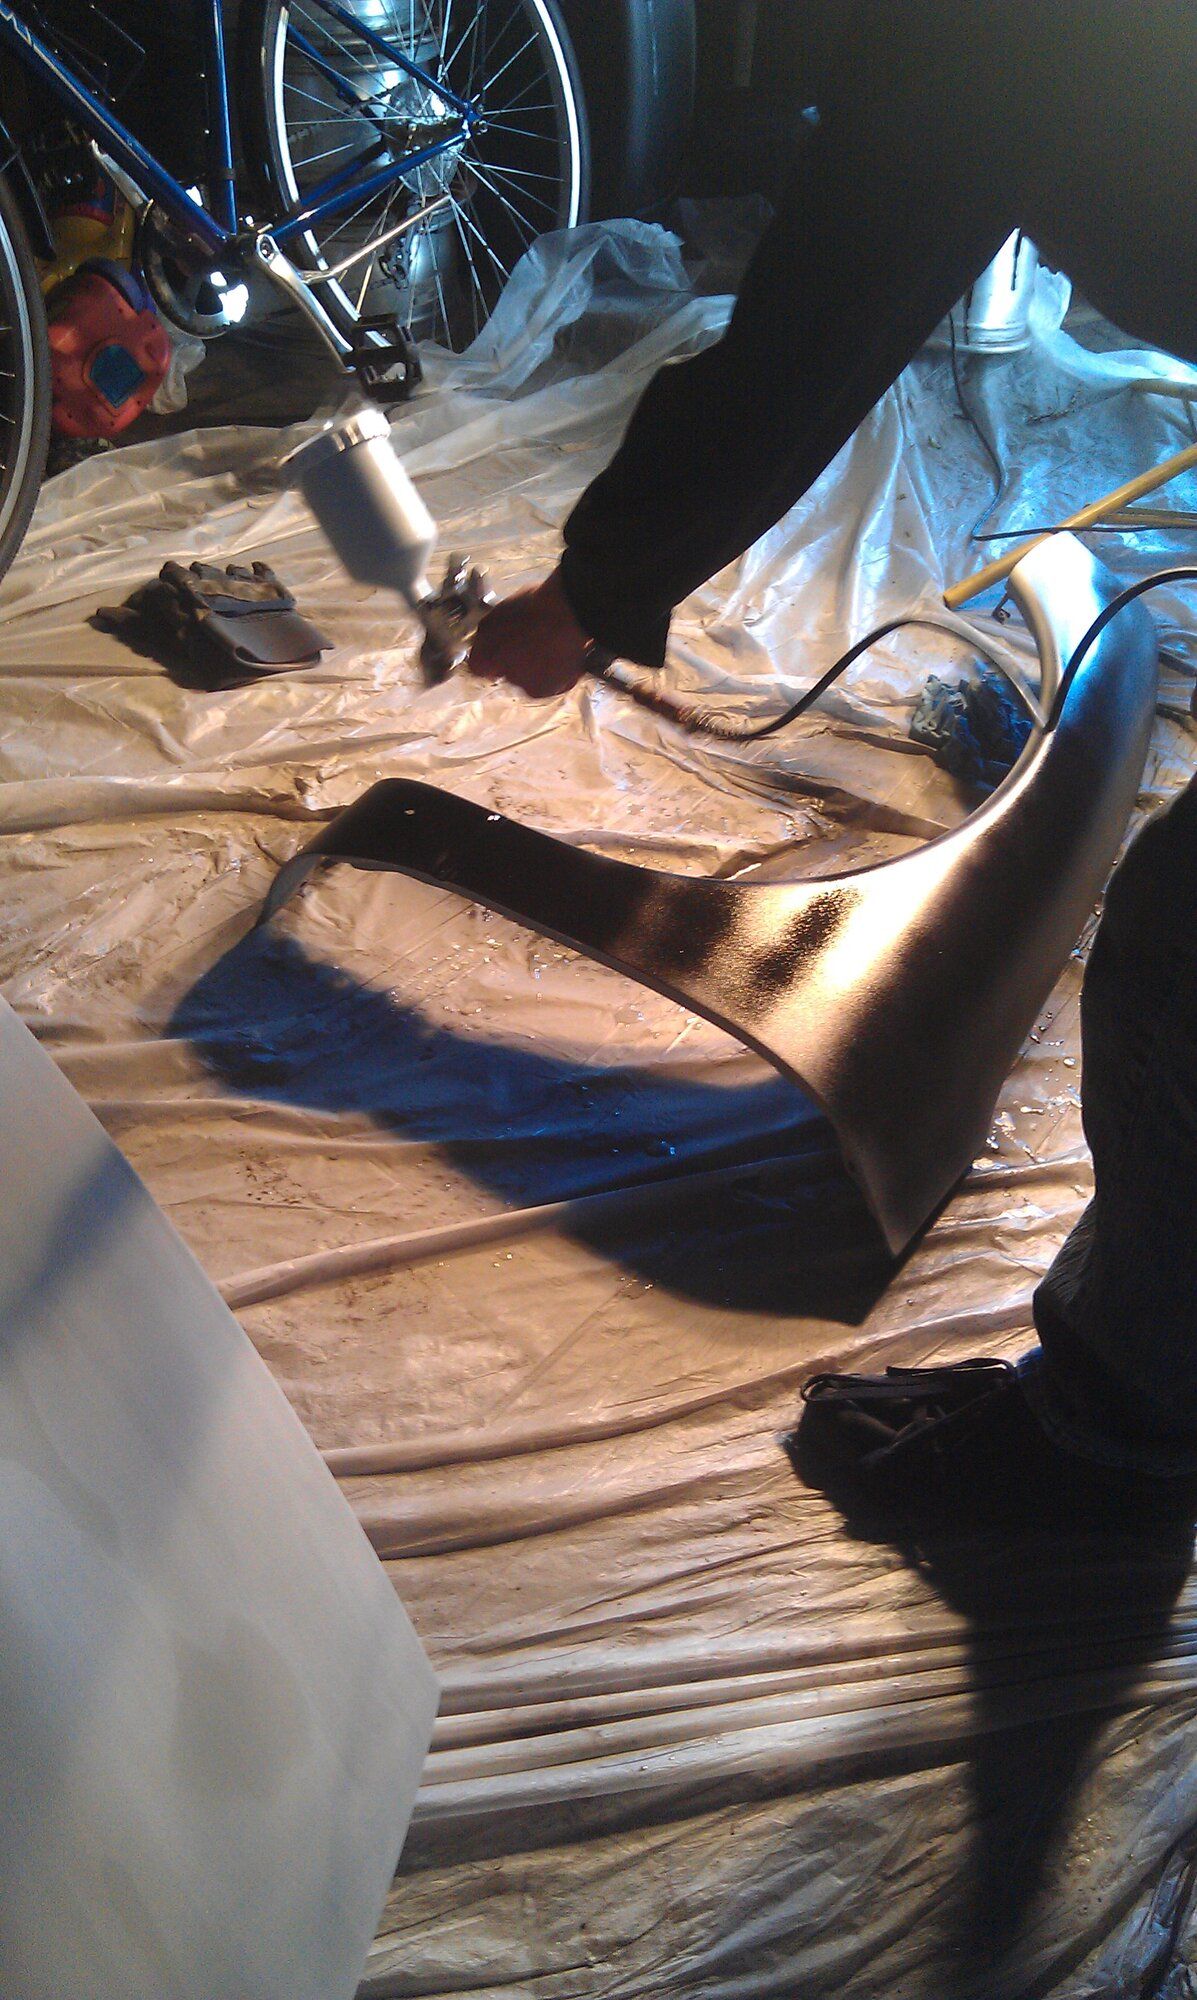
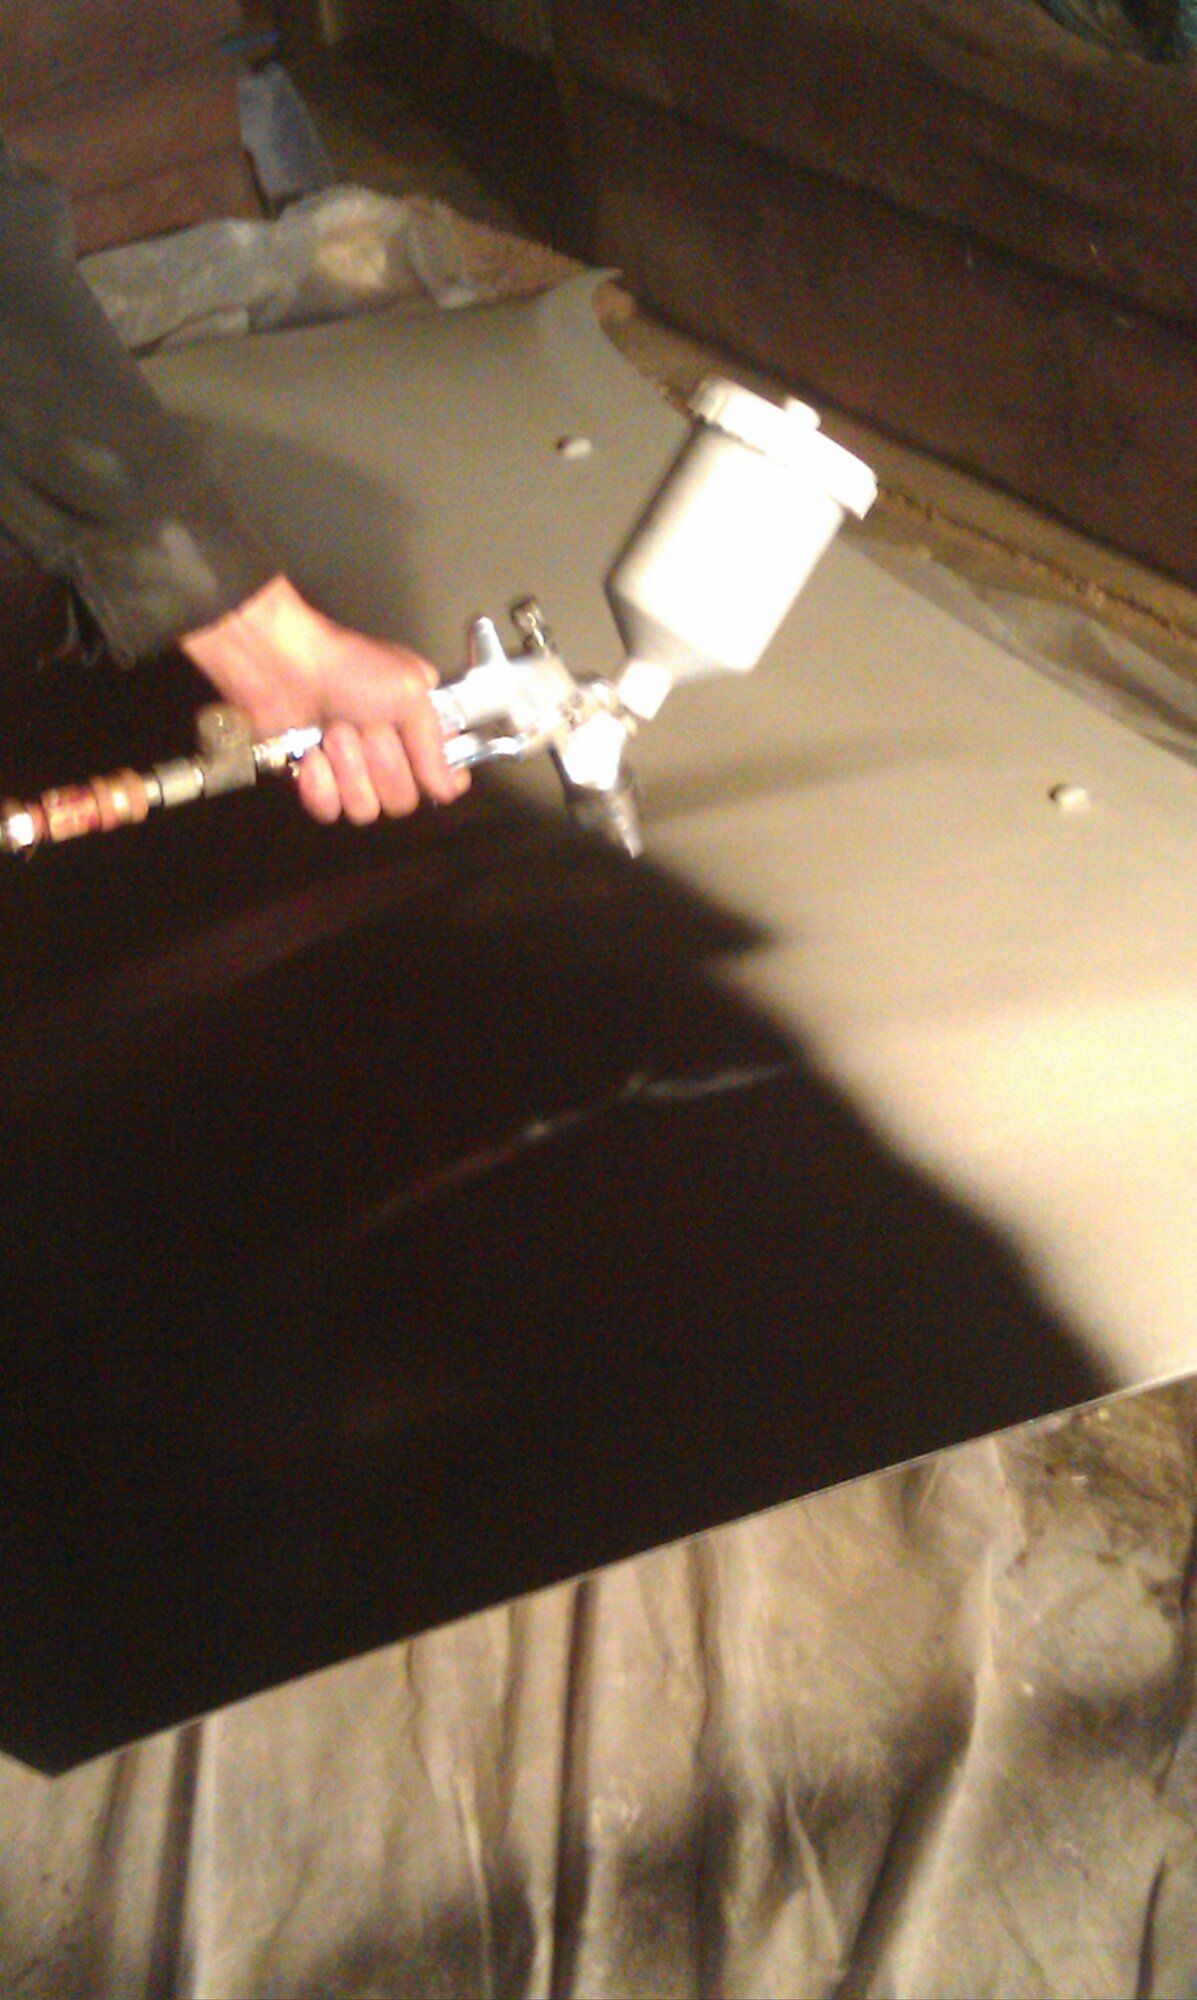
That hood and fender clashed so hard with the beautiful passenger side and when I washed the car you couldn't tell so much so I really wanted it to look nice. My friend offered to help me paint the worst offenders. The problem is, we did it in his garage in the winter so we couldn't cure it properly. It worked, but the paint flaked off in places. I was also new to painting and we didn't wear any breathing apparatus. He just didn't worry about it and said he had painted cars before and didn't wear one. Well, at one point I went to blow my nose and it came out black. Yeah I was done at that point without anything to filter my breathing. Lesson learned for me. We also failed to paint the inside of the fender outside of the primer coat so to this day you can see it, especially when you open the driver door.
Second pic is also before painting but wet from a wash. See how nice she looks? And then the second pic is after she dried
. After painting, there were these streaks that actually looked three dimensional and kind of cool but I didn't want them. After buffing she was looking really nice!- Thread starter
- #5
jukematt
15+ Year Contributor
- 291
- 40
- Jun 13, 2009
-
Portland Metro,
Oregon
Eye Candy! New engine bay look!
I have a few changes at this point:
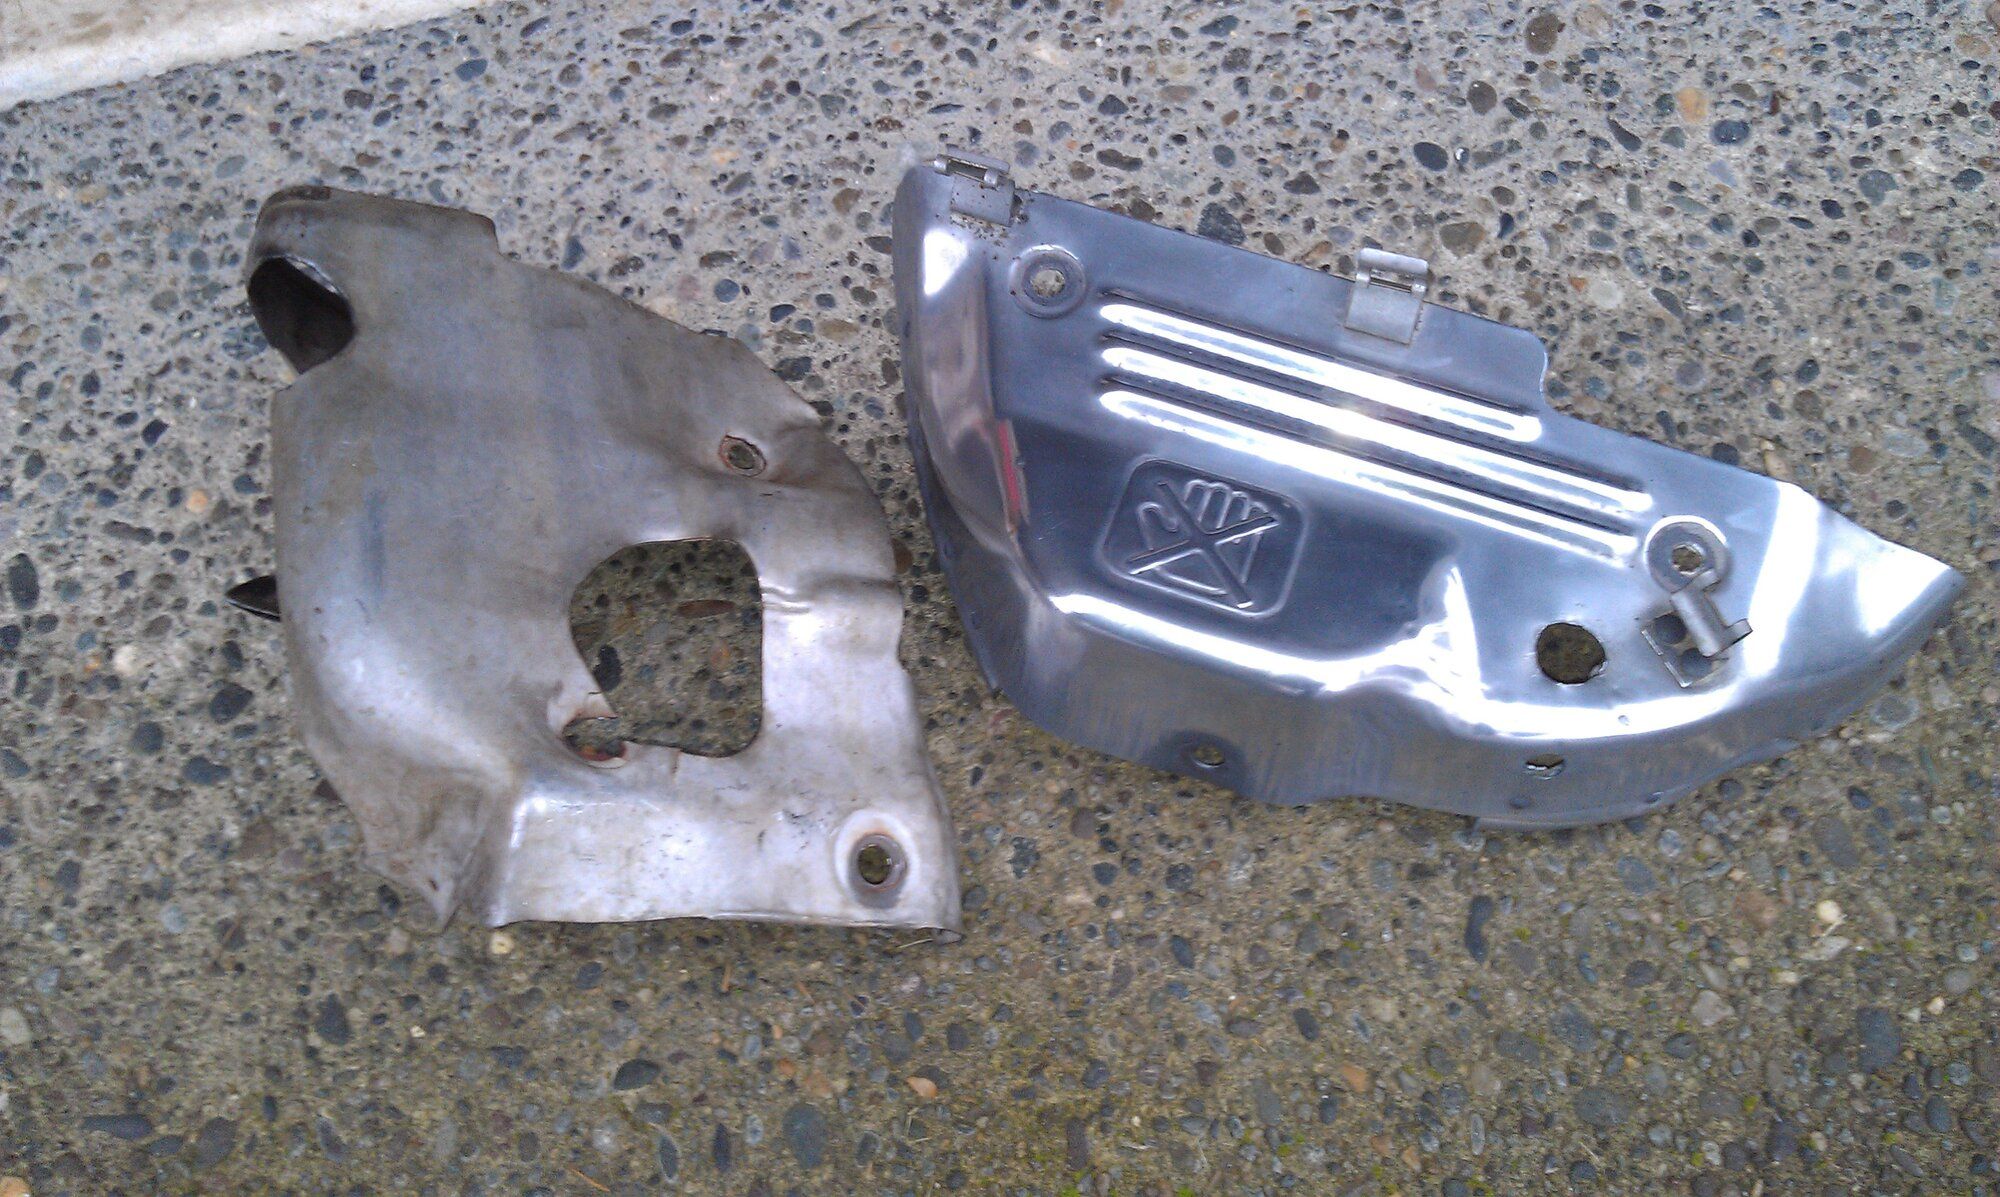
Something to bare in mind as you may see in the engine bay pic: I've seen some people not run heat shields. Well, at one point I left off the lower heat shield and my driver side fan warped and threw off its balance. And that was with a 14B at barely over stock boost! I replaced it with a non-turbo DSM fan from the junkyard which didn't mount to the lower part of the radiator correctly due to differences but it functioned. Only recently have I got a replacement fan, this time from a non-turbo Spyder with the 2.4L 4G64, hoping it will mount correctly. I haven't checked yet.
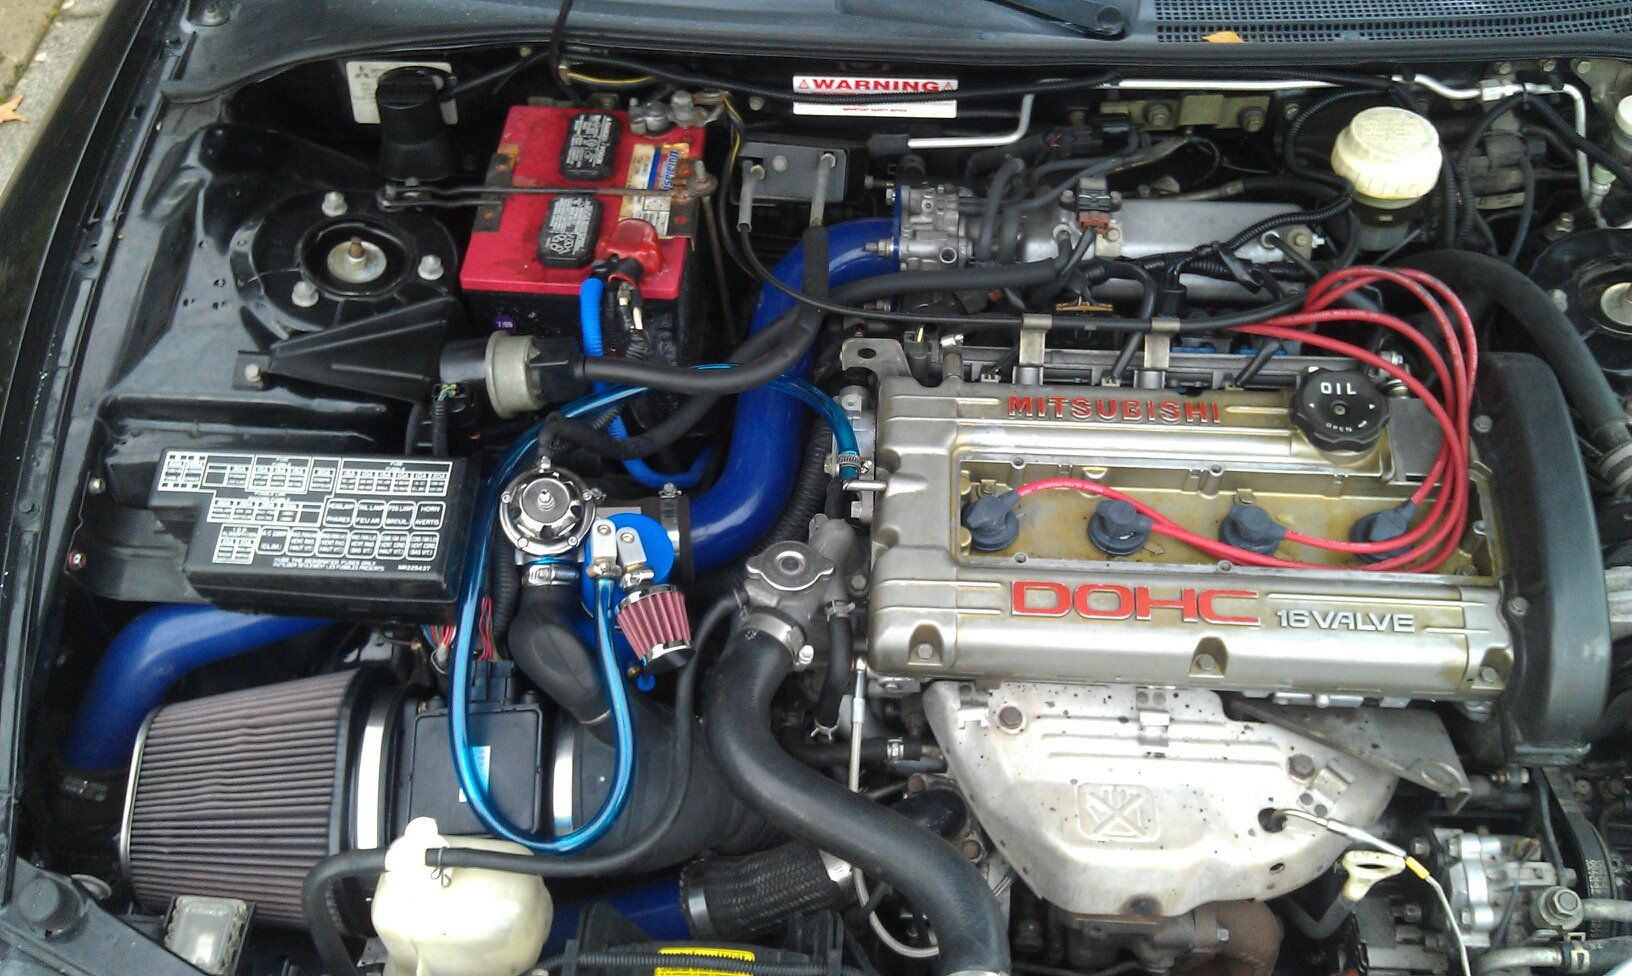
I have a few changes at this point:
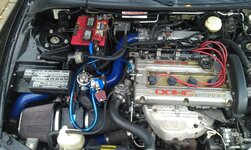
- New valve cover with MITSUBISHI
- 14B turbo after blown T-25
- Hard intercooler piping by DEJON (This was intended for the T-25 so we chopped up part of the stock soft piping to make it work with a 14B and you can see it in the pic)
- K&N FIPK
- Greddy RS BOV
- Catch can from eBay with screen door material stuffed inside to act as a filter (yes, it is incorrectly vented when it should be going to the intake for best PCV system functionality. I fixed that later)
Something to bare in mind as you may see in the engine bay pic: I've seen some people not run heat shields. Well, at one point I left off the lower heat shield and my driver side fan warped and threw off its balance. And that was with a 14B at barely over stock boost! I replaced it with a non-turbo DSM fan from the junkyard which didn't mount to the lower part of the radiator correctly due to differences but it functioned. Only recently have I got a replacement fan, this time from a non-turbo Spyder with the 2.4L 4G64, hoping it will mount correctly. I haven't checked yet.
Last edited:
- Thread starter
- #6
jukematt
15+ Year Contributor
- 291
- 40
- Jun 13, 2009
-
Portland Metro,
Oregon
Also in 2011: Oil leak at the turbo drain pipe. This was going on for a while but it wasn't bad so I put it off.
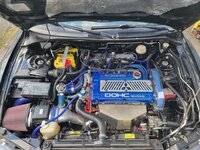
I never noticed it when I installed the 14B turbo but there is a second hole that was retapped at a different angle. That caused the return tube to not seat correctly. I had a machine shop drill and tap a larger hole. They went really big though and I had to drill out a slot in the return tube to get the bolt in. This is also when I first noticed the "4G63" on the engine block. Cracks everywhere in the casting too but did not cause a boost leak. I also took the time to take some sick engine shots (at least to my younger self). When it got dark, I took that last pic and it was one of my favorite for a long time.
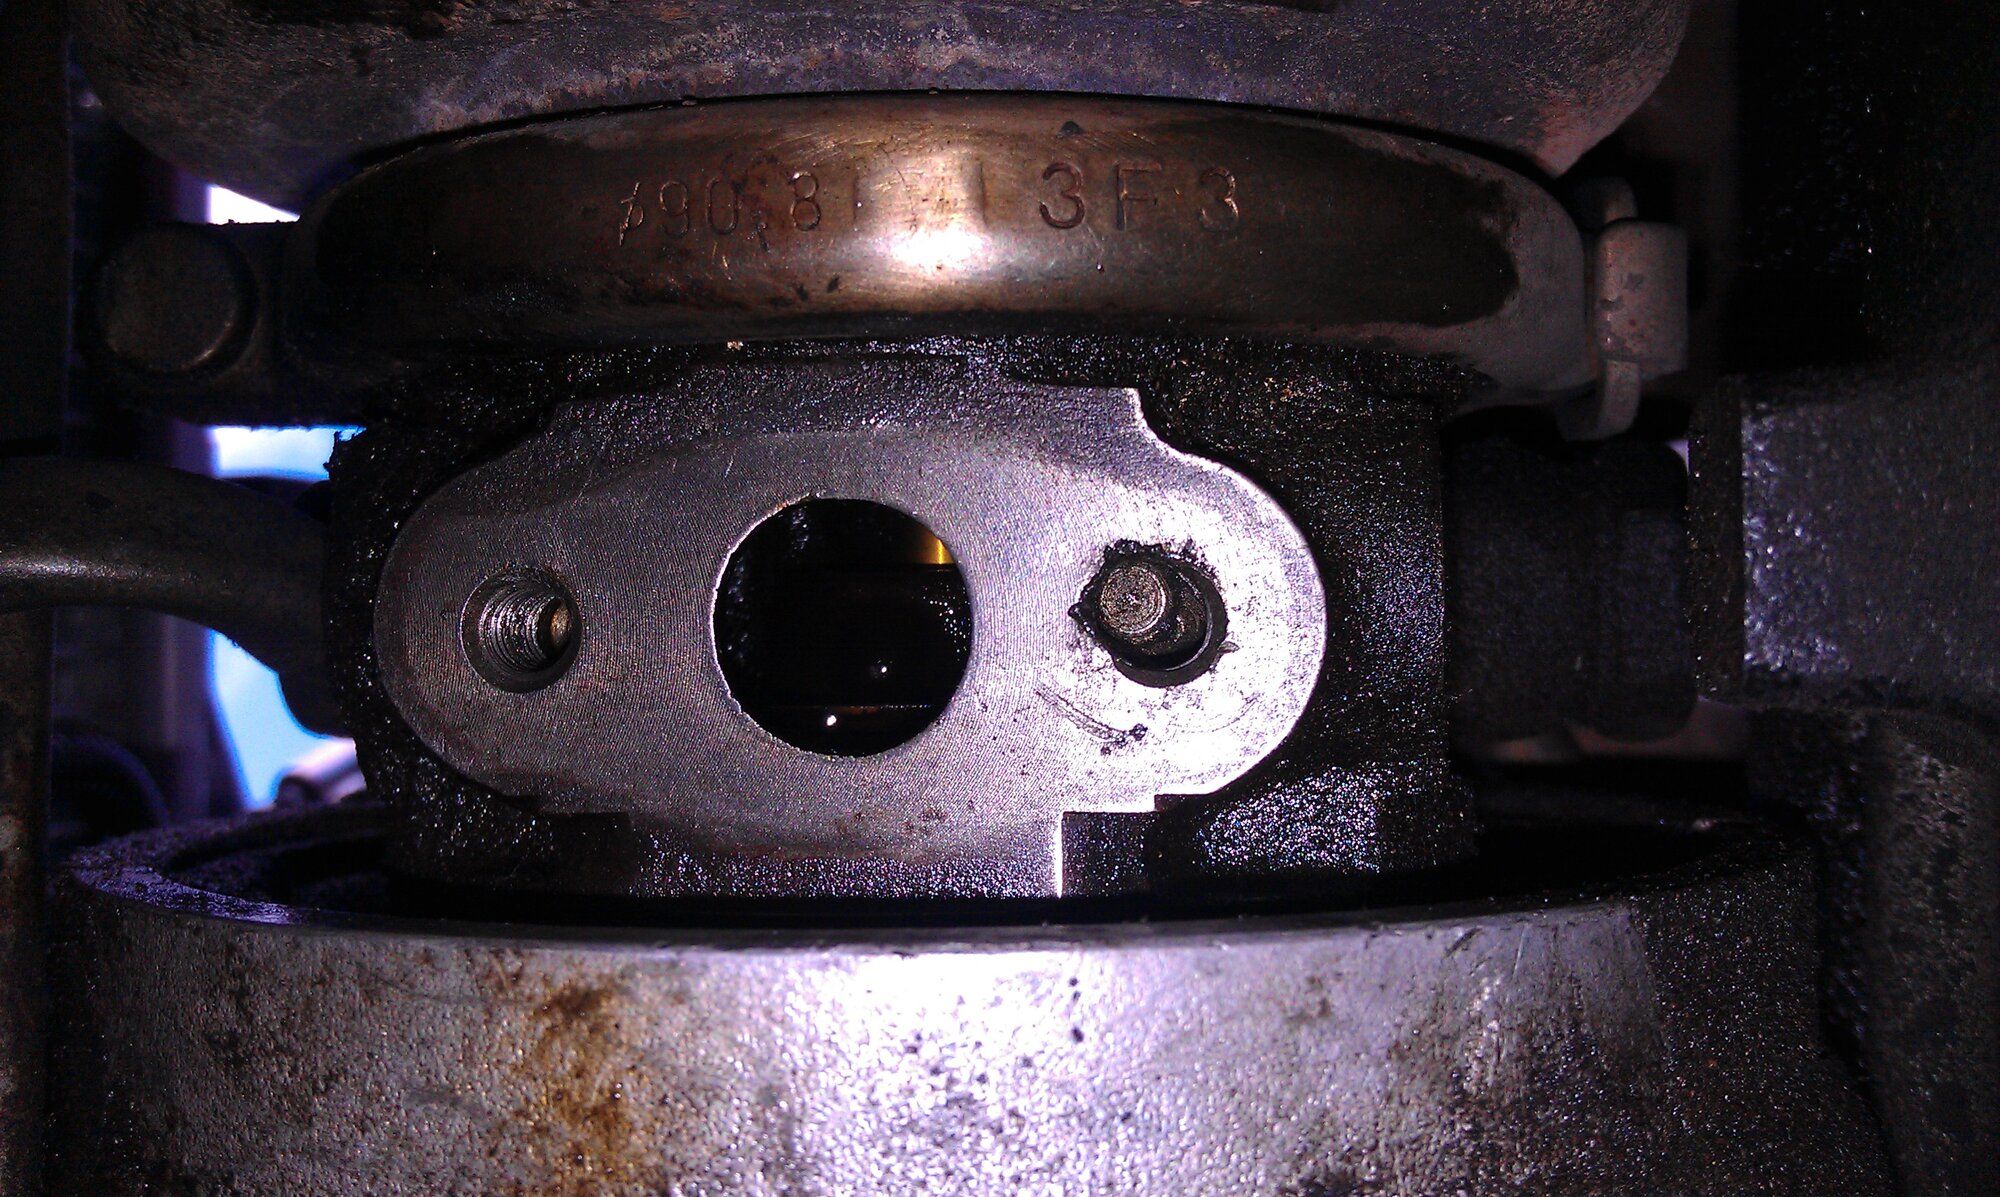
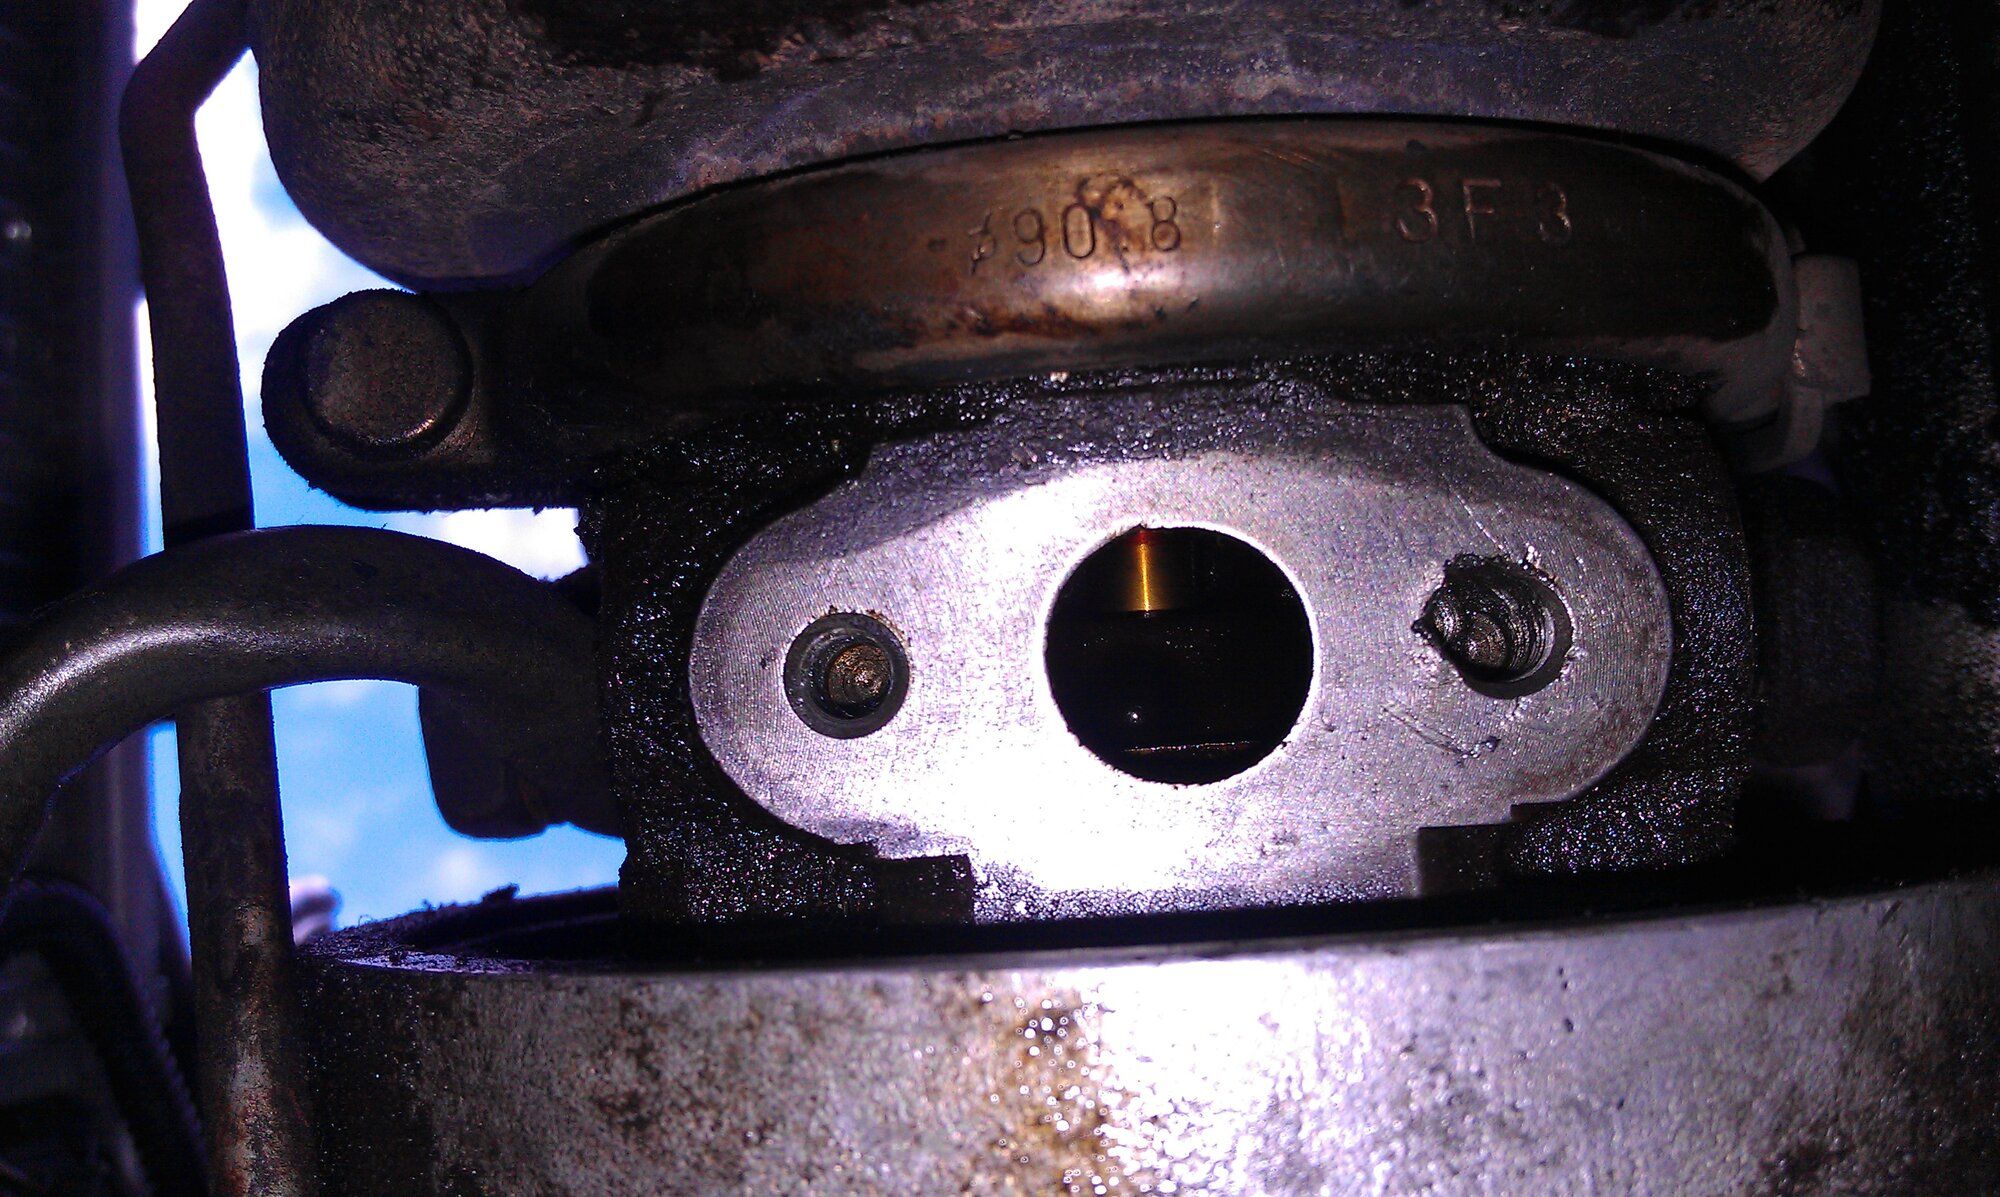
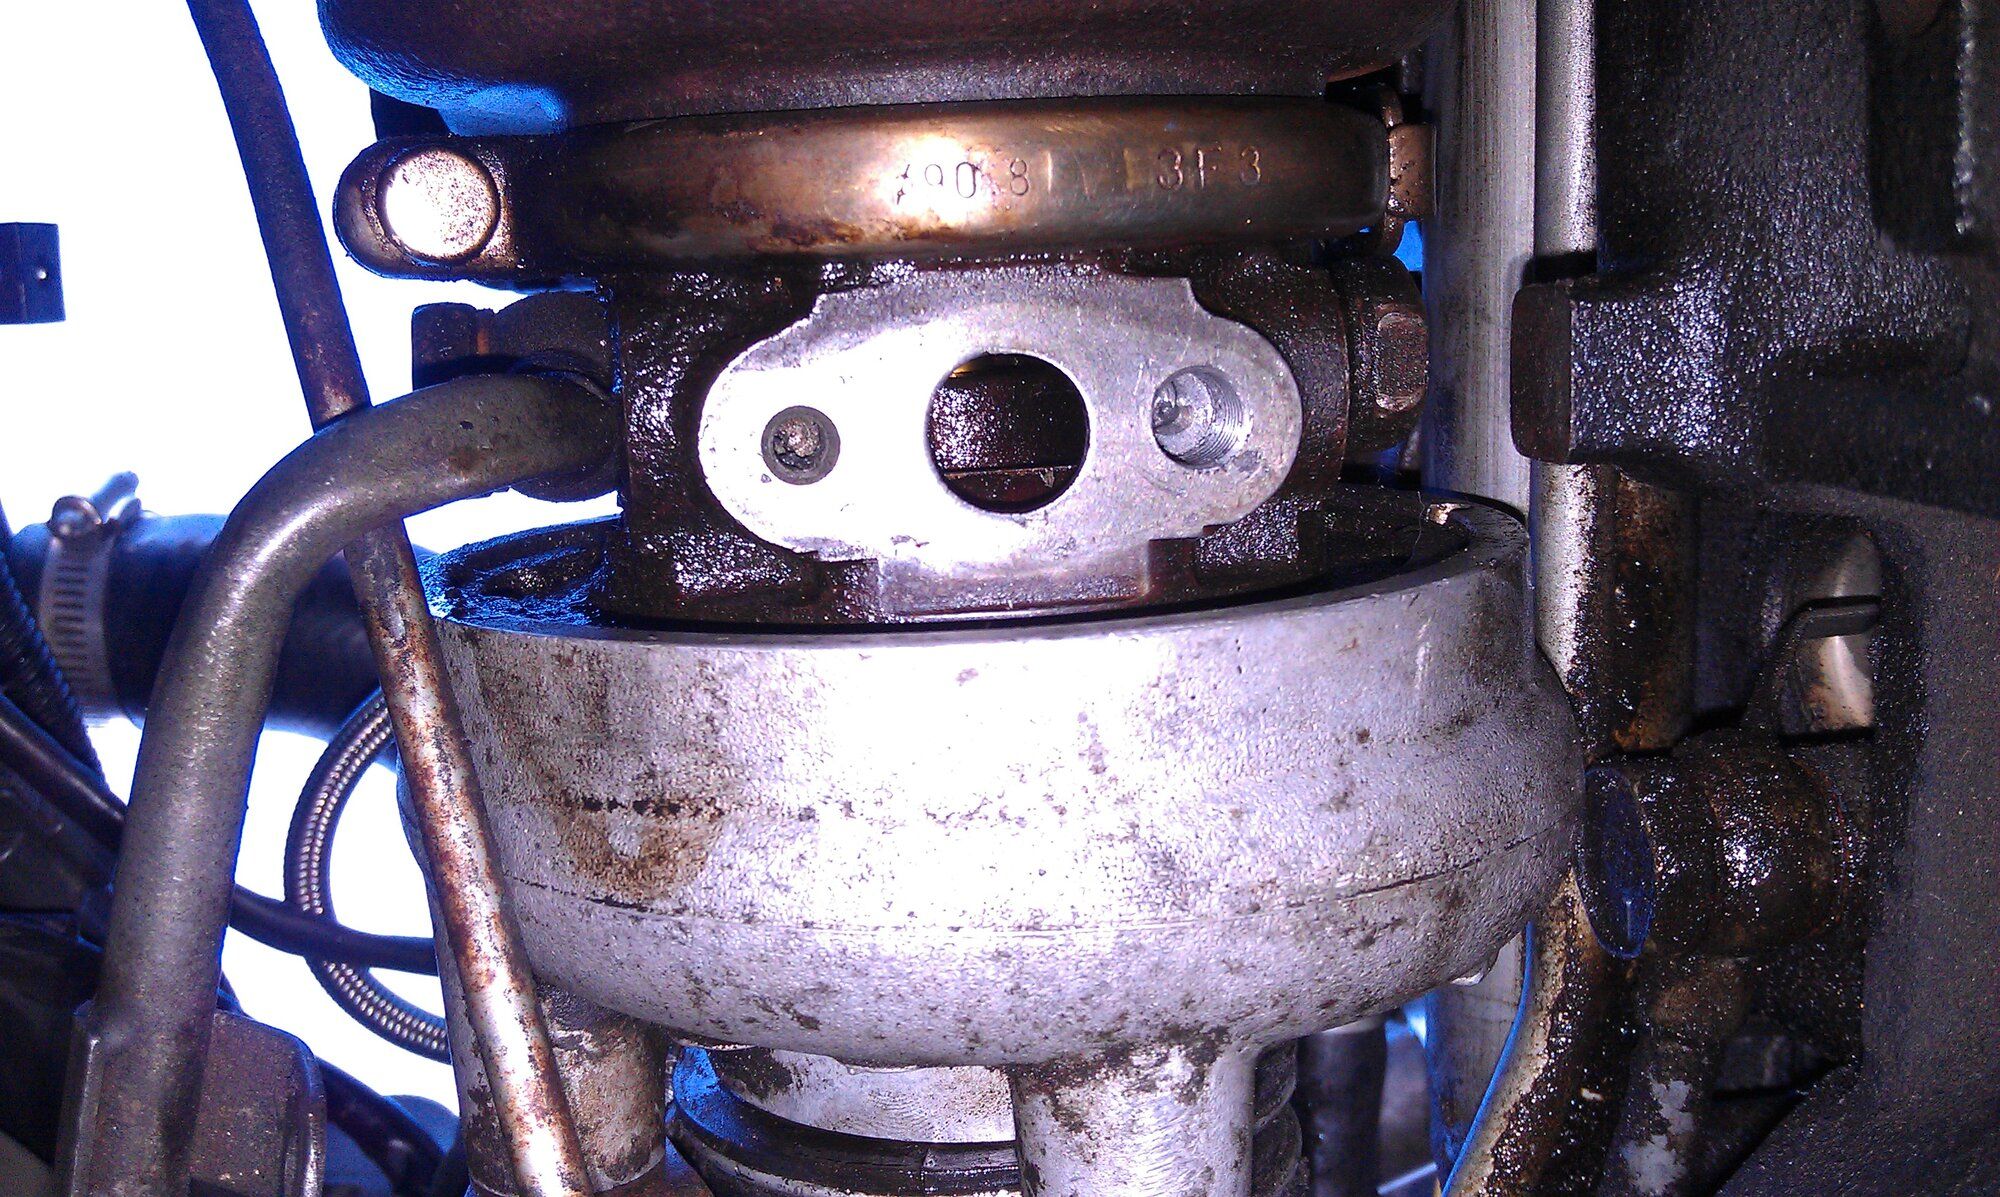
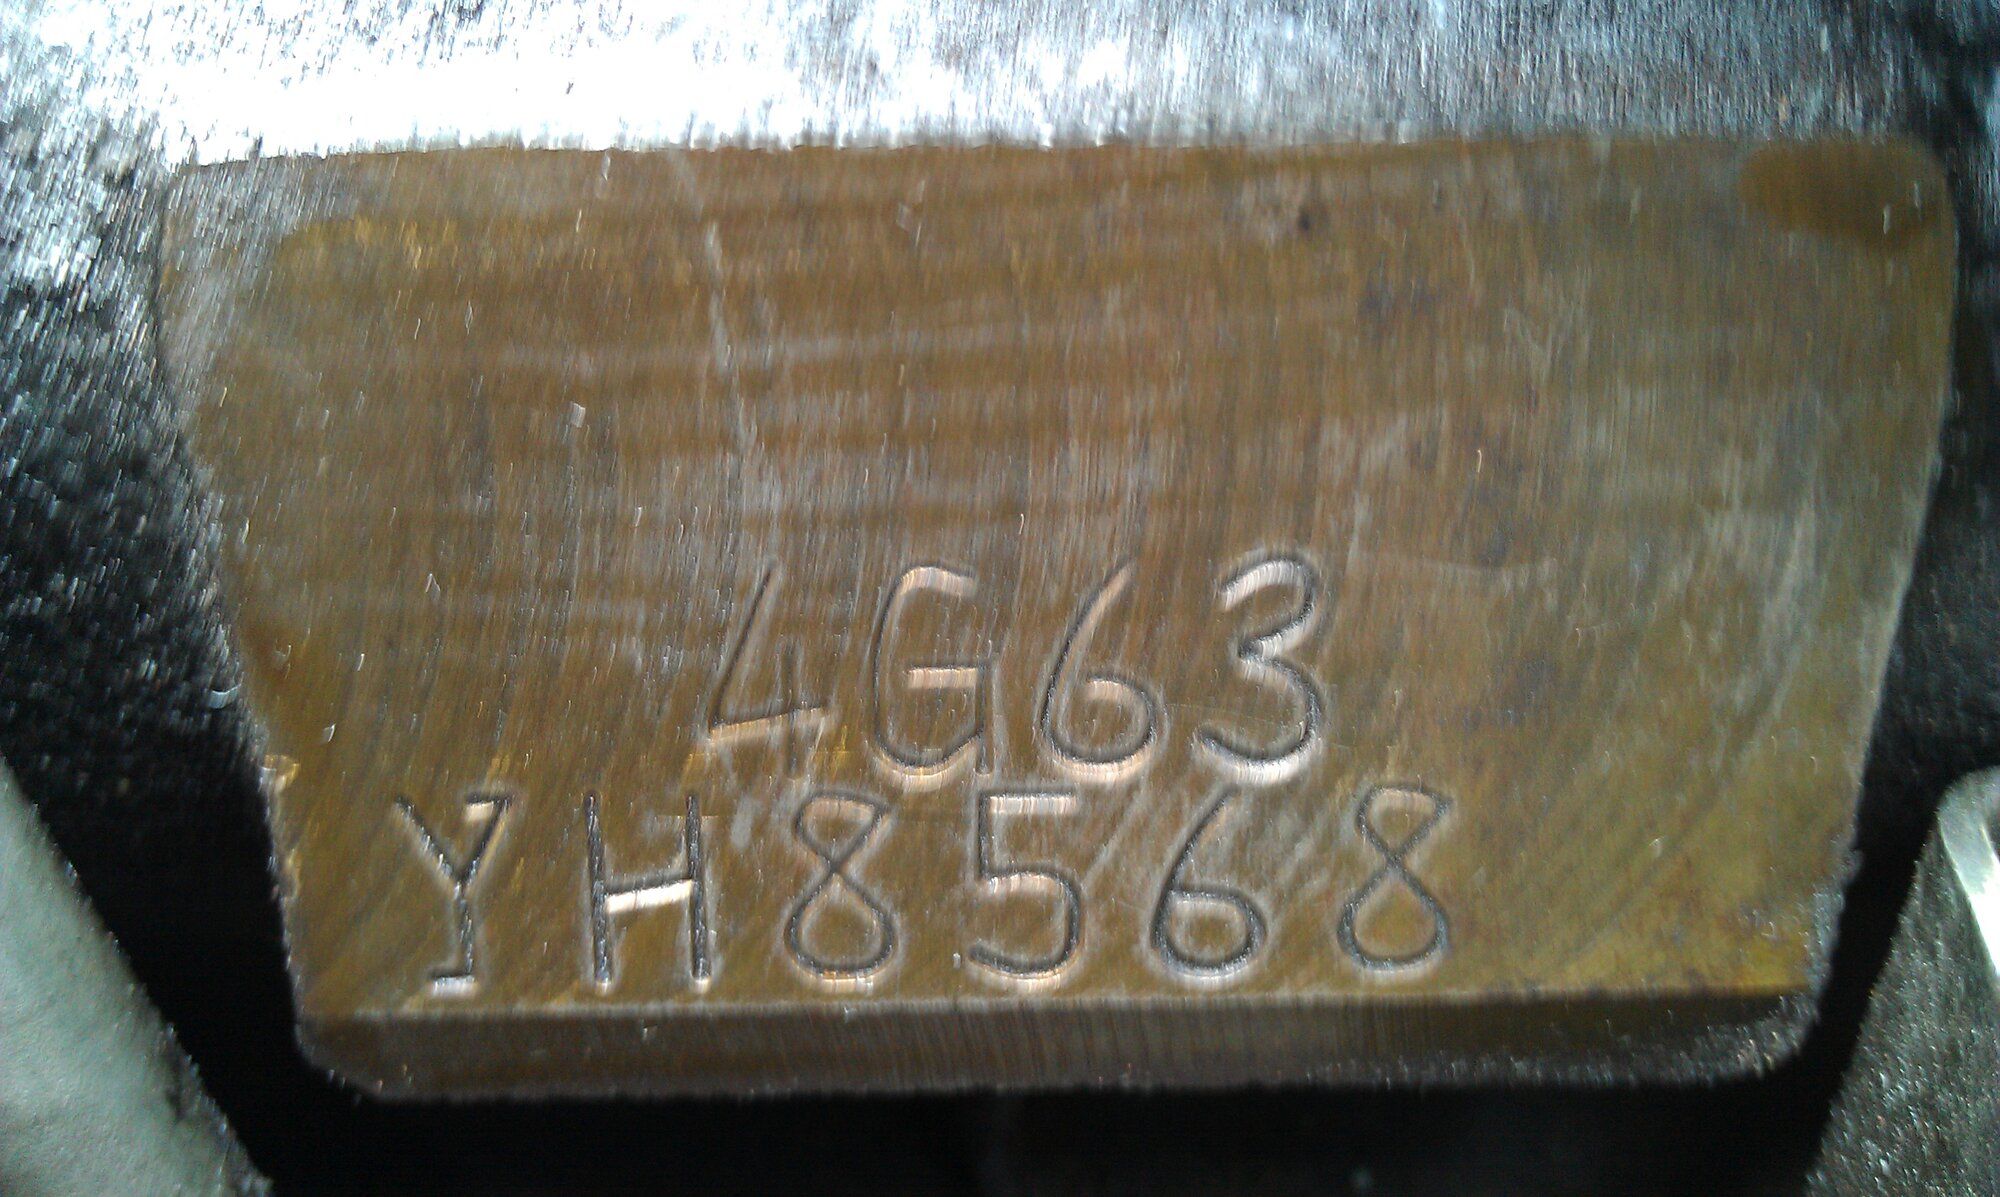
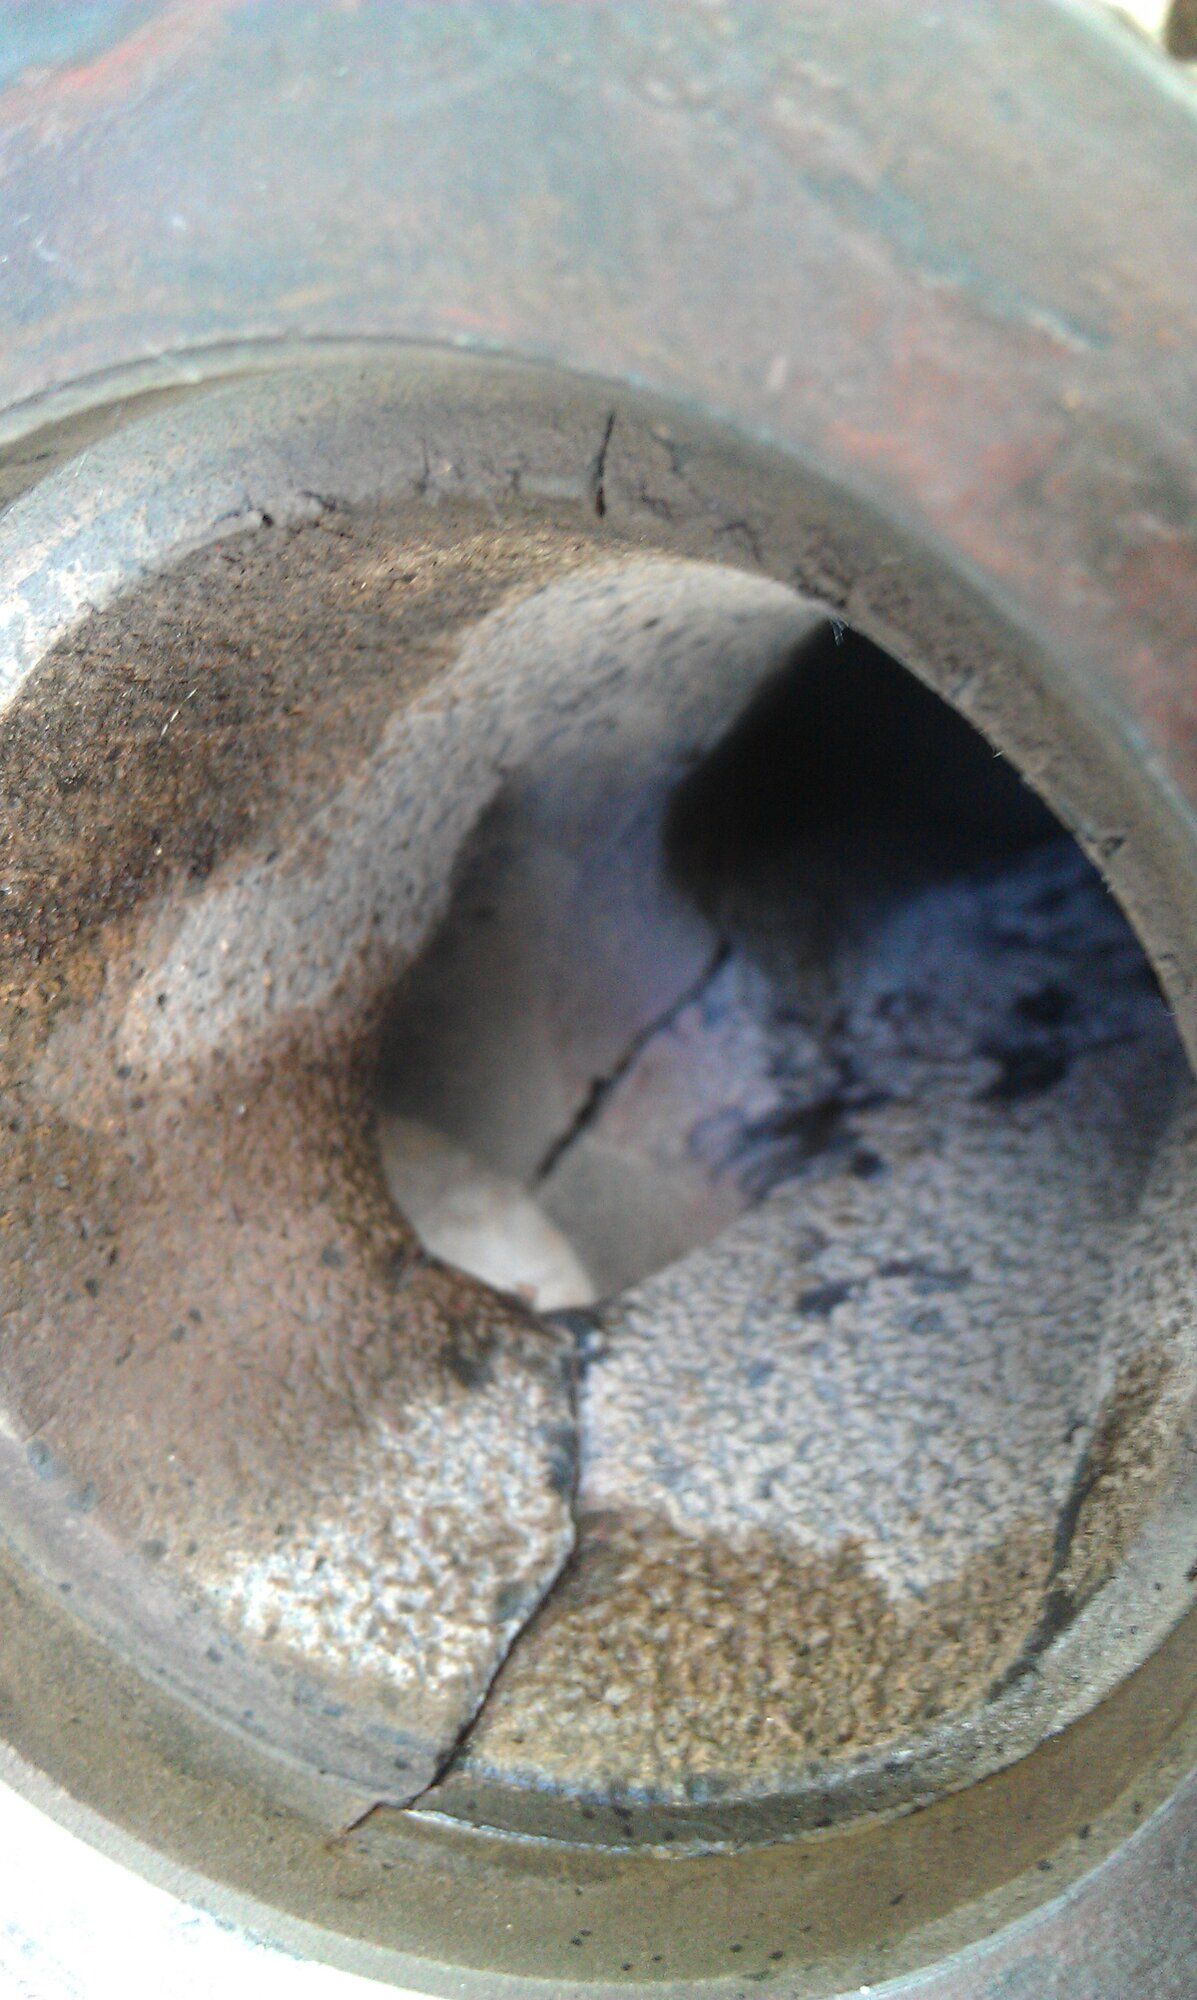
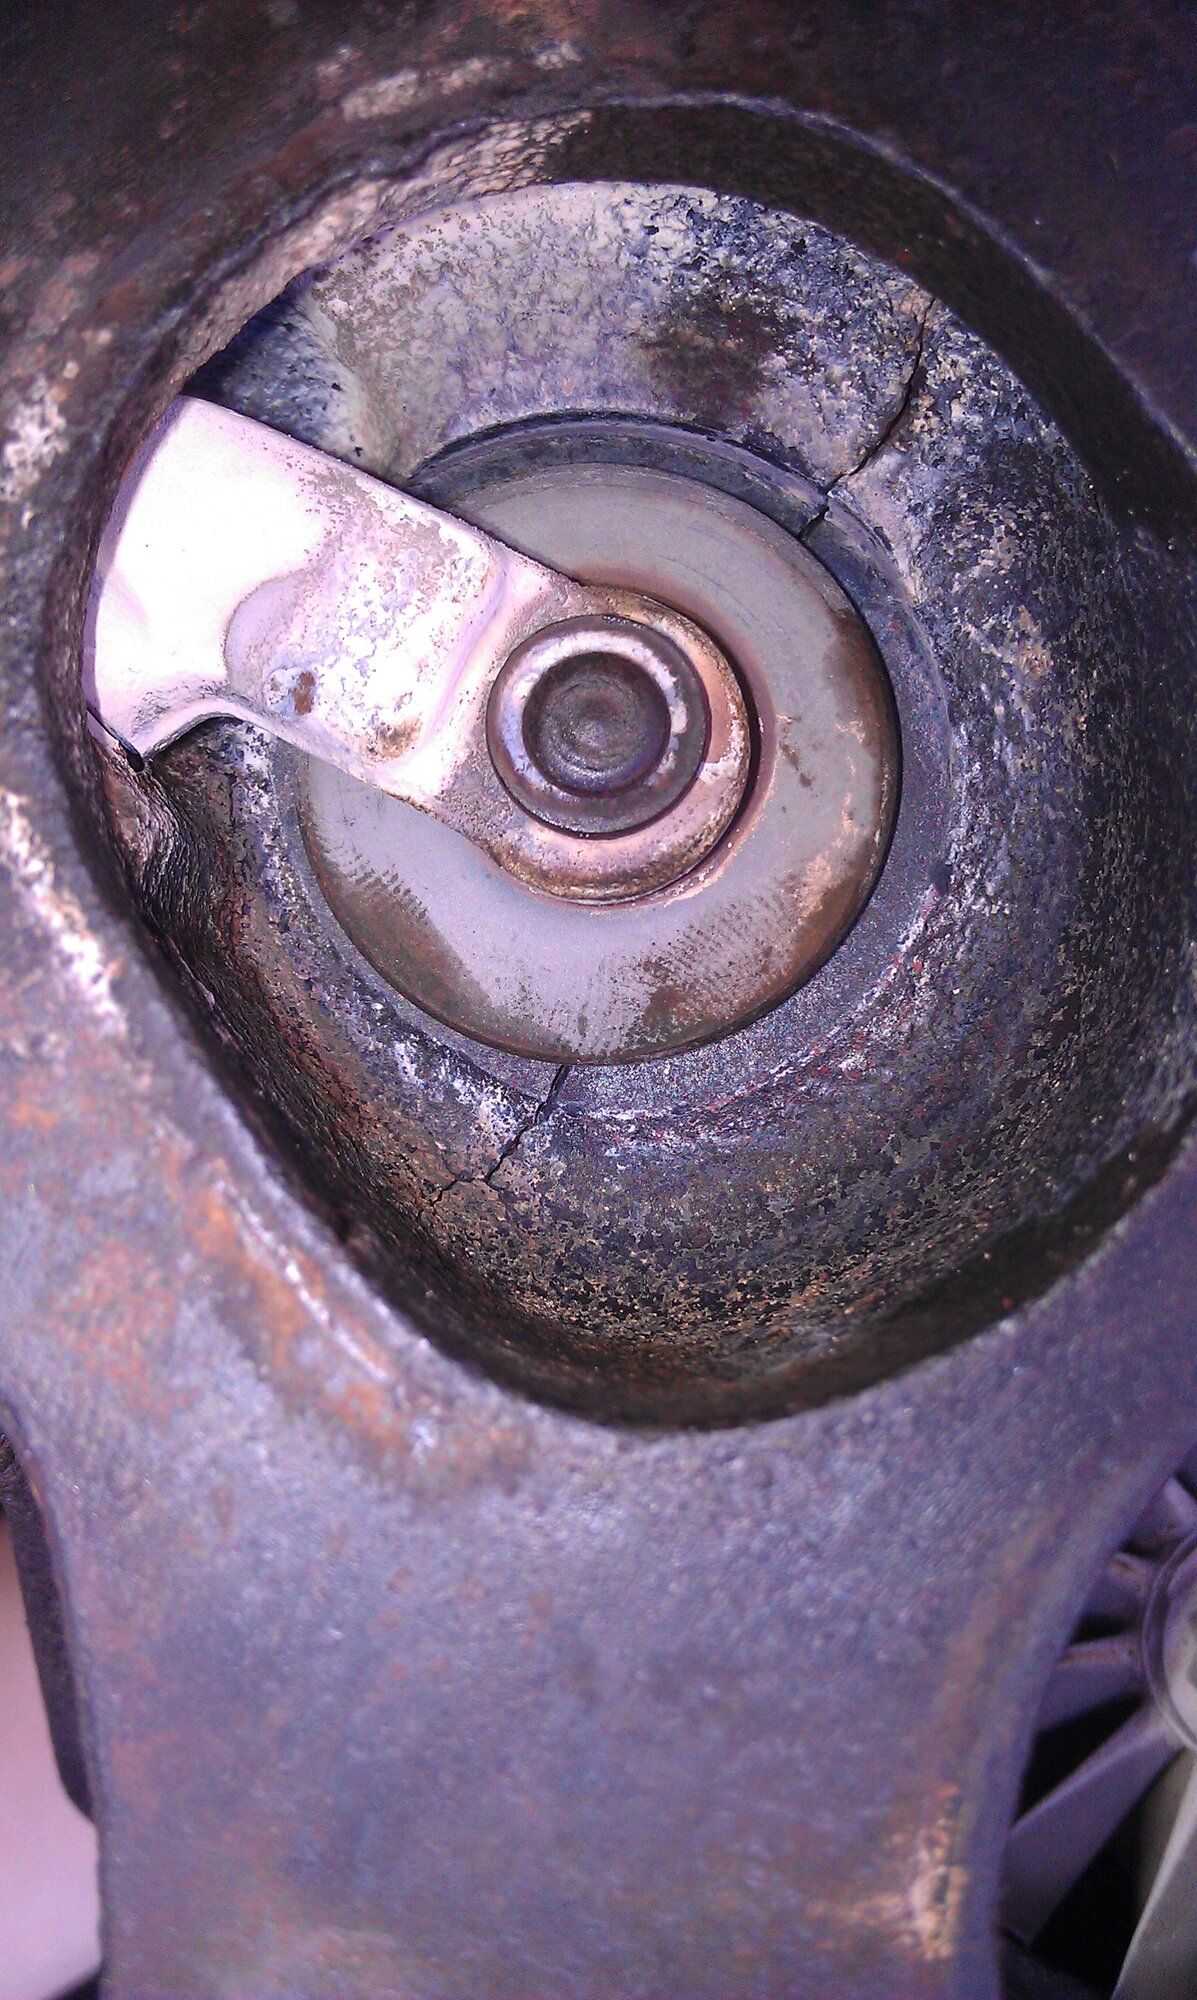
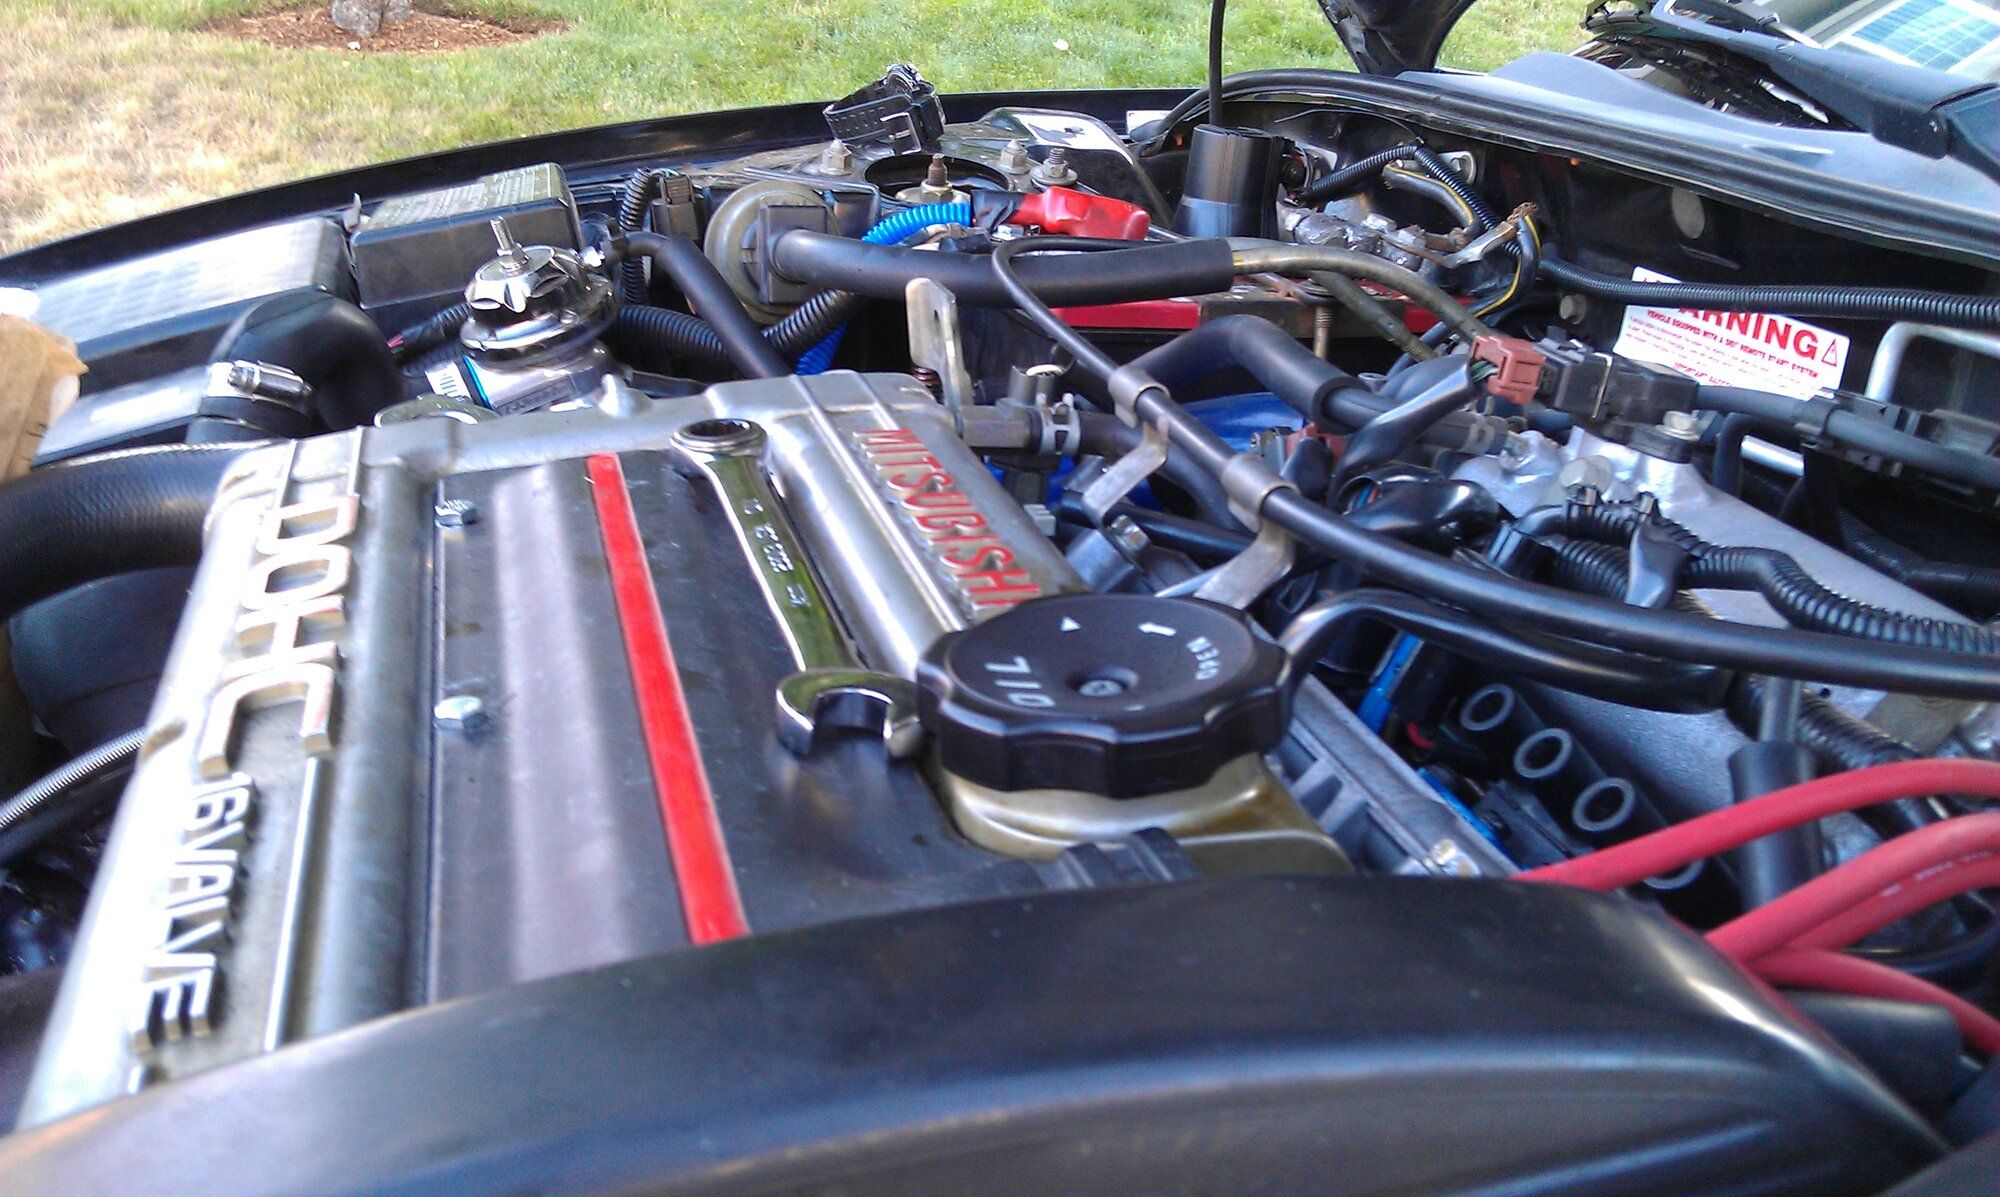
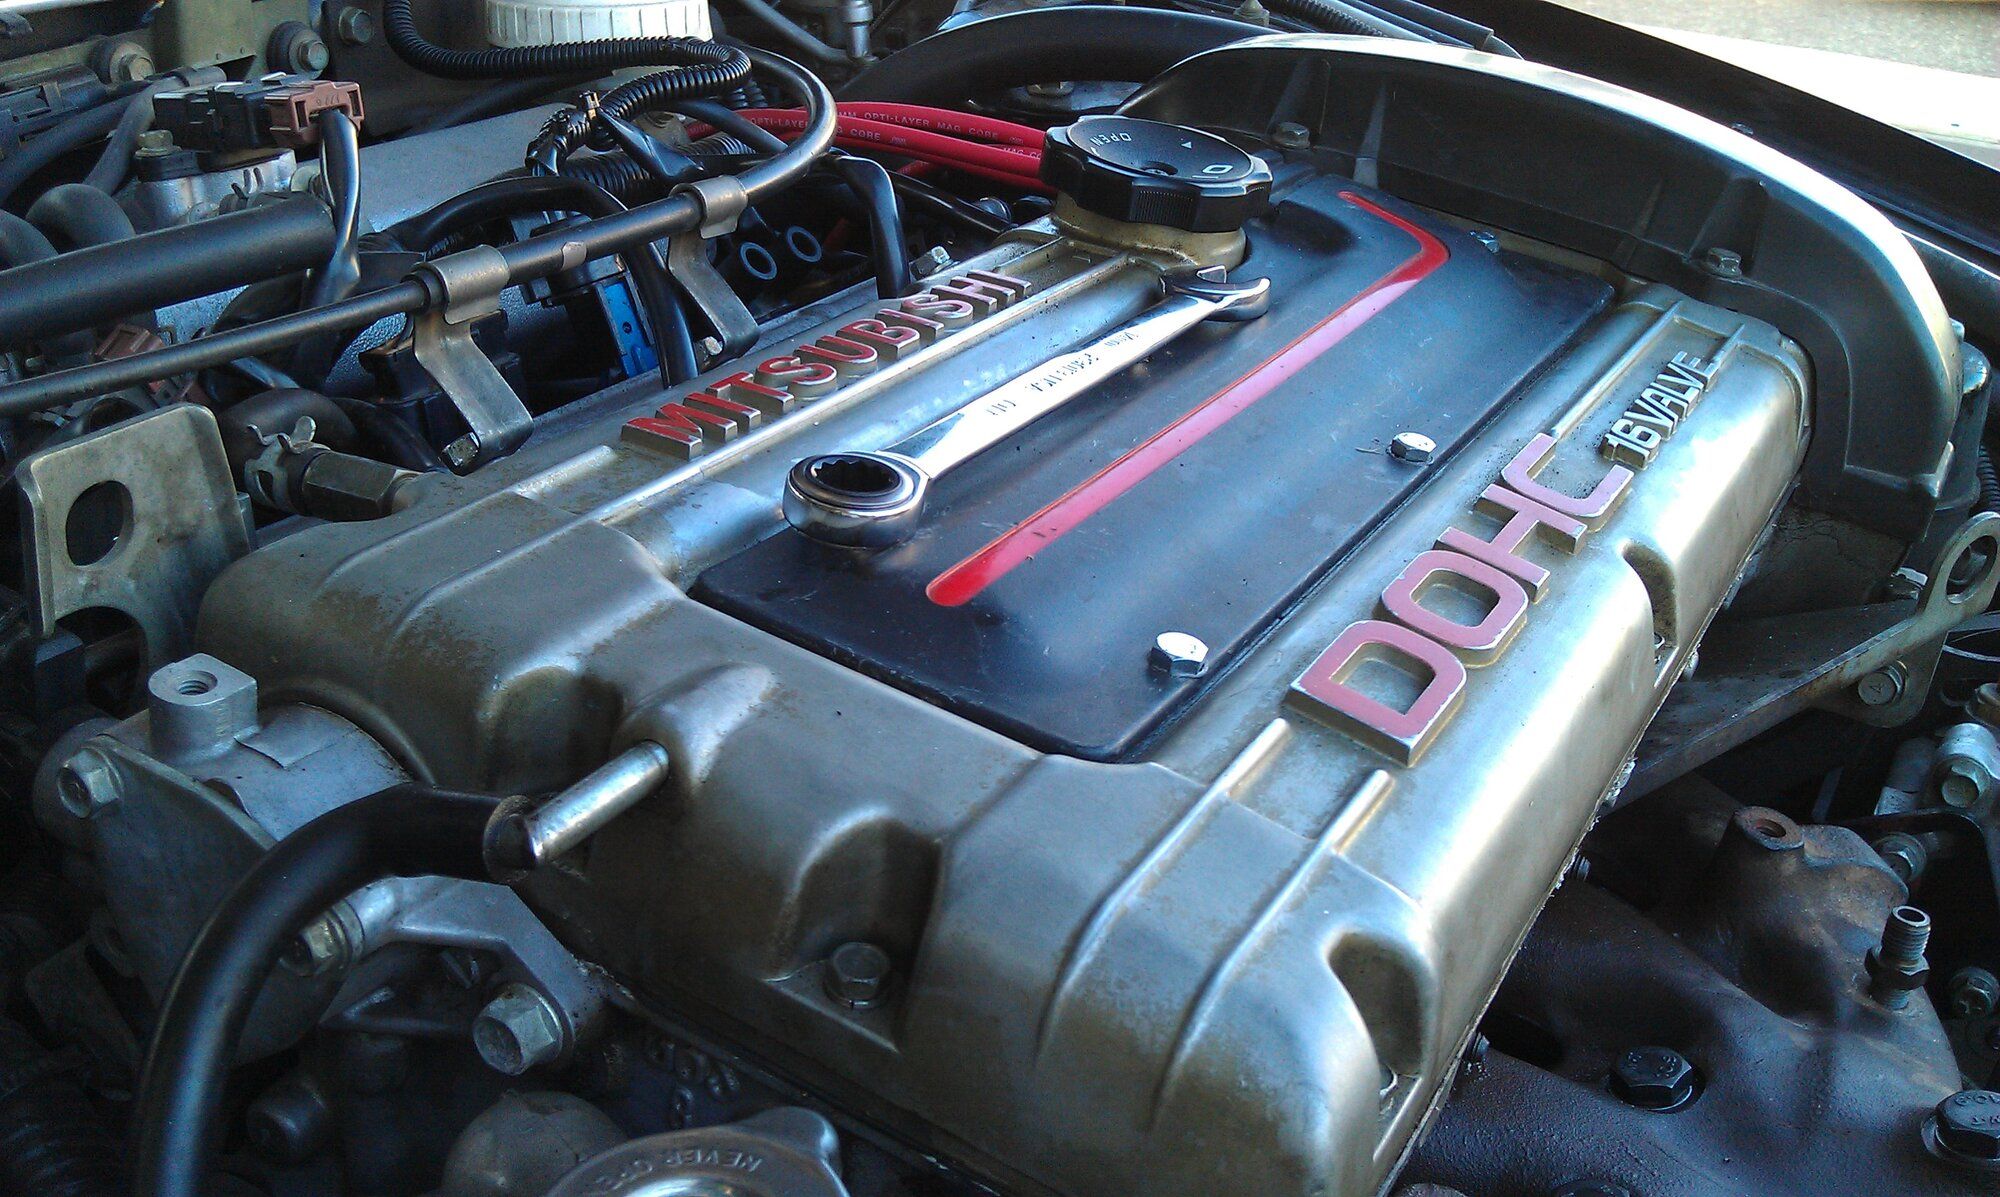
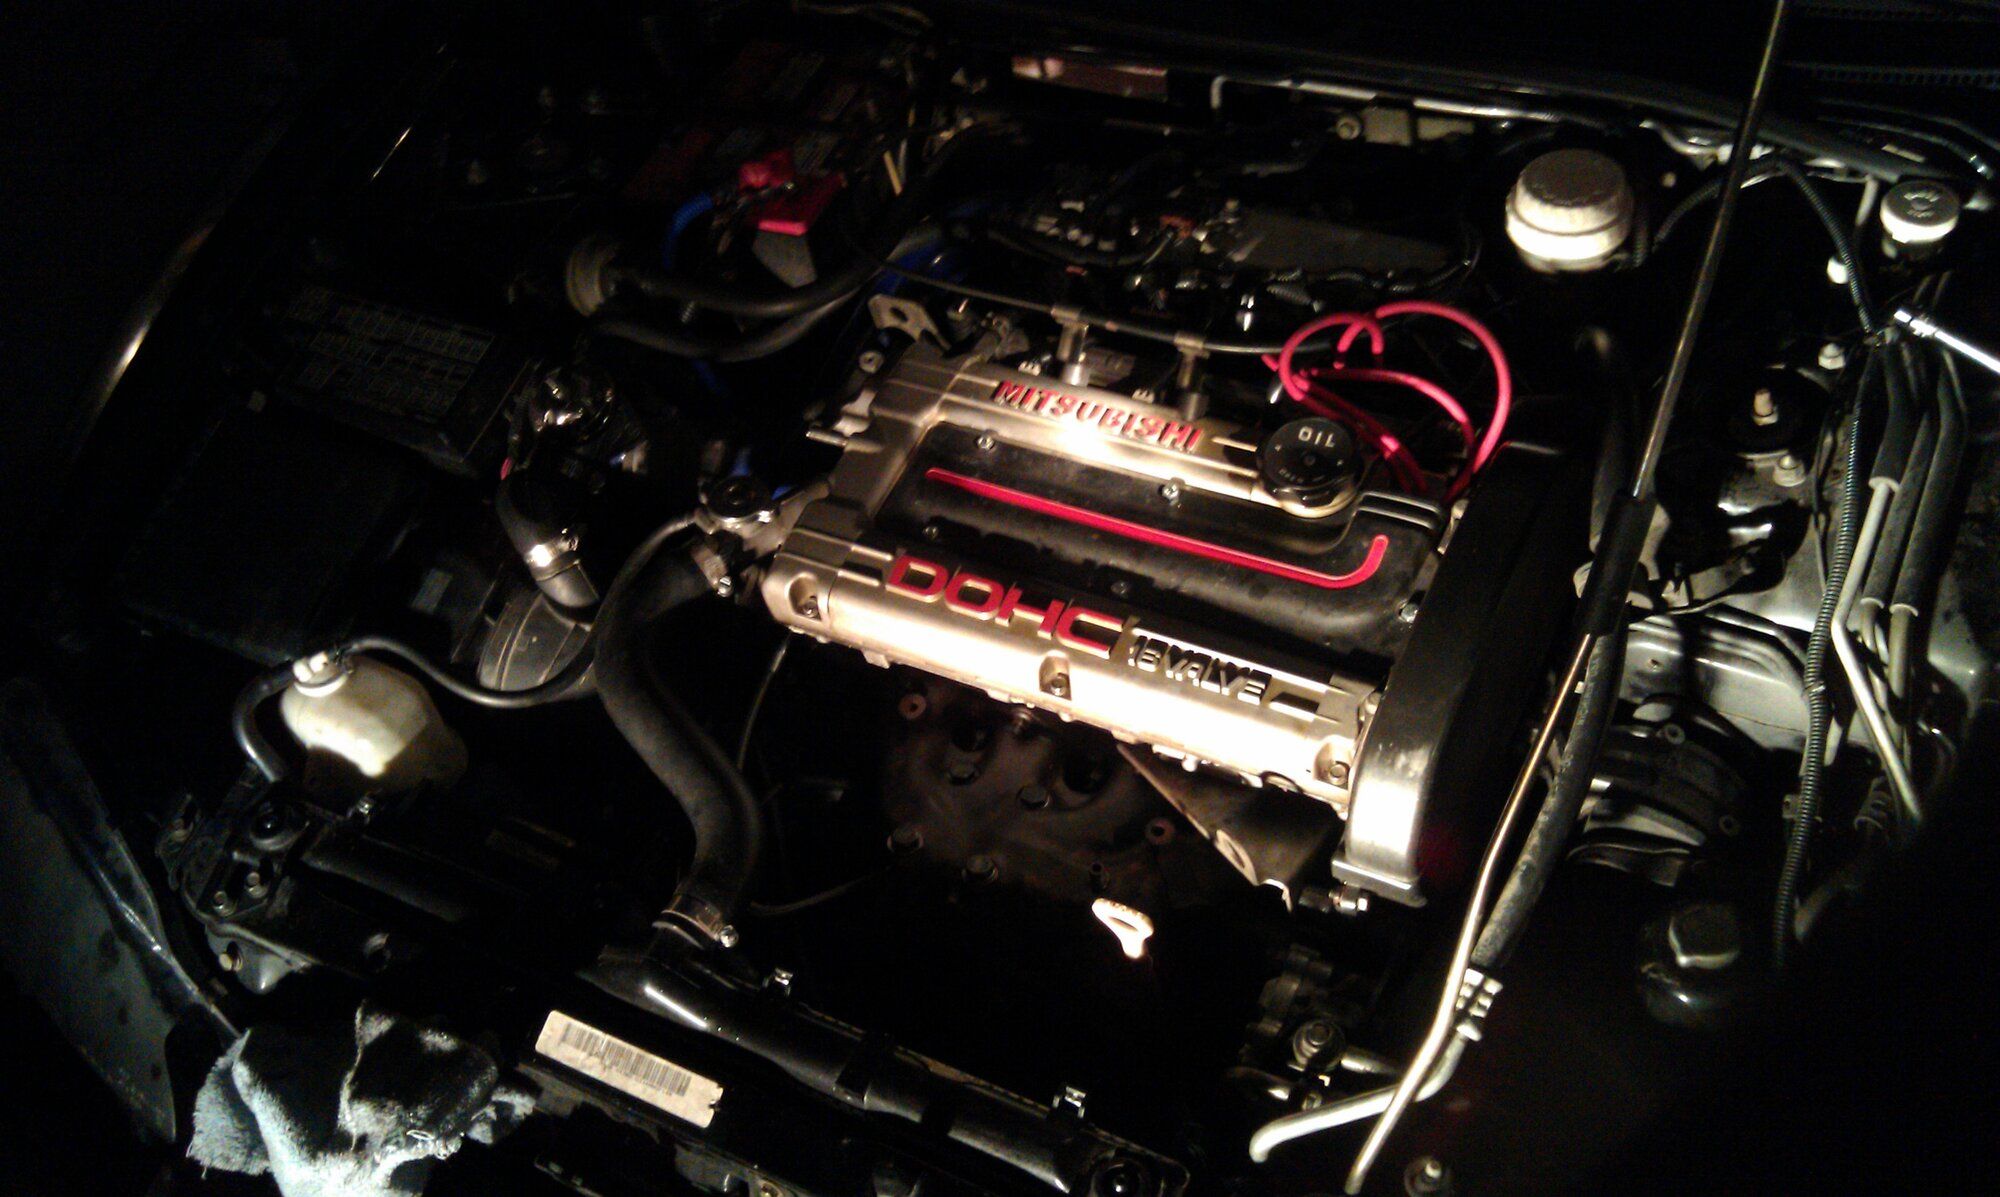
I never noticed it when I installed the 14B turbo but there is a second hole that was retapped at a different angle. That caused the return tube to not seat correctly. I had a machine shop drill and tap a larger hole. They went really big though and I had to drill out a slot in the return tube to get the bolt in. This is also when I first noticed the "4G63" on the engine block. Cracks everywhere in the casting too but did not cause a boost leak. I also took the time to take some sick engine shots (at least to my younger self). When it got dark, I took that last pic and it was one of my favorite for a long time.
Last edited:
- Thread starter
- #7
jukematt
15+ Year Contributor
- 291
- 40
- Jun 13, 2009
-
Portland Metro,
Oregon
And lastly in 2011: Project BLACK INTERIOR!
I loved the black leather interior, the black dash, etc. But the underside being all grey I didn't like so much. So, I set out to make it all match as much as possible. I picked up some SEM since that black color matches the interior perfectly! I painted the side kick panels, the glove box, and under the steering wheel except for the hood release so it is easier to see. It totally looks like it could be OEM.
To this day, the glove box area and under the steering wheel look flawless and no one believes they are painted unless I tell them, but the kick panels need to be redone since they naturally get KICKED now and then and the paint is coming off. I did not use any clear coat since I didn't want to take away from the color matching and make them shiny. Now that I have more experience with painting, I might try a matte clear to keep them looking nice. I've never tried matte or satin clear so I'm curious how it will make it look.
I considered doing the entire hatch area as well where the only thing not black would be the back of the seats, and the hatch cover, but it isn't a priority and I'll probably keep it as is. I don't have pictures of the glove box or under steering wheel, but here is what I did with the kick panels. I first washed with dawn dish soap and water with a rag, let them dry in the shade, then applied the product in order of the picture. I grabbed two cans to have enough, though I think I recall needing a third, and I maybe three coats. The last two pics are to show side by side of stock vs. painted.
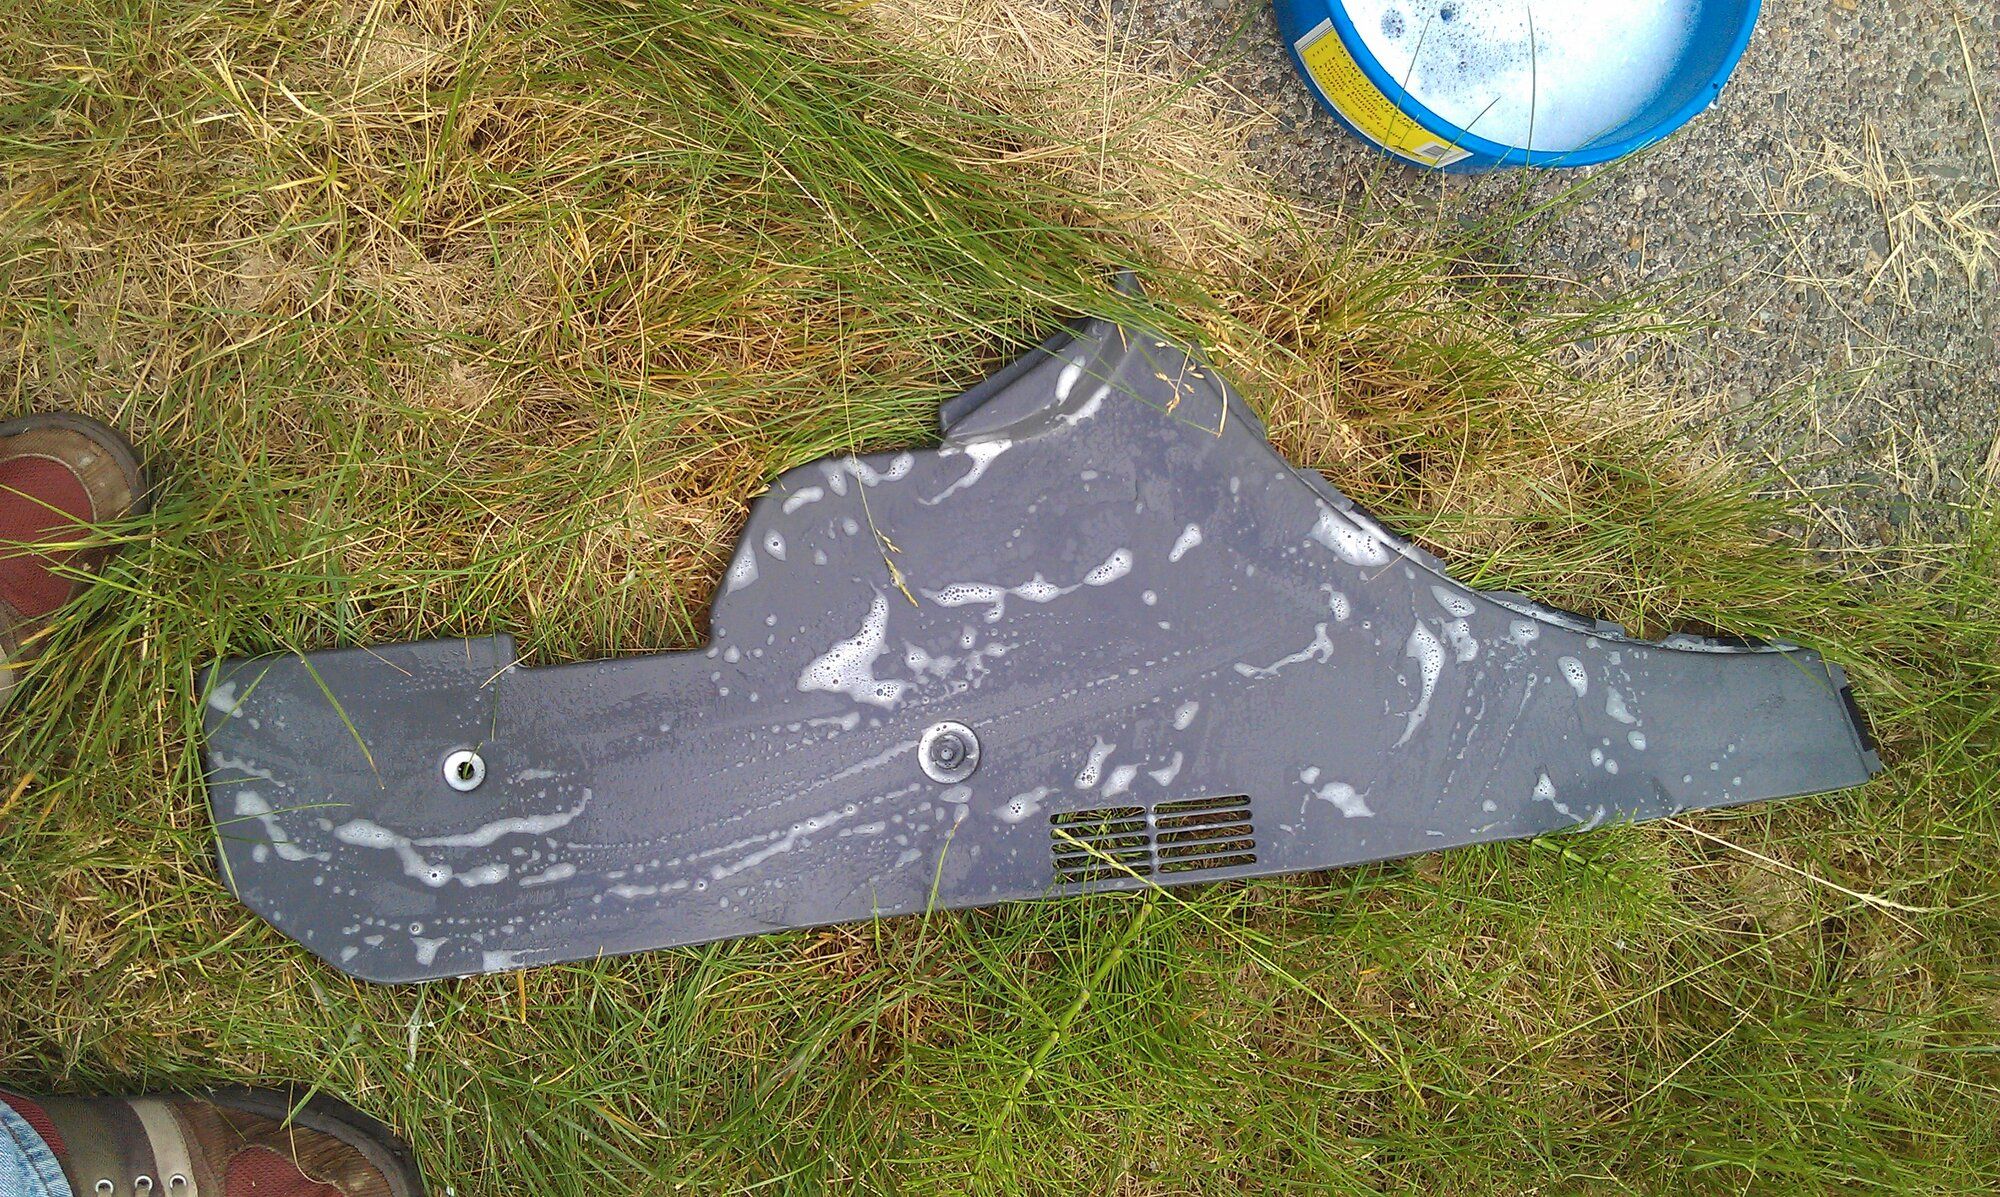
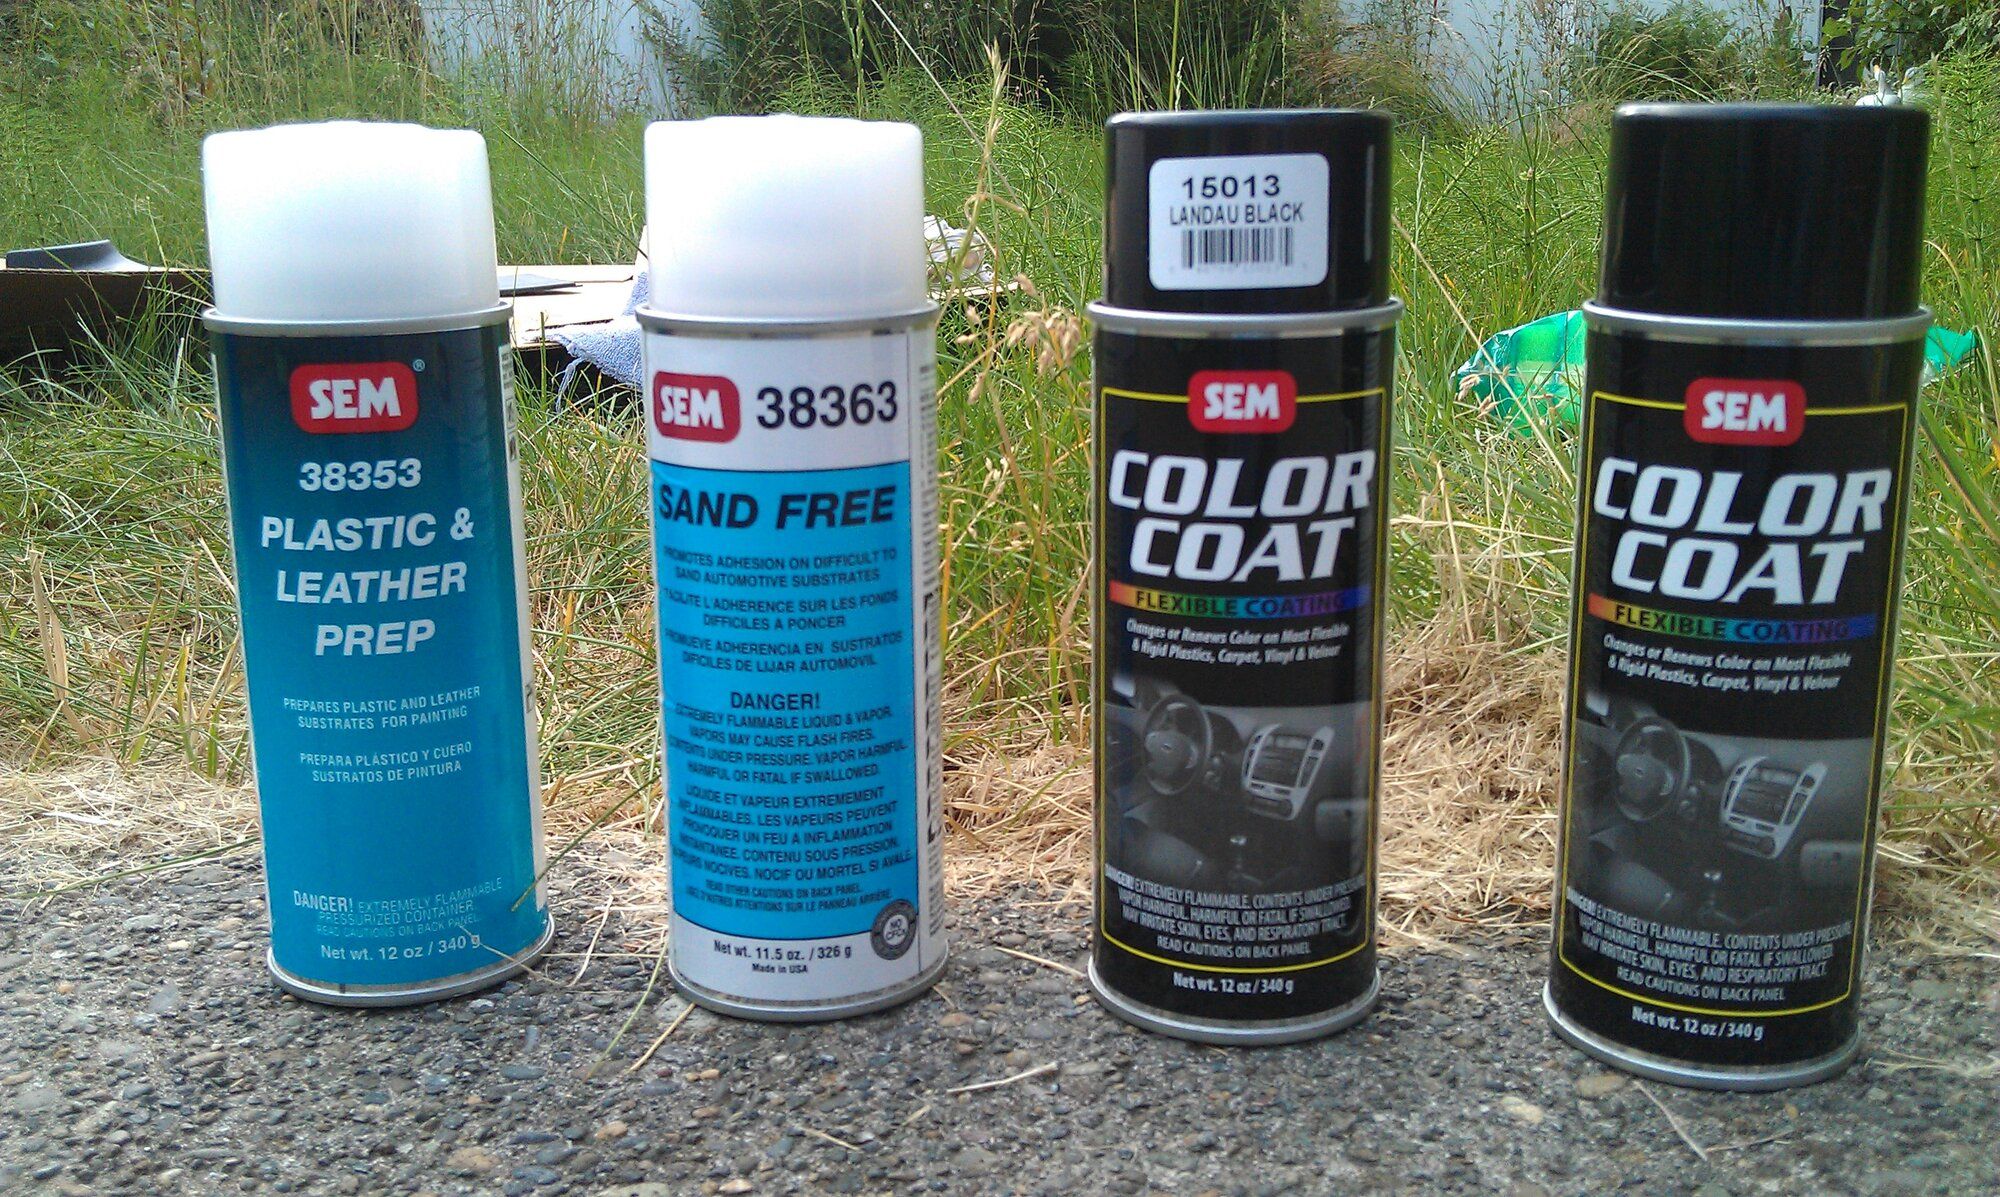
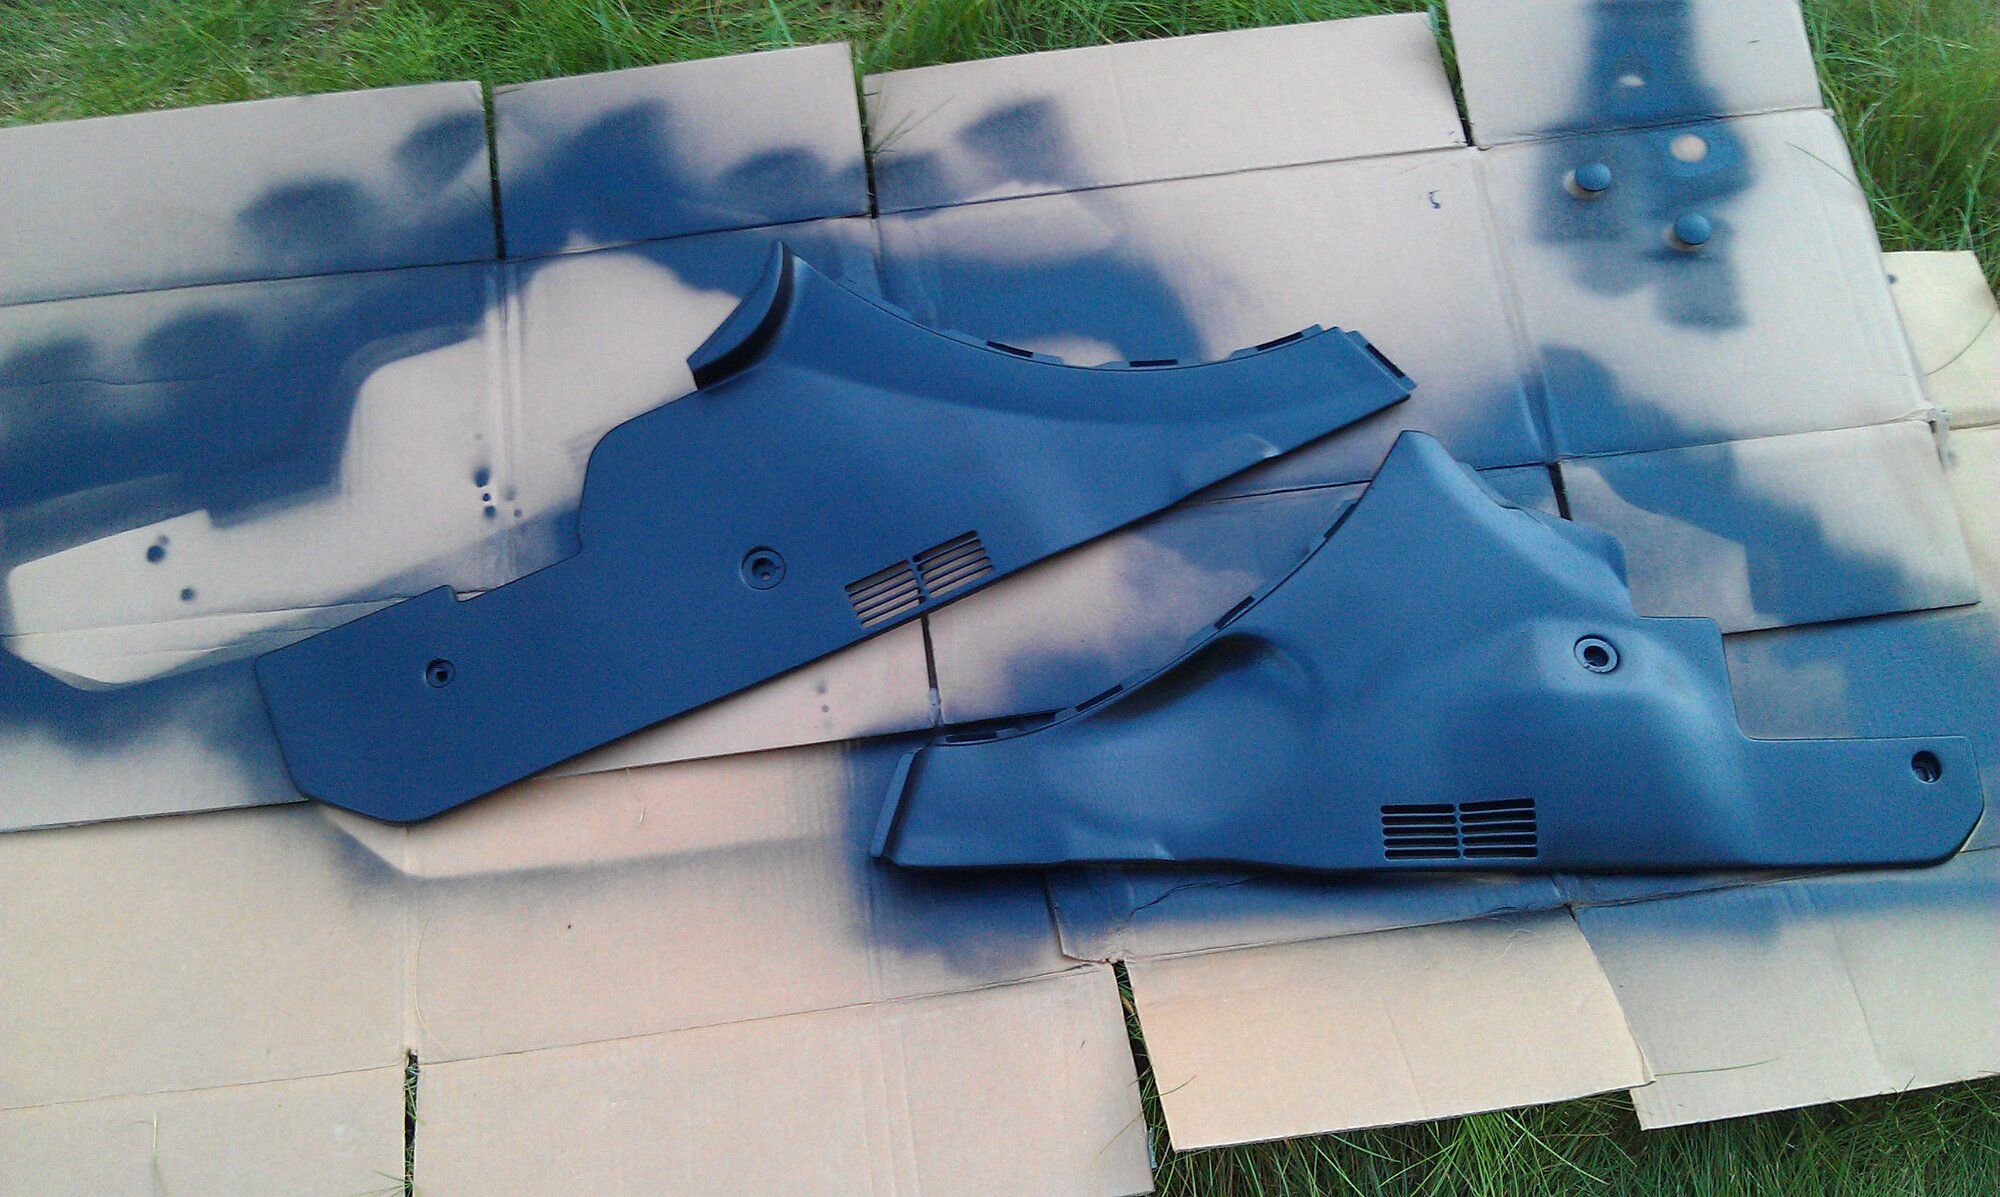
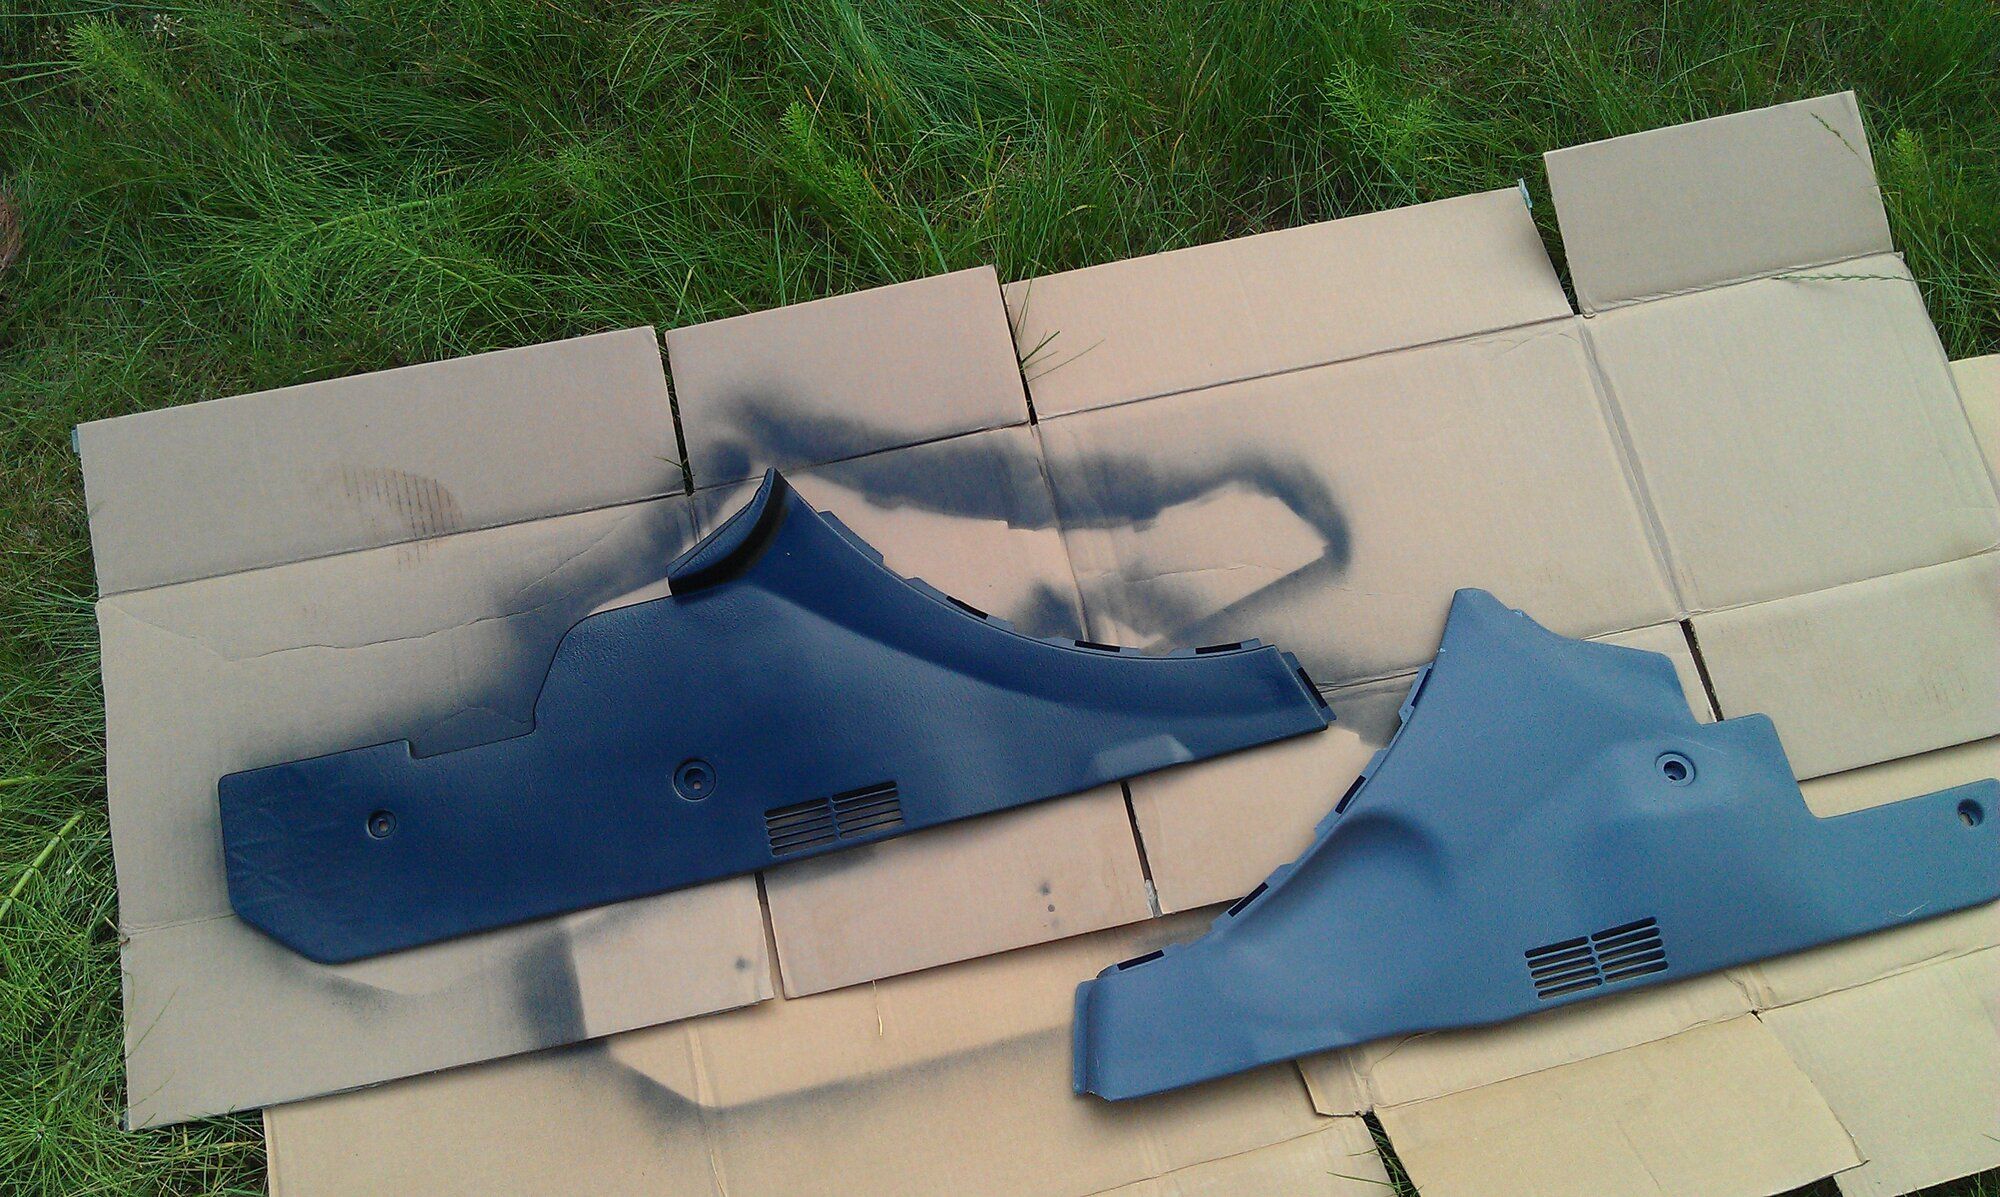
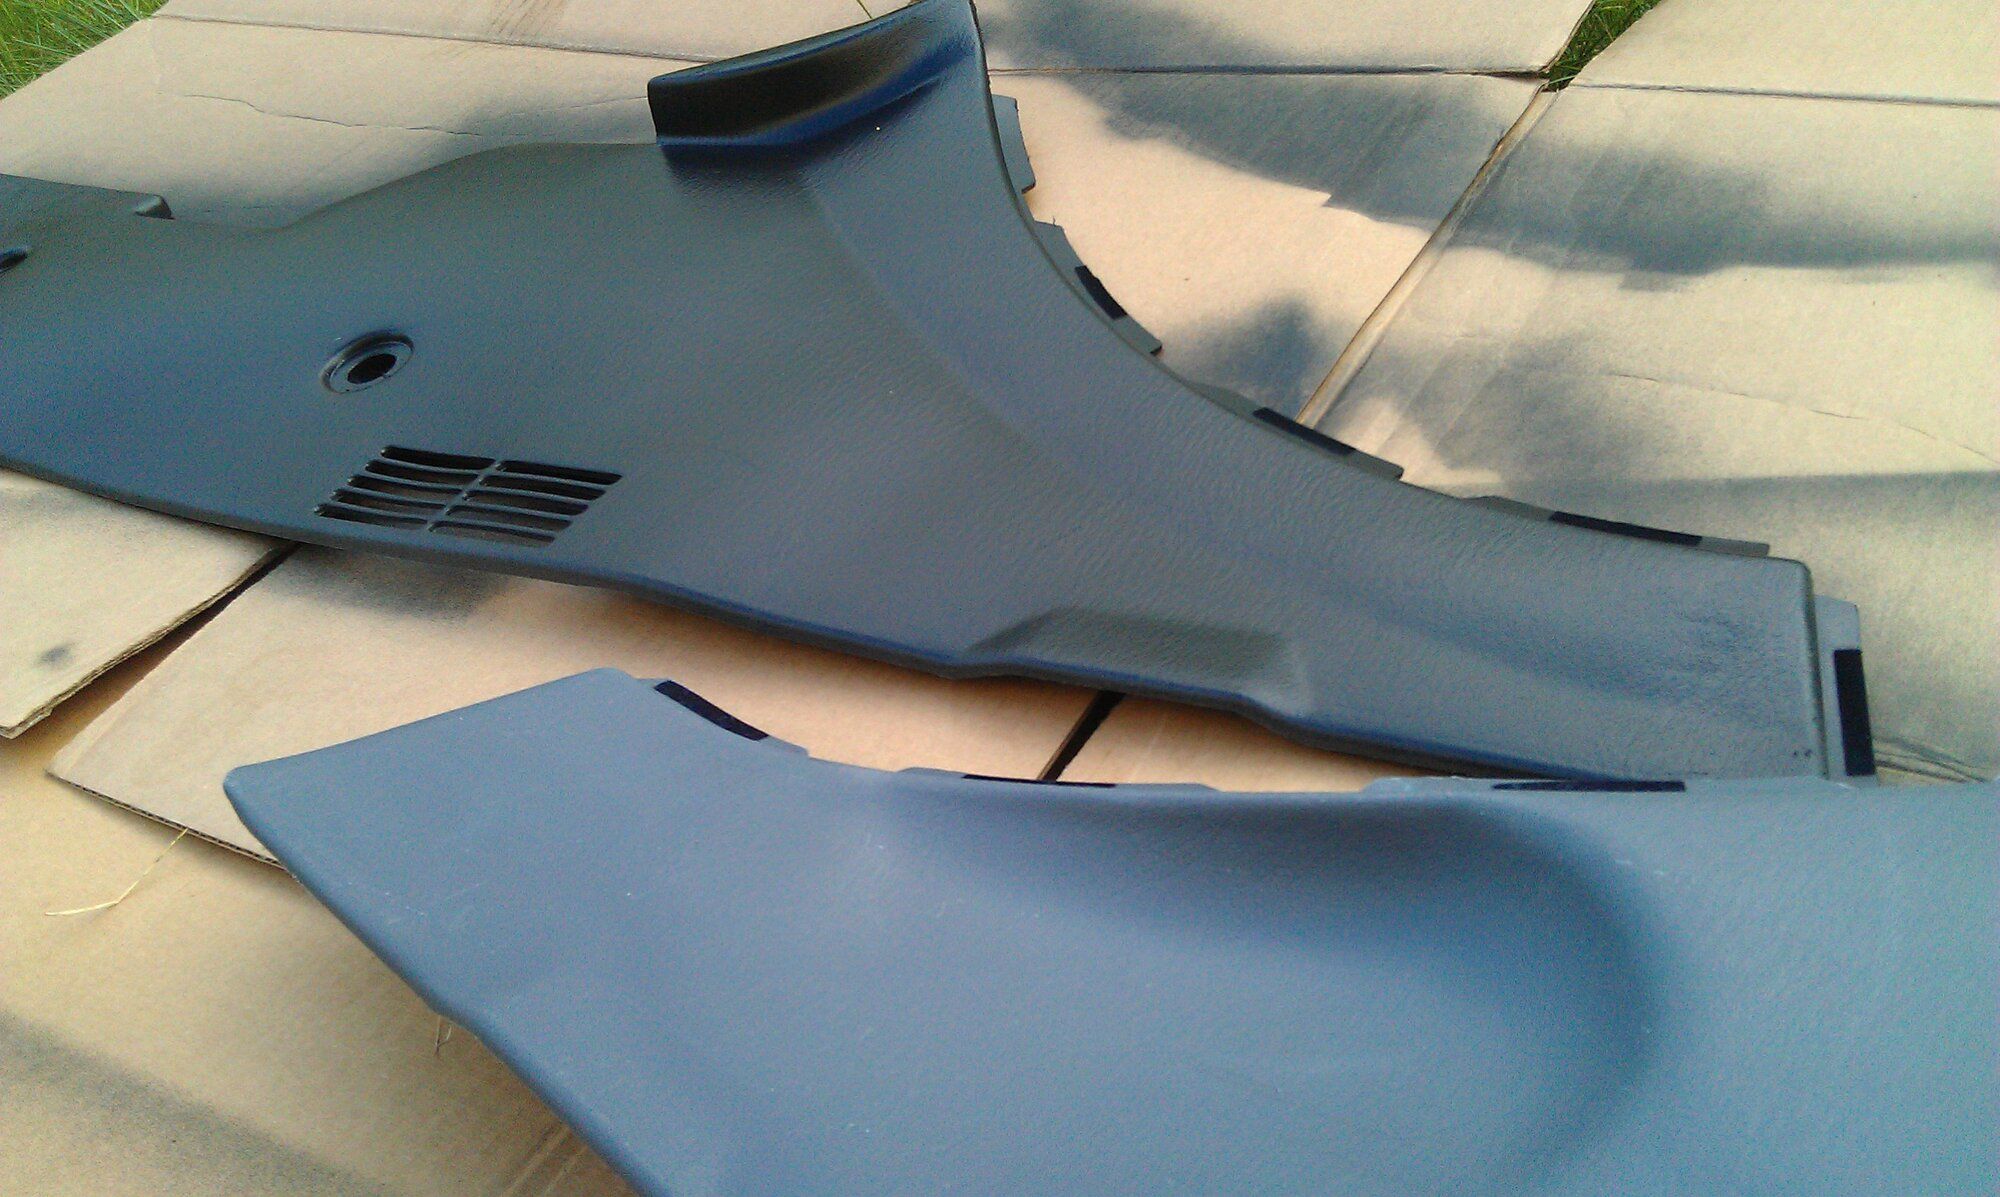
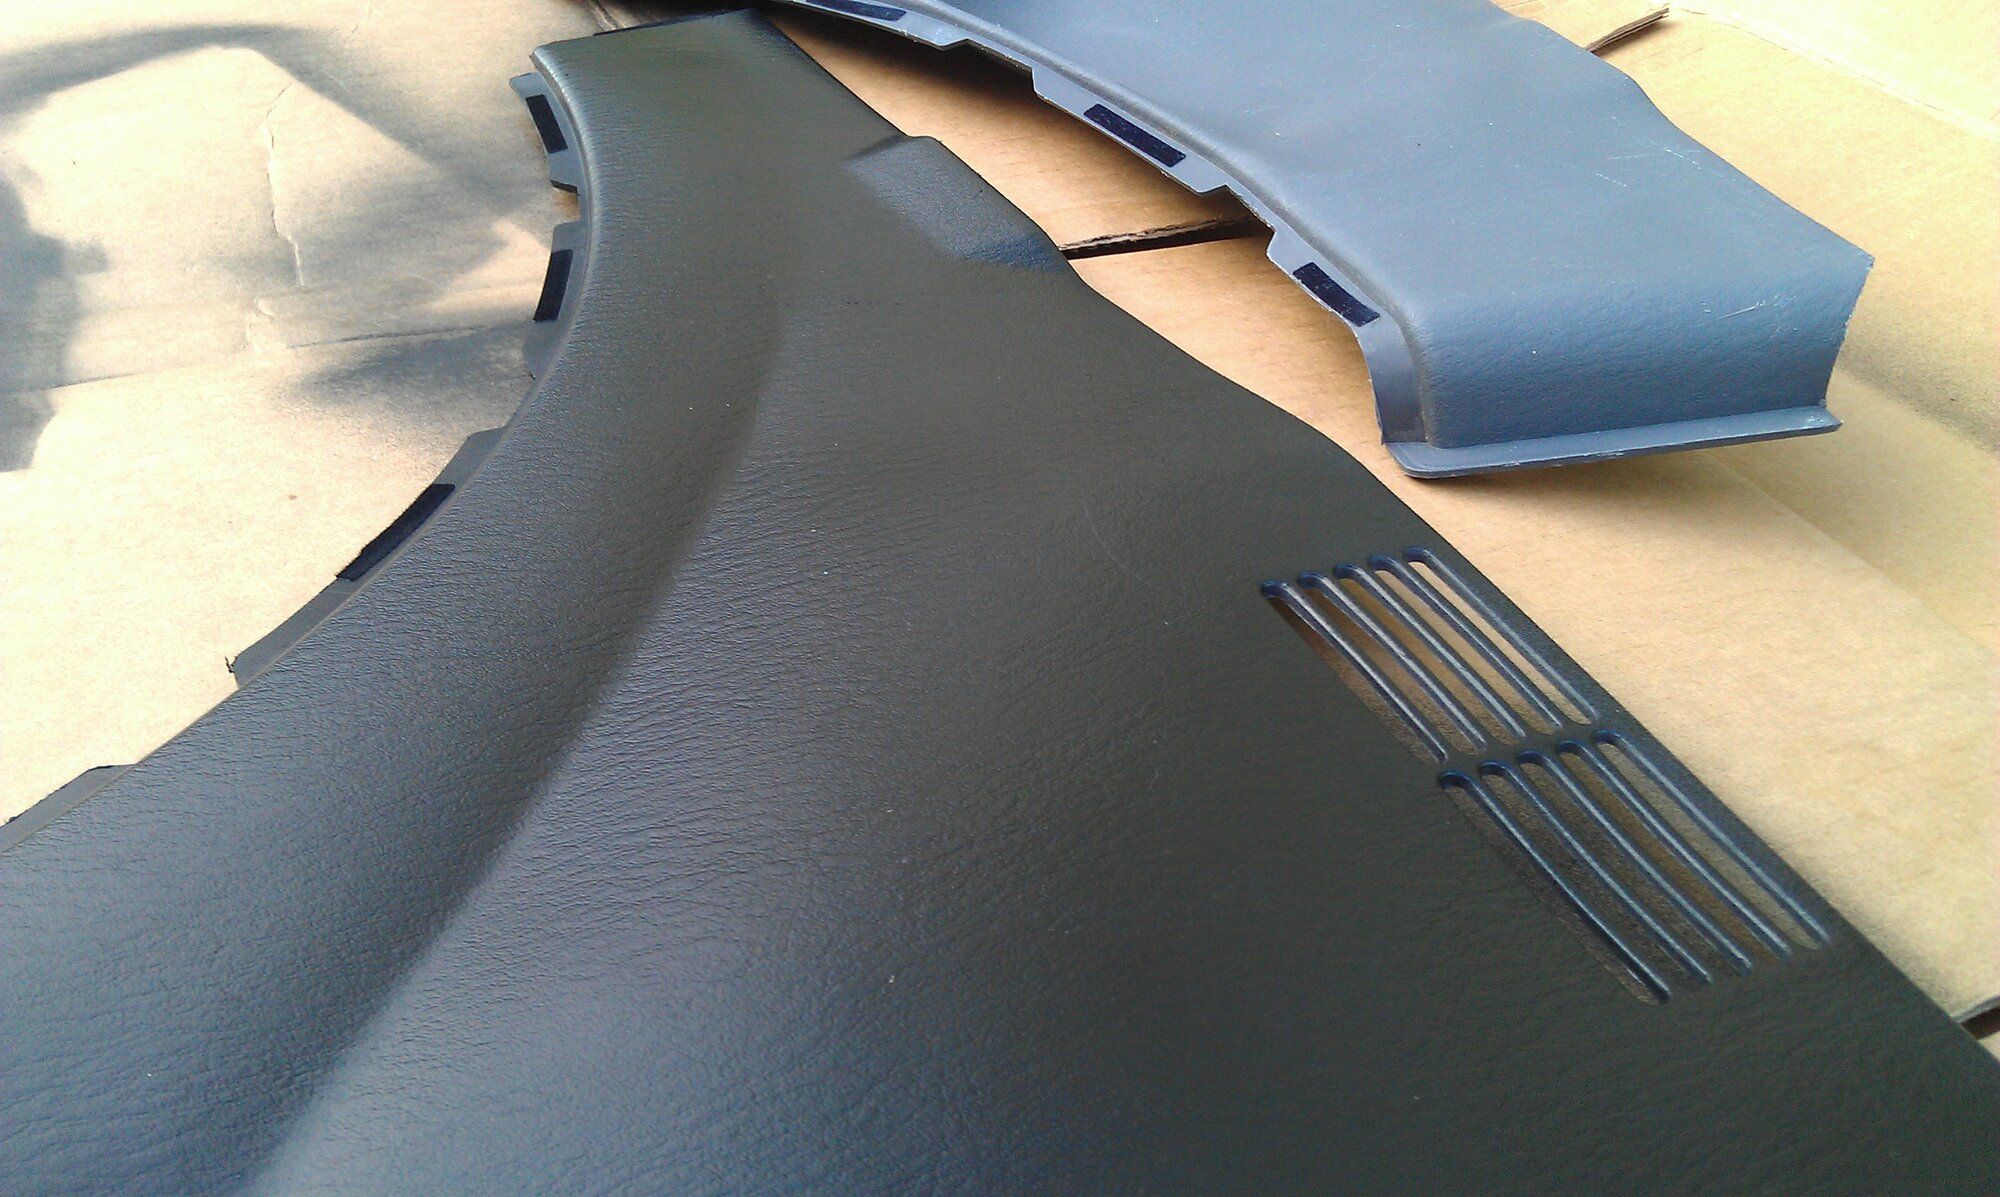
I loved the black leather interior, the black dash, etc. But the underside being all grey I didn't like so much. So, I set out to make it all match as much as possible. I picked up some SEM since that black color matches the interior perfectly! I painted the side kick panels, the glove box, and under the steering wheel except for the hood release so it is easier to see. It totally looks like it could be OEM.
To this day, the glove box area and under the steering wheel look flawless and no one believes they are painted unless I tell them, but the kick panels need to be redone since they naturally get KICKED now and then and the paint is coming off. I did not use any clear coat since I didn't want to take away from the color matching and make them shiny. Now that I have more experience with painting, I might try a matte clear to keep them looking nice. I've never tried matte or satin clear so I'm curious how it will make it look.
I considered doing the entire hatch area as well where the only thing not black would be the back of the seats, and the hatch cover, but it isn't a priority and I'll probably keep it as is. I don't have pictures of the glove box or under steering wheel, but here is what I did with the kick panels. I first washed with dawn dish soap and water with a rag, let them dry in the shade, then applied the product in order of the picture. I grabbed two cans to have enough, though I think I recall needing a third, and I maybe three coats. The last two pics are to show side by side of stock vs. painted.
- Thread starter
- #8
jukematt
15+ Year Contributor
- 291
- 40
- Jun 13, 2009
-
Portland Metro,
Oregon
January 2012: Rod Knock
Just cruising around I heard it. I didn't know what it was but it got louder the higher the engine was revved. I dropped the oil pan and found gold! Also the first time seeing inside the block. I had spun a rod bearing. From the looks of it, the other bearings didn't look in the best of condition, though I didn't experience to recognize what was normal and what wasn't. The rod and crank also had scoring on it from the metal-to-metal contact. Penny for size comparison of the largest chunks... I just noticed that penny is a 1999 and it is upside down. A reference to my car's status perhaps? Time for a rebuild. I was in college living on campus so I didn't need to go anywhere.
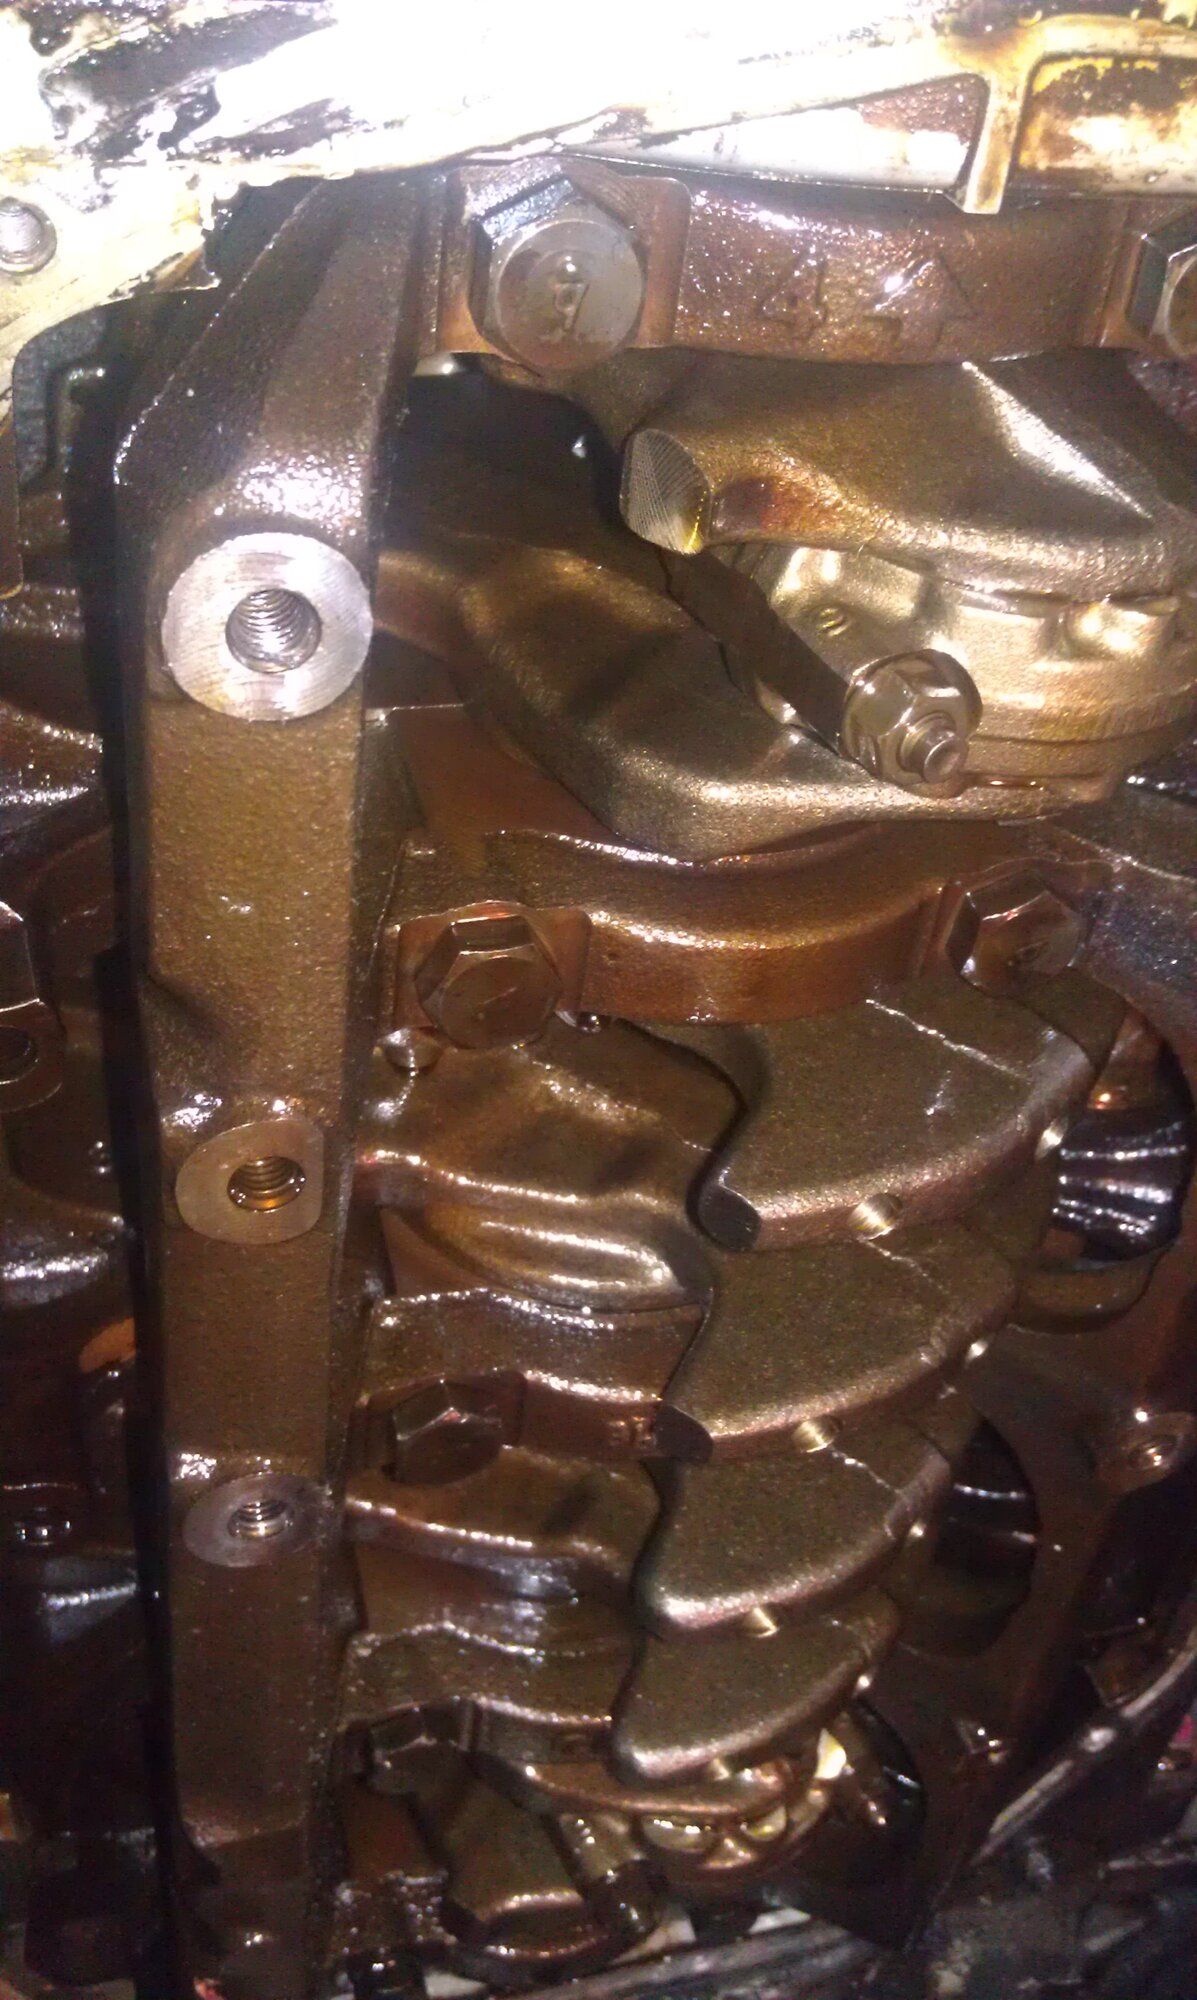
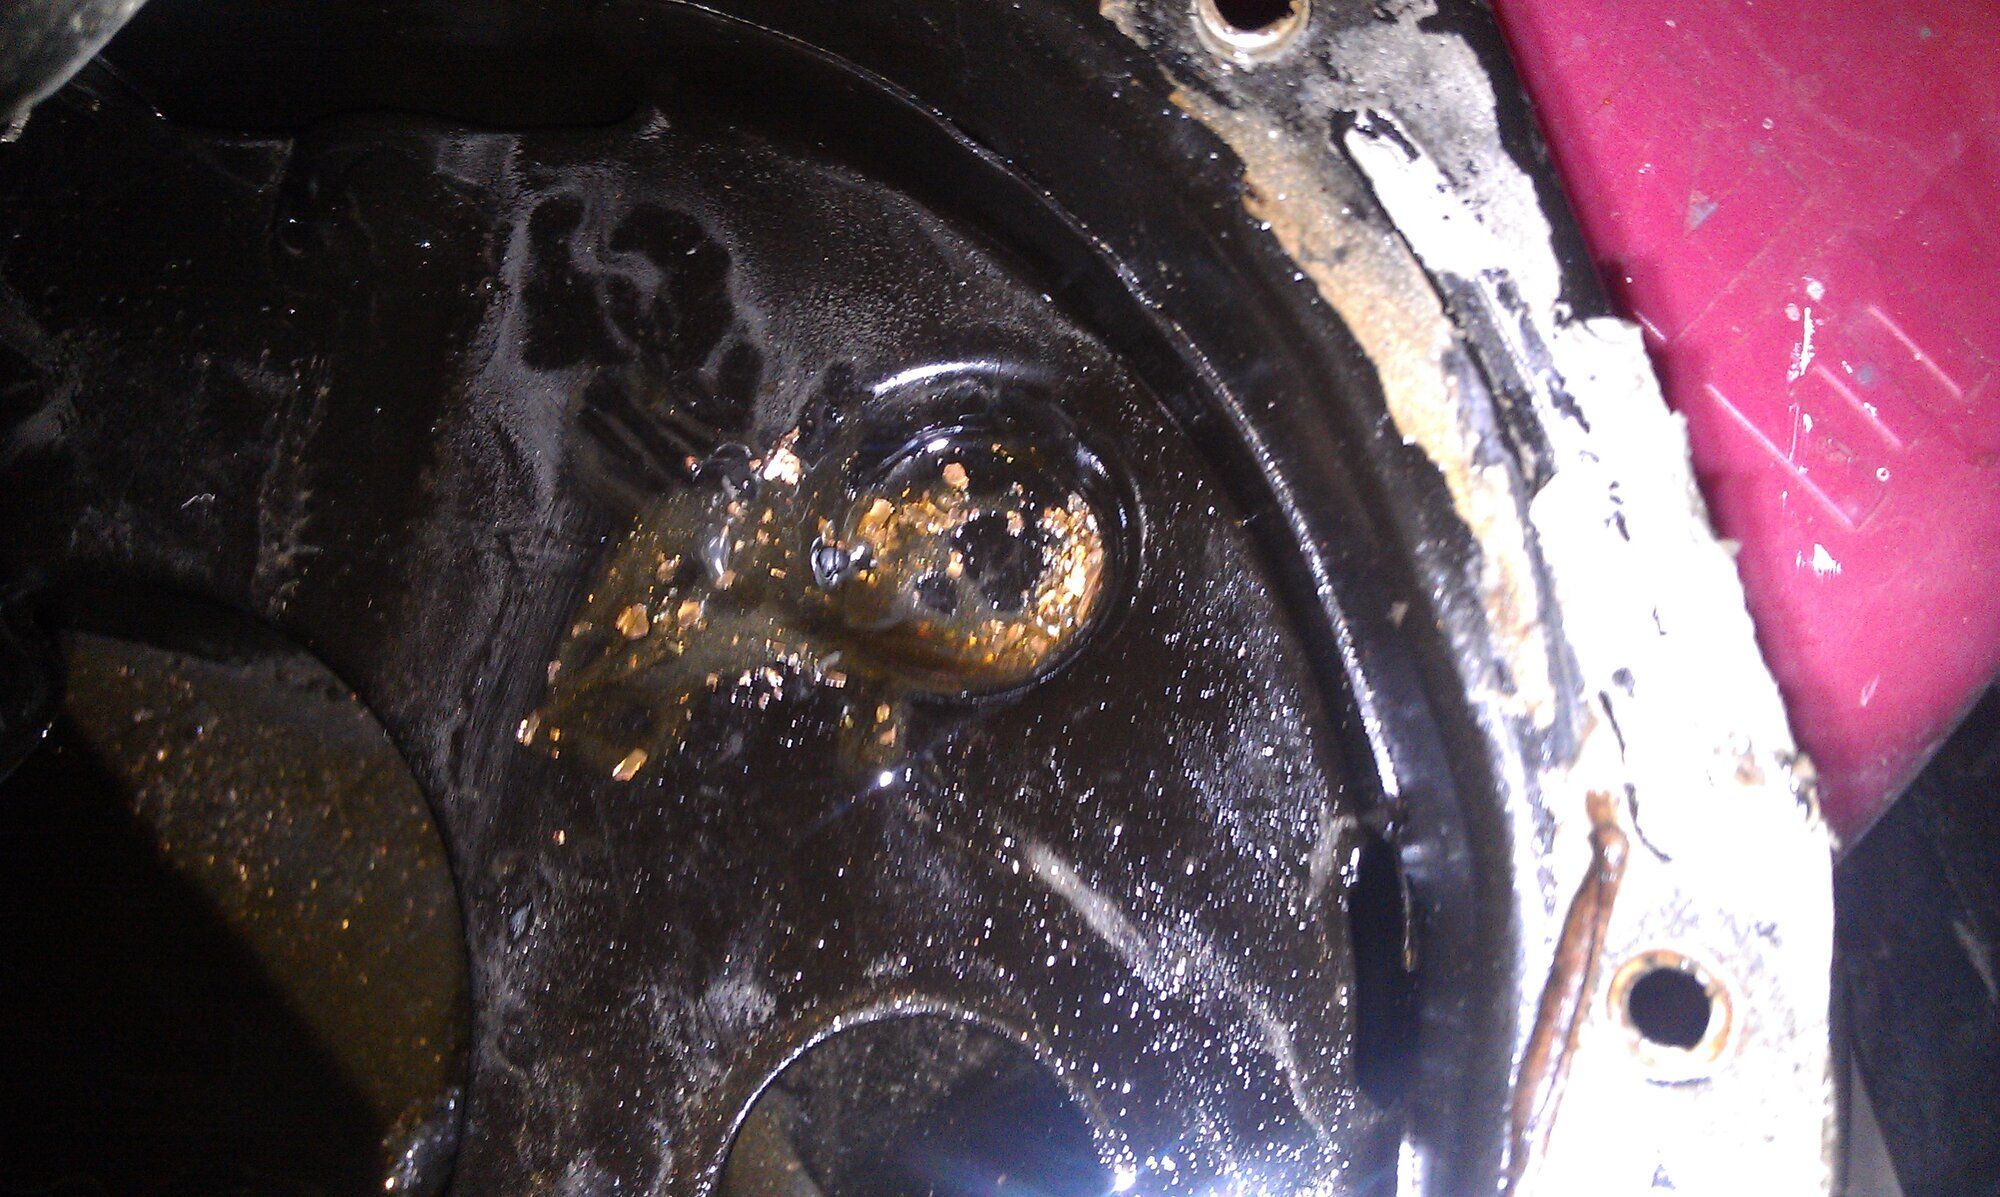
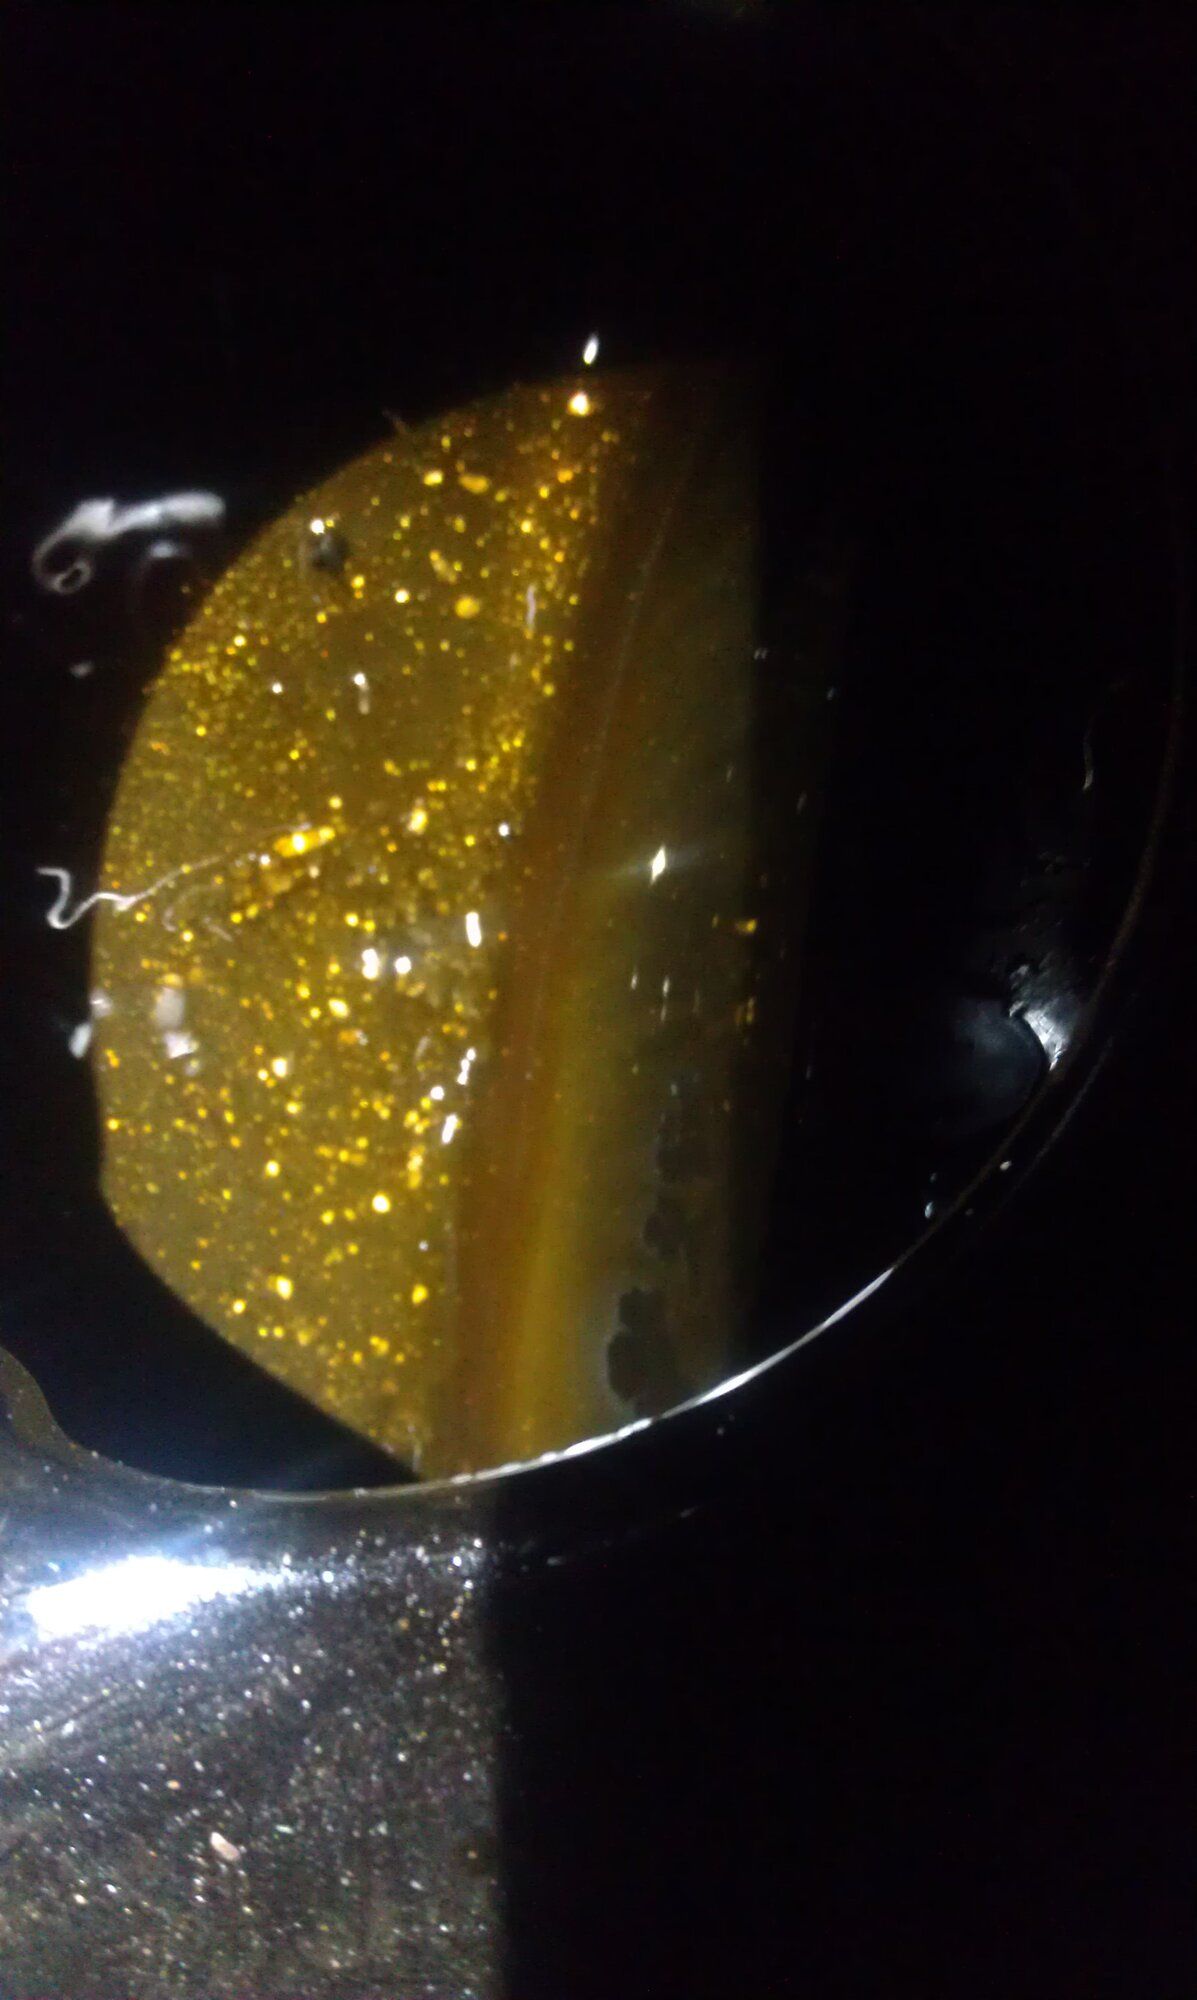
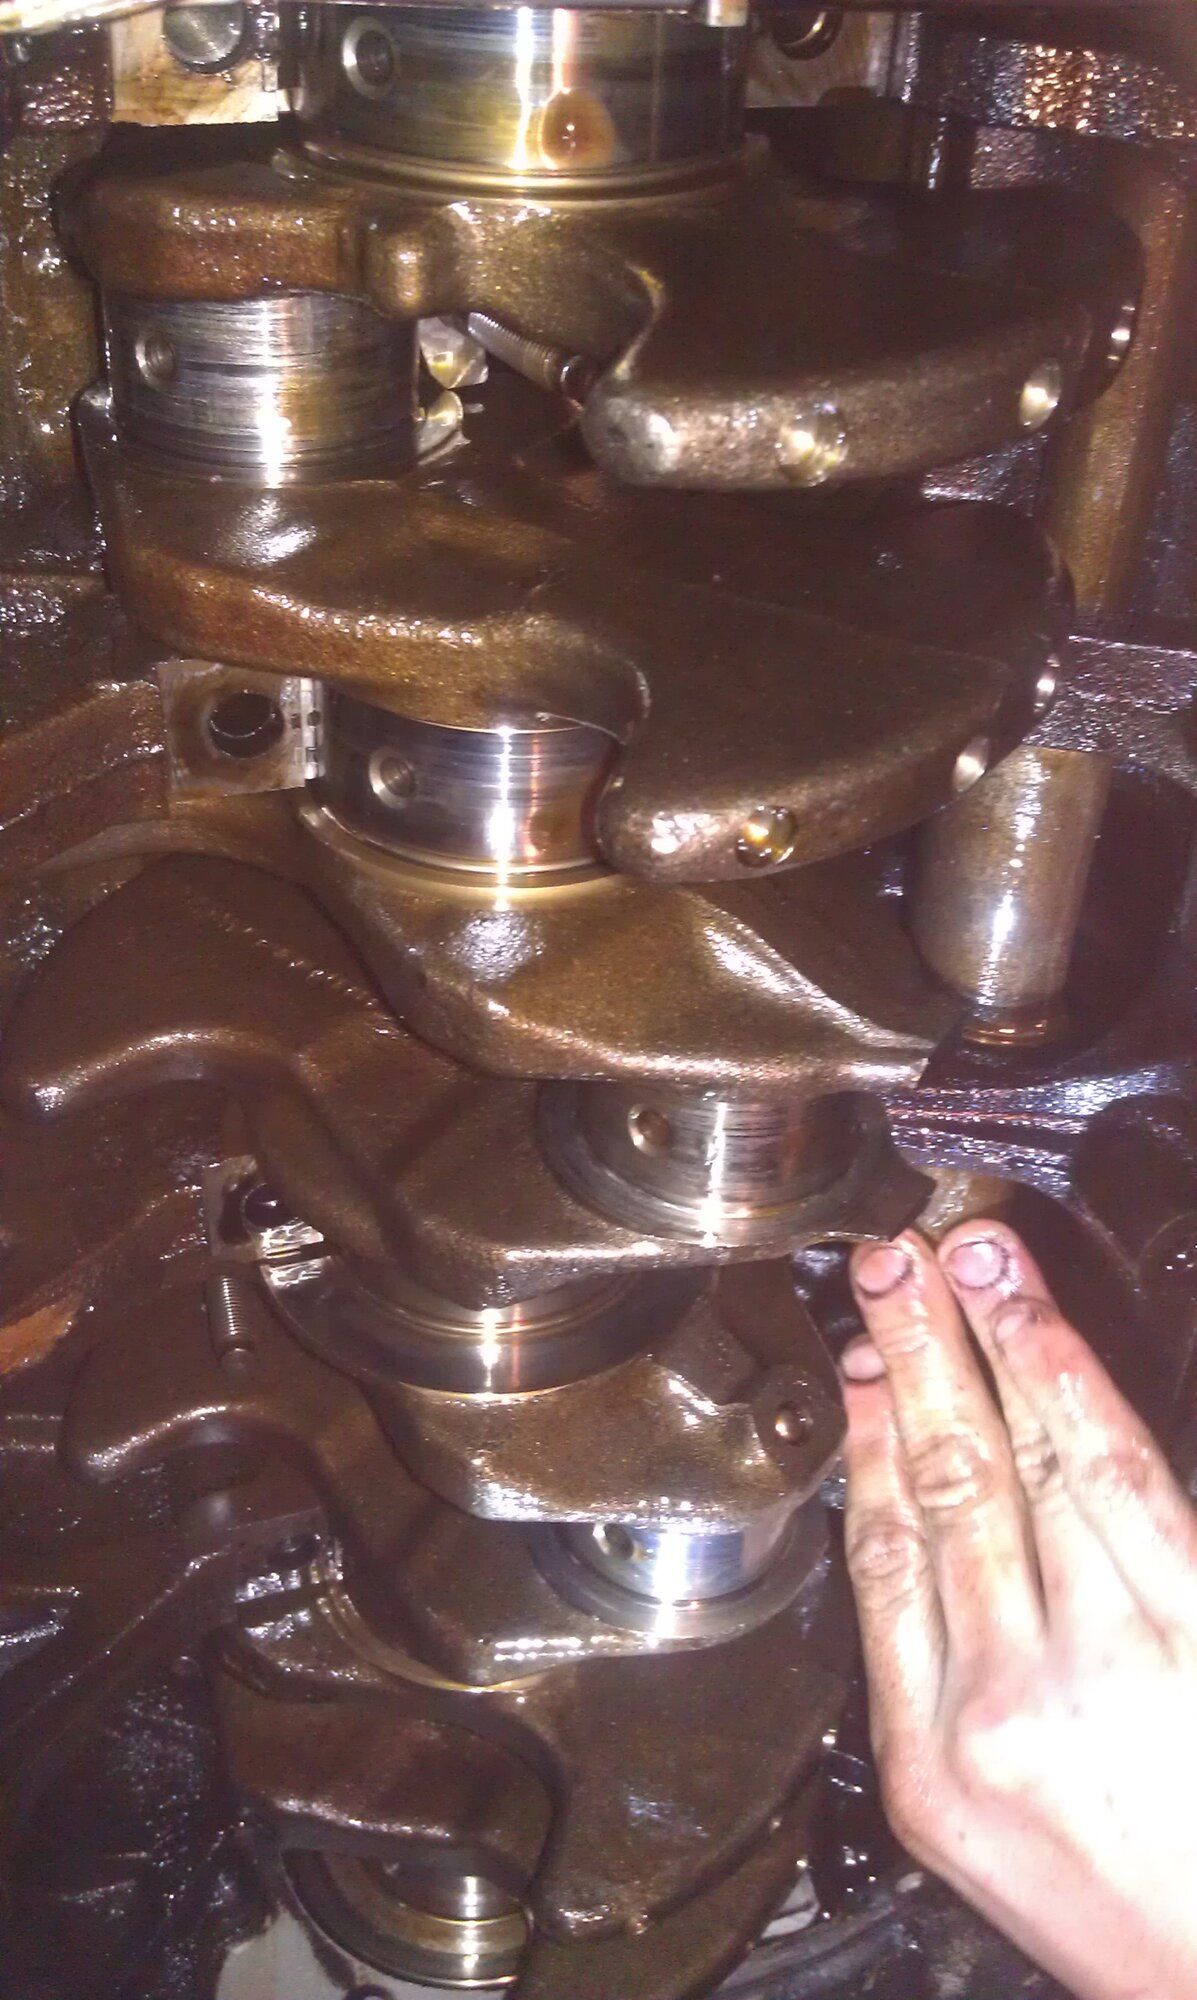
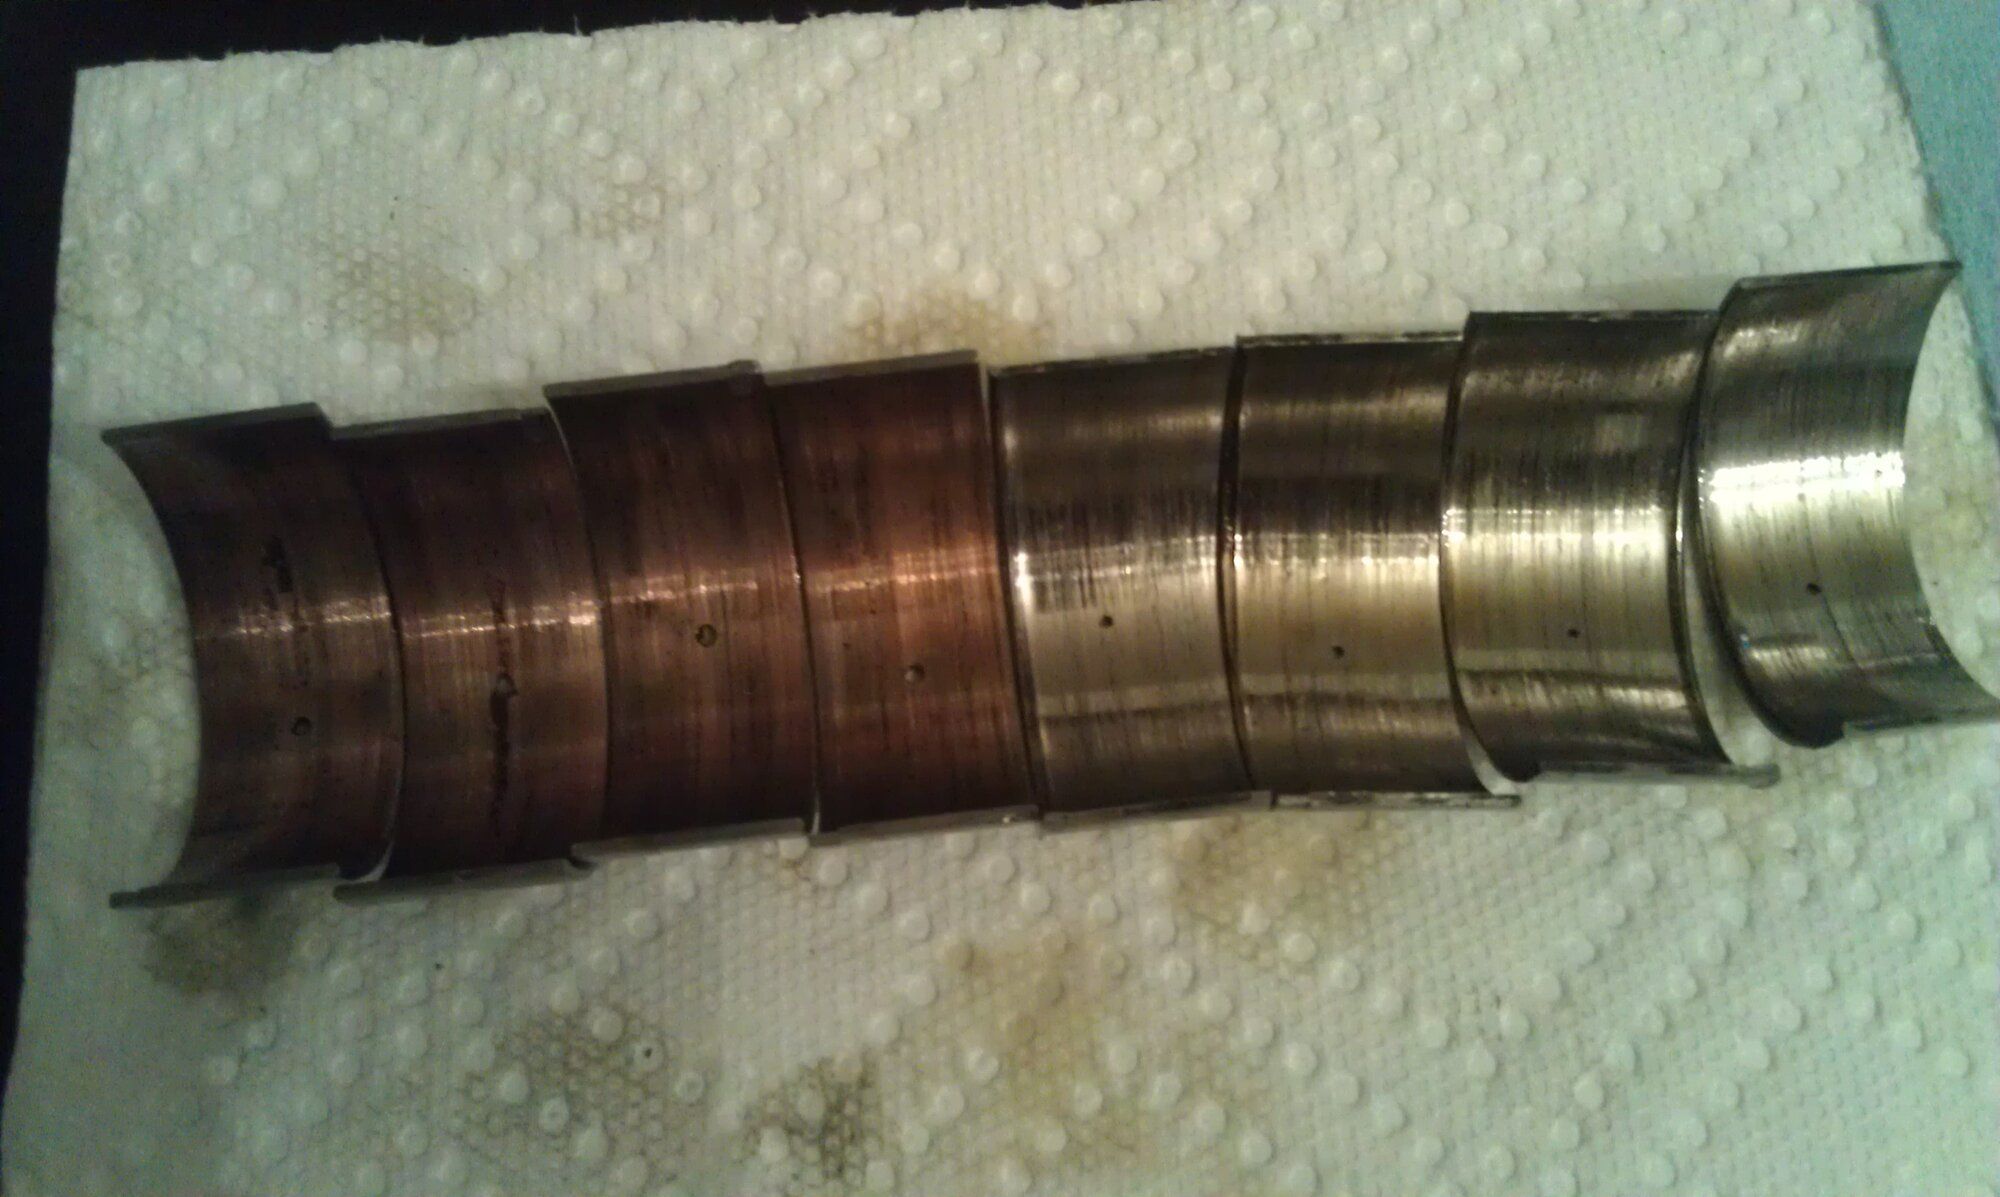
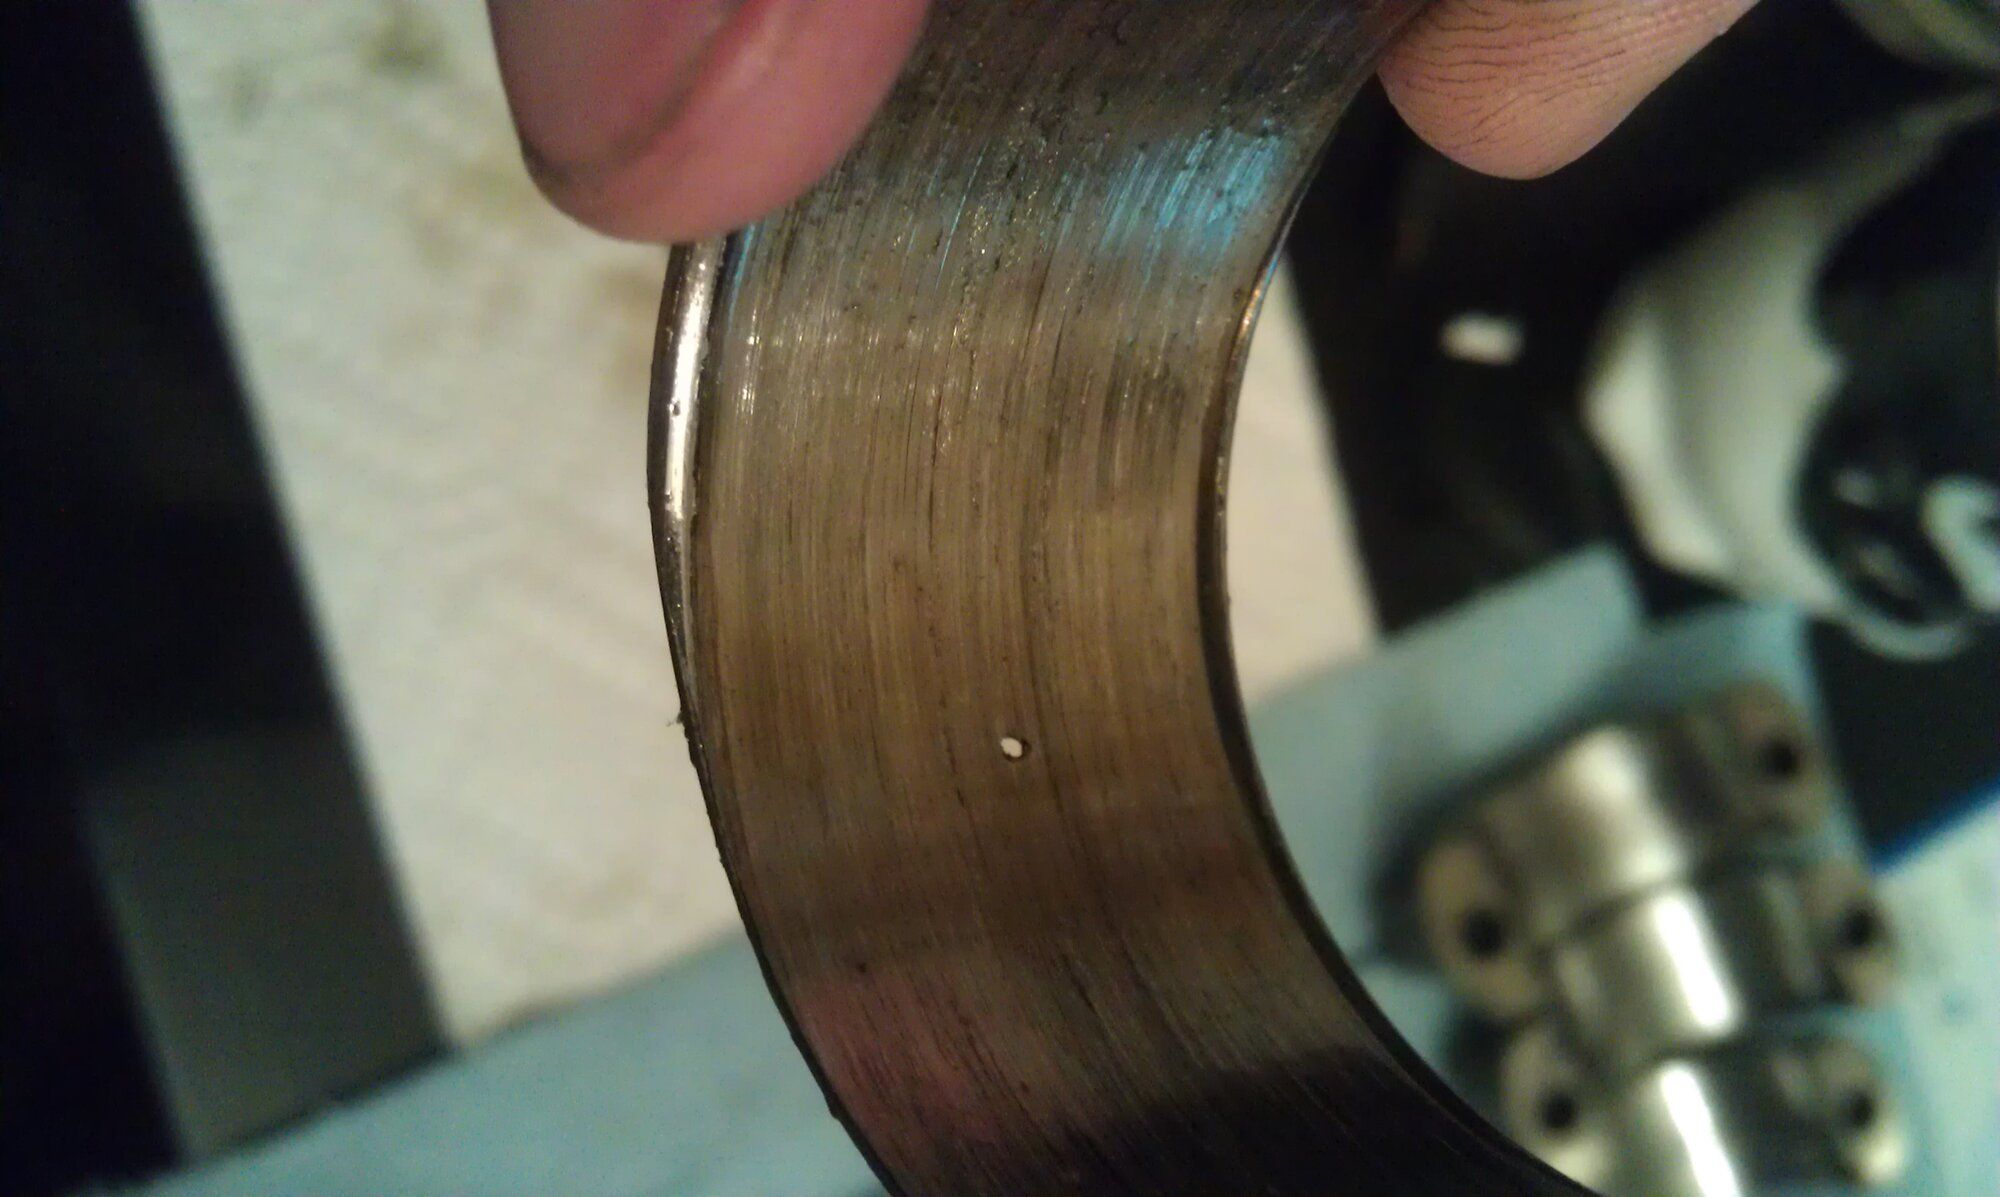
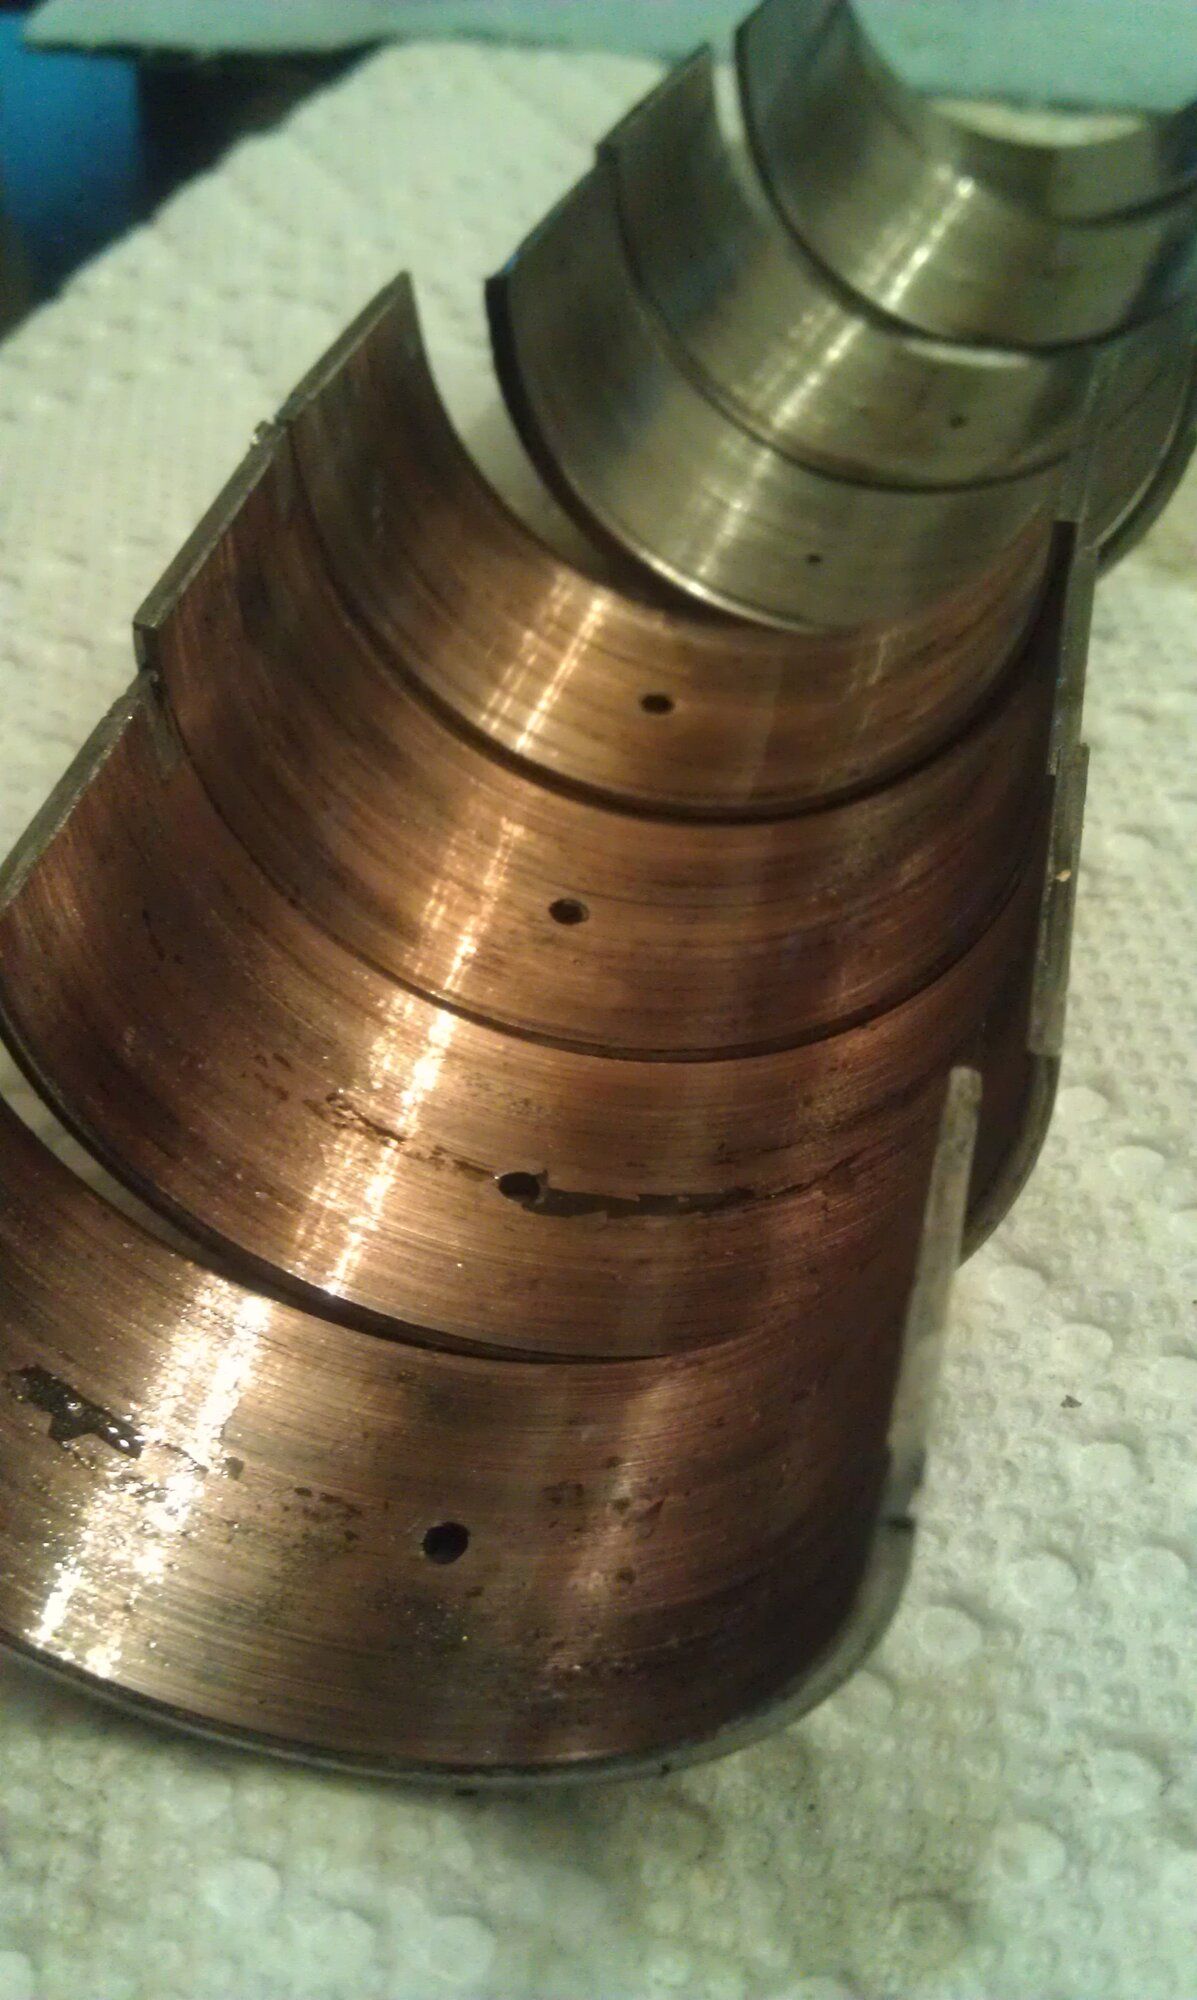
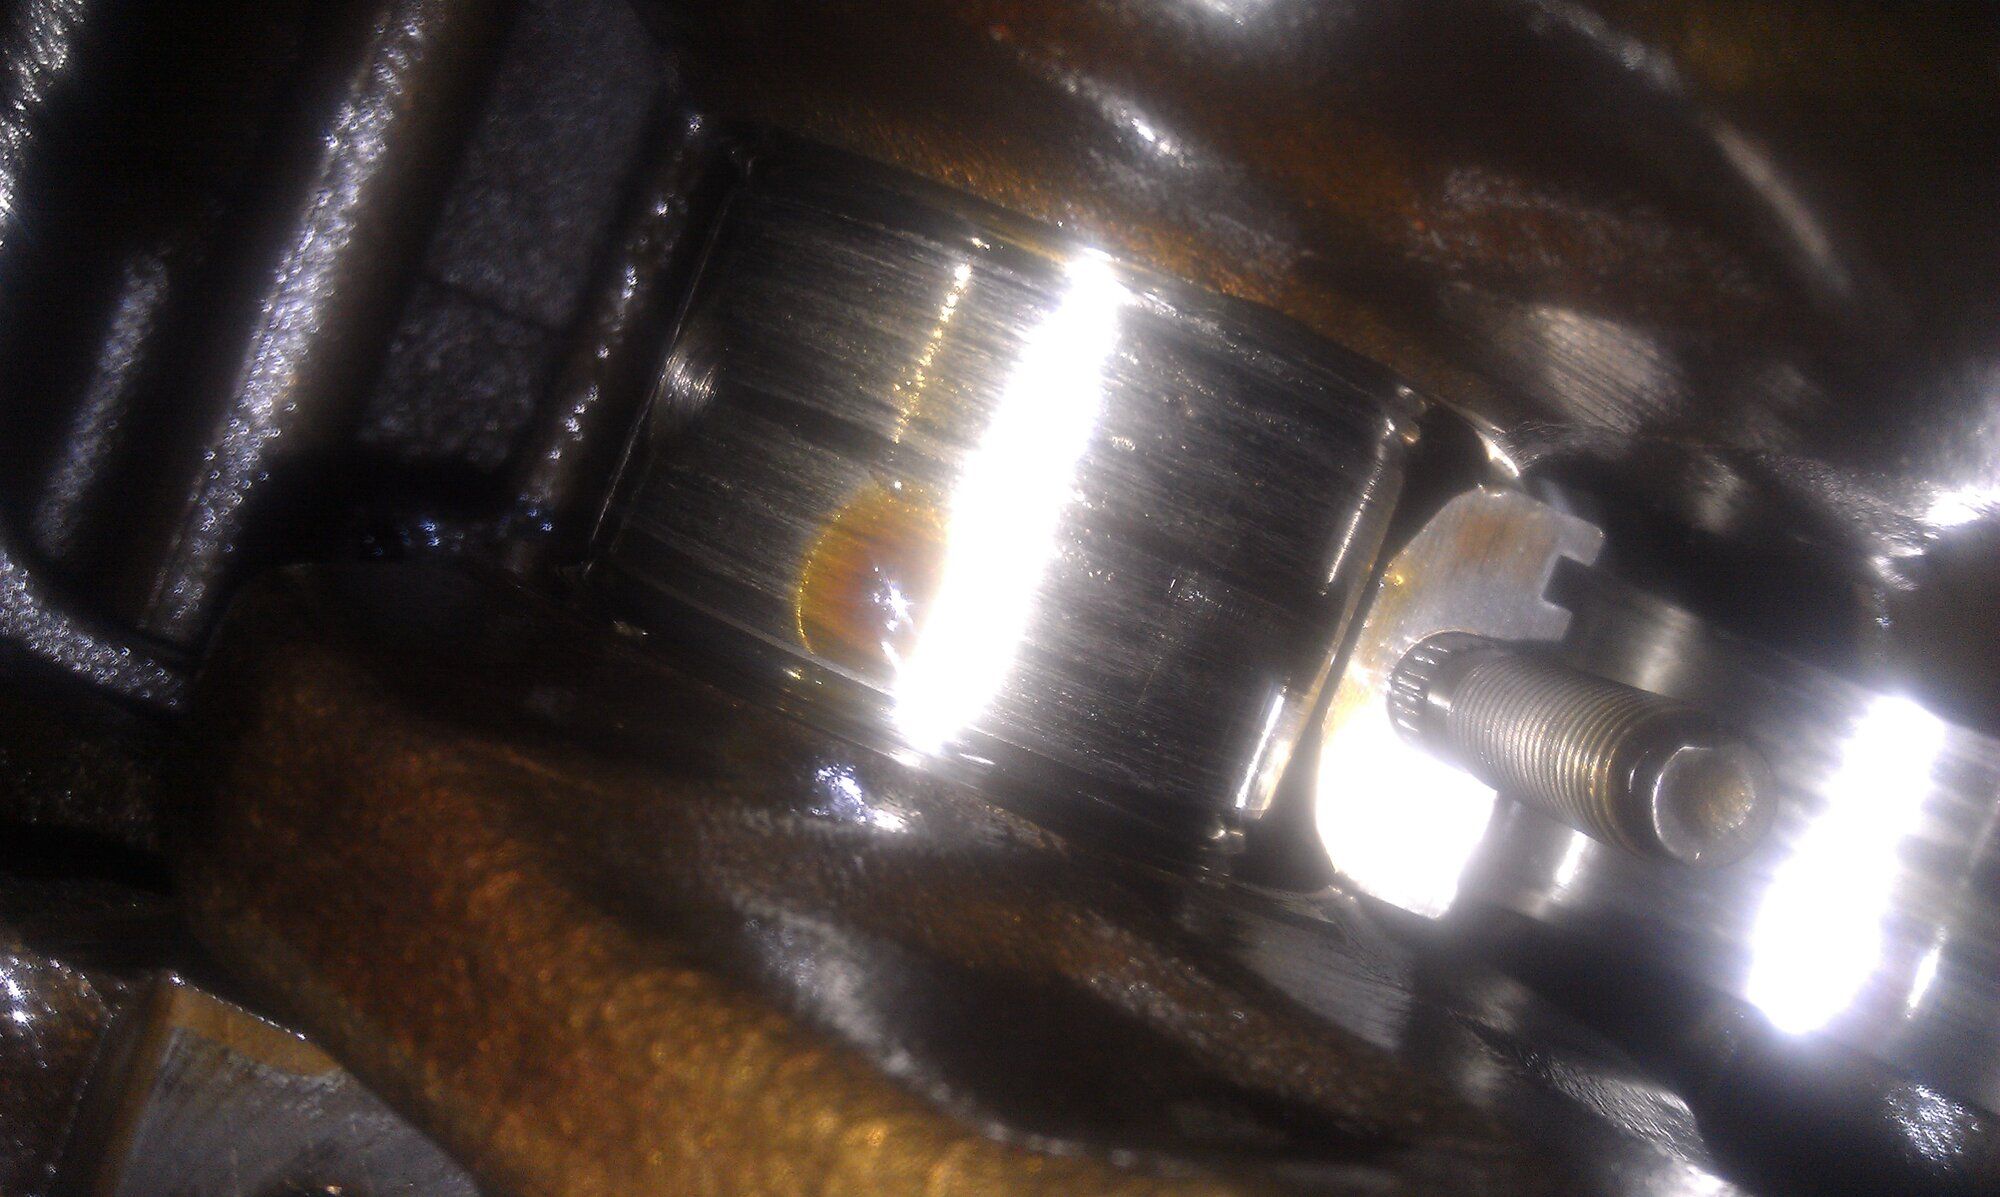
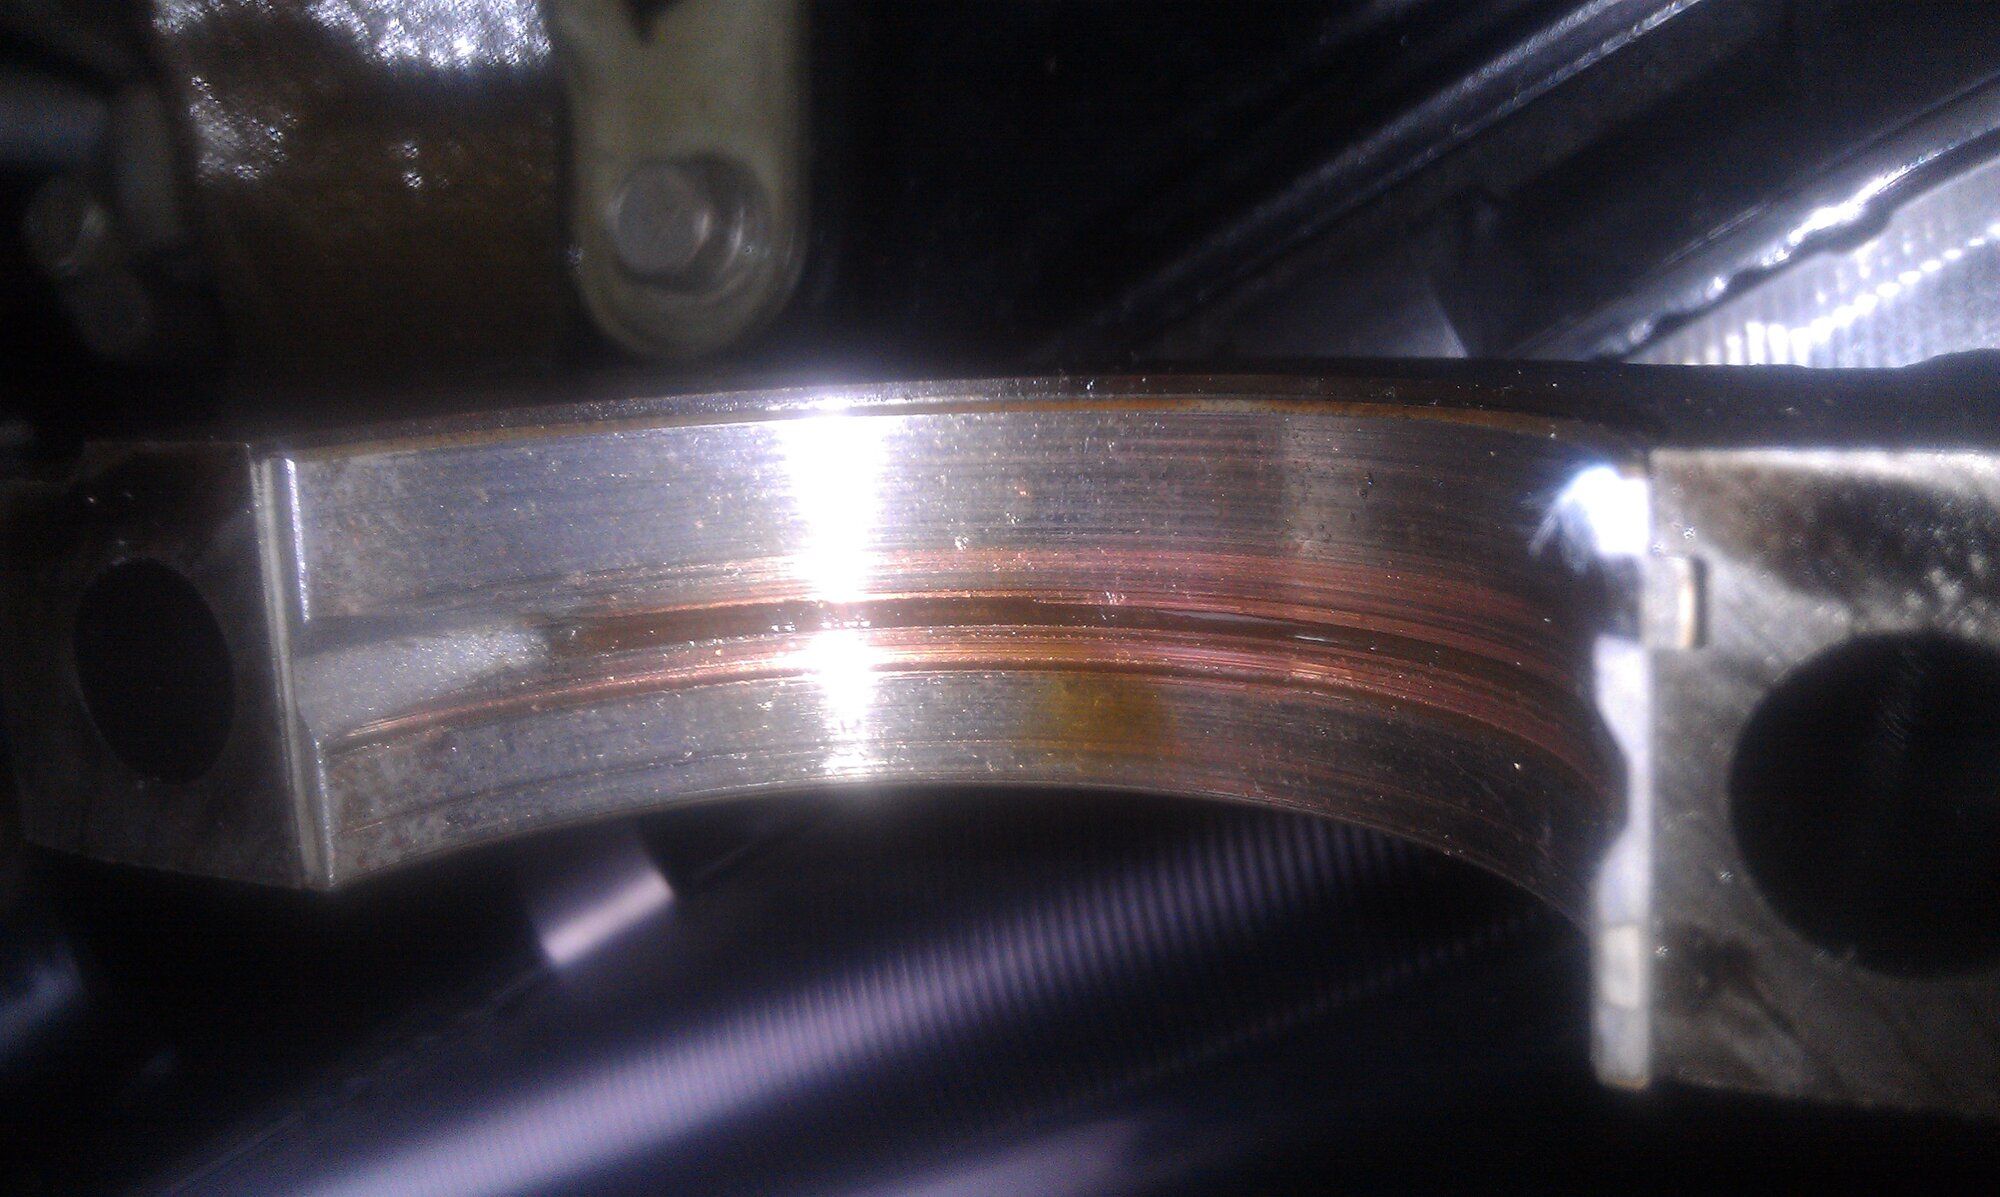
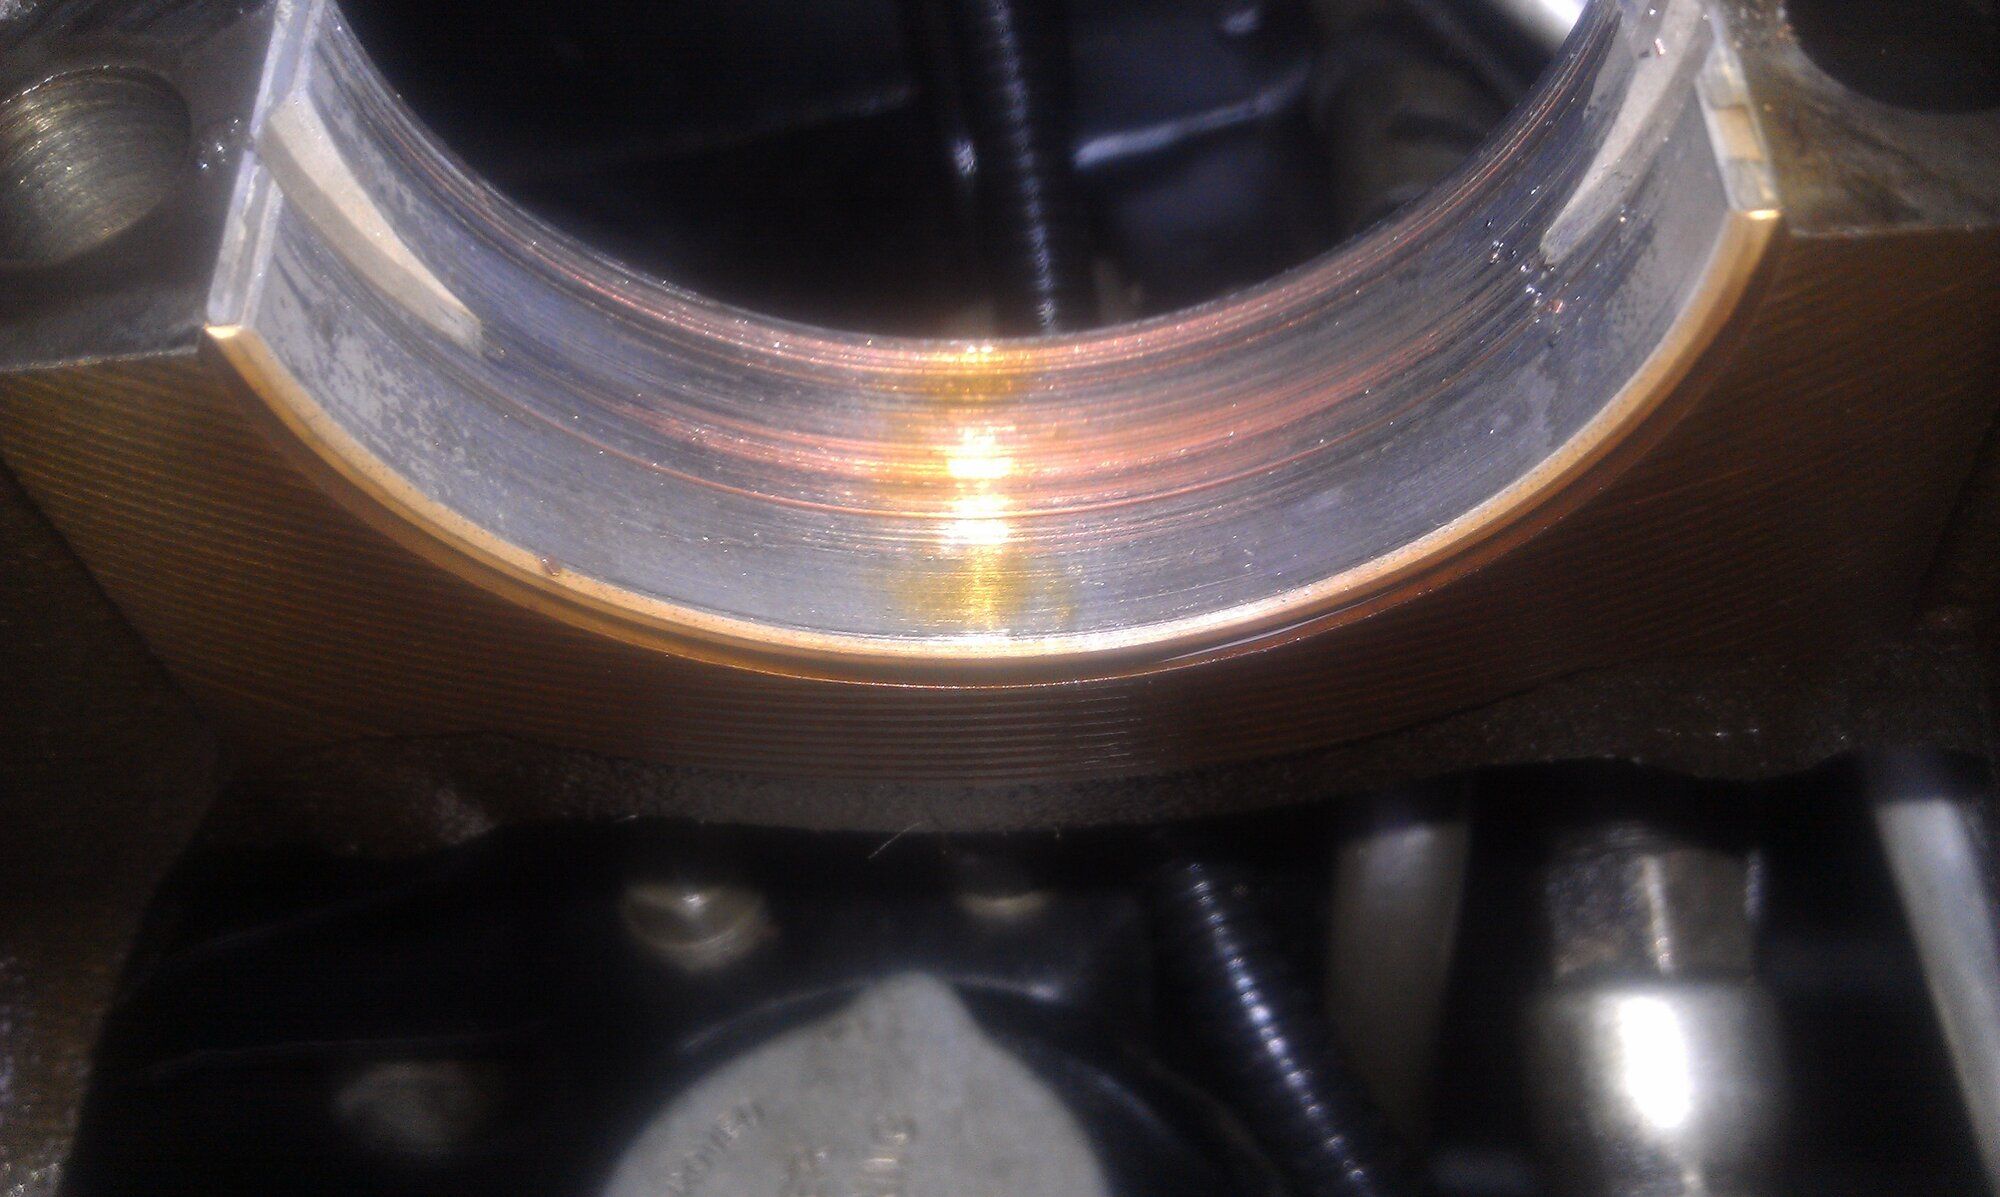
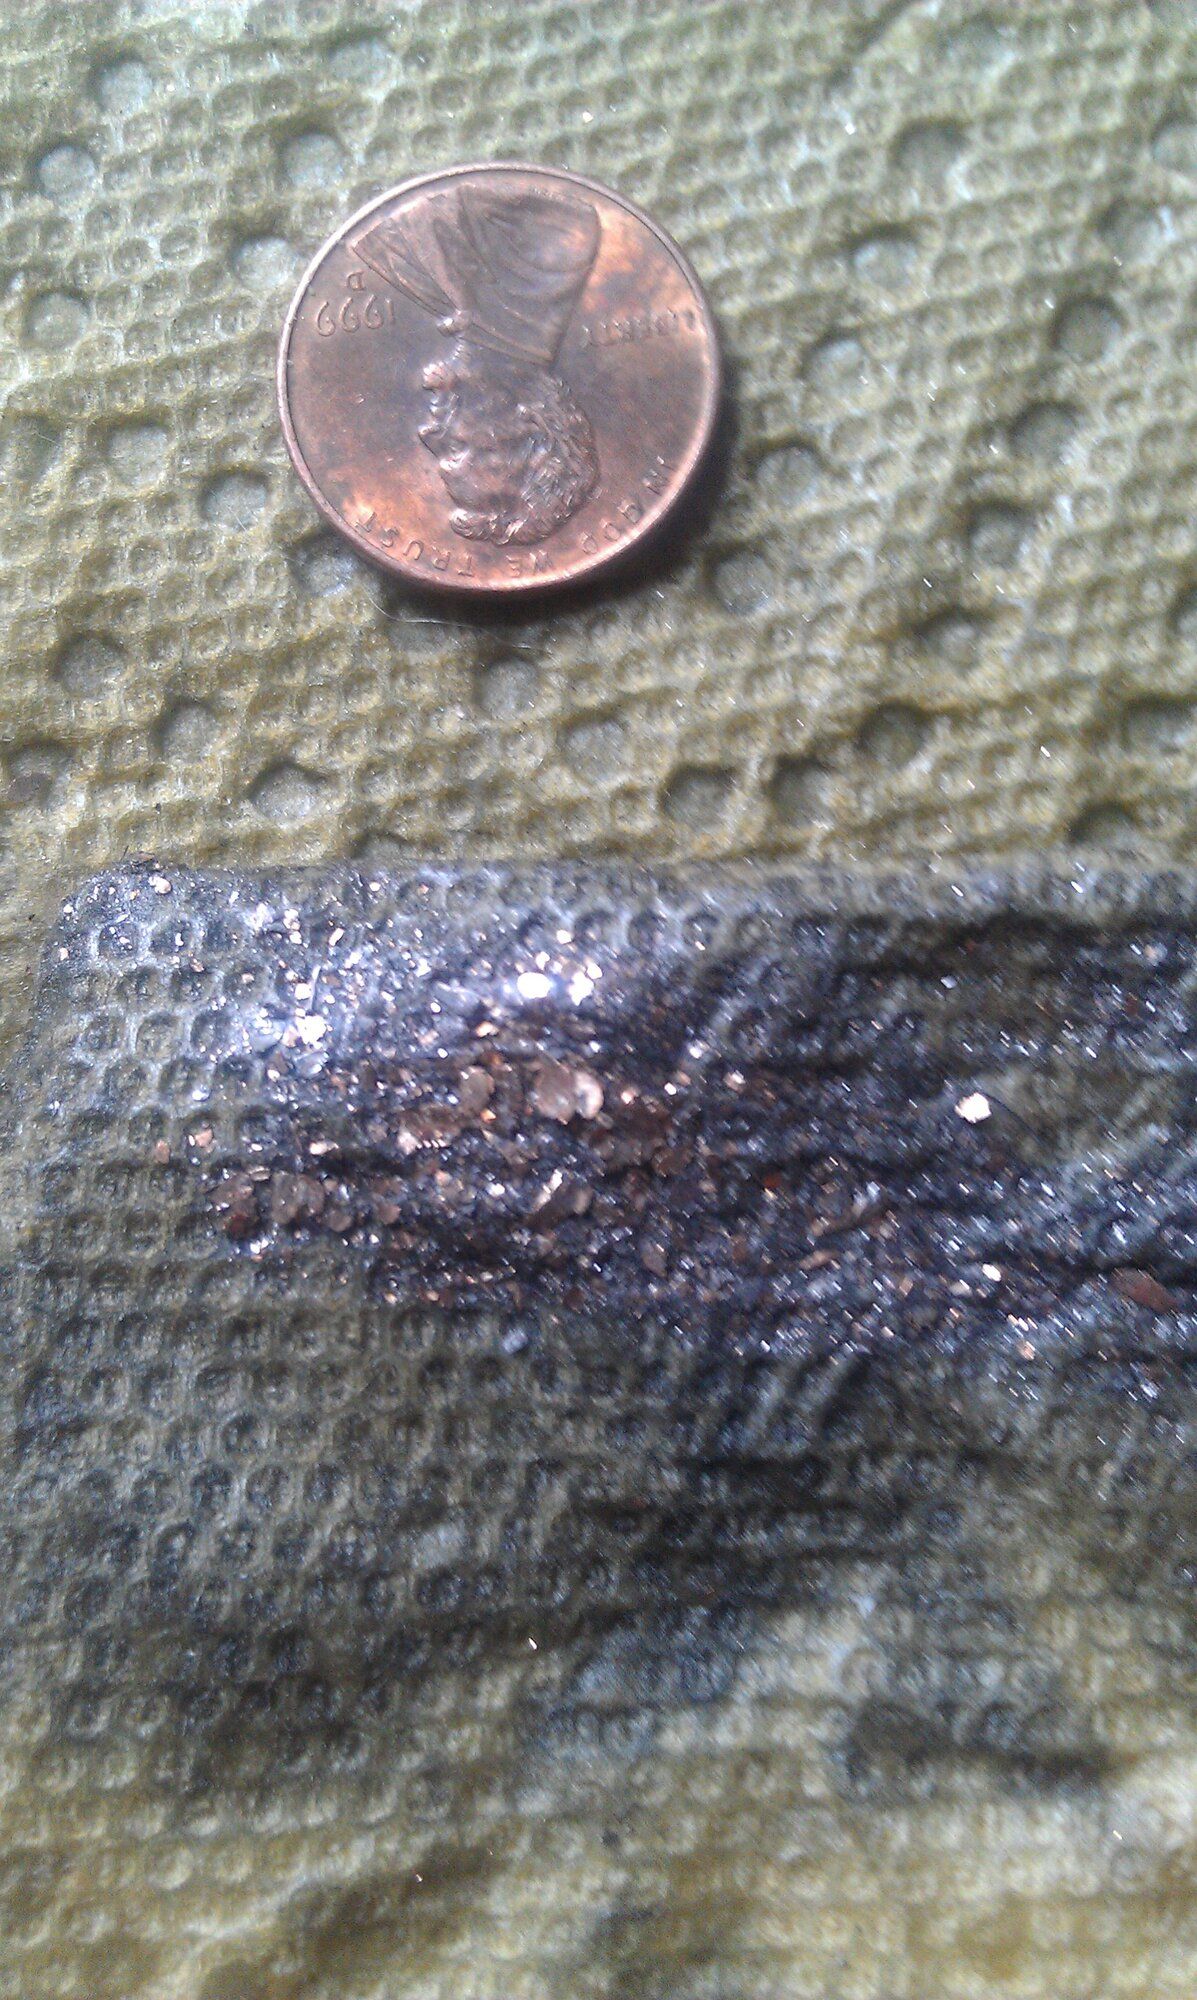
Just cruising around I heard it. I didn't know what it was but it got louder the higher the engine was revved. I dropped the oil pan and found gold! Also the first time seeing inside the block. I had spun a rod bearing. From the looks of it, the other bearings didn't look in the best of condition, though I didn't experience to recognize what was normal and what wasn't. The rod and crank also had scoring on it from the metal-to-metal contact. Penny for size comparison of the largest chunks... I just noticed that penny is a 1999 and it is upside down. A reference to my car's status perhaps? Time for a rebuild. I was in college living on campus so I didn't need to go anywhere.
Last edited:

chrisman287
5+ Year Contributor
- 1,157
- 1,110
- Jul 19, 2021
-
New York
I know that gold too well 
- Thread starter
- #10
jukematt
15+ Year Contributor
- 291
- 40
- Jun 13, 2009
-
Portland Metro,
Oregon
June-August, 2012: Rebuilding
Summer time! I had never rebuilt any engine before and Fox's owner lived 4.5 hours from my school so I couldn't really use her or her contacts for help, so I picked up both a Haynes and Chilton manual, and followed blcknspo0ln's build on here: Project "Rely-on-ability" : 6 bolt rebuild so I could ensure I did things in order. Although mine is a 7 bolt and a stock rebuild, it was still helpful. I read through the whole thing first so I could pick up any mistakes that he had to correct (there were a couple), and then followed his order of assembly.
I was pretty much broke so I worked through the summer to help pay for the build. I disassembled the entire engine, most of it while still in the engine bay (again, first time so I didn't even know that those loops at the IM and EM were for a hoist), so we ended up attaching a chain on some secure points. I took the block into a local machine shop and had it cleaned, cross-hatched for new piston rings, and resurfaced. I also had them do the Head Oil Port Mod. In my research I heard people say it should get align honed but I didn't know what that was and couldn't figure it out at the time (YT videos weren't so prevalent) and thought maybe it was for the piston rings but wasn't sure so I did not have it done. I also got the rod caps mixed up and didn't know that was bad so I ended up buying a set of used stock rods and pistons from a contact of Fox's owner who she trusted that had around 90,000 miles on them or so. I also had the intake manifold cleaned and the head resurfaced.
You may also notice I used Plasti Dip on my tail lights for that "angry tails" look. I later removed it in favor of the OEM look.
My friend's sister put pedals on her out of solace for her broken state.
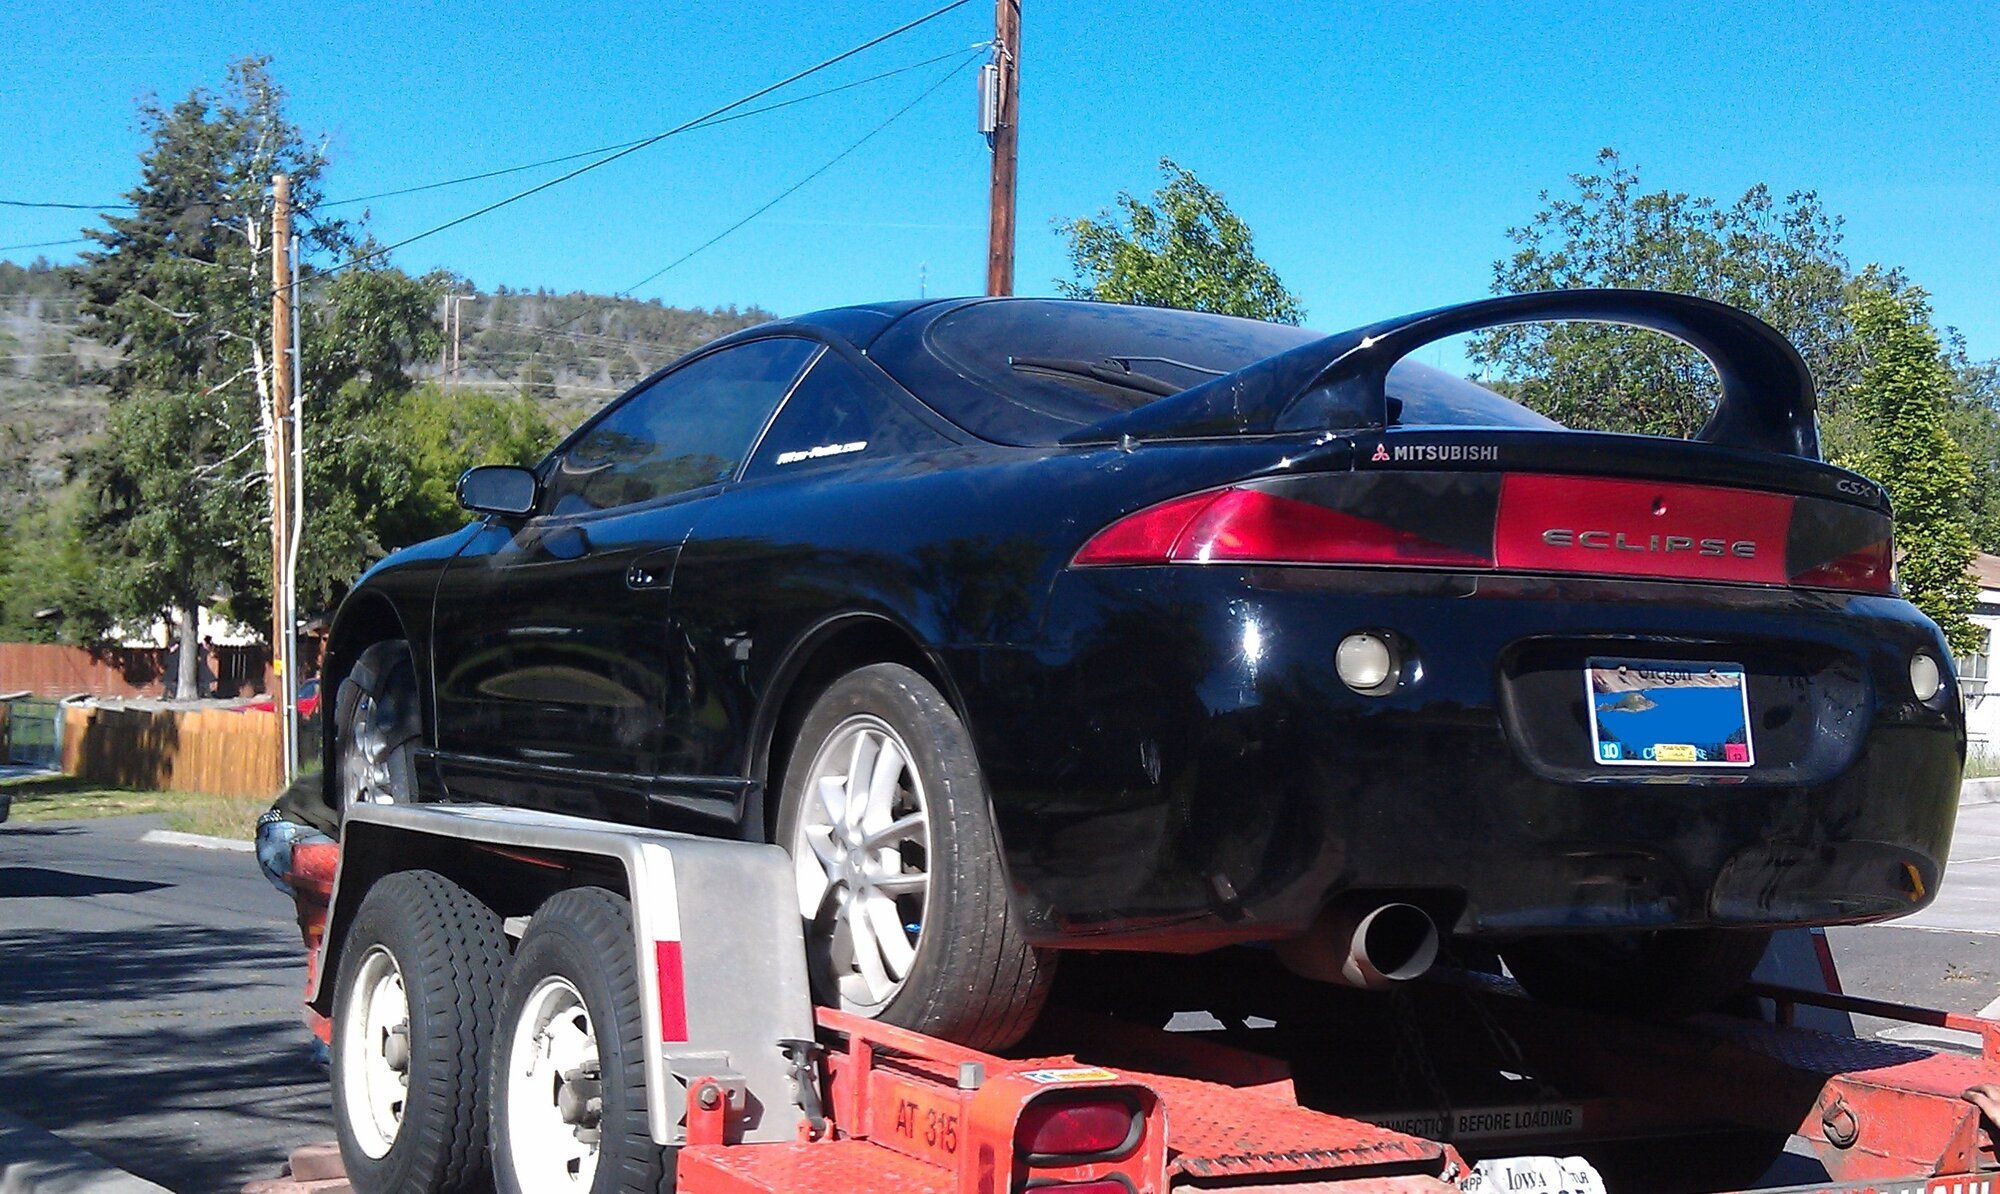
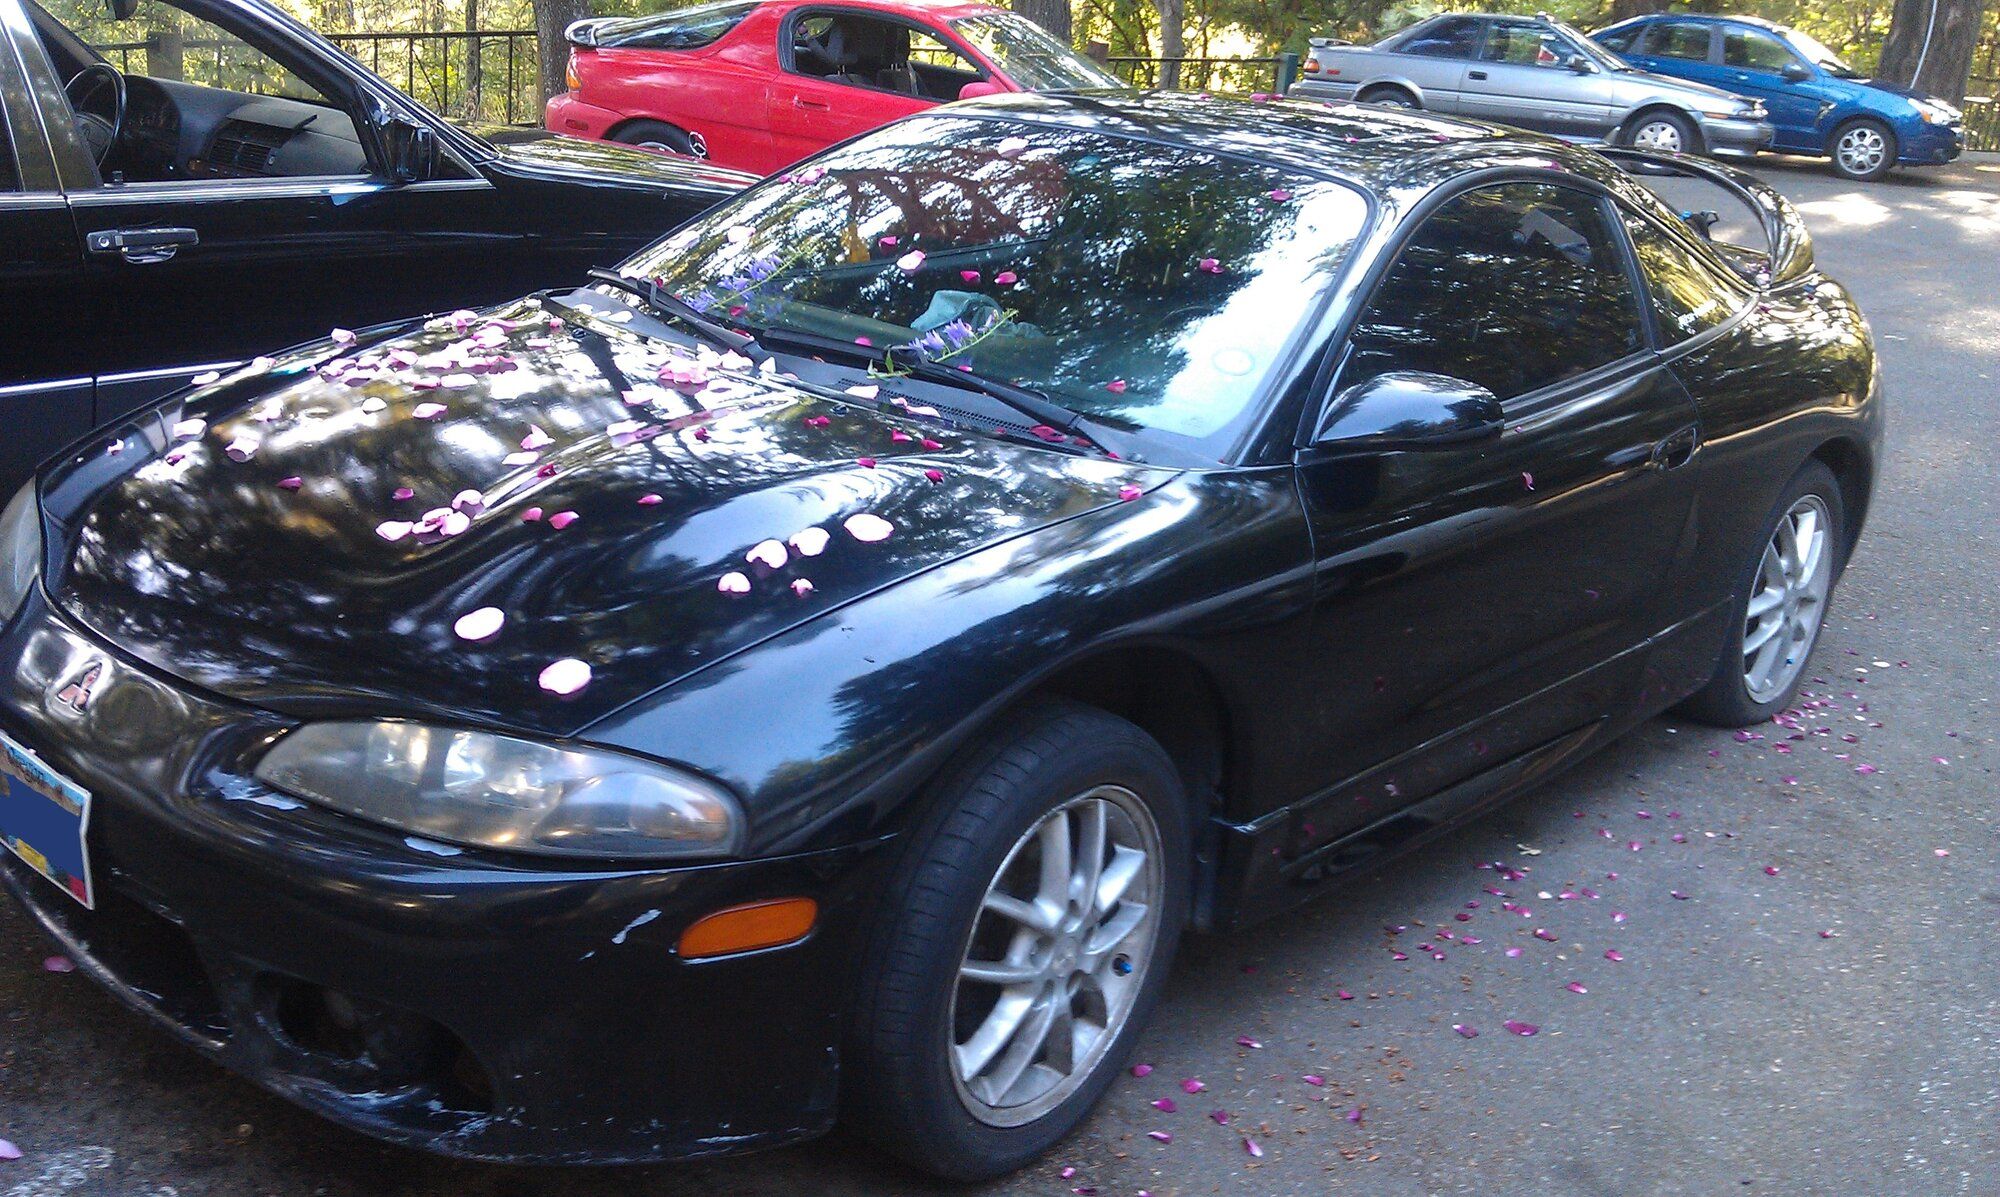
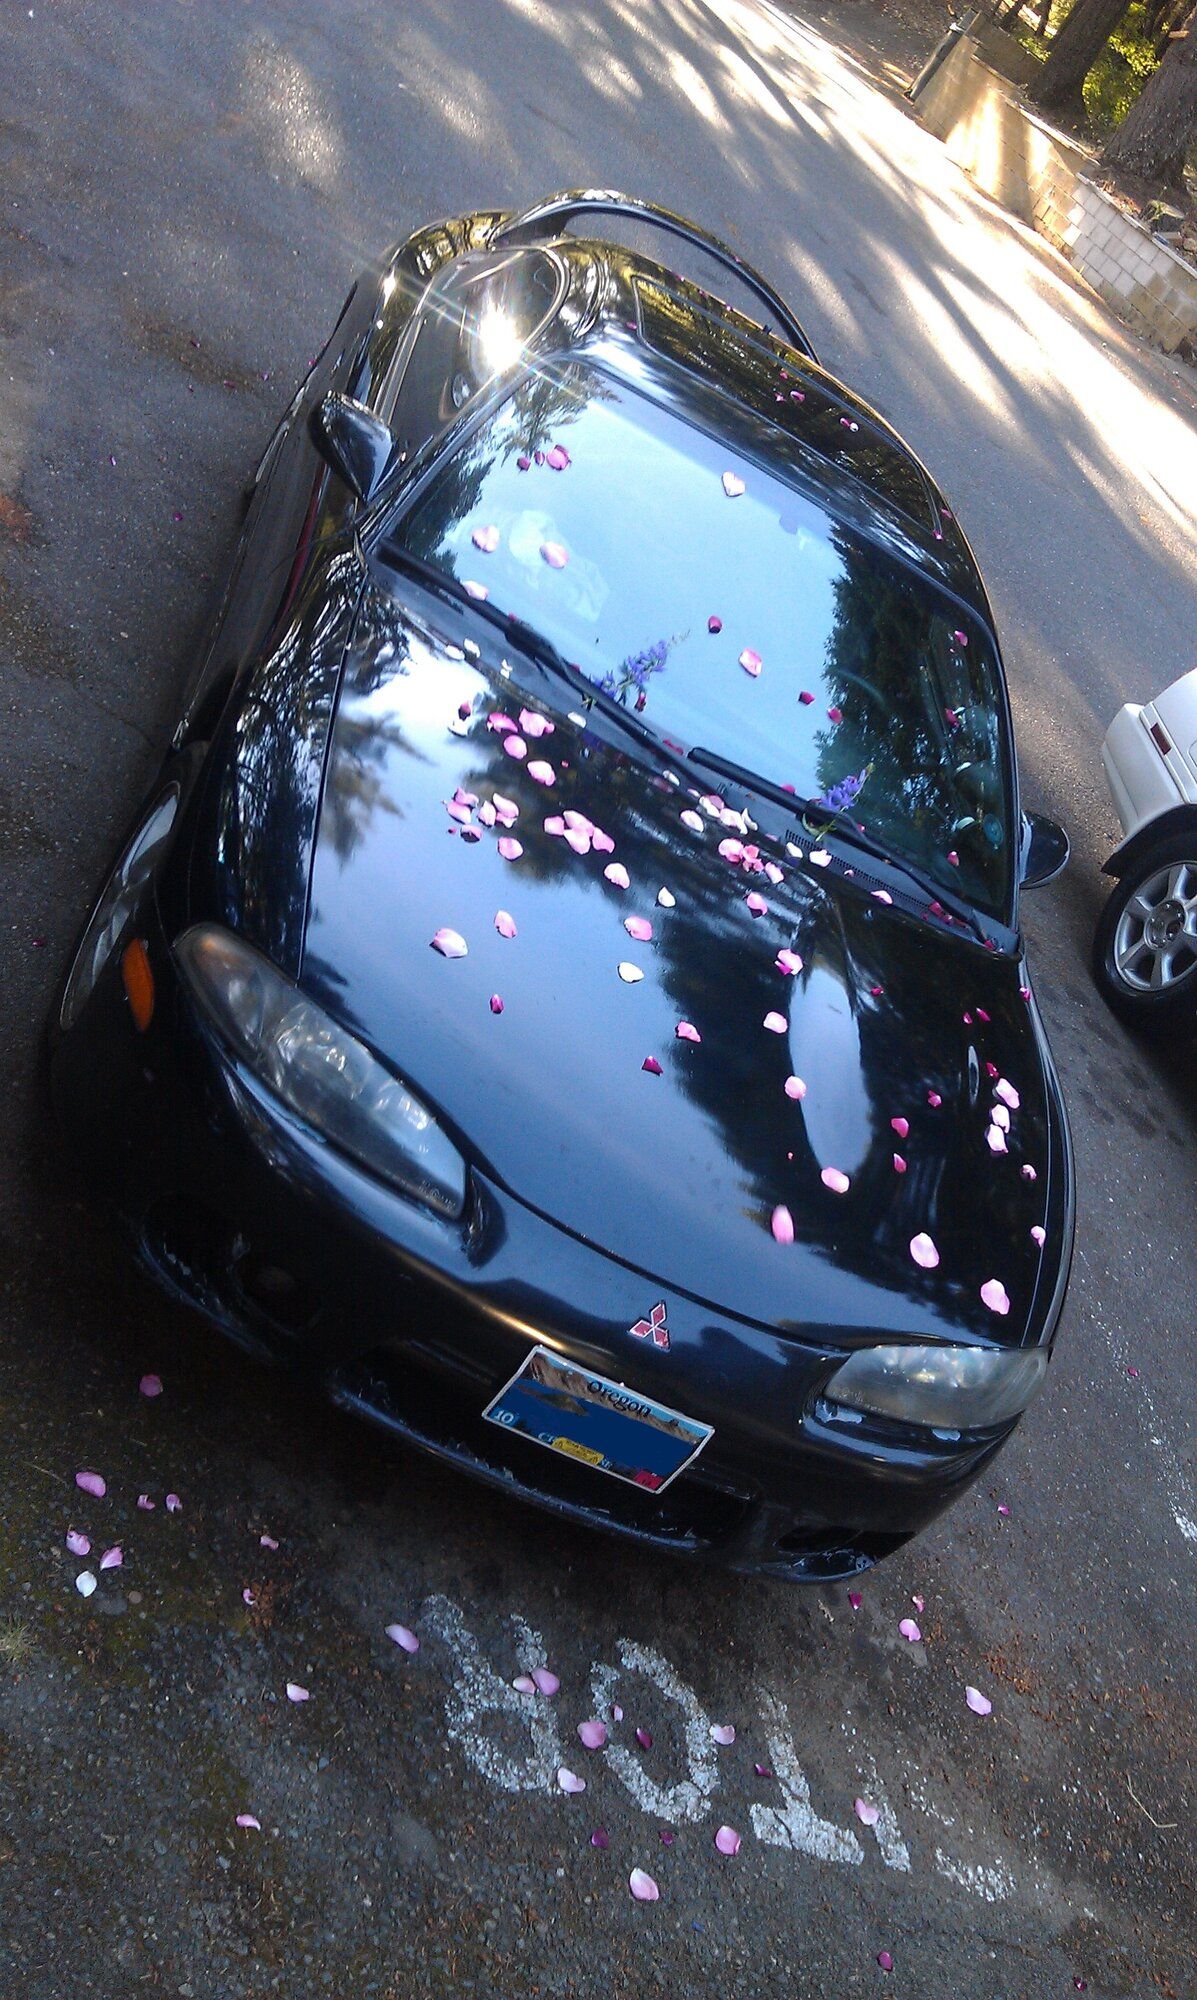
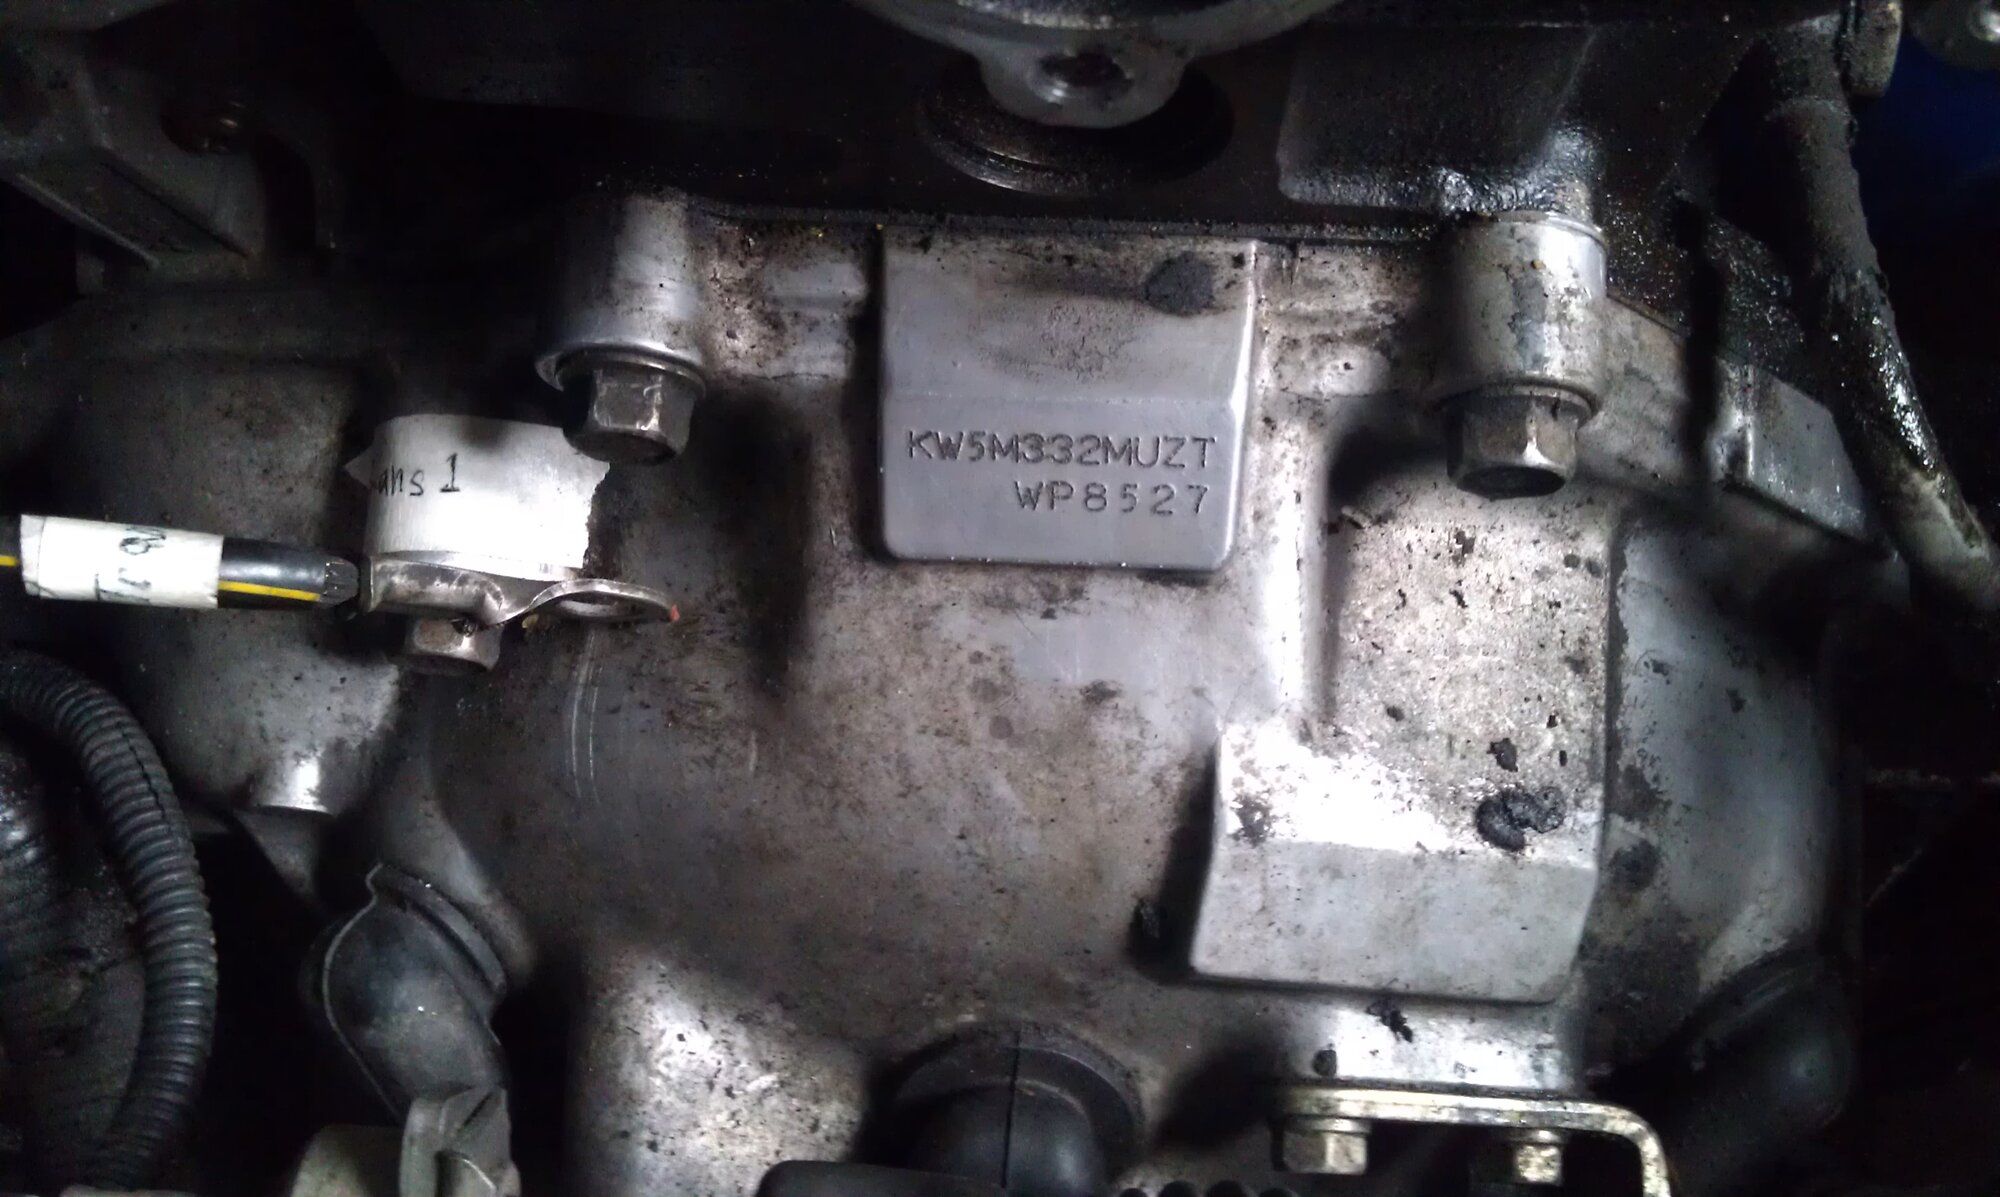
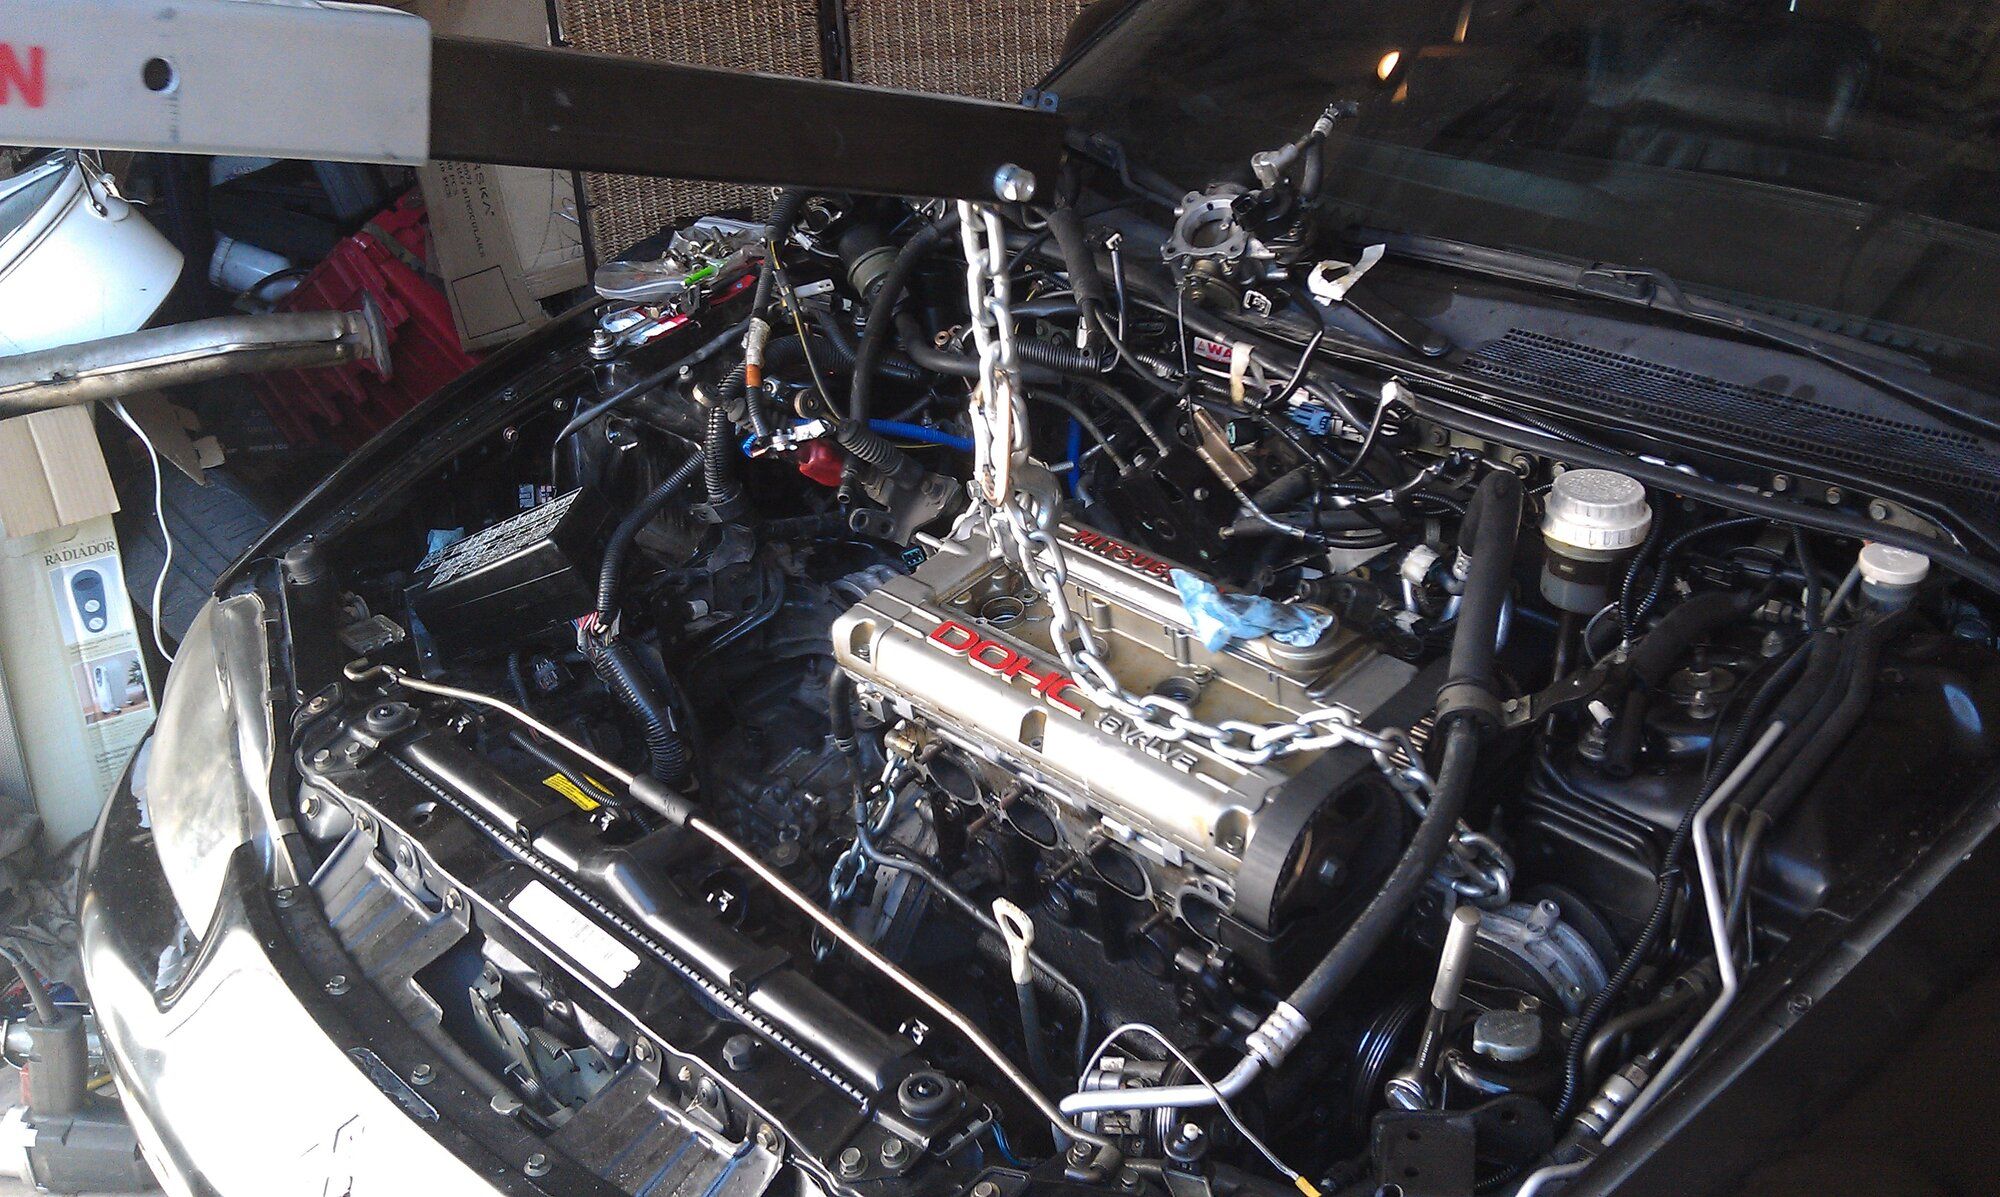
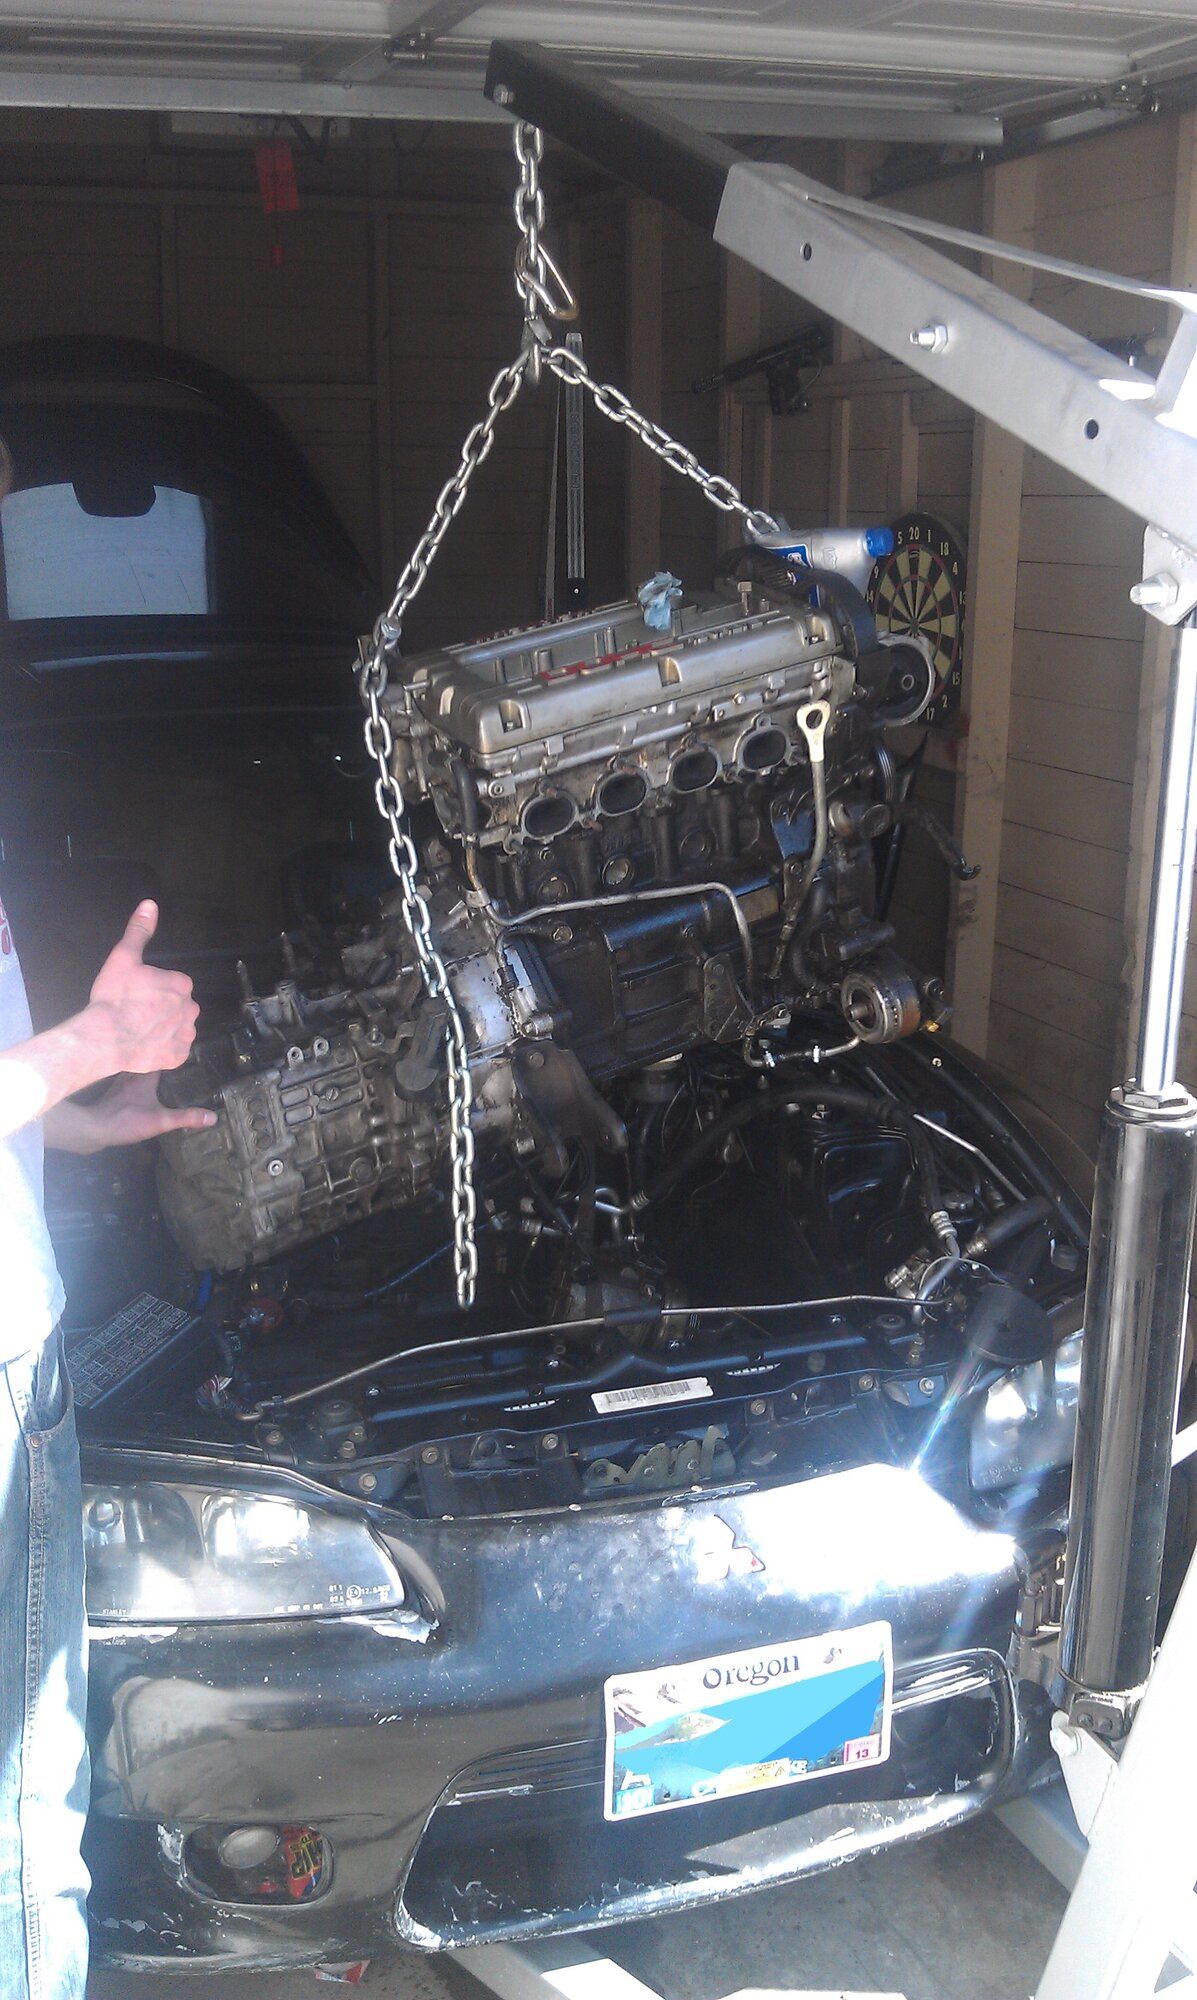
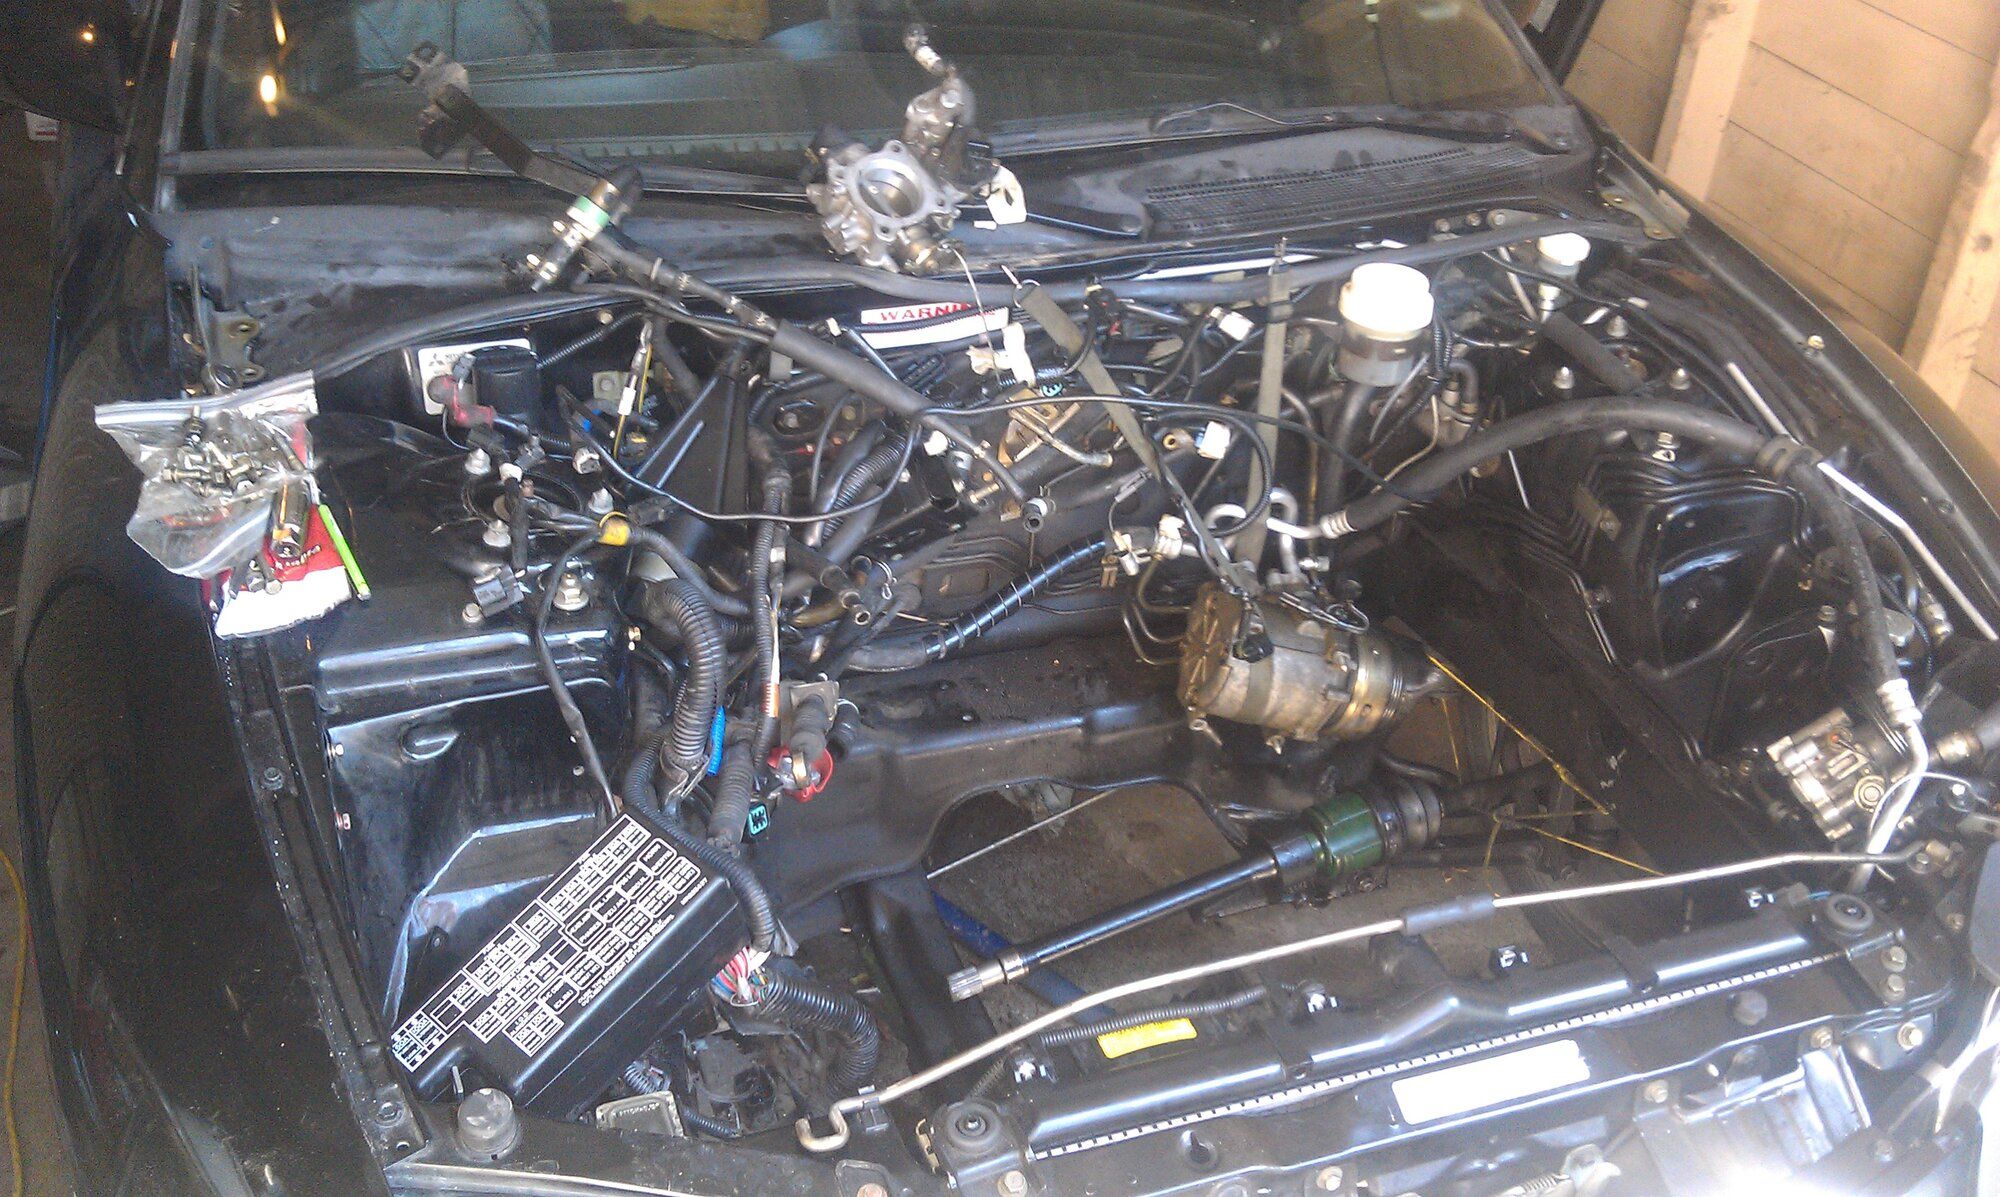
Summer time! I had never rebuilt any engine before and Fox's owner lived 4.5 hours from my school so I couldn't really use her or her contacts for help, so I picked up both a Haynes and Chilton manual, and followed blcknspo0ln's build on here: Project "Rely-on-ability" : 6 bolt rebuild so I could ensure I did things in order. Although mine is a 7 bolt and a stock rebuild, it was still helpful. I read through the whole thing first so I could pick up any mistakes that he had to correct (there were a couple), and then followed his order of assembly.
I was pretty much broke so I worked through the summer to help pay for the build. I disassembled the entire engine, most of it while still in the engine bay (again, first time so I didn't even know that those loops at the IM and EM were for a hoist), so we ended up attaching a chain on some secure points. I took the block into a local machine shop and had it cleaned, cross-hatched for new piston rings, and resurfaced. I also had them do the Head Oil Port Mod. In my research I heard people say it should get align honed but I didn't know what that was and couldn't figure it out at the time (YT videos weren't so prevalent) and thought maybe it was for the piston rings but wasn't sure so I did not have it done. I also got the rod caps mixed up and didn't know that was bad so I ended up buying a set of used stock rods and pistons from a contact of Fox's owner who she trusted that had around 90,000 miles on them or so. I also had the intake manifold cleaned and the head resurfaced.
You may also notice I used Plasti Dip on my tail lights for that "angry tails" look. I later removed it in favor of the OEM look.
My friend's sister put pedals on her out of solace for her broken state.
Last edited:
- Thread starter
- #11
jukematt
15+ Year Contributor
- 291
- 40
- Jun 13, 2009
-
Portland Metro,
Oregon
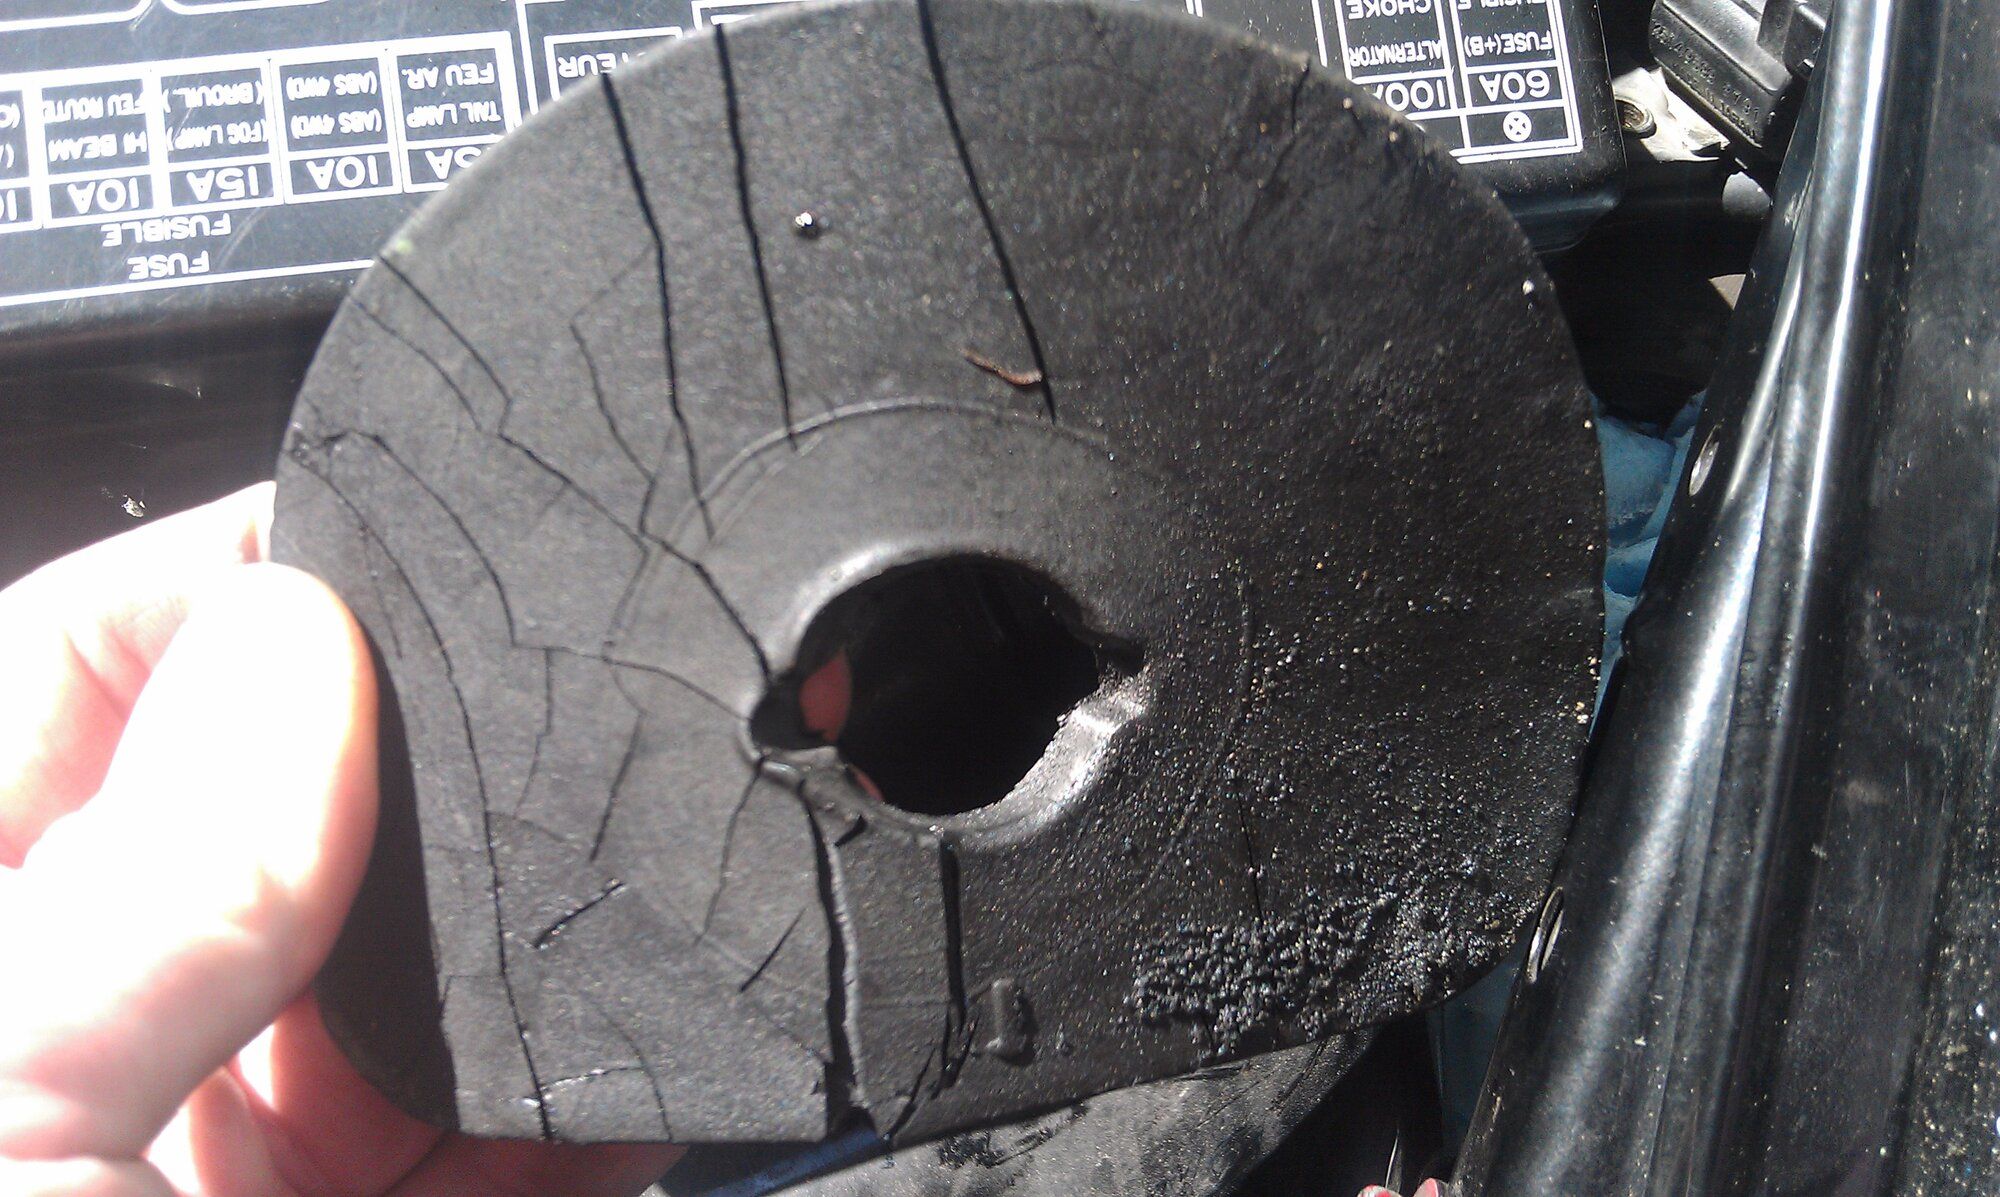
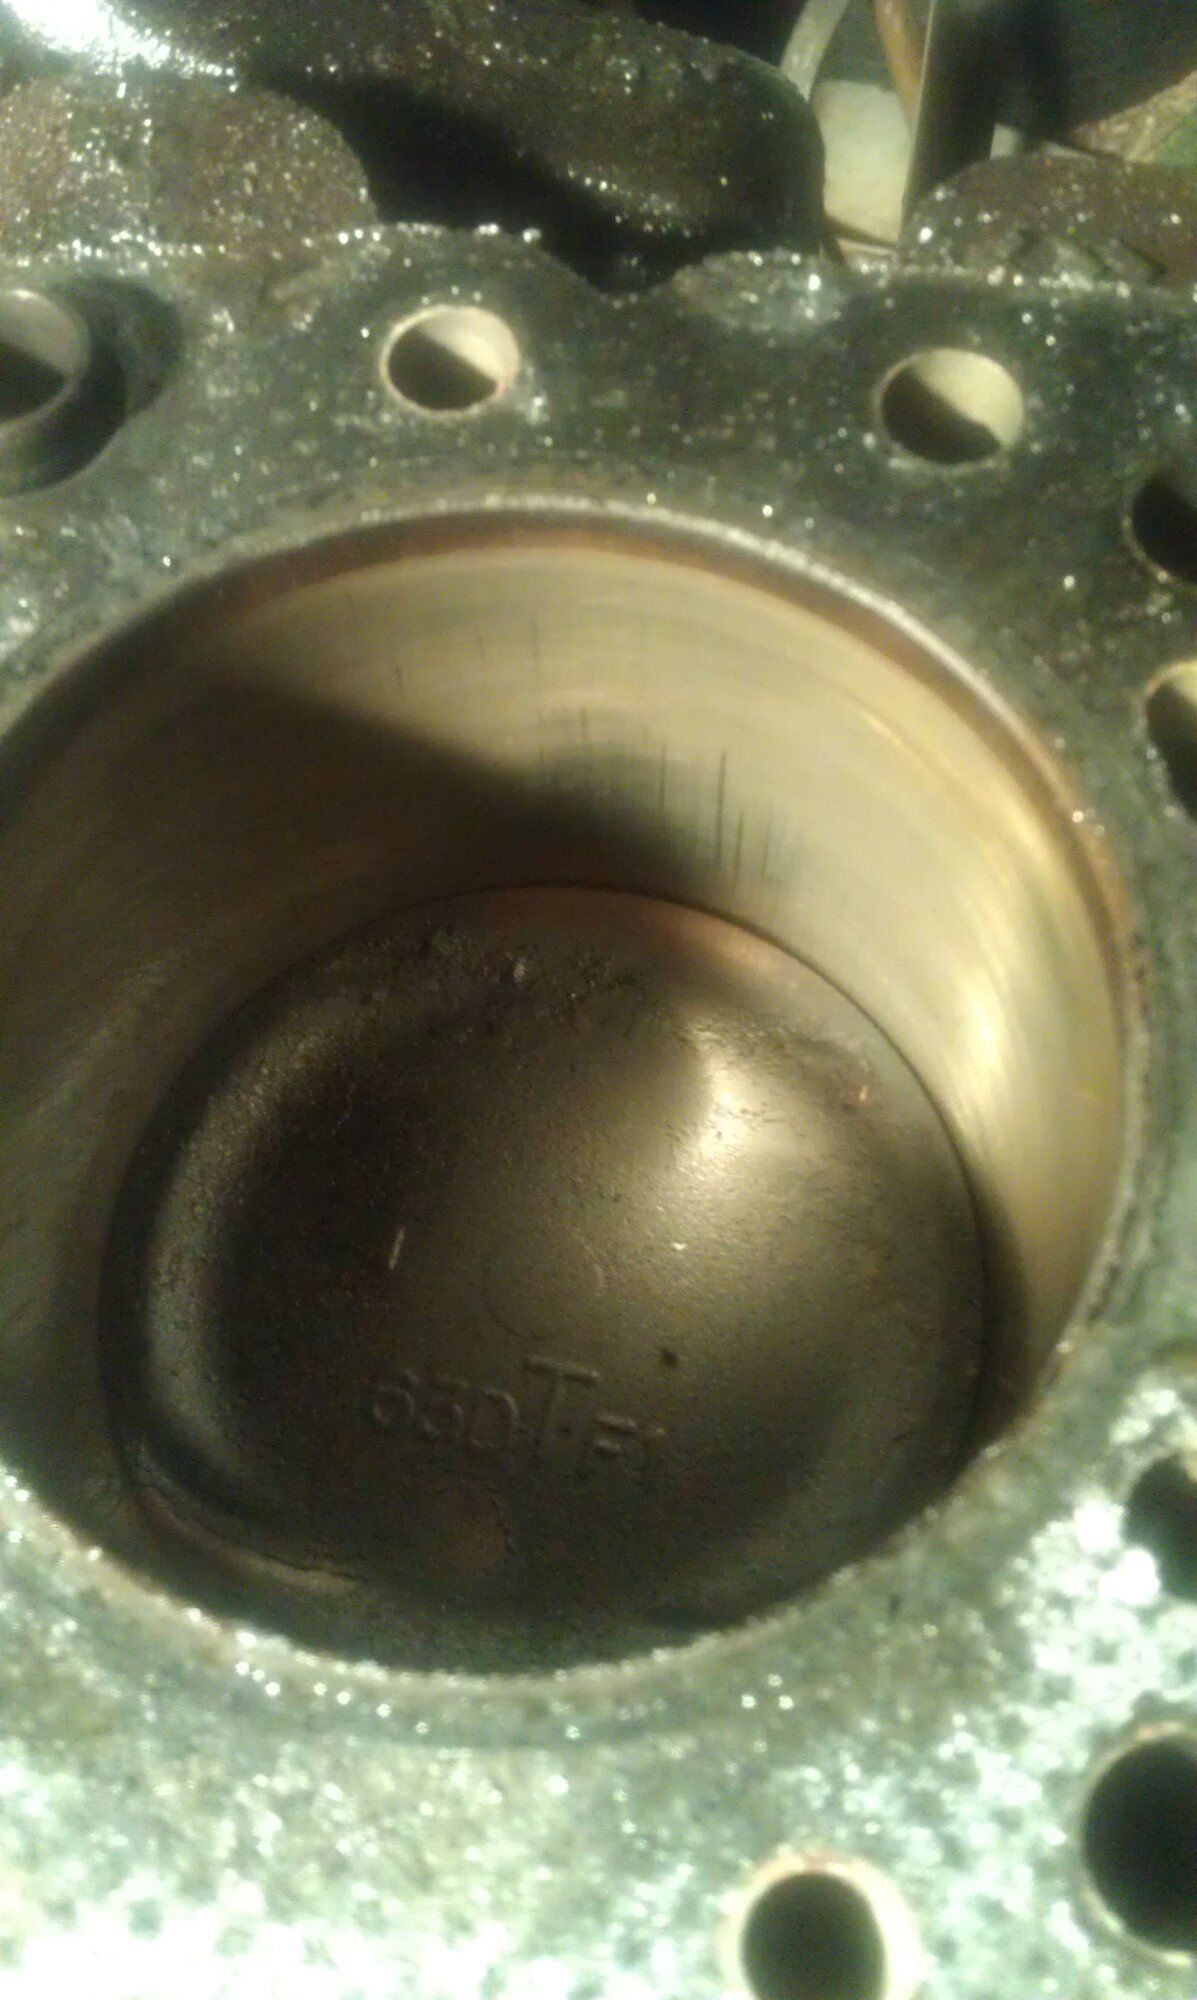
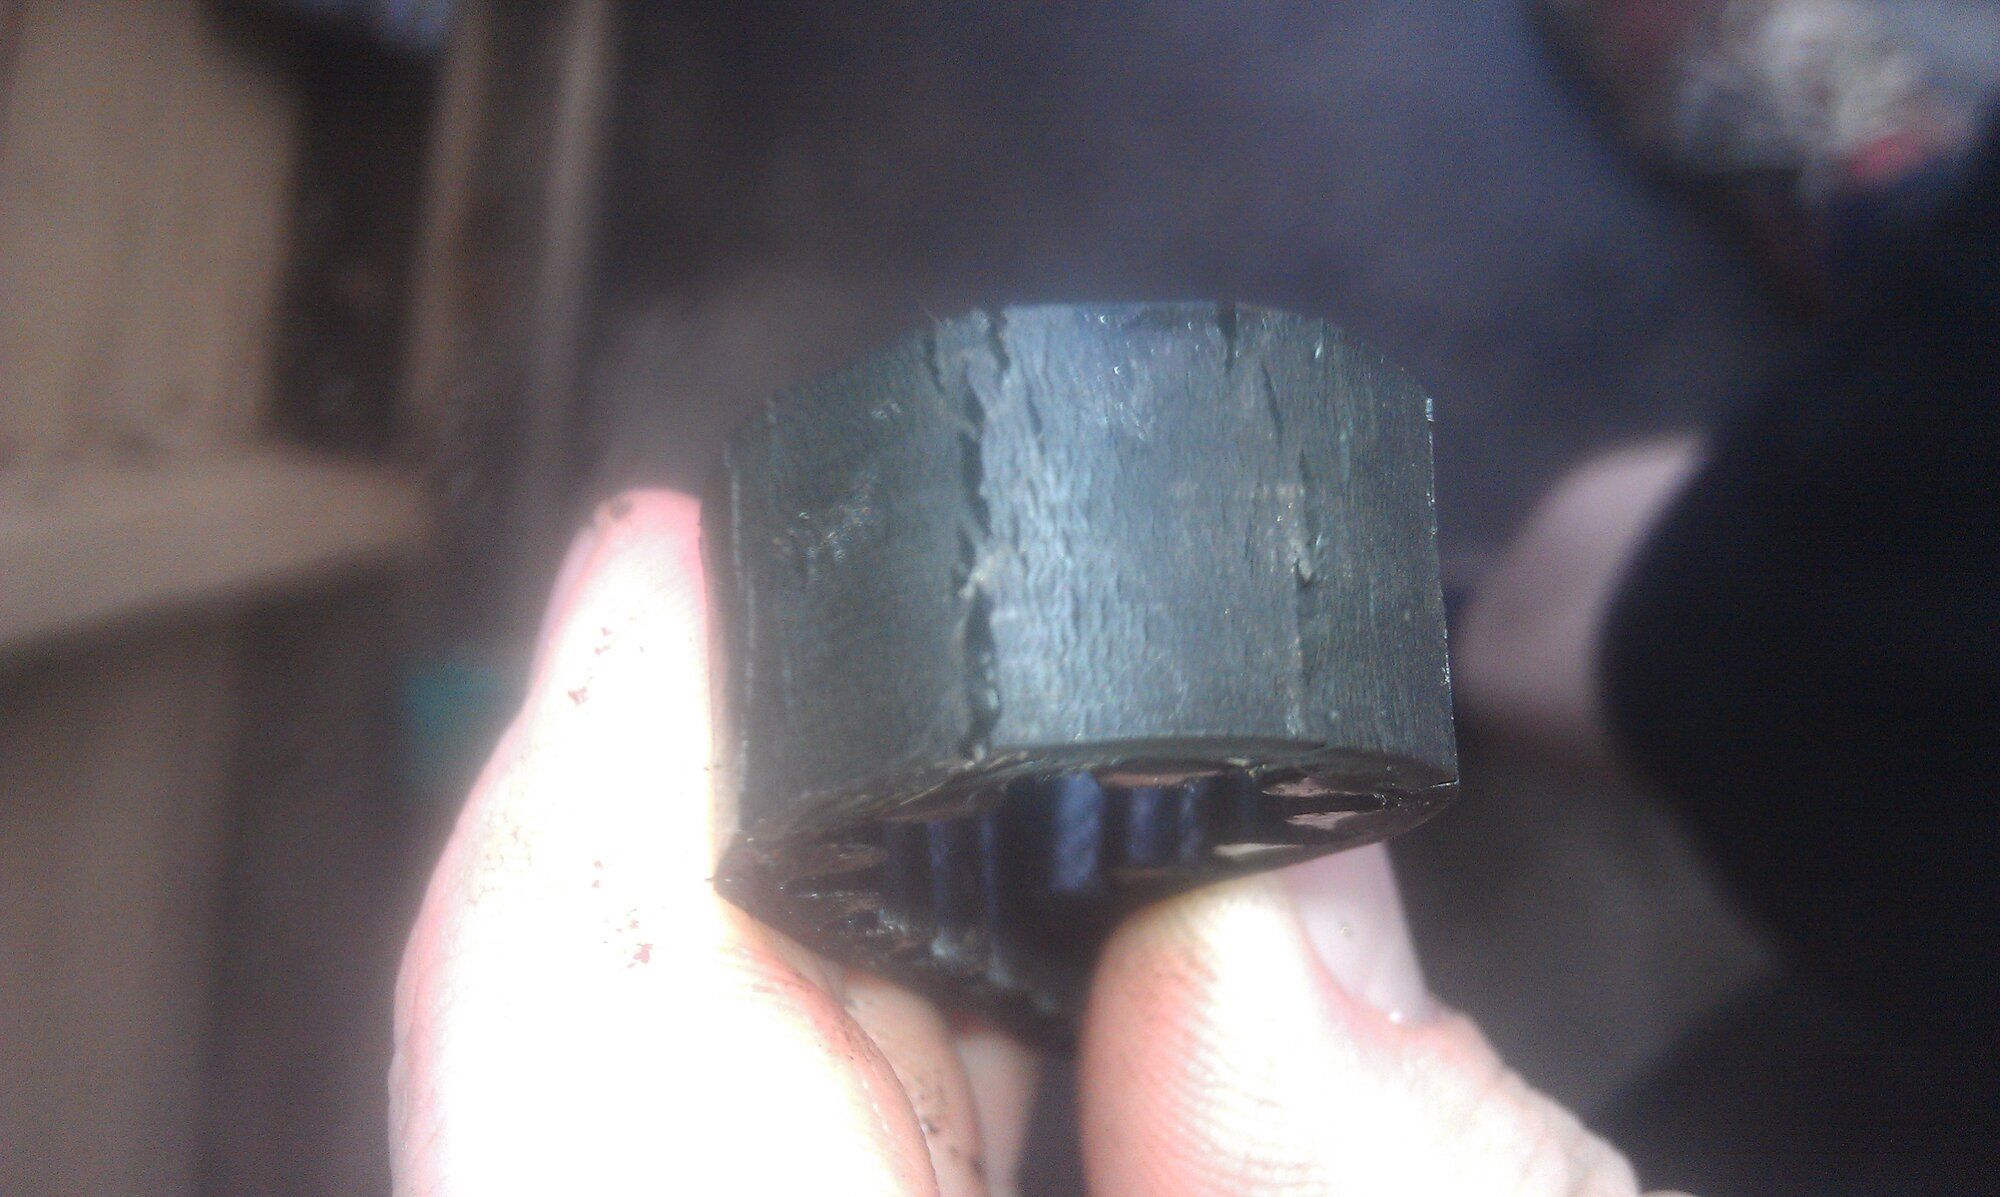
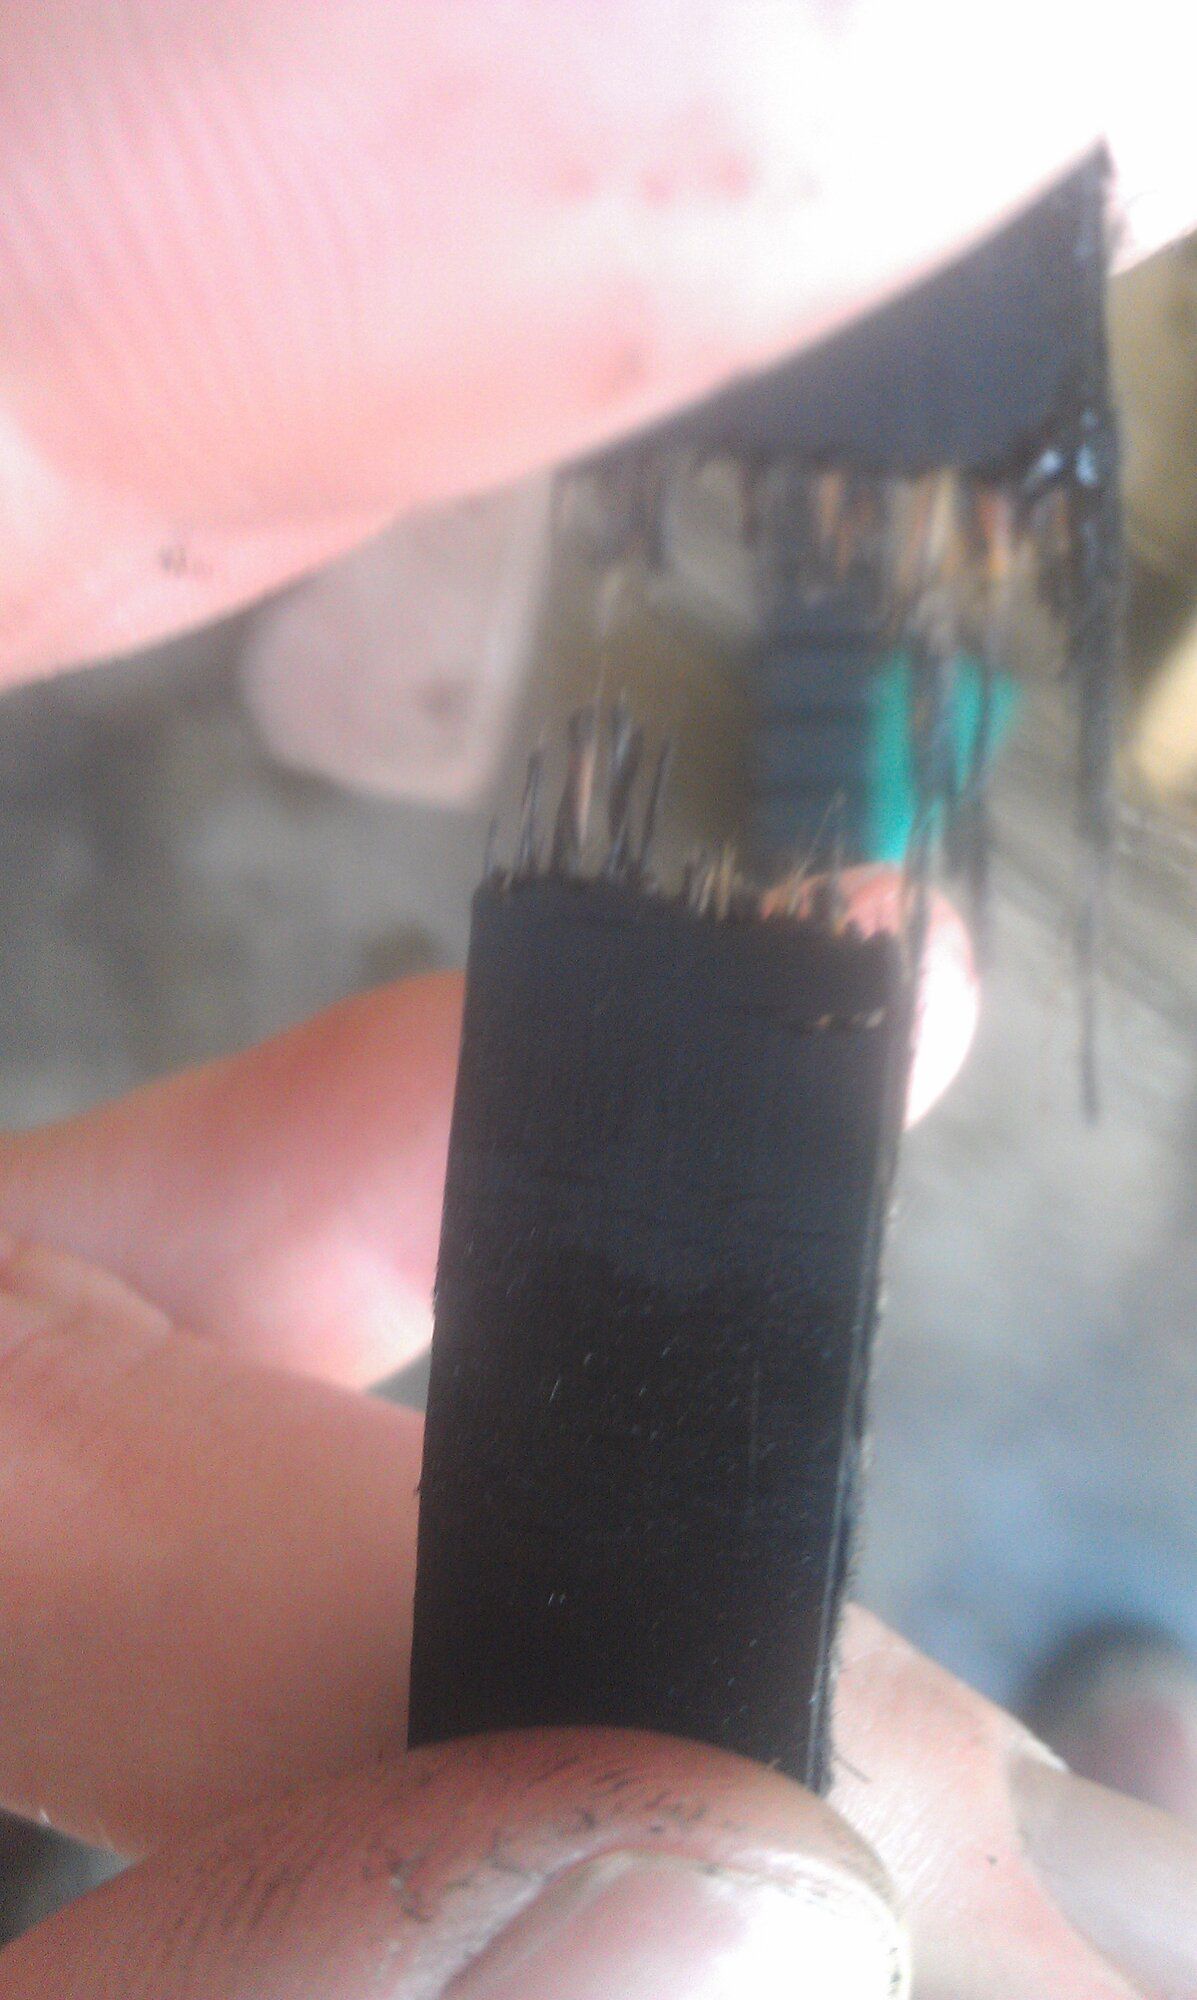
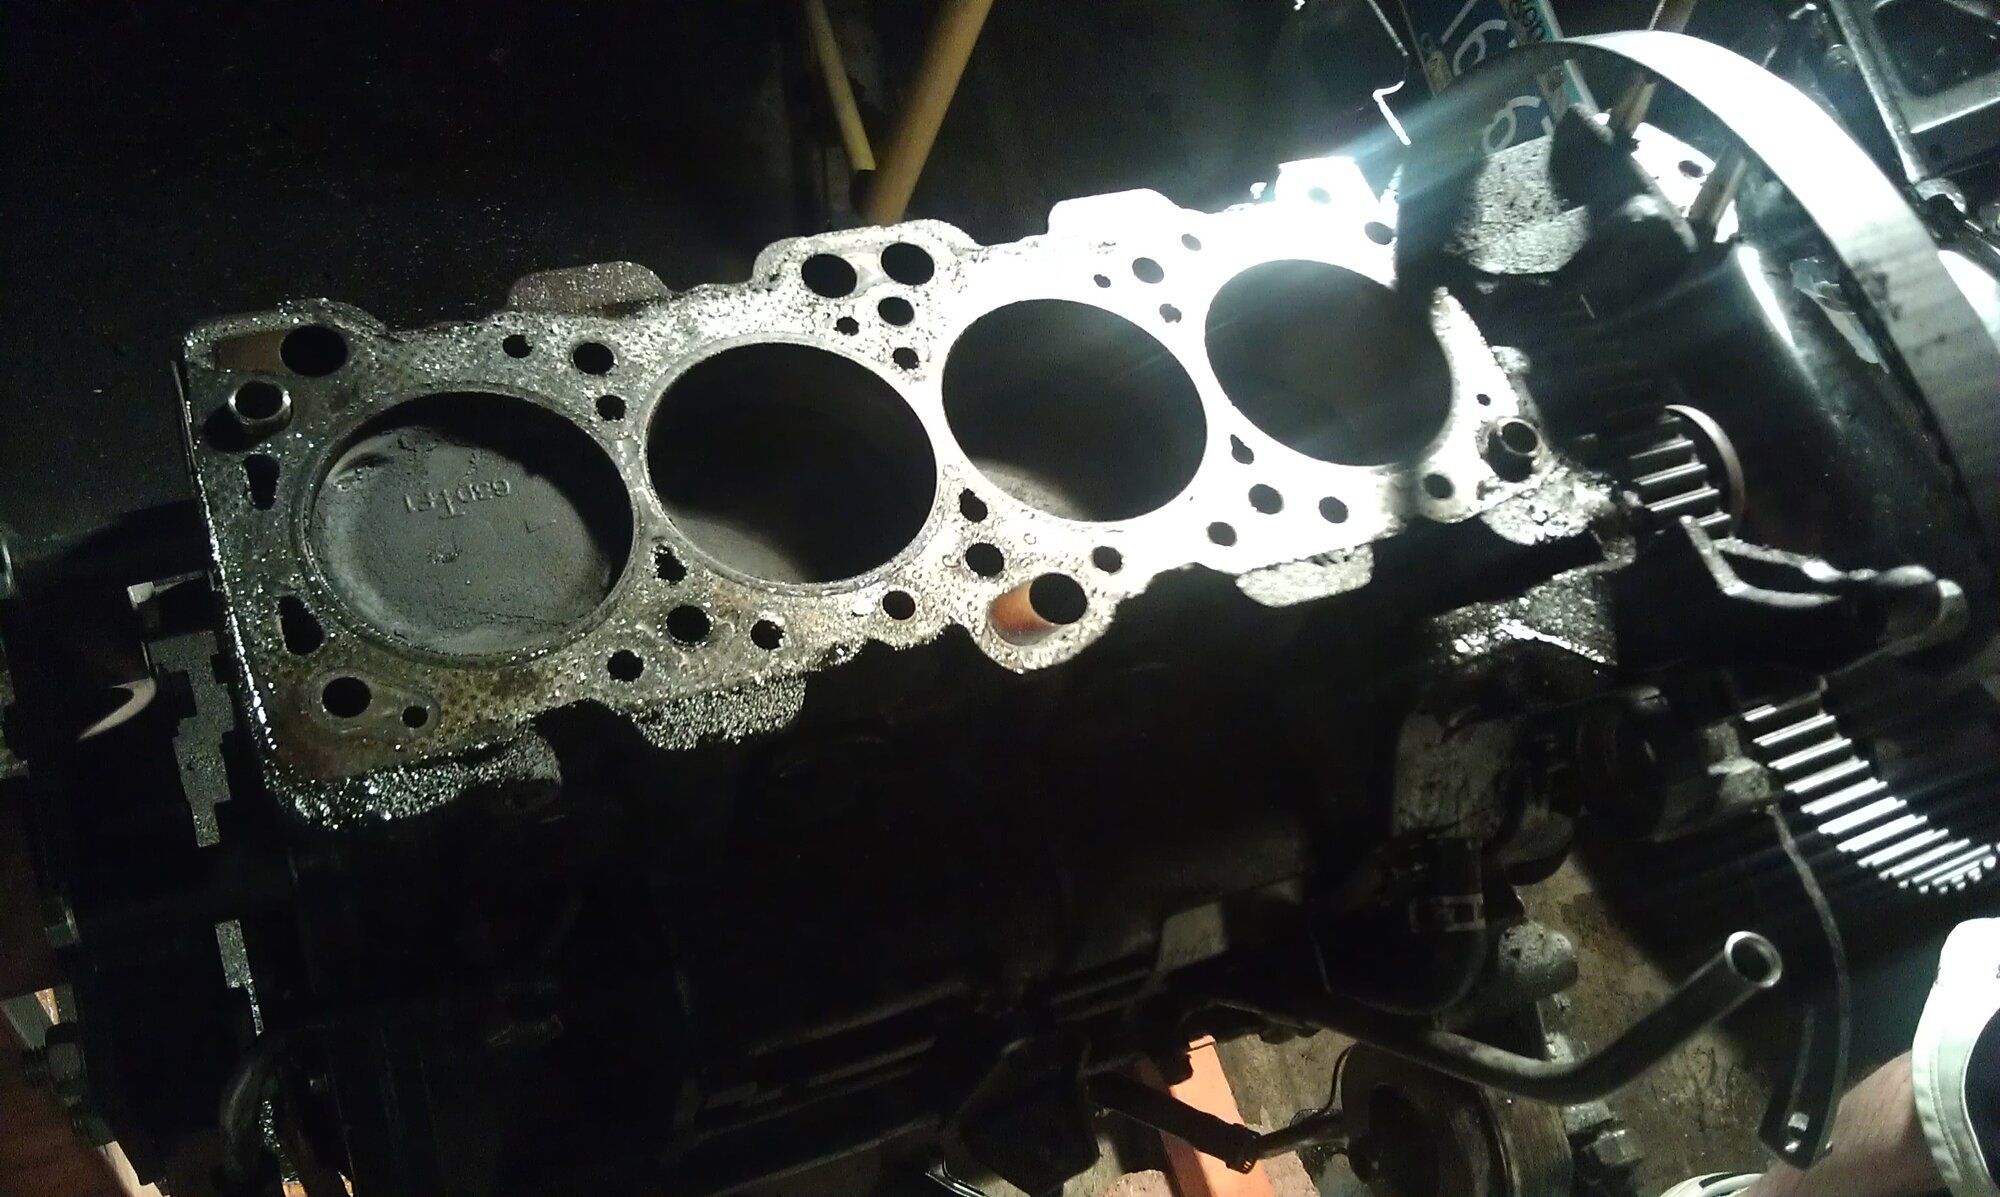
During disassembly I found a few interesting things... engine mount side rubber (whatever it's called had started cracking. Such it is with old rubber. Some scoring in the engine block piston channel. Normal? I don't know, thoughts? And clearly the balance shaft belt wasn't replaced the last (probably multiple) timing belt change. When I bent it a little farther than in the picture, it snapped, so I took another pic.
- Thread starter
- #12
jukematt
15+ Year Contributor
- 291
- 40
- Jun 13, 2009
-
Portland Metro,
Oregon
When removing the fuel filter, the hard line broke. A common problem apparently. I upgraded to a Fuelab filter and ran a tank to rail kit, but I still had to connect the line to the bottom of the filter. After some research I came across this thread: Threaded Fuel Line to Filter Broke describing a flared fitting and the parts needed to convert to the Fuelab. I picked up all the tools shown in Post 4. Apparently there are some pictures that are broken but I took a picture with my phone at the time. I also picked up a long straight of generic hard line and cut it to a length where I wouldn't have to have the fuel filter so low like that. I think the second try I was able to get a good flare and it sealed up perfectly. I don't know that I could have tried any more as there wasn't a lot of vertical line left.
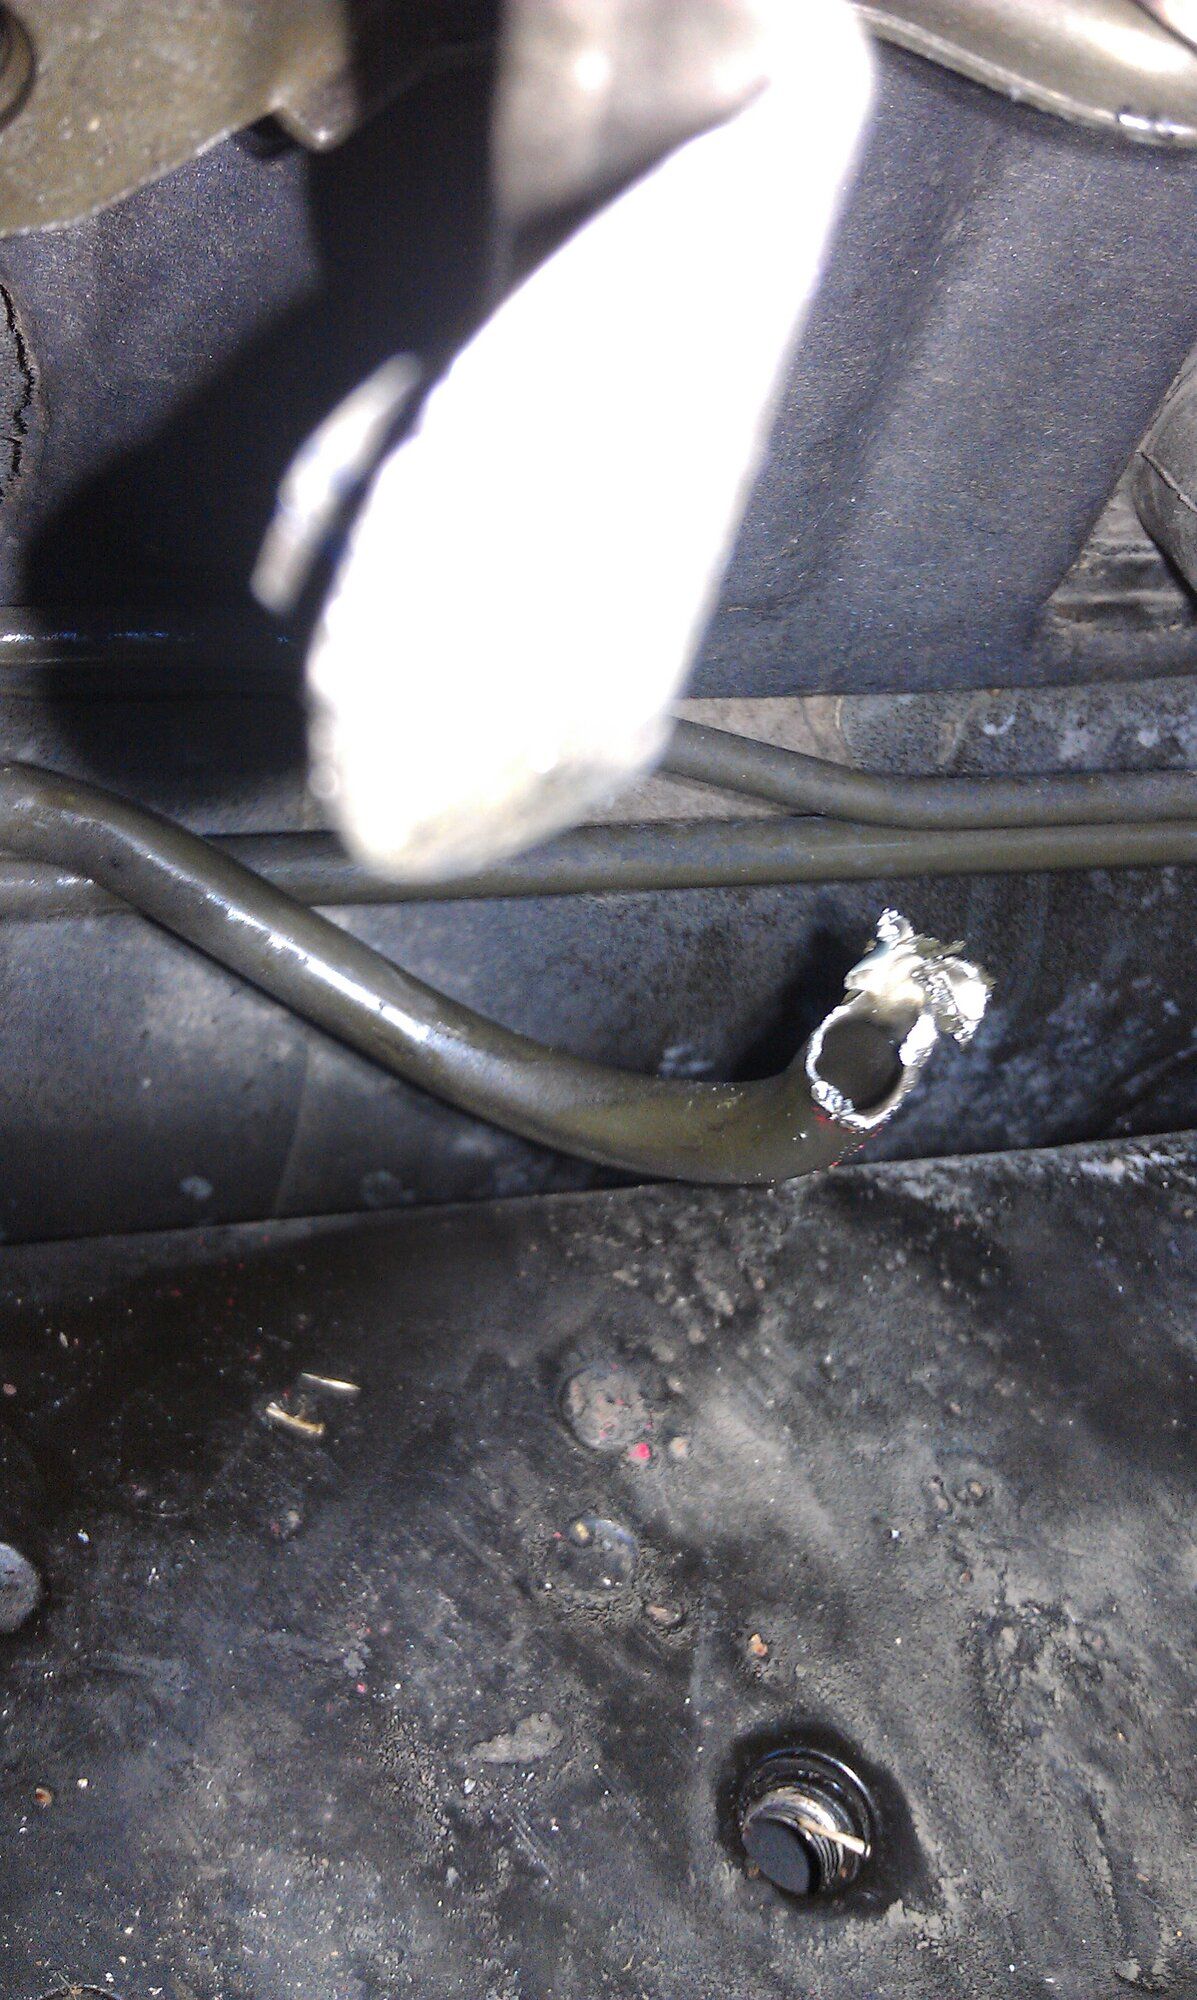
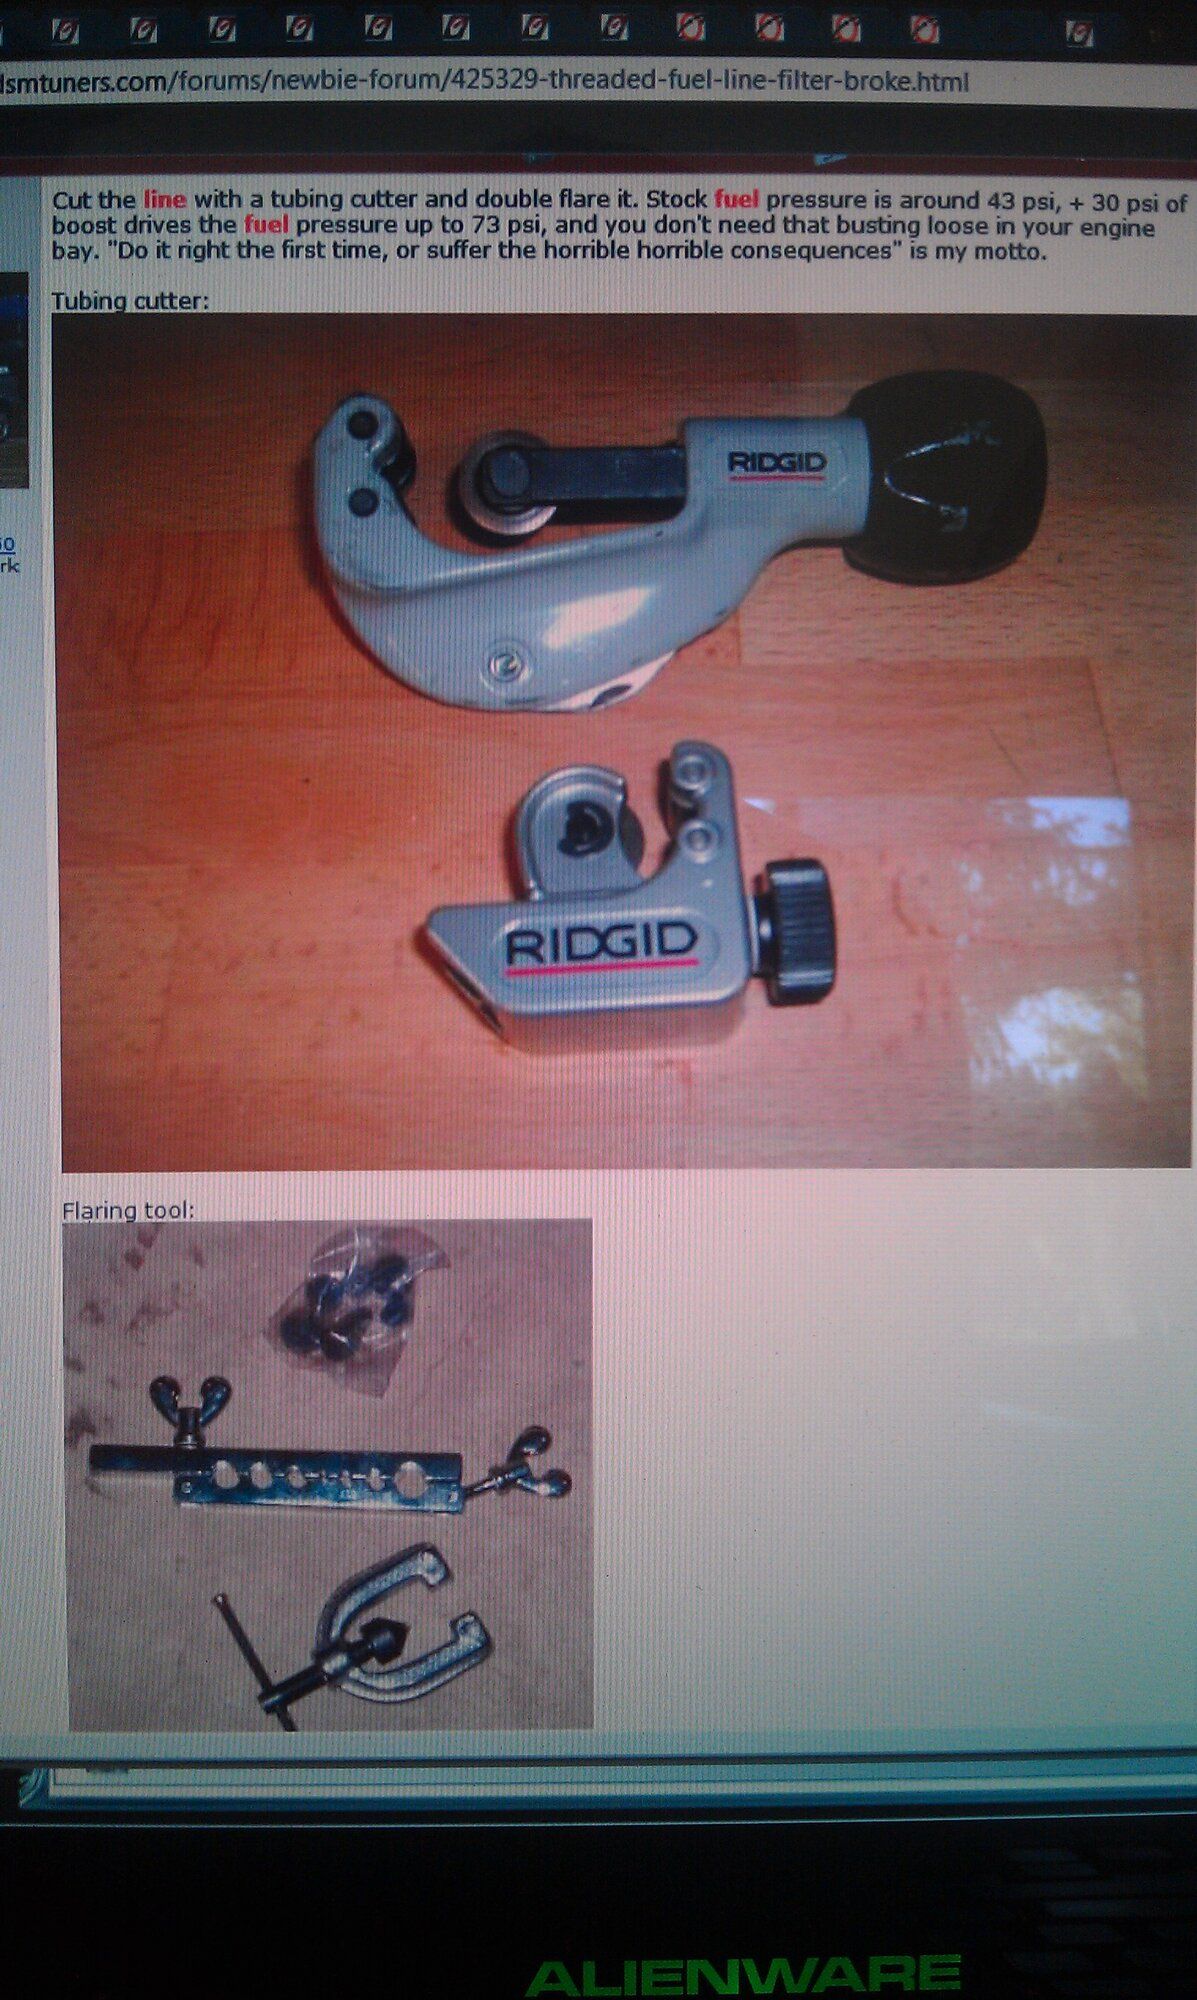
- Thread starter
- #13
jukematt
15+ Year Contributor
- 291
- 40
- Jun 13, 2009
-
Portland Metro,
Oregon
Head cleaned up, new piston rings, ARP head studs. They didn't go as deep with the Head oil port mod as in the thread but I think it is at least better than stock. You can also see my beautifully organized sheet of hardware. 
I also had a little time while waiting for the block and head so I took a bunch of sand paper all the way to like 2000 grit wet sand and MOTHERS Mag and Aluminum Polish to the Intake Manifold. I like this much better than the rough casting look. I did the same thing to the turbo compressor housing as much as I could get to. I left the area around the TD05H mostly alone since I didn't want to get rid of that, just a swipe or two to brighten up the lettering itself.
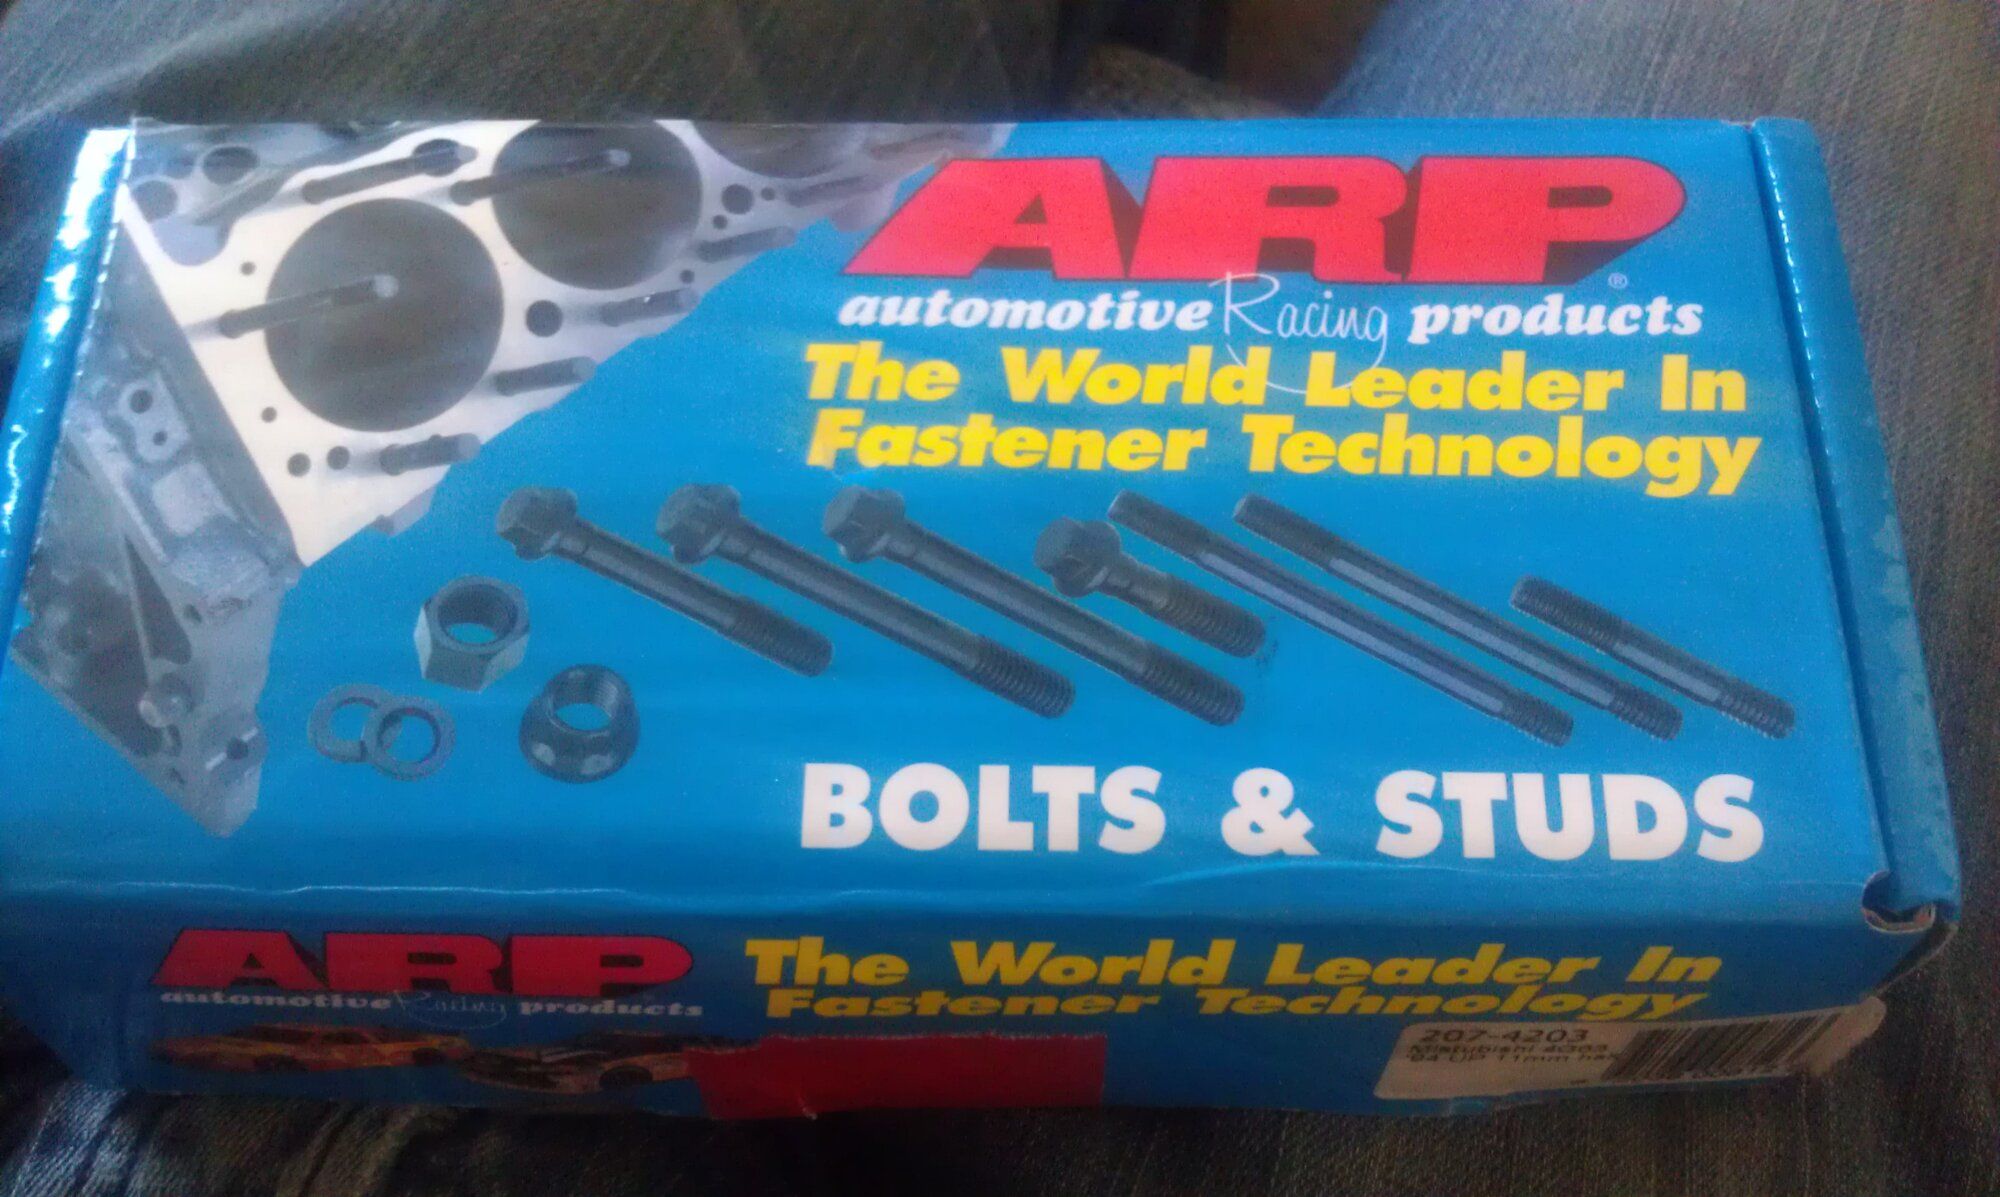
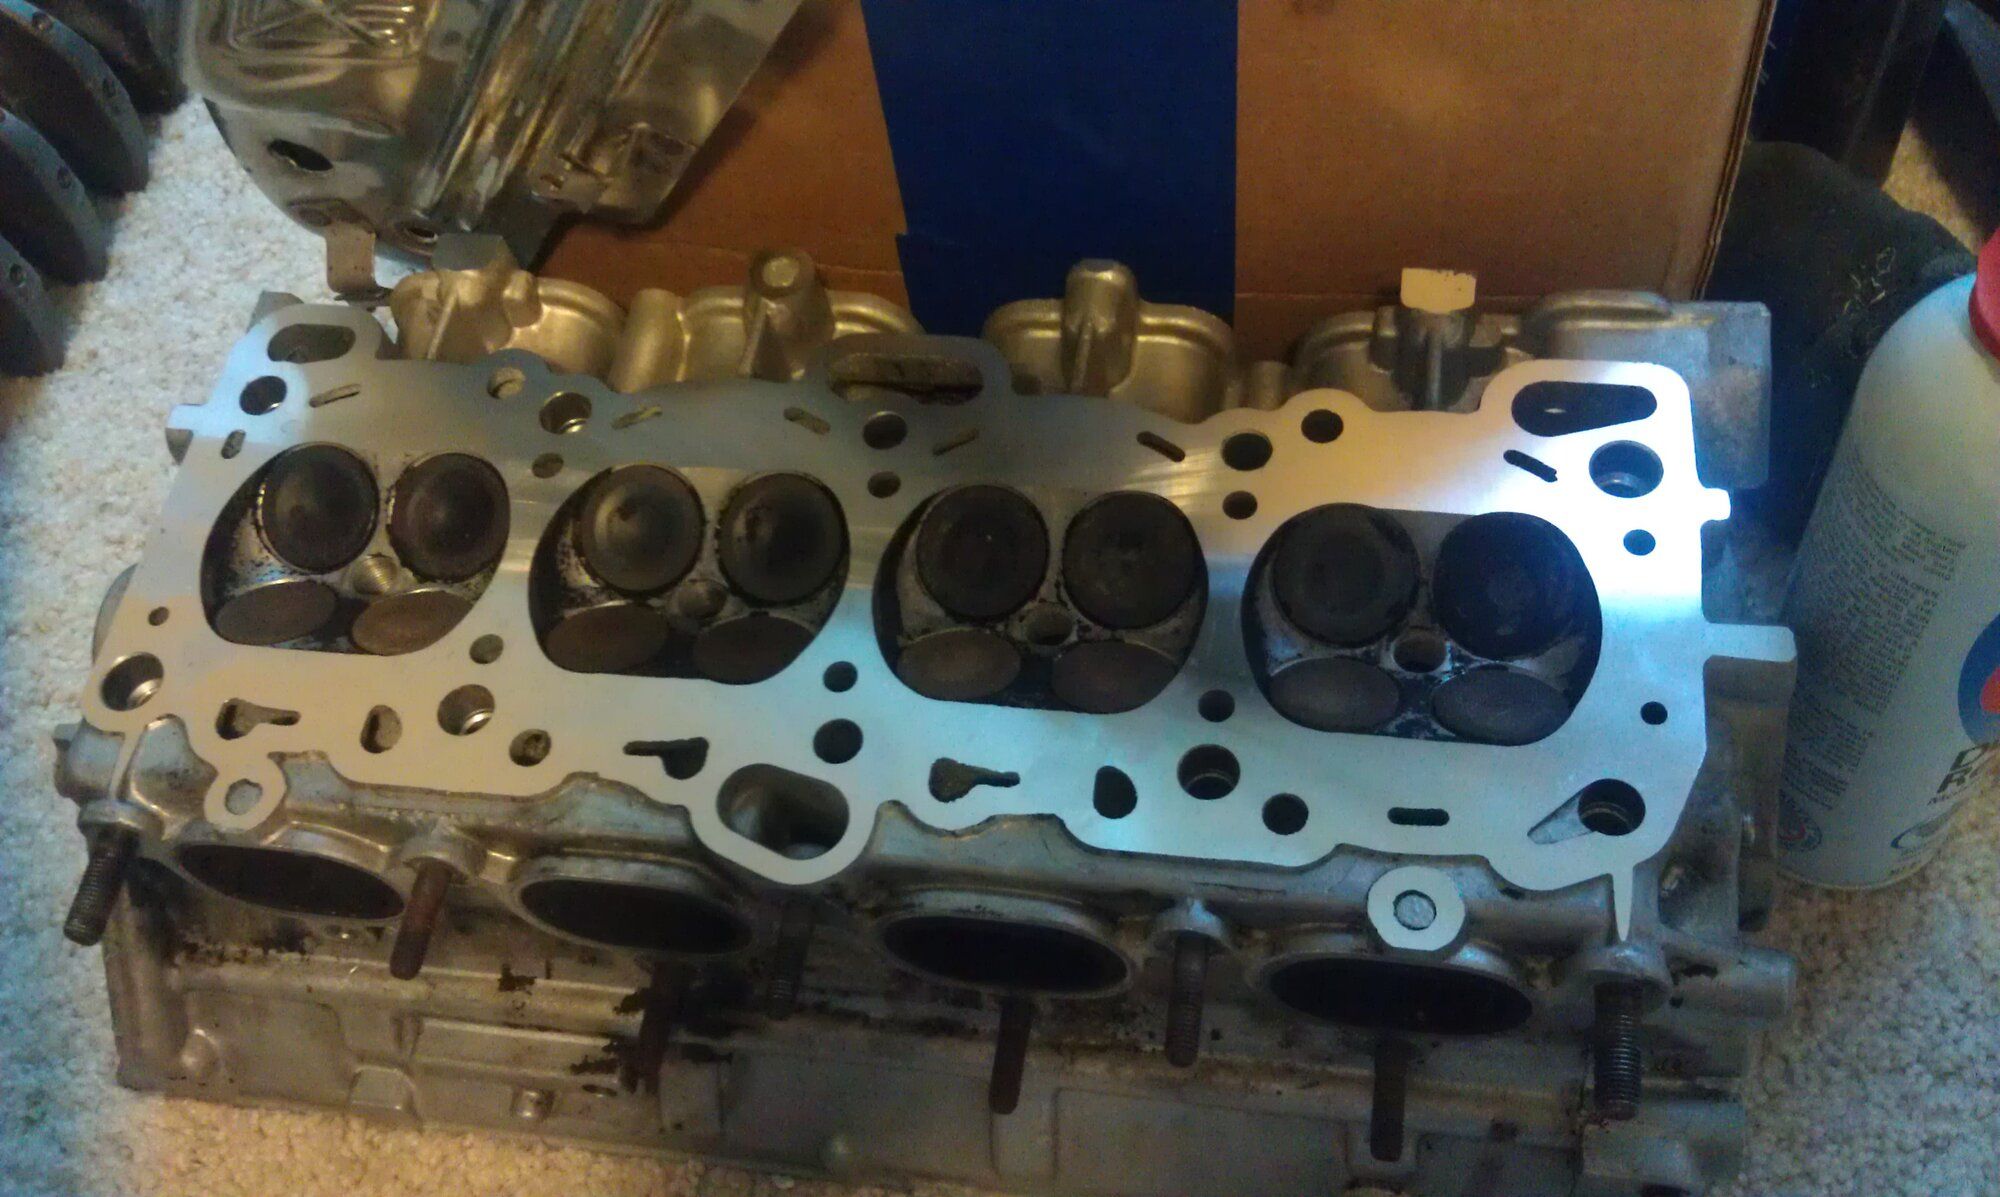
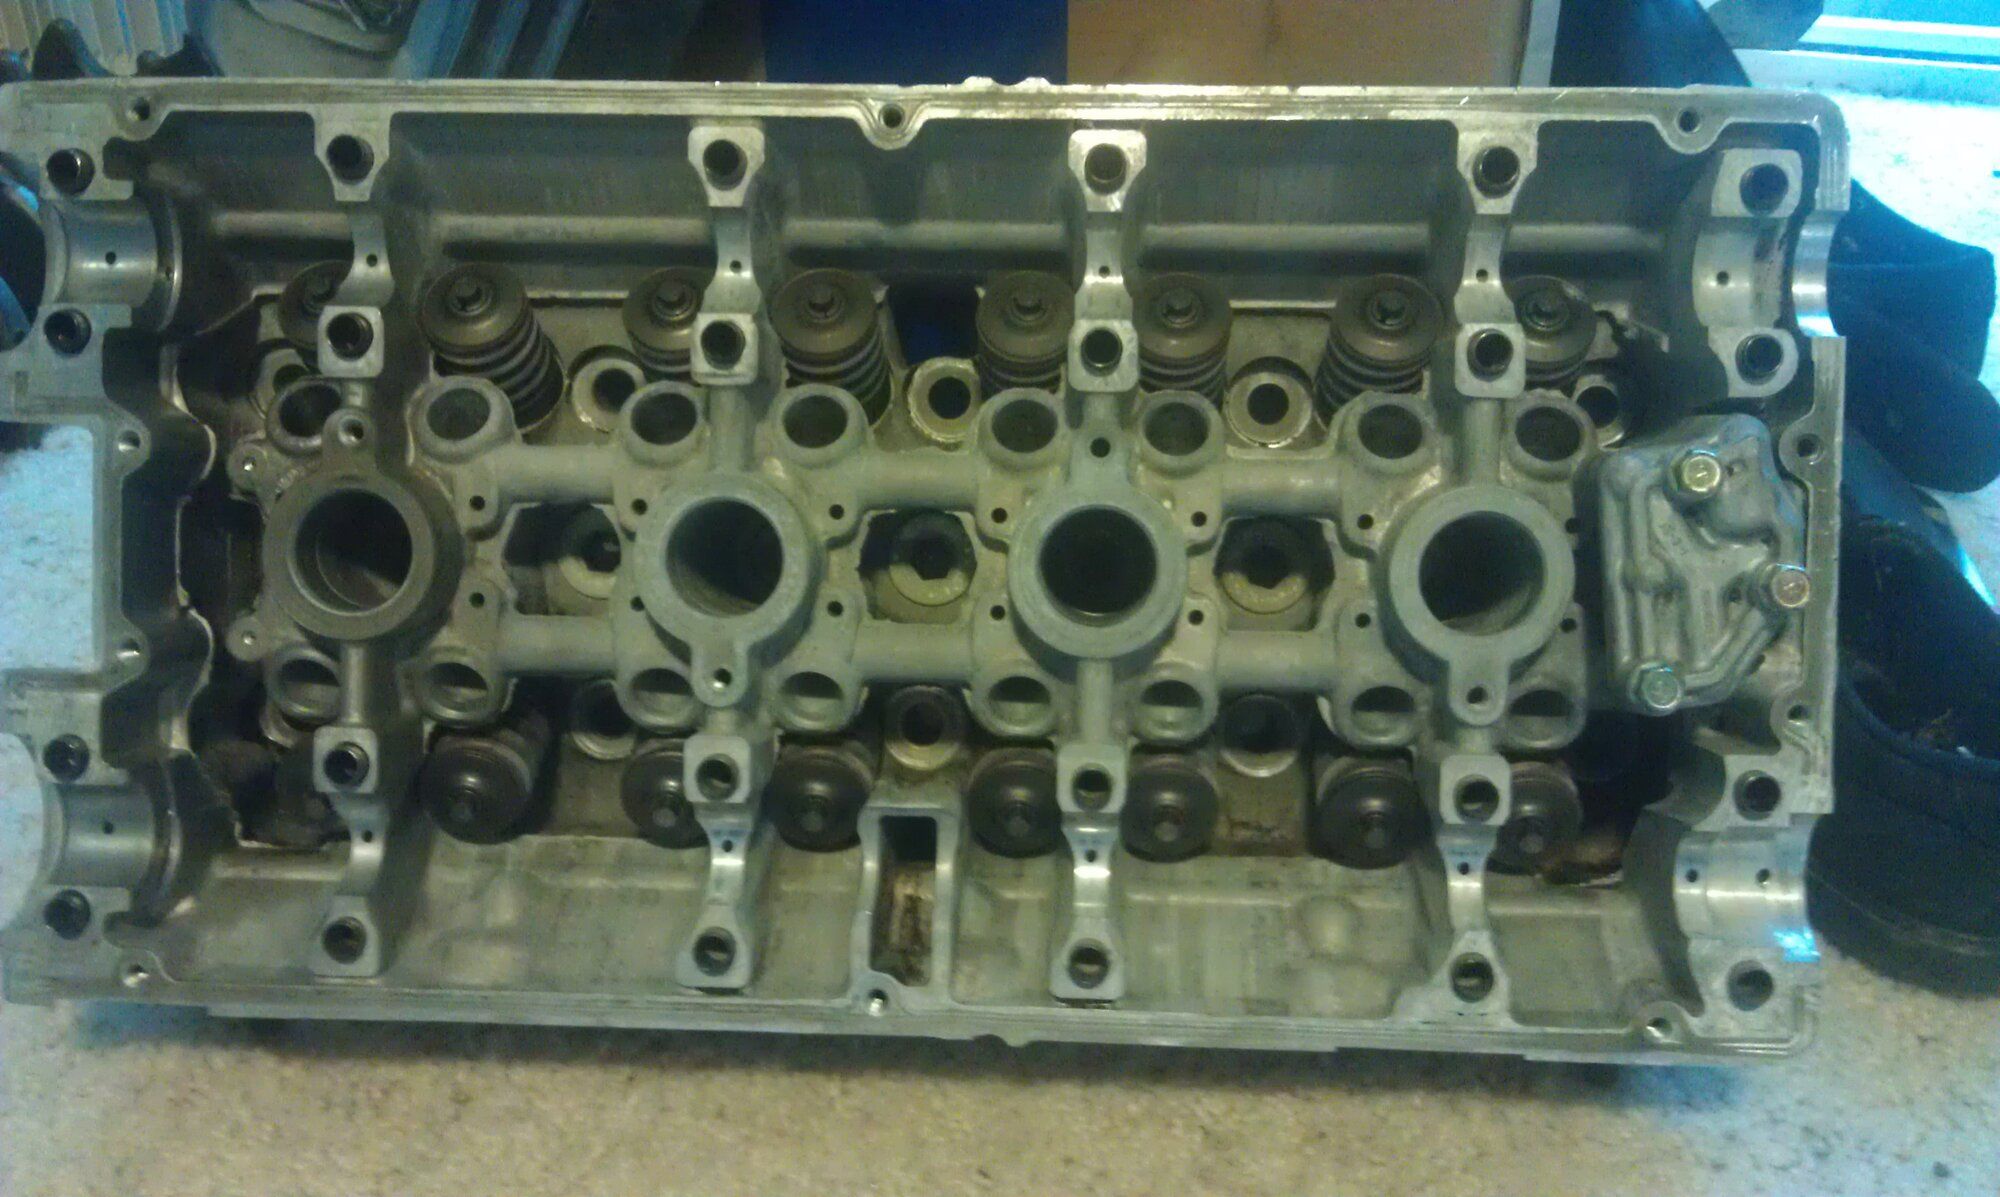
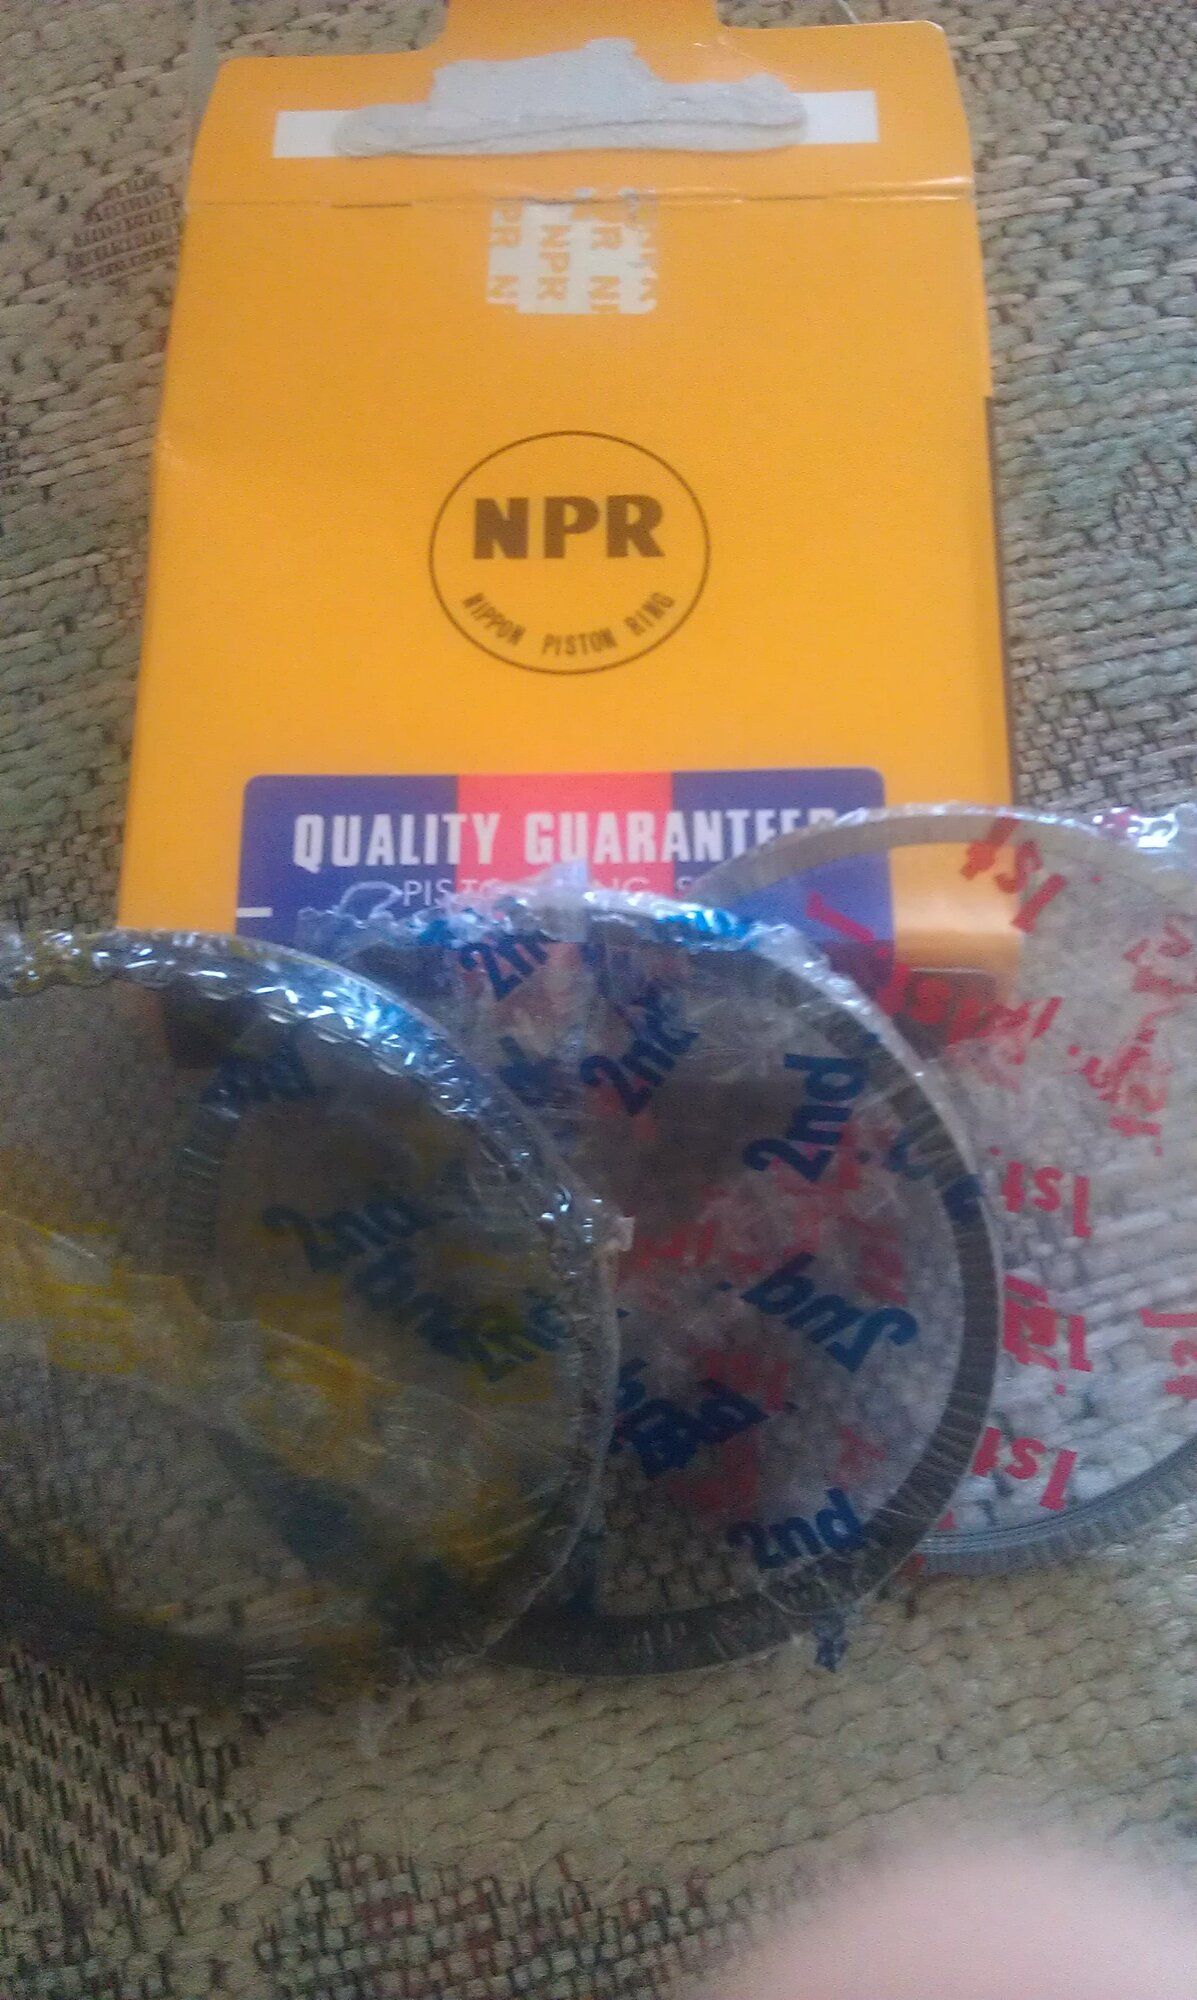
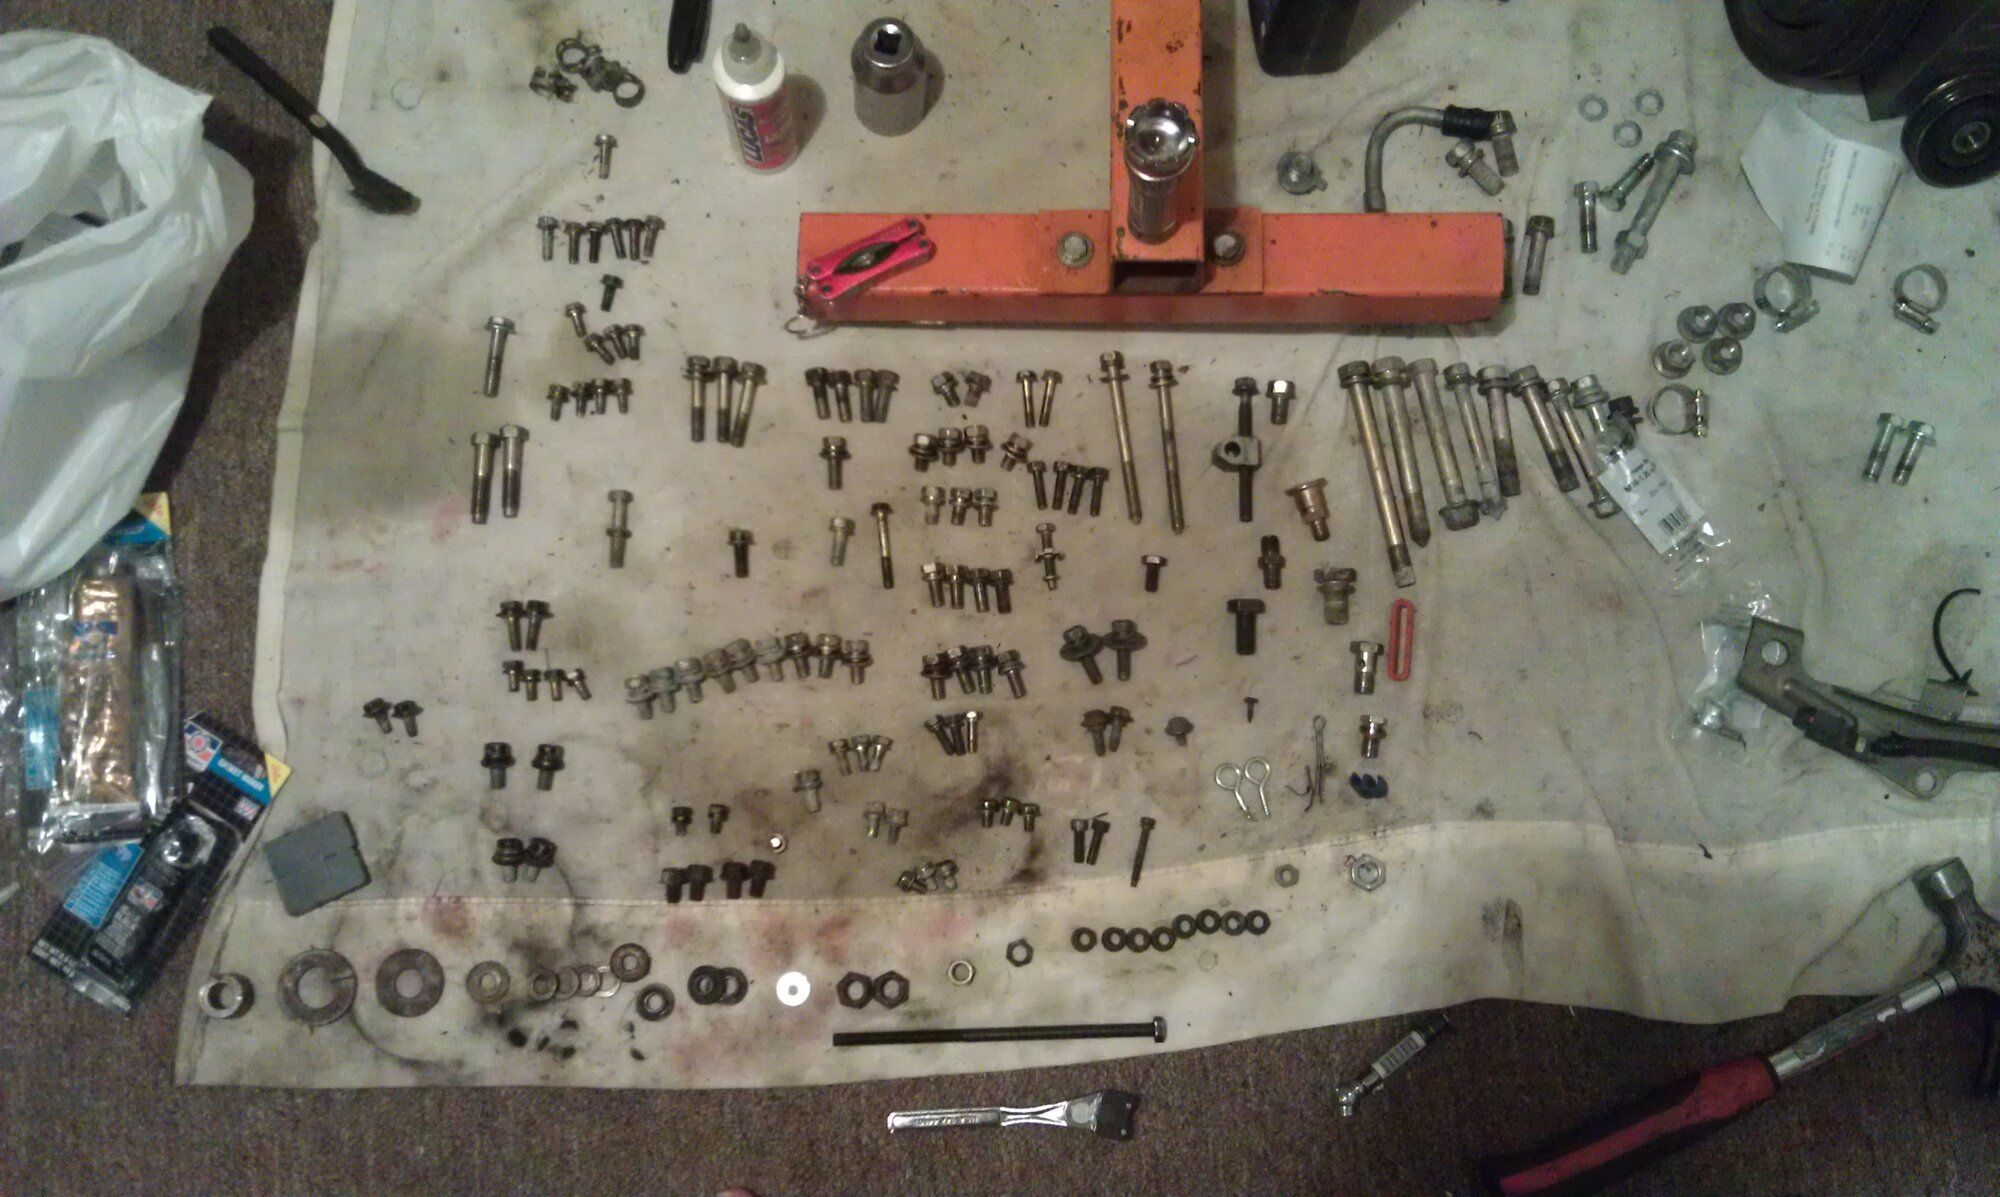
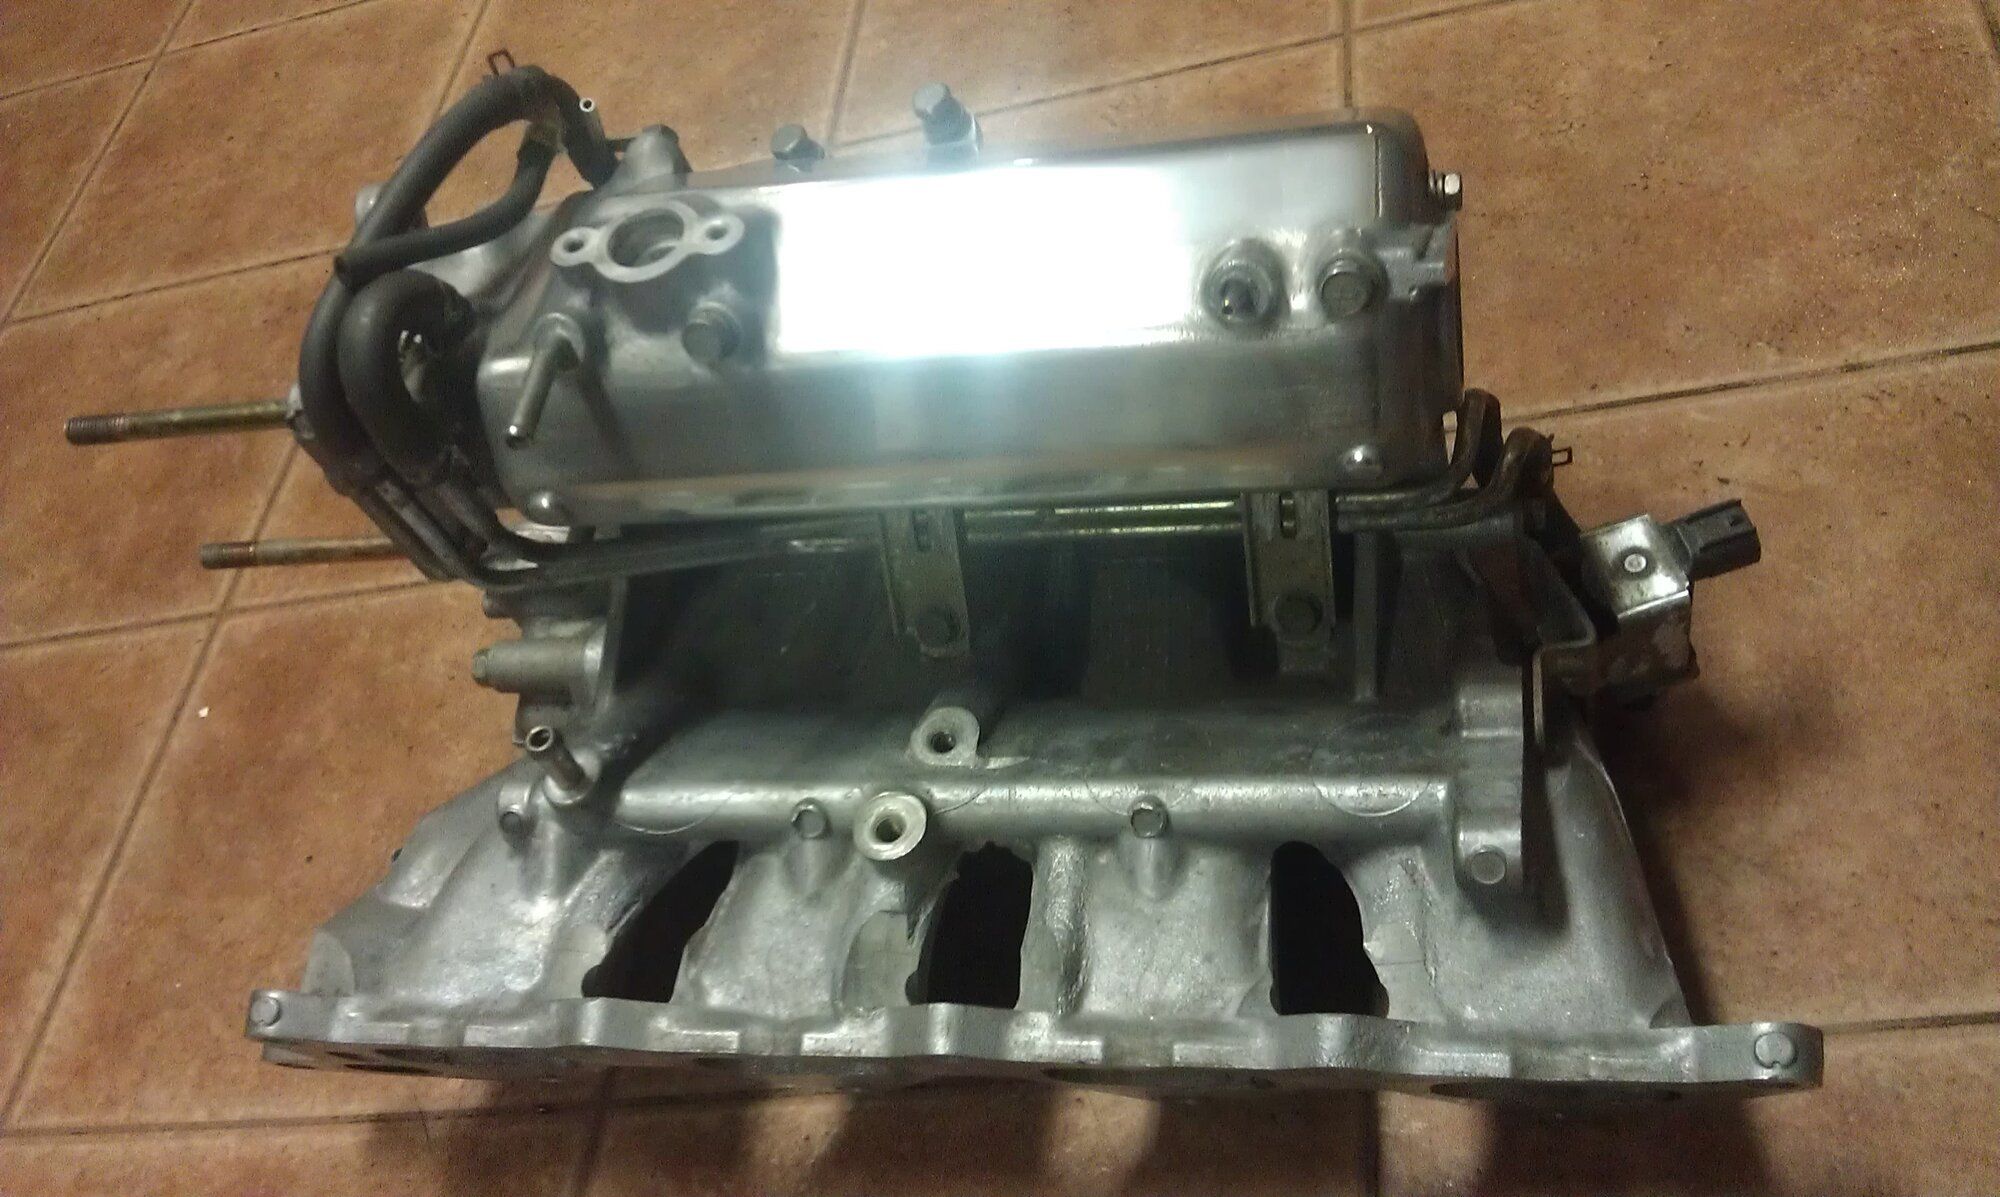
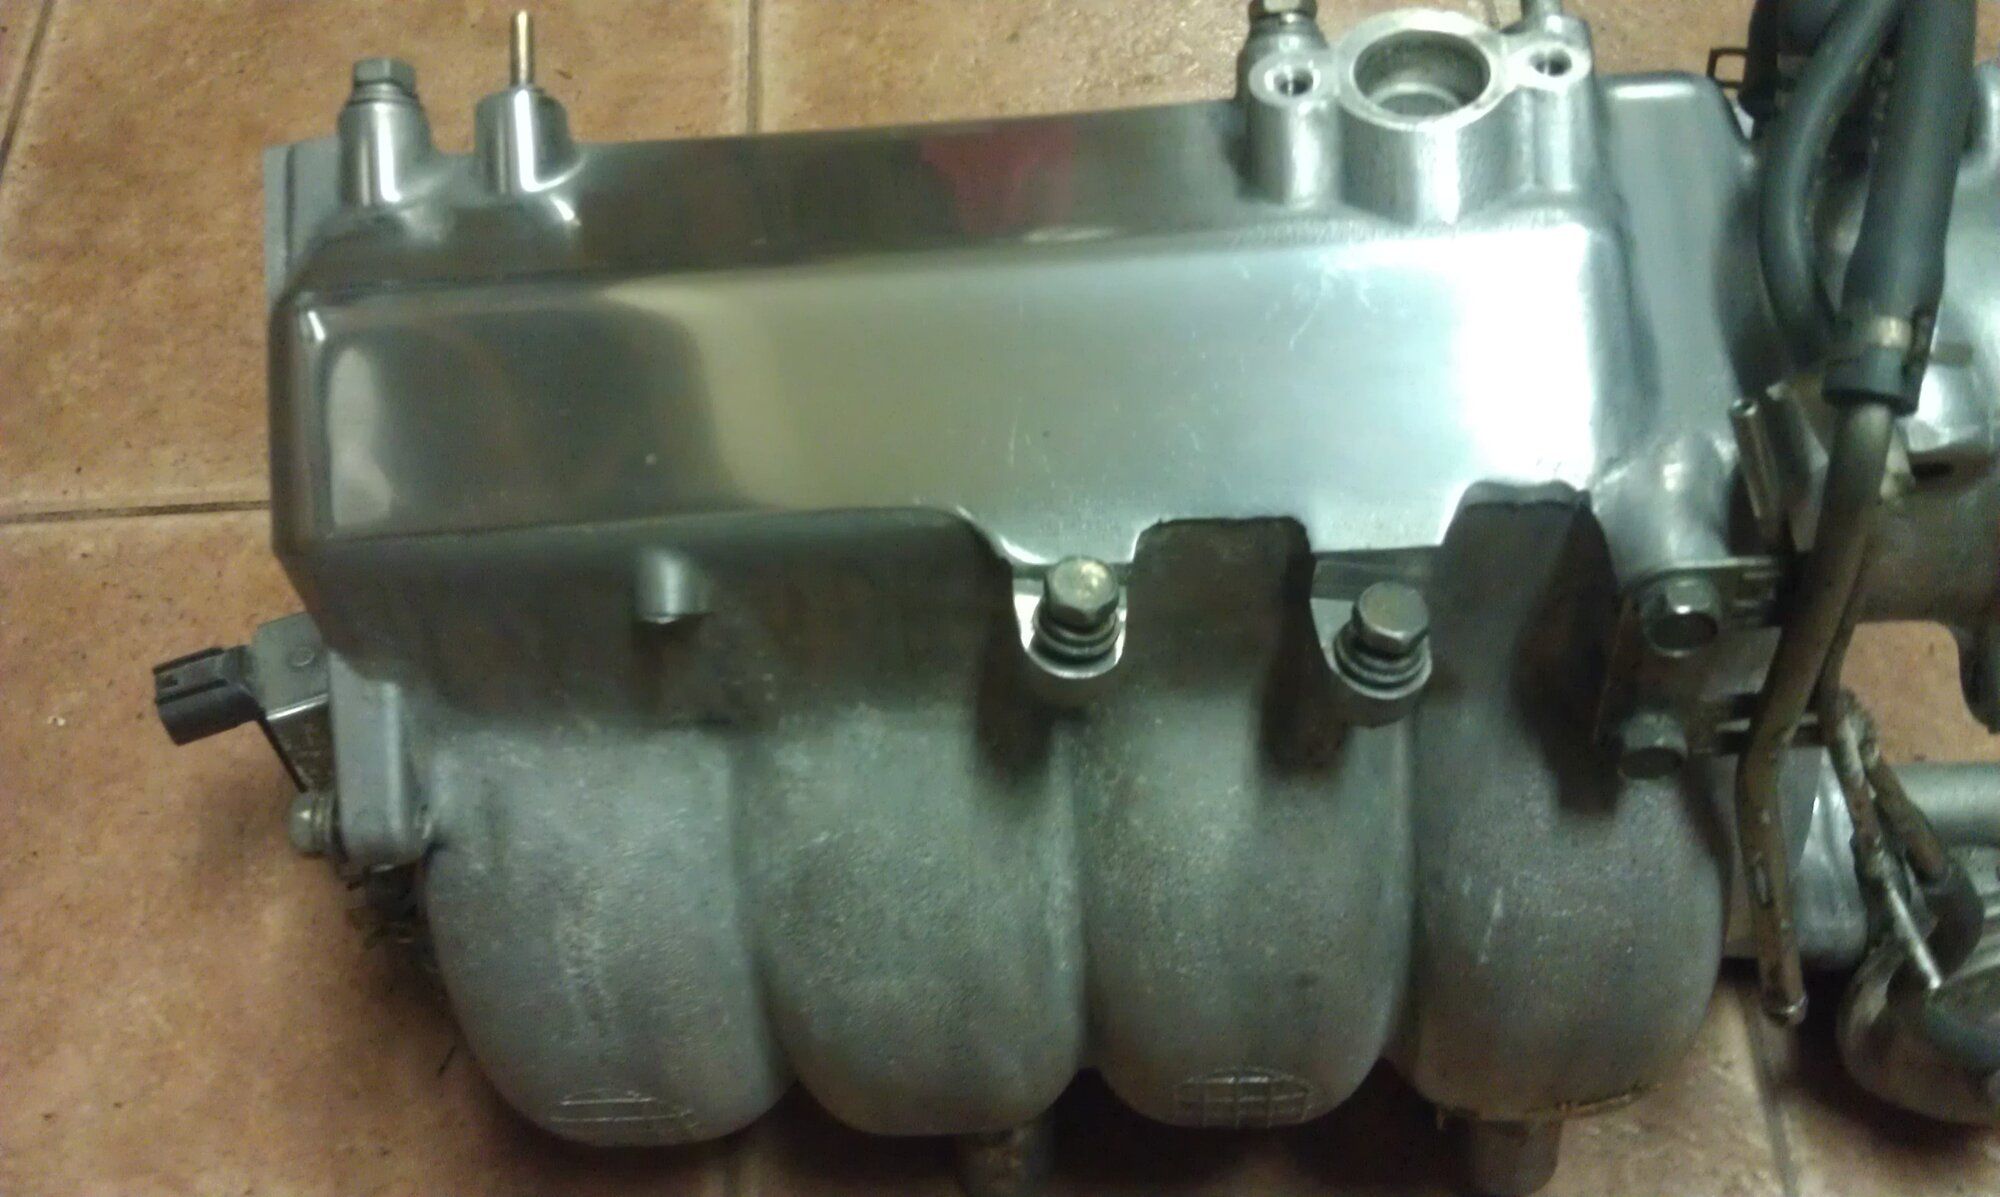
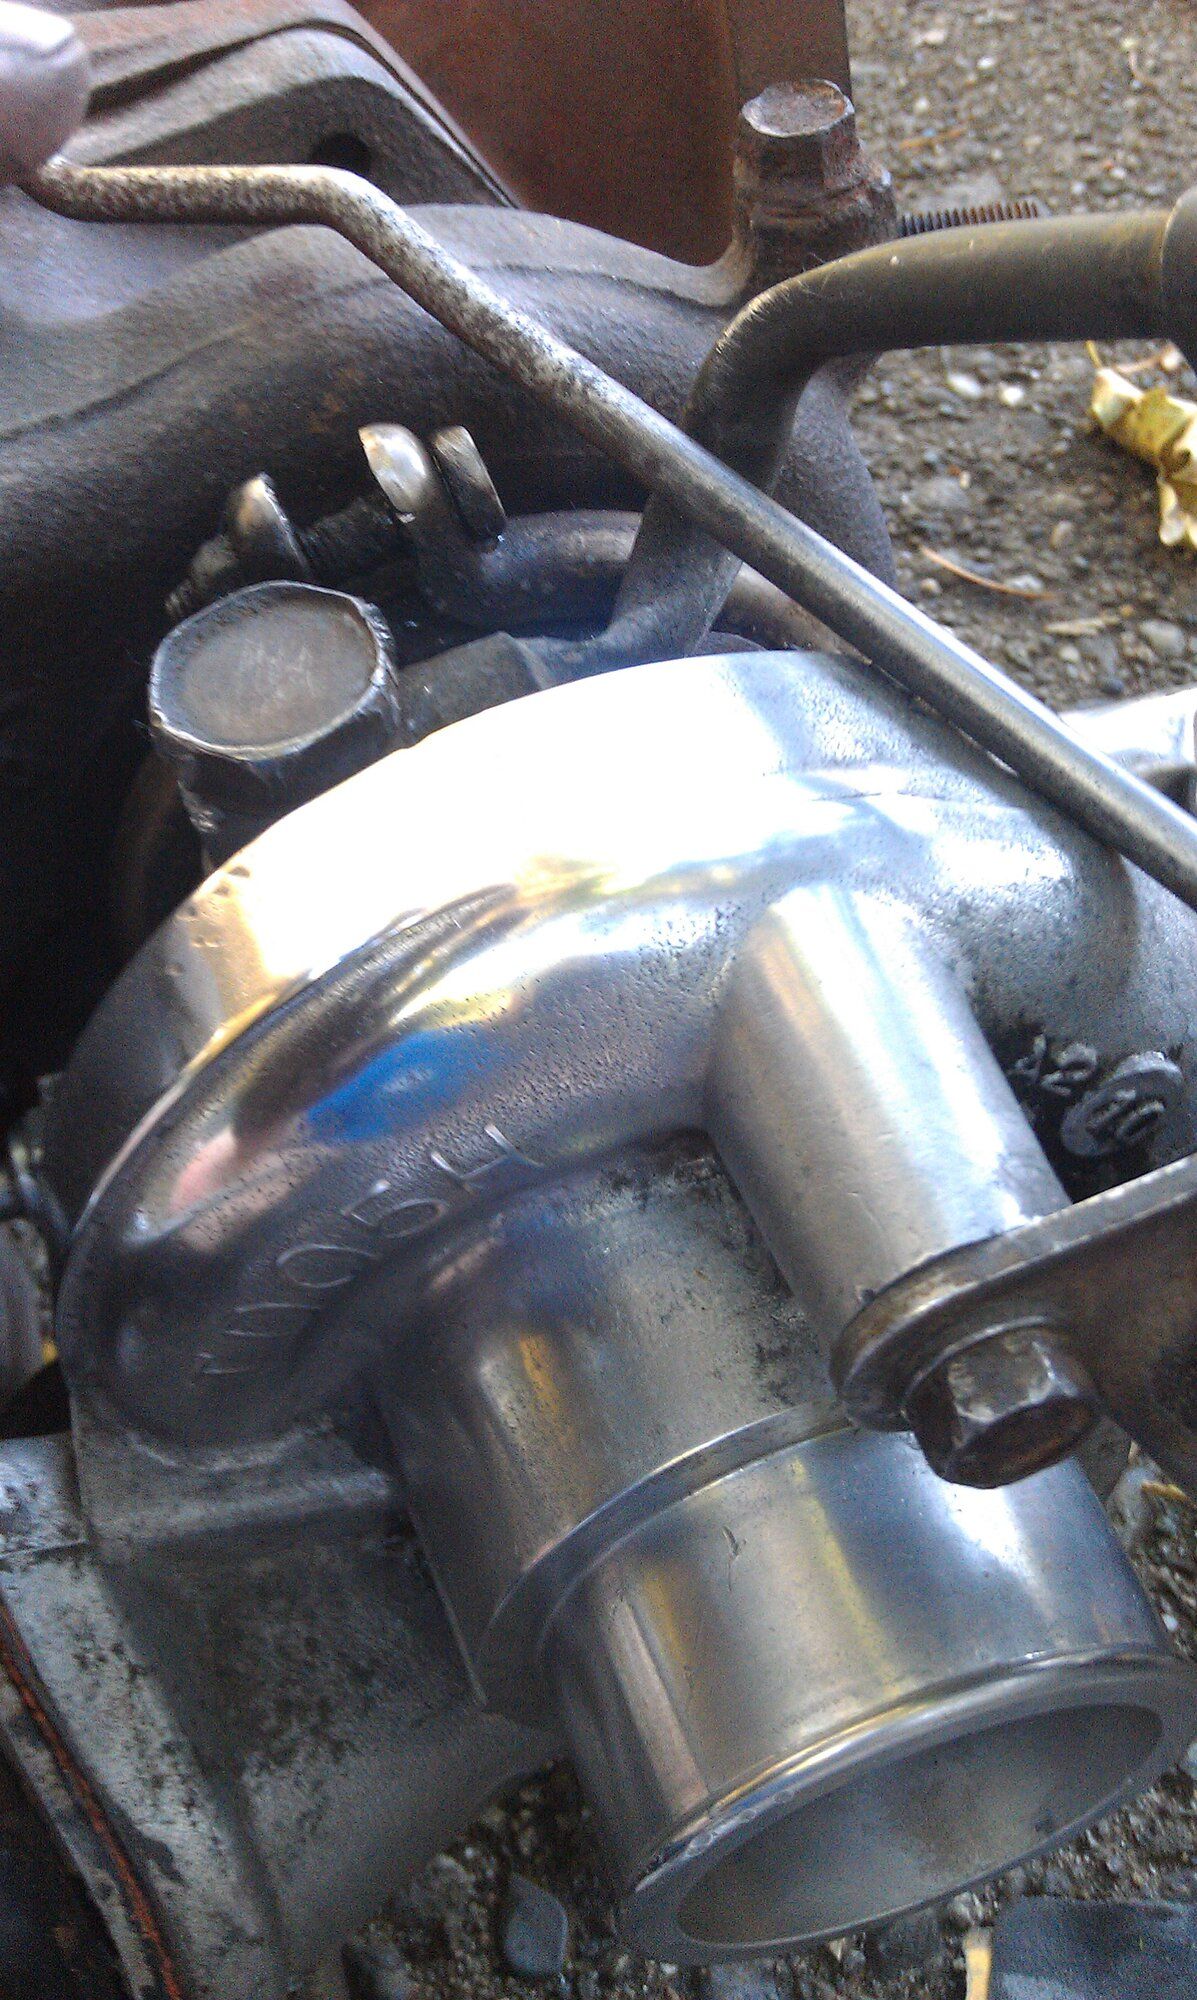
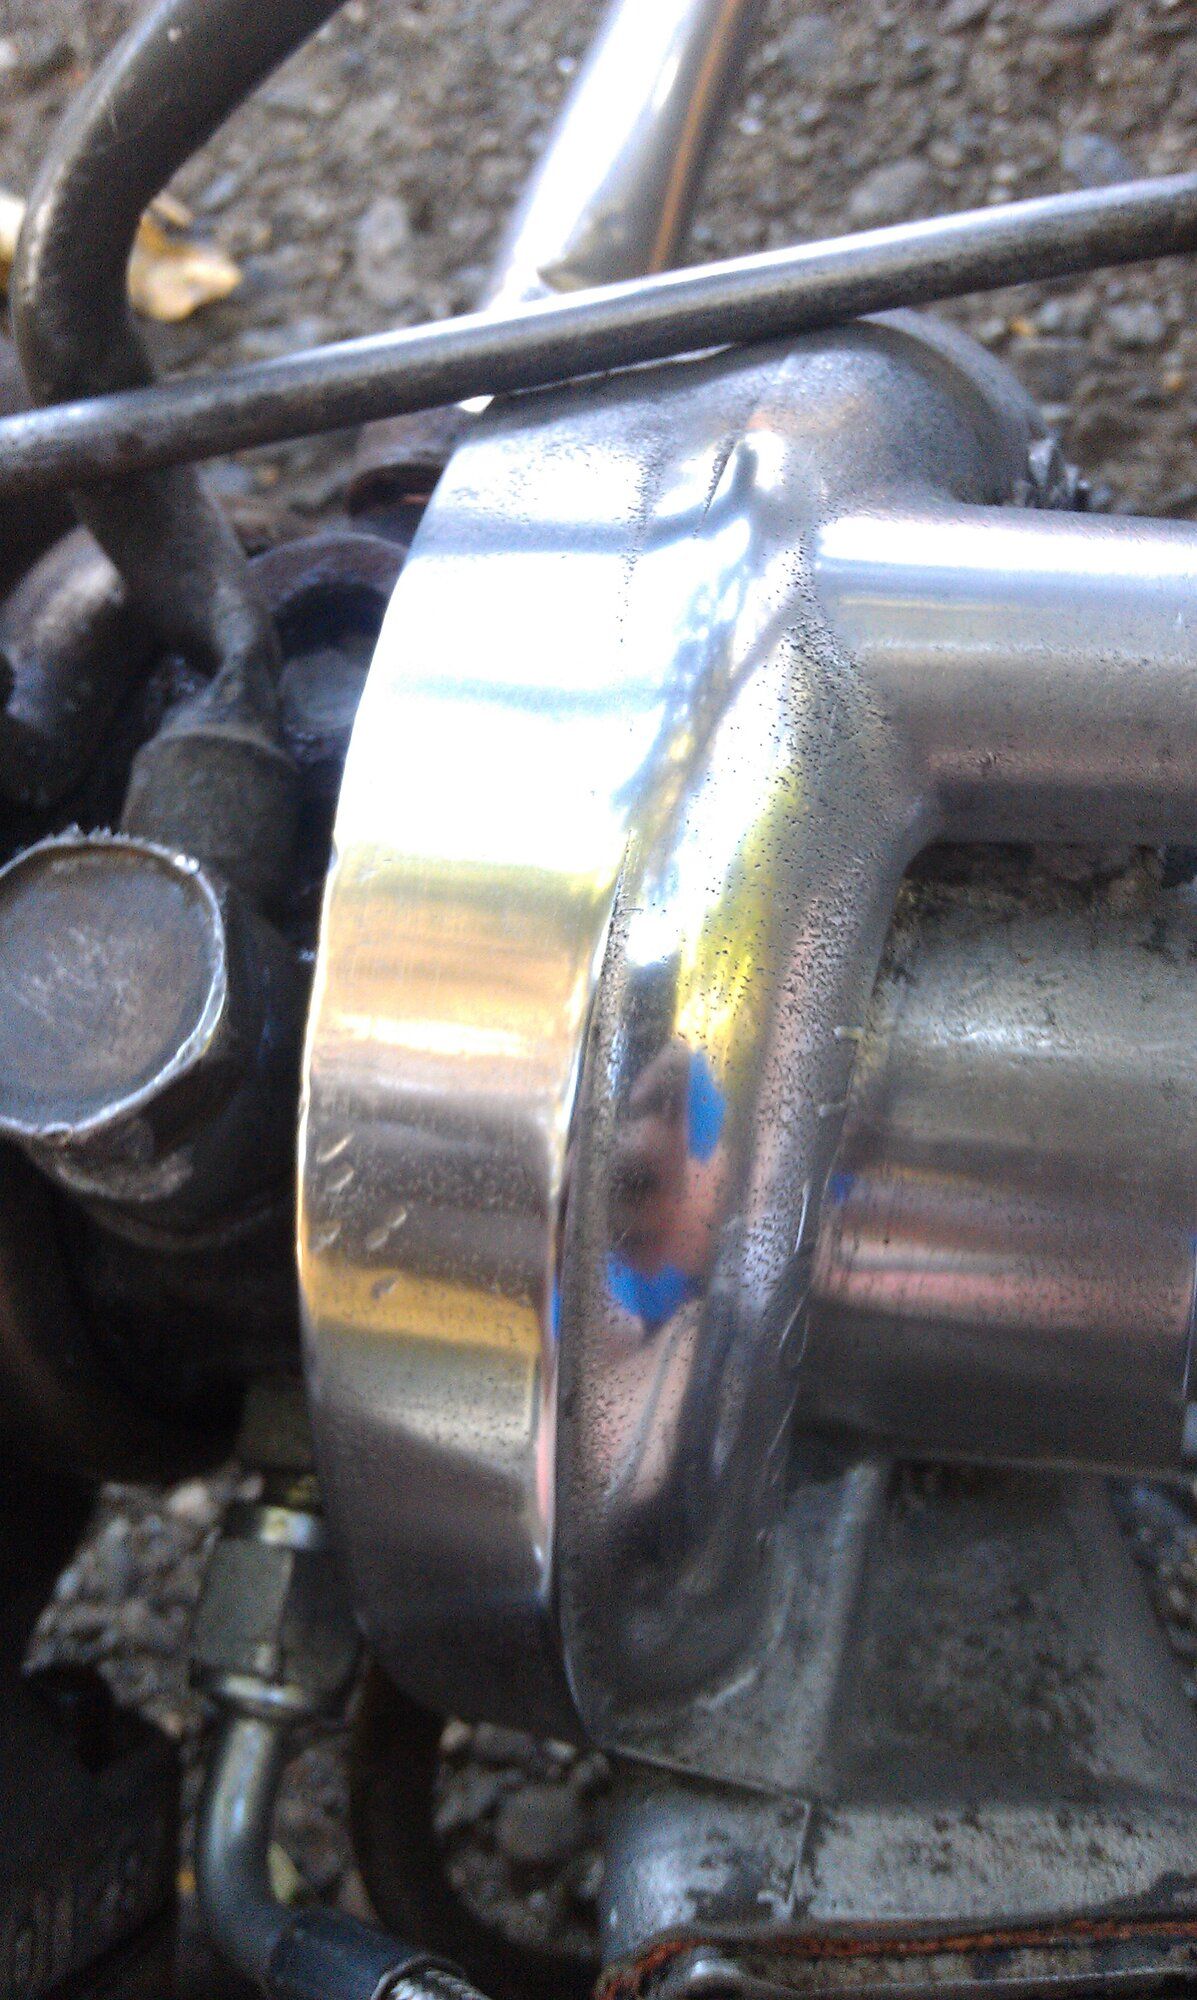
I also had a little time while waiting for the block and head so I took a bunch of sand paper all the way to like 2000 grit wet sand and MOTHERS Mag and Aluminum Polish to the Intake Manifold. I like this much better than the rough casting look. I did the same thing to the turbo compressor housing as much as I could get to. I left the area around the TD05H mostly alone since I didn't want to get rid of that, just a swipe or two to brighten up the lettering itself.
- Thread starter
- #14
jukematt
15+ Year Contributor
- 291
- 40
- Jun 13, 2009
-
Portland Metro,
Oregon
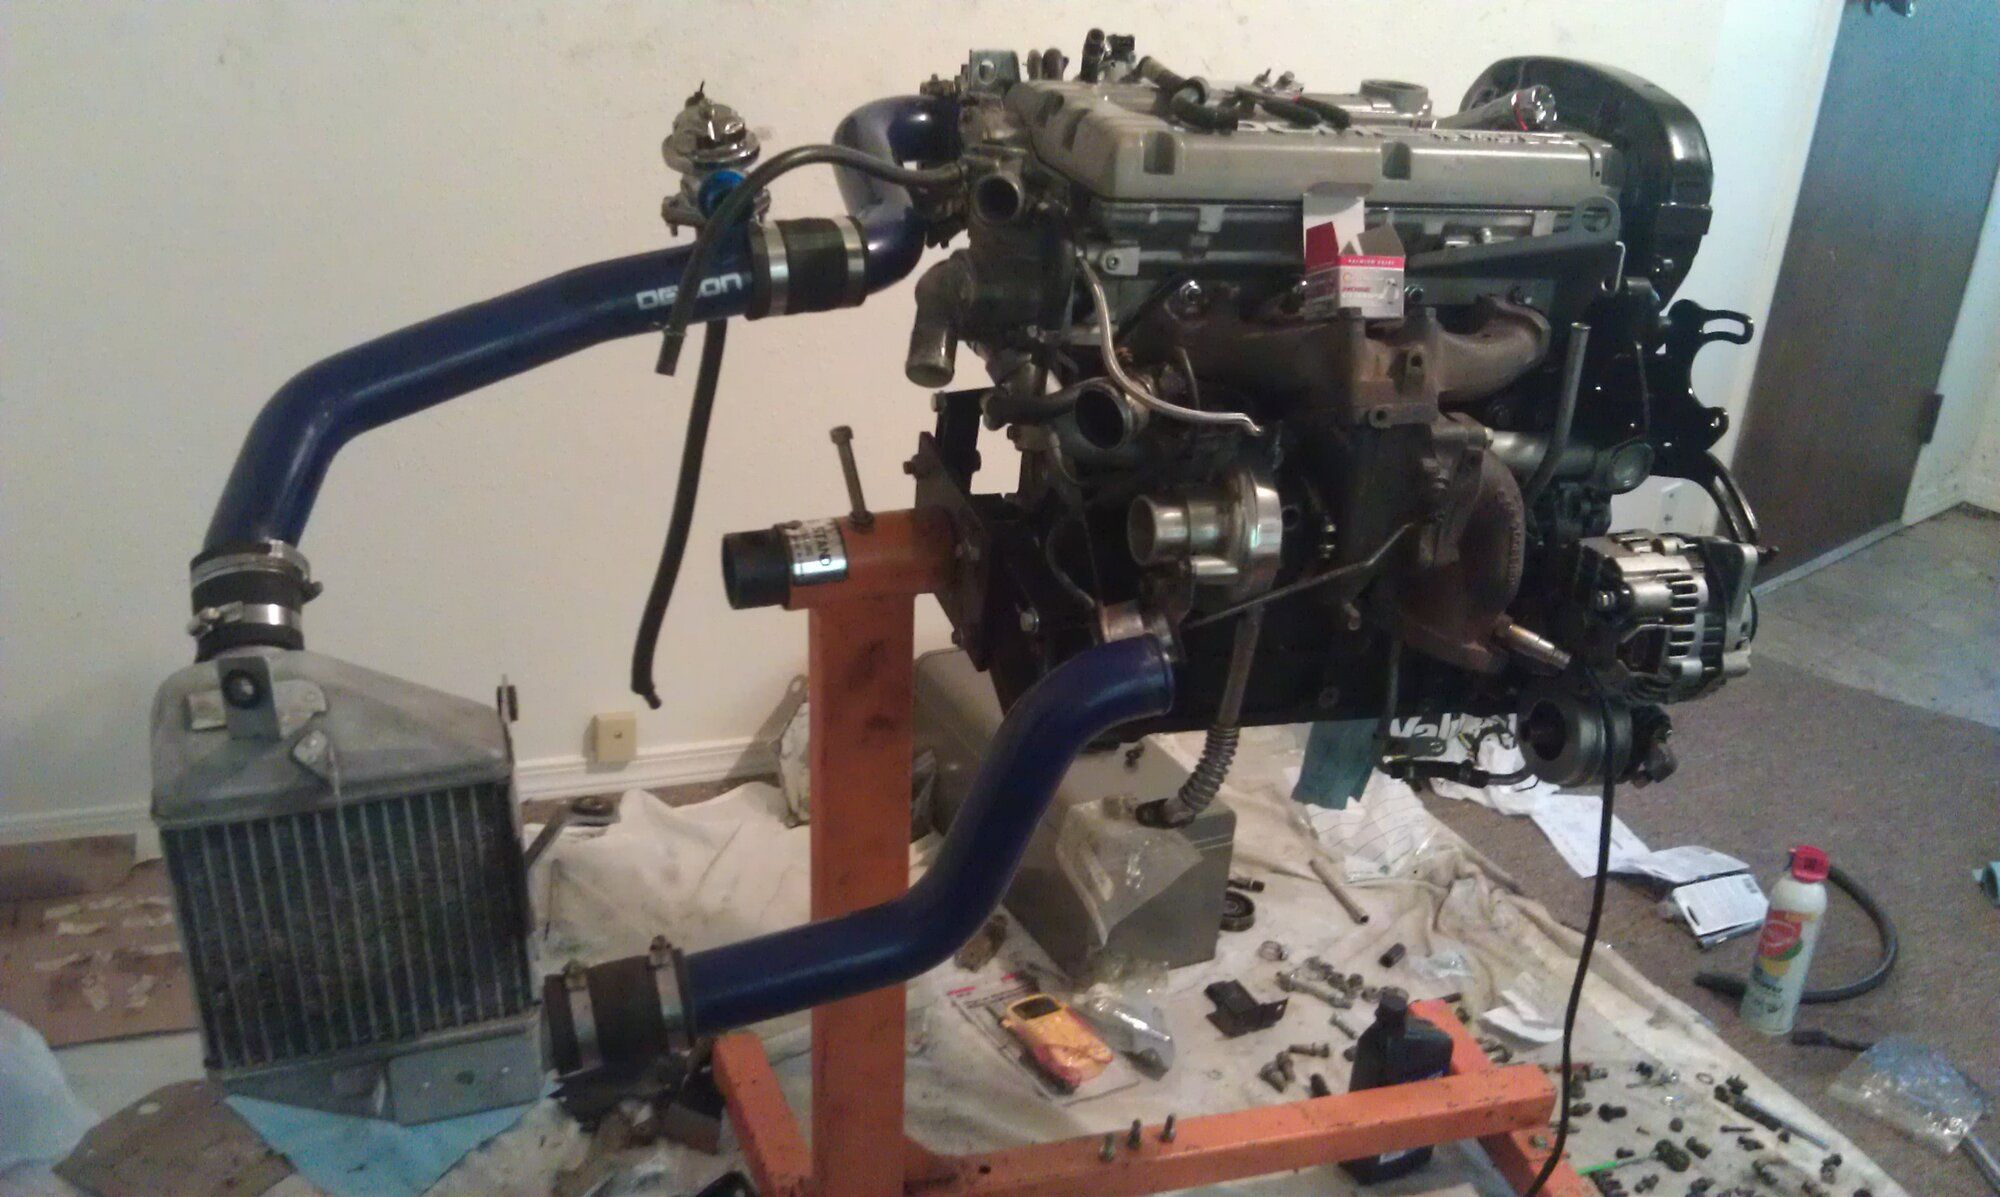
Fully assembled engine including SMIC!
Something Fox's owner told me about: Titanium coated skateboard bushings fit perfectly as replacement shifter bushings. I bought a box but of course only needed two. Just recently I gave some to another fellow DSMer. So I still have a bunch left, HAHA!
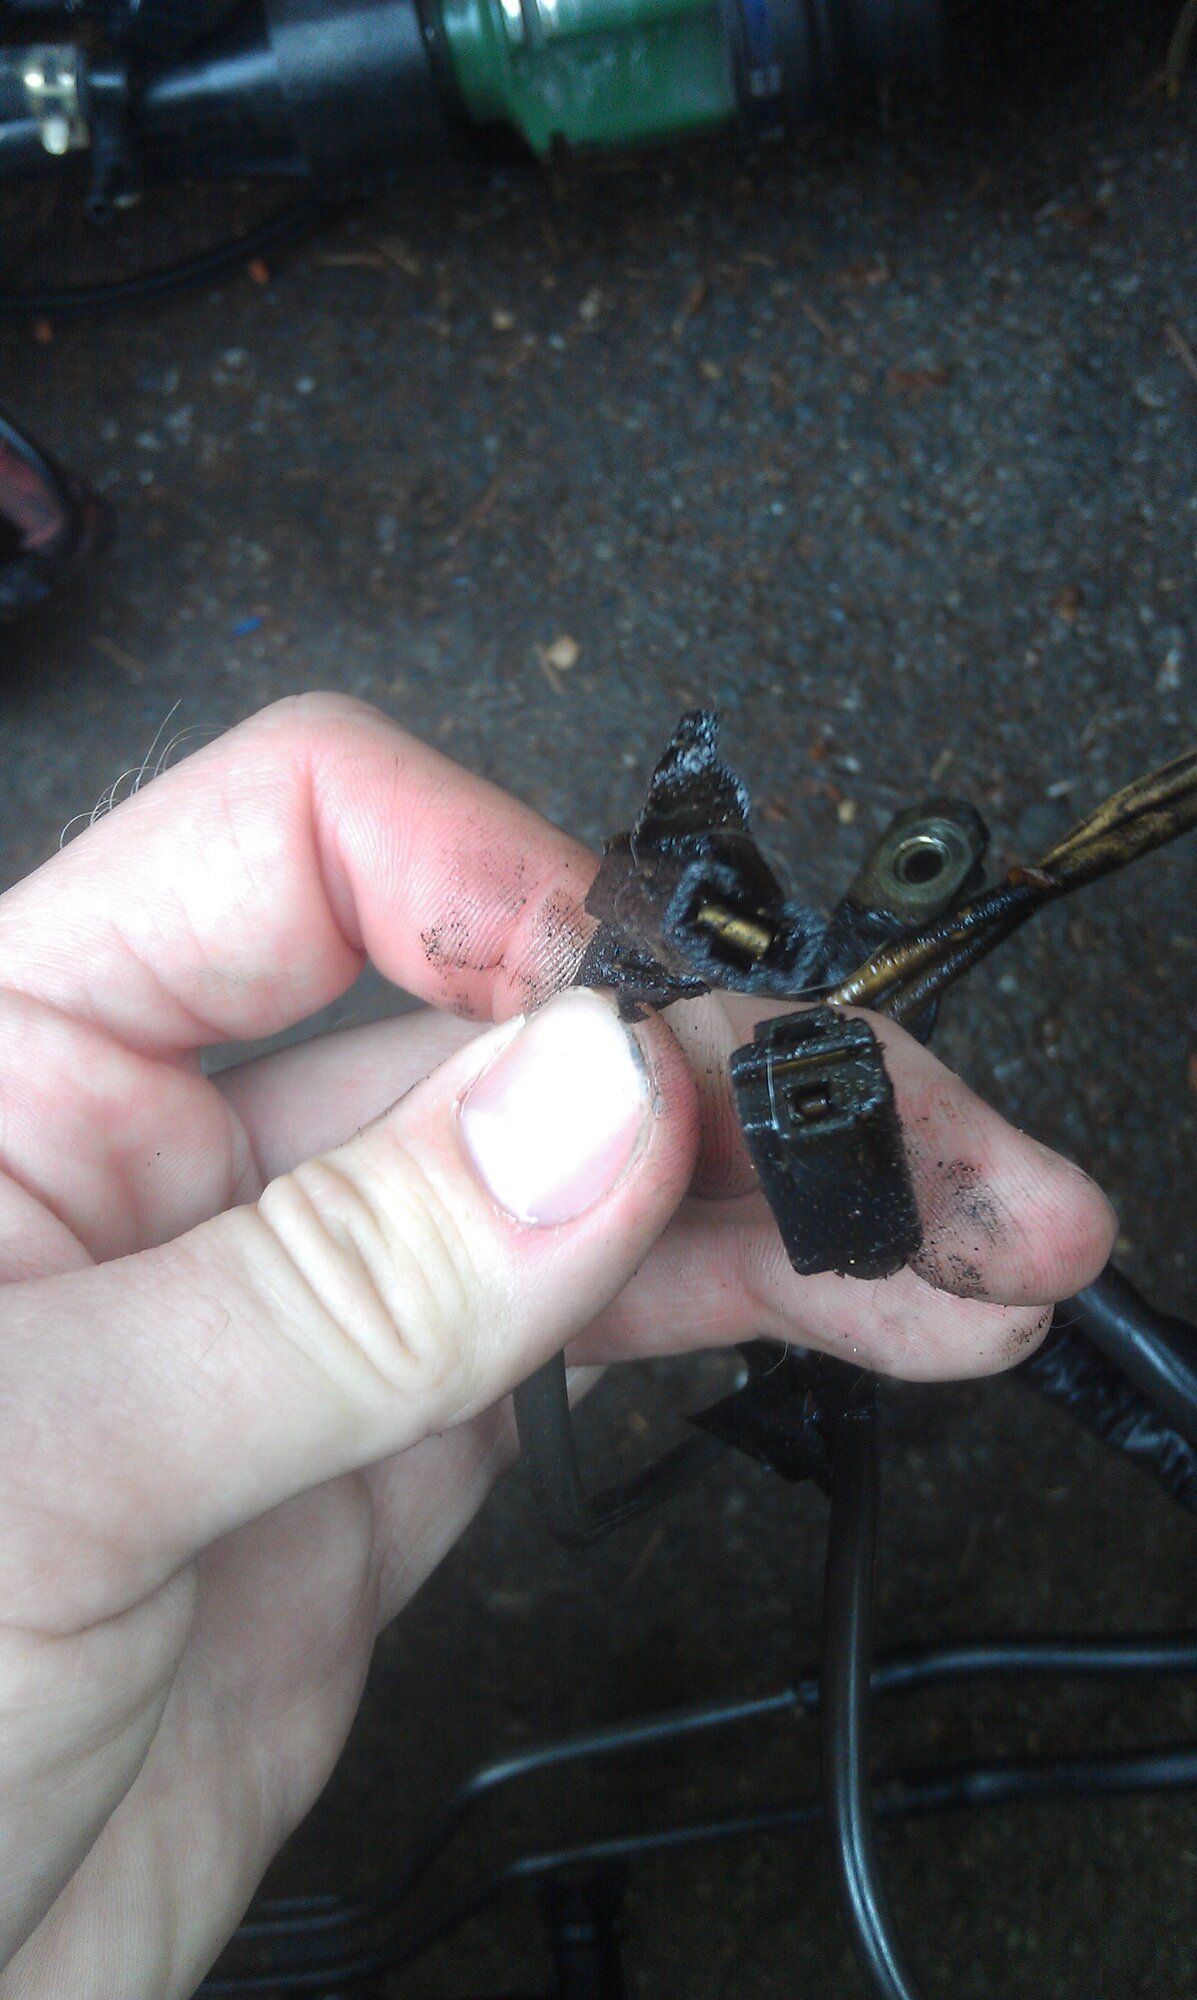
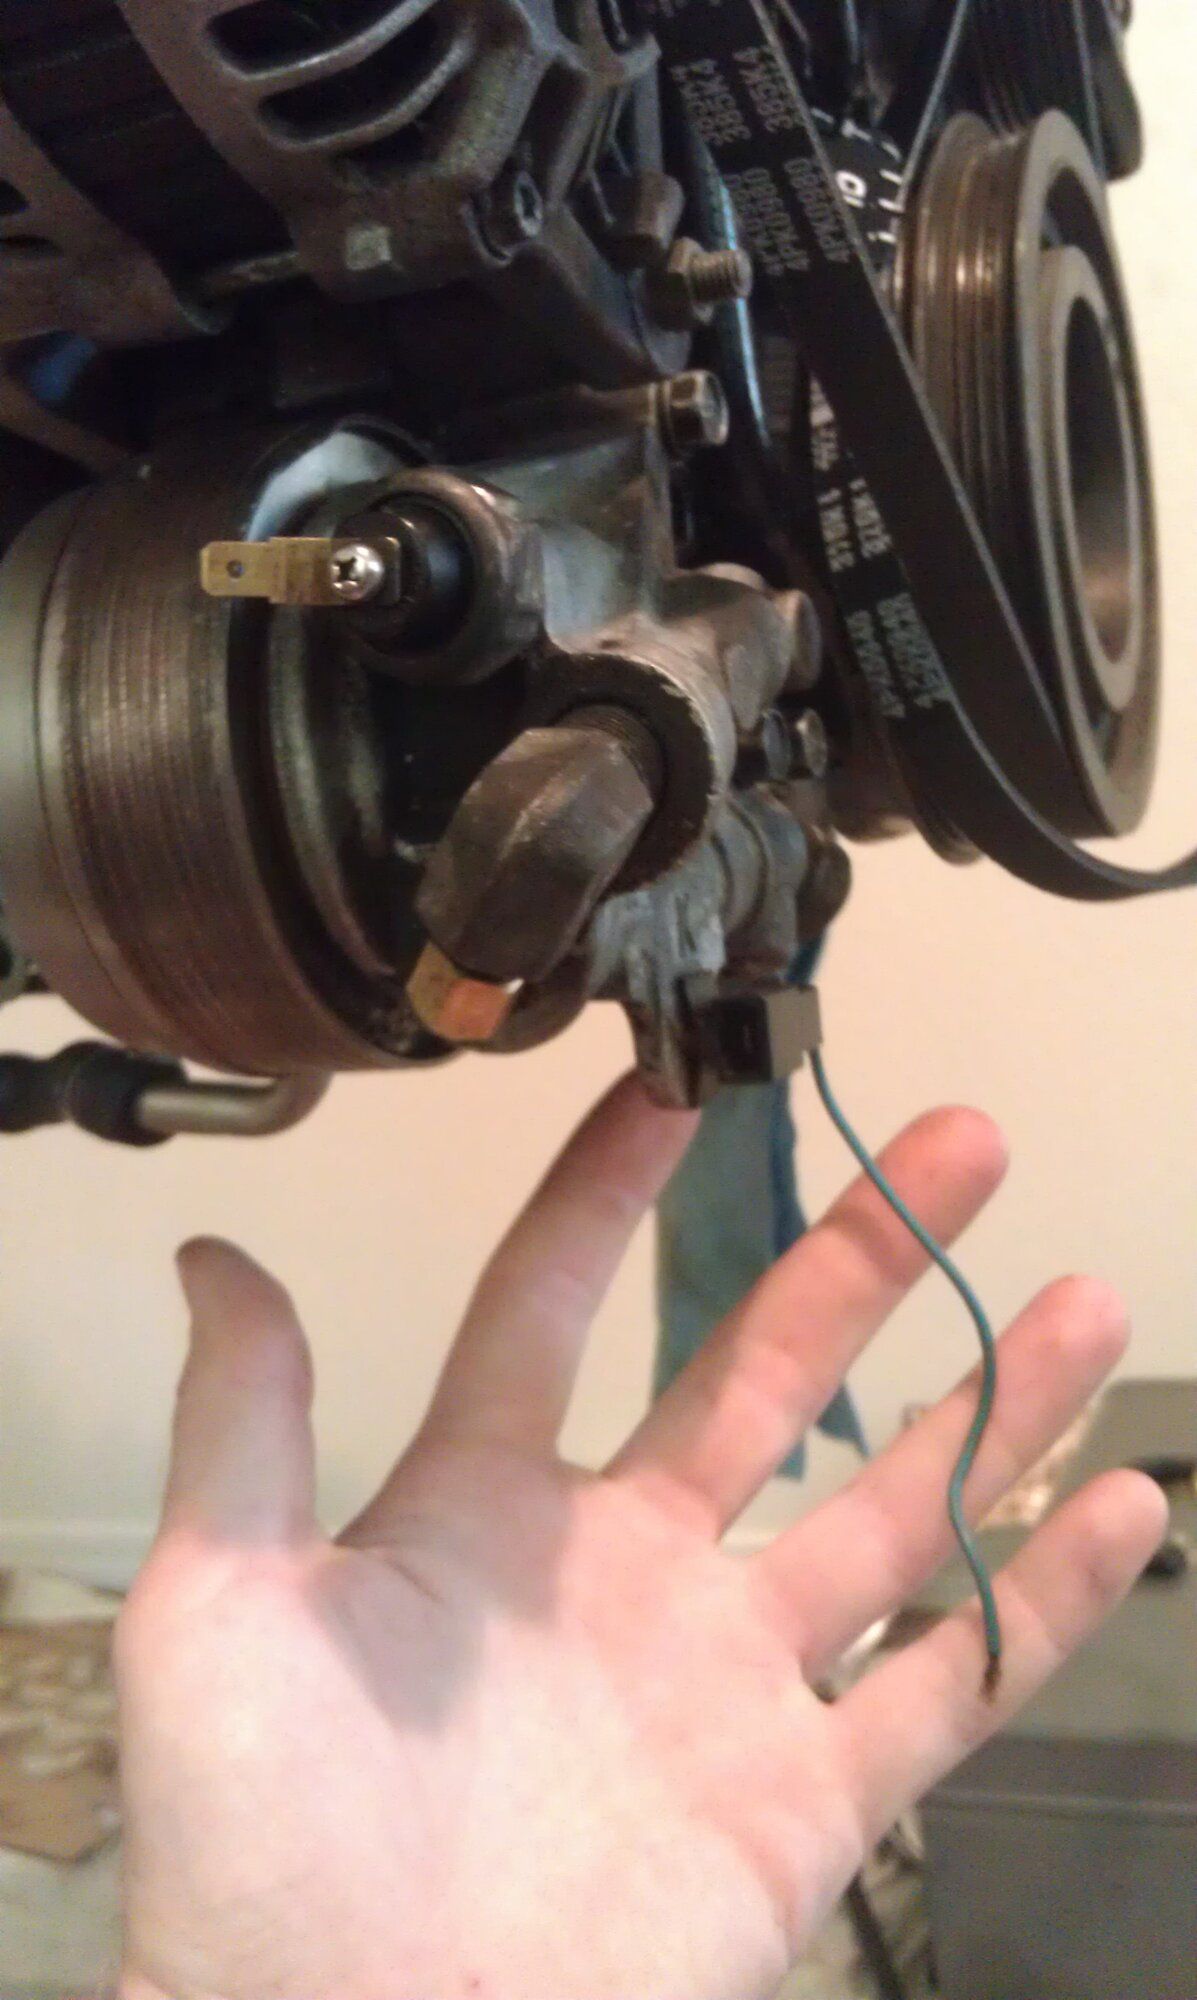
Also, a question: The last two pictures you can see two connectors which attach to the oil filter housing. One is for the stock oil pressure gauge, but what is the other one for with the wire going to nothing? Is that the wire for the part that attaches to the top of the power steering pump? Or something else?
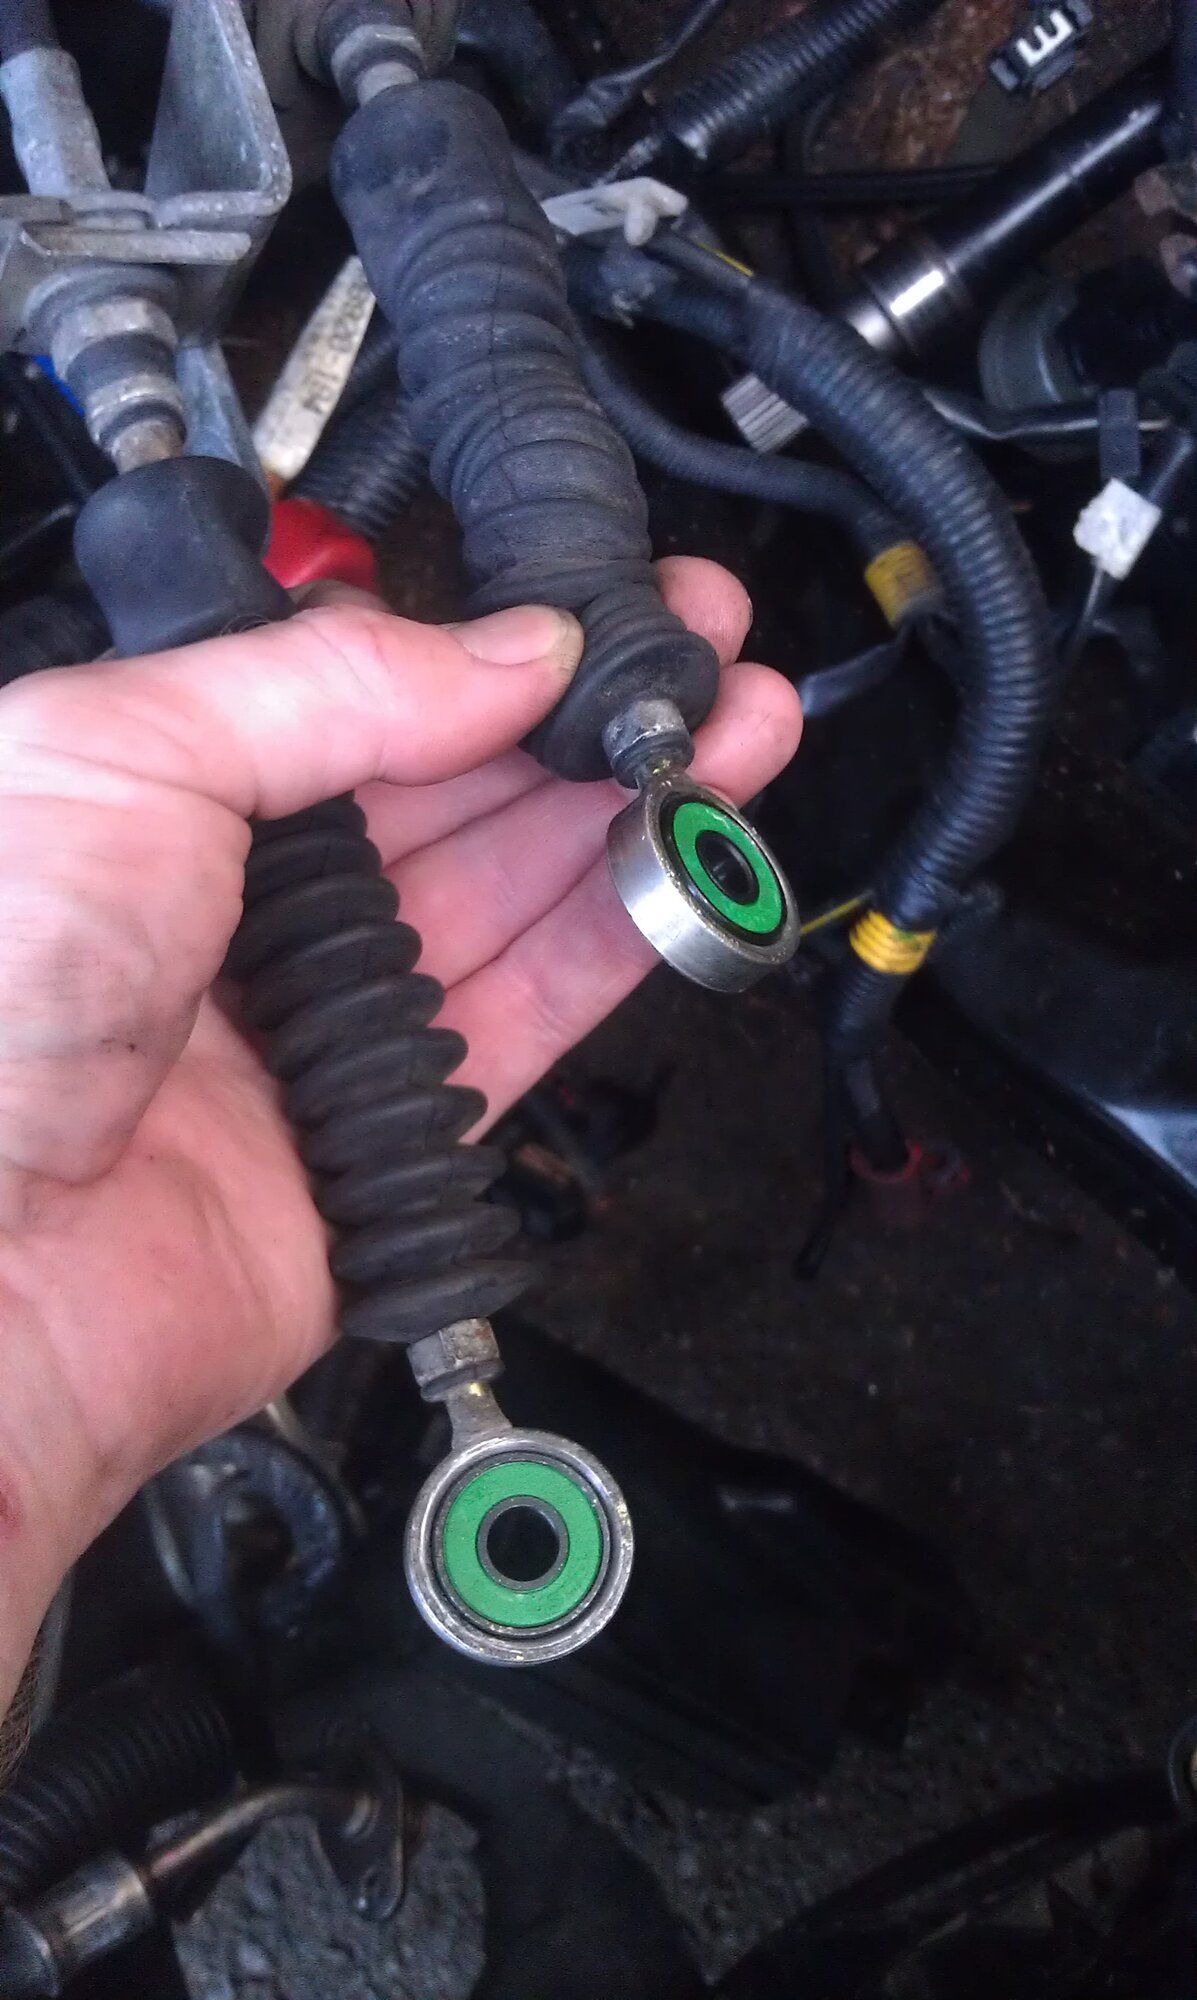
Something Fox's owner told me about: Titanium coated skateboard bushings fit perfectly as replacement shifter bushings. I bought a box but of course only needed two. Just recently I gave some to another fellow DSMer. So I still have a bunch left, HAHA!
Also, a question: The last two pictures you can see two connectors which attach to the oil filter housing. One is for the stock oil pressure gauge, but what is the other one for with the wire going to nothing? Is that the wire for the part that attaches to the top of the power steering pump? Or something else?

Dericsh
20+ Year Contributor
- 2,184
- 1,476
- Nov 25, 2002
-
Pearl River,
Louisiana
Great thread so far! I’m impressed with your memory/ability to keep up with the photos and info.
- Thread starter
- #16
jukematt
15+ Year Contributor
- 291
- 40
- Jun 13, 2009
-
Portland Metro,
Oregon
Thanks! A lot of it I kept in organized folders of photos. Looking through them and thinking about it refreshed my memory too. For some, I had to look at the date the photo was created.Great thread so far! I’m impressed with your memory/ability to keep up with the photos and info.
Side note: Do you know if that wire above is the one that leads to the connector on the top of the power steering? That became missing or broken later but I just got the connector for the power steering and I don't remember where the wire was supposed to go.
Last edited:
- Thread starter
- #17
jukematt
15+ Year Contributor
- 291
- 40
- Jun 13, 2009
-
Portland Metro,
Oregon
Eight months of down time... but finally light at the end of the tunnel?
Throughout this build, there was only one issue I encountered (that prevented me from driving the car): According to both the Haynes and Chilton manuals, they say to tighten the bolts for the pressure plate to the flywheel FINGER TIGHT. Now, I'm a stickler for following directions, especially when I have never done something. So I will take my time and those directions will be followed to a tee! (I just went out to look for those manuals to check this but I can't find them so if I did miss the torque spec. in there back then, feel free to point it out to me.) So, I got everything done, started up my car for the first time, let it warm up, no leaks, and went to put it into gear and it wouldn't go out of Neutral. If the car was off I could go through the gears fine.
I dropped the transmission, checked everything as best I could. Thanks to a forum post I made: Clutch Disk Backward, transmission drop? (The title was in reference to what someone said I might have done) and after inspection I thought it was the clip for the TOB since everything else looked correct. So I bolted it back up, connected everything again, start engine, same problem.
I dropped the transmission again and couldn't figure out what was wrong so I ended up finally posting a question on the forum here: No Clutch Disengagement After Rebuild. Well, so to me, FINGER TIGHT means I hold the bolt in my fingers and tighten it with my hand as tight as possible. Well, when I did that, the pressure plate did not sit flush with the flywheel. People were kind enough to actually give me a torque spec. and that fixed it!
I will add that now I have the digital copies of all of the DSM factory service manuals. They can be found here on the forums under Articles: Manuals and Documents. I put them on a tablet and that is my source now for service work and ALL torque values. For this build back in 2012 I looked at Haynes only and used Chilton for its pictures or if I wanted clarity. But I used Haynes for torque values and mostly everything. I have since checked and compared Haynes and Chilton. Their torque values can vary by A LOT. We are talking in some cases one might say a few inch pounds and the other several foot pounds! Not only inconsistent, but potentially dangerously so. As I believe I would find out later, but that story is for another day.
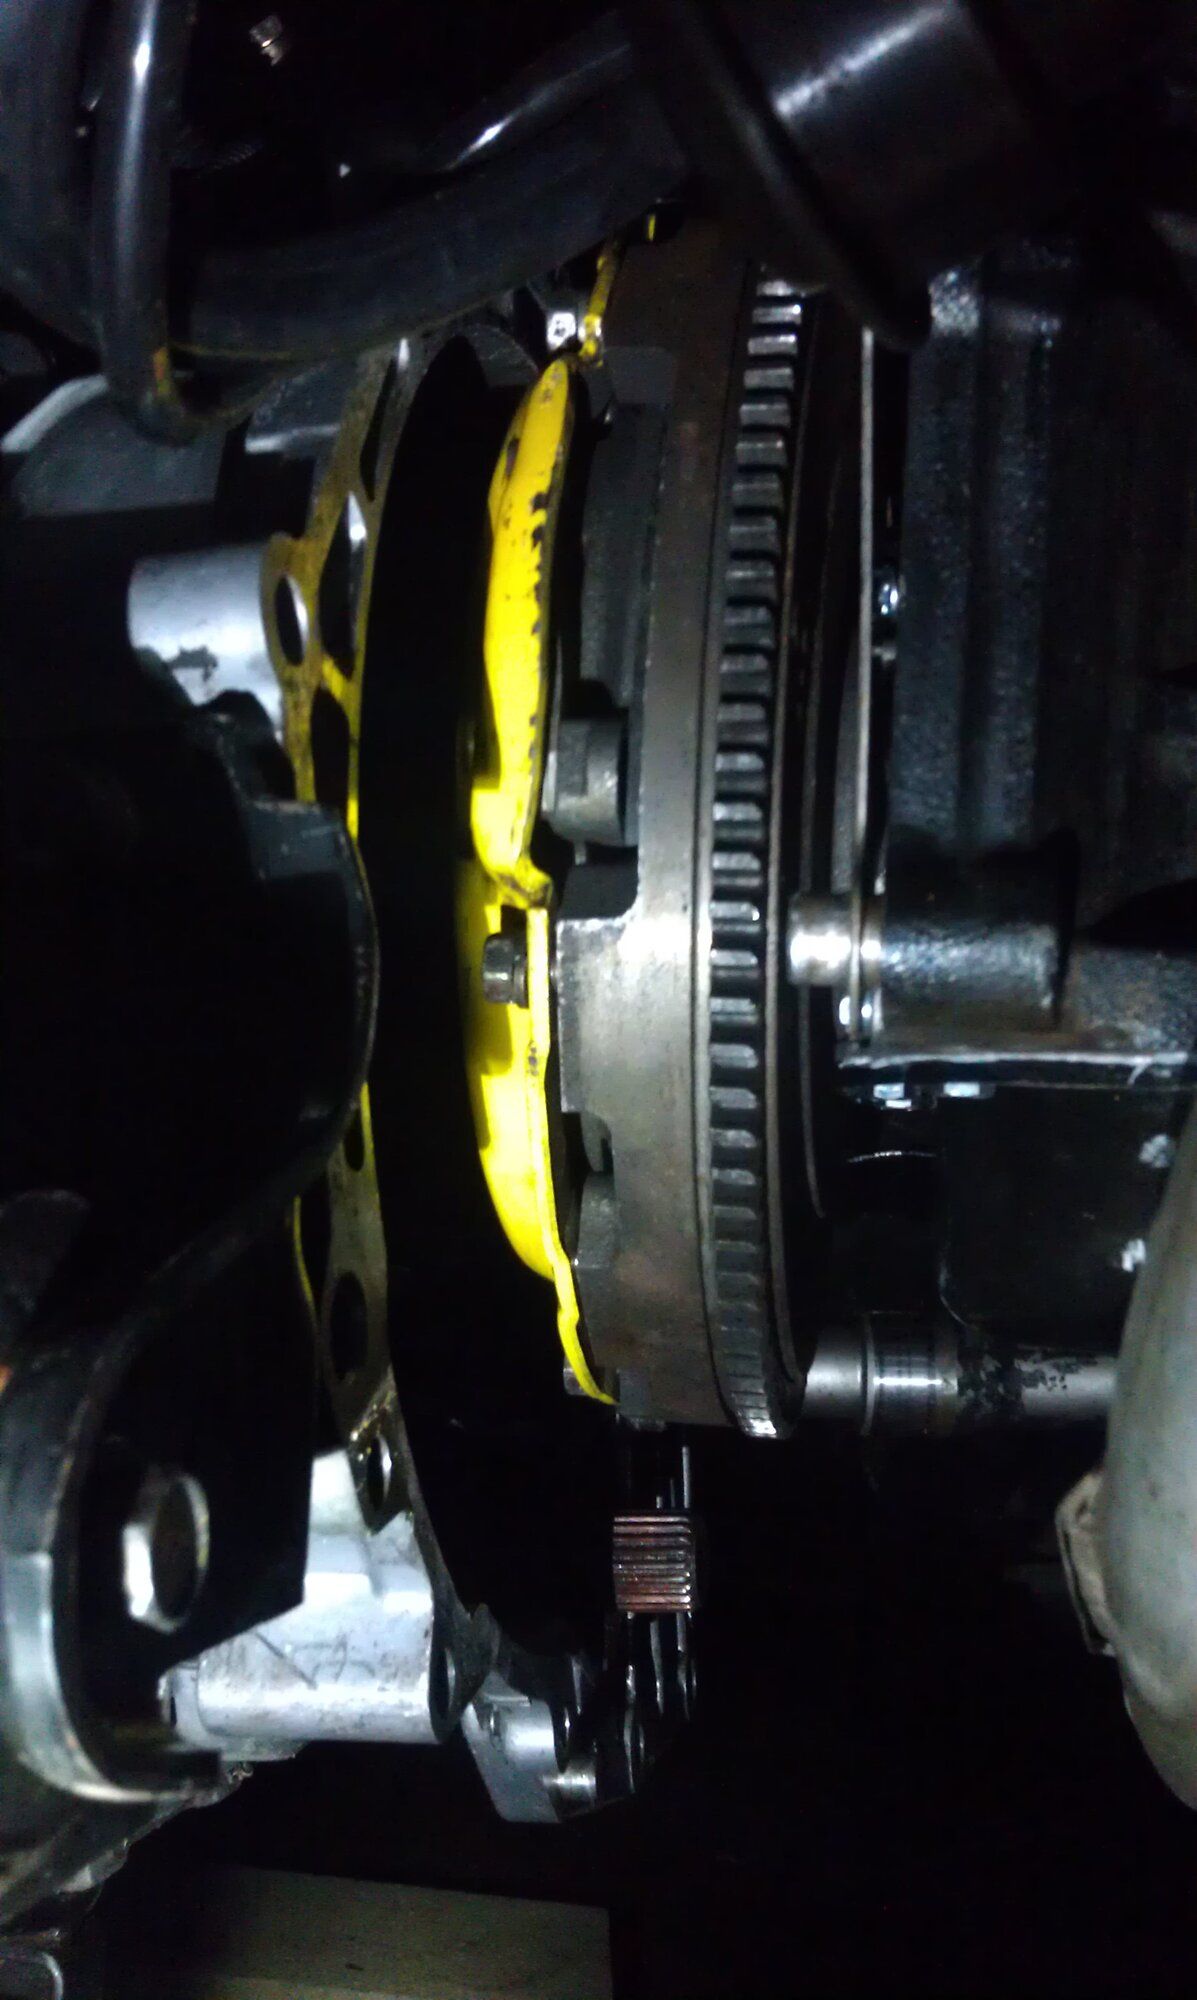
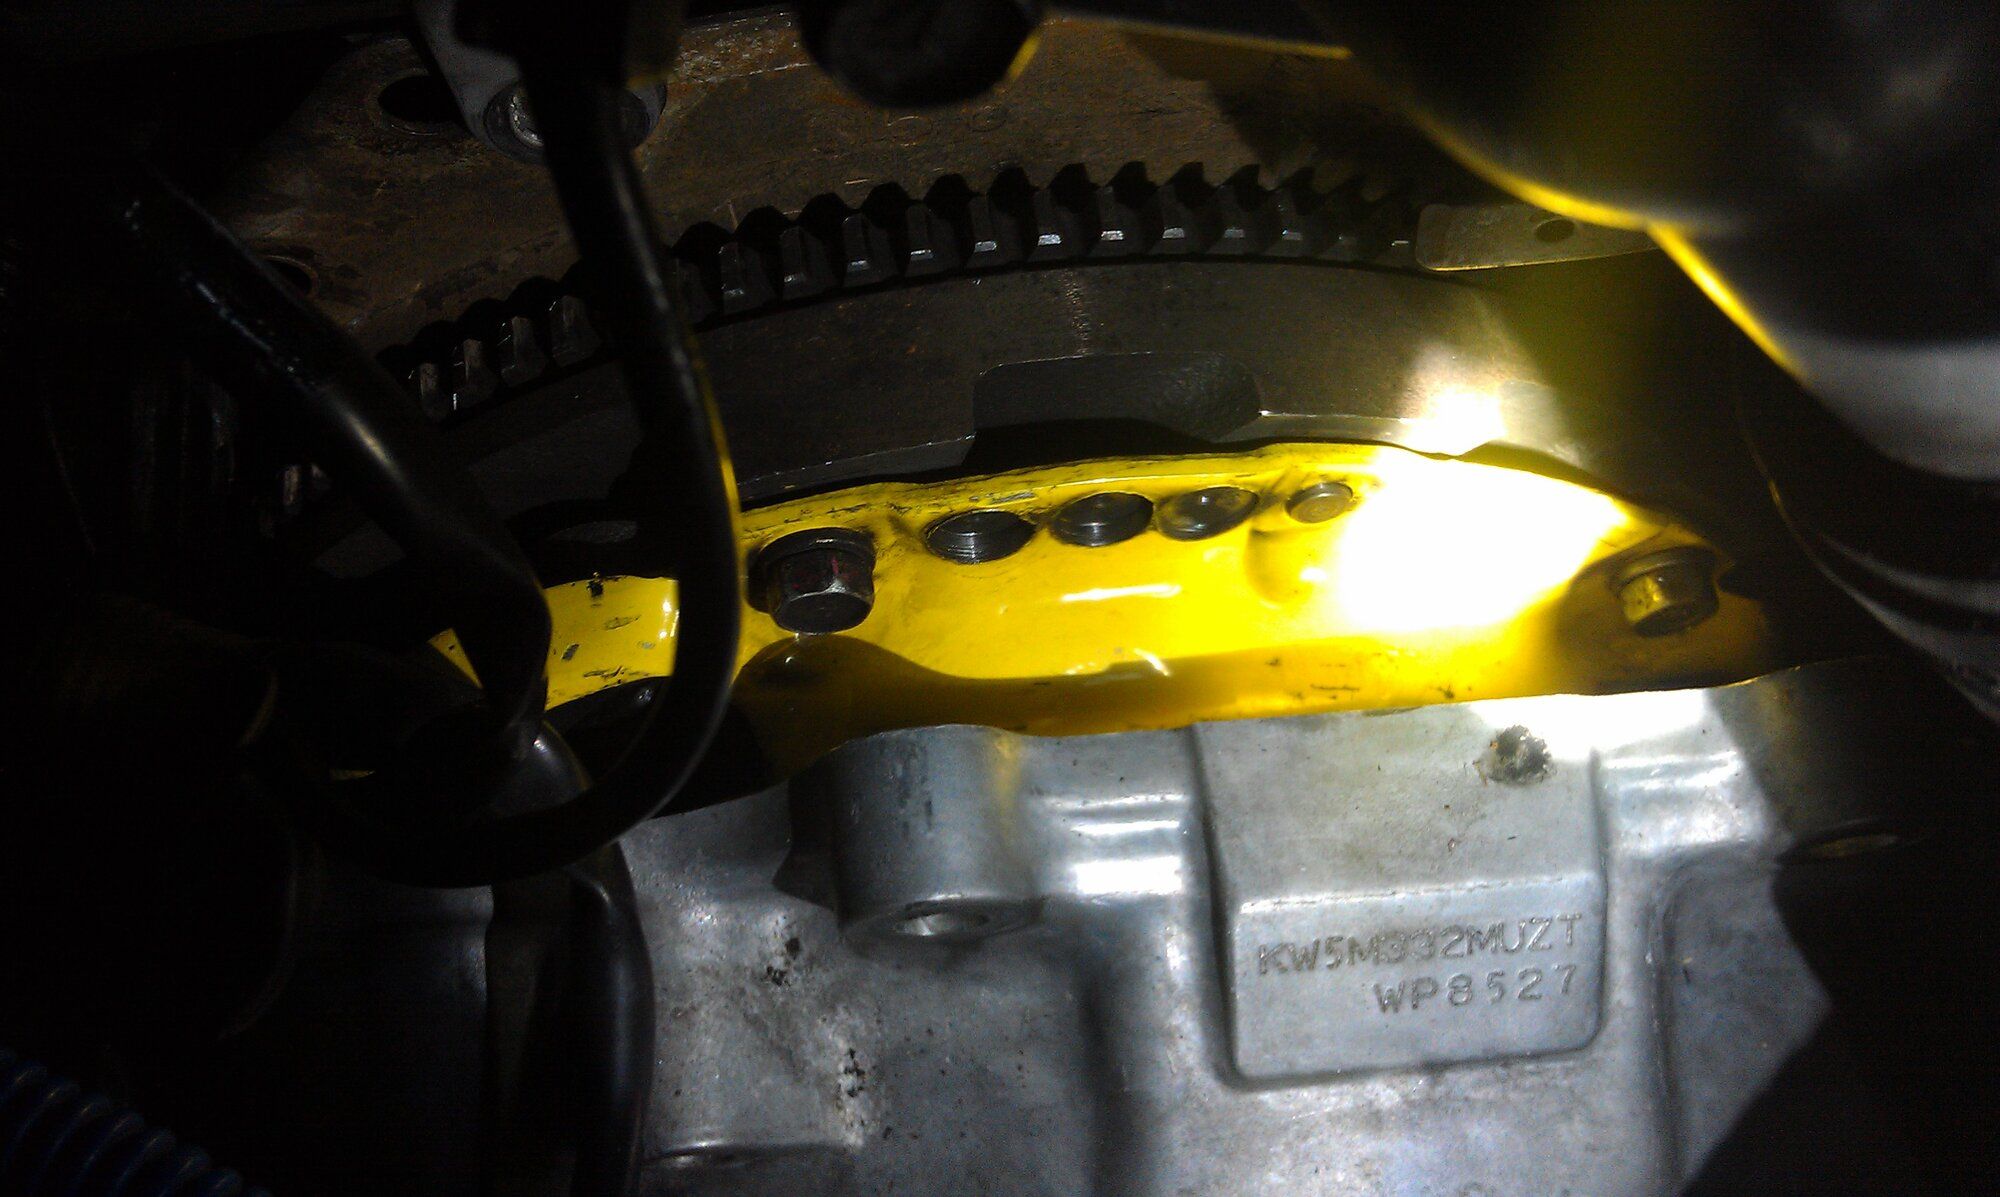
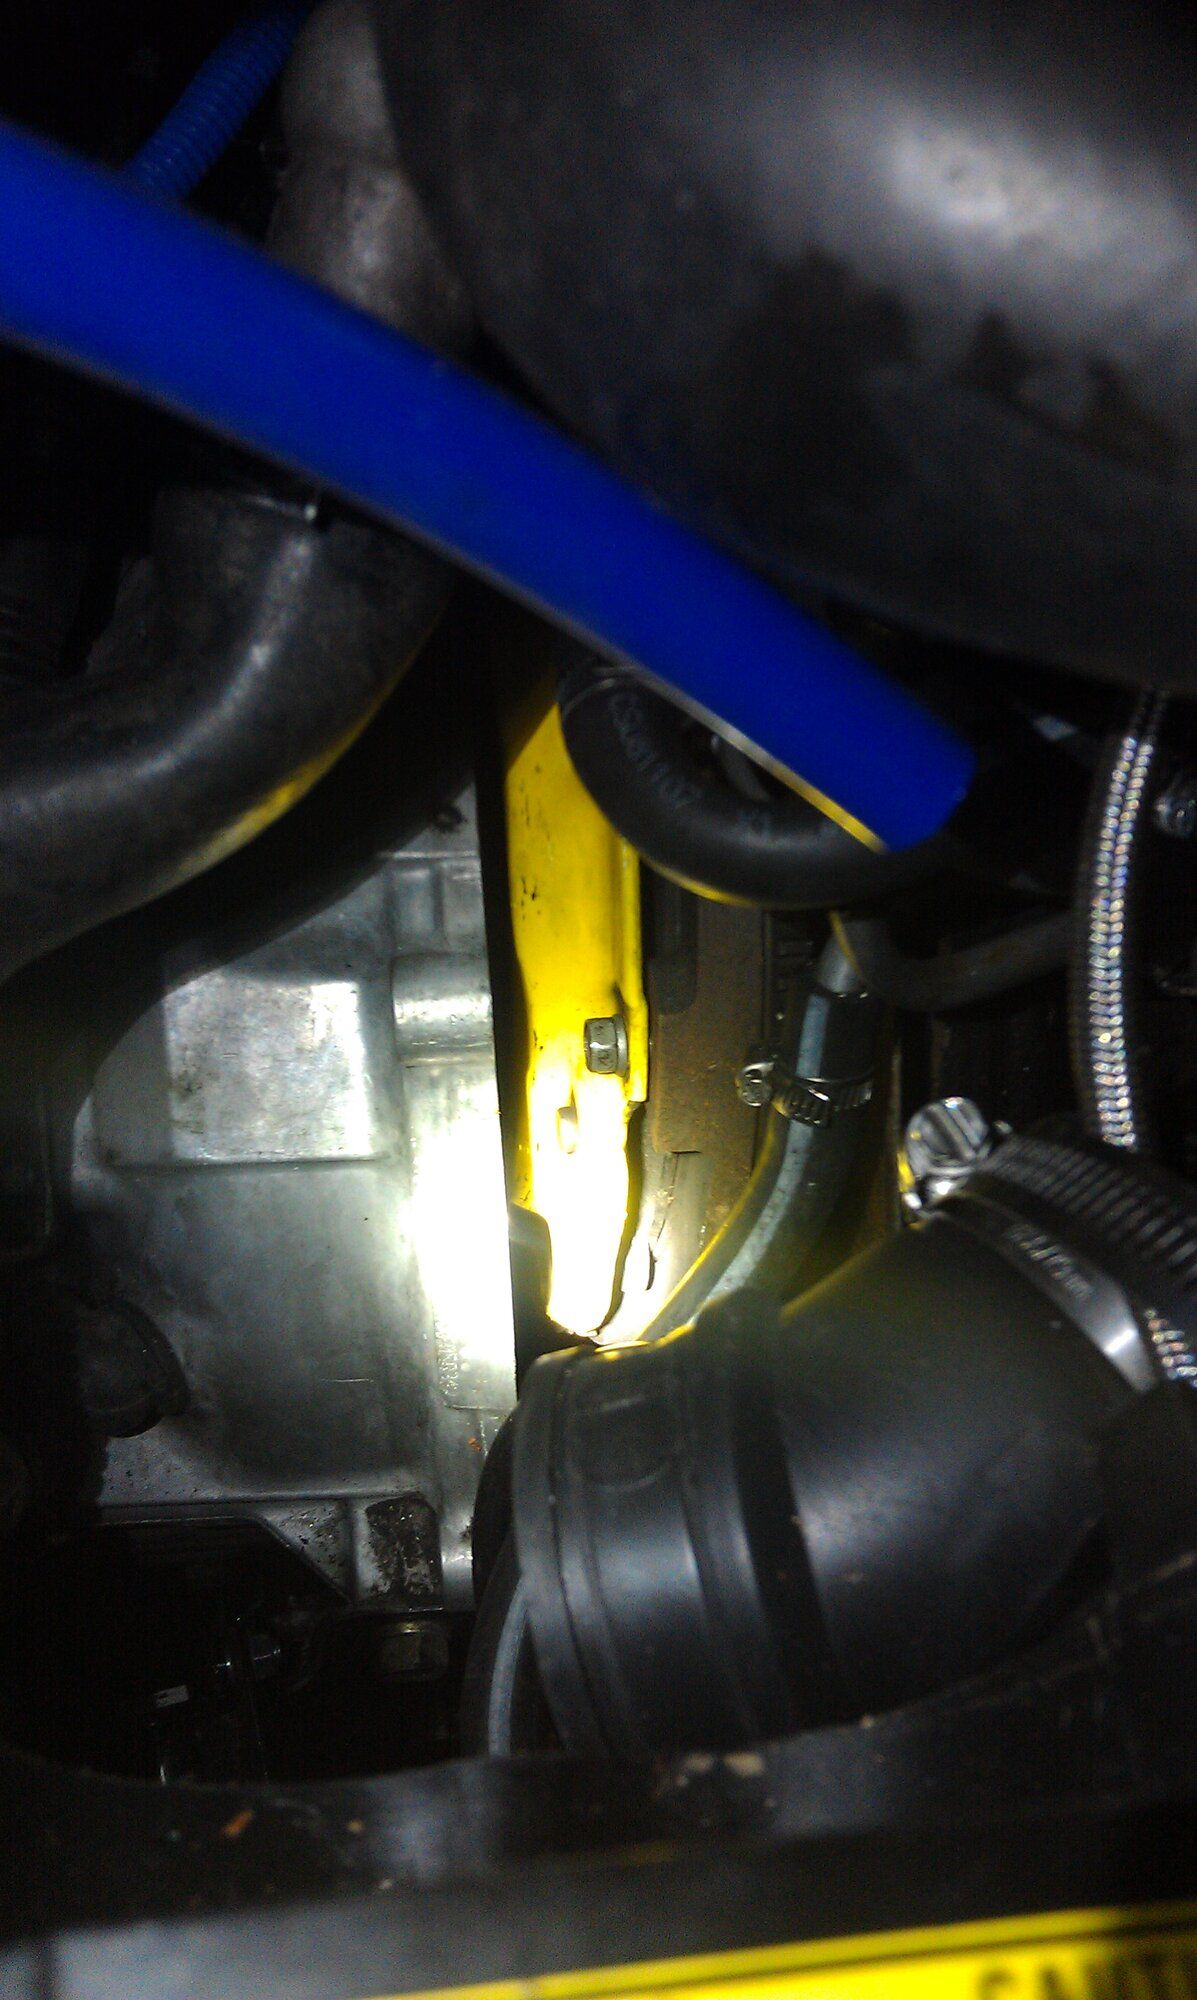
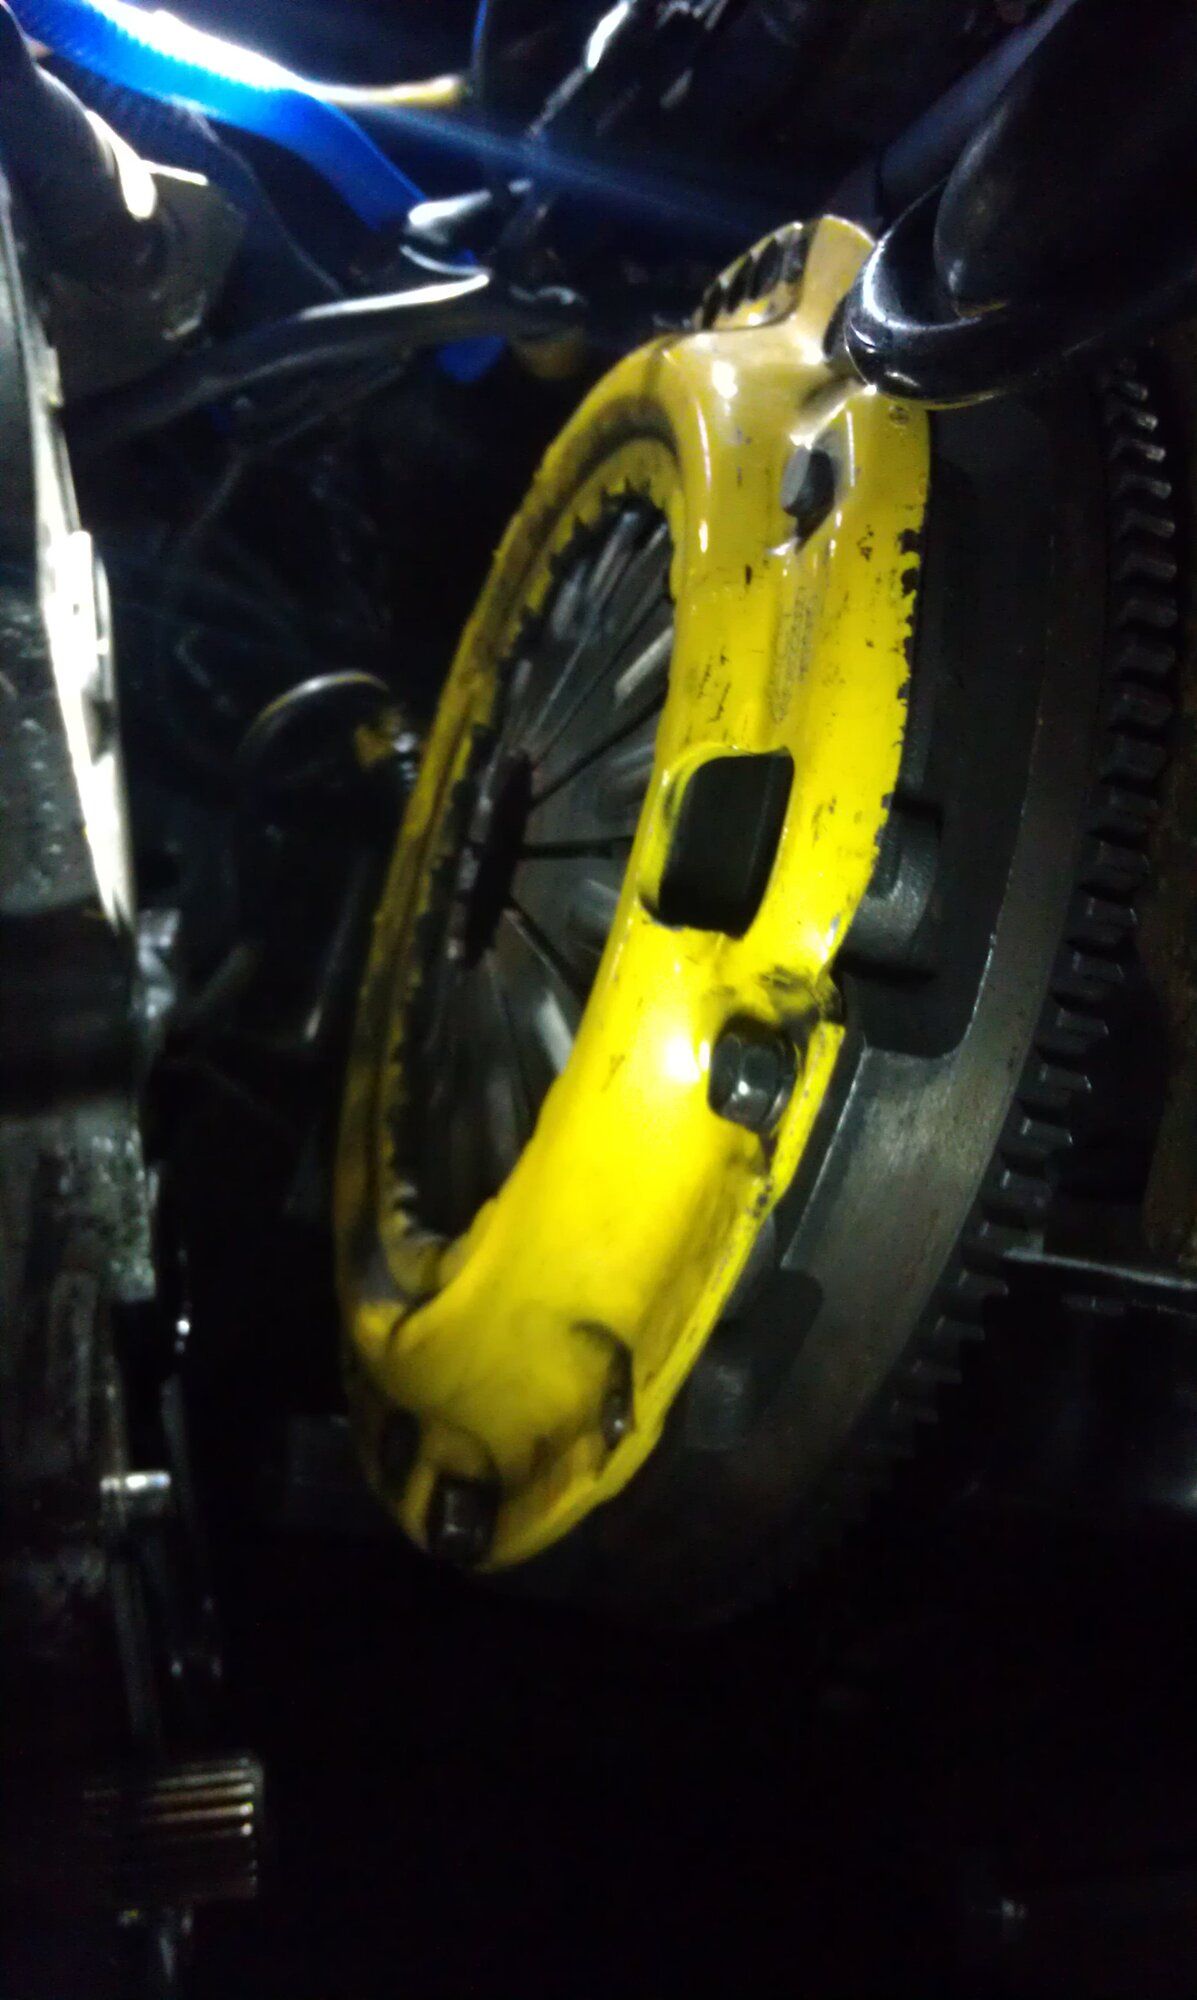
Throughout this build, there was only one issue I encountered (that prevented me from driving the car): According to both the Haynes and Chilton manuals, they say to tighten the bolts for the pressure plate to the flywheel FINGER TIGHT. Now, I'm a stickler for following directions, especially when I have never done something. So I will take my time and those directions will be followed to a tee! (I just went out to look for those manuals to check this but I can't find them so if I did miss the torque spec. in there back then, feel free to point it out to me.) So, I got everything done, started up my car for the first time, let it warm up, no leaks, and went to put it into gear and it wouldn't go out of Neutral. If the car was off I could go through the gears fine.
I dropped the transmission, checked everything as best I could. Thanks to a forum post I made: Clutch Disk Backward, transmission drop? (The title was in reference to what someone said I might have done) and after inspection I thought it was the clip for the TOB since everything else looked correct. So I bolted it back up, connected everything again, start engine, same problem.
I dropped the transmission again and couldn't figure out what was wrong so I ended up finally posting a question on the forum here: No Clutch Disengagement After Rebuild. Well, so to me, FINGER TIGHT means I hold the bolt in my fingers and tighten it with my hand as tight as possible. Well, when I did that, the pressure plate did not sit flush with the flywheel. People were kind enough to actually give me a torque spec. and that fixed it!
I will add that now I have the digital copies of all of the DSM factory service manuals. They can be found here on the forums under Articles: Manuals and Documents. I put them on a tablet and that is my source now for service work and ALL torque values. For this build back in 2012 I looked at Haynes only and used Chilton for its pictures or if I wanted clarity. But I used Haynes for torque values and mostly everything. I have since checked and compared Haynes and Chilton. Their torque values can vary by A LOT. We are talking in some cases one might say a few inch pounds and the other several foot pounds! Not only inconsistent, but potentially dangerously so. As I believe I would find out later, but that story is for another day.
Last edited:
- Thread starter
- #18
jukematt
15+ Year Contributor
- 291
- 40
- Jun 13, 2009
-
Portland Metro,
Oregon
I would also like to talk about the break-in procedure. I spoke with my contacts, checked the forums, searched all over online, etc. I could not find a consistent procedure for this engine, but one thing everyone seemed to agree on is that you have to follow the correct procedure to properly seat the piston rings.
I settled on one I found here on the forum which it seemed that a lot of people agreed was correct and had followed. It turns out it is NOT correct. It may work, but it may not seat the rings correctly. I couldn't find anything else so that's what I did:
This is the CORRECT way to break in the engine. There may be other ways that will work, and I get that things like priming could be done differently, but the actual driving style and overall Steps 4-9 make much more sense and this detailed write-up makes me confident I would be doing it right and the rings will seat correctly:
Based off of the old Forced Performance PDF, I plan to go with Amsoil Premium Protection 10W-30 on my latest engine build. I like Amsoil products. I was going to go with 10W-40, but it can get below freezing here so I will probably do 10W-30, which is also the grade the technician Andrew at MAPerformance recommended who answered my questions).
I settled on one I found here on the forum which it seemed that a lot of people agreed was correct and had followed. It turns out it is NOT correct. It may work, but it may not seat the rings correctly. I couldn't find anything else so that's what I did:
- Use conventional oil (not synthetic) for first start.
- Prime the engine (for my build, I did this manually by removing the nipple on the back of the intake manifold and threading it into the oil filter housing and pumping oil until it came out the head, which was a method I also found on this forum).
- Let it warm up then go for a drive.
- During the drive, accelerate hard but not WOT, boost is fine if under 10-15 psi, but don't use the brake. Or in other words: hit the gas, boost, drive 60 mph+, then let the engine brake itself to slow down.
- Repeat several more times then change the oil and filter with conventional oil again.
- After a few hundred miles or so, WOT is fine and normal boost levels.
- Next oil change, go to synthetic.
This is the CORRECT way to break in the engine. There may be other ways that will work, and I get that things like priming could be done differently, but the actual driving style and overall Steps 4-9 make much more sense and this detailed write-up makes me confident I would be doing it right and the rings will seat correctly:
- Use Amsoil SAE 30 Break-In Oil (but conventional oil is also OK).
- Prime the engine by disconnecting the crankshaft position sensor (and also a good idea to remove the fuel pump fuse).
- Reconnect above items and start the engine. While warming up, monitor your oil pressure gauge and check for leaks.
- While just sitting in Neutral, vary the RPMs between 2000-3000 RPM for 20 minutes to check for leaks and allow the engine to have some run time without a load. This helps with proper ring sealing as well.
- Drive for 30-50 miles, keep the RPMs UNDER 3000 as much as possible and NO BOOSTING. Also during this time, accelerate to 45-60 mph when you can and allow the engine to brake itself until idle (don't stop or stall the engine).
- Change the oil and filter, again with Amsoil SAE 30 Break-In Oil if using that, or with conventional.
- For the next 500 miles, drive normally but still NO BOOSTING and stay out of high load situations. To me, since I have a 5-speed, 60 mph is nearing 3000 RPM so I will mostly stay off of freeways except for short runs.
- Change oil and filter and move to conventional oil if haven't yet. After 500 miles and the second oil change, you should be good for pulls/tuning as long as the tune is good.
- 1500 mile mark: change oil and filter, and switch to synthetic if desired.
Based off of the old Forced Performance PDF, I plan to go with Amsoil Premium Protection 10W-30 on my latest engine build. I like Amsoil products. I was going to go with 10W-40, but it can get below freezing here so I will probably do 10W-30, which is also the grade the technician Andrew at MAPerformance recommended who answered my questions).
Last edited:
- Thread starter
- #19
jukematt
15+ Year Contributor
- 291
- 40
- Jun 13, 2009
-
Portland Metro,
Oregon
By this time, I was at the end of Summer and needing to go back to school. It was down to the last weekend before starting the term on Monday. I did my initial drive in the break-in procedure, changed the oil and filter, and drove around a bit more. I discovered I was losing oil rather quickly, a little TOO quickly. I even saw the oil light after some driving around but shut it off immediately. I pulled the timing covers, added oil, and started her up. As soon as she warmed up, oil would start to seep out from behind one of the timing gears. I checked the torque value and it was correct, but each time I let her warm up, she would start to leak. By this time it was dark and getting pretty late on Sunday night. I was out of time.
I had to drive from Grants Pass, OR to Klamath Falls, OR: a two-hour drive. I picked up an extra 5-quart jug of conventional oil so I had two full ones and what was left of a third from the first oil and filter change. I also had about 3-4 quarts of Mobil 1 synthetic. I sat in my car and prayed hard to God. I jumped in the car and went to the gas station on my way out. I definitely didn't have enough gas for the drive. I was also dead broke. If I recall correctly I had a bout $6-7 in my bank account. I know it was under $10. But when you use a debit card, it only checks for at most $5. So I told the guy to fill it. I would get an overcharge from my bank but I needed the gas.
During the drive I stopped every few minutes to check the oil. I also would leave my car running when I did this because I was having an issue with the battery as well not holding a charge. I figured the long drive would hopefully charge it. I found that I literally had to stop about every 15-20 minutes and add more oil as it would be down to the lowest setting on the dipstick or barely touching it at all. At one point, I turned the car off without thinking, filled the oil, and she wouldn't start again. I was driving up a big hill. I have done a rolling start before without too much issue, but I have never done it in reverse. I tried a few times but failed. I tried calling the non-emergency police but they said they had pulled their last patrol car for the night. I just needed a jump. They tried to get me a tow truck but said they were tied up with some issue.
I got out my jumper cables and tried waving them at the few passing cars, but mind you this is in the middle of nowhere at night with trees all around and no street lights from what I recall. One person stopped, rolled their window down halfway and asked me what the problem was and I told them. They said "Yeah... we can't help you." I was like, "I just need a jump." And thinking to myself ("well, why did you stop then?"). They said they would drive up a little ways and maybe help if no one else comes. They pulled over a little ways ahead, waited a couple of minutes, then drove off.
Finally, a guy in a small SUV stopped and was super friendly. I of course also was on my guard since I felt pretty vulnerable out there by myself so I made sure I didn't turn my back to him or anything. But he was super nice and was like "yeah this has happened to me a few times." My car started right up from the jump, I thanked him, and we parted ways. I made sure to not shut my car off any more, and continued to fill oil every few minutes.
By the time I reached the top of the hill, I had gone through ALL of the conventional oil, so like 11 quarts or whatever. At the top of the hill, I had to put the synthetic oil in and used it all... I said another prayer and put her in Neutral and coasted at idle down the hill, figuring the low RPM would help. It sure did! I had to use the gas very little and was maybe 25-30 minutes or something away from my destination. I made it with no oil light. Once at school I could walk or use my bike and could figure out my oil issue later.
As it turns out, there is a thick metal spacer behind one of the gears. I even had it in my left over parts zip-loc bag. Problem solved.
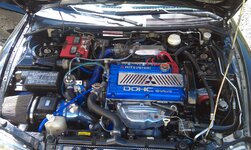
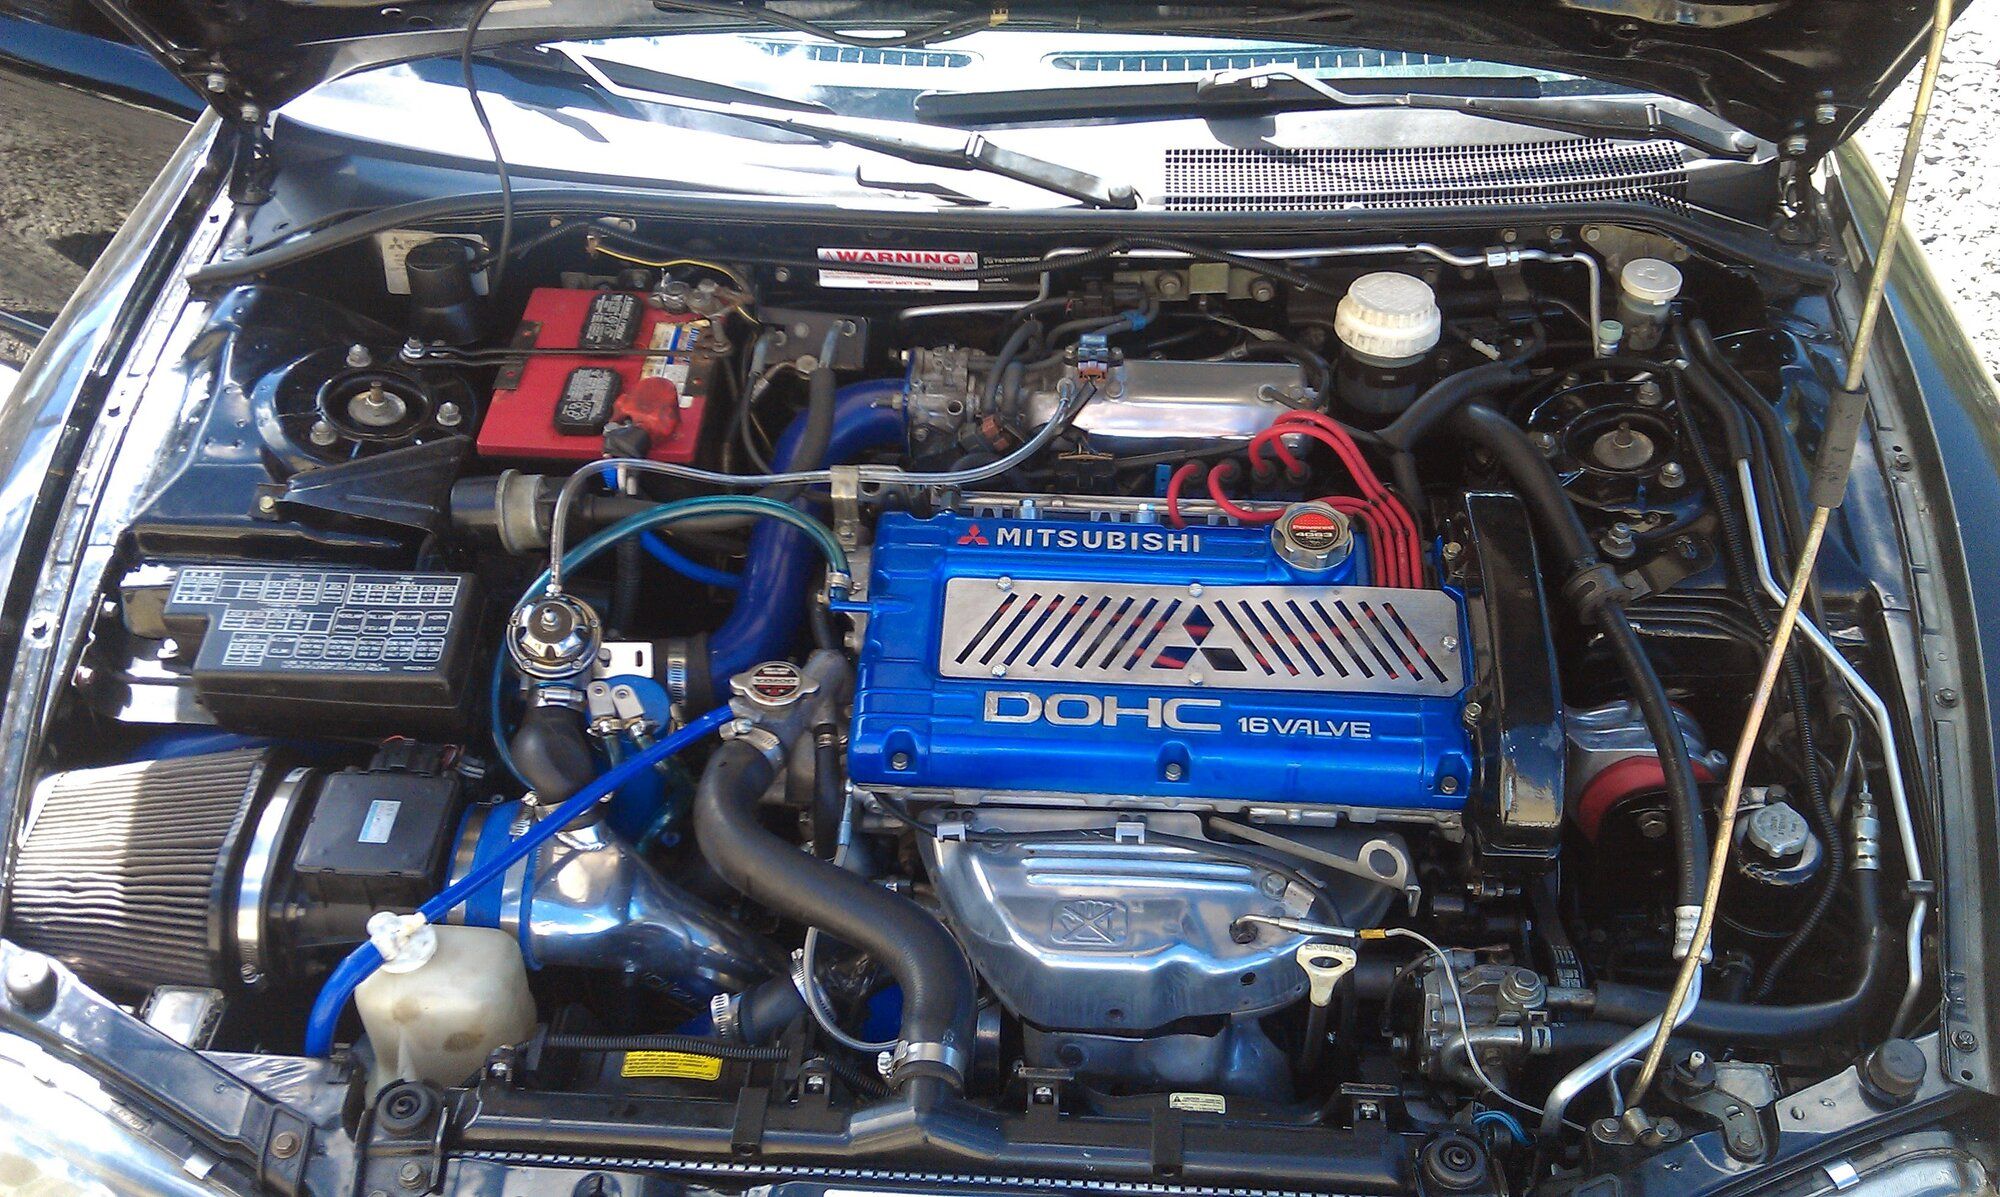
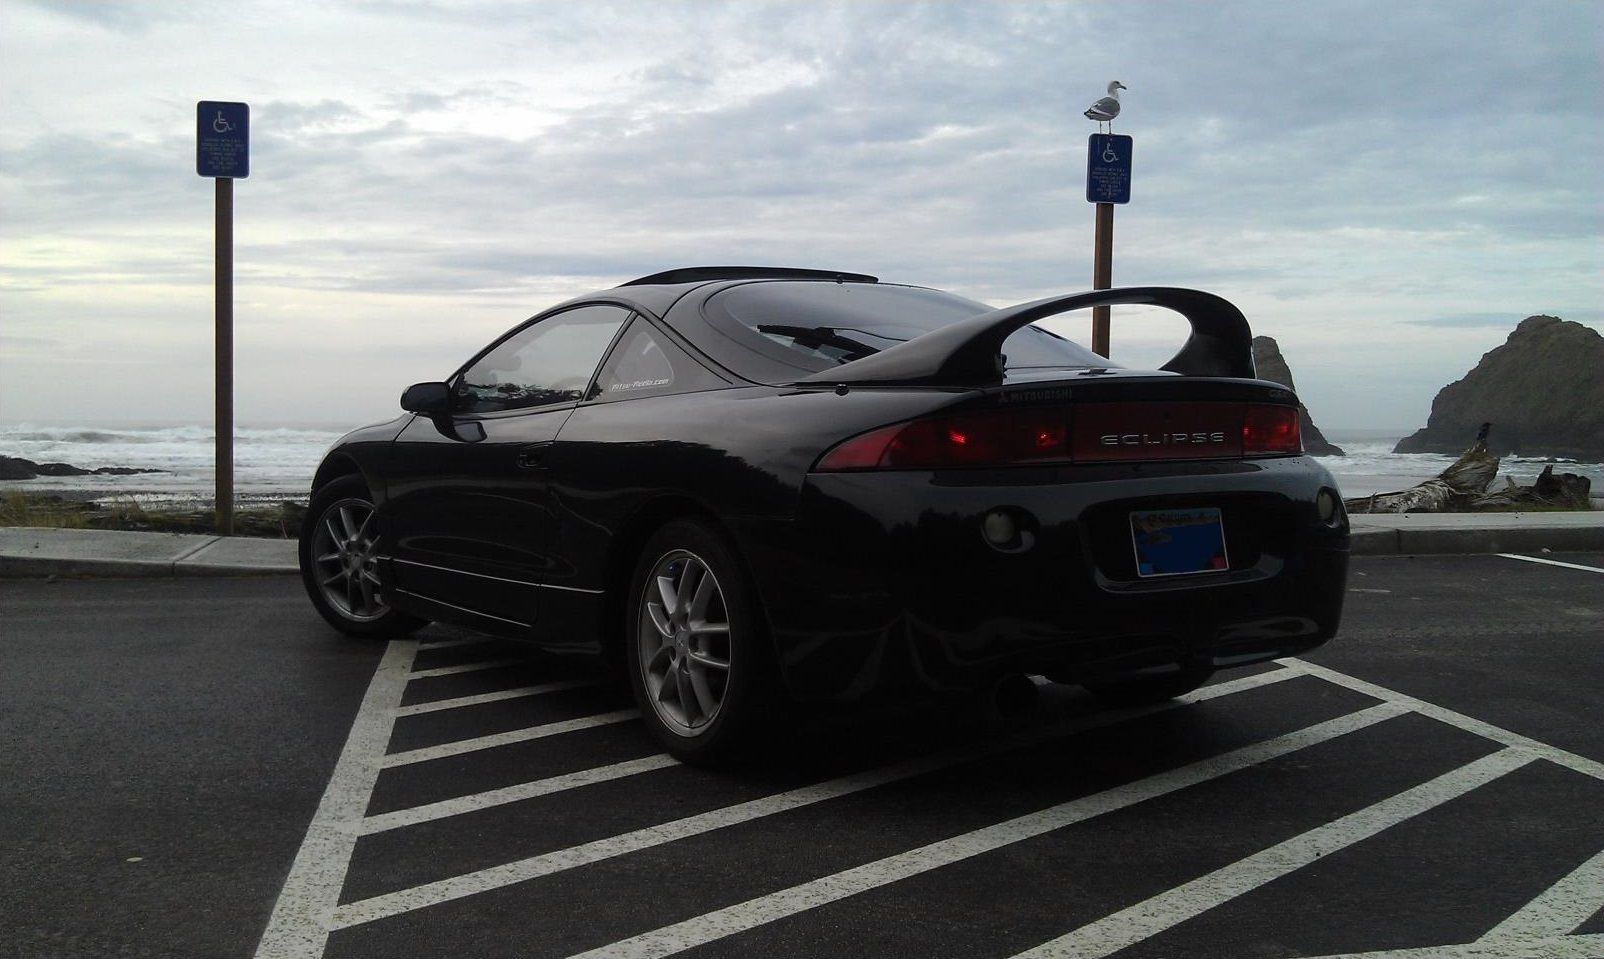
Oh and I forgot to include the engine pic. I had found a powder coated blue valve cover during the Summer here in the Classifieds. (This was before I realized I would have next to no money at the end of Summer.) Not only did the valve cover say MITSUBISHI, it also had the rare logo on it as well. And in a beautiful color! I use that valve cover today. It came with all polished lettering. I added the red paint on the logo. And look at the beautifully polished IM, intake, and valve cover. You may notice that I did a wire tuck as best I could where I put the harness essentially through the intake manifold. That spark plug cover I also found in the Classifieds. It's an old Mach V cover.
That red Duralast battery is the one I had bought back when I first purchased the car but after using it for a few years and then it sitting for eight months without charging, I guess it did itself in. I bought an oversize Duralast Gold after this and loved it for its higher cranking amps and CCA and it fit in that space without issue. For those curious, the AutoZone part number is 34-DLG. That is what I used and I would use it again. The only reason I show an Optima Yellow Top in my vehicle profile is because I forgot the part number for the Gold and they don't have a Gold that is listed as compatible for our cars. But then I realized that my AutoZone card has a forever list of everything I purchased that comes with a warranty. So I had them look it up and they told me what the part number was.
I had to drive from Grants Pass, OR to Klamath Falls, OR: a two-hour drive. I picked up an extra 5-quart jug of conventional oil so I had two full ones and what was left of a third from the first oil and filter change. I also had about 3-4 quarts of Mobil 1 synthetic. I sat in my car and prayed hard to God. I jumped in the car and went to the gas station on my way out. I definitely didn't have enough gas for the drive. I was also dead broke. If I recall correctly I had a bout $6-7 in my bank account. I know it was under $10. But when you use a debit card, it only checks for at most $5. So I told the guy to fill it. I would get an overcharge from my bank but I needed the gas.
During the drive I stopped every few minutes to check the oil. I also would leave my car running when I did this because I was having an issue with the battery as well not holding a charge. I figured the long drive would hopefully charge it. I found that I literally had to stop about every 15-20 minutes and add more oil as it would be down to the lowest setting on the dipstick or barely touching it at all. At one point, I turned the car off without thinking, filled the oil, and she wouldn't start again. I was driving up a big hill. I have done a rolling start before without too much issue, but I have never done it in reverse. I tried a few times but failed. I tried calling the non-emergency police but they said they had pulled their last patrol car for the night. I just needed a jump. They tried to get me a tow truck but said they were tied up with some issue.
I got out my jumper cables and tried waving them at the few passing cars, but mind you this is in the middle of nowhere at night with trees all around and no street lights from what I recall. One person stopped, rolled their window down halfway and asked me what the problem was and I told them. They said "Yeah... we can't help you." I was like, "I just need a jump." And thinking to myself ("well, why did you stop then?"). They said they would drive up a little ways and maybe help if no one else comes. They pulled over a little ways ahead, waited a couple of minutes, then drove off.
Finally, a guy in a small SUV stopped and was super friendly. I of course also was on my guard since I felt pretty vulnerable out there by myself so I made sure I didn't turn my back to him or anything. But he was super nice and was like "yeah this has happened to me a few times." My car started right up from the jump, I thanked him, and we parted ways. I made sure to not shut my car off any more, and continued to fill oil every few minutes.
By the time I reached the top of the hill, I had gone through ALL of the conventional oil, so like 11 quarts or whatever. At the top of the hill, I had to put the synthetic oil in and used it all... I said another prayer and put her in Neutral and coasted at idle down the hill, figuring the low RPM would help. It sure did! I had to use the gas very little and was maybe 25-30 minutes or something away from my destination. I made it with no oil light. Once at school I could walk or use my bike and could figure out my oil issue later.
As it turns out, there is a thick metal spacer behind one of the gears. I even had it in my left over parts zip-loc bag. Problem solved.
Oh and I forgot to include the engine pic. I had found a powder coated blue valve cover during the Summer here in the Classifieds. (This was before I realized I would have next to no money at the end of Summer.) Not only did the valve cover say MITSUBISHI, it also had the rare logo on it as well. And in a beautiful color! I use that valve cover today. It came with all polished lettering. I added the red paint on the logo. And look at the beautifully polished IM, intake, and valve cover. You may notice that I did a wire tuck as best I could where I put the harness essentially through the intake manifold. That spark plug cover I also found in the Classifieds. It's an old Mach V cover.
That red Duralast battery is the one I had bought back when I first purchased the car but after using it for a few years and then it sitting for eight months without charging, I guess it did itself in. I bought an oversize Duralast Gold after this and loved it for its higher cranking amps and CCA and it fit in that space without issue. For those curious, the AutoZone part number is 34-DLG. That is what I used and I would use it again. The only reason I show an Optima Yellow Top in my vehicle profile is because I forgot the part number for the Gold and they don't have a Gold that is listed as compatible for our cars. But then I realized that my AutoZone card has a forever list of everything I purchased that comes with a warranty. So I had them look it up and they told me what the part number was.
Last edited:
- Thread starter
- #20
jukematt
15+ Year Contributor
- 291
- 40
- Jun 13, 2009
-
Portland Metro,
Oregon
April, 2013: Power Steering Fluid Leak
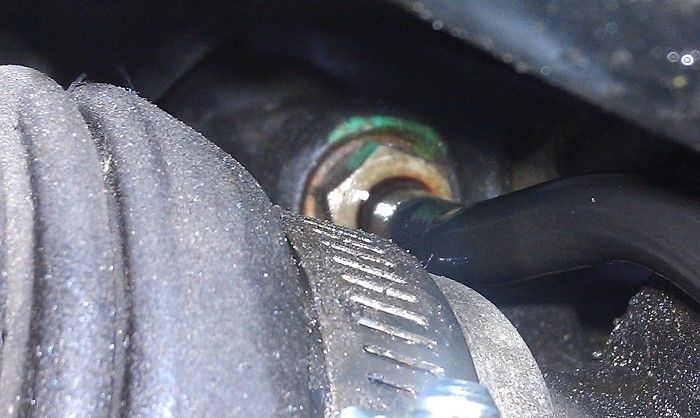
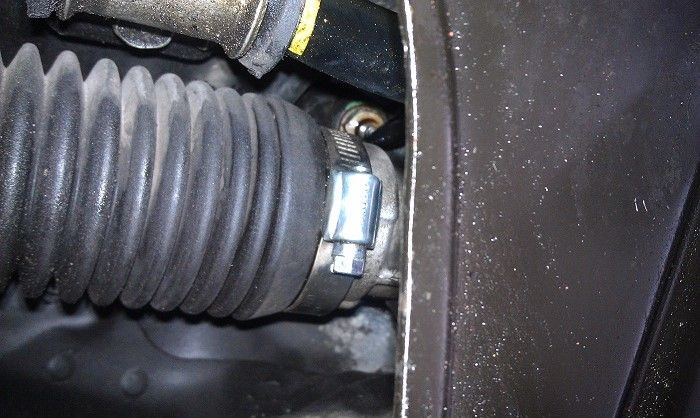
Up to this point, now that I had rebuilt an engine, I was thinking I had touched everything there is to touch related to the operation of the car. I was wrong. I had never touched the power steering rack. I noticed what sounded like a struggling motor whenever I turned the wheel and saw the fluid was low. I filled it but it happened again and saw it was low again. Apparently one of the hard lines was leaking. I disconnected it and there was a little o-ring in there. I took it to the auto parts store and they had a little mini brief case of different o-ring sizes. I picked out one that appeared to be close to what the original may have looked like when it was new. Replaced it and problem solved.
Up to this point, now that I had rebuilt an engine, I was thinking I had touched everything there is to touch related to the operation of the car. I was wrong. I had never touched the power steering rack. I noticed what sounded like a struggling motor whenever I turned the wheel and saw the fluid was low. I filled it but it happened again and saw it was low again. Apparently one of the hard lines was leaking. I disconnected it and there was a little o-ring in there. I took it to the auto parts store and they had a little mini brief case of different o-ring sizes. I picked out one that appeared to be close to what the original may have looked like when it was new. Replaced it and problem solved.
- Thread starter
- #21
jukematt
15+ Year Contributor
- 291
- 40
- Jun 13, 2009
-
Portland Metro,
Oregon
June, 2013: Project HID
Summer time again and one thing that really bothered me is that night driving was a real pain. I can't tell you how many times I checked my headlight switch to make sure that my headlights were actually on and not just my parking lights. Time to change that.
I did some research and found that HID and halogen are completely different technologies. You never want to run HIDs in halogen housings since it just scatters the light in all directions and not only do you blind drivers, but you also won't see the gains that you would with HID projectors. There are also halogen projectors but those are designed differently and also not intended to run HIDs. The spacing of the light to the step is also what gives you that rainbow color at the sharp edge of the cutoff.
I did not want to cut up my stock headlight housings so I bought a set of HID projector headlight housings off of eBay with my only intention of using the housing, not the projectors since I knew they would be horrible. I was right. Just for comparison, I ran them for a week or so until my new projectors came in. The design was terrible, the cutoff was blurred and not aligned properly, etc.
On The Retrofit Source forum, everyone was talking about how the TSX projectors are the best, but they are BIG. And I was not confident they would fit in our small headlight housings and still look good if even possible. So I picked up a set of FX-R Bi-Xenon retrofit projectors. They are based on an Infiniti FX35 SUV HID projector with some tweaks to make them more universal, better color in the cutoff, etc. For those still unfamiliar, HID projectors have a sharp cutoff. In terms of shear brightness, it is like having your brights on all the time, but the cutoff prevents the light from going too high to blind drivers. At the crest of a hill where someone below you is under the cutoff, they can still seem bright to them initially. Bi-Xenon has a tiny motor which when activated, removes the cutoff to act as your brights as well. So I can have my regular and brights in one. I followed a tutorial on HID Planet to set up the projectors to have adjustment once fully installed.
For me, I picked up a set of DDM Tuning HID ballasts and D2S bulbs (the ones supported by the FX-R projectors). They are VERY reasonably priced and a quality product from my experience. I also grabbed the wiring harness to get power from the battery rather than the harness as HIDs are known to pull a spike of power right when you flip the switch. I also picked up the harness that lets me still use the regular brights. So when my brights are on, both the Bi-Xenon will activate and the brights in the other reflector part of the housing.
First pic is seeing how the halo LEDs look. I had also done the wiring mod to enable the fog lights with parking lights. And since my front logo was missing, for a few months I was running that light-up logo.
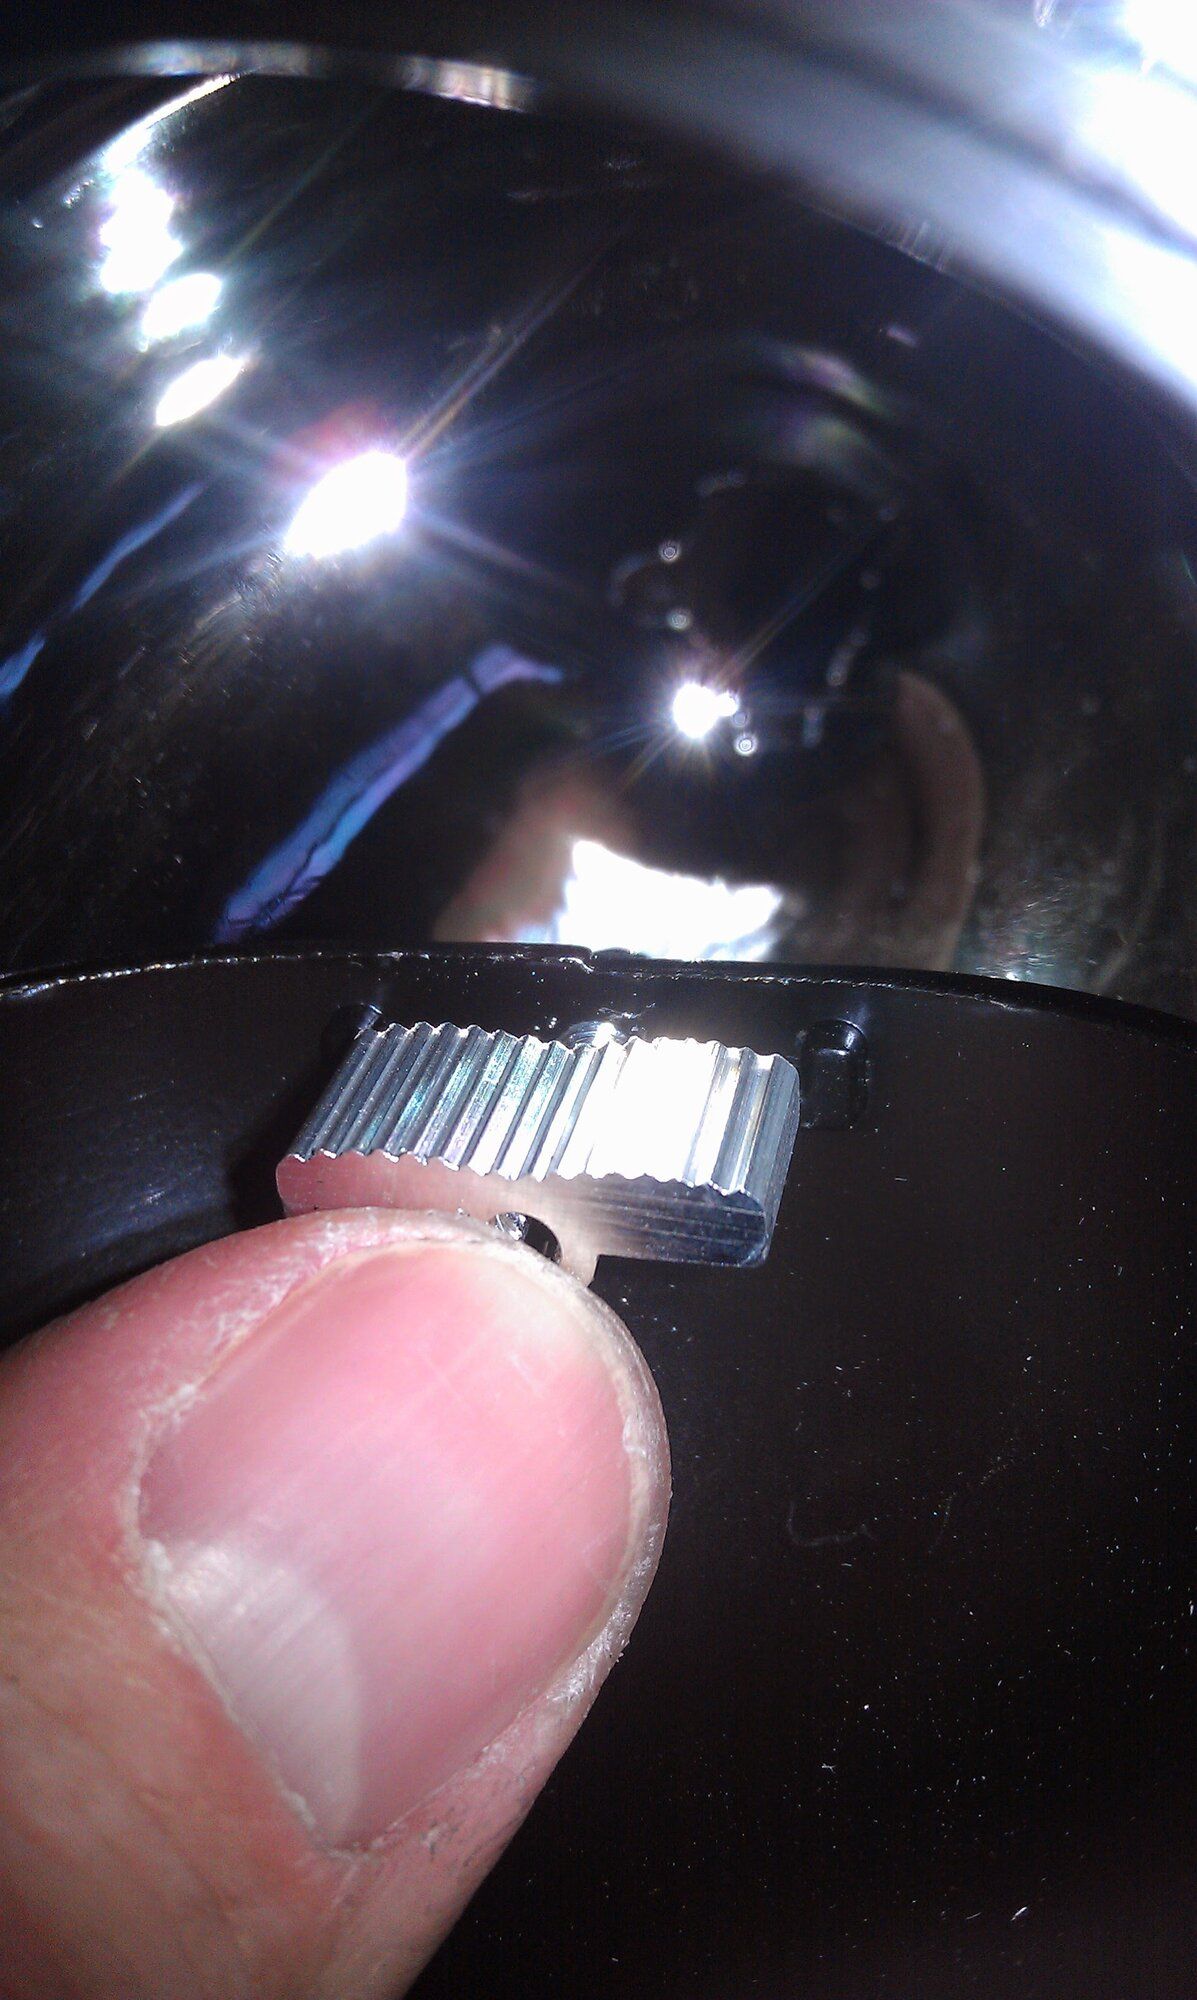
Second pic: eBay projectors. That little thing is called a Squirrel Finder. It reflects a small amount of light up so that when your low beams are on, you can still see above the cutoff. It is safer at night, but this is just a cheap little ribbed metal piece in the case of the eBay projectors that wasn't even mounted straight and worked horribly.

Summer time again and one thing that really bothered me is that night driving was a real pain. I can't tell you how many times I checked my headlight switch to make sure that my headlights were actually on and not just my parking lights. Time to change that.
I did some research and found that HID and halogen are completely different technologies. You never want to run HIDs in halogen housings since it just scatters the light in all directions and not only do you blind drivers, but you also won't see the gains that you would with HID projectors. There are also halogen projectors but those are designed differently and also not intended to run HIDs. The spacing of the light to the step is also what gives you that rainbow color at the sharp edge of the cutoff.
I did not want to cut up my stock headlight housings so I bought a set of HID projector headlight housings off of eBay with my only intention of using the housing, not the projectors since I knew they would be horrible. I was right. Just for comparison, I ran them for a week or so until my new projectors came in. The design was terrible, the cutoff was blurred and not aligned properly, etc.
On The Retrofit Source forum, everyone was talking about how the TSX projectors are the best, but they are BIG. And I was not confident they would fit in our small headlight housings and still look good if even possible. So I picked up a set of FX-R Bi-Xenon retrofit projectors. They are based on an Infiniti FX35 SUV HID projector with some tweaks to make them more universal, better color in the cutoff, etc. For those still unfamiliar, HID projectors have a sharp cutoff. In terms of shear brightness, it is like having your brights on all the time, but the cutoff prevents the light from going too high to blind drivers. At the crest of a hill where someone below you is under the cutoff, they can still seem bright to them initially. Bi-Xenon has a tiny motor which when activated, removes the cutoff to act as your brights as well. So I can have my regular and brights in one. I followed a tutorial on HID Planet to set up the projectors to have adjustment once fully installed.
For me, I picked up a set of DDM Tuning HID ballasts and D2S bulbs (the ones supported by the FX-R projectors). They are VERY reasonably priced and a quality product from my experience. I also grabbed the wiring harness to get power from the battery rather than the harness as HIDs are known to pull a spike of power right when you flip the switch. I also picked up the harness that lets me still use the regular brights. So when my brights are on, both the Bi-Xenon will activate and the brights in the other reflector part of the housing.
First pic is seeing how the halo LEDs look. I had also done the wiring mod to enable the fog lights with parking lights. And since my front logo was missing, for a few months I was running that light-up logo.
Second pic: eBay projectors. That little thing is called a Squirrel Finder. It reflects a small amount of light up so that when your low beams are on, you can still see above the cutoff. It is safer at night, but this is just a cheap little ribbed metal piece in the case of the eBay projectors that wasn't even mounted straight and worked horribly.
- Thread starter
- #22
jukematt
15+ Year Contributor
- 291
- 40
- Jun 13, 2009
-
Portland Metro,
Oregon
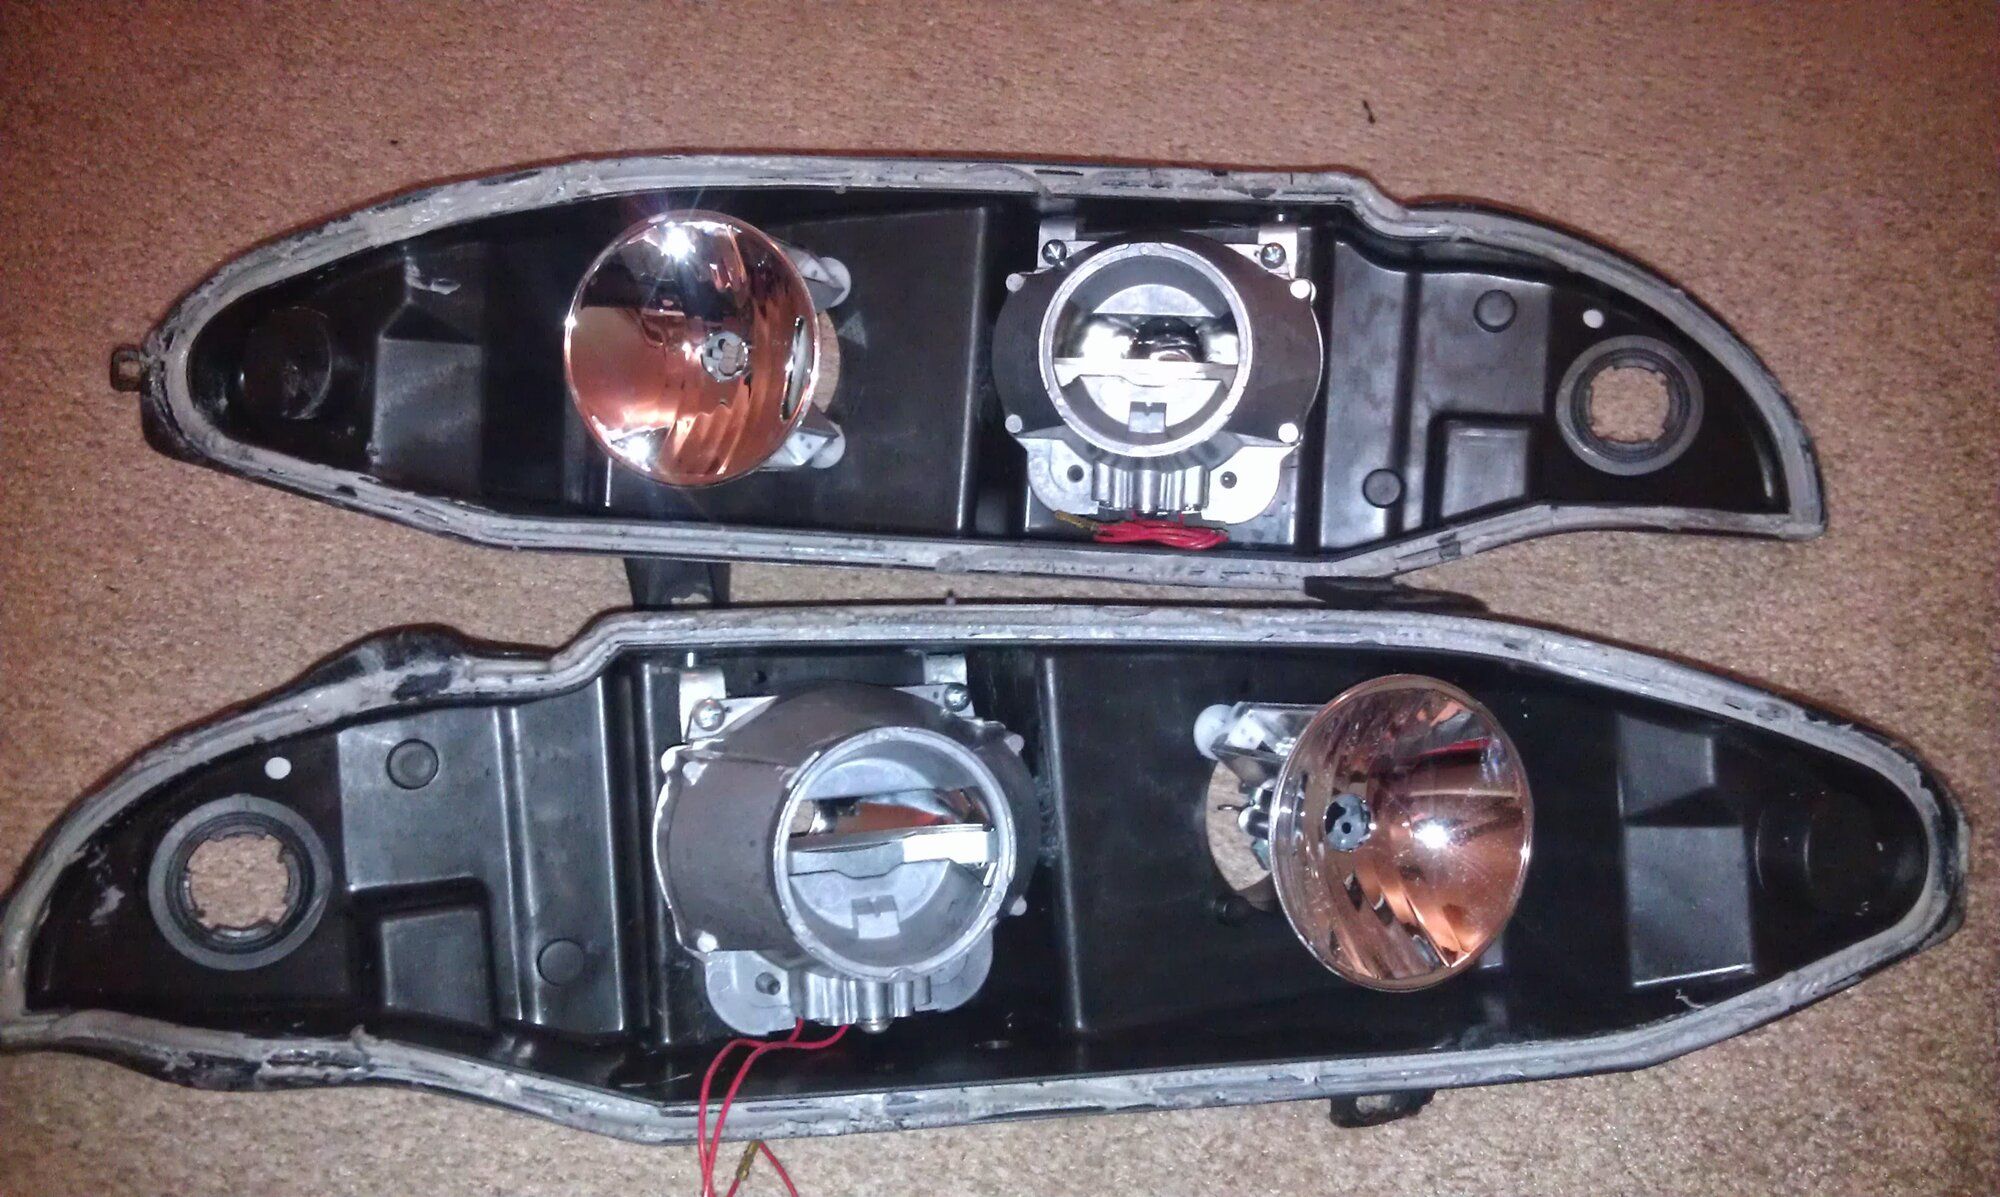
I bought a heat gun from Harbor Freight and used that to heat up the bonding butyl rubber to separate the housings. I've heard you can also put them in the oven but I was worried about smell and melting. Doing it with a heat gun, you have more control, but it takes a while and you have to be gentle separating the lens from the housing.
After separation, you can see the eBay projector and the reflector housing for the high beams. And the piece that was separated with the lens and beauty cover for lack of a better term.
Side-by-sides of of the eBay projector and the FX-R one. I can't remember if I got the 3" or 2.5" size.
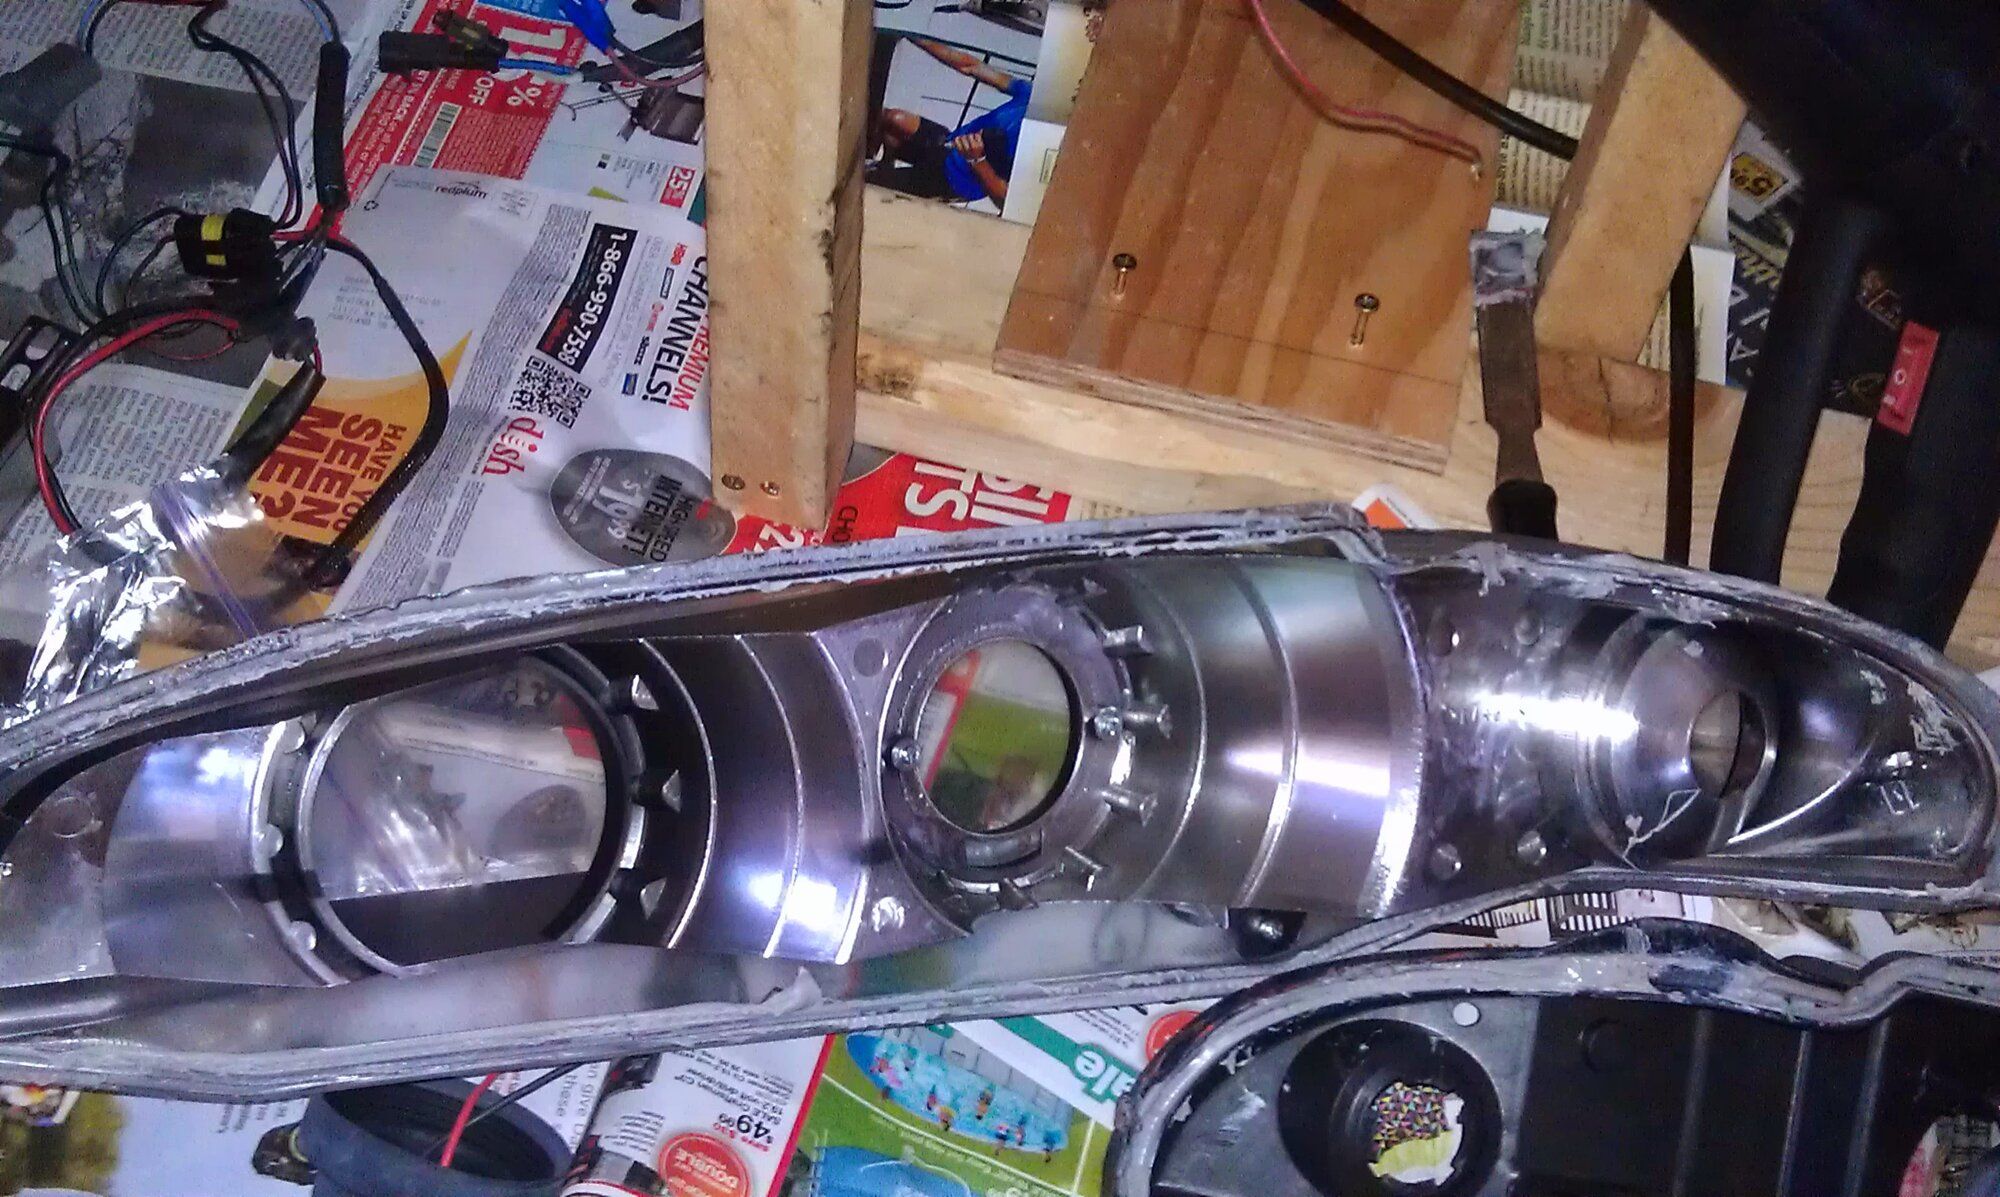
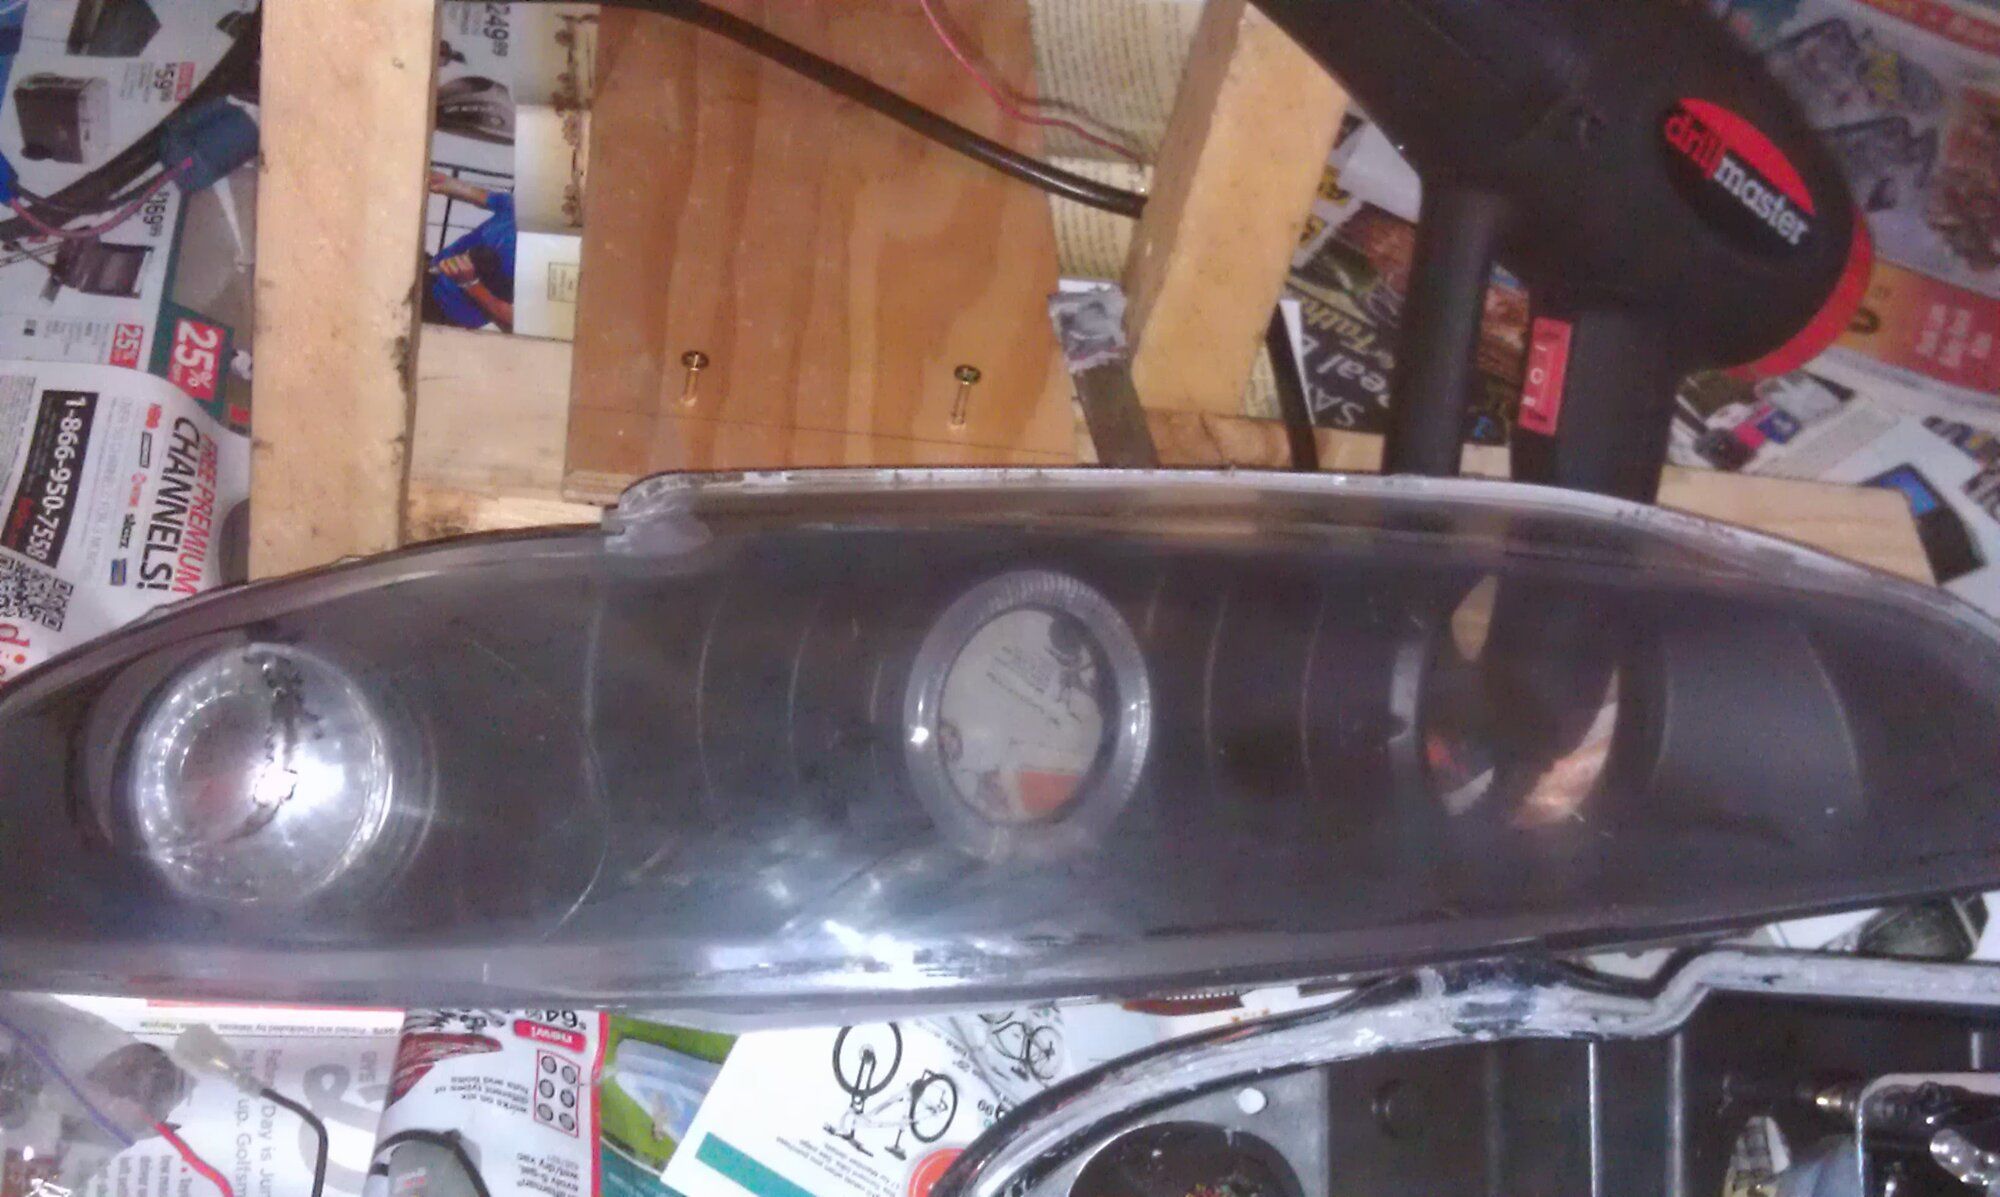
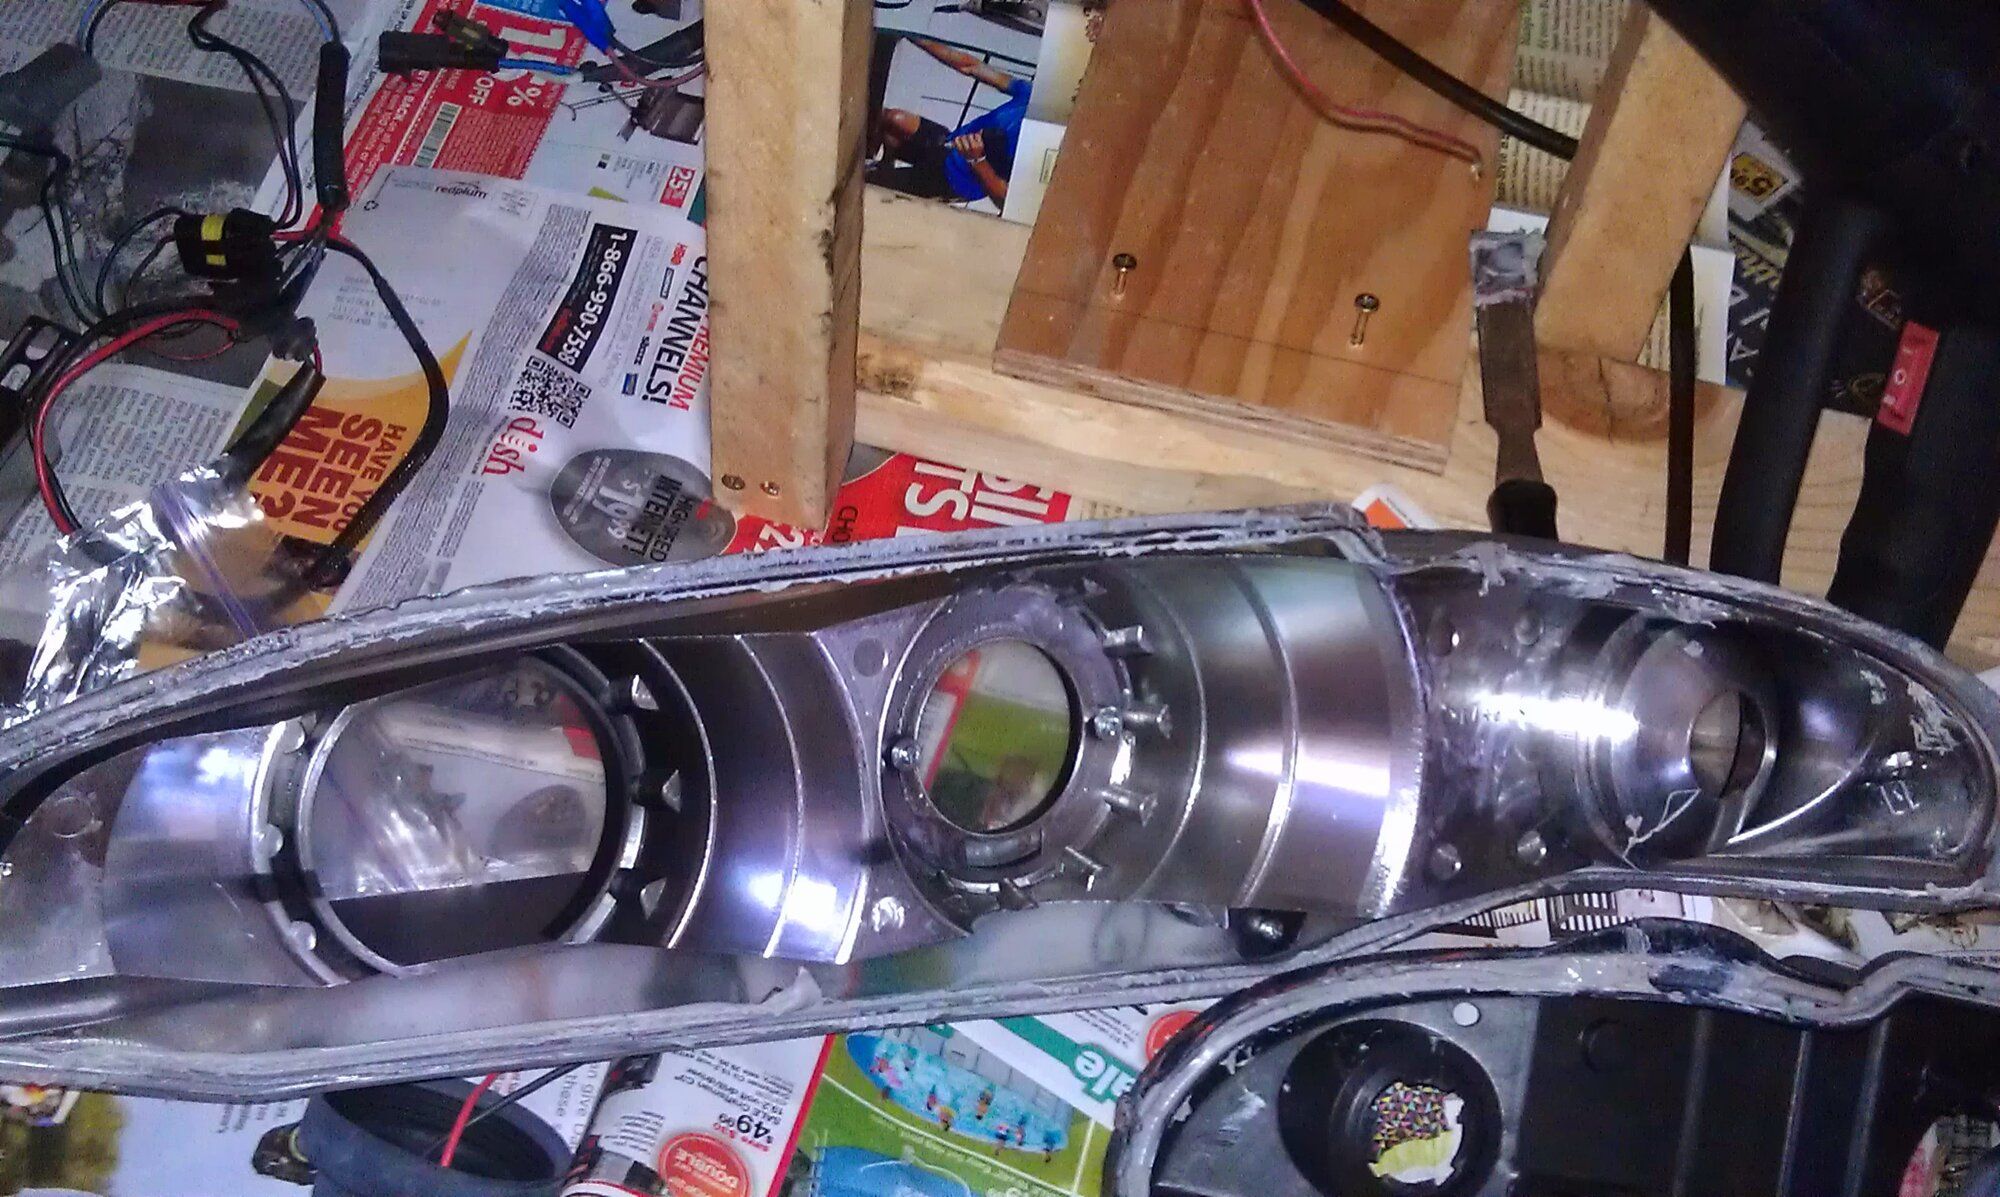
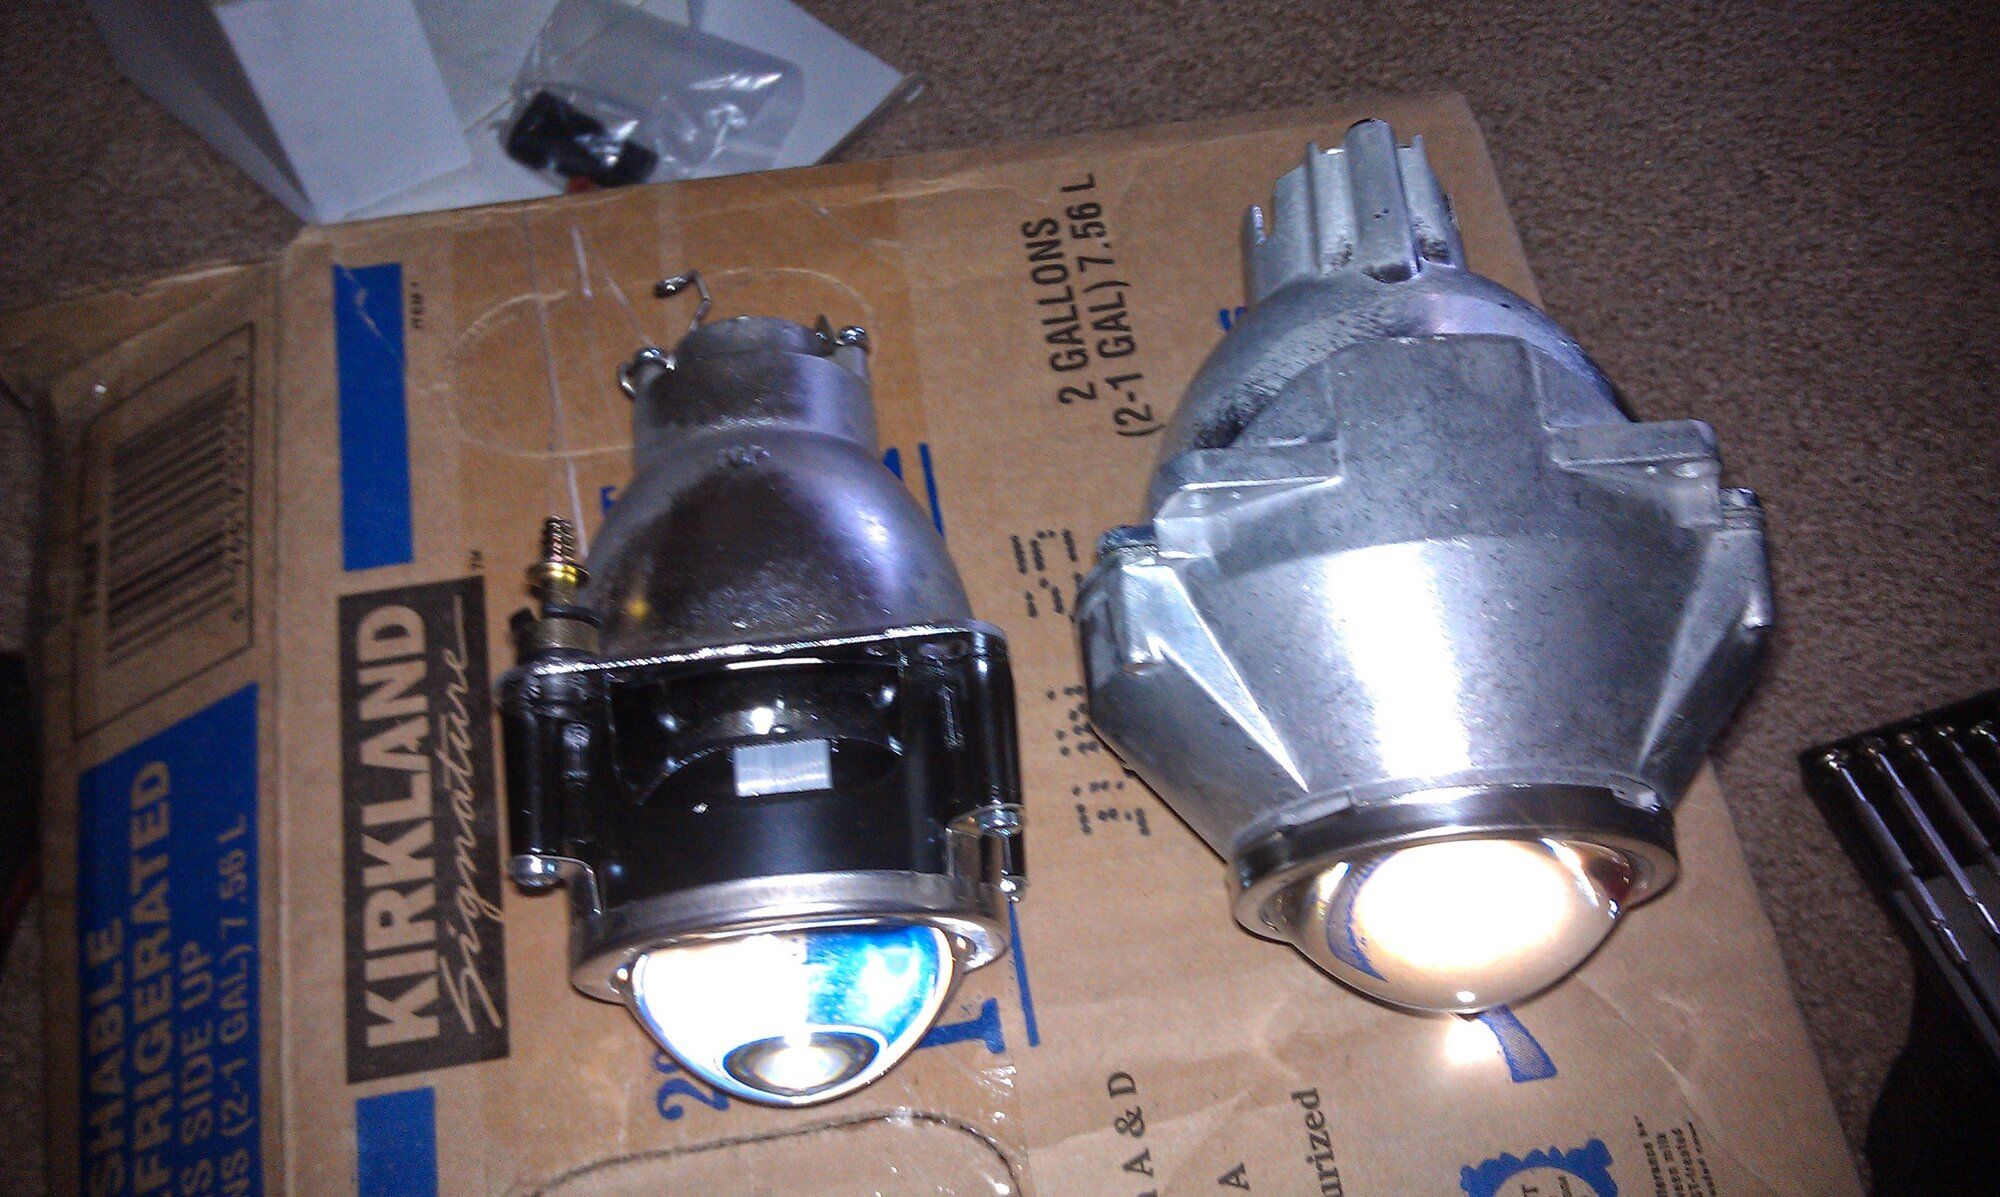
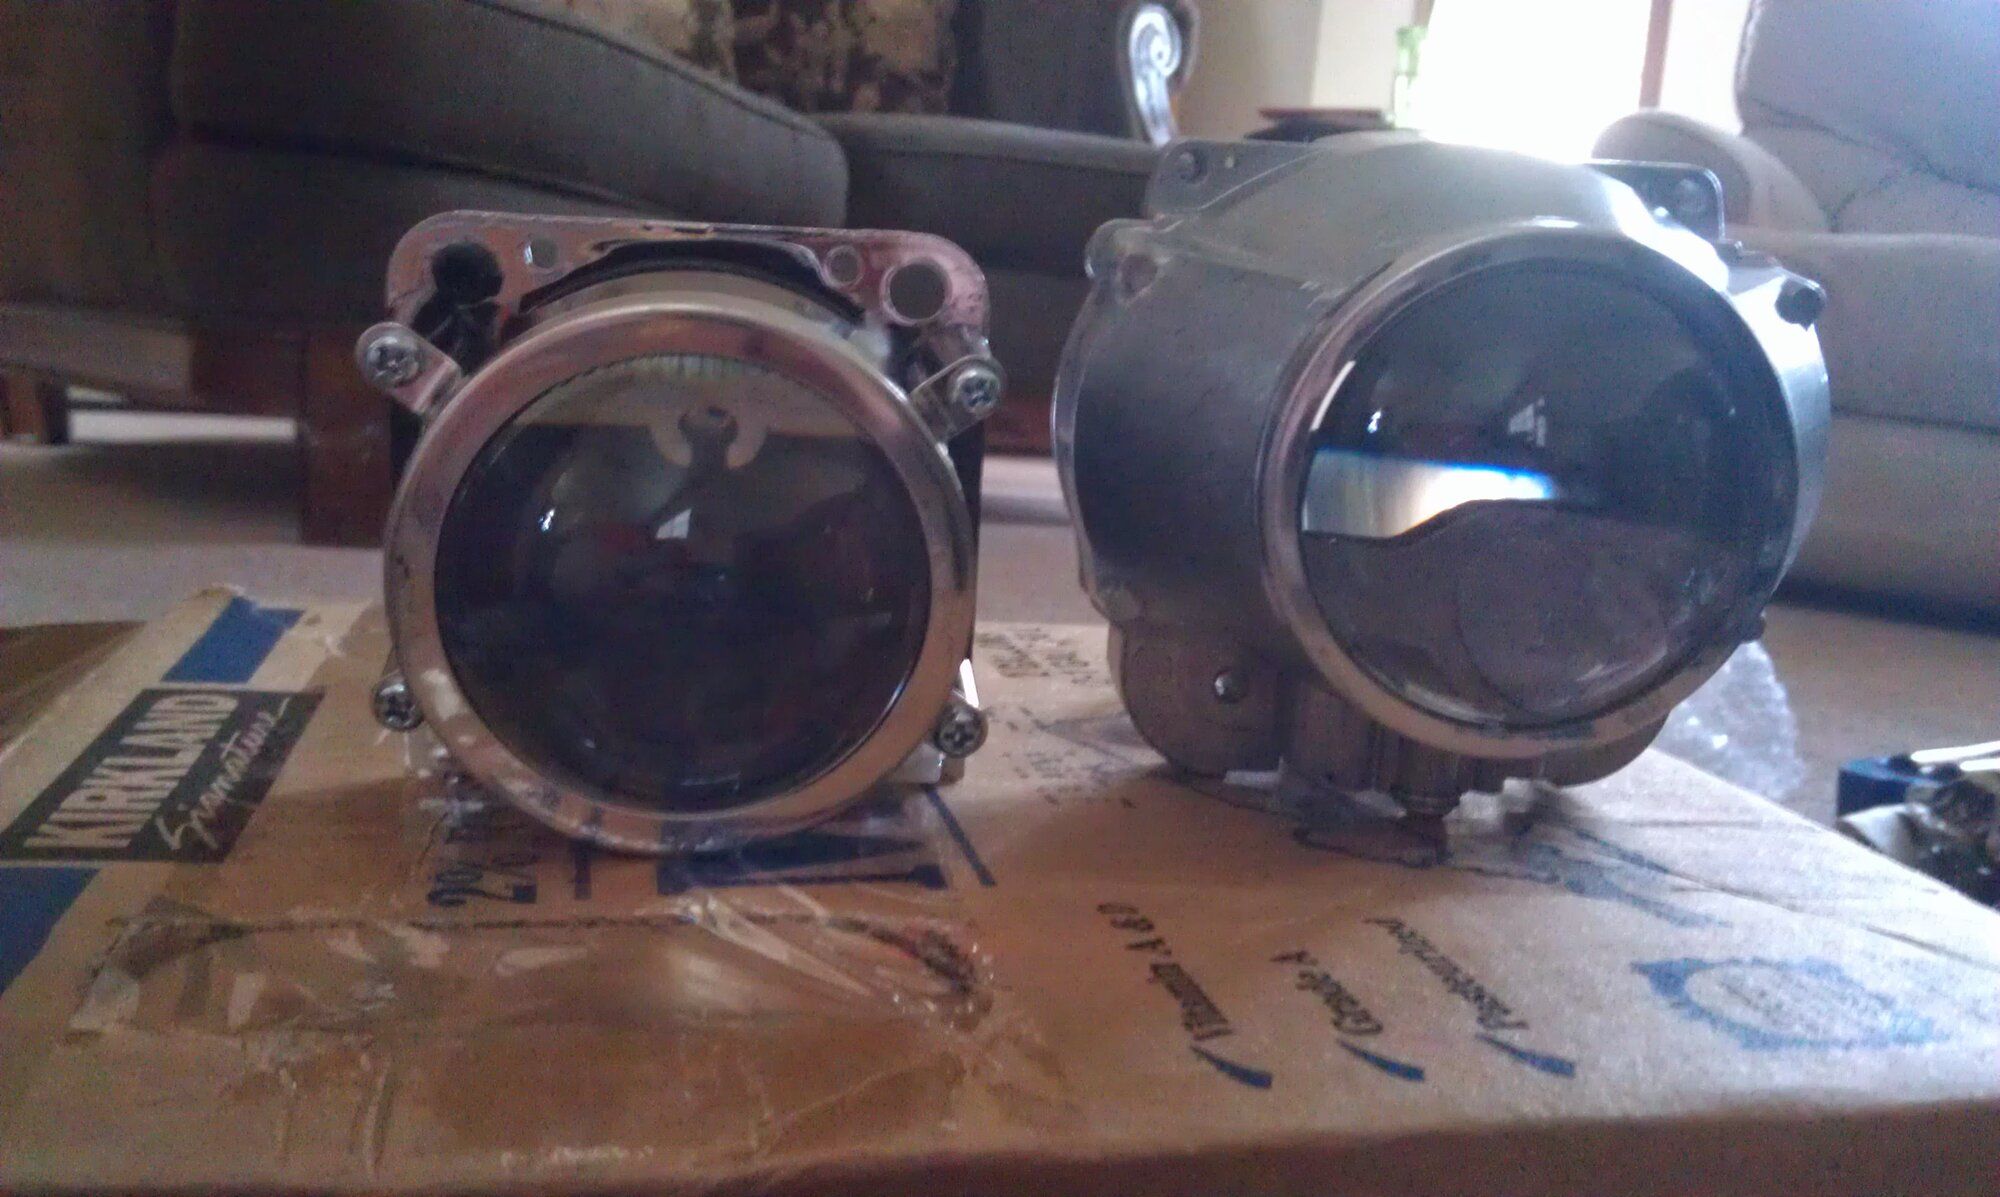
After separation, you can see the eBay projector and the reflector housing for the high beams. And the piece that was separated with the lens and beauty cover for lack of a better term.
Side-by-sides of of the eBay projector and the FX-R one. I can't remember if I got the 3" or 2.5" size.
- Thread starter
- #23
jukematt
15+ Year Contributor
- 291
- 40
- Jun 13, 2009
-
Portland Metro,
Oregon
The adjustment thread had me use three of those right angle brackets you can get from the hardware store. 1/8" thick, drilled out and tapped for 10-24 size screws. I drilled holes through the housing as needed and used rubber grommets to ensure the holes were sealed. I also had to trim a bit of the opening to accommodate the clip that holds the bulb in place.
In the third pic, the one screw poking through above the red wires is what is used for adjustment. Even though it is off to the side, it really only controls verticality. It doesn't really move it to the side or anything. The red wires are for the Bi-Xenon motor.
I tested the projectors in the living room to make sure they functioned and see how they look.
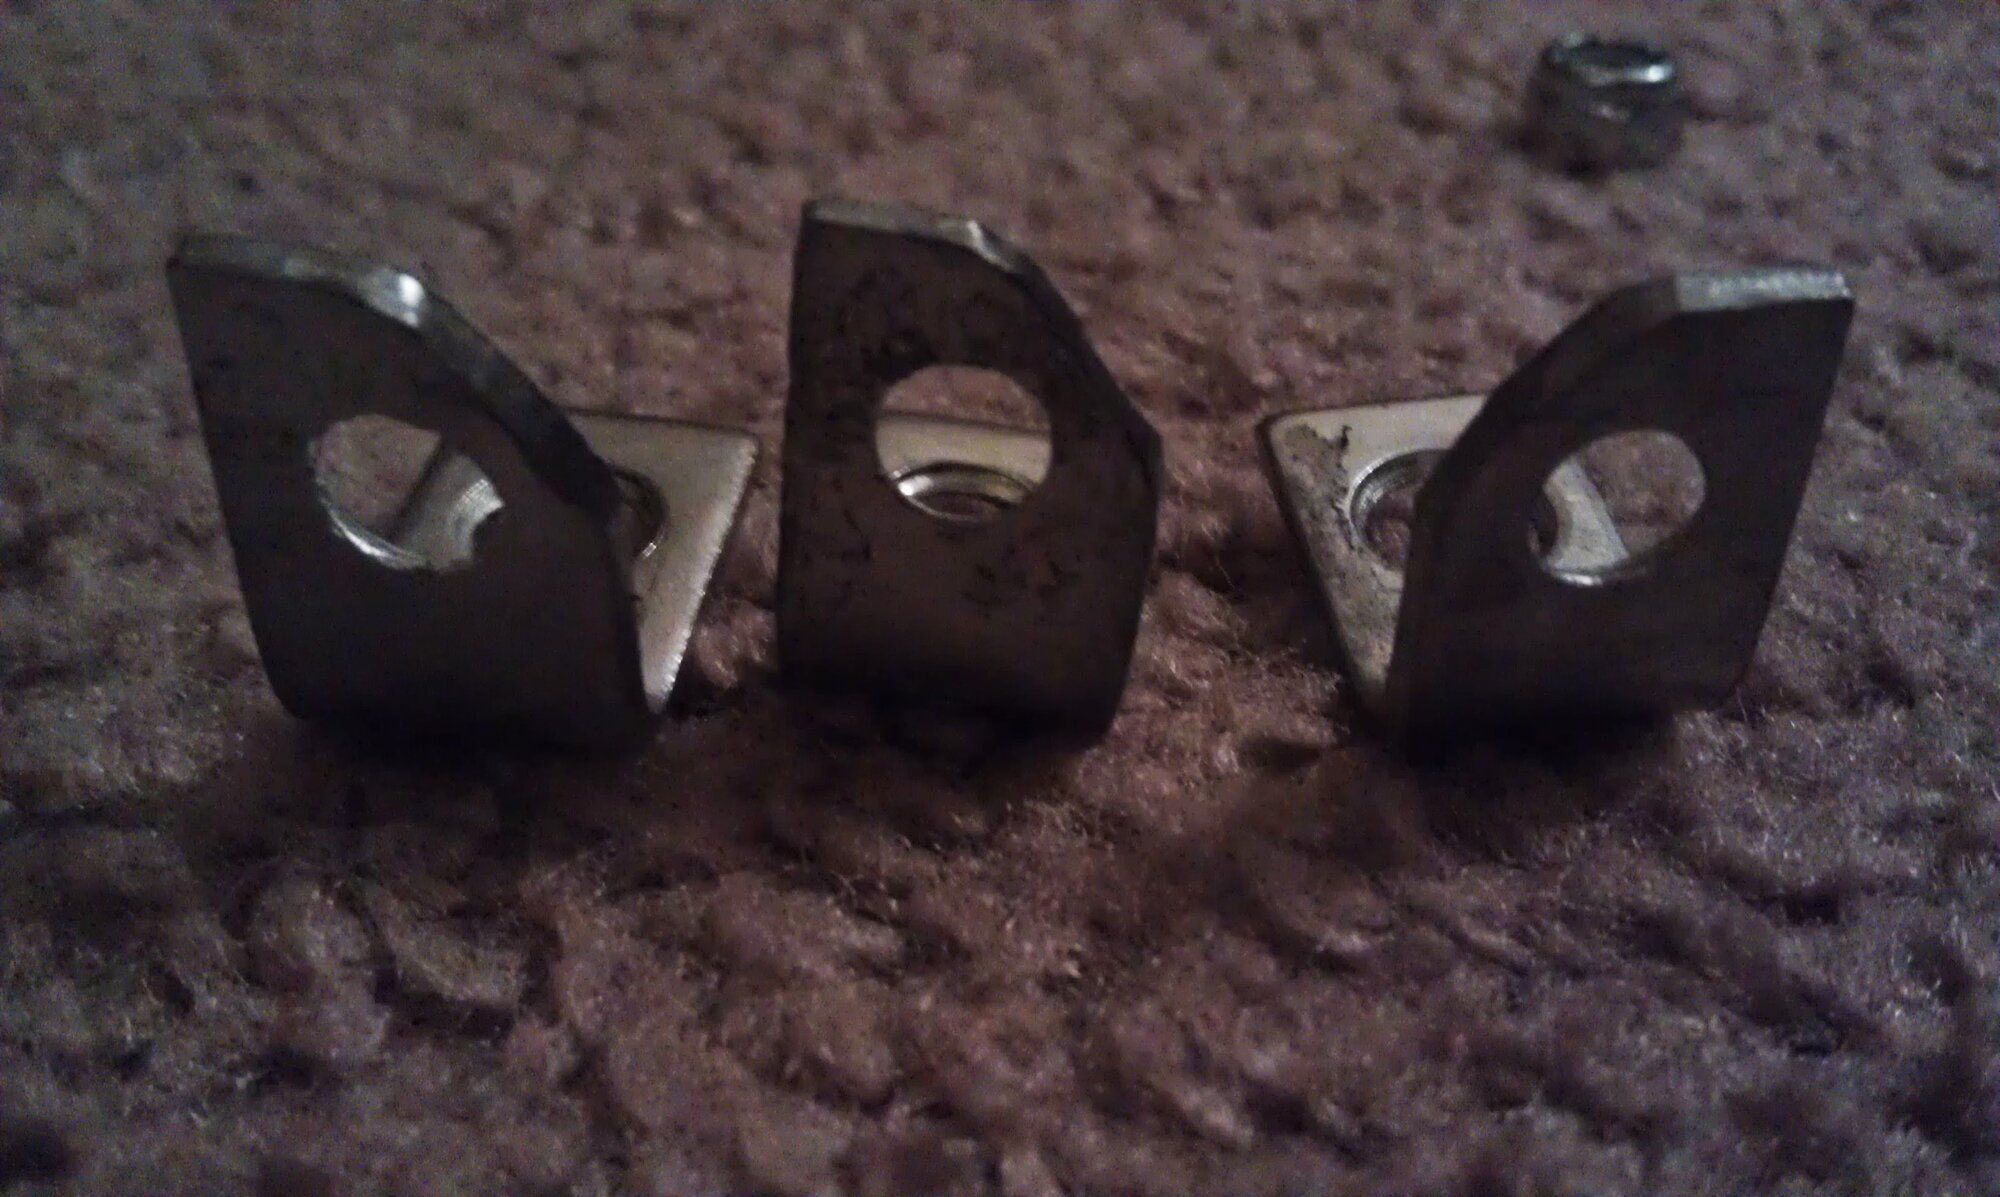
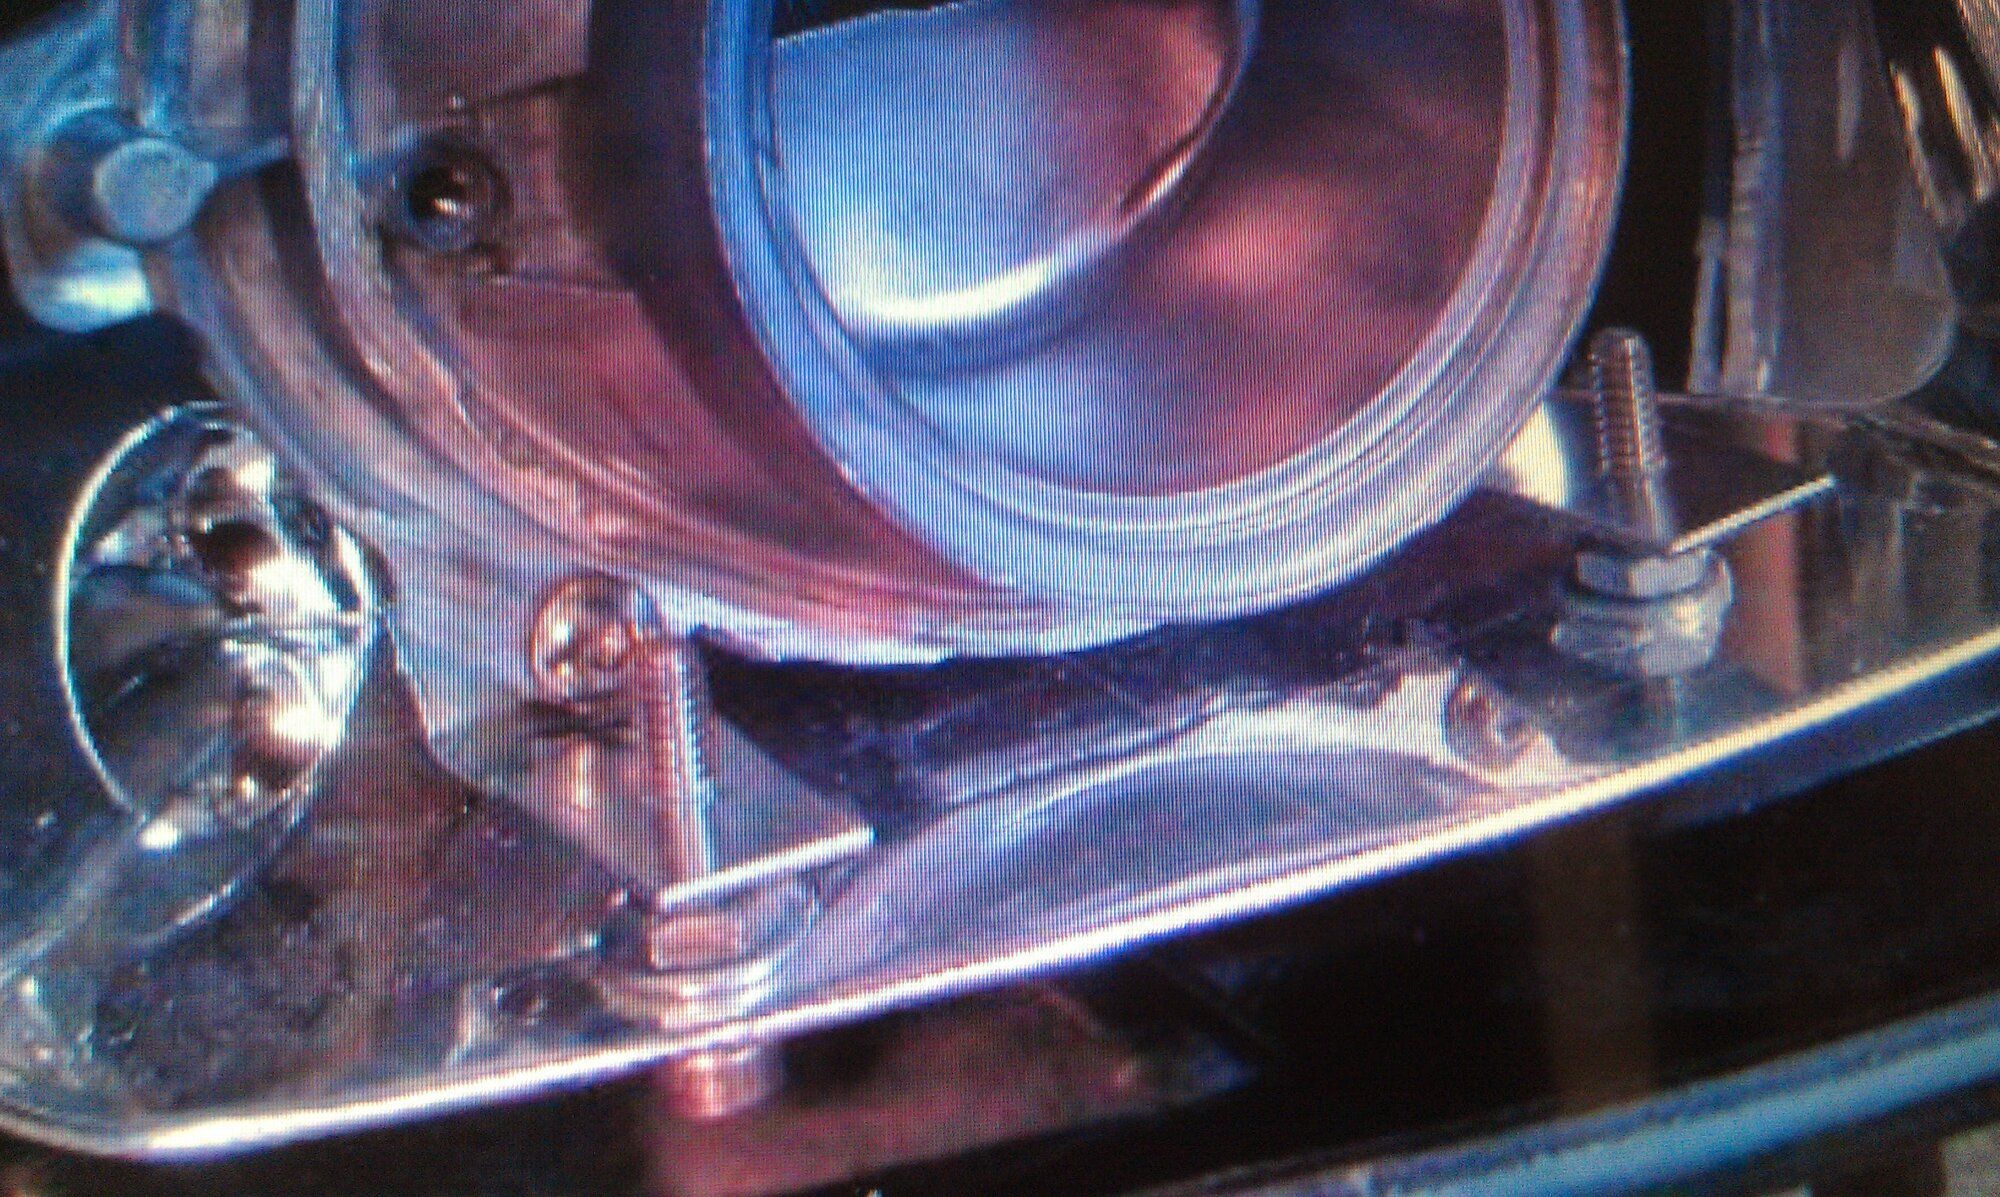
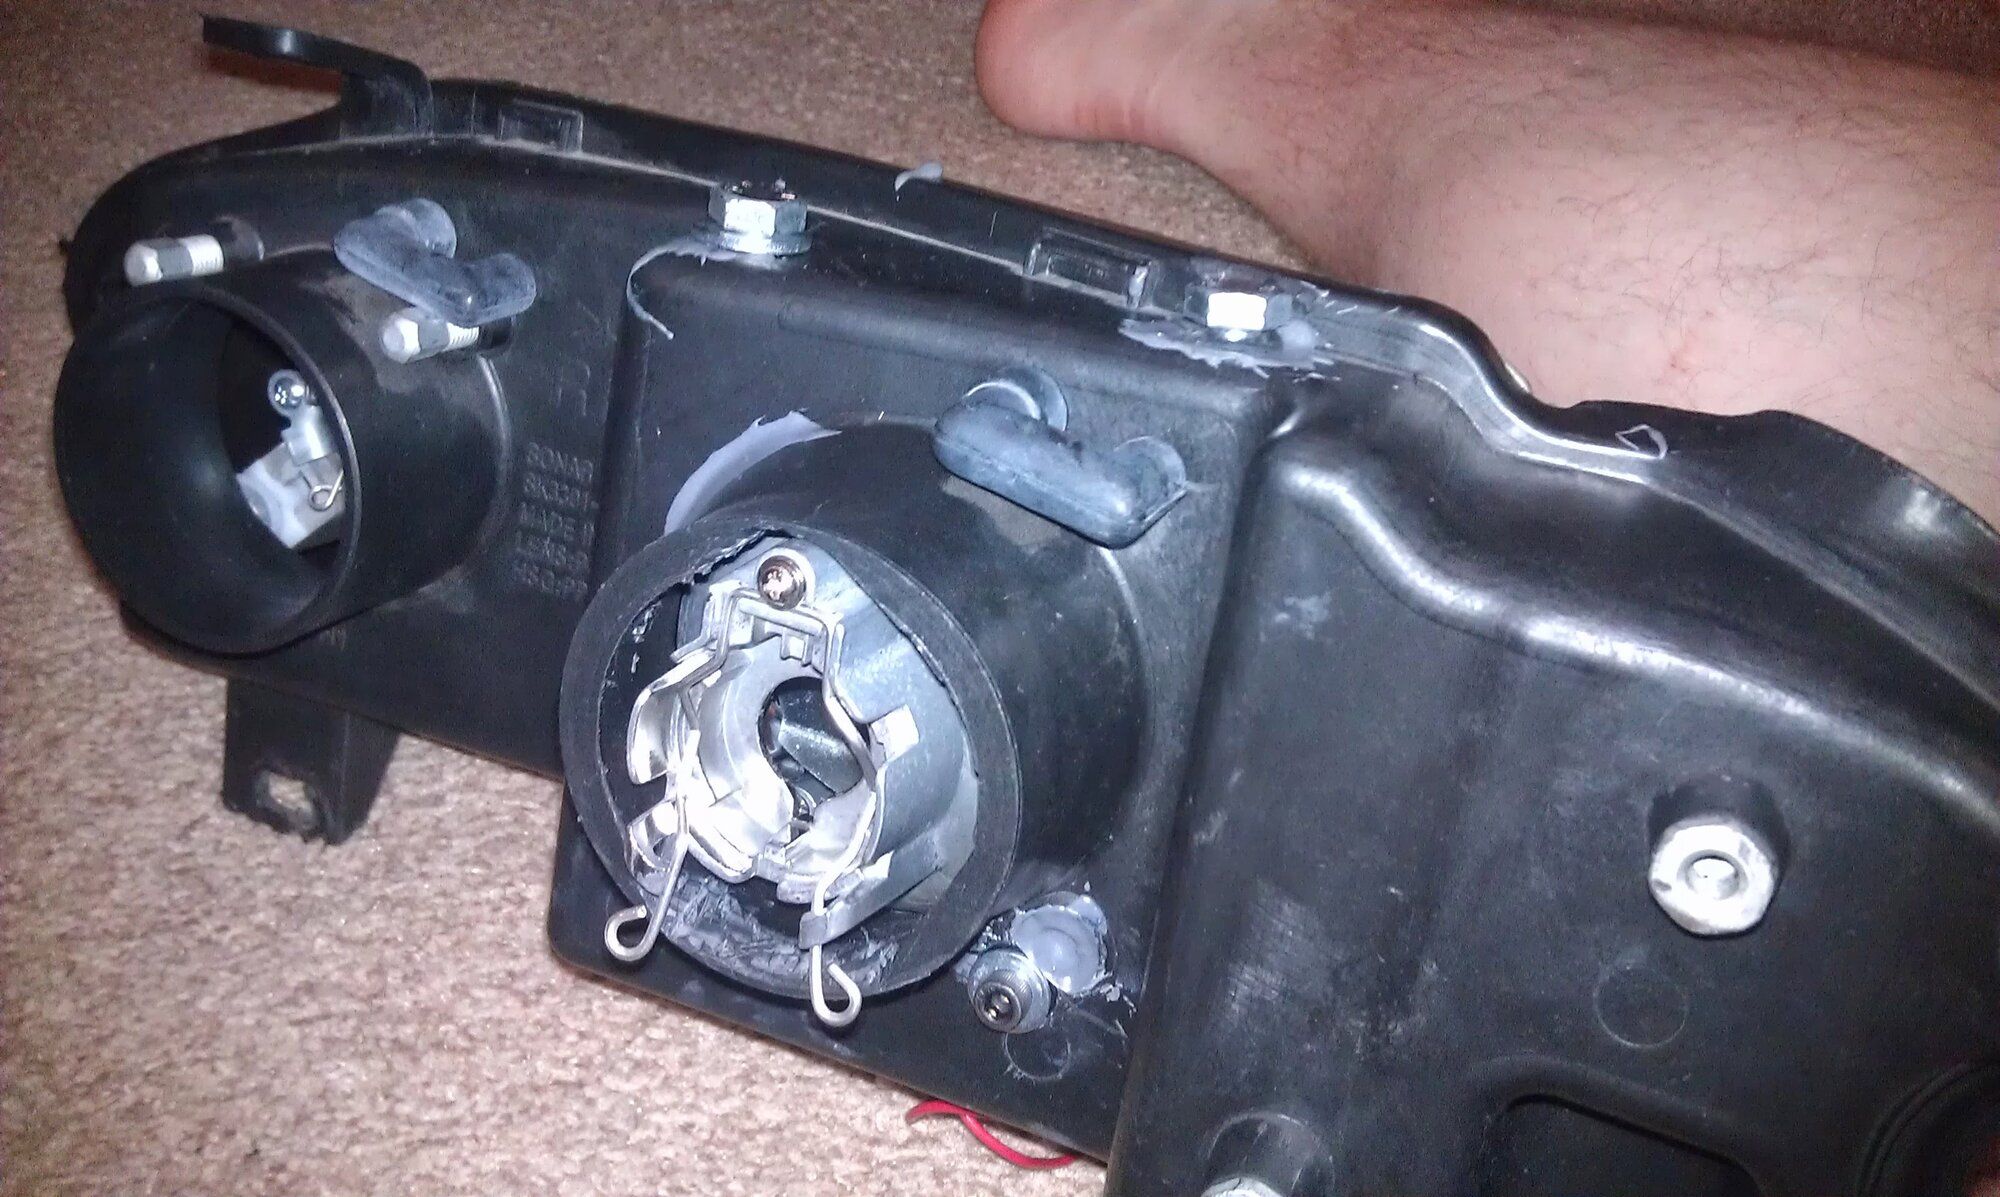
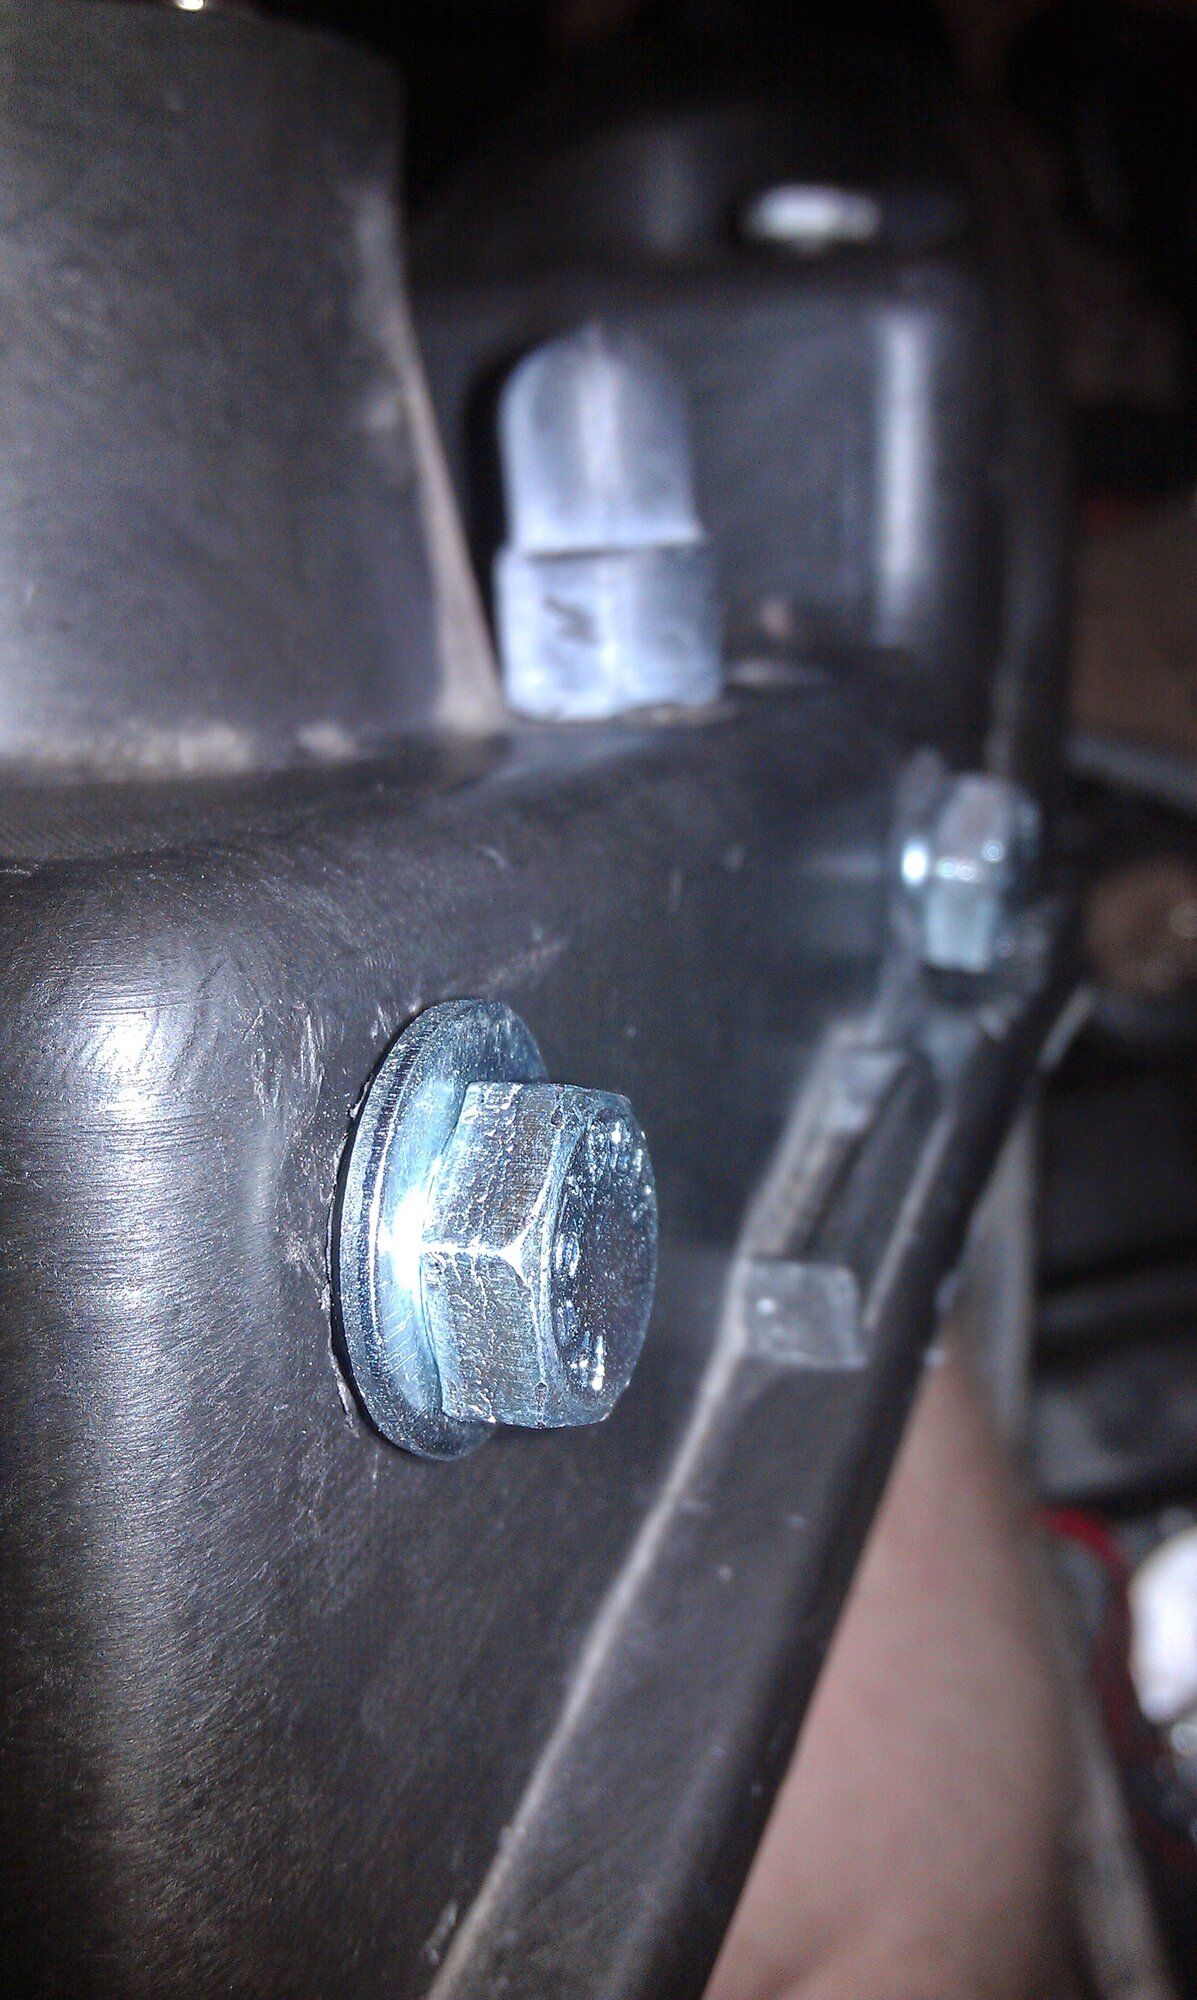
In the third pic, the one screw poking through above the red wires is what is used for adjustment. Even though it is off to the side, it really only controls verticality. It doesn't really move it to the side or anything. The red wires are for the Bi-Xenon motor.
I tested the projectors in the living room to make sure they functioned and see how they look.
- Thread starter
- #24
jukematt
15+ Year Contributor
- 291
- 40
- Jun 13, 2009
-
Portland Metro,
Oregon
I was also thinking to myself that I have these super fancy projectors but just a random bulb for my turn signal. How about I design some fancy LEDs for my turn signals?
I went into this miscellaneous project store which had bulk LEDs and resistors. I did a bunch of calculations with the guy's help and picked up a little breadboard I cut it down, fit the bulbs through, and glued it to this piece of thin particle board that was barely an interference fit over the turn signal reflector. I don't have a picture of the back side I guess but it was a garbled mess trying to wire all of them together in parallel. I also bought this separate little LED resistor thing intended for cars that switch to LEDs so the turn signals don't blink super fast considering LEDs use a lot less power and the car thinks a bulb is burnt out.
It looked pretty cool from a distance but up close it actually looks kind of ghetto. But I would really have to take my headlight lens off again to get them out so I left it. I didn't really protect the back of the LEDs from moisture though so after a while like half of the LEDs per side were starting to no longer work.
I miss my stock ducting. I wish I still had it as I think I could adapt it to work with even an FMIC.
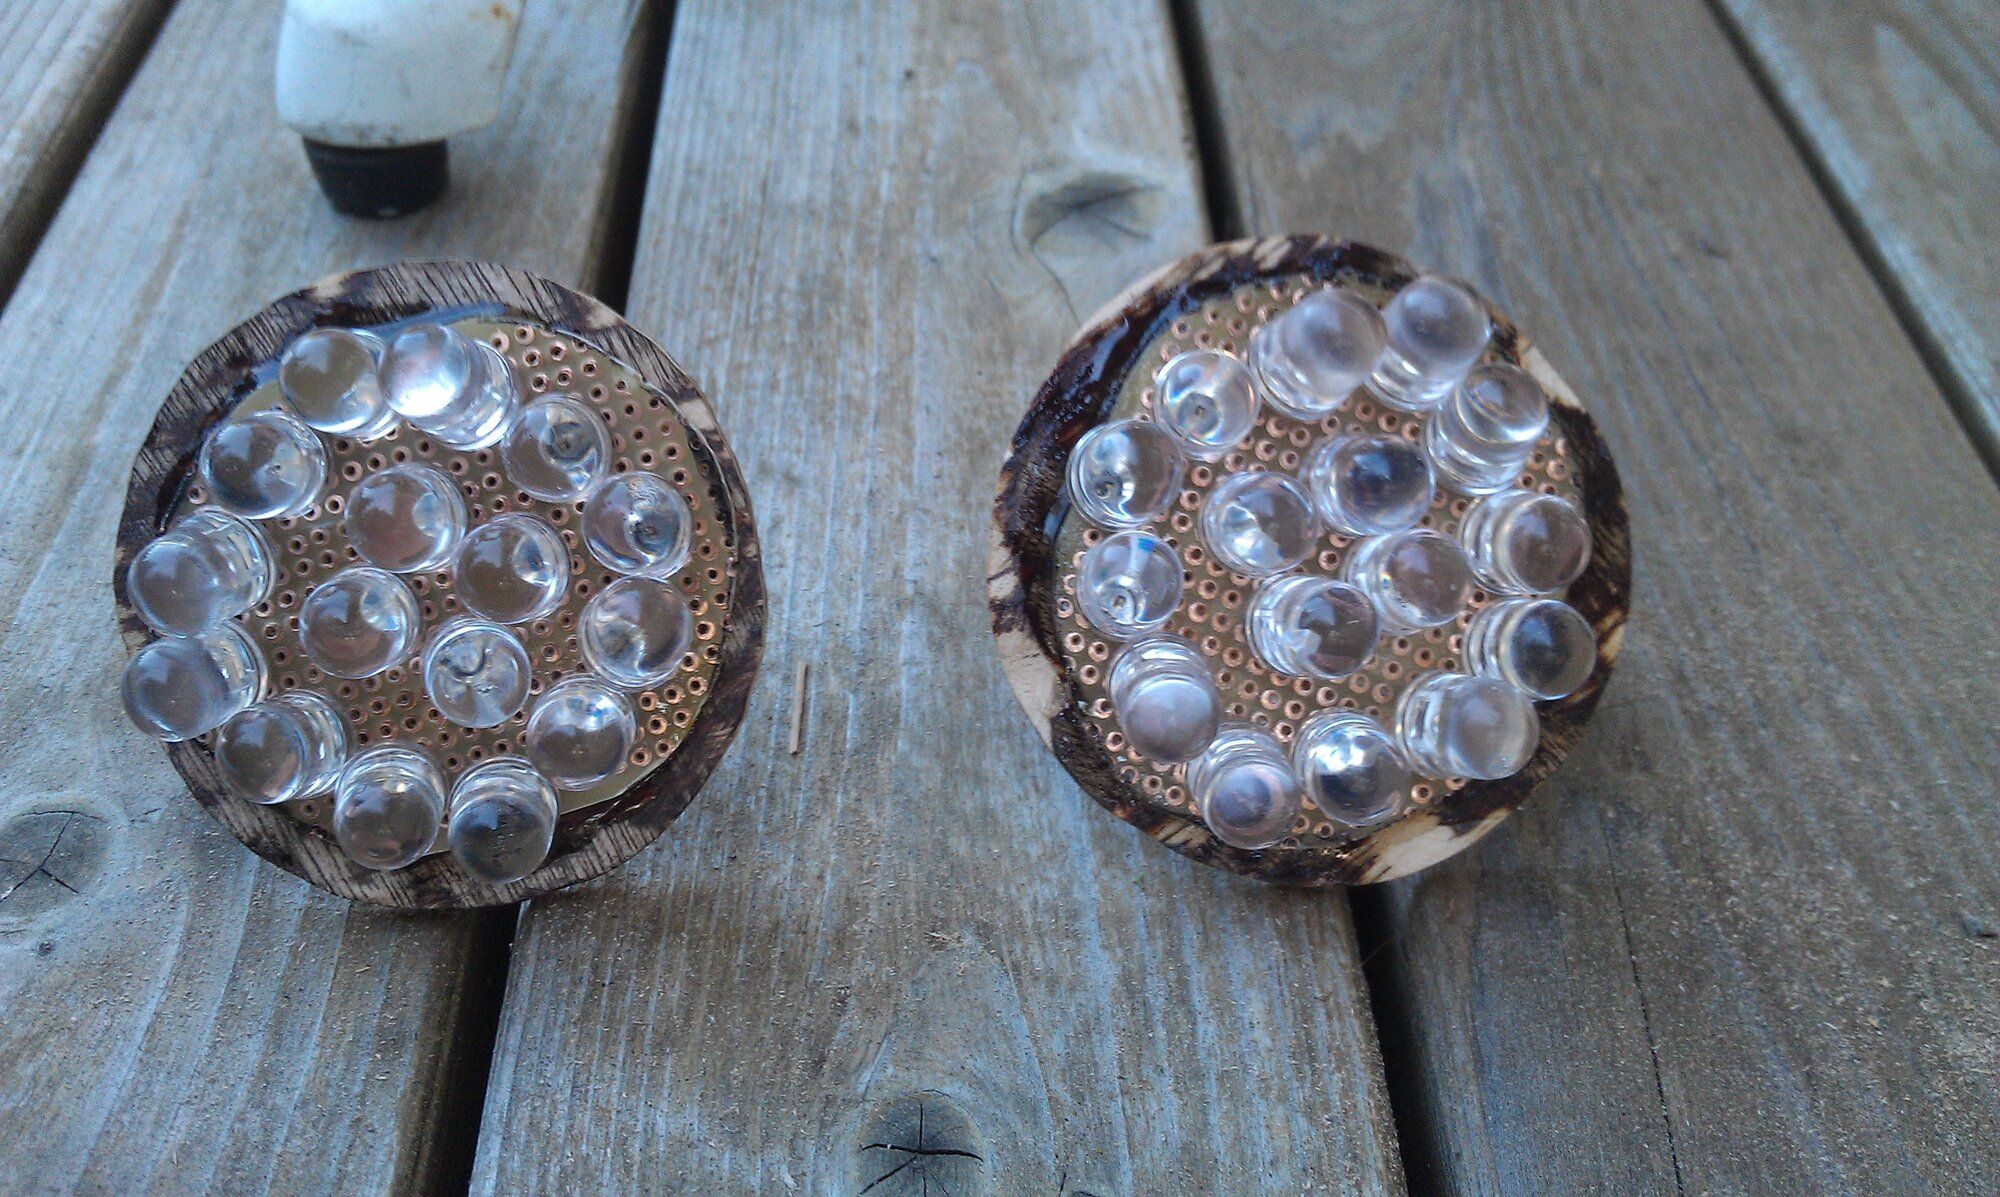
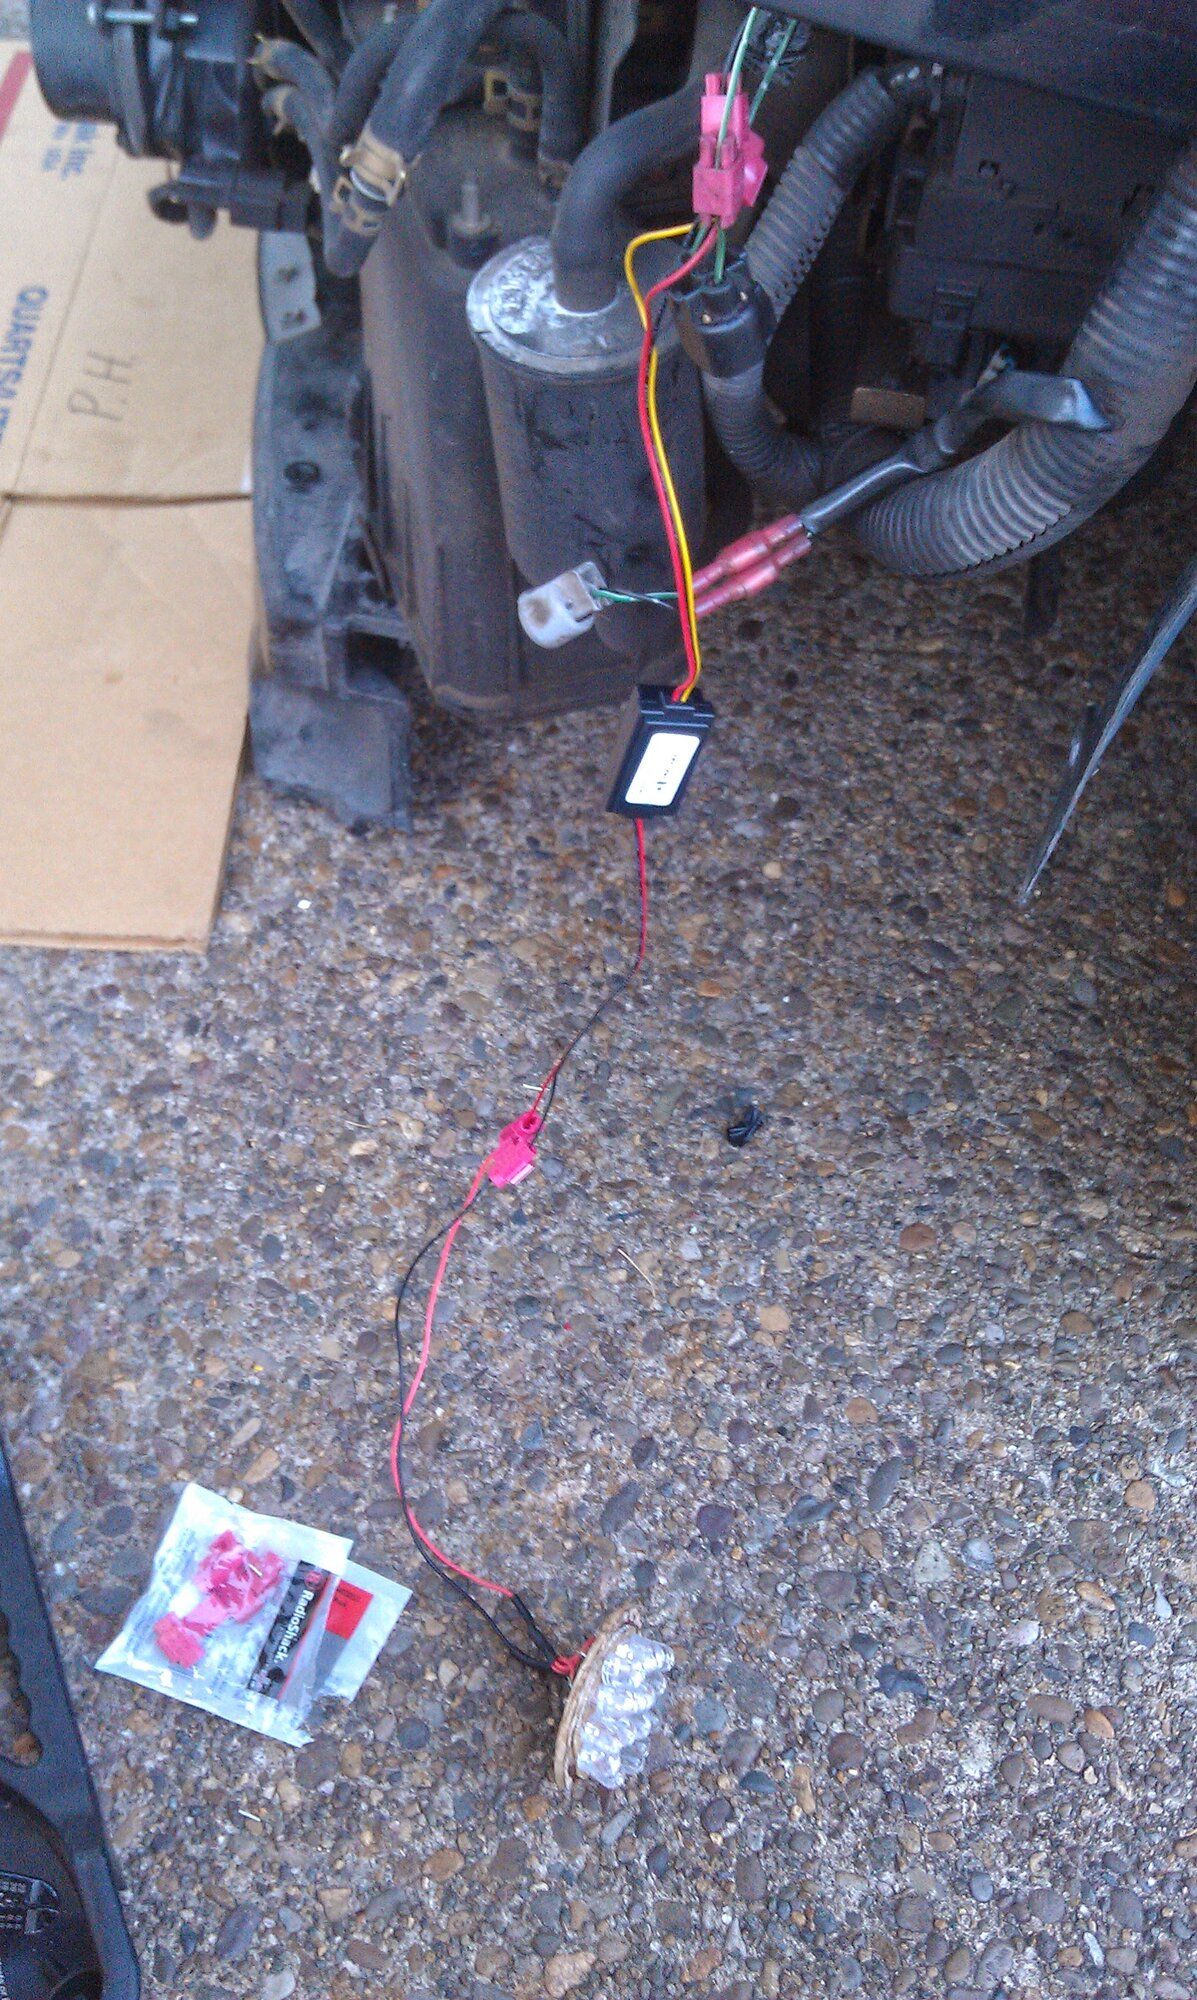
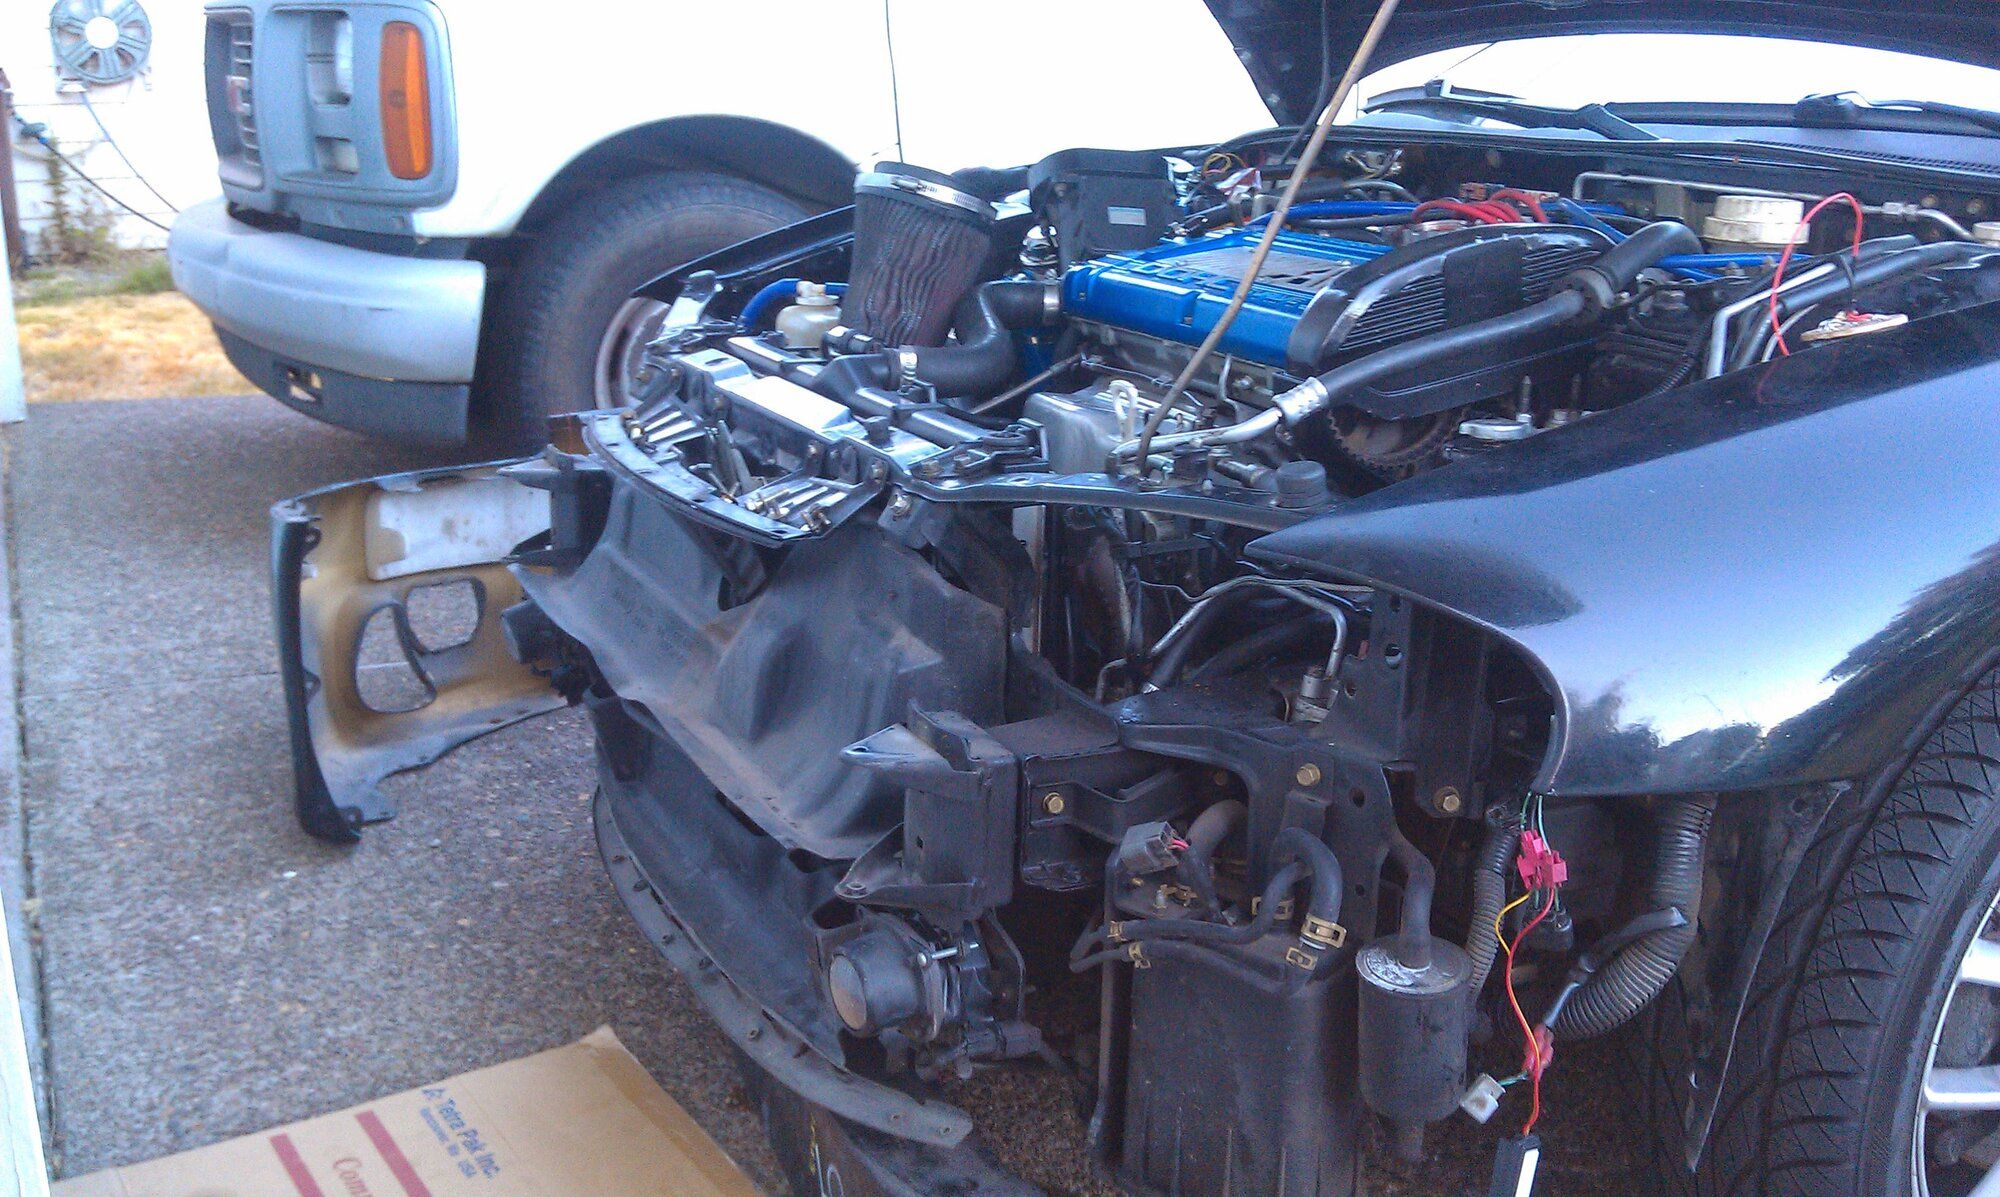
I went into this miscellaneous project store which had bulk LEDs and resistors. I did a bunch of calculations with the guy's help and picked up a little breadboard I cut it down, fit the bulbs through, and glued it to this piece of thin particle board that was barely an interference fit over the turn signal reflector. I don't have a picture of the back side I guess but it was a garbled mess trying to wire all of them together in parallel. I also bought this separate little LED resistor thing intended for cars that switch to LEDs so the turn signals don't blink super fast considering LEDs use a lot less power and the car thinks a bulb is burnt out.
It looked pretty cool from a distance but up close it actually looks kind of ghetto. But I would really have to take my headlight lens off again to get them out so I left it. I didn't really protect the back of the LEDs from moisture though so after a while like half of the LEDs per side were starting to no longer work.
I miss my stock ducting. I wish I still had it as I think I could adapt it to work with even an FMIC.
- Thread starter
- #25
jukematt
15+ Year Contributor
- 291
- 40
- Jun 13, 2009
-
Portland Metro,
Oregon
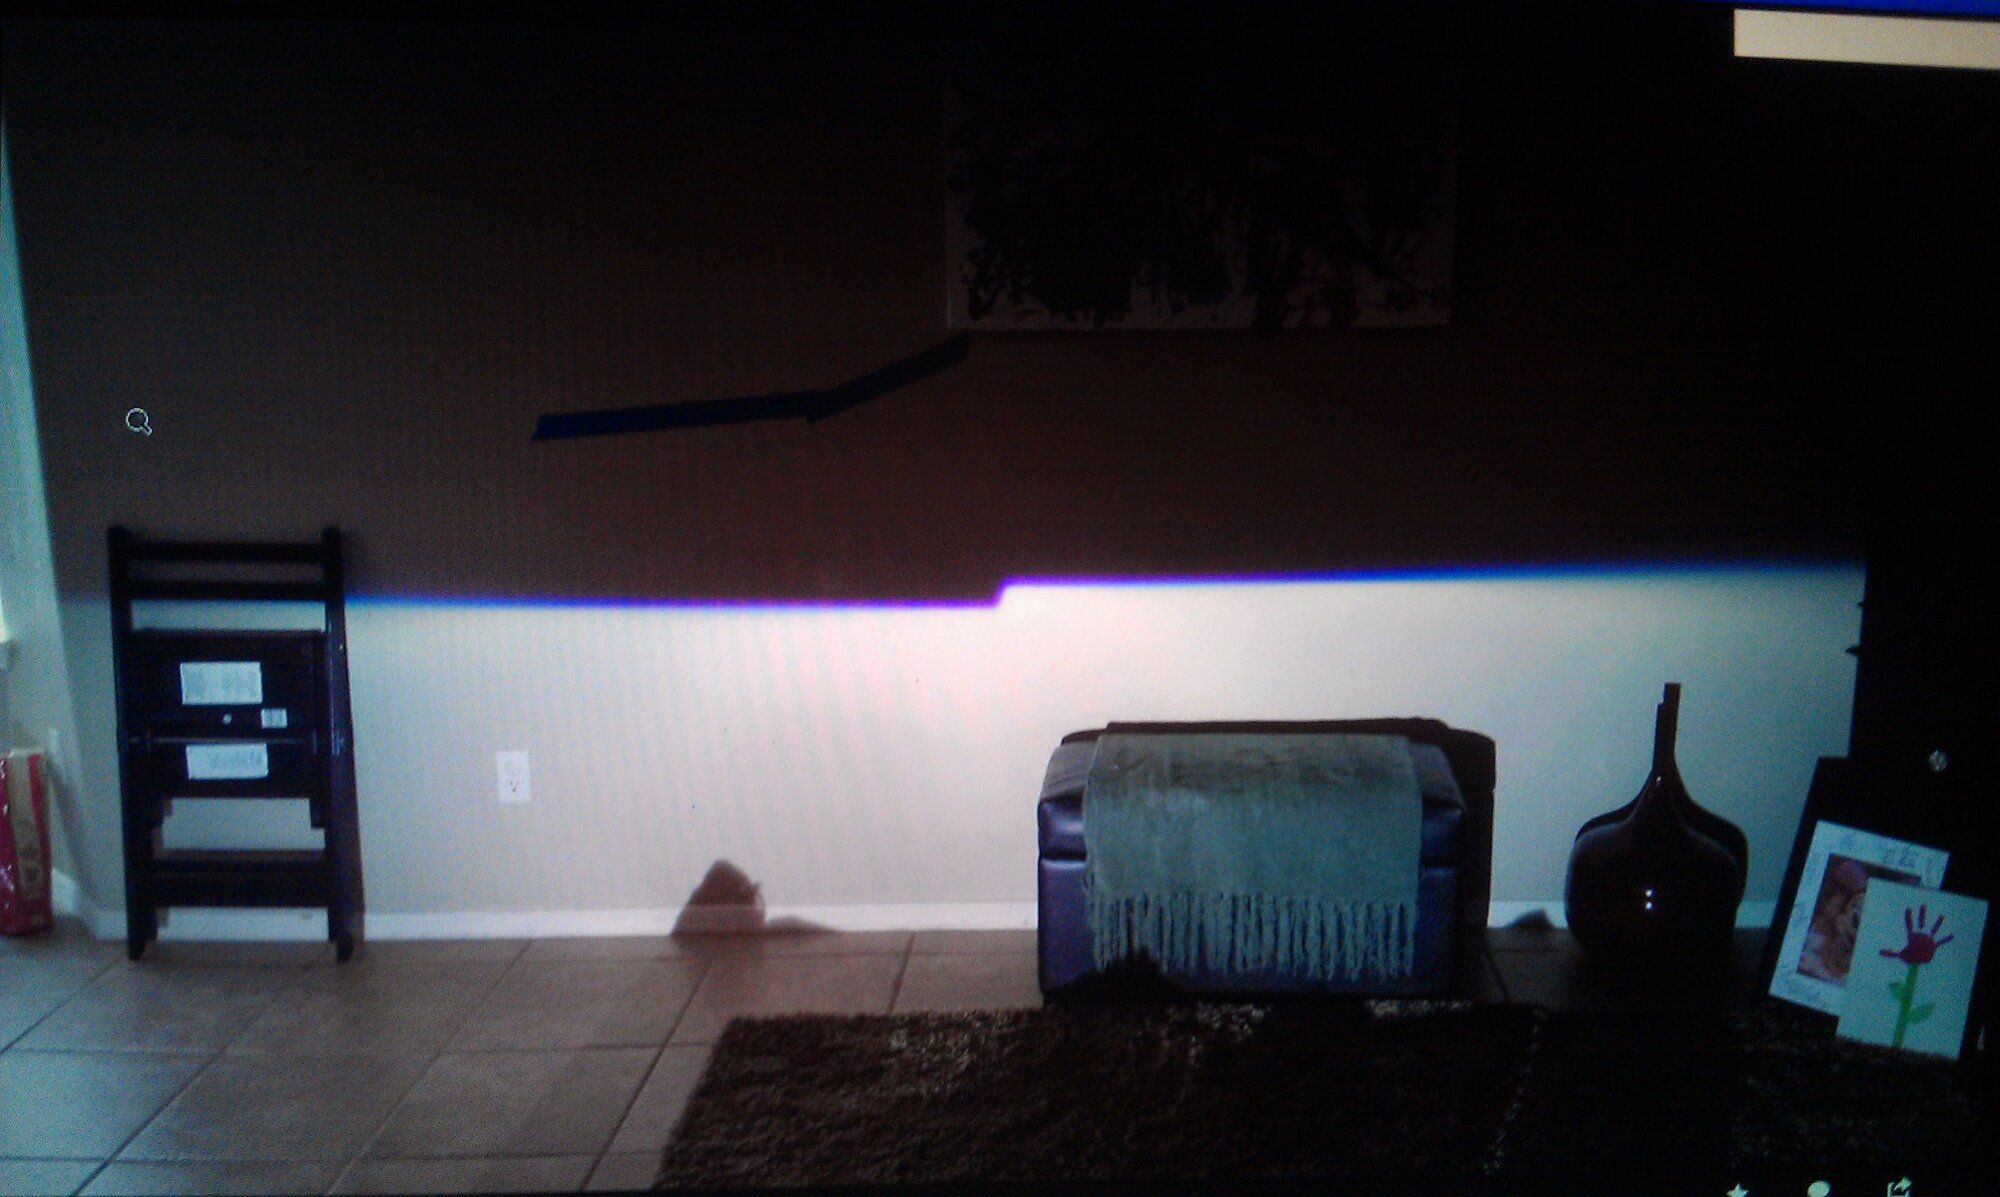
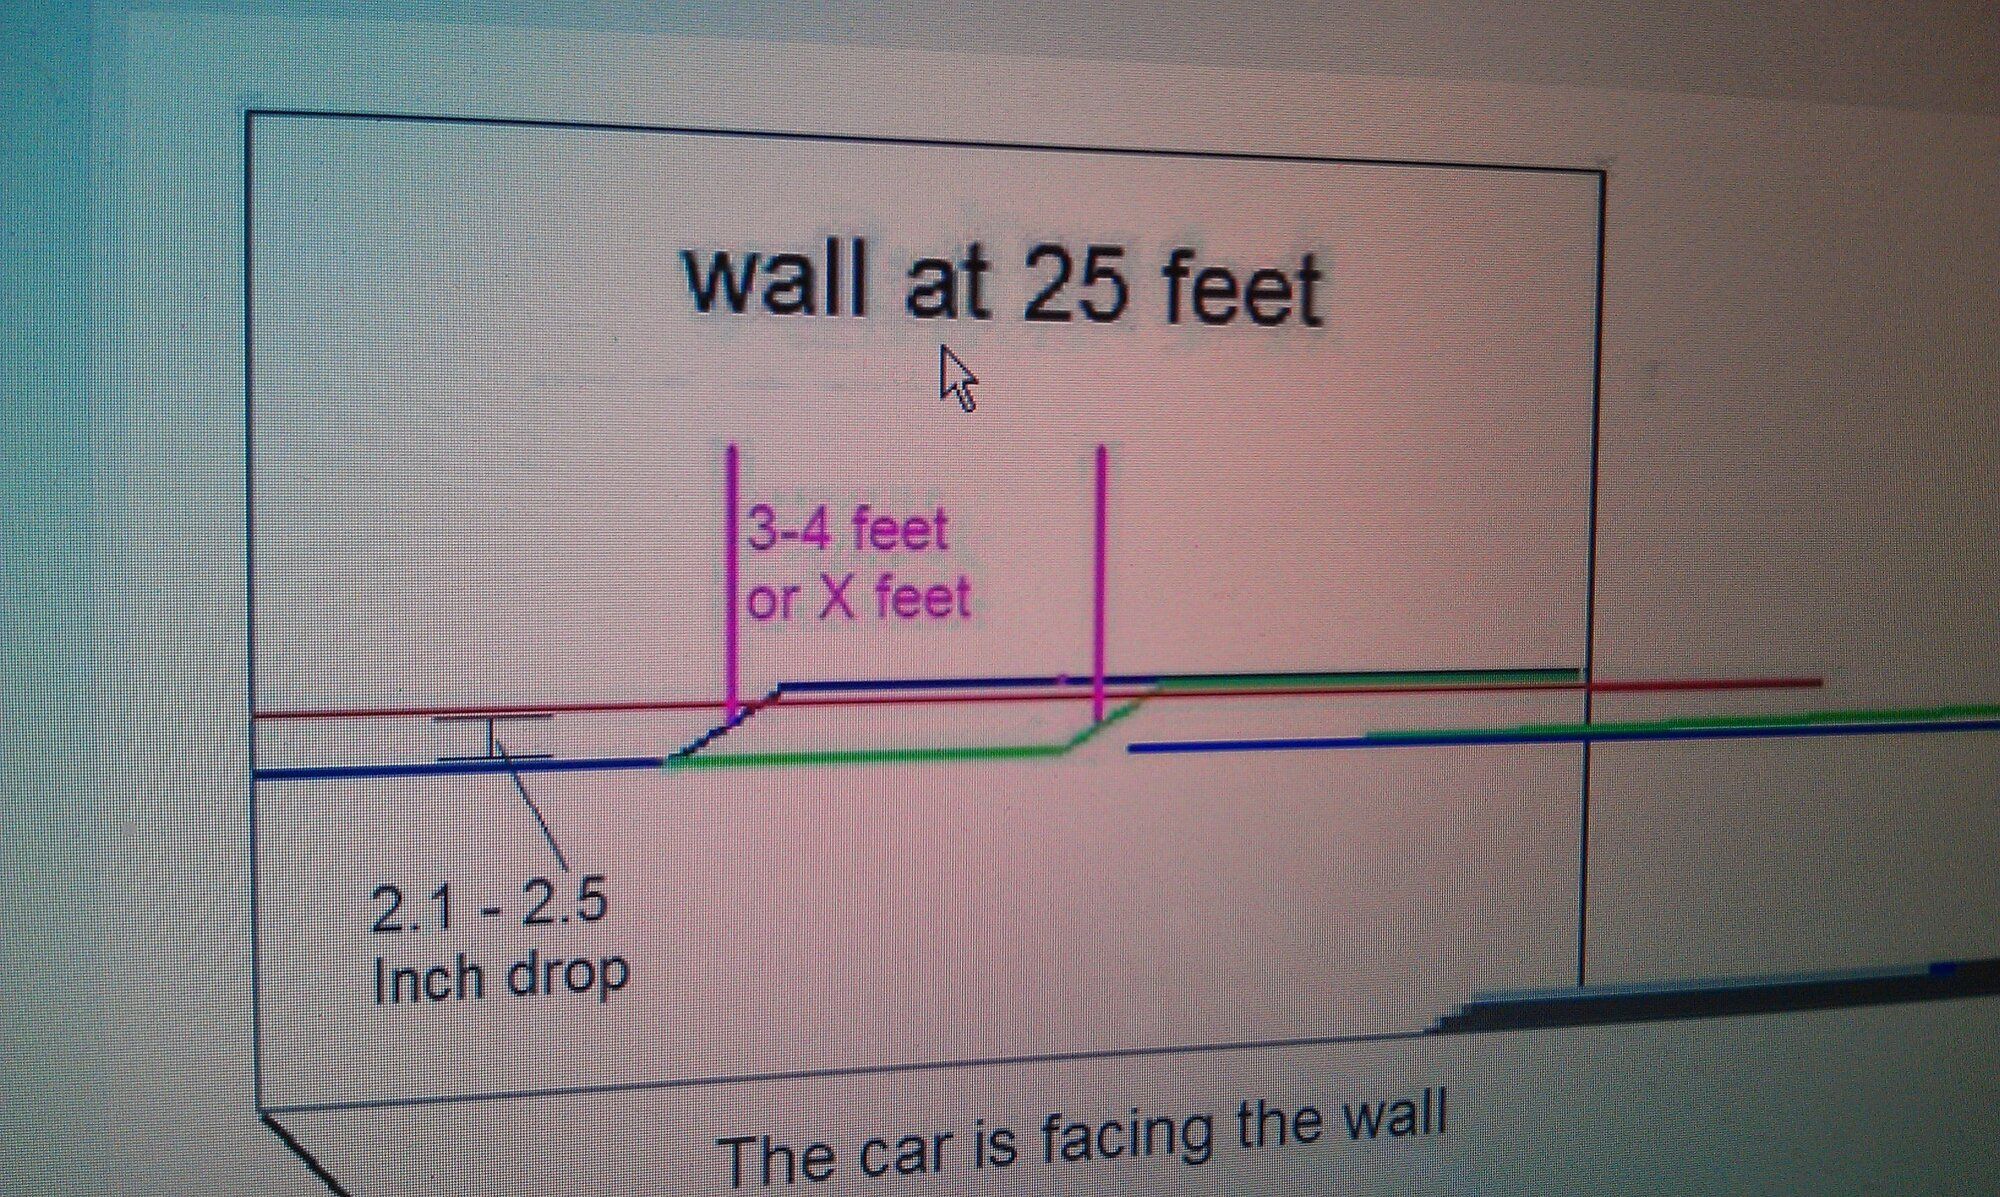
Now for final positioning. To position correctly, you're supposed to park on a flat surface a certain distance away from a flat wall. I drove to an empty warehouse parking lot. There, I installed my stock headlights and marked with tape where it looked like my cutoff is. It's hard to tell with projector housings but I think I got close.
And finally the eye candy of the beautiful projector. Passenger side first, then driver side, then both. Look at that sharp cutoff with the blue line! Individual brights look a little weird at this point because of my distance to the wall.
I remember a police car pulling up too asking what I was doing. I told him and the one seemed pretty curious and interested in what I was doing. They stuck around for a few minutes but I was just finishing up.
Now whenever I drive around, I can't help but smile at how far ahead I can see. And another selling point on these projectors is how wide they are. You can tell a little in the last couple of pictures, but now when I drive to or from college where there is nothing around but trees along the highway, I can see quite a bit off the highway on both sides for any animals or anything.
Also, I thought I had a picture but I don't at the moment. I had removed the halos during this install and cut little grooves where I show red lines below, then adhered the LED ring to the projector housing. Now there is this glow behind the housing when I have just my parking lights on.
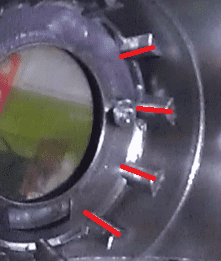
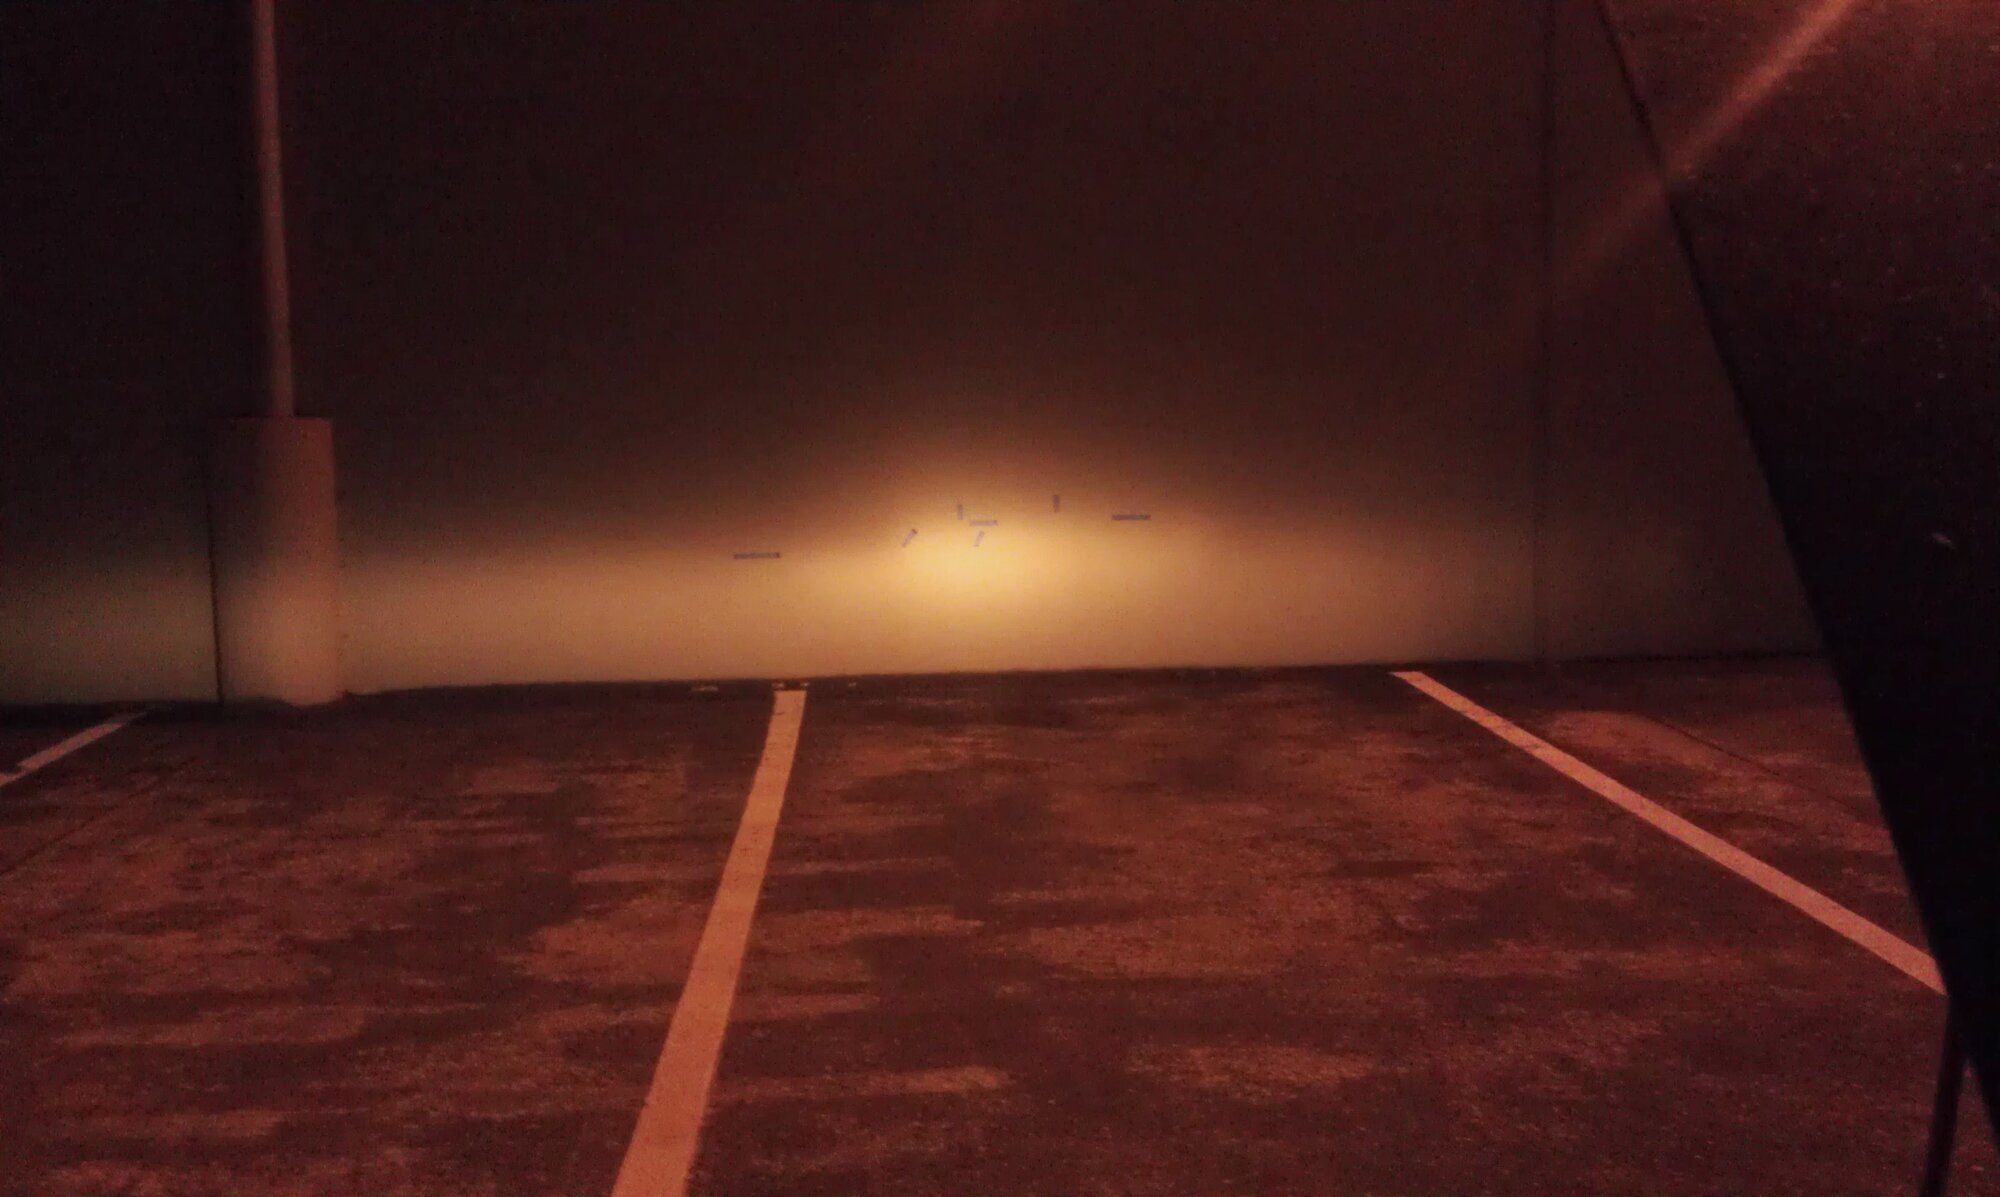
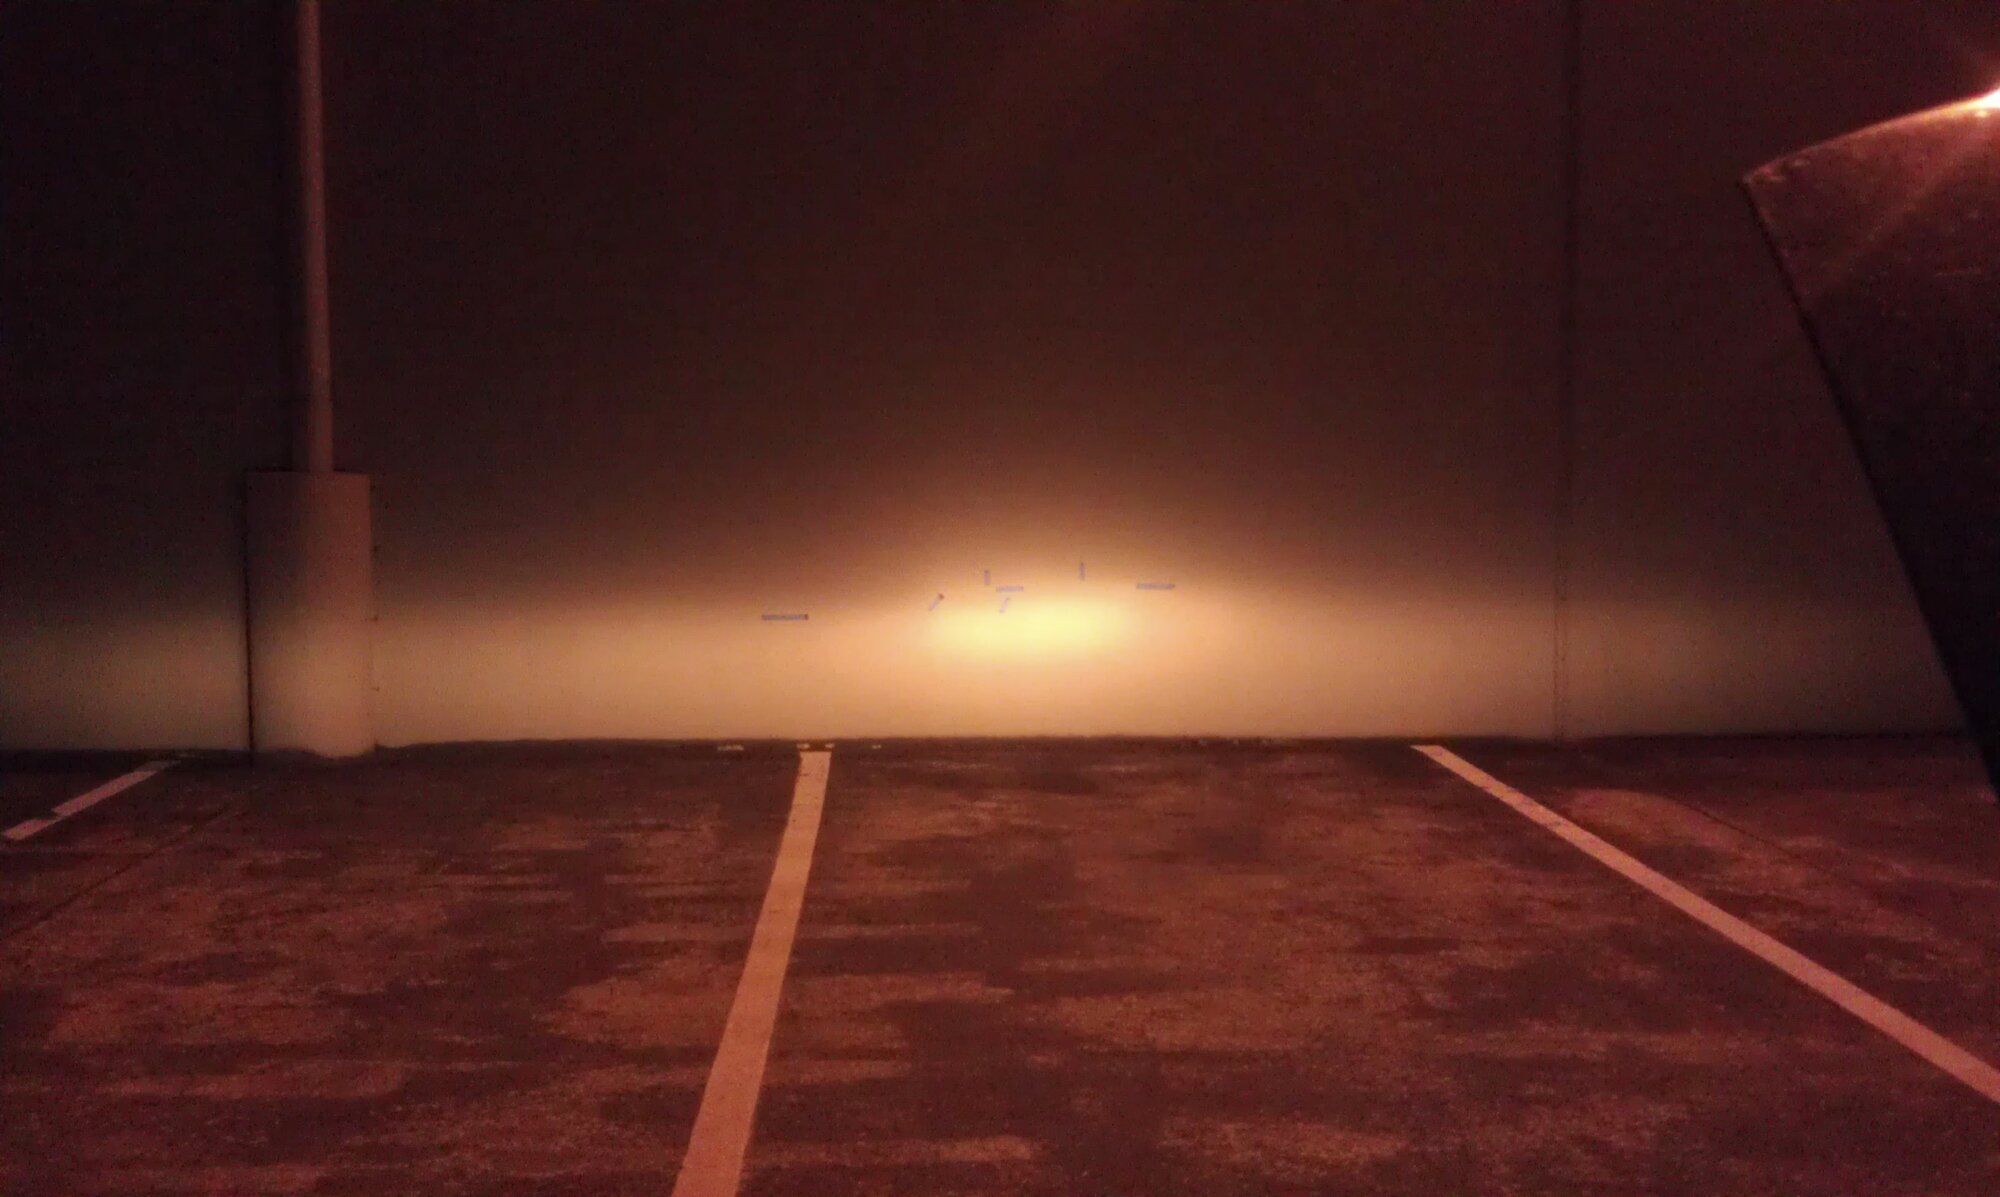
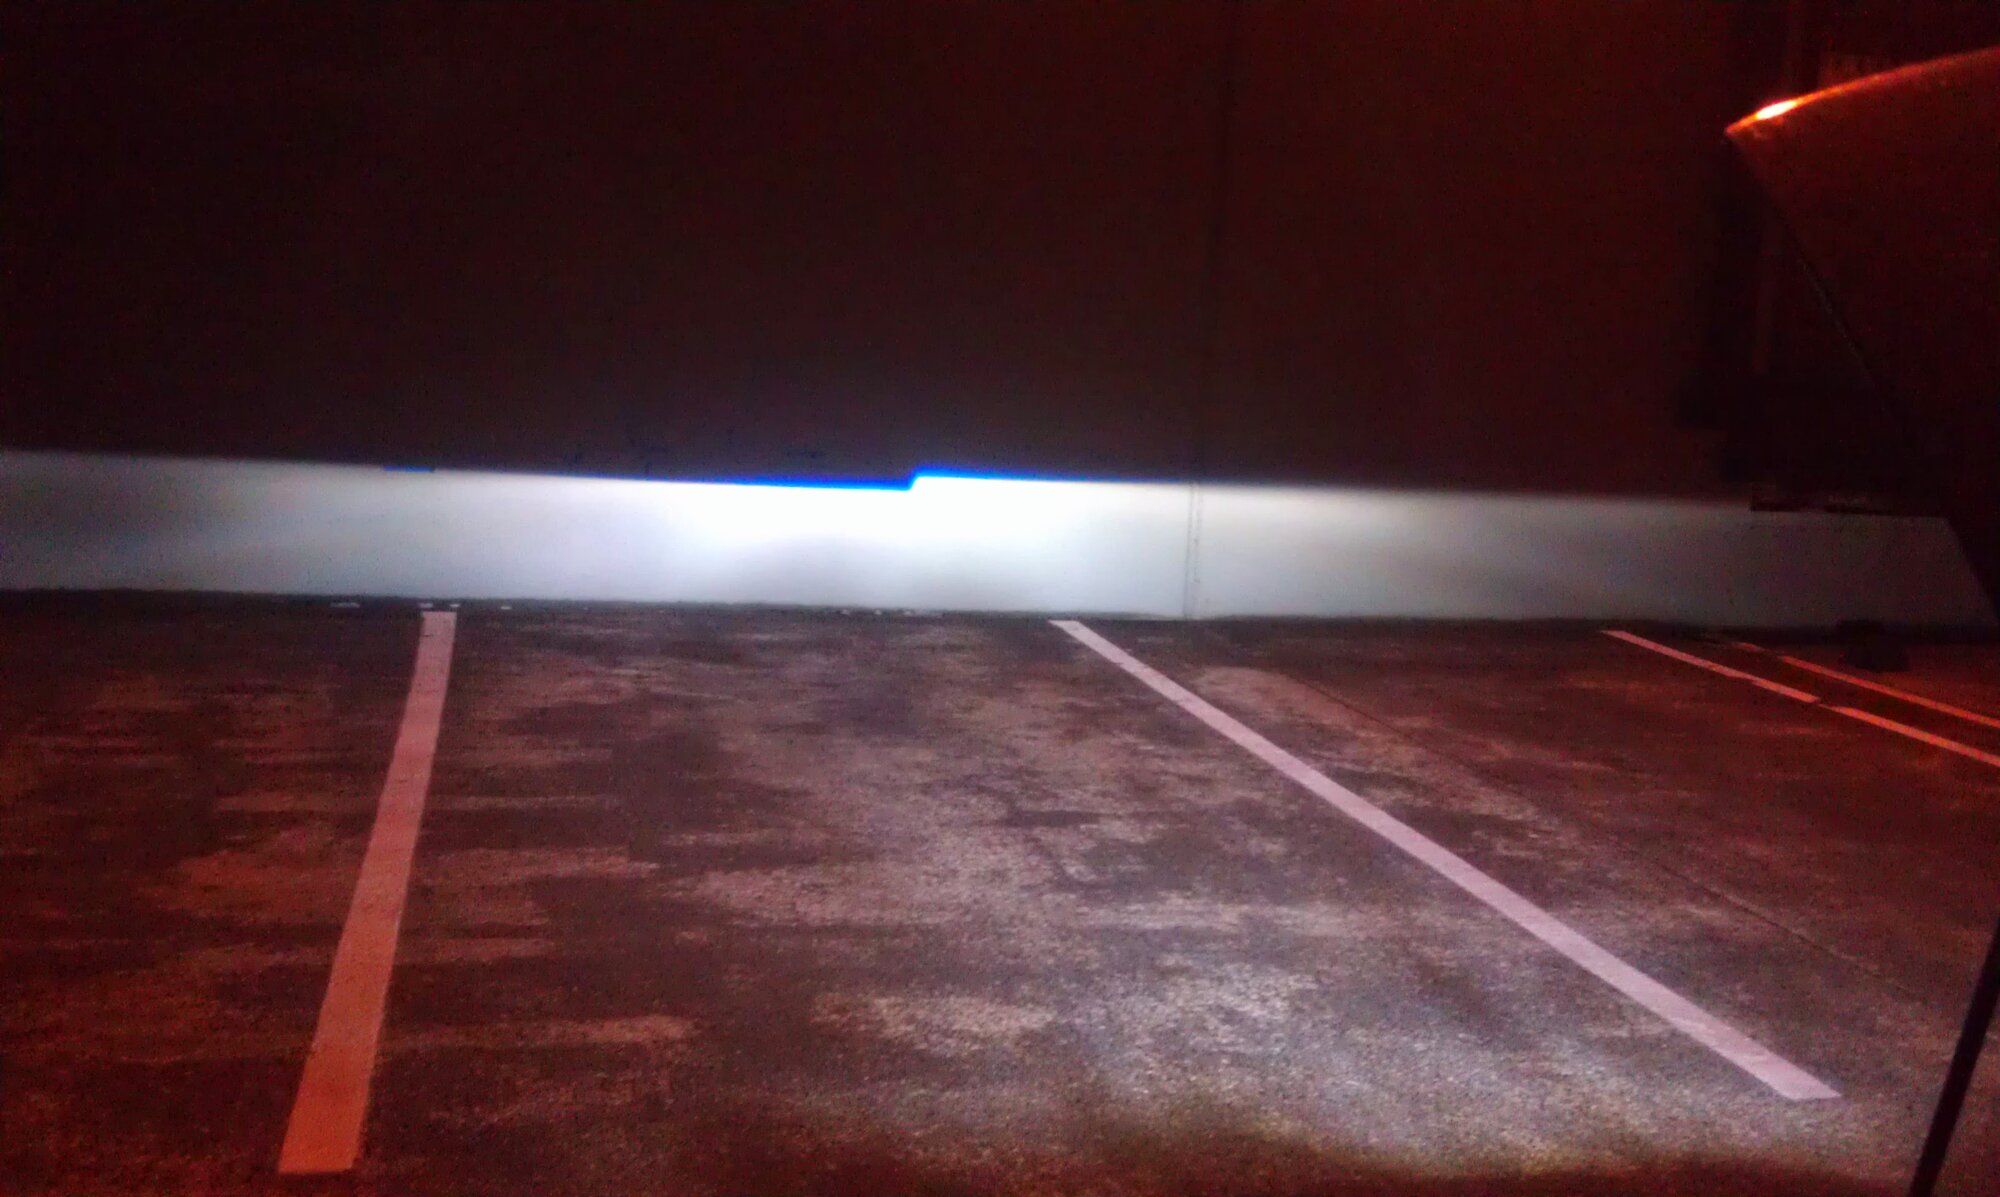
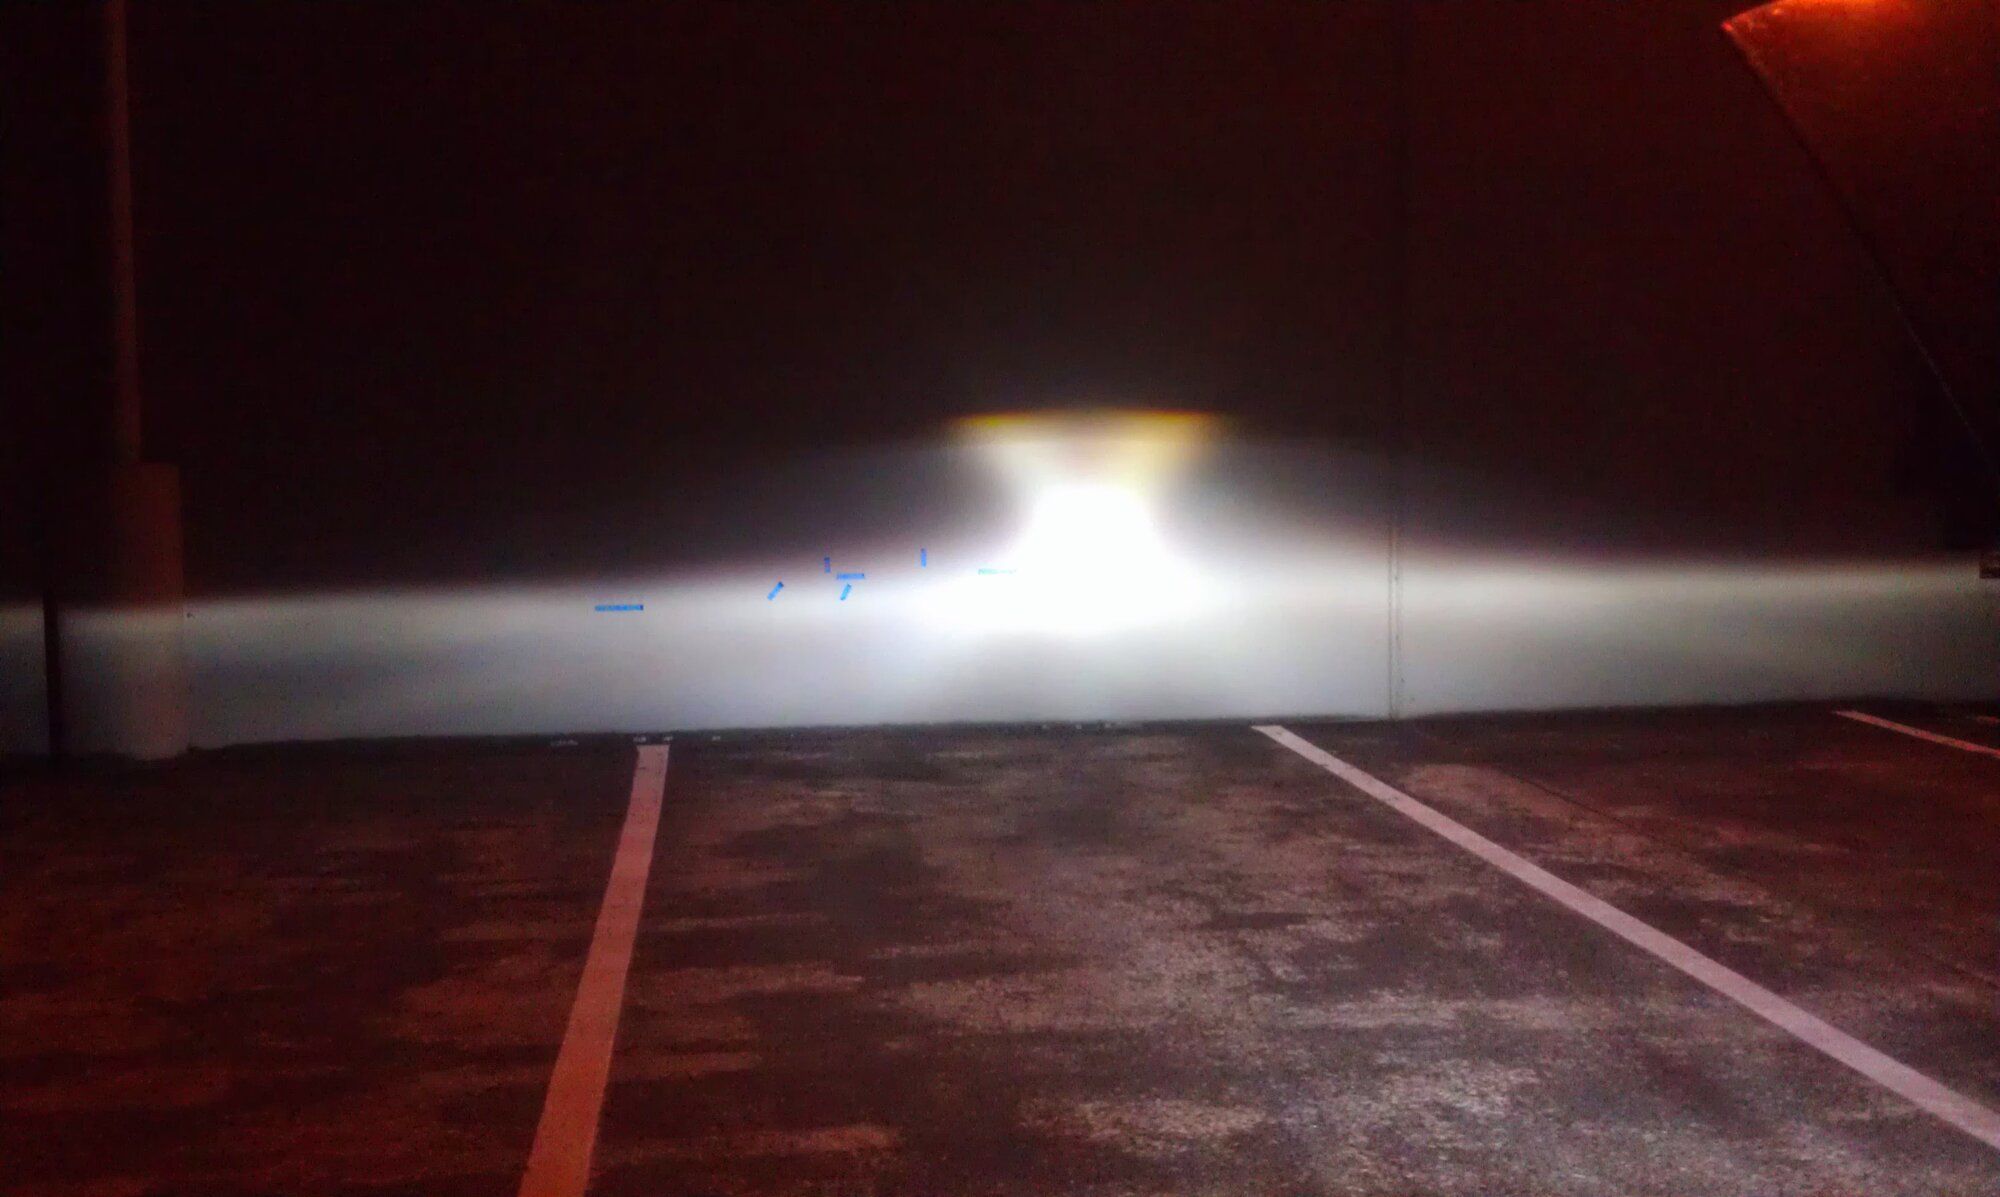
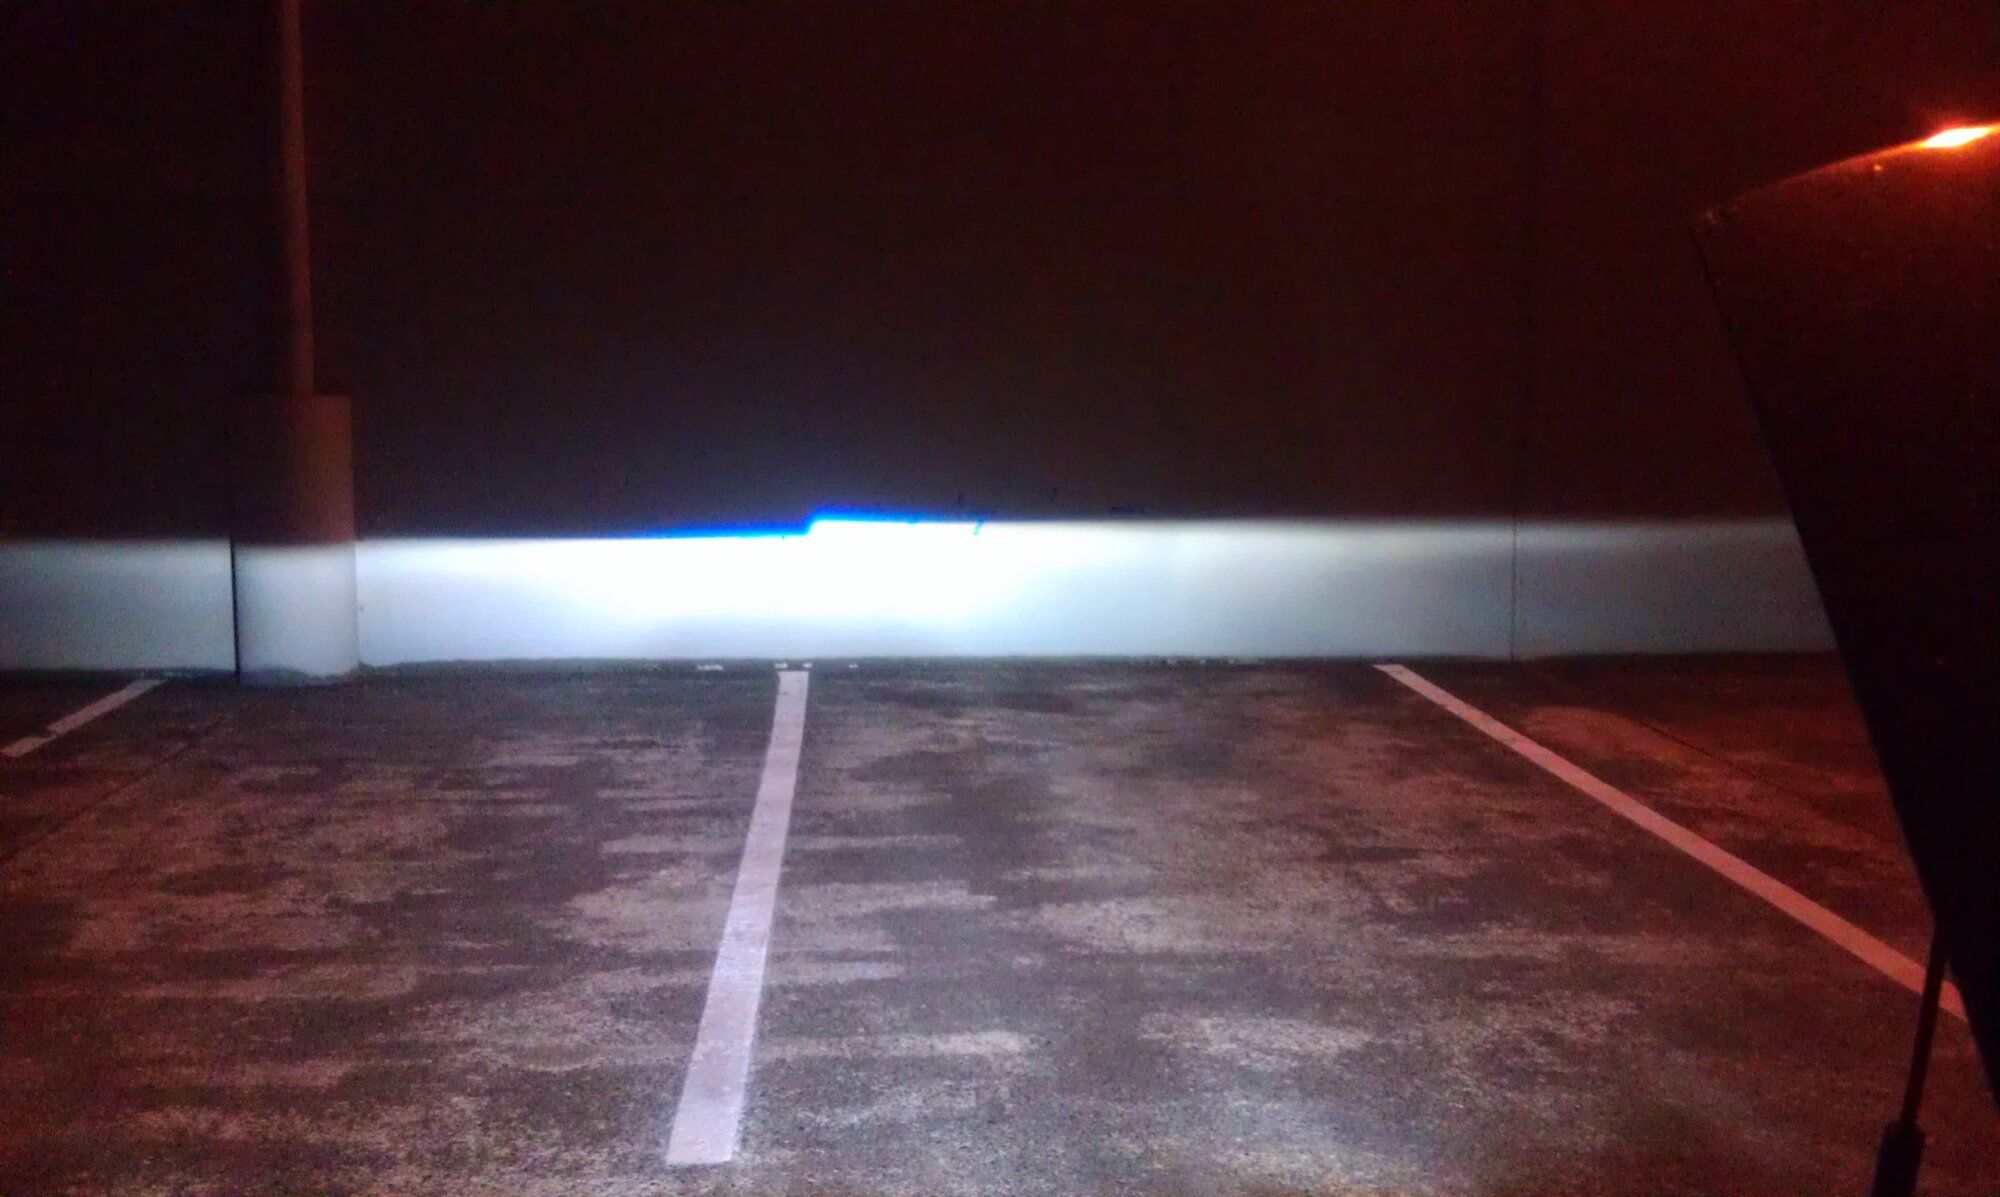
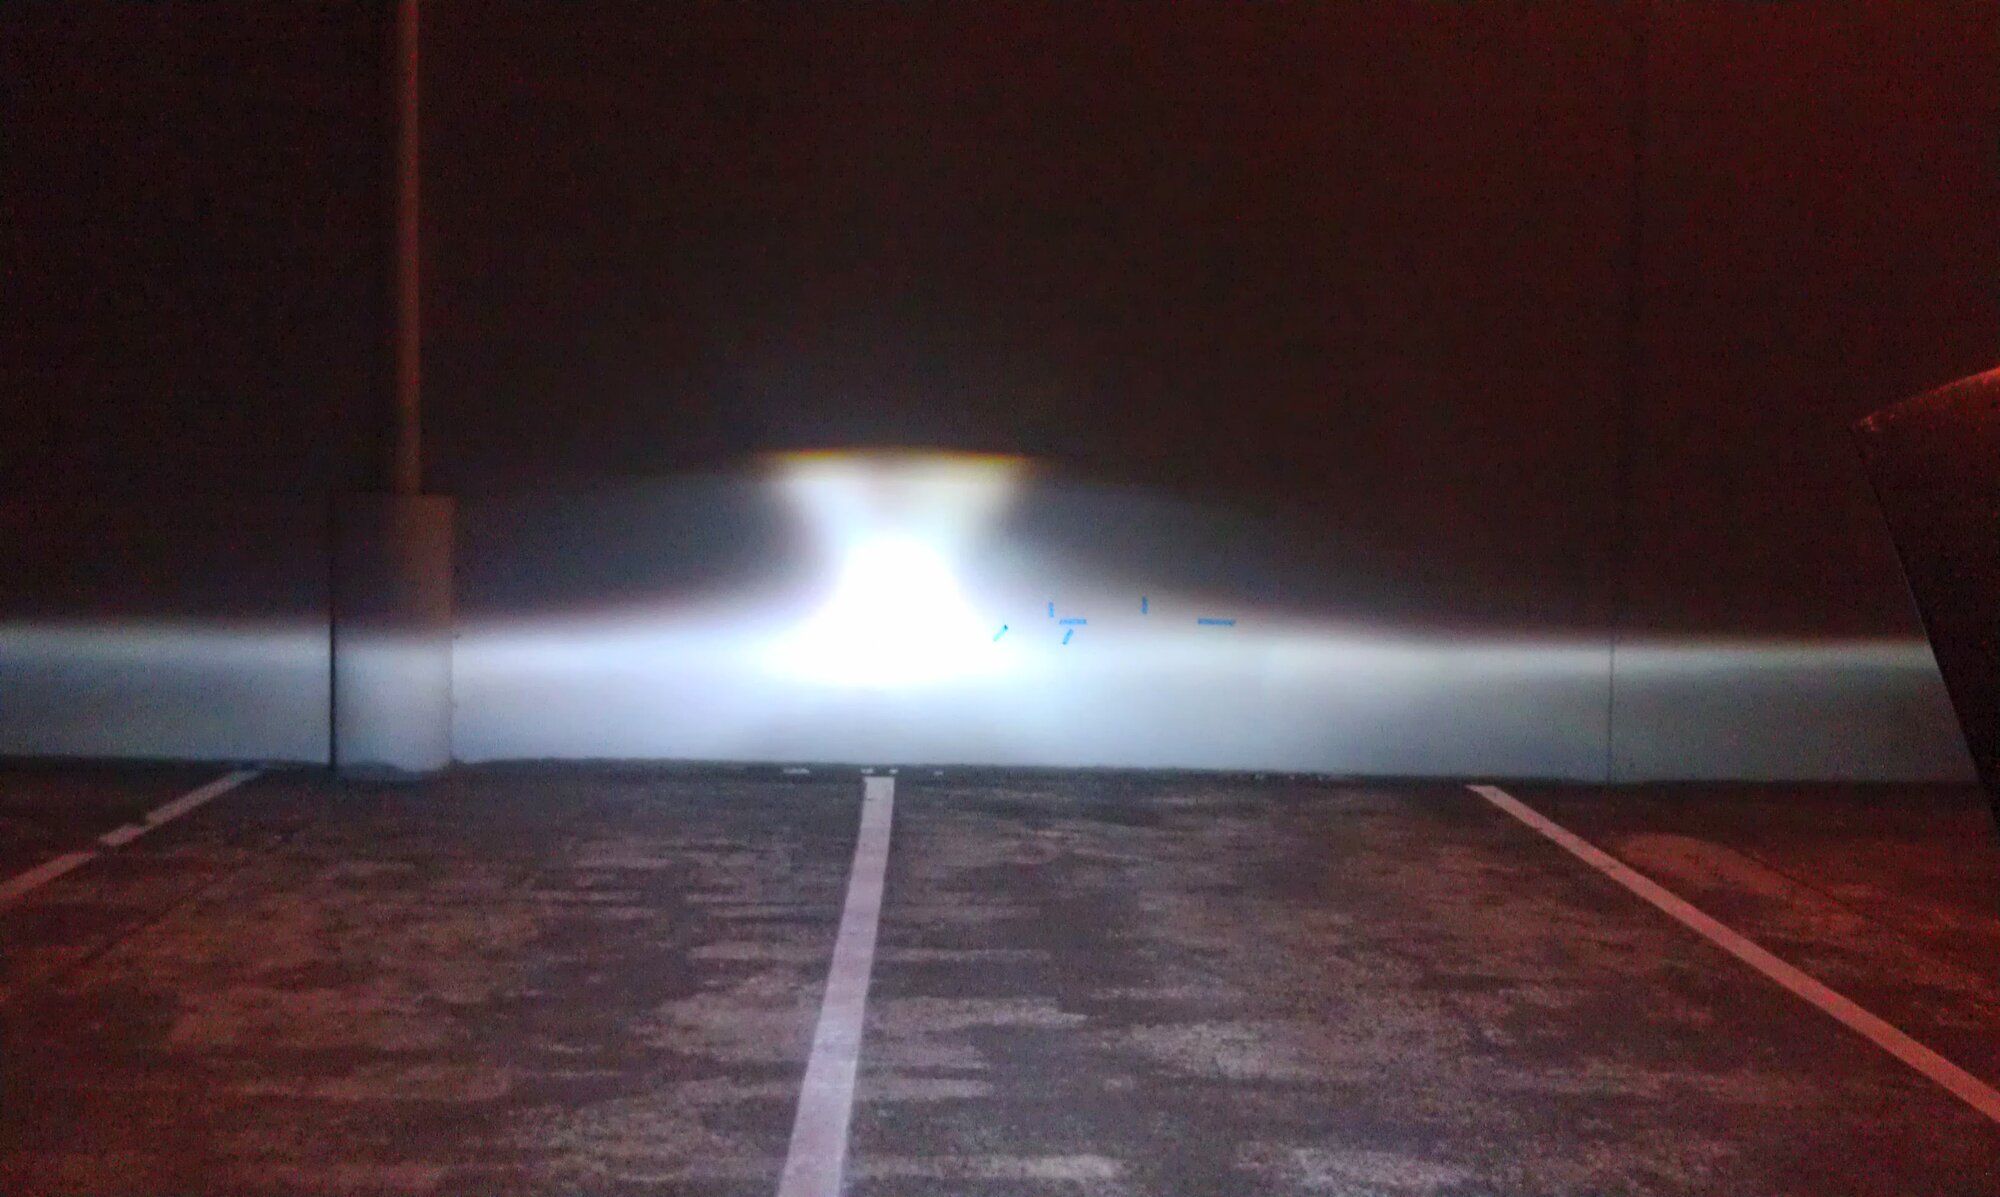
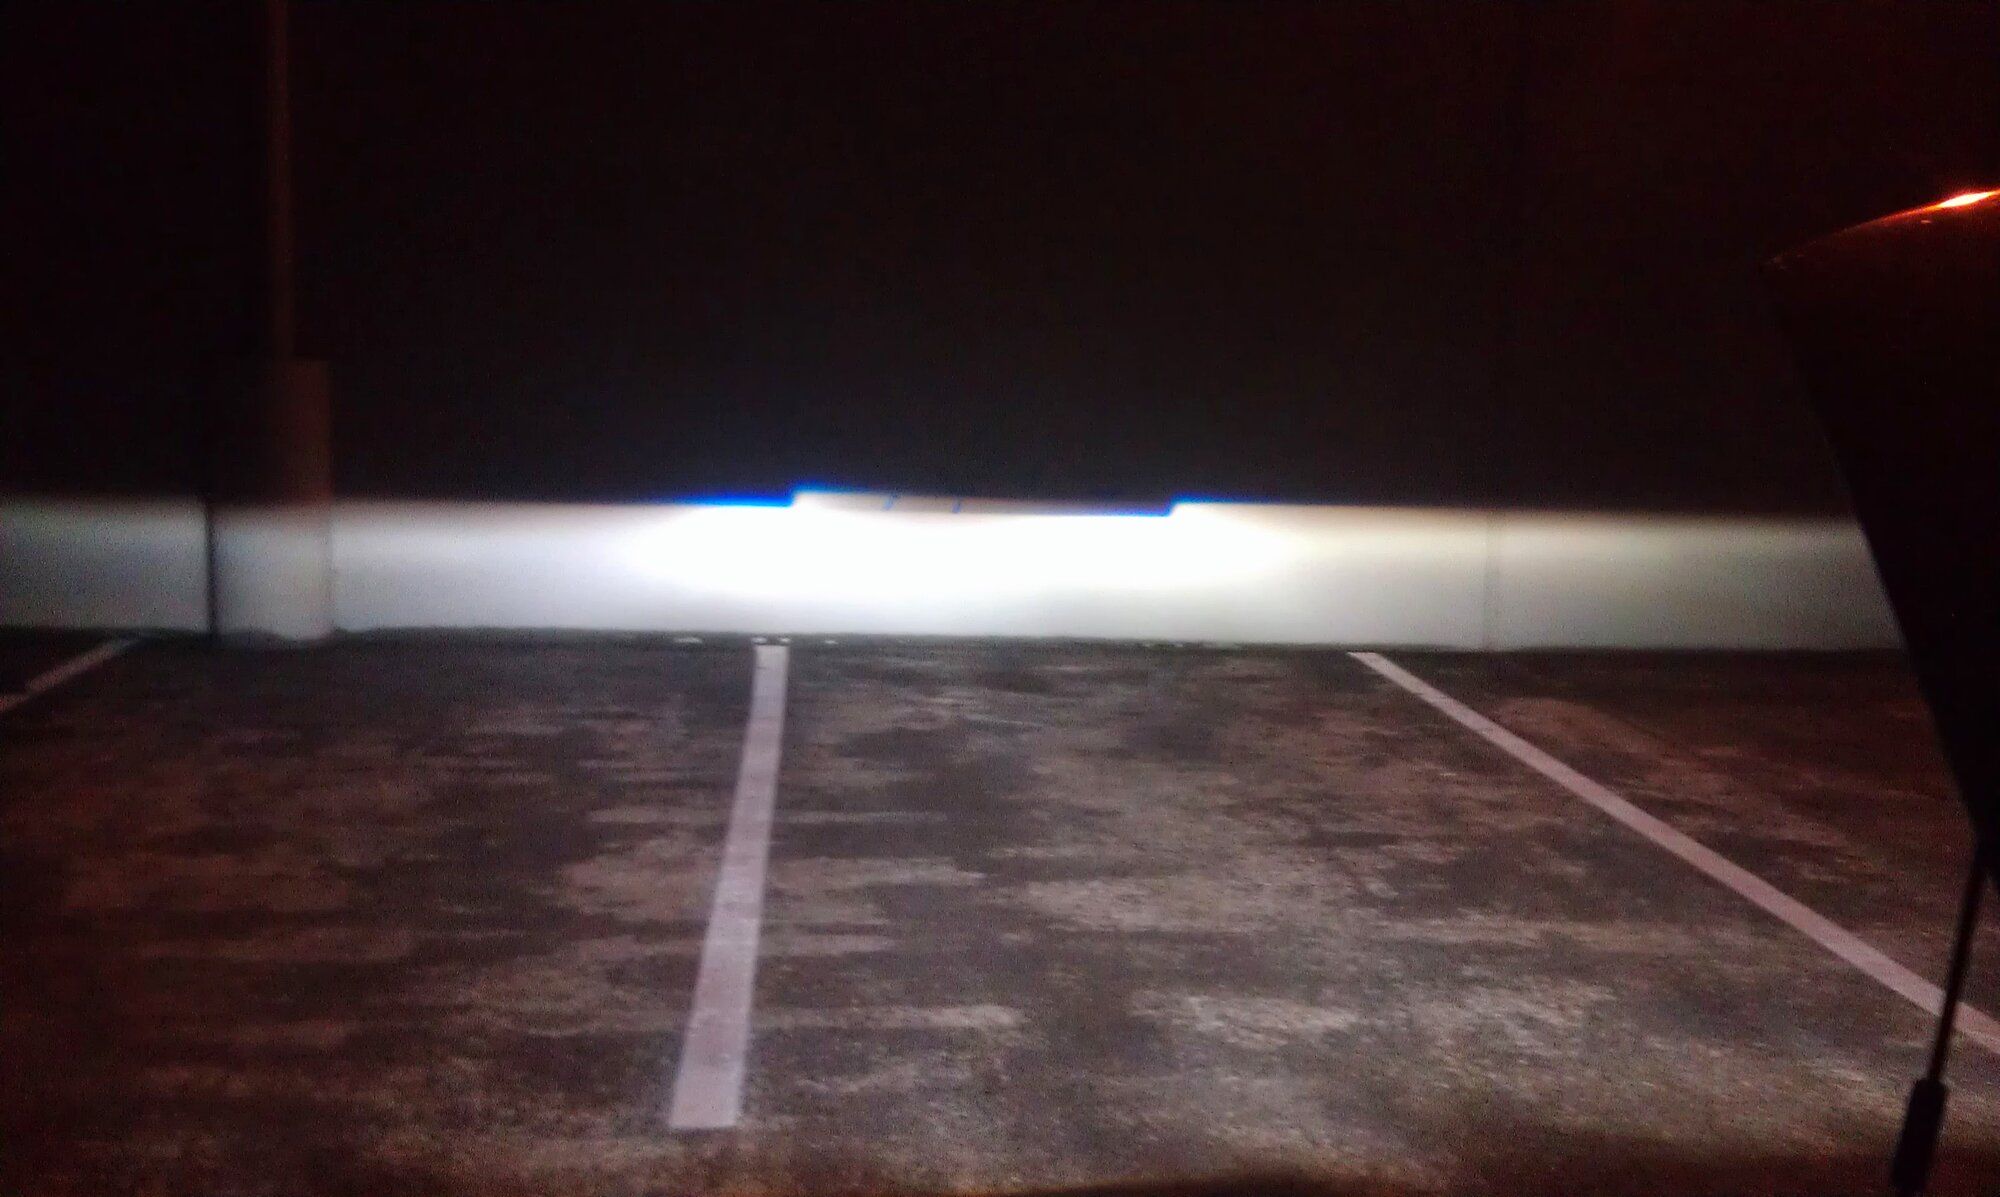
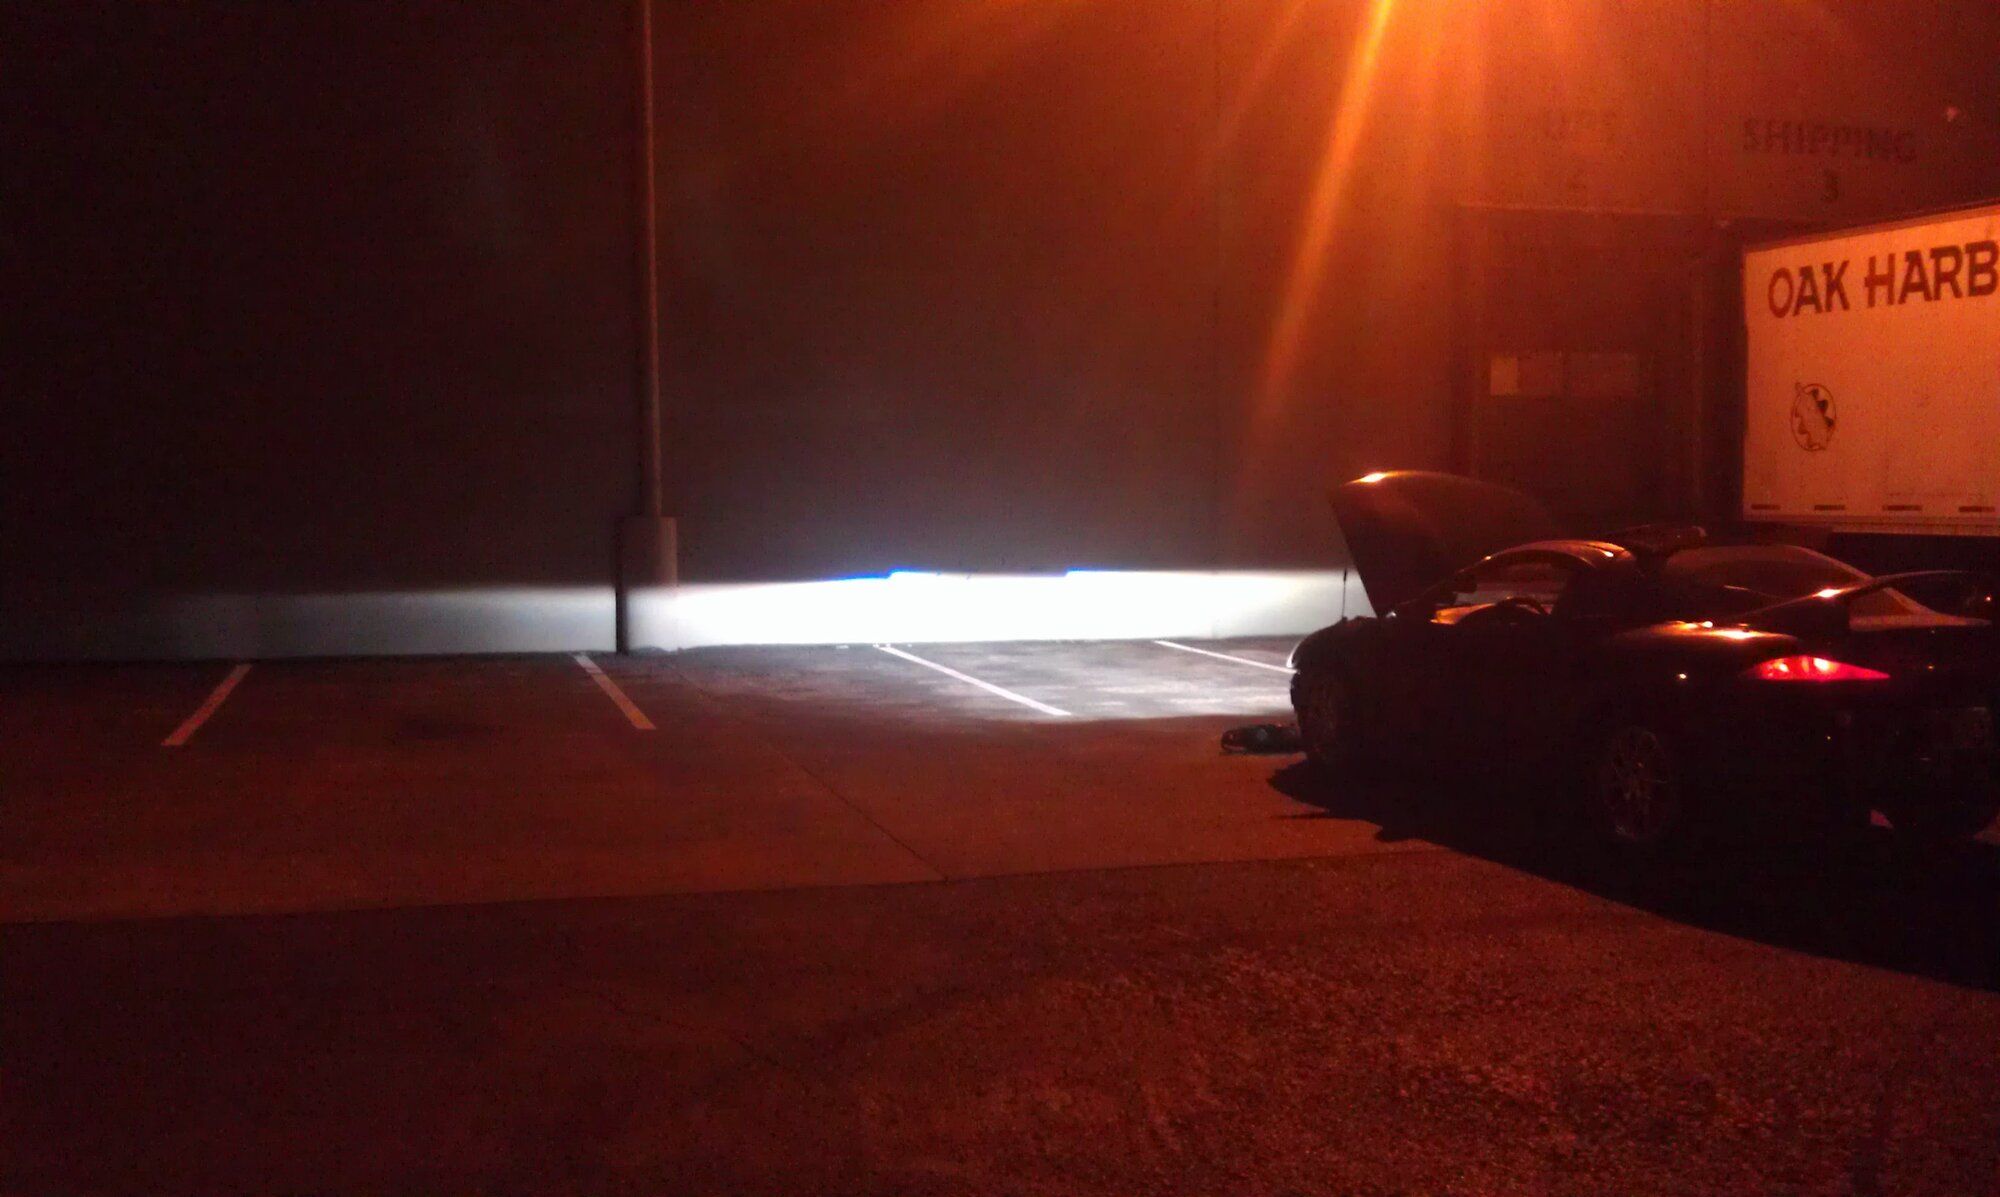
EDIT: FOUND MORE PICS! I found the one that describes the aiming method that I'm doing in the above pictures and one with the stock high beam for comparison (which I added above next to the low beam). Also, the same driver side rear shot as the one above but with the stock headlights so you can see the difference in wide area even though it is more pronounced at a greater distance. You can maybe kind of get a better idea of the improvements now like how far past the left pillar the light goes.
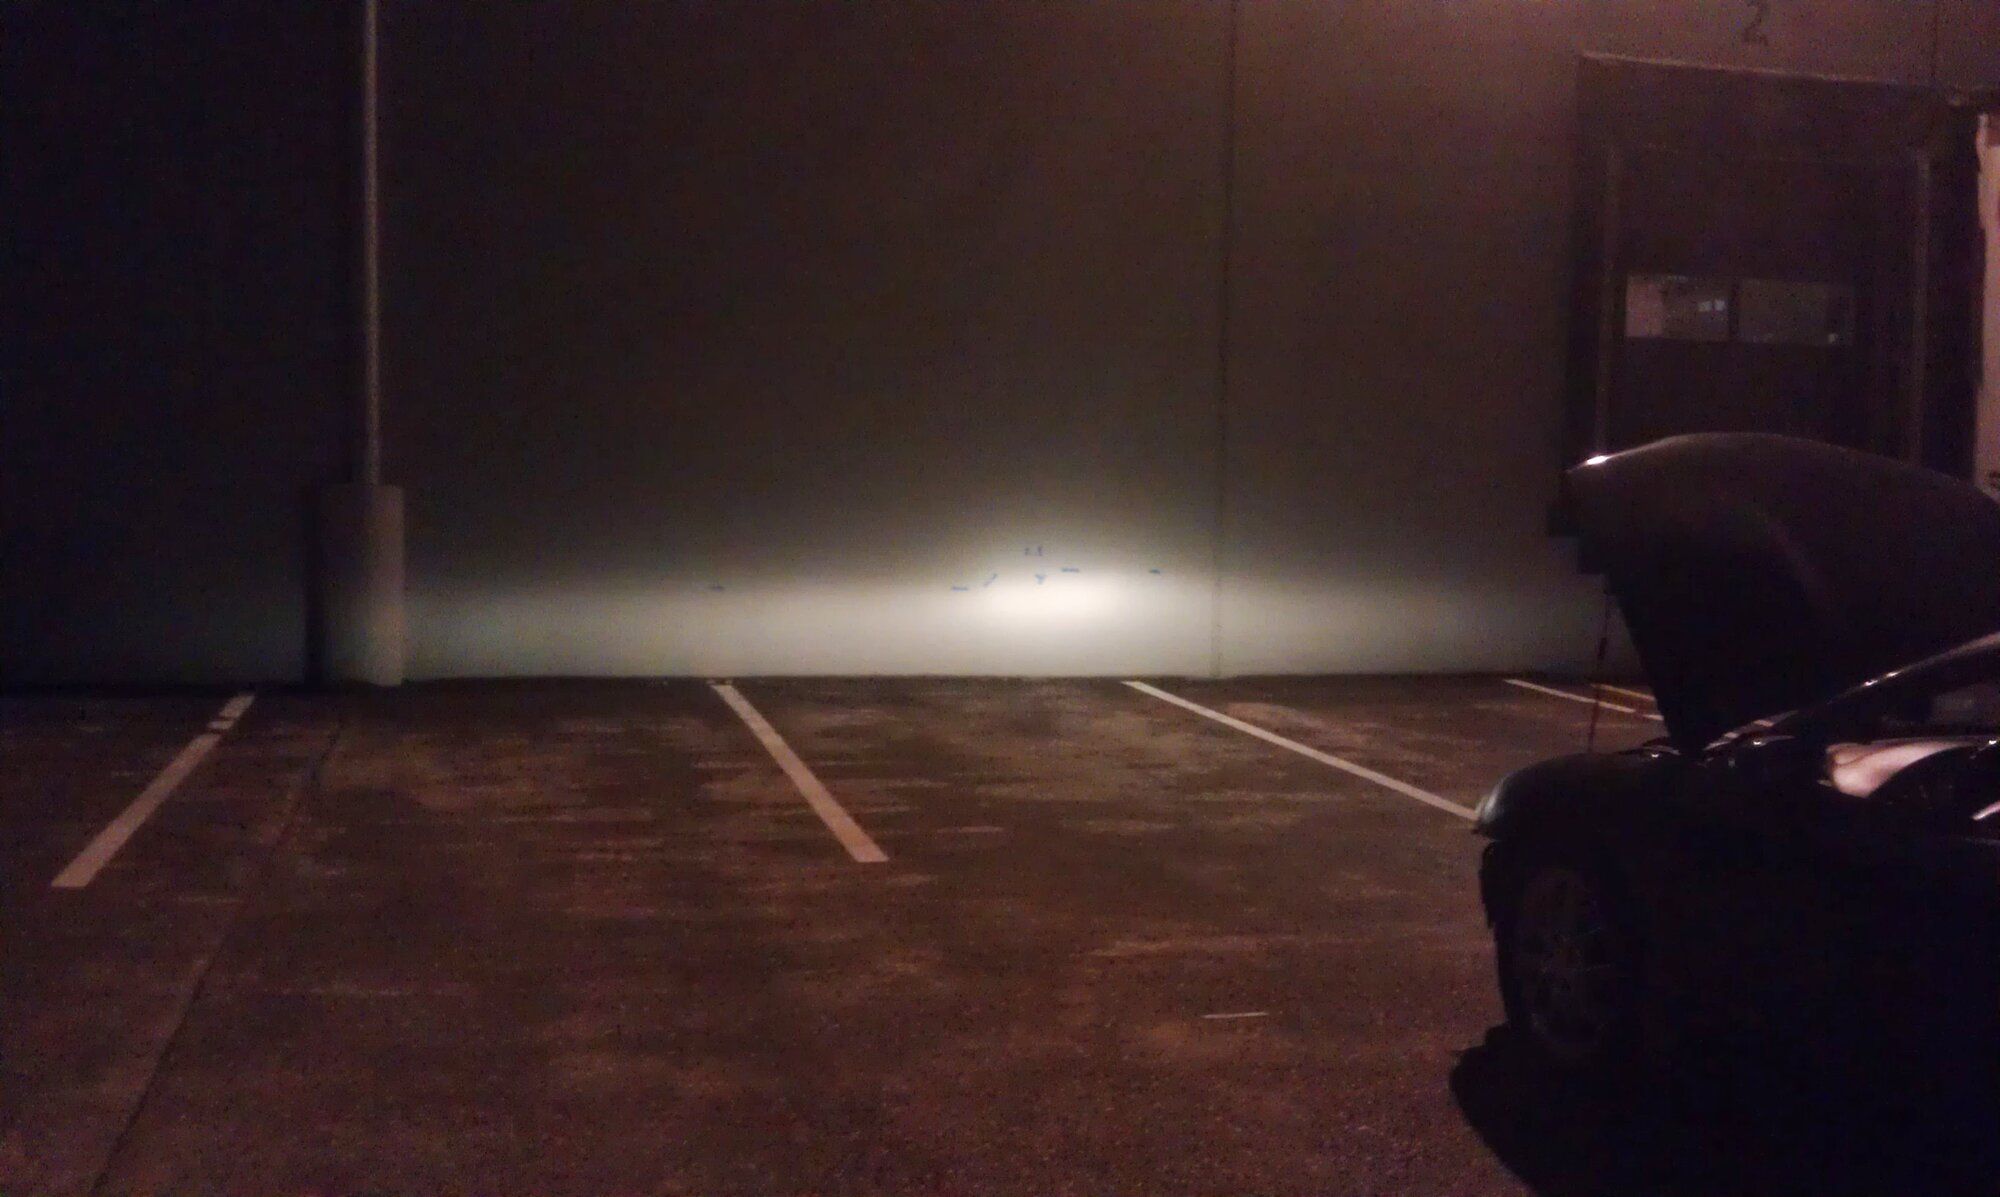
And finally the eye candy of the beautiful projector. Passenger side first, then driver side, then both. Look at that sharp cutoff with the blue line! Individual brights look a little weird at this point because of my distance to the wall.
I remember a police car pulling up too asking what I was doing. I told him and the one seemed pretty curious and interested in what I was doing. They stuck around for a few minutes but I was just finishing up.
Now whenever I drive around, I can't help but smile at how far ahead I can see. And another selling point on these projectors is how wide they are. You can tell a little in the last couple of pictures, but now when I drive to or from college where there is nothing around but trees along the highway, I can see quite a bit off the highway on both sides for any animals or anything.
Also, I thought I had a picture but I don't at the moment. I had removed the halos during this install and cut little grooves where I show red lines below, then adhered the LED ring to the projector housing. Now there is this glow behind the housing when I have just my parking lights on.
EDIT: FOUND MORE PICS! I found the one that describes the aiming method that I'm doing in the above pictures and one with the stock high beam for comparison (which I added above next to the low beam). Also, the same driver side rear shot as the one above but with the stock headlights so you can see the difference in wide area even though it is more pronounced at a greater distance. You can maybe kind of get a better idea of the improvements now like how far past the left pillar the light goes.
Last edited:
Similar threads














Support Vendors who Support the DSM Community
Latest posts
 1g AWD
- Latest: Alex Perrigo
 1G rebuild start up questions
- Latest: Robert503
 2G First Gear Pops Out
- Latest: twicks69
- ReTimed
- Latest: jacobdsm7
 1G Is this car worth buying?
- Latest: Vladimir
 Can anyone identify what brand of valve this is?
- Latest: 1990TSIAWDTALON
 Cheap(ish) Valve Cover?
- Latest: miliman13
 1998 Eagle Talon TSI AWD
- Latest: Miasma


Build Thread Updates
-
1g AWD
- Latest: Alex Perrigo
- ReTimed
- Latest: jacobdsm7
-
1998 Eagle Talon TSI AWD
- Latest: Miasma
-
Galant VR-4 Restoration #129/1458
- Latest: miliman13
 NWHTanK's Eclipse GST (AWD swap)
- Latest: NWHTanK
Vendor Updates
 T4 Divided vs V-band - ApexTurbo Dyno Testing
- Latest: MorrisonFab
 RockAuto.com Discount Code Rock Auto Rockauto
- Latest: explicitgst
- Stainless Steel Water Pipes (Race Pipe and Stock)
- Latest: athlete3344
Latest Classifieds
 For sale 1g MD122260 Forward Facing Oil Filter HousingUp for sale Discontinued MD122260 Forward Facing Oil Filter Housing $150.00 shipped plus paypal...
- BTKai
- Updated:
- Expires
 For sale 2g 2G OEM AWD Manual Driver Front Axle2G OEM AWD Manual Driver Front Axle $80 + shipping & paypal feesYou must be registered to see...
- jersygsx
- Updated:
- Expires
-
For sale 2g 2G AWD Fuel Level Sending Unit2G AWD Fuel Level Sending Unit $85 + shipping & paypal fees* this is not the fuel pump hanger...
- jersygsx
- Updated:
- Expires
 Wanted Spyder decal for rear bumper MR300306My '98 Spyder GS-T lacks the decal on the rear bumper that denotes the car as a Spyder (my...
- 98MaroonSpyder
- Updated:
- Expires
 For sale Evo 8 steering wheel with dsm adapter welded on.Evo 8 wheel with welded adapter for dsm
- 98TalonPandaTSI
- Updated:
- Expires